The PAC-3 Patriot is a surface-to-air missile system, whose primary purpose is to intercept ballistic missiles in the terminal phase of flight. This new offering from Aoshima is the first injection molded kit of the Patriot Missile system in 1/72 scale. The kit includes the Transporter Erector Launcher trailer, 4 missile containers, and an Isuzu Type 73 Heavy Truck. There are several options for displaying the model: you can display the TEL with outriggers up or down; the missile canisters can be stowed or ready to fire; the antenna can be in the raised or lowered position; or you can also show it firing a PAC-3 missile. One of the neat features of the kit is that it provides two full sets of outrigger legs and you do not glue the legs on, they are attached by poly caps. This means that if you are careful you should be able to swap out how you display the trailer.
Osprey is a publishing house in the United Kingdom that should be familiar to most modelers, historians, and military history buffs. They have several ongoing series that tackle a variety of topics, including famous campaigns in military history. The 278th volume of their campaign series tackles the capture of the French port city of Cherbourg in June, 1944. The author of the volume is one of Osprey’s most prolific, Steven J. Zaloga. The illustrator of the color plates is Steve Noon. At 93 pages of text, this is a fairly standard length for this series.
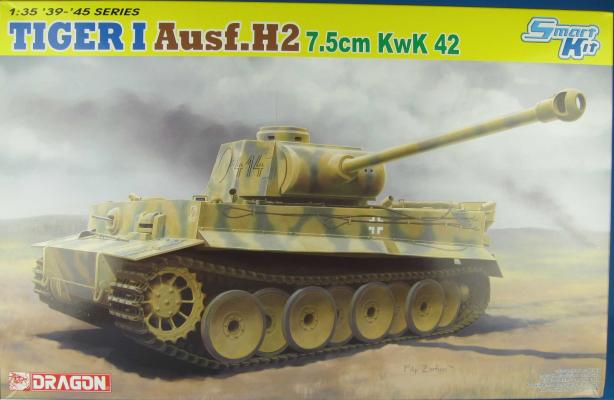
Anyone who knows me well knows that I’m a bit of a fan for speculative or hypothetical armor. In this field, Dragon Models has done me well over the decades, and I’ve had the pleasure of assembling everything from their E-100 and Kugelblitz AA tank to a couple of variants on the Panther F. This latest incarnation sits well with my other renditions and then some.
As is typical of Dragon, the box comes packed with parts; 17 sprues in all plus clear parts for the periscopes, three separate sheets of photoetch, two types of metal cable for the tow ropes, a metal shroud for the mantlet and rubberized tracks. There’s also a tiny decal sheet that seems to have been tossed in more as an afterthought. Predictably for Dragon, you’ll inevitably find yourself with a host of spare parts which should be useful for other projects.
Master Model from Poland specializes in aftermarket turned-metal parts for model kits. In my personal option, they are among the best in the market; I really like their products.
This set is devoted to the German 2 cm L/65 Flak 38 and includes a turned-metal barrel and a flash suppressor. The set is very nicely detailed, capturing small details, even down to the holes on the side of the suppressor.
The instruction sheet clearly describes where to cut and how to modify the plastic part to receive the aftermarket detail part. It is a very easy task, and any modeler with a bit of experience modifying parts will run into no problems.
My sample suffered some minor damage during transit. However, it was easy to shape the flash suppressor back to its original size. I just used the tip of a toothpick and very gently rolled the piece back and forth until it rolled smoothly over a flat tile (any hard, flat surface would work).
HAD Models has introduced a 1/35 scale Radio which represents the kind found in Russian tanks from 1900 to 1980 but also could be applicable to present times also. The set consists of two cast resin part and three pieces of photoetch. The resin and photoetch are very well done and initial building is simple.
The Product
My sample arrived in the standard Brassin blister package, a folded paper information/assembly guild doubles as the cover art. Also included are fourteen pieces of resin in varying shades of grey and a small photo-etch fret. The parts clean up easily and are very highly detailed. The photo-etch parts are extremely small and delicate. The instructions are easy to understand and covers the build in four steps. However, the Bren gun can be configured in several options (see Eduard’s photo attachments). The most distinct option is the drum or clip types of magazines. The set also contains a bag for empty shells and support legs.
The Build
The build was completed in a couple of hours and proved almost non eventful. All the pieces fit very nicely and build an impressive 1/35th gun. The photo-etch parts were the hardest thing involved, simply because of their size.
This is the second half of the review of the Big Ed set for the Meng Models D9R Dozer.
This portion will focus on the exterior detail set (36265) which happens to be one of the most extensive sets as well as parts for every side of the vehicle are covered.
I started by assembling all the ammo racks for both sides and rear of the vehicle. They are made up of several different pieces, but the assembly went off without too much trouble. I used a piece of styrene rod for the securing bar on the bottom of the first rack I built, but later decided to use some brass rod instead as I could solder that in place for a more secure bond overall. The instructions say to use 1mm plastic rod…brass looks better.
First off, the MENG D9R kit is a beast, but it’s a beautiful piece of modeling goodness once you get going. The Big Ed photoetch (PE) set that Eduard has designed for this kit is an exceptional addition. There are some rather tedious steps involved if you plan to use the entire set of PE, but it isn’t out of reach if you’re patient and pay attention to what you’re doing. The set consists of three separate smaller sets: 36265 Exterior, 36268 Interior (color), and 36270 Cooling Slats. In part one of this review, I will focus on the cooling slats and interior. I’ll follow this up with the exterior set in part two.
This is a first look ‘In the Box’ review of PlusModel’s new U.S. Grader resin kit. A subsequent review will review the detailed assembly of the kit. The kit appears to be a very complete, nicely detailed, high quality kit of a unique vehicle from WWII. The U.S. Grader follows PlusModel’s excellent dozer models.
The kit comes in a sturdy 10.5 x 7.5 x 2.5" deep corrugated cardboard box. First out of the box are a photo CD, 6” x 8.25" stapled instruction booklet with 28 pages, a small bag with decals, photoetch fret, and a length of copper wire.
Next are six sealed bags of 231 gray resin parts. The parts have crisp detail and no air bubbles are apparent. The large grader blade appears straight with no visible defects. The radiator is nicely detailed with raised letters for the words Caterpillar along the sides and top front of the radiator. One of the bags his two clear parts for the headlamps.
I began building Dragon Model kits when they first became available back in the 1970’s. Even back then they were a breath of fresh air on the modeling scene. They offered fascinating subjects never seen before and although sometimes a bit simplified, I liked them a great and built numerous models from their catalog, enjoying them all. My, how they have evolved over time.