Platz has added to their stable of excellent kits with its issue of the Curtiss C-46D, in their JASDF series. The size of the real aircraft means that even in 1/144 scale, this is a pretty good-size model and doesn’t require micro-surgery to work on. The kit’s molded in light gray plastic with beautifully engraved panel lines and detail.
Hobbyboss has an excellent series of hits coming, and their line of F3H Demon kits is most welcomed with their foldable wings and engraved lines.
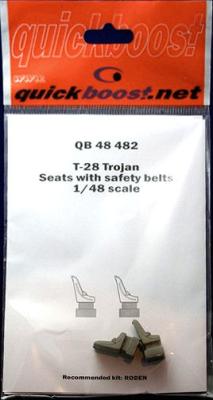
Like most modern planes, the kit suffers from the ability to do a really good ejection seat. Quickboost gives modelers an option with a perfectly cast five piece seat with molded seat belts. The seat comes with the main body, headrest, center stick and two loops for the sides of the seat. This is an early seat, those early seats being replaced by the MB series.
Assembly is straightforward after removing the parts from the mold block. Notice in the comparison pictures that the kit parts do have some large ejector pin marks and that there are no seat belts. The Quickboost seat is a direct drop in and much better in shape and accuracy. This is the kind of resin I love- large improvement, low cost and easy to use.
It's amazing to me how many of the kits that were not around at all are actually being produced now. One of the companies coming out with a great selection of kits is Kinetic and their S2F Tracker is a lovely kit with options for wing folds and nicely engraved panel lines. One small deficiency of the kit is that it ignored the engine exhausts which are above and below the wings on the nacelles. For a lot of modelers, this is no big deal and the kit still is wonderful. View the images in the slideshow which clearly illustrate the location of the exhausts, with arrows indicating where they should go.
Installation is easy. I used a small drill bit to open the holes and then refined them with files and a knife. Once the holes have been opened and cleaned up, the exhausts were added. Total time, to open the holes and satisfactorily test fit the exhausts was about 15 minutes. This is a great addition to a great kit and would be a great start to weathering the Tracker.
Hasegawa’s 1/48th scale J-35 Draken kit is an excellent representation of the plane. Like most injected kits, the ejection seat is not as good as the rest of the kit due to molding limitations. Now Quickboost comes to the rescue with a highly detailed resin Saab ejection seat with molded belts.
I have enclosed pictures of the Quickboost seat as well as Aires seat and the kit seat. Aires has a set of PE seat belts that need to be built prior to installing the seat, Quickboost's belts are molded onto the seat and the kit seat has no belts at all. The Aires and Quickboost seat are similar with excellent detail on the fabric and seat. The Aires seat comes with an entire replacement cockpit.
This is a very small item when assembled, as the photographs will show. The model is composed of four parts: the body of the indicator, cast in a slick, red plastic; a bezel made from thin steel similar to a photo etch part; the wind vane assembly which appears to me to be of plastic or resin; and two identical instrument dials printed in black on a thin plastic sheet coated with what appears to be white paint.
The instructions are on the reverse of the packaging sheet and show all of the parts painted, prepared and ready to go. The resulting photographs show an extremely detailed and precise completed wind powered indicator. However, reality does not meet up with advertising in this instance.
Thank you to Mr. Neil Yan of HK Models and the IPMS Reviewer Corps for the opportunity to review a wonderful new model release in large-scale aircraft. This next installment is fairly brief and describes the construction of the nose section and the remainder of the fuselage.
Thank you to Mr. Neil Yan of HK Models and the IPMS Reviewer Corps for the opportunity to review a wonderful new model release in large-scale aircraft. This next installment covers the waist interior and fuselage assembly, which is from the ring mount around the ball turret through the Cheyenne tail turret, and closing up the fuselage. I originally thought it might be more instructive to work up the armament first, but after reviewing the kit more with some experience, I elected to skip the all of the cool-looking 50s and describe them when they get installed. Instruction steps 15 through 25 are used to construct this subassembly.
The cascade of kits, aftermarket details sets, and decals for WWI aircraft has given model builders reason to play in an appealing arena that only a few had the nerve to venture into in the past. Because most of these products have been conceived and produced in the last four or five years, current technologies have blessed builders with ever-improving quality. And, since the level of detail molded into today’s kit components – especially in 1/32 scale – is literally breathtaking, any aftermarket detail that is introduced into the fray must equal or surpass what will be found inside the kit box.
For the longest time, the only 1/48 scale model of the workhorse Sikorsky H-34 helicopter was made by Revell, whose molds at one point were rumored to be “lost at sea.” Then, after being missing in action for nearly 25 years and fetching high prices on eBay and elsewhere, the venerable Revell kit was joined by a new-tool H-34 coming from MRC’s house brand Gallery Models. The announcement was released in 2012; MRC displayed test shots and box art for two forthcoming versions in Orlando at the 2012 National Convention – a USMC version and a US Navy version. The USMC version is the subject of this review.
When you open the largish box, you are greeted by no less than 231 parts on eight sprues of light gray plastic, three sprues of clear pieces, and two frets of brass photo etch parts. Decals are provided for three different H-34’s:
Eduard has been producing model-specific masks for a while now, but this is only the second set I’ve used. This one is a die-cut set specifically designed for the HobbyBoss F-5E kit and contains masks for the canopy, windscreen, main wheels, and nose wheel. In the package is a single page of instructions and a small square (about 1.5 inches) of masks on Kabuki type tape. You have to look closely at the yellow square since the laser cut lines are delicately inscribed.