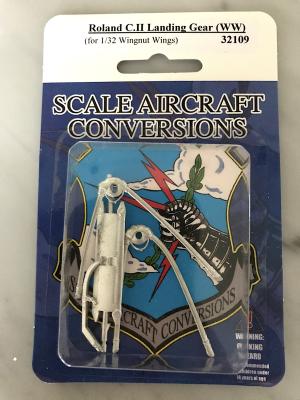
Recently I was given the opportunity by IPMS USA to review Scale Aircraft Conversions adaption of the Roland C.II landing gear in white metal for the 1/32 Wingnut Wings kit. The set contains left and right landing gear legs, a center axle and airfoil section, plus a replacement tail skid. These are direct replacements for the ones found supplied with the kit with just a little more detail. Overall this is highly recommended for stronger landing gear with added detail and is a great addition to the Wingnut Wings kit.
I would like to thank Scale Aircraft Conversions for another great offering in metal landing gear and IPMS USA for the opportunity to review this item.


