
Su-25 UB/UBK Frogfoot
In the latter half of the 1970’s the Sukhoi Design Bureau rolled out the Su-25, NATO codenamed “Frogfoot”, to the Soviet Air Force to fill a requirement for a dedicated close air support aircraft. Similar in role to the US Air Force’s A-10 Warthog, the Su-25 was designed to carry large air-to-ground payloads and internal cannon to defeat a wide variety of ground threats, including armor and personnel, and to have extended on-station time in the combat area to provide maximum support to its ground forces. About a decade after the Su-25’s introduction, Sukhoi began delivery of two-seat trainer variant prototypes and production units. Designated “UB” and “UBK,” these variants offered the capability to provide direct skill assessment of flight cadets and training and operational effectiveness reviews of active combat pilots.
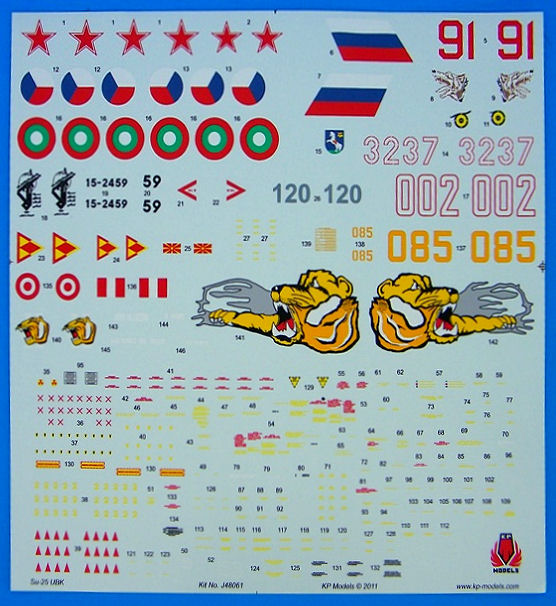
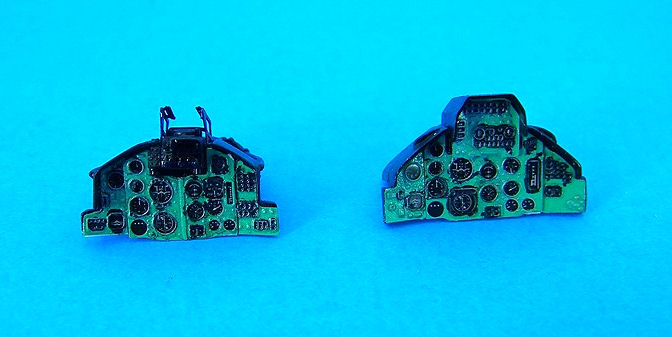
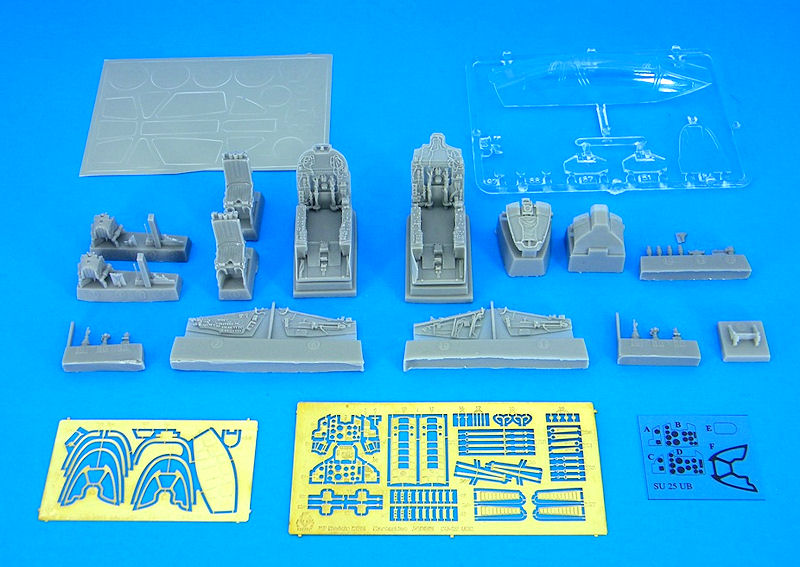
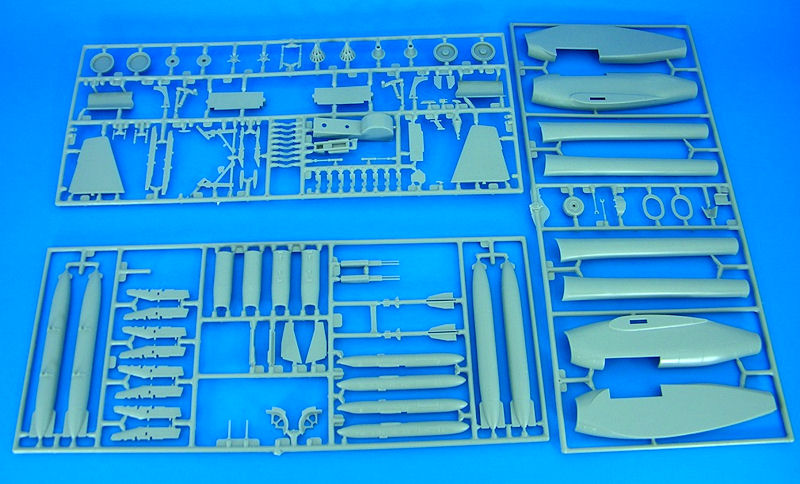
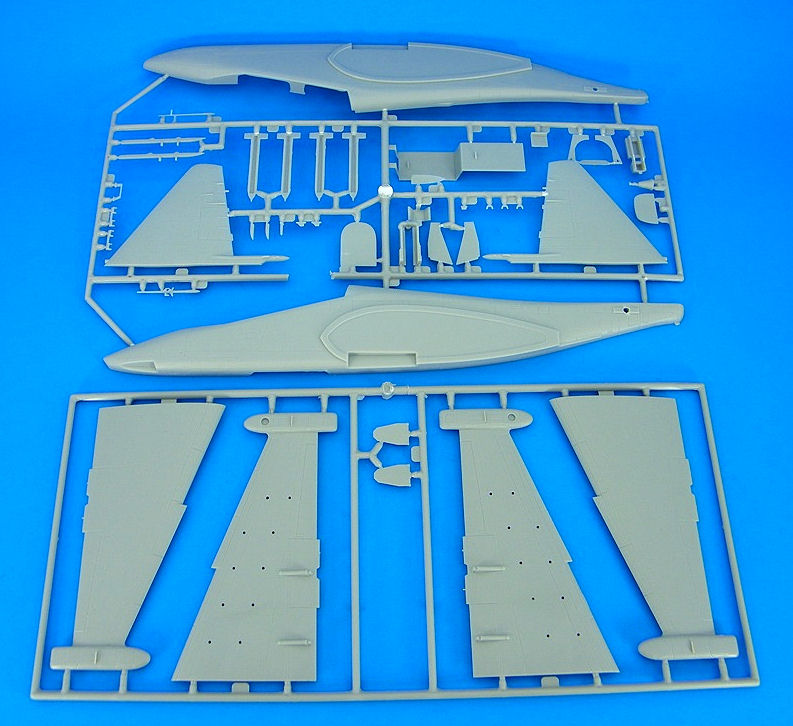
KP Models presents a striking rendition of the UB and UBK variants in this Masterline Series release of the older Kopro kit. To raise the ante, KP tosses in some vinyl masks, crisply molded resin, and beautiful unpainted photoetch to breathe new life into this offering. The box contains 102 injection molded parts in soft gray plastic, one sprue of clear plastic, 15 resin cockpit castings, a couple frets of PE, canopy and wheel masks, and a decal sheet with markings for 6 aircraft. Instructions are Eduard-like, and contain all 6 full-color profiles for painting and markings placement. Recessed detail is mixed – some crisp, some a bit soft. Not uncommon to limited-run kits is the obligatory excess of flash, also. All-in-all, though, not a bad first impression.
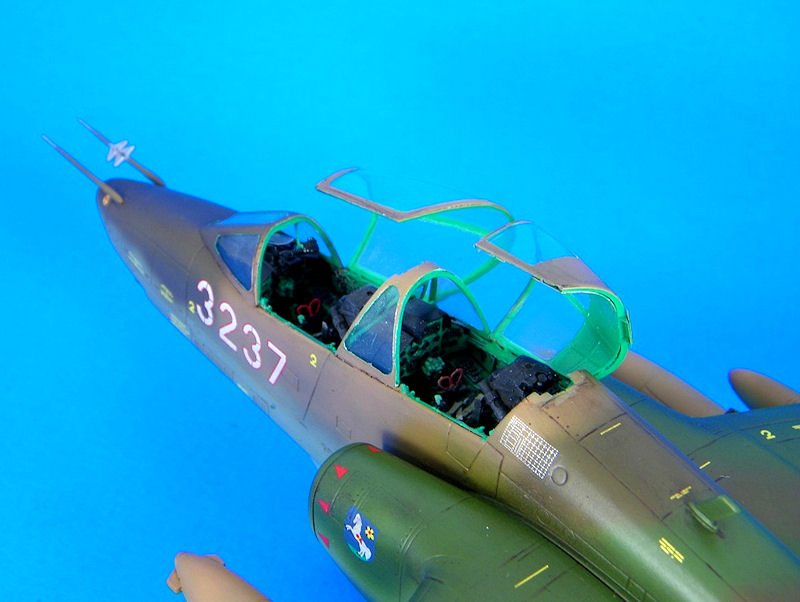
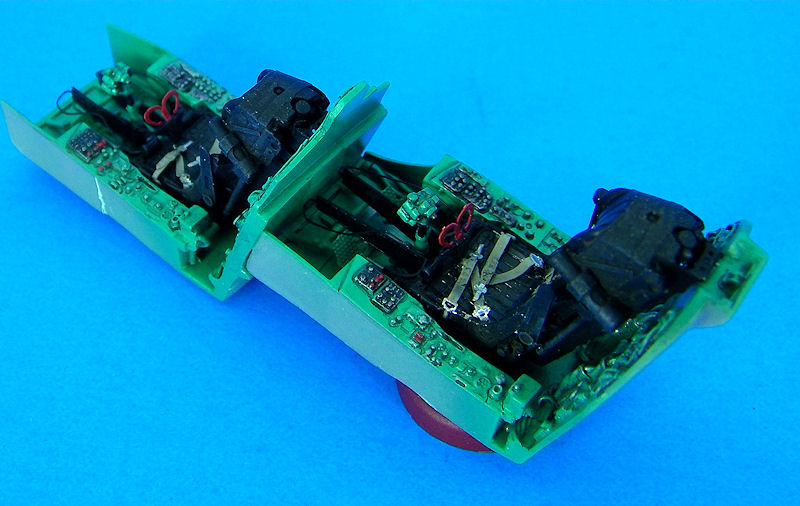
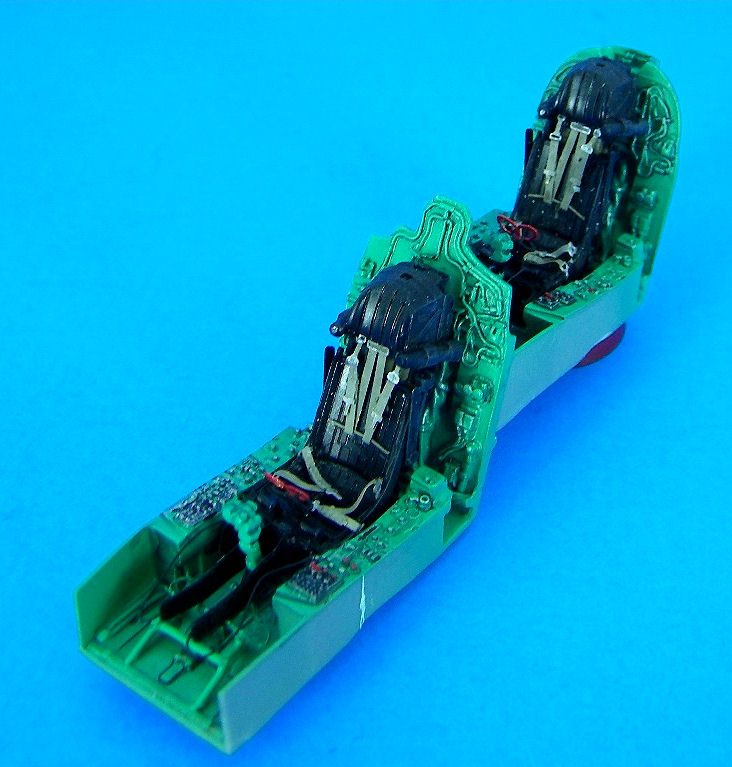
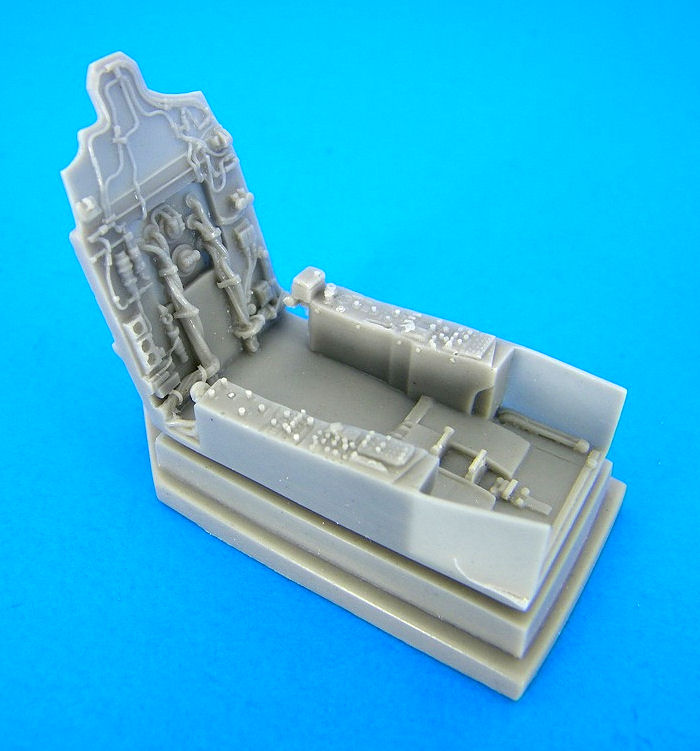
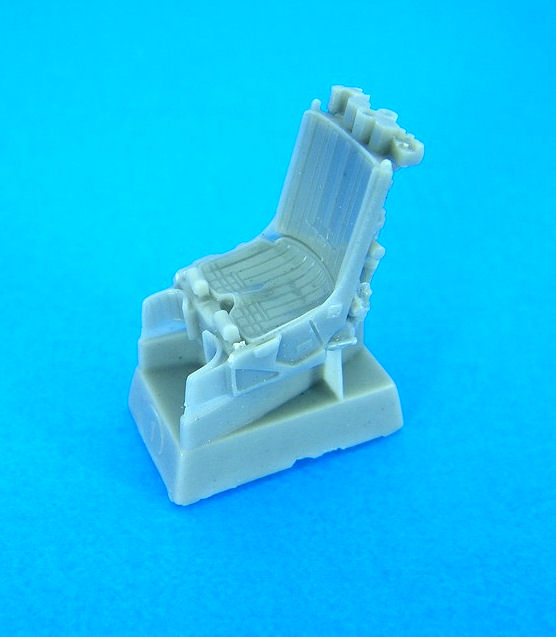
Construction leads off with assembly of the resin and PE cockpit. Although the parts are crisply cast and etched, the resin requires lots of saw work to liberate the parts from the casting blocks, so you’ll want to have a robust razor saw on hand at the onset of the build. Once the sawing is done, build-up of the seats and harnesses progresses quickly. I deviated from the instructions, though, and added the harness after the resin seat parts and harnesses were assembled and painted as subassemblies. Disappointingly, no color callouts were provided for the gorgeous seats, so I had to resort to the web, finally settling on flat black seats and blue-gray harnesses. Seat rail detail is also a bit over-engineered, as I opted to use only 1 of 9 little shelf-like parts in each seat rail – that was the one that can be seen when the seats are installed.
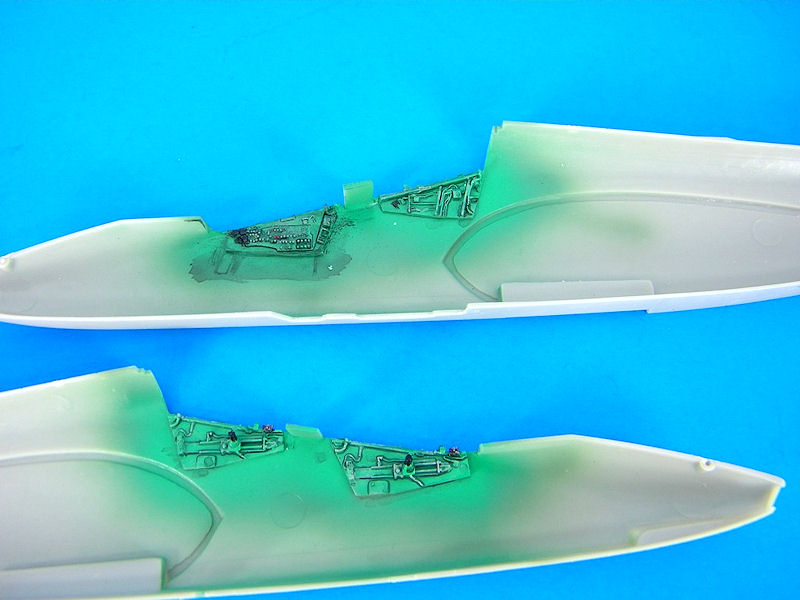
Care must be exercised when installing the cockpit into the fuselage halves to ensure proper fit – lots of dry fitting here! Ample time must be taken to sand the interior cockpit edges to remove ridges along the canopy rails and bulkhead areas, which would otherwise prevent proper fit of the sidewall panels and bulkheads.
Once the cockpit is done, KP would have the modeler button up the fuselage (don’t forget the nose weight – not supplied) and add the canopy parts. The nose wheel well required a bit of trimming to accommodate the resin cockpit. One of my biggest beefs with this kit was that the canopy was molded in one piece and required cutting to be displayed in the open position. For this price and the effort put into the nice cockpit and PE, one would think KP would retool the canopy into a multi-piece version. While retooling the canopy into the multi-piece variety, it could also be tweaked to be as wide as the cockpit opening. My canopy was about 3/32” too narrow, and created a bit of extra touch-up work after the airframe was painted.
Assembly of wings, vertical stab, and engine nacelles was without incident. A bit of filling was needed on the fuselage, wing, and nacelle subassemblies, with some of the softer detail succumbing to the putty and the sanding stick.
Integration of the subs into a complete airframe called for a goodly bit of trimming of the nacelle-side wheel wells and a bit of facing with the sanding stick to get everything to fit nicely. Absence of locator pins or features also necessitated close attention to instruction drawings to ensure proper location and alignment.
Landing gear assembly followed. Gear detail seems a bit chunky – but then again, this is a heavy-duty Russian design operating from forward airfields. The main gear doors, molded in one piece, need to be cut into 3 pieces and trimmed extensively to fit the airframe properly. Locating the nose strut to the wheel well was without problem, but the mains were a different story. Absence of definitive locator pins or mistake-proofing features on the struts and in the main wells made installation a tedious process requiring extensive alignment checks. Also finicky was the nose wheel ‘s fender, as it required some trimming around its attach points to the wheel hub.
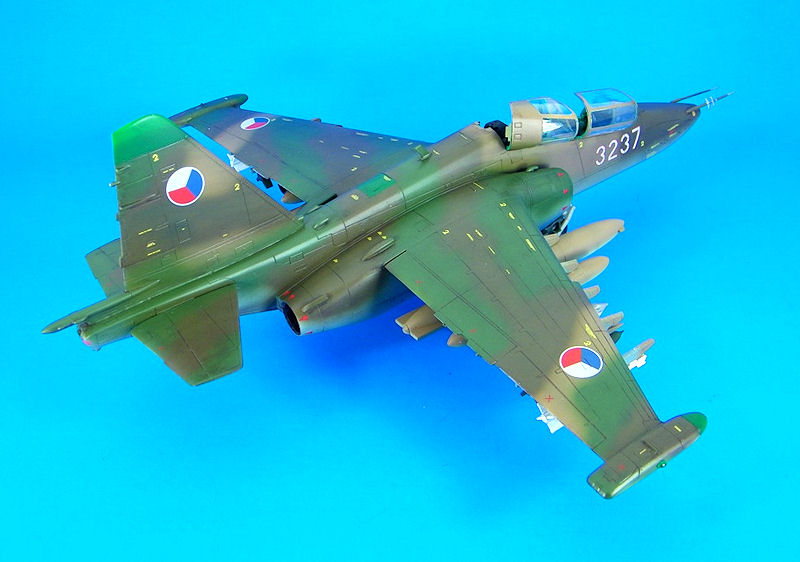
Underwing stores fill up the pylons nicely, but color profiles are absent for the drop tank, gun pod, and air-to-air missiles. A bit of poking around on the web provided sufficient info to make them at least appear convincing. The tails of the rocket pods, rockets, and air-to-air missile are a bit rough and require a bit of attention to look less toy-like.
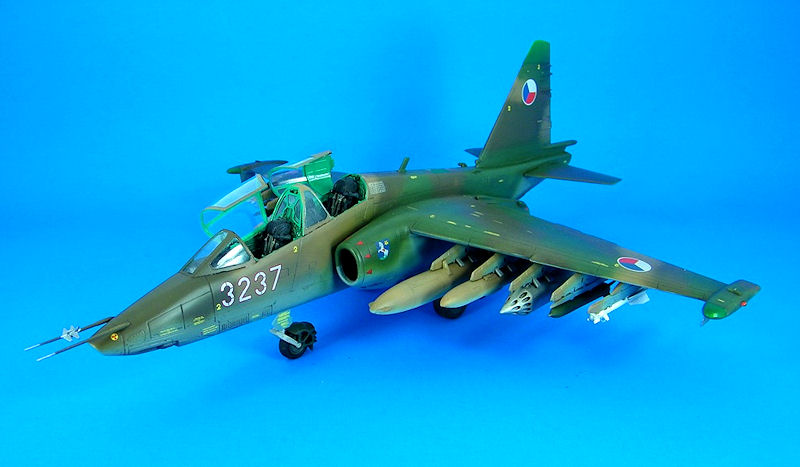
When it came to paint, I opted to cross-reference the provided Gunze colors to locally-available Tamiya, Model Master Acryl, and Floquil colors. After a coat of Tamiya White Primer and a surprising absence of missed seams, the camo colors were applied and sealed with Minwax Acyrlic Gloss (blue label). This appears to be the same stuff as MM Acryl clear gloss – both made by RPM (go figure) – at a fraction of the per-ounce cost! Thanks to Vince Digiandomenico of IPMS/Wright Field Scale Modelers for sharing that tip at a recent monthly meeting.
Decals went down beautifully and required little to no Micro Sol. Color and registration appear spot-on. Very nicely done, KP! I chose the Czech markings – as any decent great grandson of Czechoslovakia would. After sufficient setting time, the decals were sealed with the Minwax Acrylic. A few hours later, a sludge wash was applied, followed by post shading, then sealed with a flat coat.
Application of fiddly bits, canopies, and some general touch-up brought the build to its conclusion after approximately 40 hours of build time.
Although challenging at times, this little mud-mover has turned out to be one of the most interesting pieces on my shelf, and I would recommend it to advanced modelers looking to model an eye-catching subject not frequently seen in displays or on the contest tables – or just to round out an Eastern Bloc aircraft collection. My only caution is to temper expectations and be prepared for some cutting, grinding, scraping, and finessing.
Thanks to KP Models for the sample kit. You folks are certainly moving in the right direction – please continue to drive improvements as you’ve started – seeing lots of potential here!


Comments
Add new comment
This site is protected by reCAPTCHA and the Google Privacy Policy and Terms of Service apply.
Similar Reviews