
Military Vehicles of the Armed Forces of Ukraine
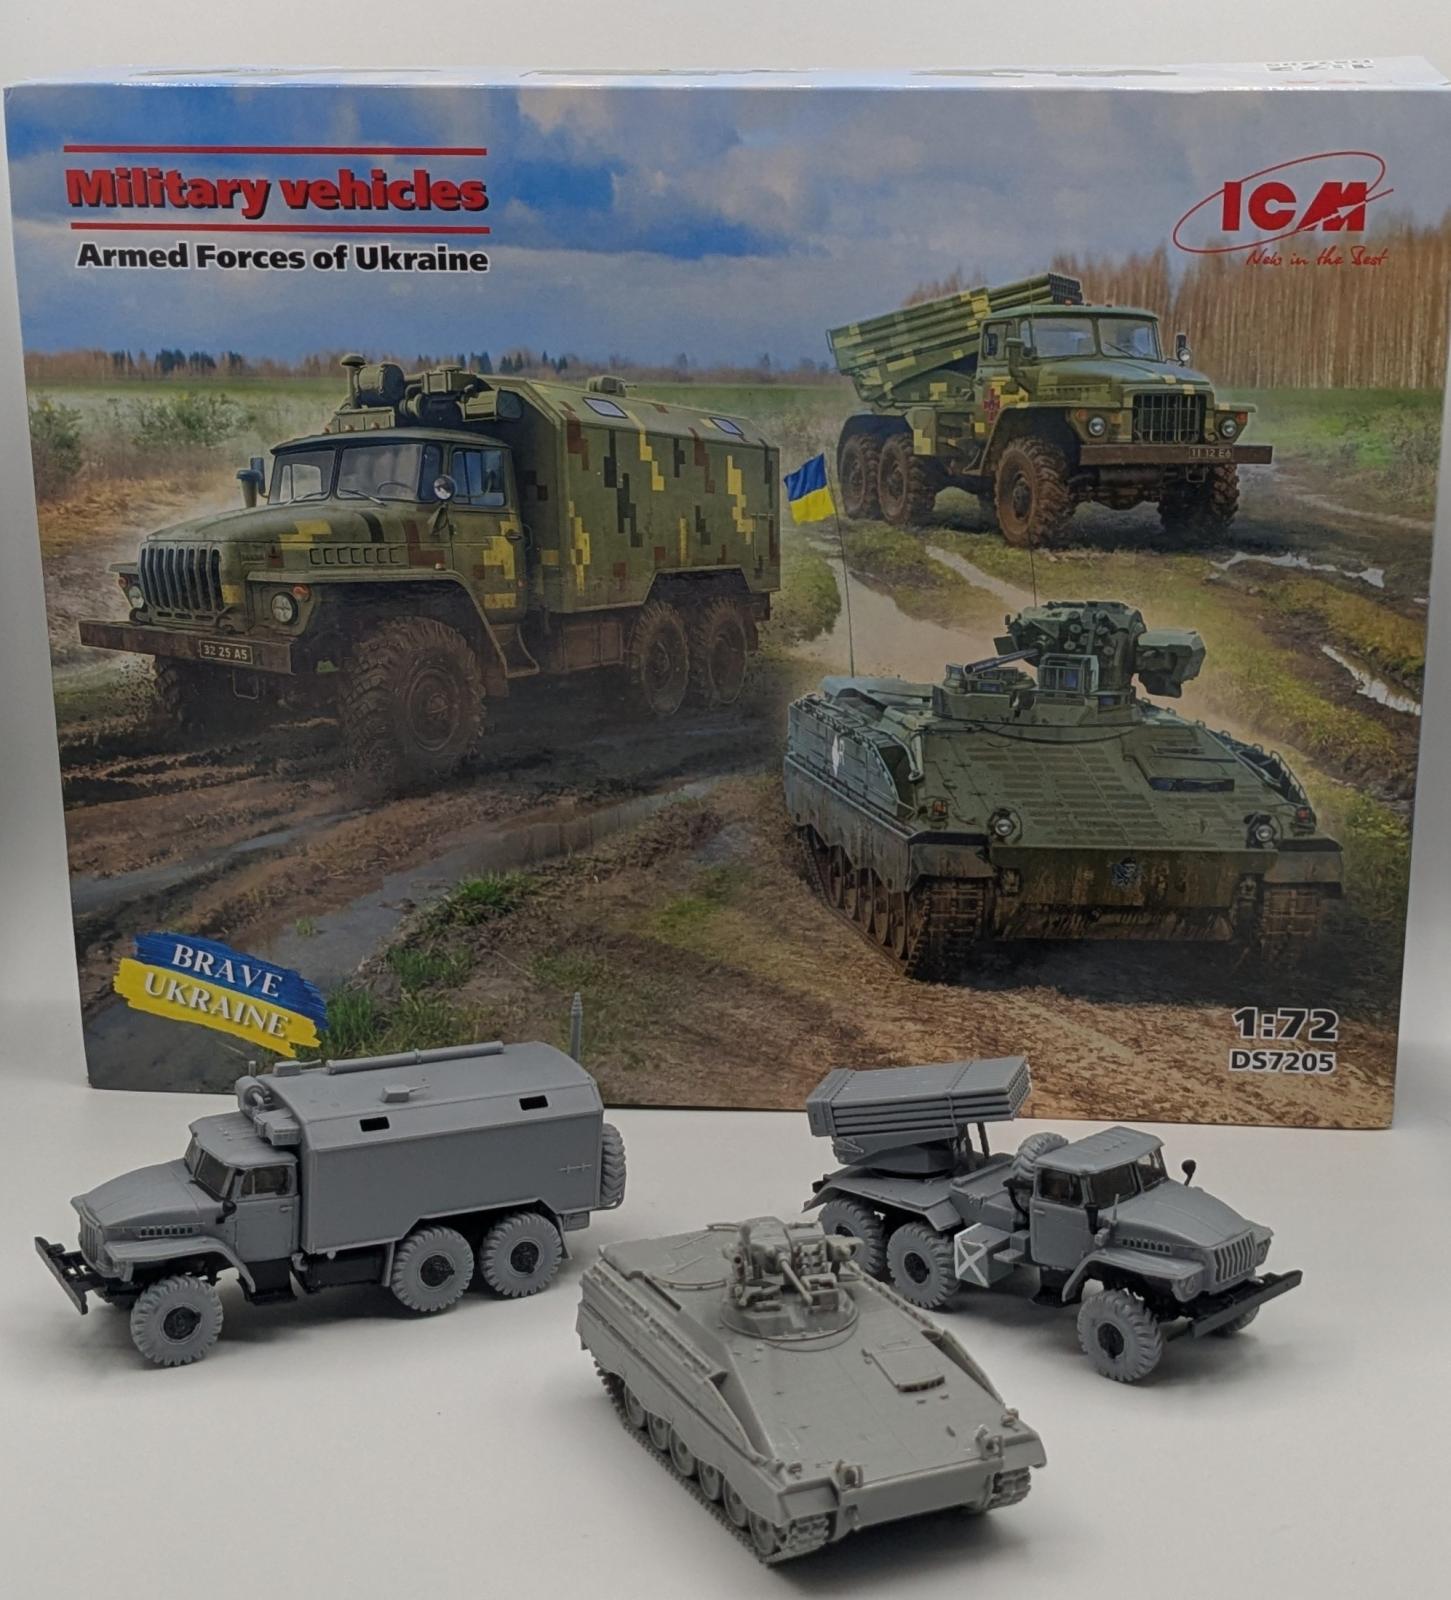
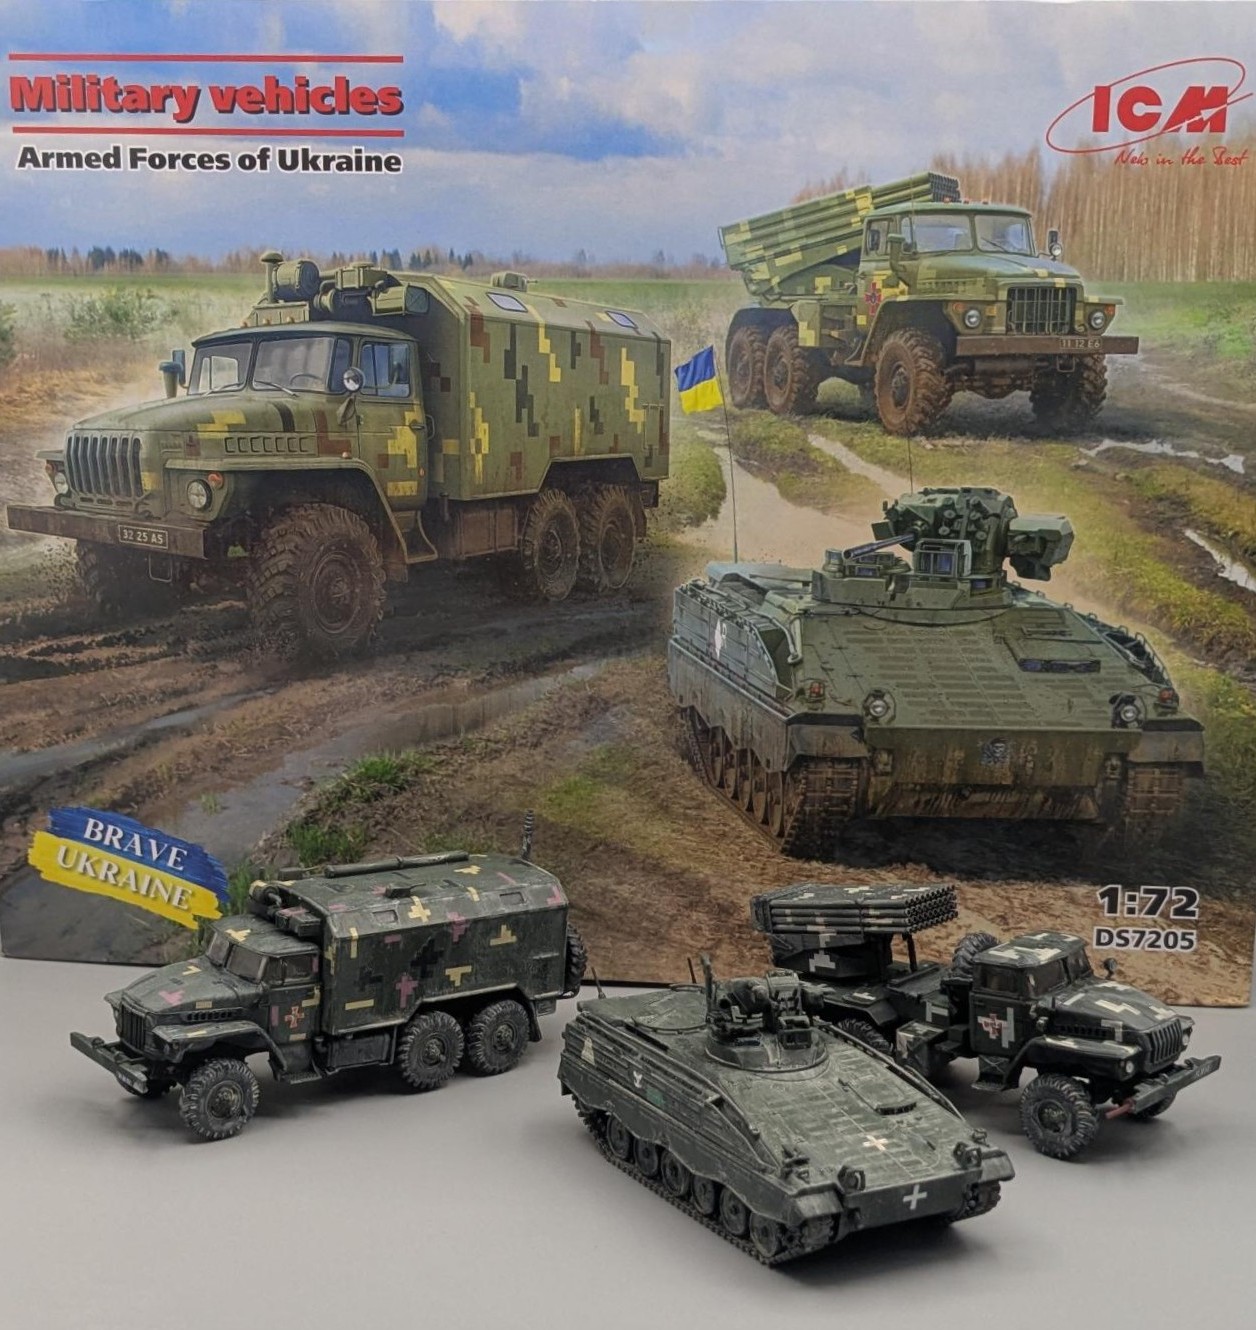
ICM has done it again with a great combination kit containing three vehicles currently serving Ukraine against the Russian invasion. This boxing Military Vehicles of the Armed Forces of Ukraine (DS7205 – Diorama Set) has three complete kits: Ural-43203, BM-21 ‘Grad’ and SPz Marder 1 A3. From the ICM webpage for the Military Vehicles of the Armed Forces of Ukraine:
The Ground Forces of the Armed Forces of Ukraine operate various military equipment, primarily consisting of Soviet-era models. Most of these vehicles have stood the test of time and remain effective for combat tasks.
Wheeled military vehicles are among the most common equipment in modern armies. The Ural-4320 all-wheel-drive vehicle remains popular due to its high operational qualities. It has many variants, including versions with KUNG-type bodies—enclosed vans for mounting special equipment and transporting personnel.
Among multiple rocket launcher systems, the BM-21 “Grad” is one of the most numerous. It provides fire support to army formations, destroys personnel and vehicles, establishes minefields, and creates smoke screens.
The Armed Forces of Ukraine also operate Western armored vehicles, such as the SPz Marder 1A3 infantry fighting vehicle. This IFV is one of the most proven and reliable weapon systems of its type in the world. In Ukraine, the SPz Marder 1A3 has been deployed primarily to the Air Assault Forces, where it has demonstrated excellent qualities as a well-protected and reliable combat vehicle.
All three kits have been produced by ICM separately. The Ural-43203 (Kit No. 72709) was first produced in 2023 (with an enclosed trailer body and new decals, based on the ubiquitous Ural truck first introduced by ICM in 2000, itself a reboxing of the Omega-K kit of a cargo body Ural first released in the 1990s). The BM-21 ‘Grad’ (Kit No. 72707) was first released in 2023, itself largely a reboxing of their earlier Kit No. 72714 released in 2005. The SPz (Schützenpanzer) Marder 1 A3 (Kit No. 72822) was released 2025 and is a former Revell Marder 1A3 kit that was first issued in 1999, There is a lot of plastic with the three kits making up this impressive diorama set.
Upon opening the cover, there is a reinforced white inner box that does a good job of protecting the three kits in their respective plastic bags. There are eighteen plastic sprues (eight for the Ural-43203, six for the BM-21 ‘Grad’, and four for the SPz Marder 1A3), two vinyl tracks for the SPz Marder 1A3, and three decal sheets. The three instruction manuals (Ural-43203 has nine steps over four pages; the BM-21 ‘Grad’ has 12 steps over four pages; and the SPZ Marder 1A3 has 35 steps over 12 pages). The downloadable instructions are also available separately online. As this is a review for the DS7205 Military Vehicles of the Armed Forces of Ukraine (multi-kit), each kit will be reviewed separately. Unfortunately, these are not the new generation of ICM tooling as they are all retools. Take care with small pieces (grab handles, etc) as the plastic is fragile and will break when removed from the sprue gates. The black plastic sprues covering the suspension and underbody for both the Ural-43203 and BM-21 ‘Grad’ is very soft, has lots of flash, and seems to repel paint.
A note on Ukrainian pixel camouflage decals in these kits. There are two variants applied over the base Ukrainian green: the 2016 version consisting of yellow, black and brown (replacing the 2015 version with just black and yellow), and the 2021 version consisting of yellow, light brown and dark brown).
Of note, both the Ural-43203 and BM-21 ‘Grad’ require a detailed study of the instructions and using reference materials. There is only a single location pin on each kit and that is to locate the back underside of the cab onto the frame. The axles, suspension, undercarriage boxes, etc are approximations. Without further ado, let’s dig in.
It is advisable to keep the three kits separate to avoid confusion.
Ural-43203
Military Box Vehicle of the Armed Forces of Ukraine
The Ural-4320 military all-wheel drive car was produced in 1977. It was popular and widely distributed due to its high operational qualities, and the production of its modernized versions is still ongoing. The car has many versions, among which there are versions with bodies of the “KUNG” type – closed van bodies for the installation of special equipment and transportation of personnel. Initially, they were made of wood, later – using metal. These van bodies were developed for specific car models, but they were also universal, which made it possible to use them on different chassis. In addition to special army equipment, such van bodies were equipped with heating, ventilation, and lighting systems. A significant quantity of Ural-4320 cars with such closed bodies continues to be used in the Armed Forces of Ukraine.
The model build is a conundrum, and the sequence is not logical. I have highlighted where there are notes identified by their instruction step:
Step 2: Pay attention to the dimensions and mm markings to determine the best place to affix the parts as there are no locating marks. Test fit, test fit, and test fit again before committing glue.
- The transfer case (Parts A11 and A12) should be attached to the truncated engine block (Part A45) before removing the supports identified (the body will not fit on the chassis if the supports are intact – ask me how I know).
- The rear axle supports (Part A17 x 2) and leaf springs (Part A48 x 2) need to be reamed to accommodate the leaf spring connection (Part A38) and axles (Parts A14 x 2 and Part A8).
- Pay close attention when attaching the drive shafts (Parts A40, A41, and A42) as they only fit one way.
Step 3: There are no locating holes for the passenger grab handle (Part A39), so look at references for the correct location.
Step 6:
- The instructions show cutting an underneath portion of the bottom of the shell. I couldn’t find a reason to do so, and the parts fit without cutting. Also, cutting the part would require more work to fill in the newly created hole.
- The mud flaps (Part B10 x 4) should be left off until the frame has been attached (Step 9) as mine didn’t fit with the rear double wheels, most likely to my feeble attempt to line up the frame with its many components.
- Despite the instructions calling for the four windows (Part E4 x 4) to be installed in Step 9, this is a nearly impossible task as the windows are designed to be installed from the inside. Install them before mating the shelter (Part G) to its floor (Part B1). The rear window (E1) is called out in the step, but it should also be installed from the inside rather than on the outside as shown.
Step 7: This step is key to the cab fitting properly, so pay close attention to the order of construction. It also is a lot easier to paint the cab interior before assembly.
- The clear plastic windows require careful test fitting. I finally cut the driver (Part C4) and passenger (Part C3) windows into two parts each (the small triangular part and the roll-up/down window so they would fit the frame). Once cut, test fit again and affix with a clear glue.
- Step 4 (the seats and floorboard) pair with Step 3 (instrument panel and steering wheel). I recommend gluing the instrument panel (Step 3) into place first, then affixing the seats and floorboard assembly (Step 4) as gluing them together makes the fit tougher to align.
- The under-cab shroud (Parts A46 and A47) is a real mystery on how they align. Once the cab is dry and solid, test fit, test fit, and test fit again on how they should fit. I had to use reference photos to determine the correct alignment, then taped them together and test fit with the truck frame to make sure it all lined up (see photo – Parts A46 and A47 alignment).
- I recommend keeping the mirrors (Parts A56 and A57) and the search light (Part A19) off until after painting as they will most likely break off while mating the cab to the frame and painting.
Step 9: The windshield wipers are to be scratch built, but no dimensions are provided.
The Ural-43203 has two marking options:
- 1. Ural-43203, Armed Forces of Ukraine
- 2. Ural-43203, Armed Forces of Ukraine, camouflage version from 2021
I painted the Ural-43202 in the second option, using masking solution for the windows as there is no way to install them after painting.
BM-21 'Grad'
MLRS of the Armed Forces of Ukraine
The development of the BM-21 Grad MLRS began in 1960 and its serial production began in 1964. It is designed to provide general fire support for army formations, destroying manpower, armored vehicles, unarmored vehicles, field fortifications, laying minefields, and creating smoke screens. The artillery part consists of a package of 40 tubes on a platform that can rotate in the vertical and horizontal planes. The time for a full salvo is 20 seconds. The fire salvo can be controlled both from the cockpit and with the help of a remote control. This MLRS can use various types of ammunition: high-explosive, cluster, incendiary, lighting, and smoke. The most common is the high-explosive fragmentation projectile, which has a maximum range of 20.4 km. There are also types of ammunition for this MLRS that have a range of up to 40 km. The system is loaded manually by a combat crew. As of 2022, the BM-21 Grad was the most mass-produced MLRS of the Armed Forces of Ukraine.
This model is also a conundrum for the same reasons stated above. Here are notes that are identified by their instruction step:
Step 2: Pay attention to the dimensions and mm markings to determine the best place to affix the parts as there are no locating marks. Test fit, test fit, and test fit again before committing glue.
- The transfer case (Parts A11 and A12) should be attached to the truncated engine block (Part A45). The instructions call for removing the supports identified, but the support needs to be present so the spare wheel mount can fit properly on frame. Ask me how I know as I cut the supports, then had to look at reference photos to determine why the spare wheel mount didn’t fit properly.
- The rear axle supports (Part A17 x 2) and leaf springs (Part A48 x 2) need to be reamed to accommodate the leaf spring connection (Part A38) and axles (Parts A14 x 2 and Part A8).
- Pay close attention when attaching the drive shafts (Parts A40, A41, and A42) as they only fit one way
Step 3: There are no locating holes for the passenger grab handle (Part A39), so look at references for the correct location.
Step 5: This step is key to the cab fitting properly, so pay close attention to the order of construction. It also is a lot easier to paint the cab interior before assembly.
- The clear plastic windows require careful test fitting. I finally cut the driver (Part C4) and passenger (Part C3) windows into two parts each (the small triangular part and the roll-up/down window so they would fit the frame). Once cut, test fit again and affix with a clear glue.
- Step 4 (the seats and floorboard) pair with Step 3 (instrument panel and steering wheel). I recommend gluing the instrument panel (Step 3) into place first, then affixing the seats and floorboard assembly (Step 4) as gluing them together makes the fit tougher to align.
- The under-cab shroud (Parts A46 and A47) is a real mystery on how they align; they also require a 1mm strip be cut off the front of each piece. To make it even more interesting, I found that there needs to be a 9-10mm gap between the pieces, so the cab fits properly with the frame. Once the cab is dry and solid, test fit, test fit, and test fit again on how they should fit. I had to use reference photos to determine the correct alignment, then taped them together and test fit with the truck frame to make sure it all lined up (see photo – Parts A46 and A47 alignment).
- I recommend keeping the mirrors (Parts A56 and A57) and the search light (Part A19) off until after painting as they will most likely break off during mating the cab to the frame and painting.
Step 6: The multiple rocket launch tubes (Parts B22, B23, B24 and B25) are designed well and sandwiched together nicely. My kit had two tubes that were short shot and one broke while sanding off the sprue runner. I found some properly sized styrene tube and grafted them together. The mistakes were lost under a coat of paint.
Step 8: This is mostly a step that begs the question “why is this included?” Parts B32, B33, B34 and B35 all fill in holes on the bottom of the platform. The platform could have been produced in one piece to eliminate these steps as they all end up flush.
Step 12:
- Even with the dimensions provided, the fuel tank (Step 9) didn’t fit in the space provided with the rear wheels. I had to perform reduction surgery on the fuel tank to make it fit properly.
- The rocket pod elevation hydraulic cylinders (Part B8 x 2) position in the instructions is nebulous. Flipping the rocket pod upside down reveals two locating holes that fit the hydraulic cylinders perfectly.
- There is no reference for windshield wipers that are missing. Easy enough to scratch build, but curious, nonetheless.
The BM-21 ‘Grad’ has two marking options:
- 1. BM-21 ‘Grad’, Armed Forces of Ukraine
- 2. BM-21 ‘Grad’, Armed Forces of Ukraine, camouflage version from 2021I painted the BM-21 ‘Grad’ in the second option to have a different pixel camouflage.
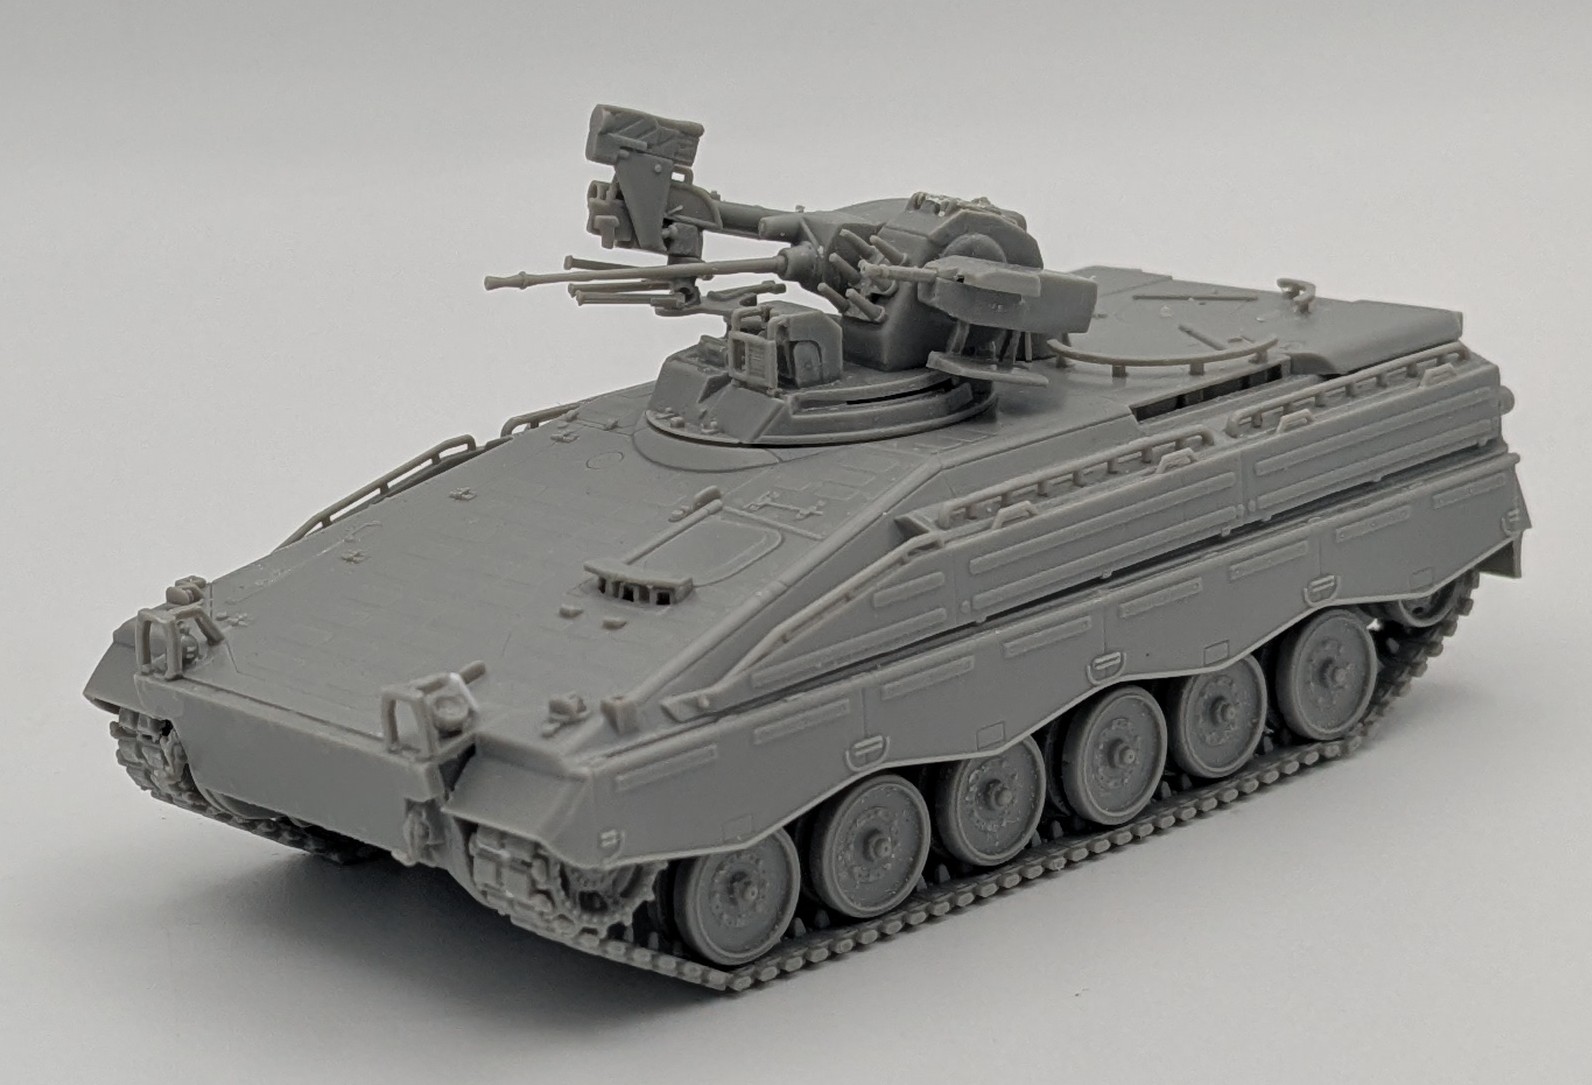
SPz Marder 1A3
SPz Marder 1A3 - Ukrainian Infantry Fighting Vehicle
The SPz Marder 1 is a German infantry fighting vehicle (IFV) developed by Rheinmetall that has served as the main combat vehicle of the armored infantry divisions of the Bundeswehr since the 1970s.
The vehicle underwent several modernizations throughout its service life, with the A3 upgrade program launching in 1988. This modernization included 1600 kilograms of improved armor, reinforced suspension, a new braking system, and a modified turret configuration. The resulting SPz Marder 1A3 has proven to be one of the world’s most battle-tested and reliable IFVs.
Starting in March 2023, Ukraine began receiving SPz Marder 1A3s, with deliveries continuing until late 2024. Open sources indicate Ukraine received approximately 200 of these vehicles, primarily allocated to the Air Assault Forces of the Armed Forces of Ukraine, where they have demonstrated their effectiveness as well-protected and reliable infantry fighting vehicles.
The model builds straightforwardly, and the sequence is logical. There are minor notes that are identified here by their instruction step:
Step 07: The link and length tracks assemble well if you take your time. I had to add two individual links (Part No. 18) to the front drive sprocket, and one individual link to the rear idler, for both sides. Of note, the top run of the track is not visible once the side skirts are installed.
Step 08: Three hull parts (under the troop compartment vision blocks) are all numbered Part No. 21. Two are Part 21 (left and right side), while the rear part should be labelled Part No. 22).
Steps 10-11: You may want to install the fragile handholds (four x Parts No. 27A) after completion, so they don’t get damaged while handling during construction.
Steps 15: The left (Part No. 39) and right (Part No. 40) rear view mirrors are very fragile, and you may wait until final assembly to avoid damage. As an aside, on the real AFV, the mirrors could be folded down onto the hull (easy to do with a precise cut), or removed, as many photos of Ukrainian Marder 1A3s don’t show the mirrors present.
Steps 16: Take care when handling the headlight guards (Parts No. 42) as they are very fragile.
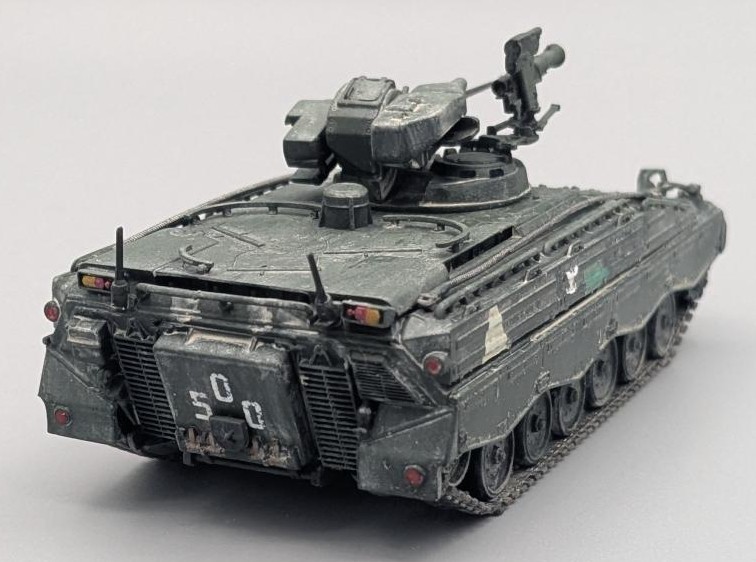
Step 21: The radio antennae bases (2 x Parts No. 52) are very fragile, take care even during final installation.
Step 30: The RAWLS (Rotating Amber Warning Light System, Part 71) isn’t used in combat. If omitted (haven’t seen any Ukrainian Marders with it installed yet), fill in the location hole.
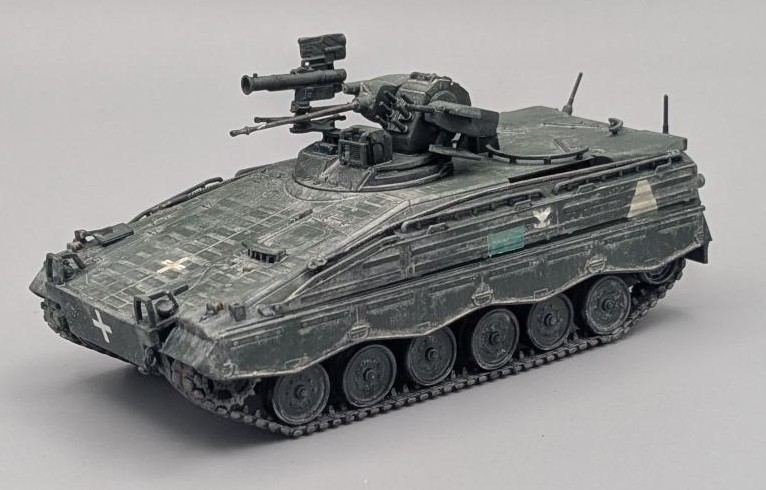
There are four marking options for this kit, the first three in overall green (called out as German Field Grey (ICM No. 1070) or 4BO Green (ICM No. 1073), and the fourth in NATO three-tone camouflage:
- SPz Marder 1A3, Airborne Assault Troops, Donetsk Region, December 2023
- SPz Marder 1A3, 25th Separate Airborne Brigade, Donetsk region, Spring 2024
- SPz Marder 1A3, Airborne Assault Troops, Southeastern Region of Ukraine, Summer-Autumn 2024
- SPz Marder 1A3, unknown unit of the Armed Forces of Ukraine, Kursk region, Autumn 2024
I chose the first option, the SPz Marder 1A3, 25th Airborne Assault Troops, Donetsk Region, December 2023, as I like the Marder painted in the color of its Cold War adversary, 4BO.
The decals for all three models are delicate and conform well to the model, have no silvering and really look the part, care must be taken due to their small size and fragility as a few wanted to curl back on themselves.
While the two Ural-based tracks are generously described as onerous; the biggest drawbacks are the clear plastic windows and lack of connecting points as annotated above. On the plus side, ICM has provided these models in braille scale and hopefully receives the new tool treatment that has become ICM’s trademark. The Ural-based trucks are recommended for advanced modelers, but they really look the part of heavy utility trucks once completed.
Slava Ukraini! (Glory to Ukraine!)
Profuse thanks to ICM and IPMS/USA for providing the review sample.
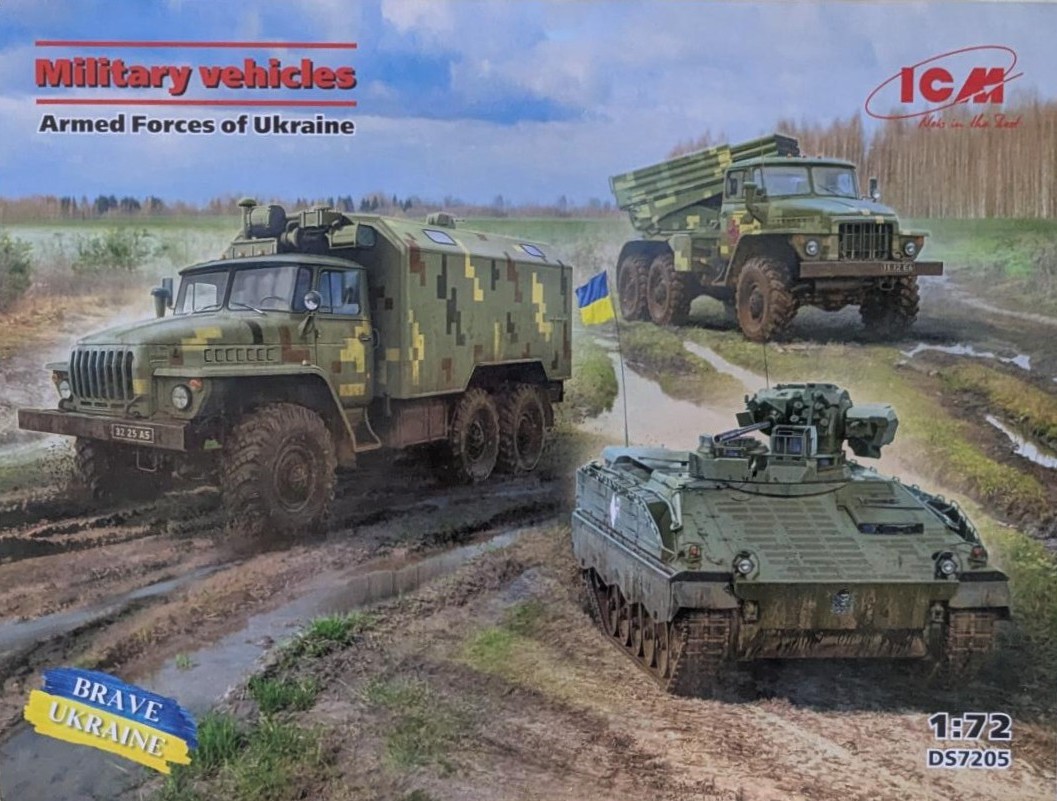
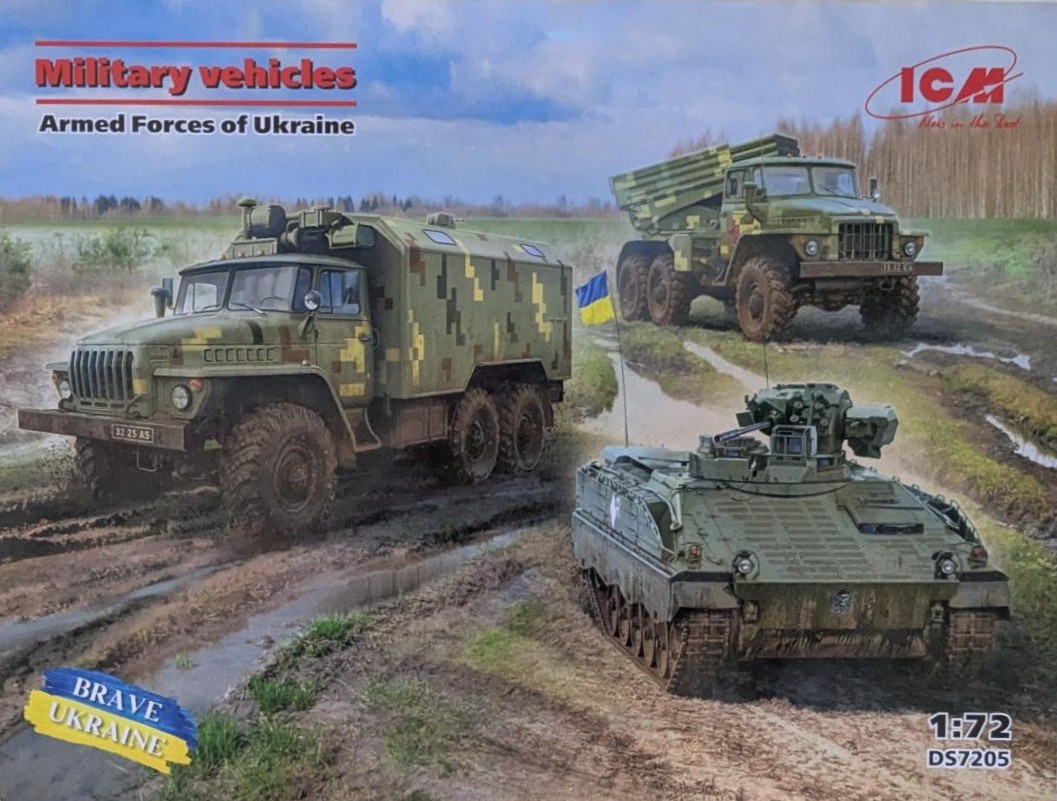
Military Vehicles of the AFU Box art
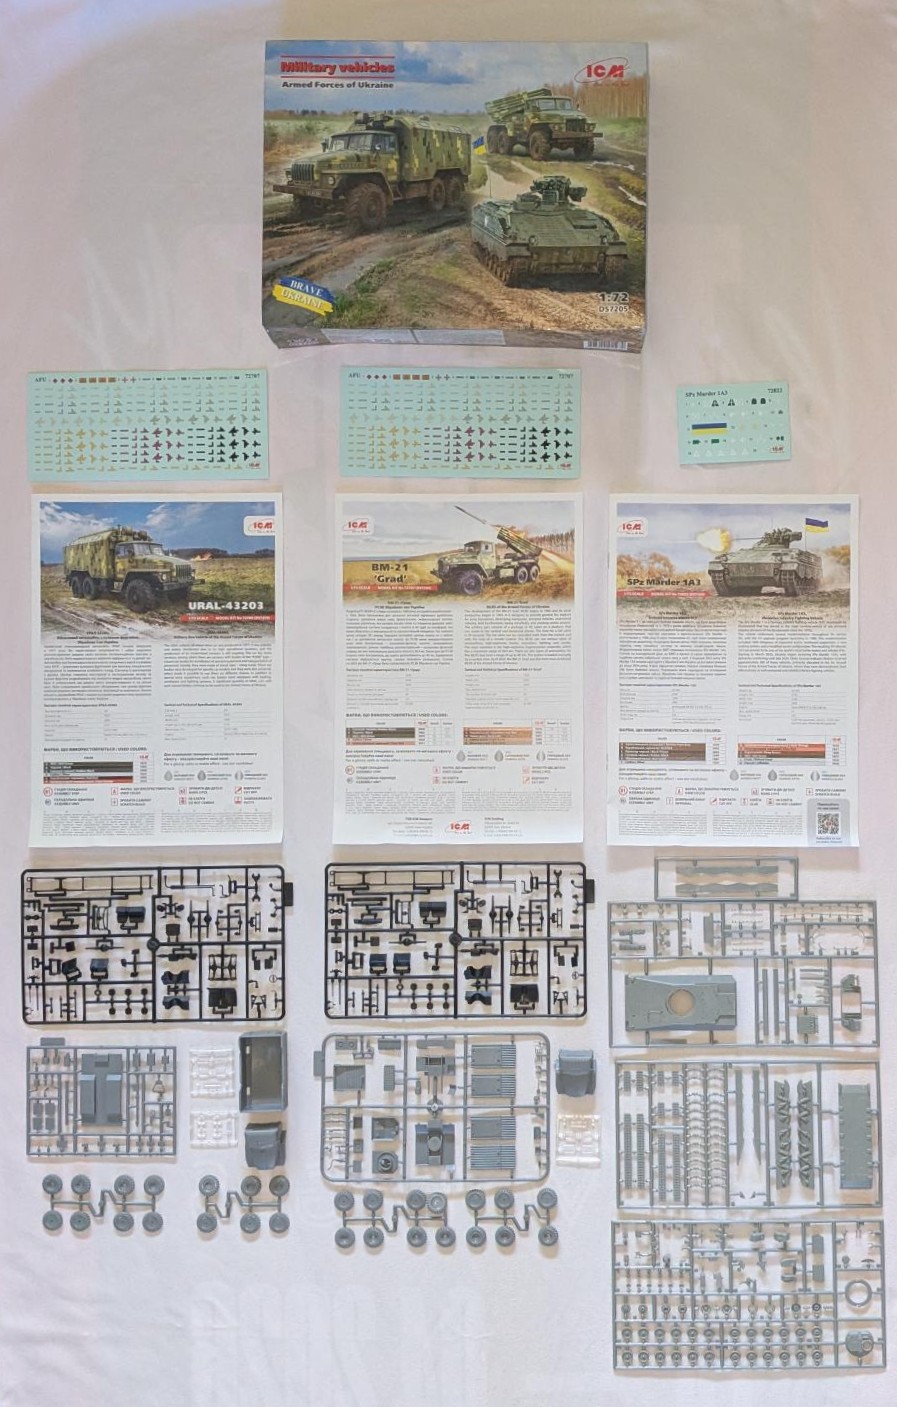
Military Vehicles of the AFU expanded
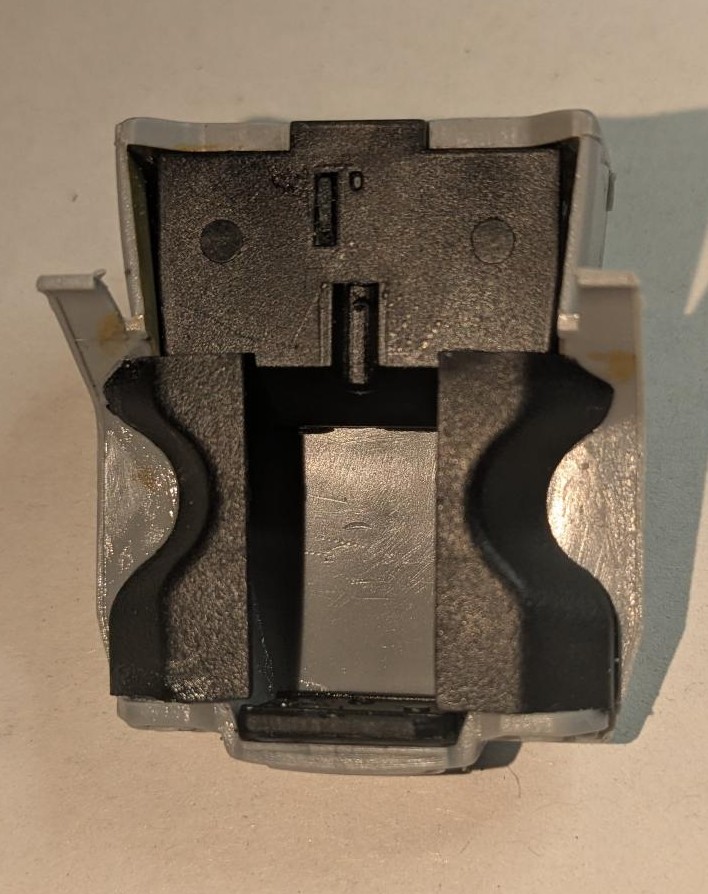
Ural and BM-21 parts A46 and A47
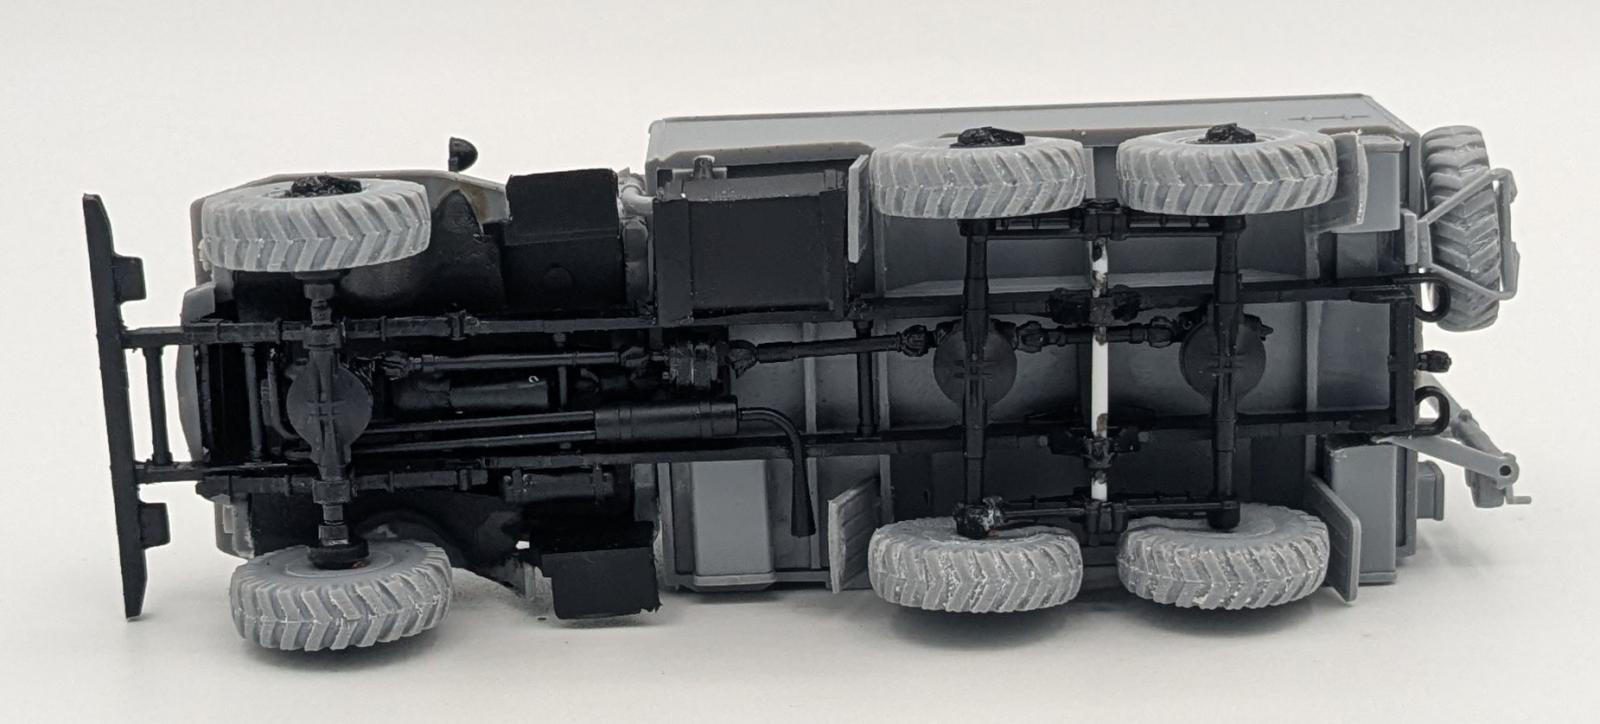
Ural undercarriage
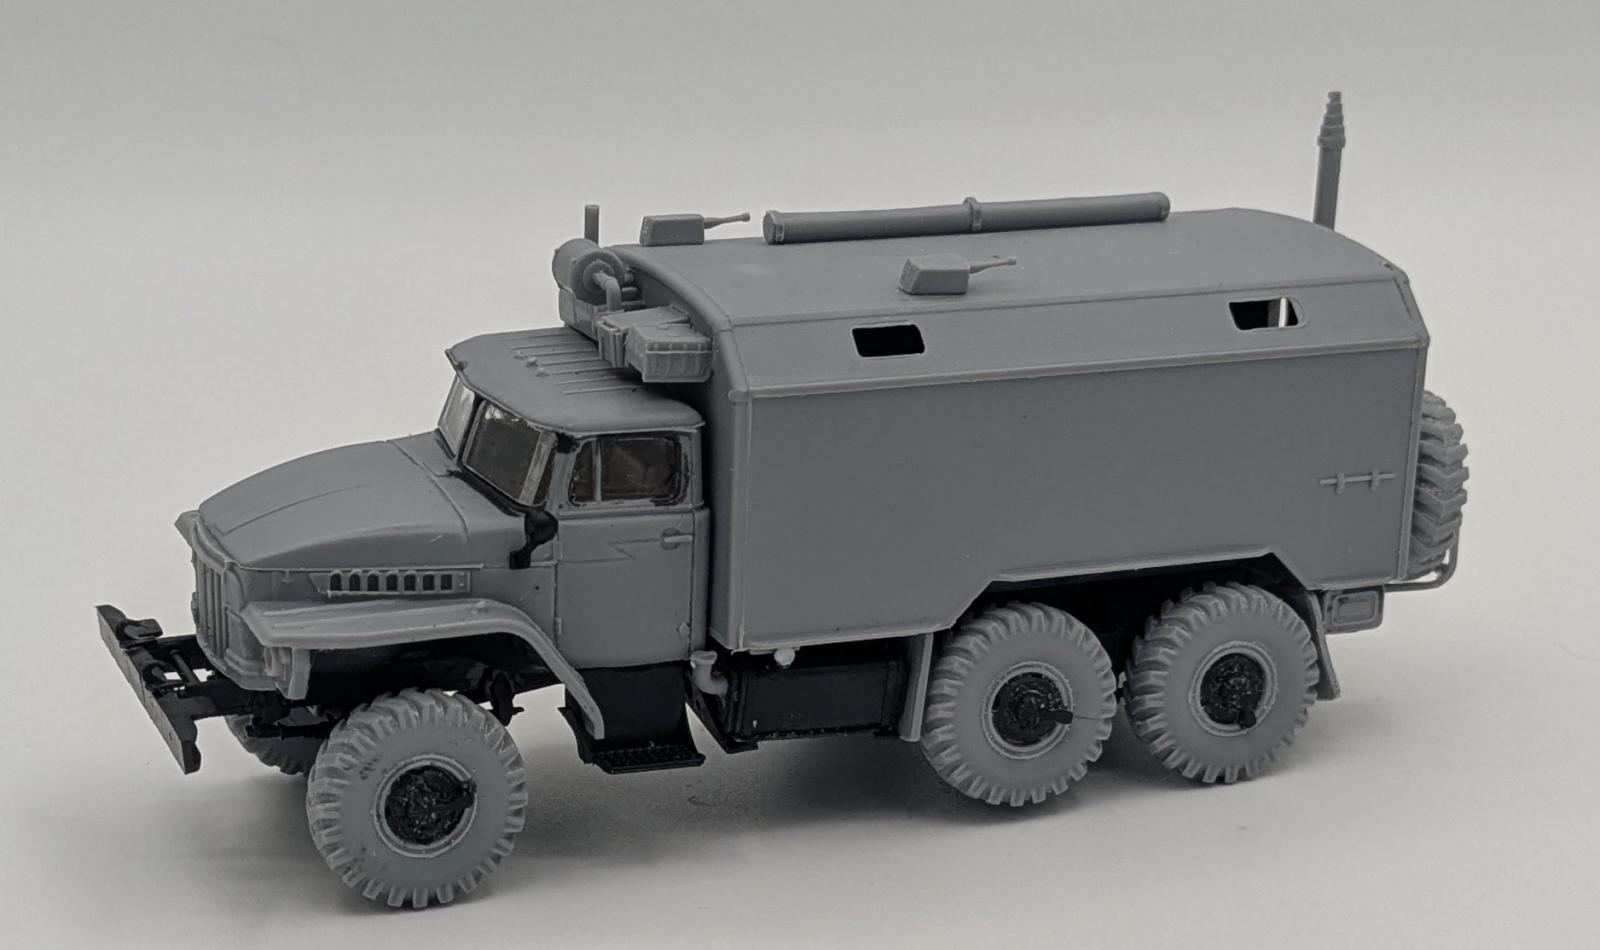
Ural left
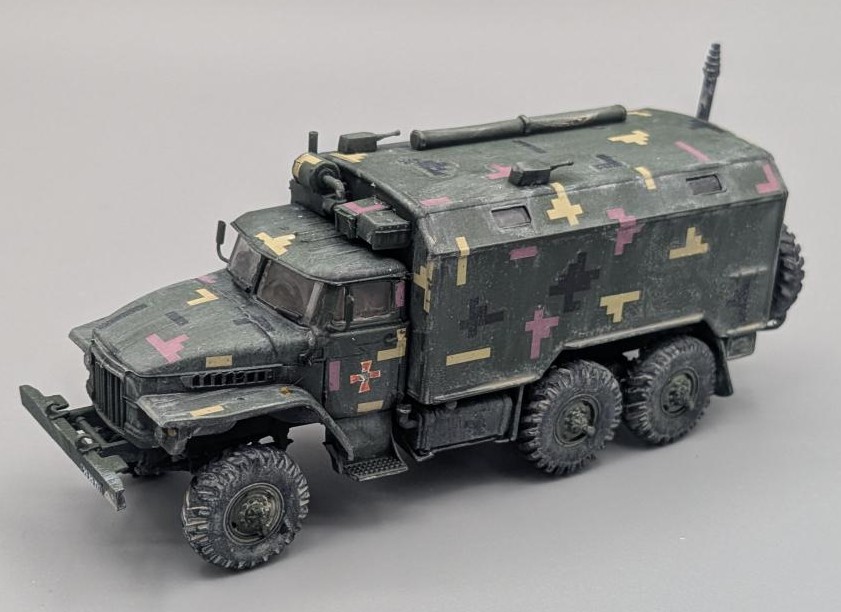
ural painted left
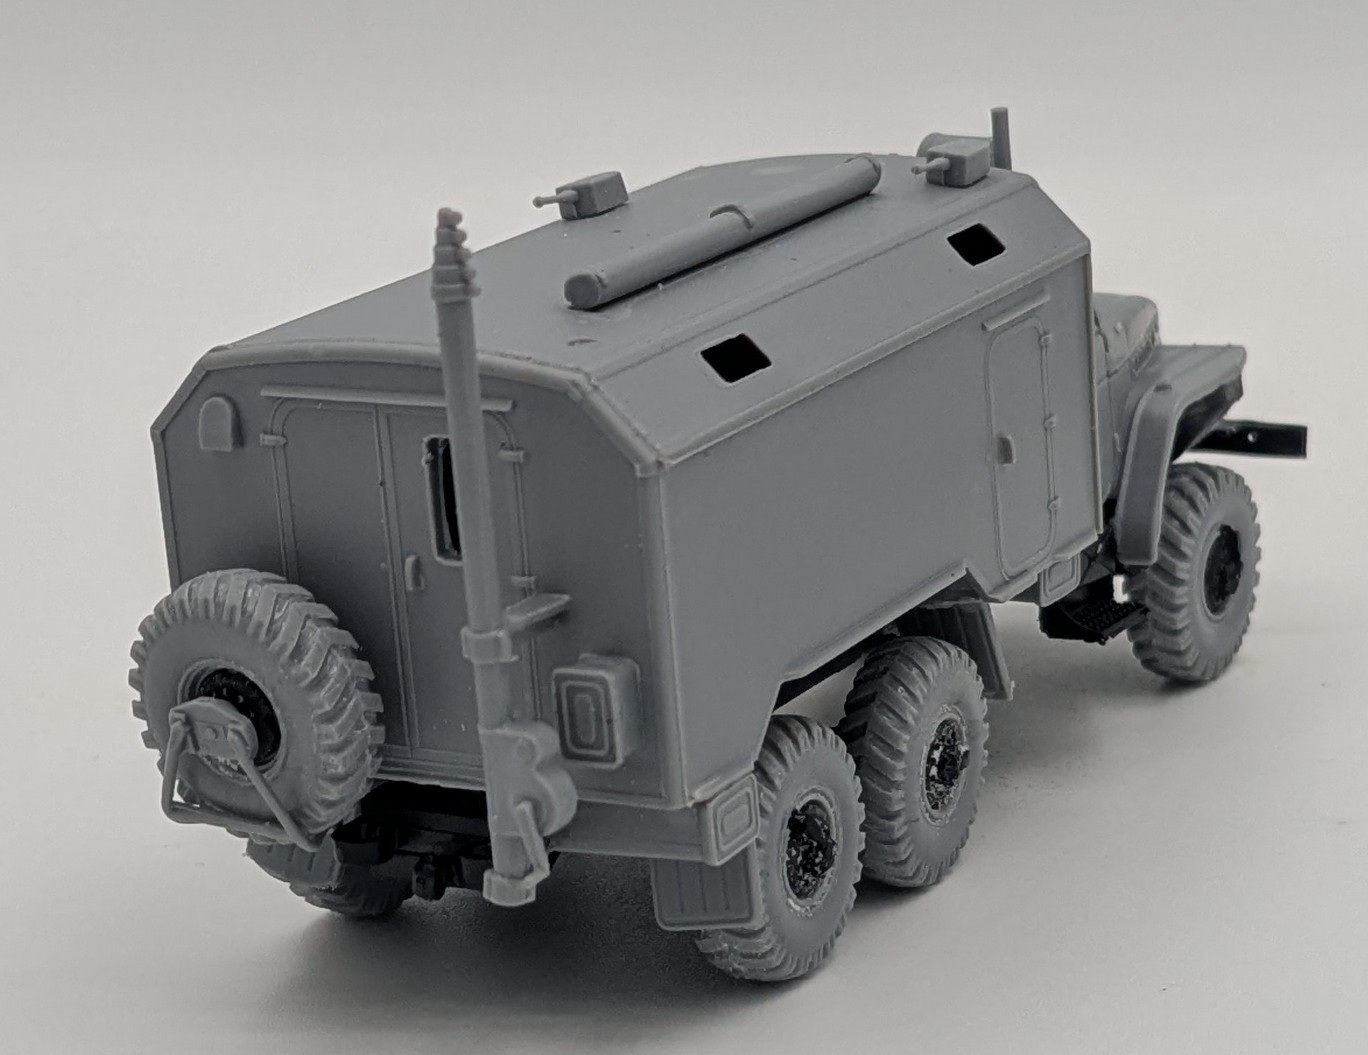
Ural right rear
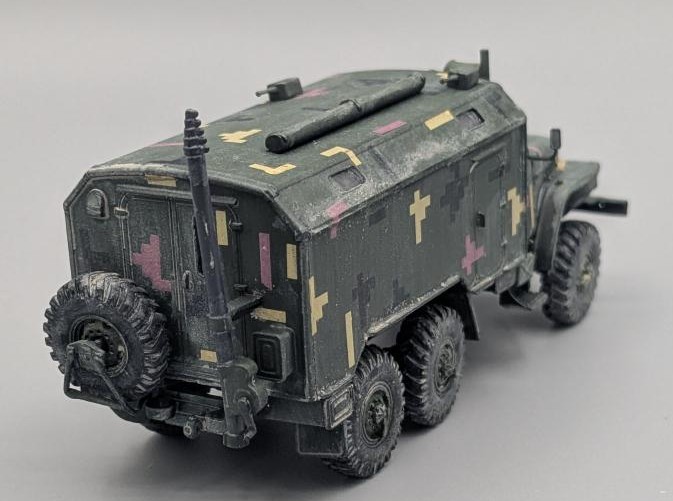
Ural painted right rear
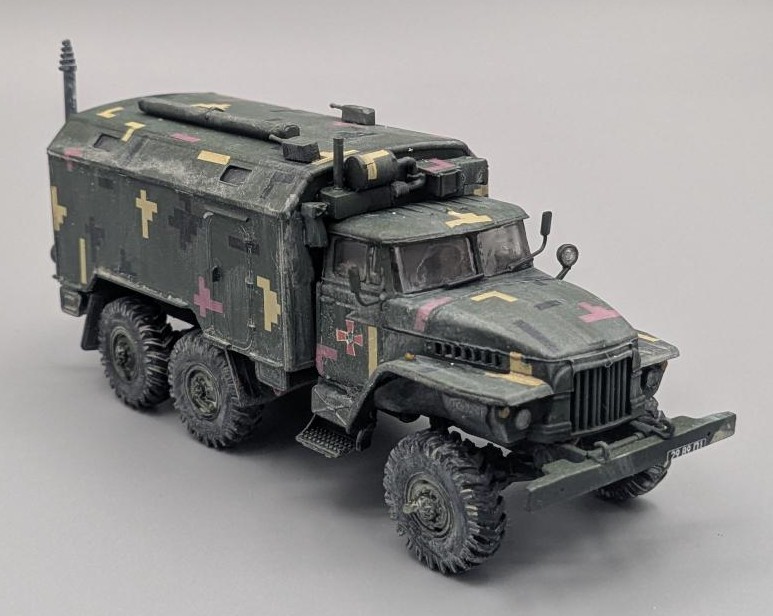
Ural front right
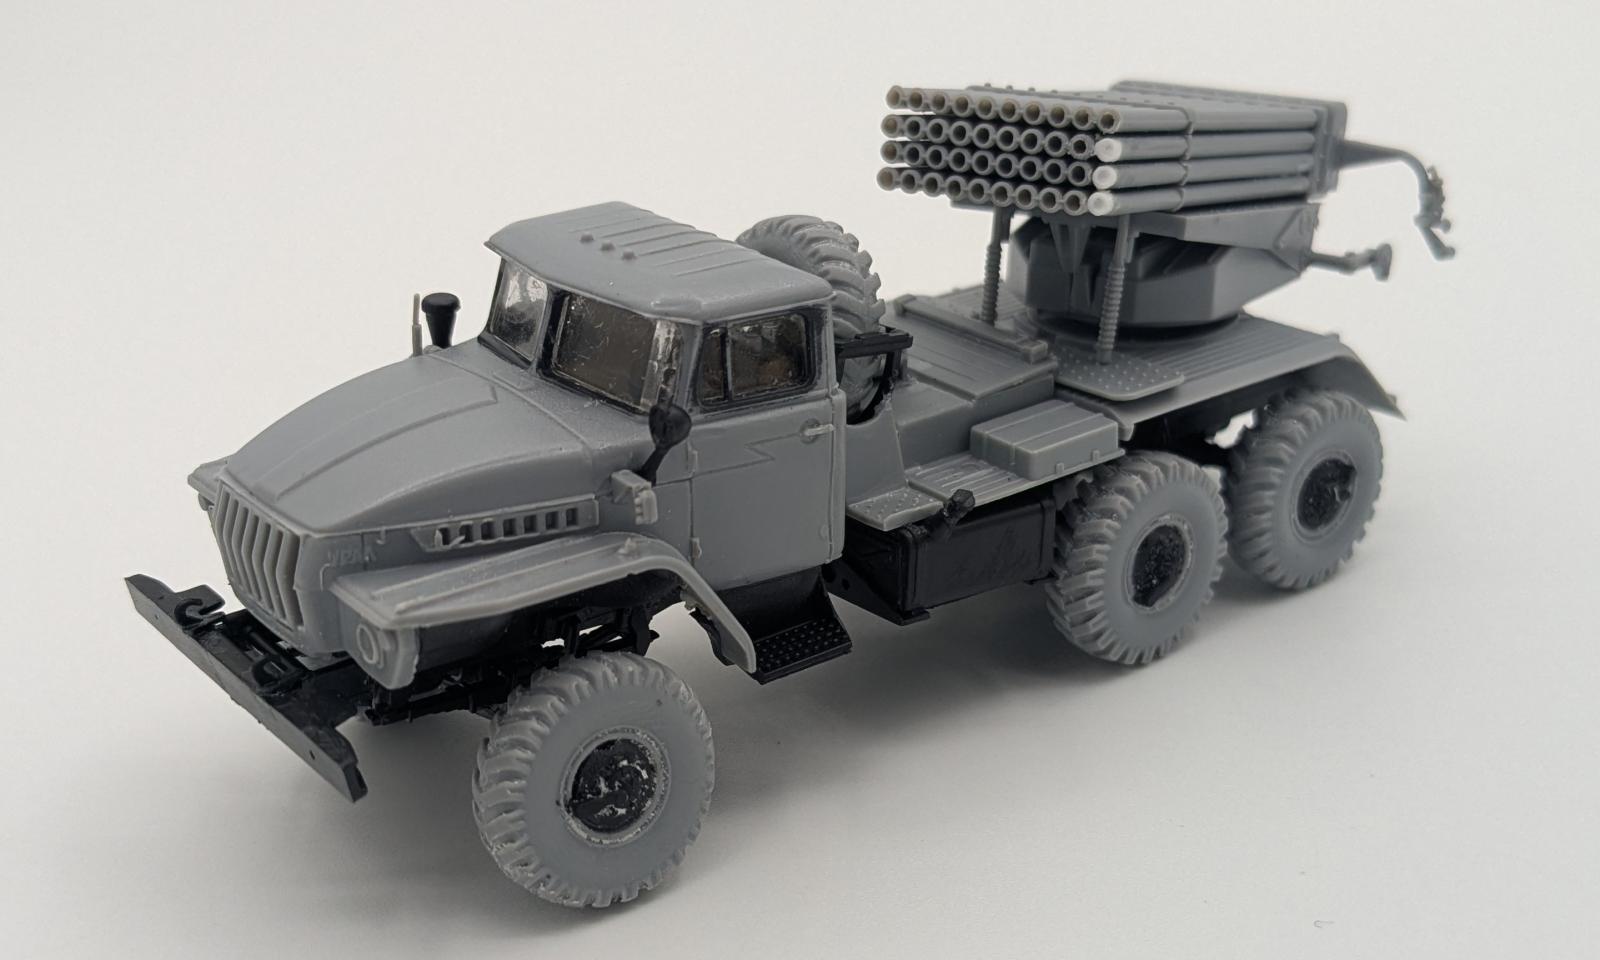
BM-21 front left
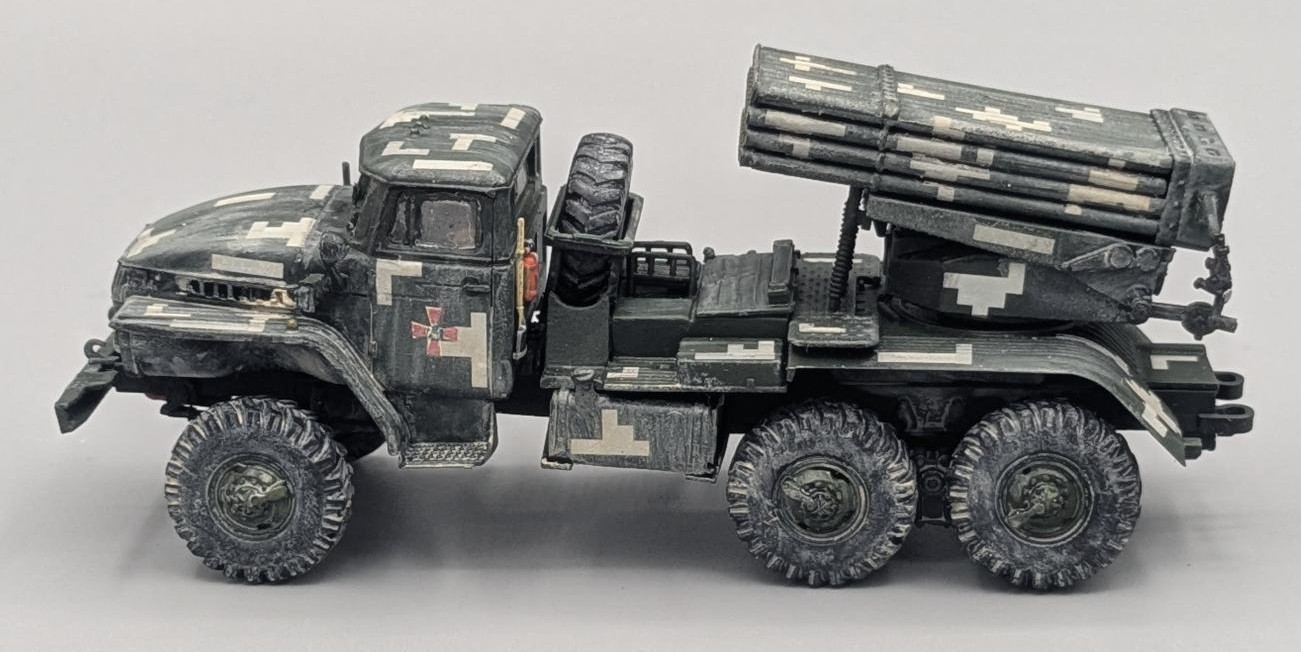
BM-21 painted left
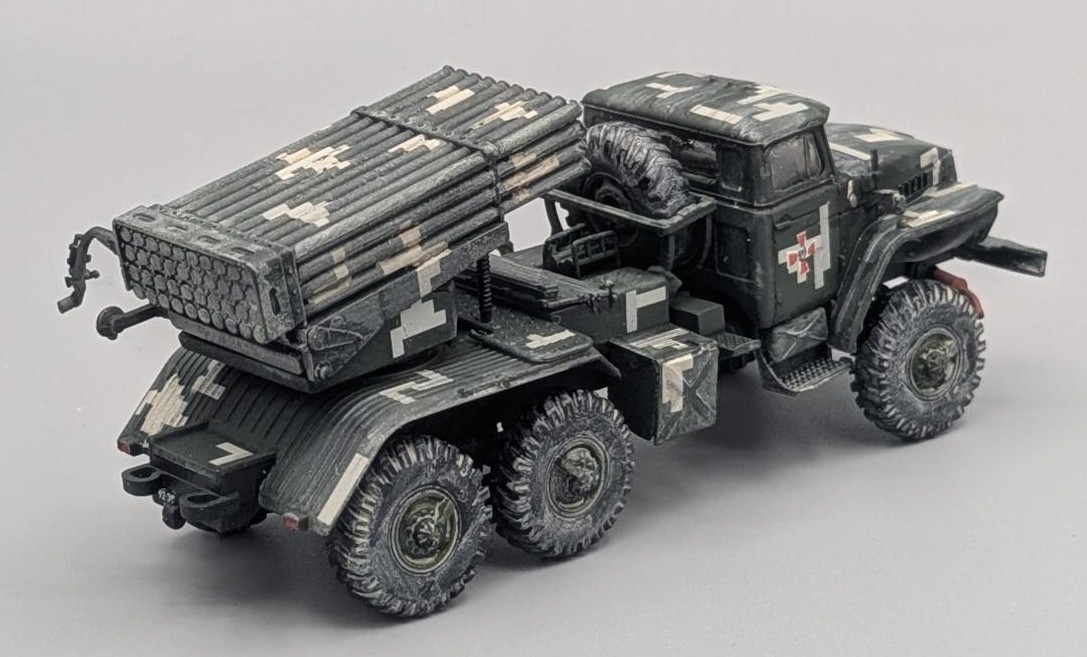
BM-21 painted right
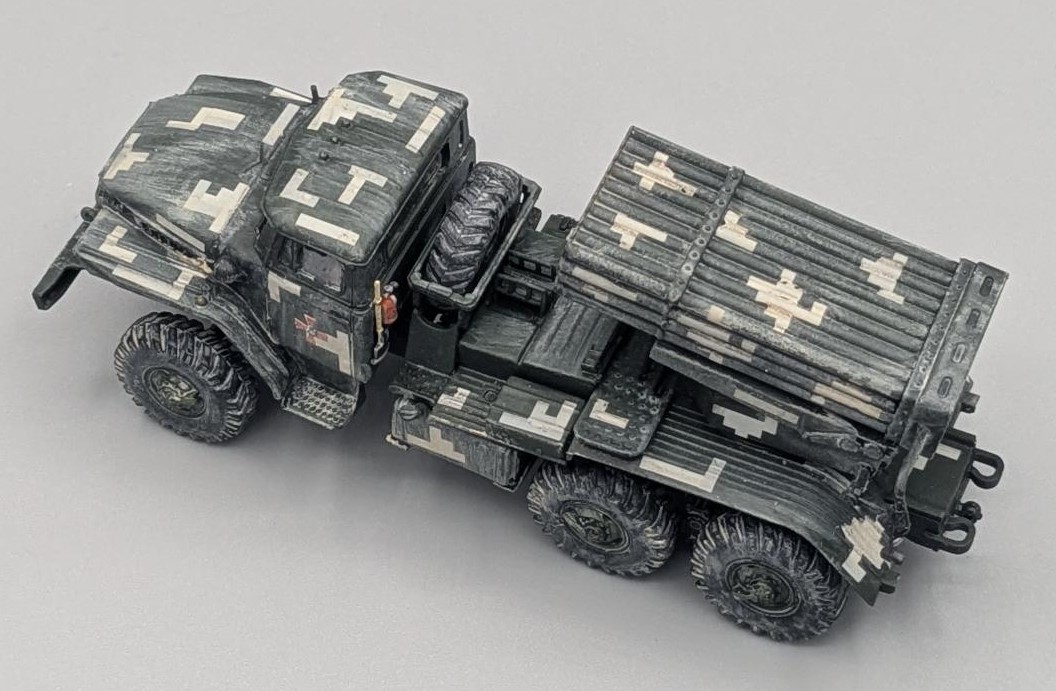
BM-21 painted above
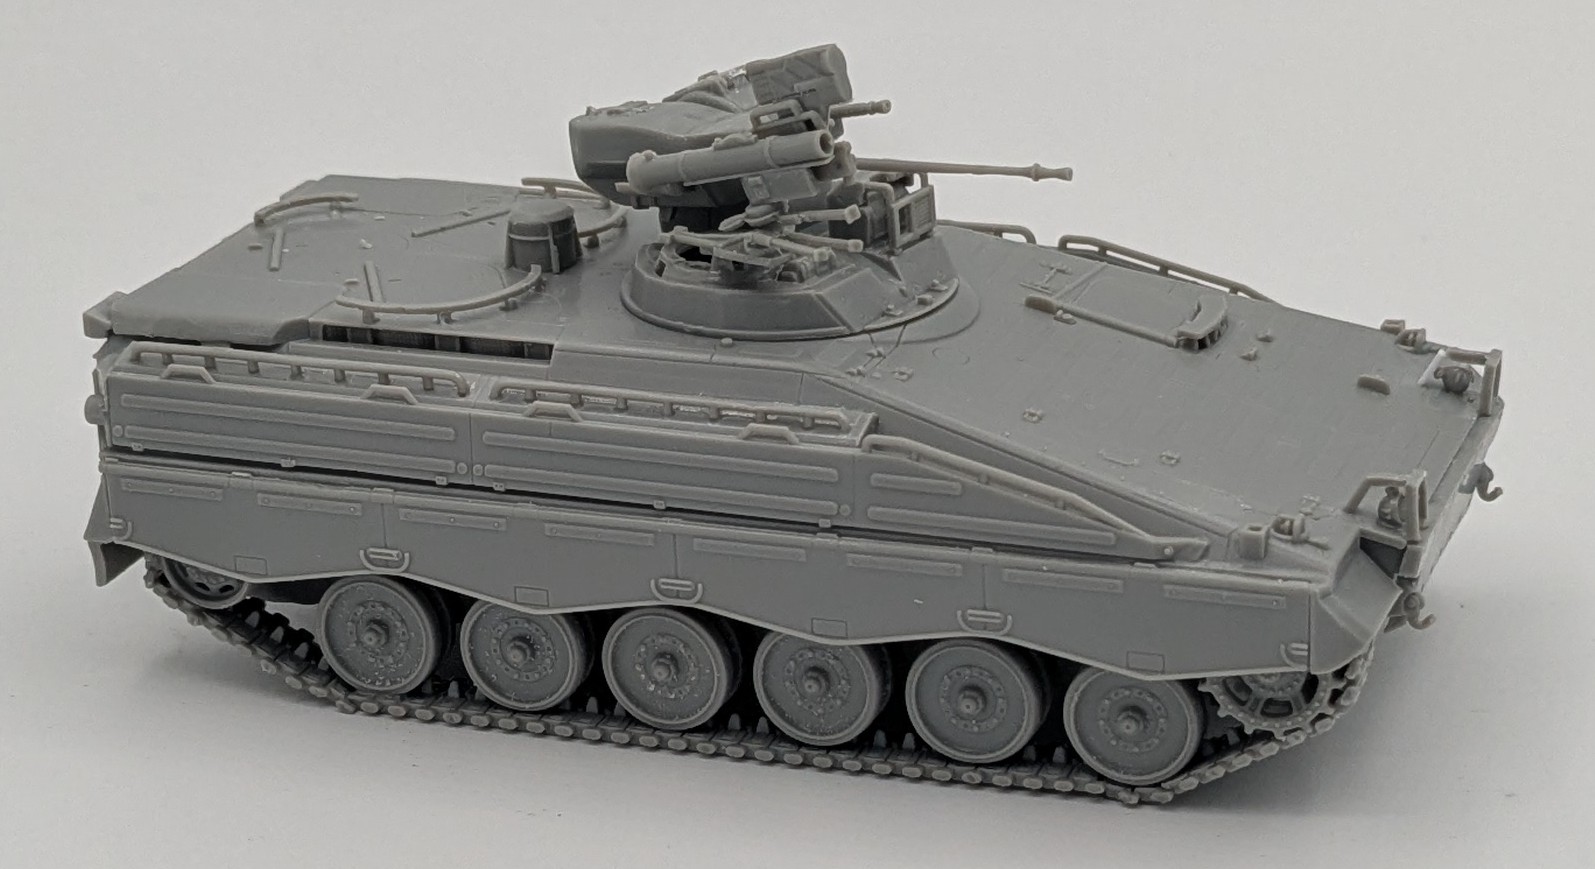
Marder right
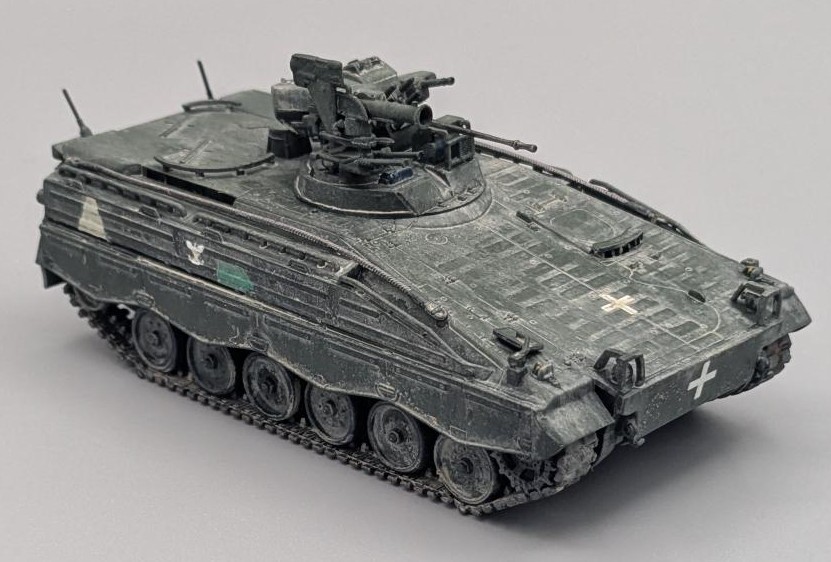
Marder painted right
Marder front left
Painted front left
Marder rear
Built models with box
Comments
Add new comment
This site is protected by reCAPTCHA and the Google Privacy Policy and Terms of Service apply.
Similar Reviews