
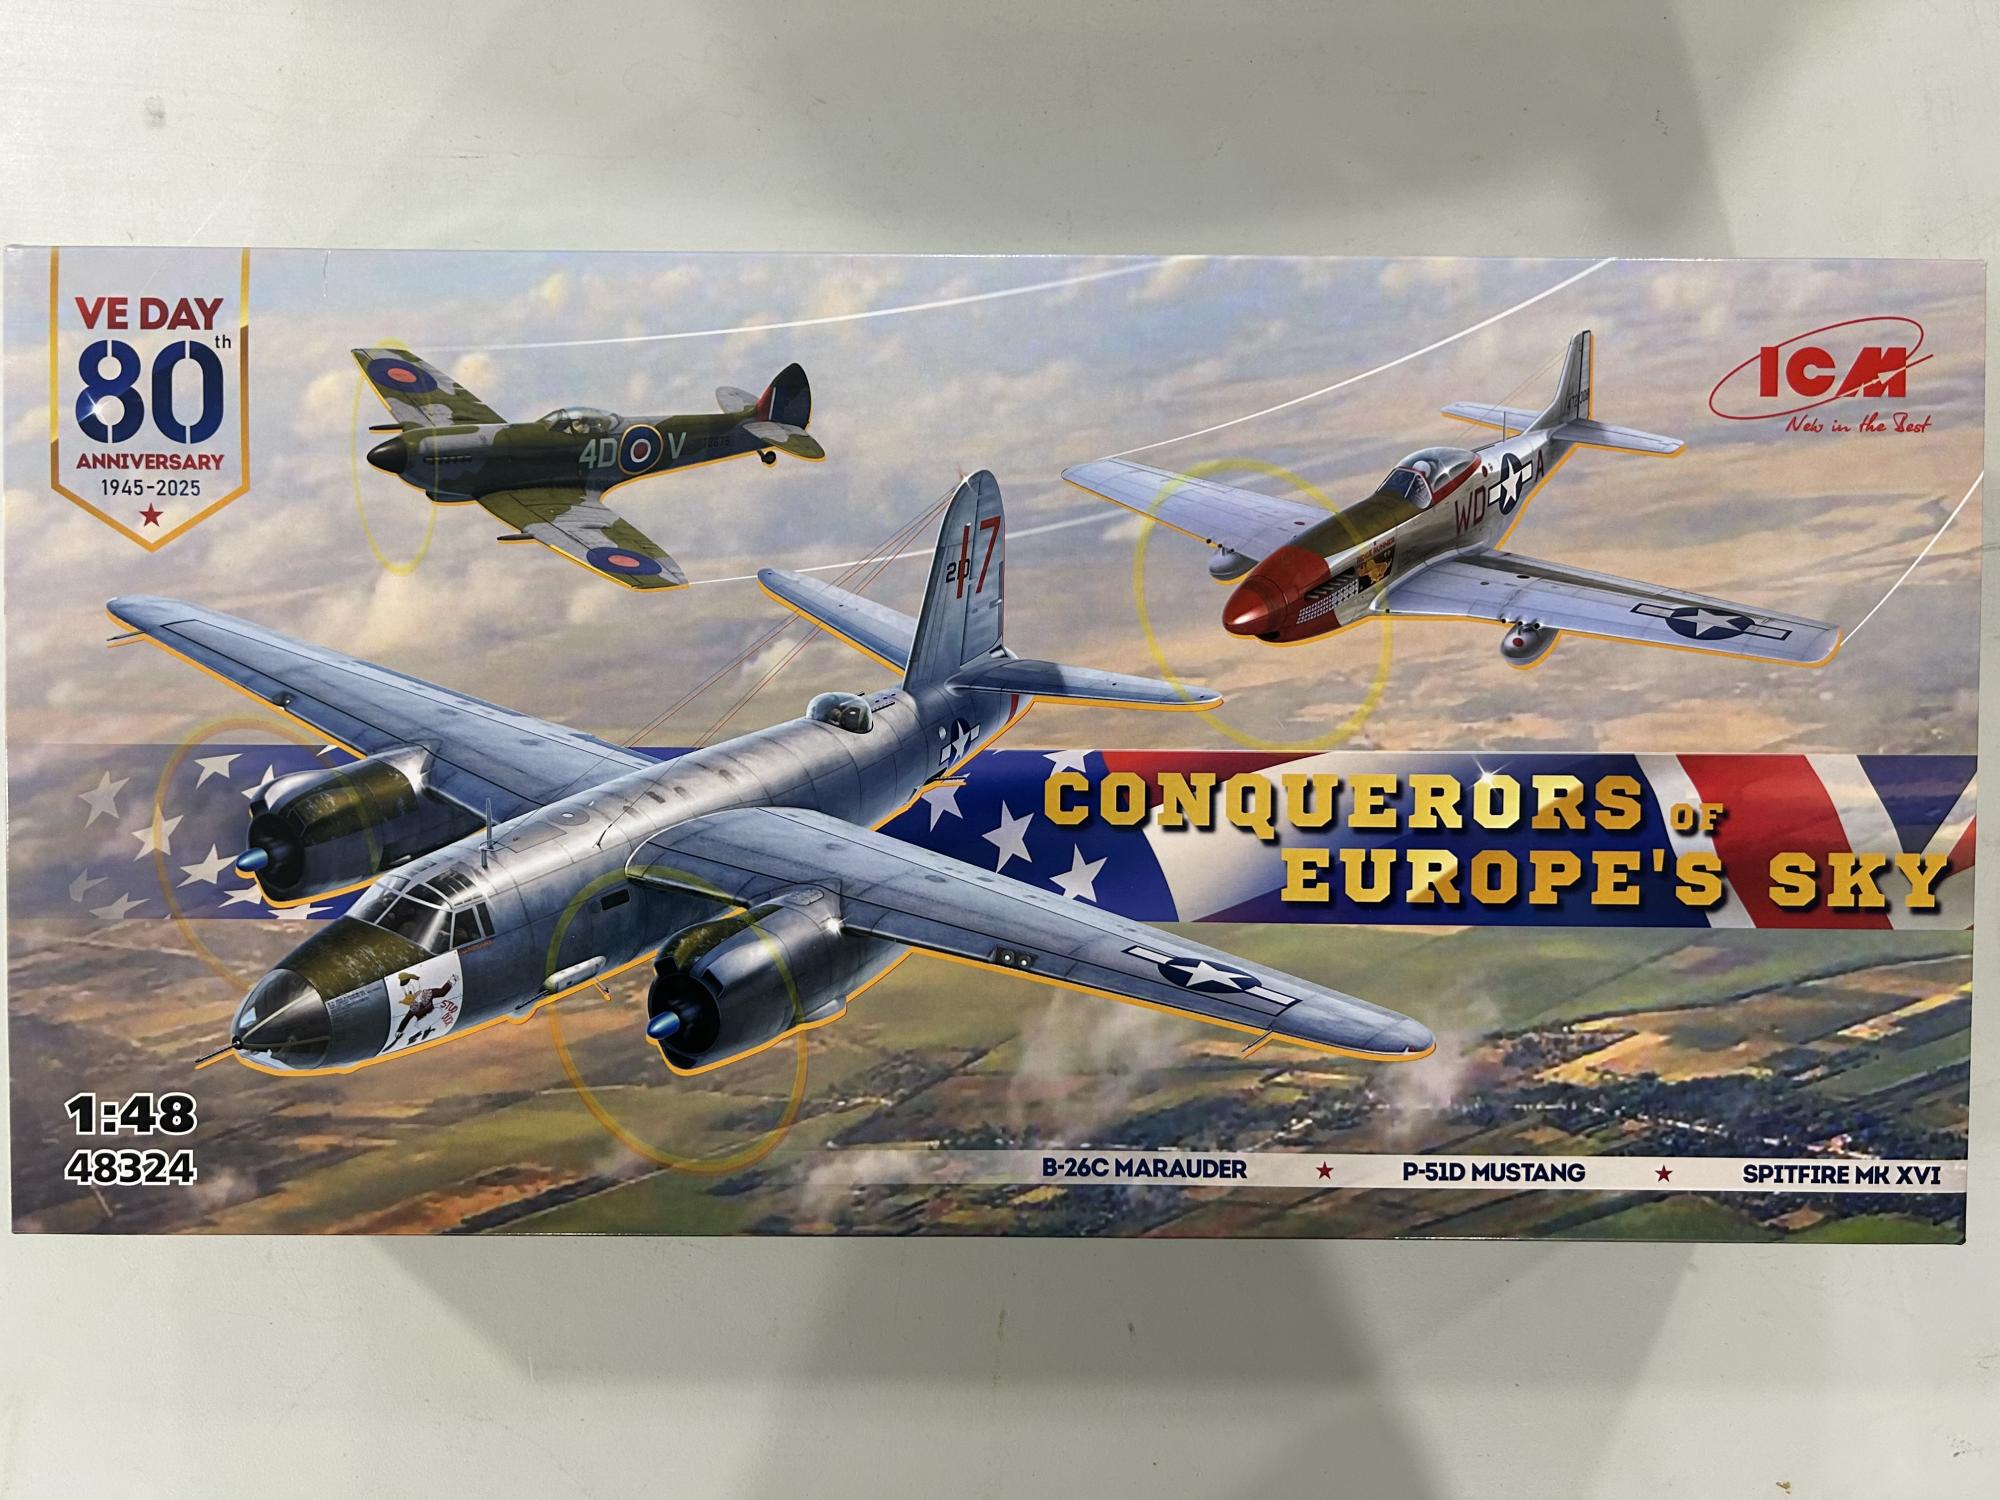
Conquerors of Europe's Sky
The 1/48 ICM kit “Conquerors of Europe’s Sky” has three kits included, a B26C Marauder, a P-51D Mustang and the Spitfire Mk XVI.
The B26C is a new tool kit, the P-51D and the Spitfire Mk XVI is an old tool kit which came out back in 2006, so those molds are almost twenty years old.
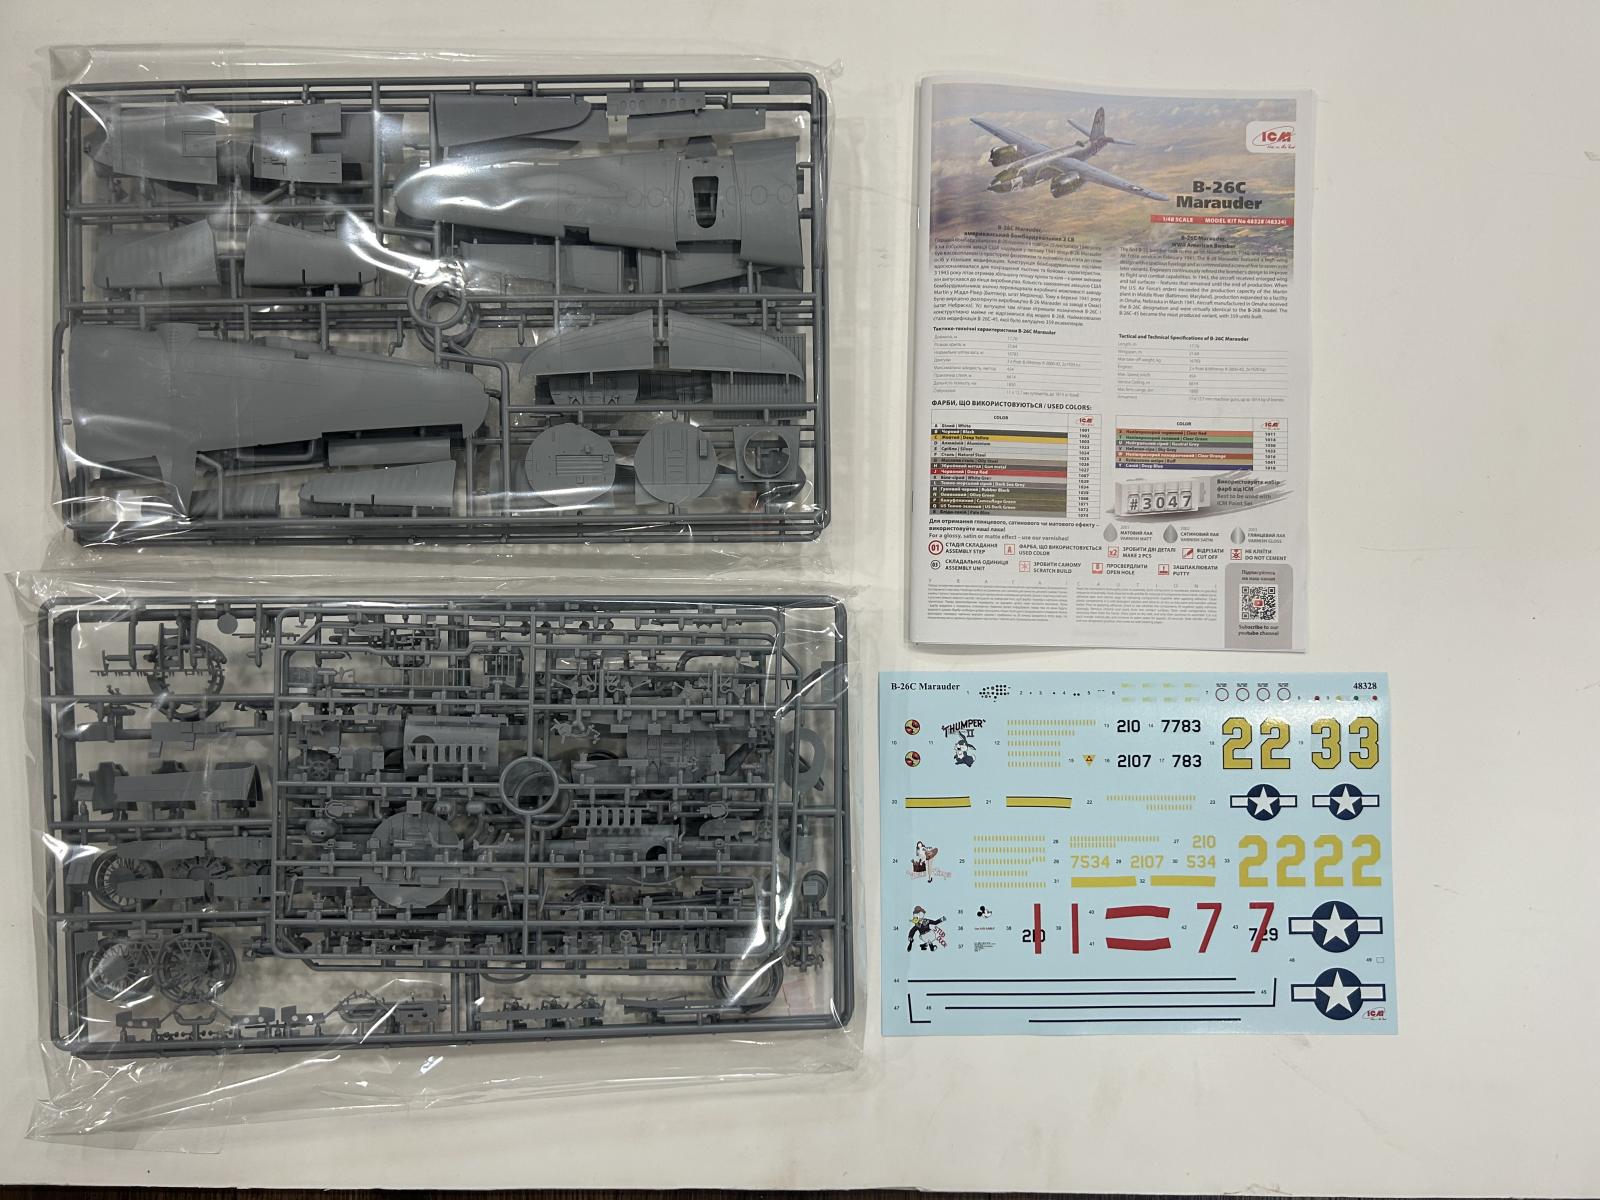
Included in the B26C kit is:
- Eight grey sprues
- One clear sprue
- One set of decals for three different aircraft
- One mask template
- One instruction booklet
- One instruction page for paint and decal placement
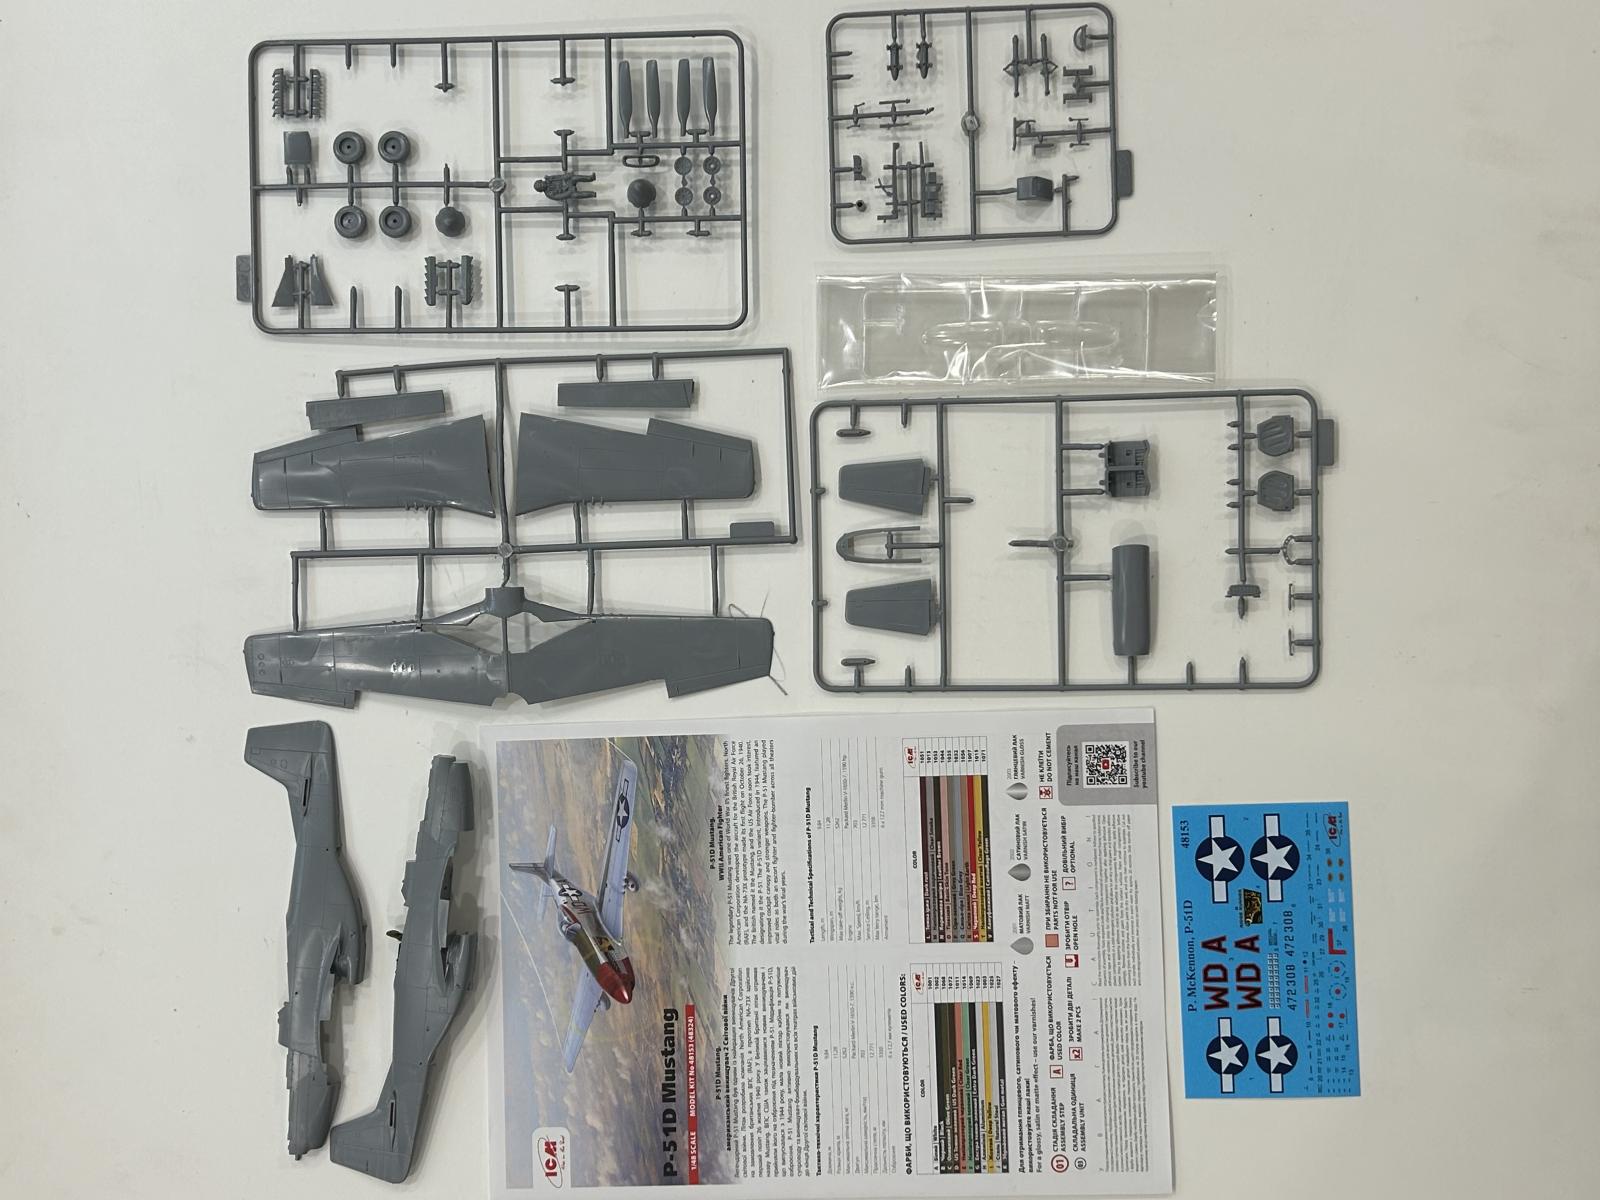
Included in the P-51D Mustang kit:
- Five grey sprues
- One clear sprue
- Decals for one aircraft
- One instruction book
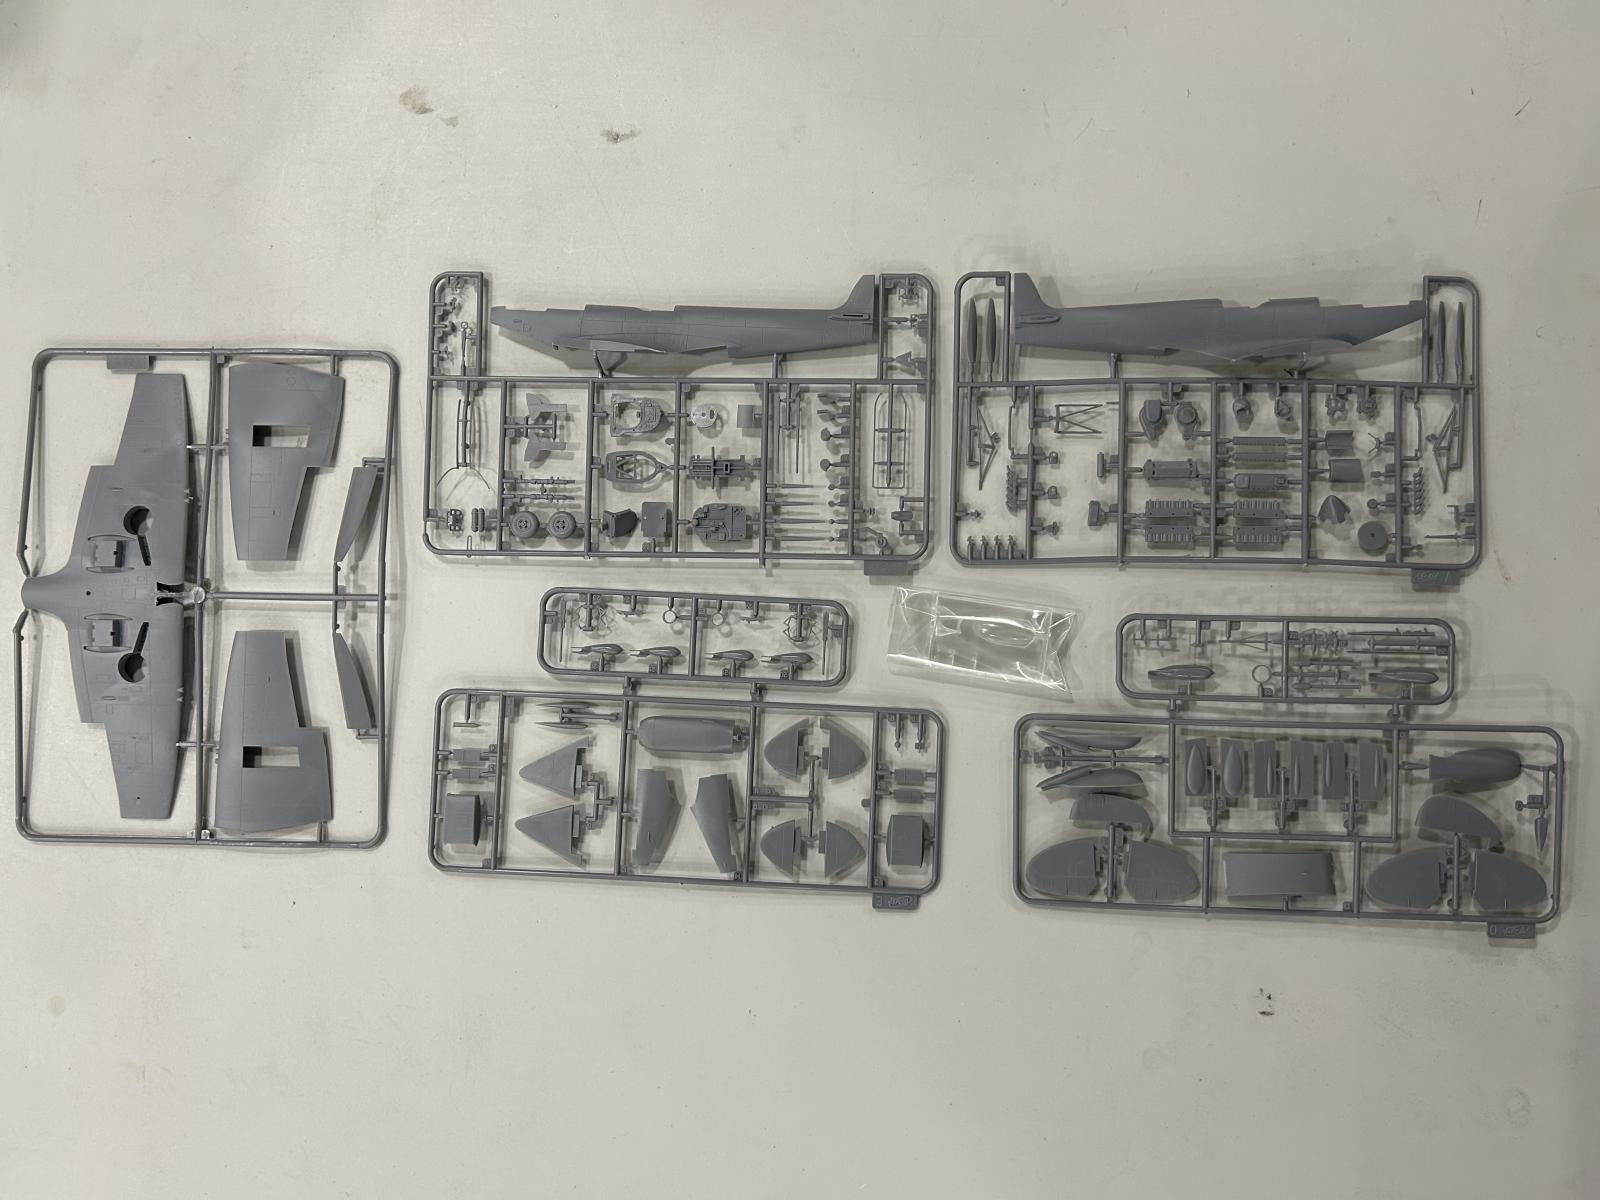
Included in the Spitfire Mk XVI kit:
- Five grey sprues
- One clear sprue
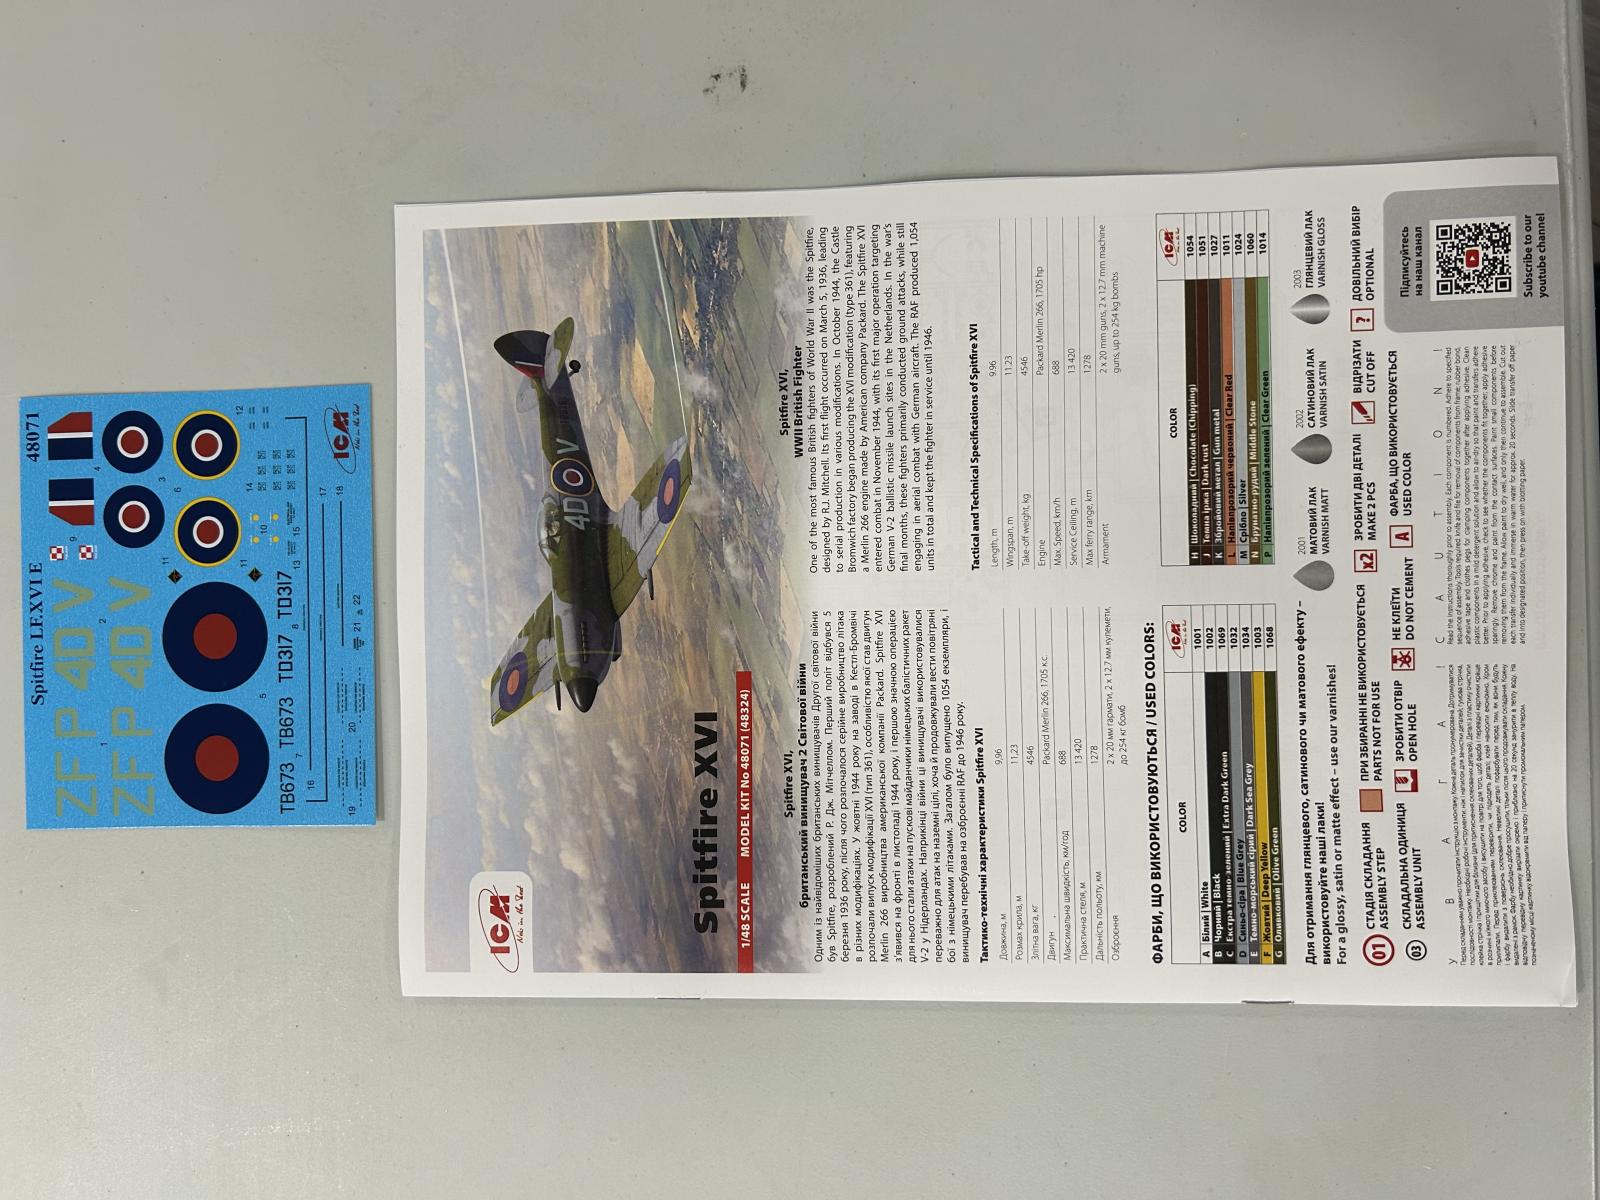
- Decals for two aircraft
- One instruction book
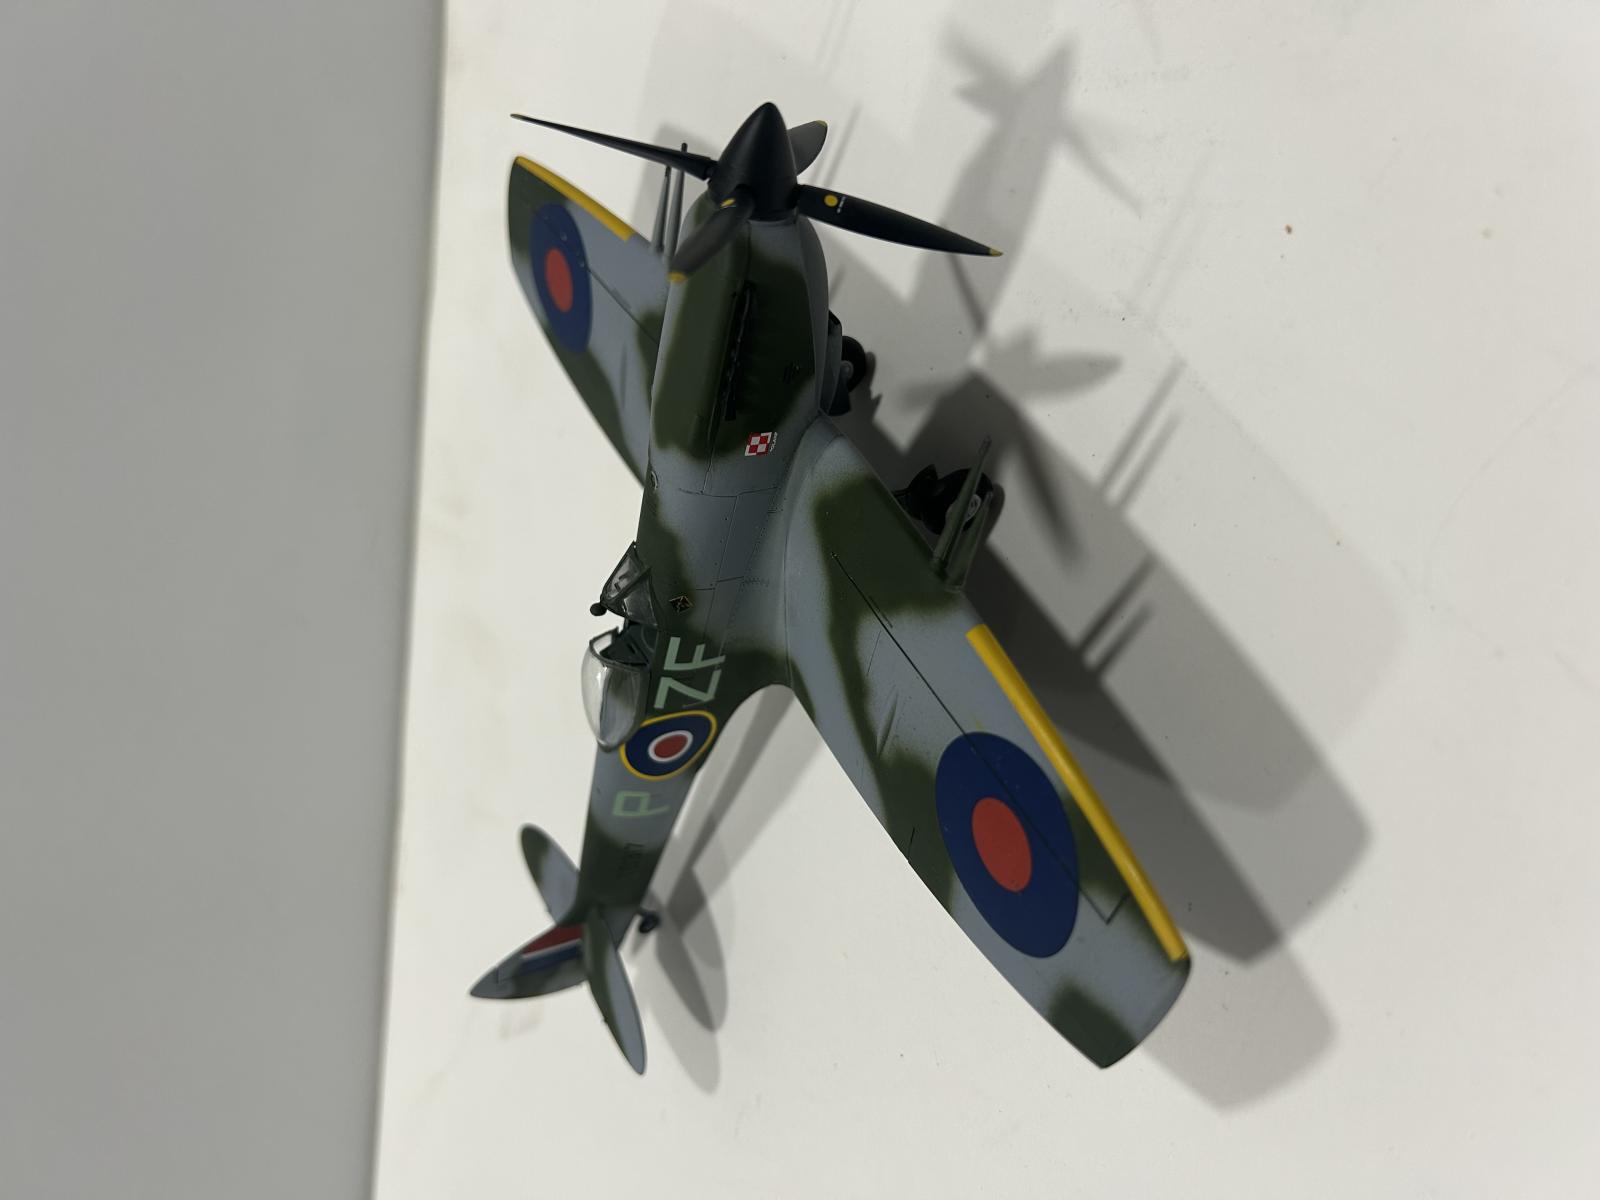
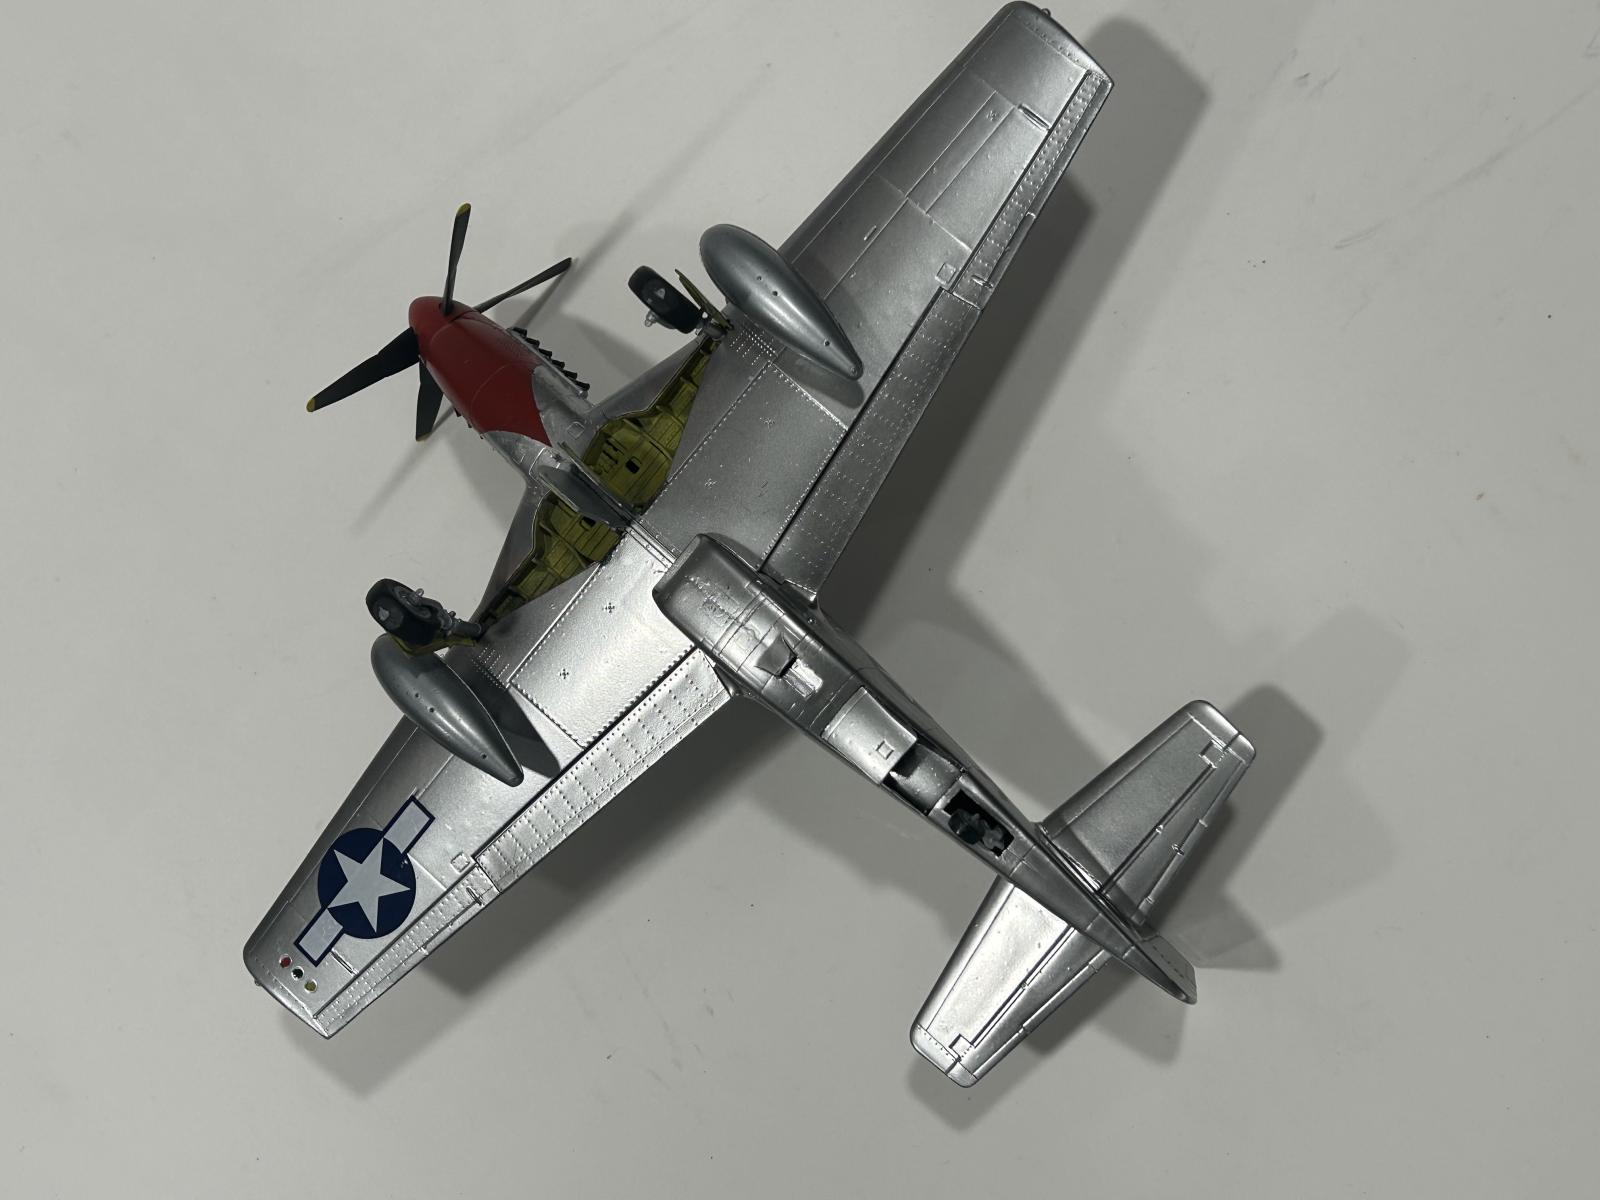
I will start with the Spitfire Mk XVI kit first. Considering this kit is almost 20 years old, it does have some nice detail with recessed panel lines and some rivet and fastener detail.
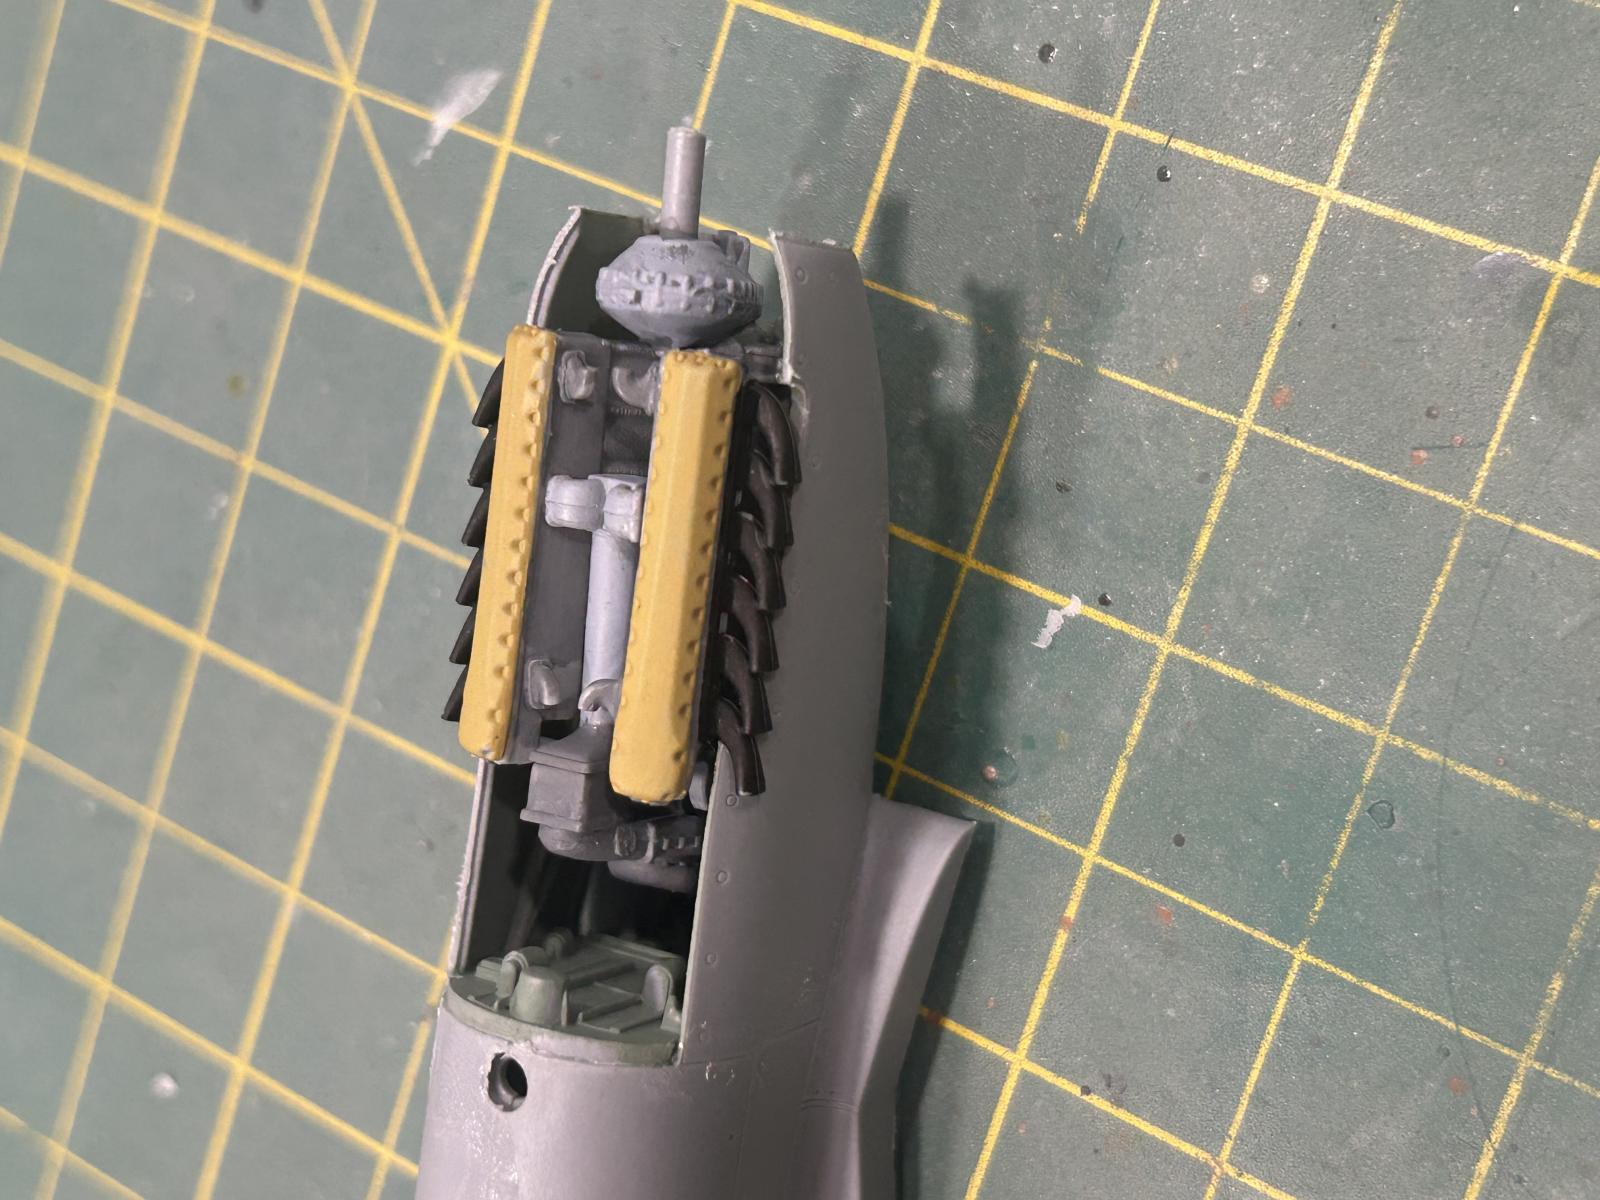
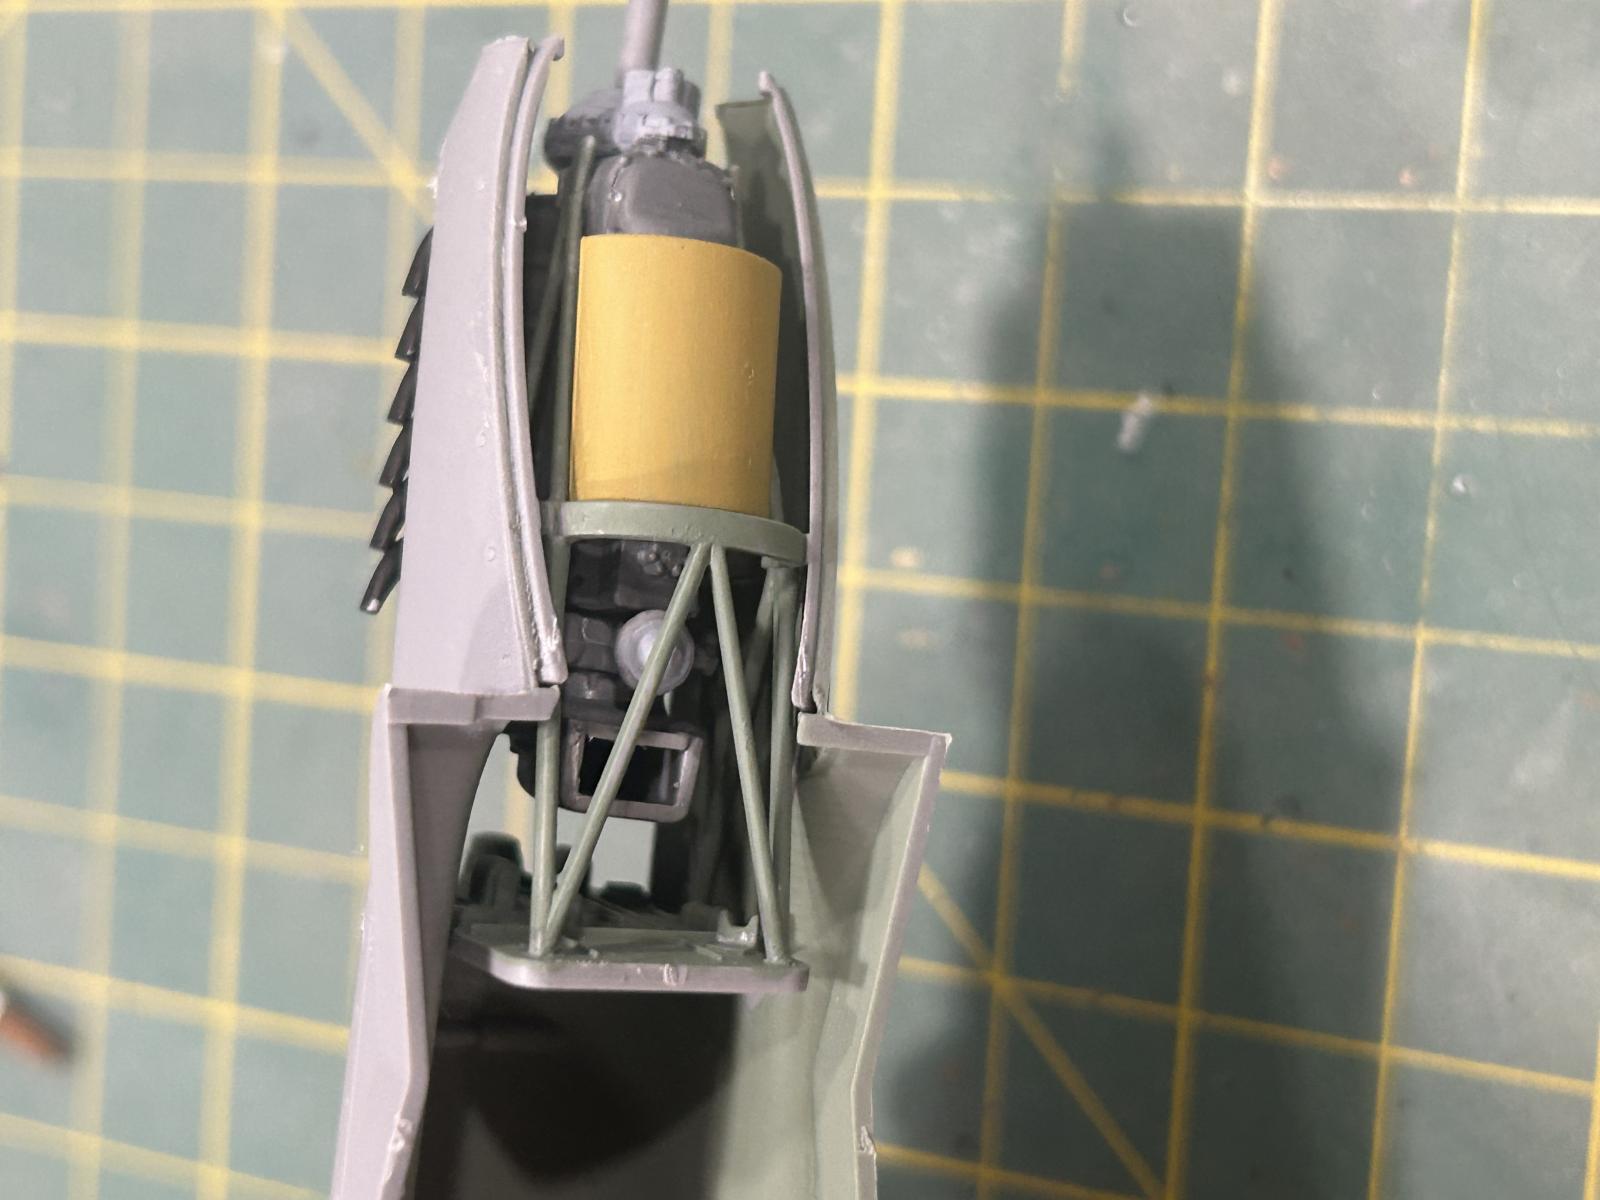
Assembly was straight-forward starting with the engine.
The engine was very detailed and had over 20 parts.
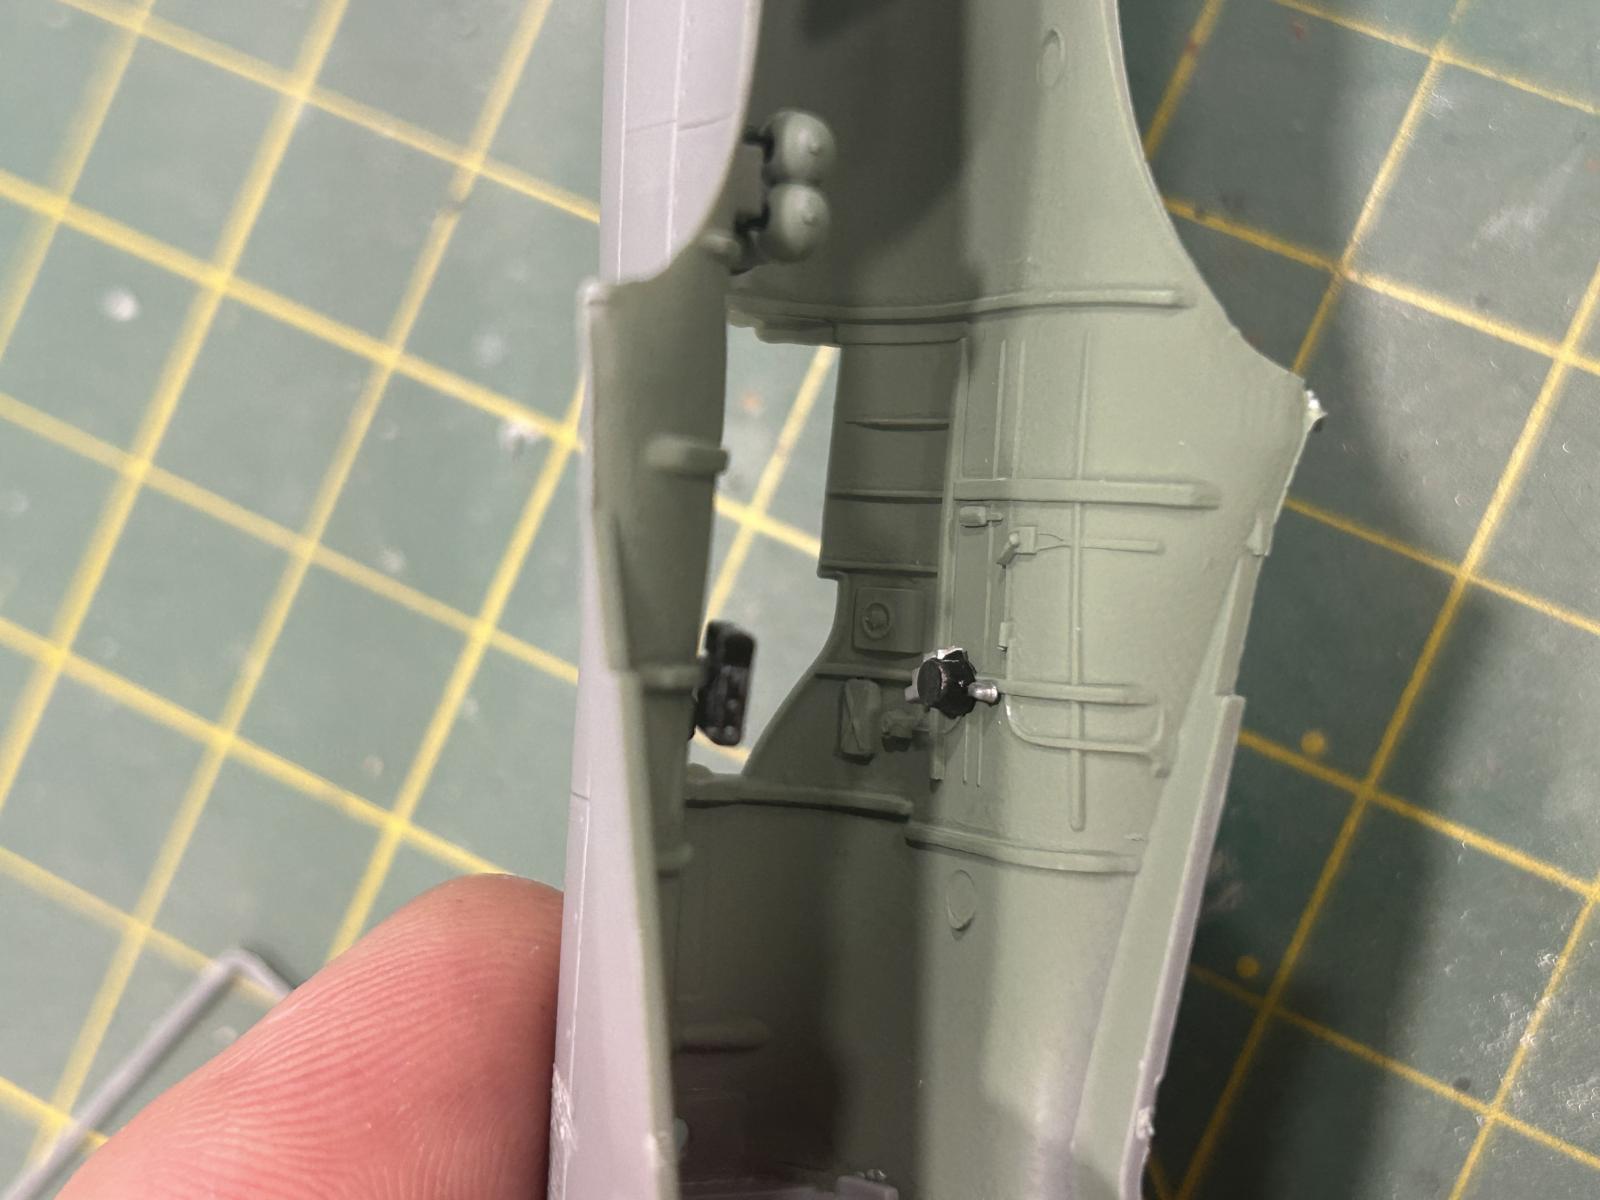
The cockpit was also nicely detailed with molded-in structure on the side walls and interior parts added. The seat, instrument panel and bulkheads were nicely detailed.
Assembly of the fuselage halves with the engine and cockpit was not the easiest; I had to do some massaging of parts to get everything to line up. The horizontal stabilizers and rudder fit with no issues.
Installing the cowling on top of the engine compartment, I found it would not sit down onto the side cowls and found the engine valve covers sit up too high. So I removed the valve covers and figured, no one would see them anyway once covered.
The wings were next and had provisions for guns to be installed but the guns and ammo chutes would not fit as directed, so I eliminated them. The wing halves went together well, and I was ready to attach the fuselage.
The fuselage and wing mating had some minor issues with alignment and needed filler in some areas.
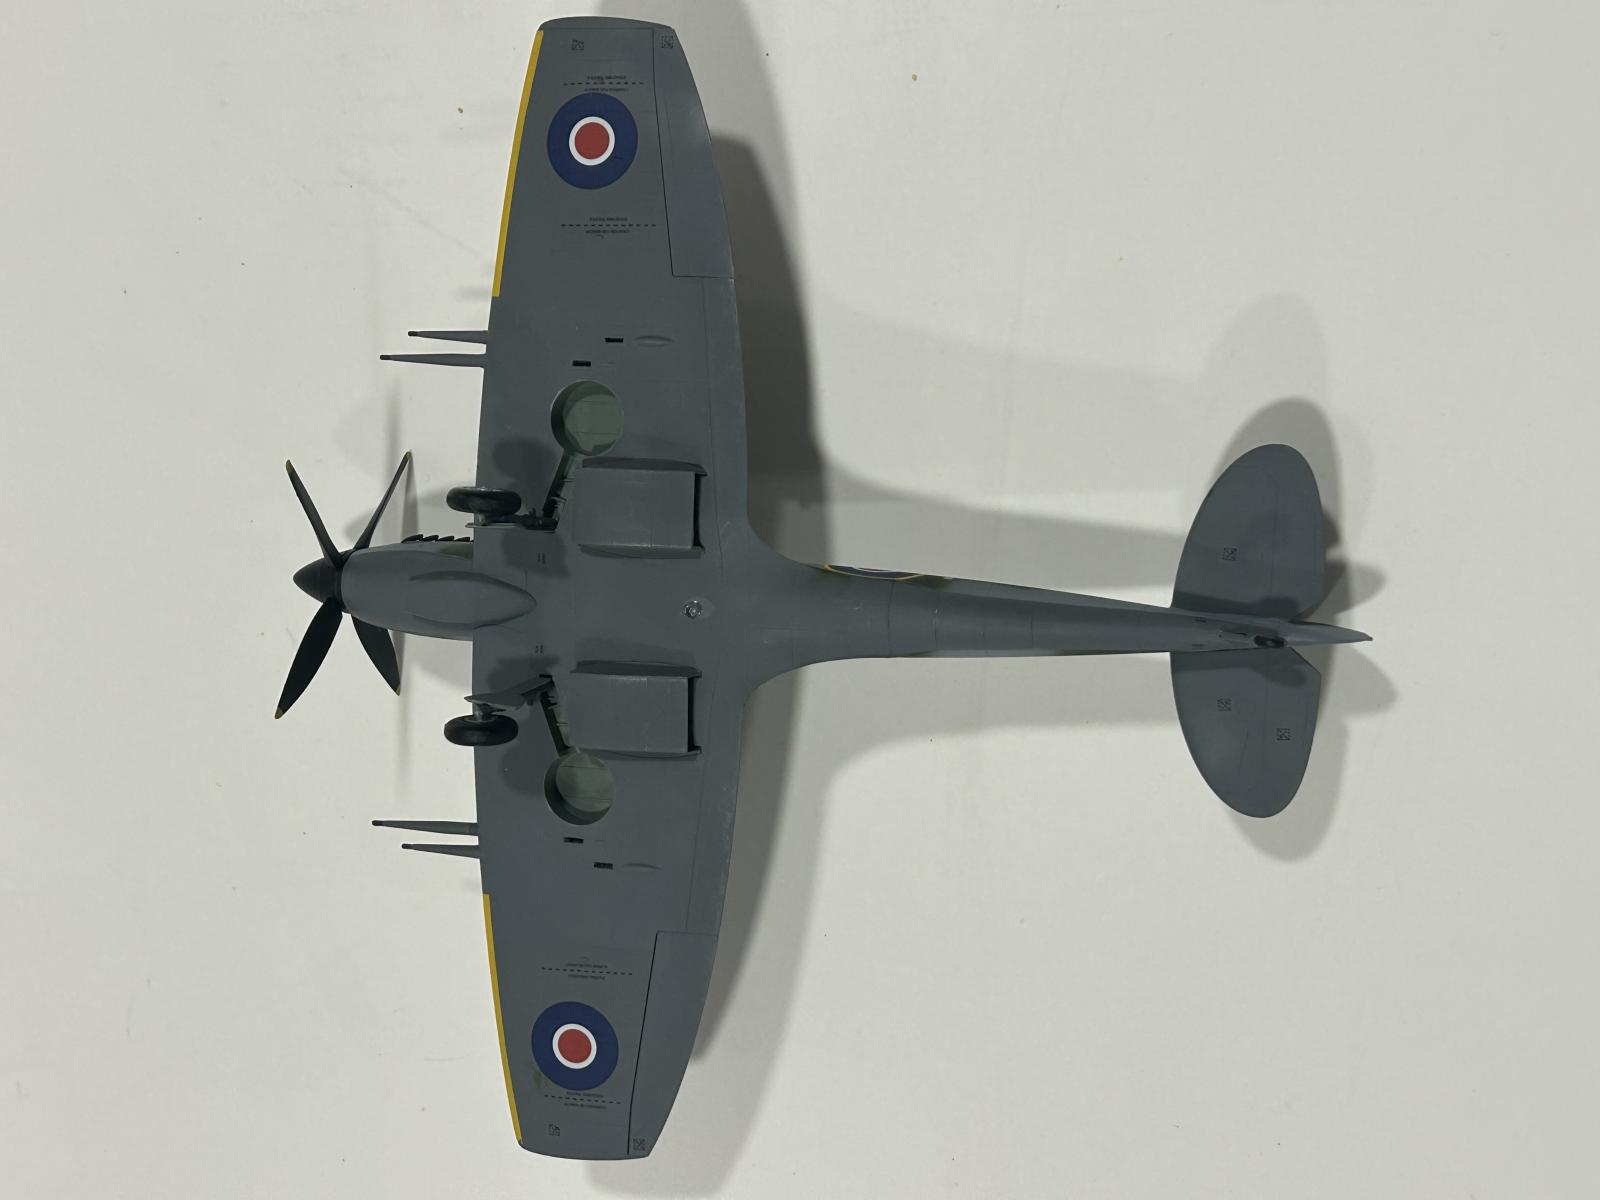
The landing gear had some detail and had the gear door glued to the strut, while the tire and rim were one piece.
The model had provided bombs and a slipper tank to add to the wings and fuselage, but I did not use them.
I painted the aircraft the usual dark green and blue gray camo upper with dark sea gray lower with the yellow stripe on the leading edge.
The decals were of good register and laid down fairly well using micro set and some micro sol to get them to lay down.
Overall, the kit was OK considering the age of the molds.
Pros
- Nice detail on fuselage and wings
- Fairly detailed cockpit area
- Nicely detailed engine
- Decent decals
Cons
- Some parts had flash (old molds)
- Poor fit on engine cowl and fuselage to wing
- Engine detail not seen unless opened up
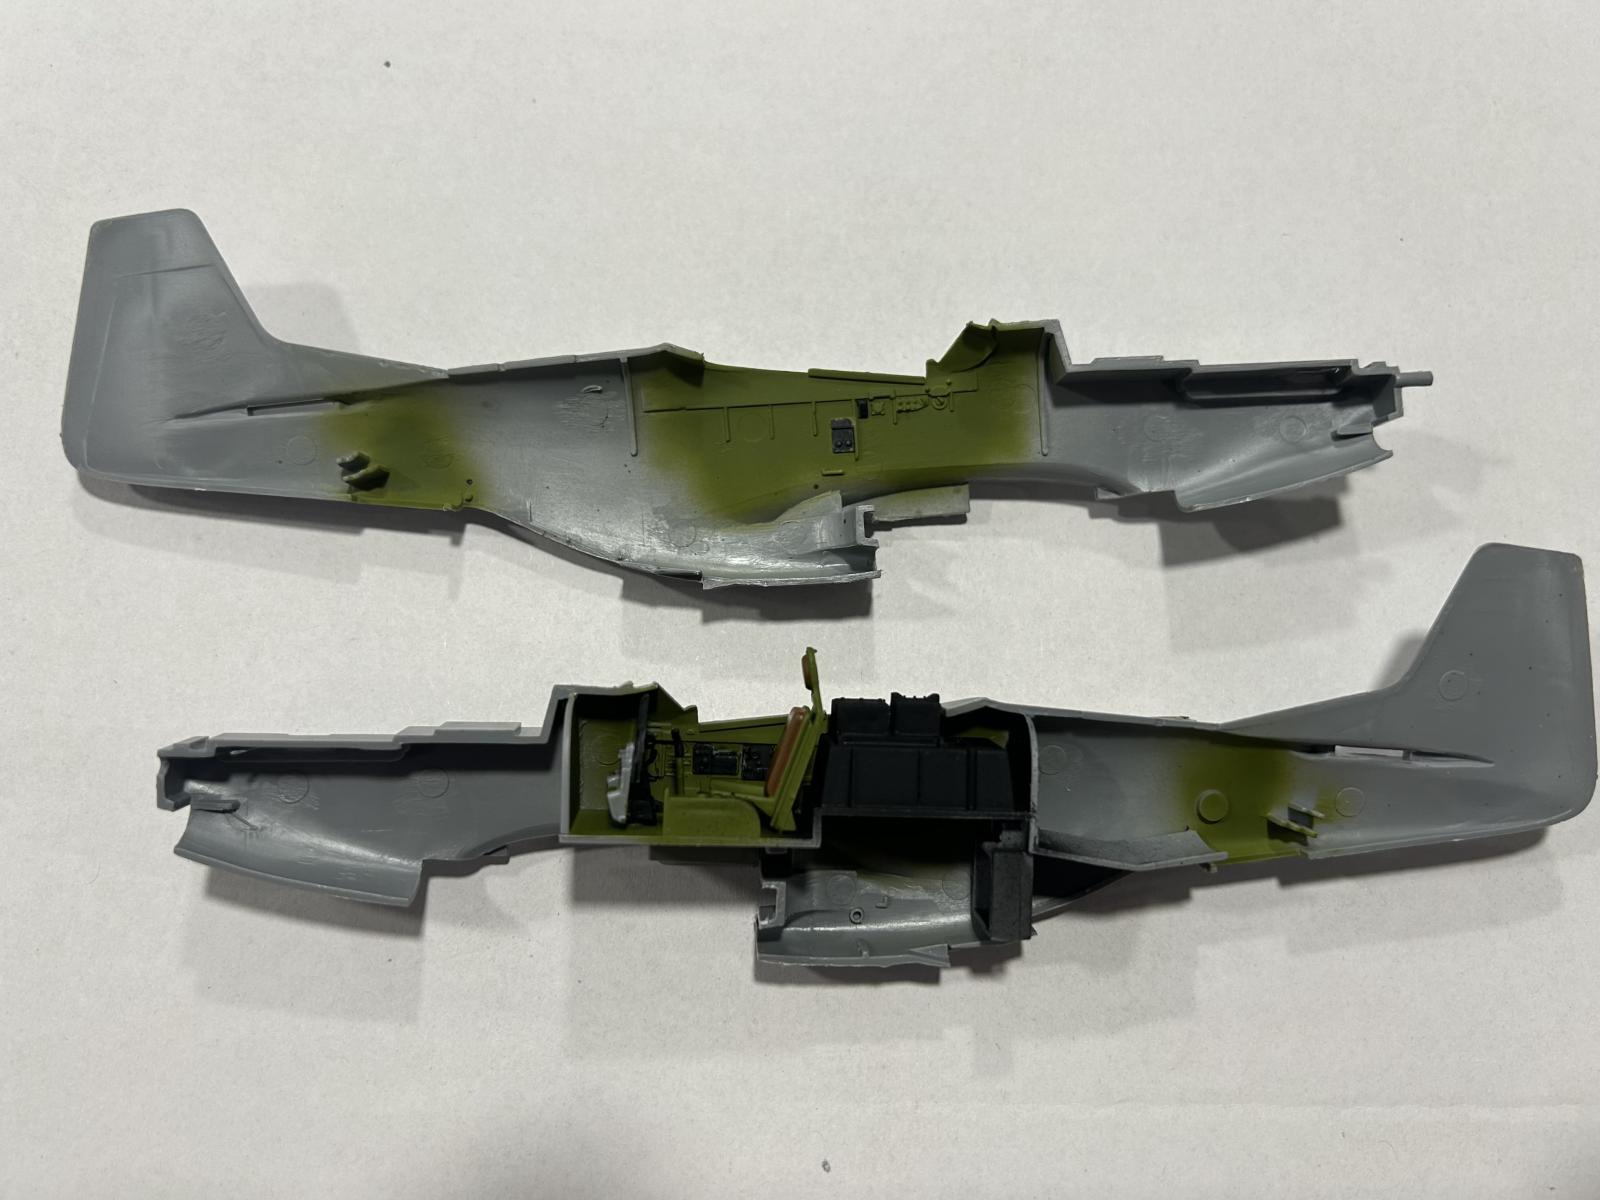
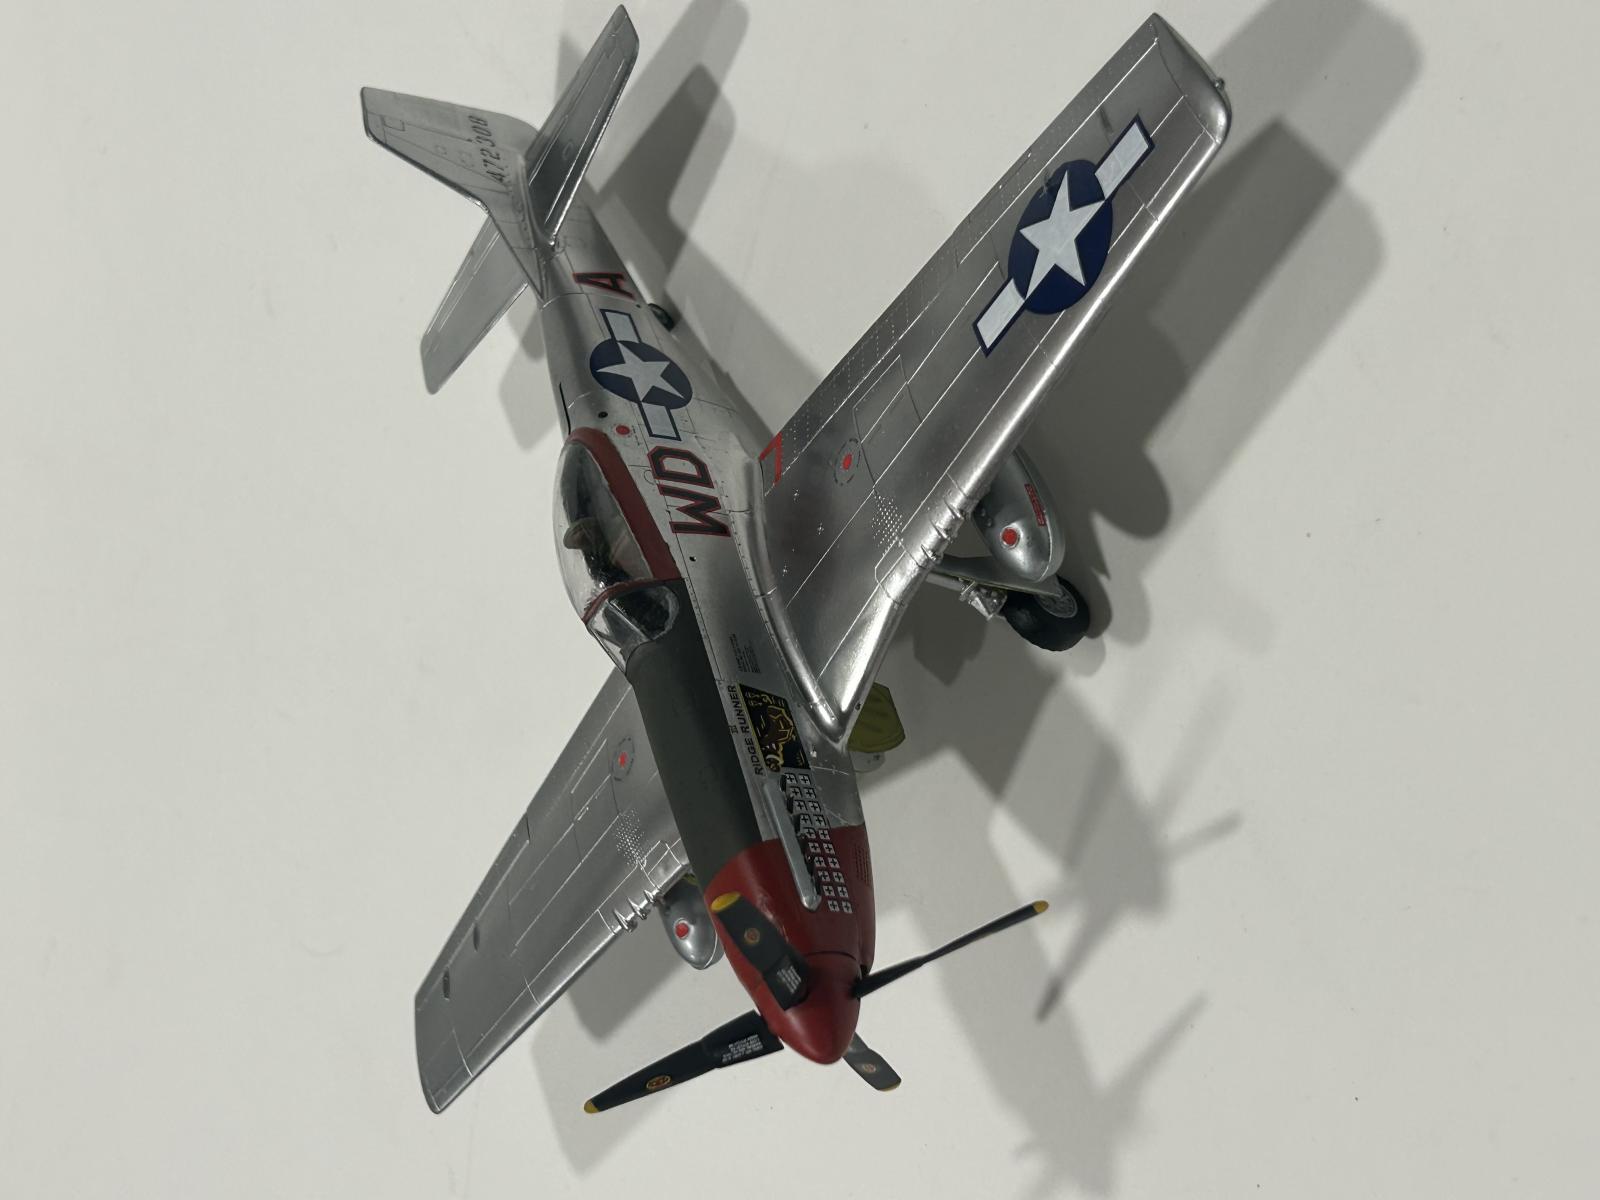
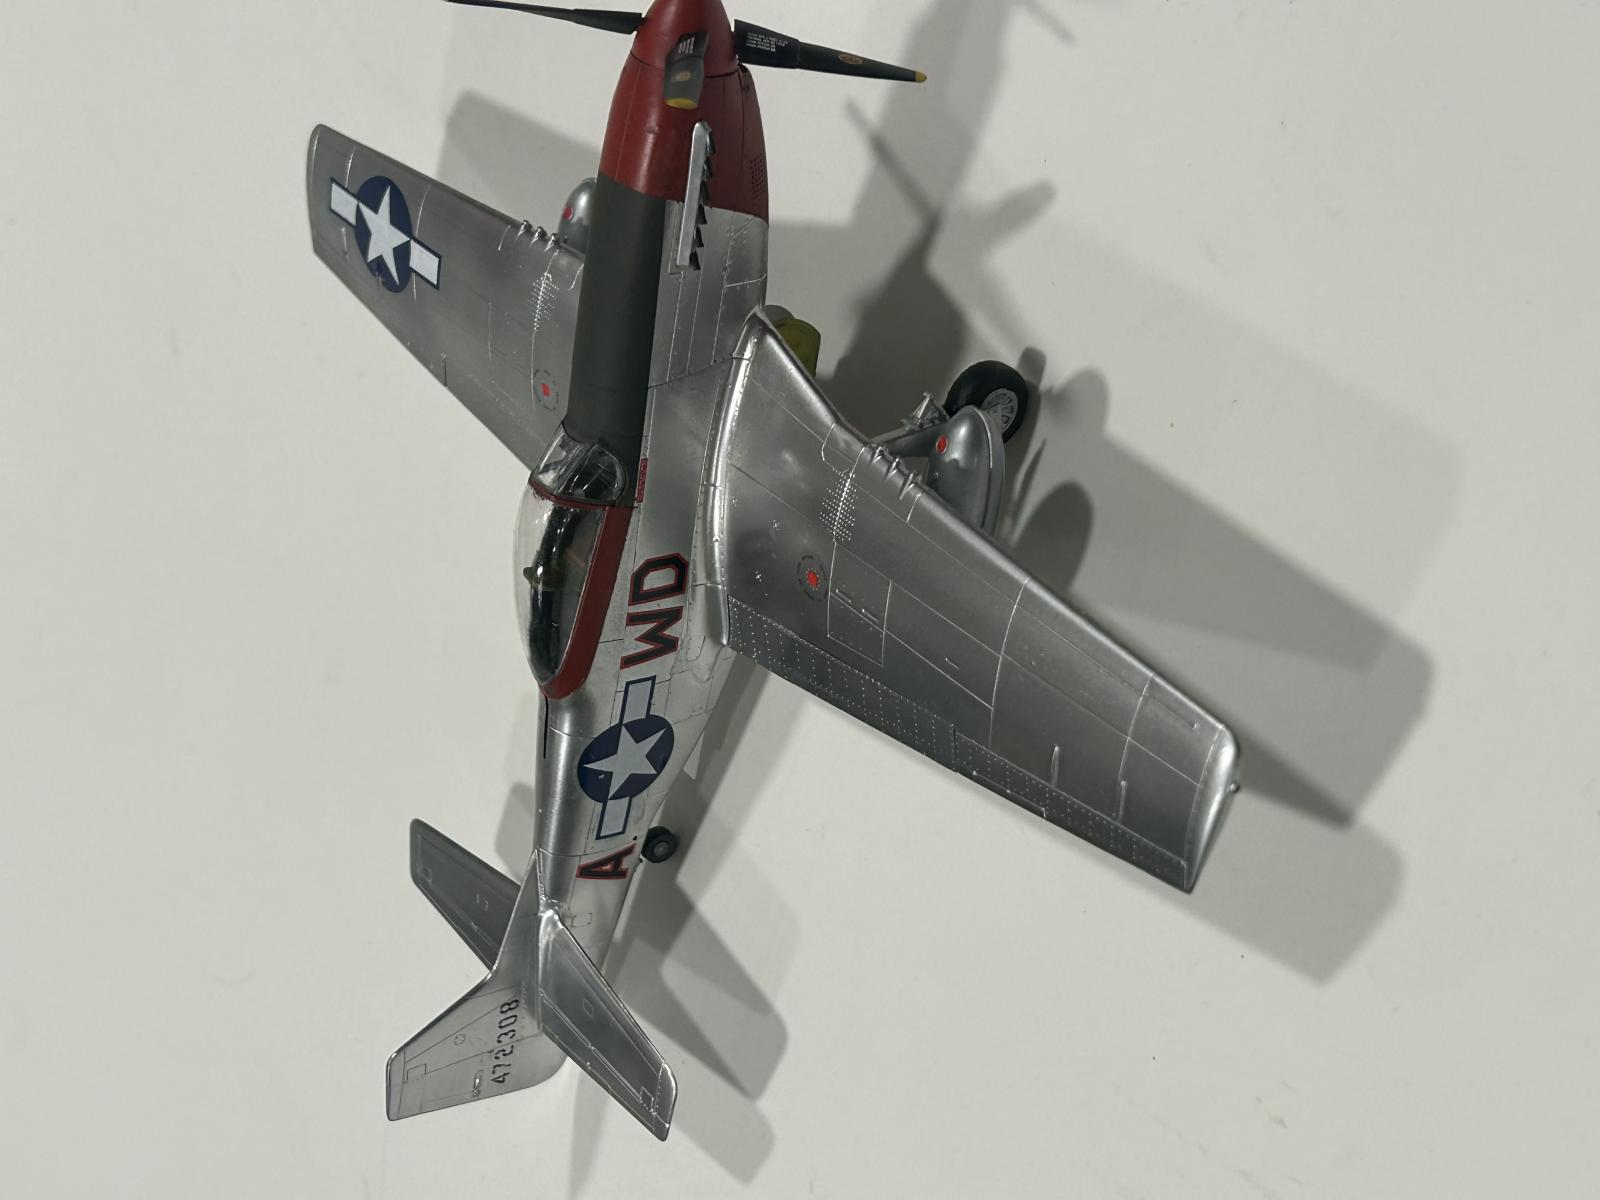
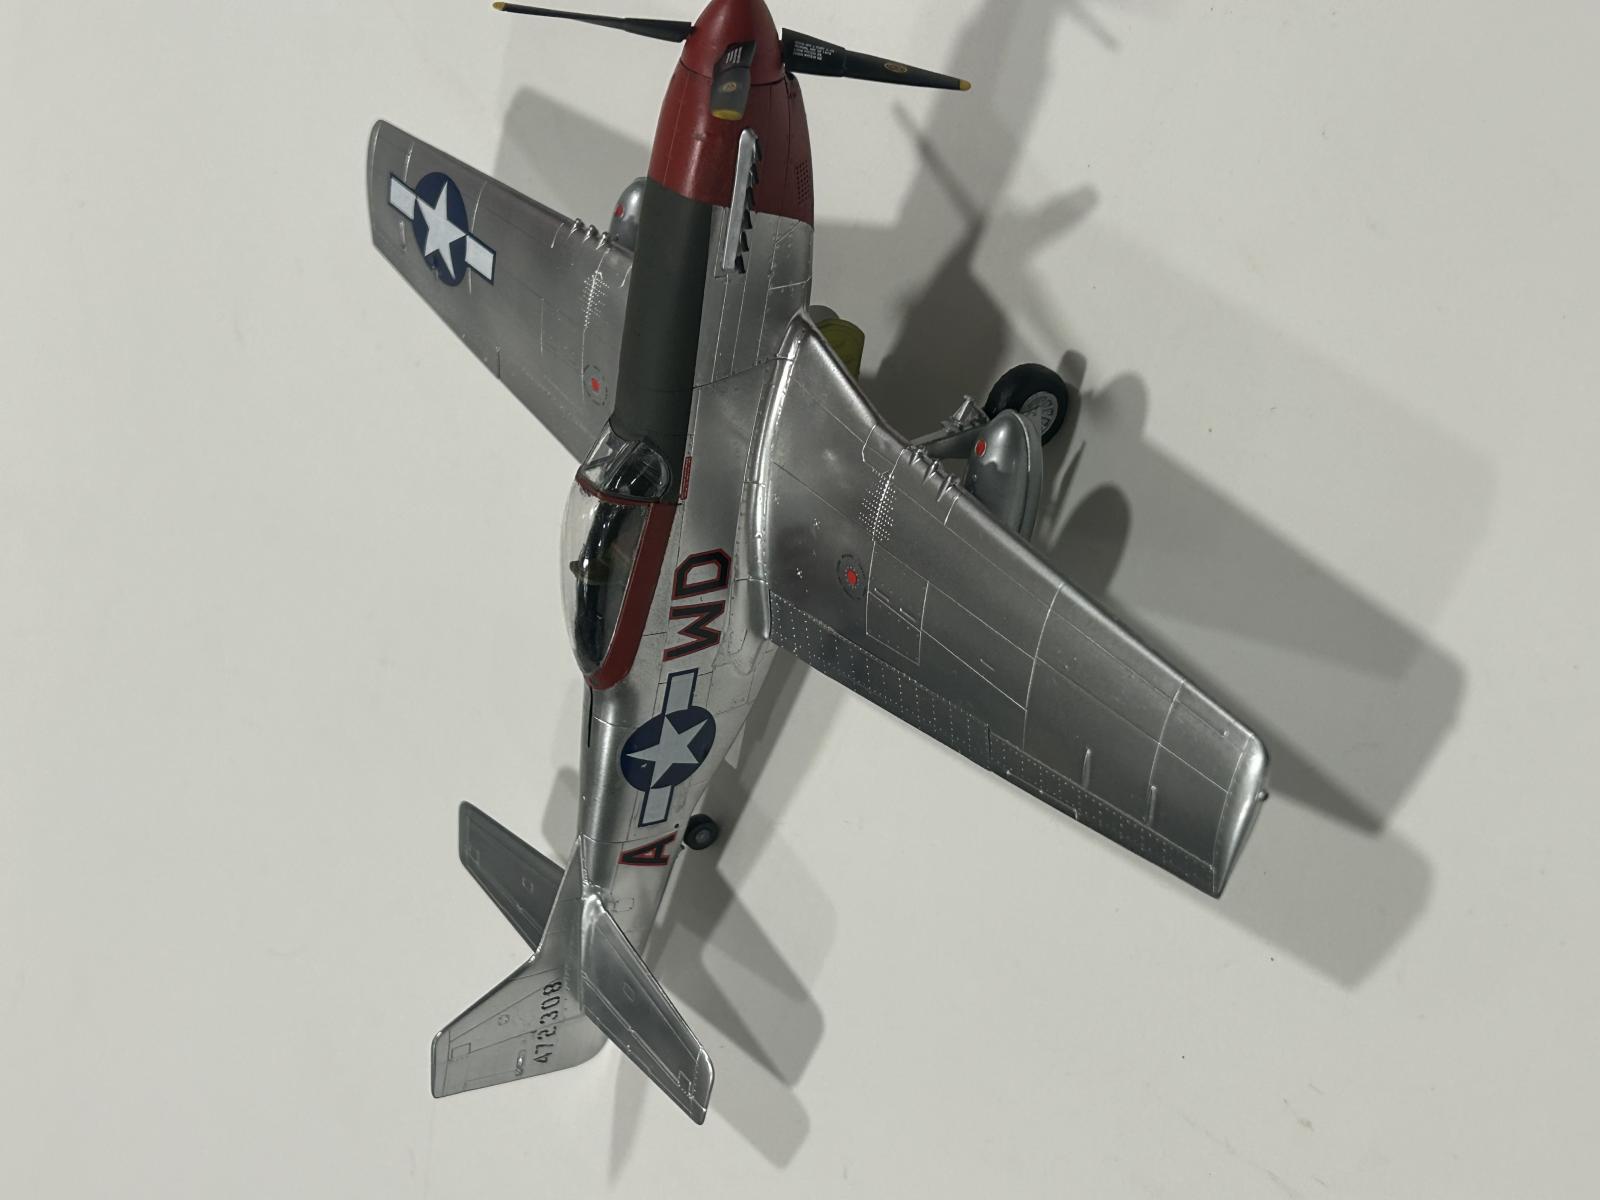
The next kit is the P-51 D Mustang. This mold is also almost 20 years old but has some nice detail, recessed panel lines and fastener and rivet detail. One detail most overlooked is the P51D wings were laminar flow and had all panel lines filled and painted for better flow over the wings. I did not fill the panel lines on my model.
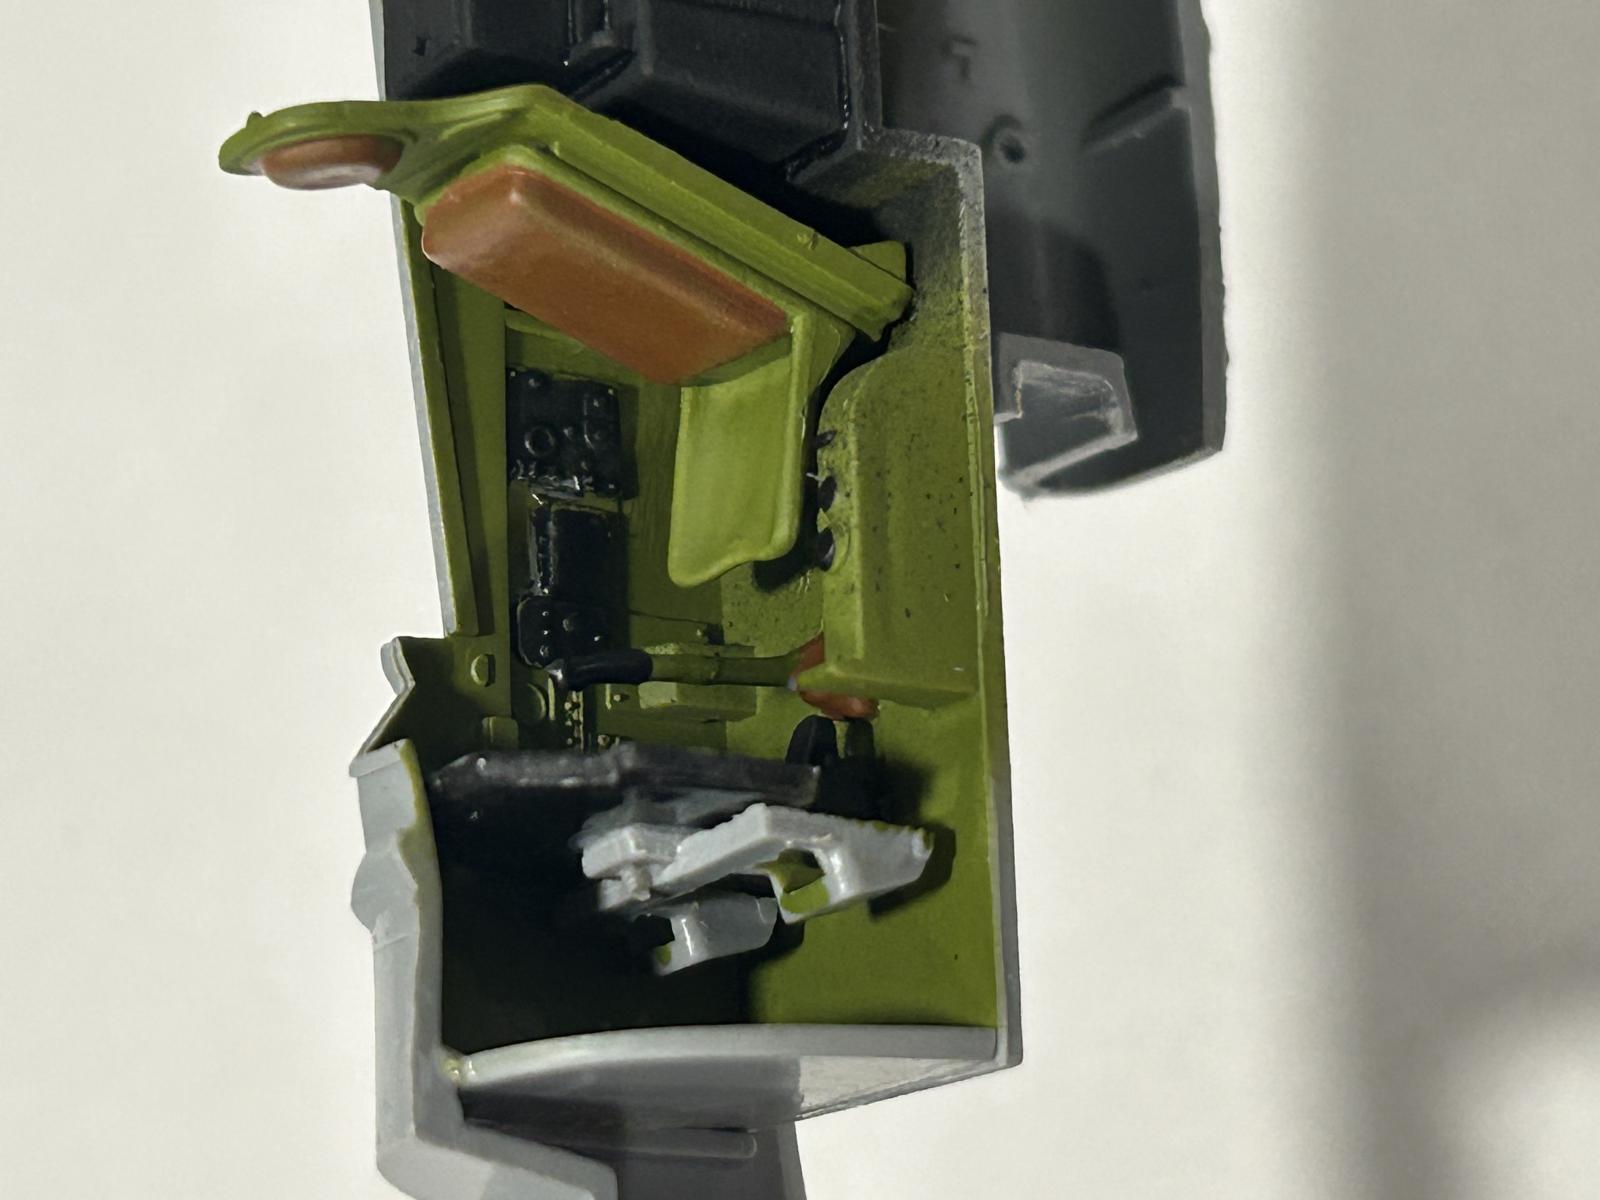
The kit is started with the cockpit first, and it was not as nicely detailed as the Spitfire. It also had a pilot figure which I did not install in the cockpit. The cockpit went together with no hitch.
The fuselage was next, which had some nice molded in sidewall detail for the cockpit. One thing I have to mention here is there was no engine to build on this kit which saves some time, especially when the engine is all closed up and not seen.
The cockpit and fuselage halves went together well with no issues.
The landing gear was next, which I assembled painted and set aside.
Wings were next with one full lower section and two top halves. Some holes had to be drilled to accept the drop tank mounts. Ailerons were molded in. All went together fine.
The wing was mated to the fuselage and assorted pieces added, including flaps.
One could add bombs or drop tanks. I chose the drop tanks. I painted those and set aside.
I added the windshield and canopy and masked everything for painting.
The fuselage on P51Ds were natural metal and wings were painted silver, I just painted everything shiny aluminum and added the dark green anti-glare panel. This aircraft had a red nose, around the canopy and spinner.
The decals were a bit tricky at first. The upper wing star was torn when trying to get it in place, but all others went on without any problems.
I added all the external parts, landing gear and doors, tail wheel, prop and drop tanks.
Overall it was a decent model to build.
Pros
- Nice detail on exterior
- Easy to build not too many parts
- Decent decals
Cons
- Lots of flash on parts (Older molds)
- Tailwheel very weak
The last of the three plane set is the B26C Marauder, which happens to be a new mold just out earlier this year. I found this kit to be rather complex with many parts and instructions that, on a couple of occasions were hard to read or interpret where the parts actually went. The instructions had 24 pages with black line drawings written in English and what appears to be Ukrainian.
This is the first new 1/48 B26 Marauder kit since the AMT and Monogram kits from 1978.
Starting this build is the left side fuselage, which has numerous parts that need to be attached, including some of the window glass and cockpit side walls. There are a few holes that need to be drilled out in the fuselage also.
Next is the pilot’s area, which is very detailed, including the instrument panel, throttle quadrant, control column and pilot's seat. The cockpit floor is also part of the bombardier’s nose section with the seat and Norden bombsite which is attached to the nose gear bay ready for installation into the fuselage.
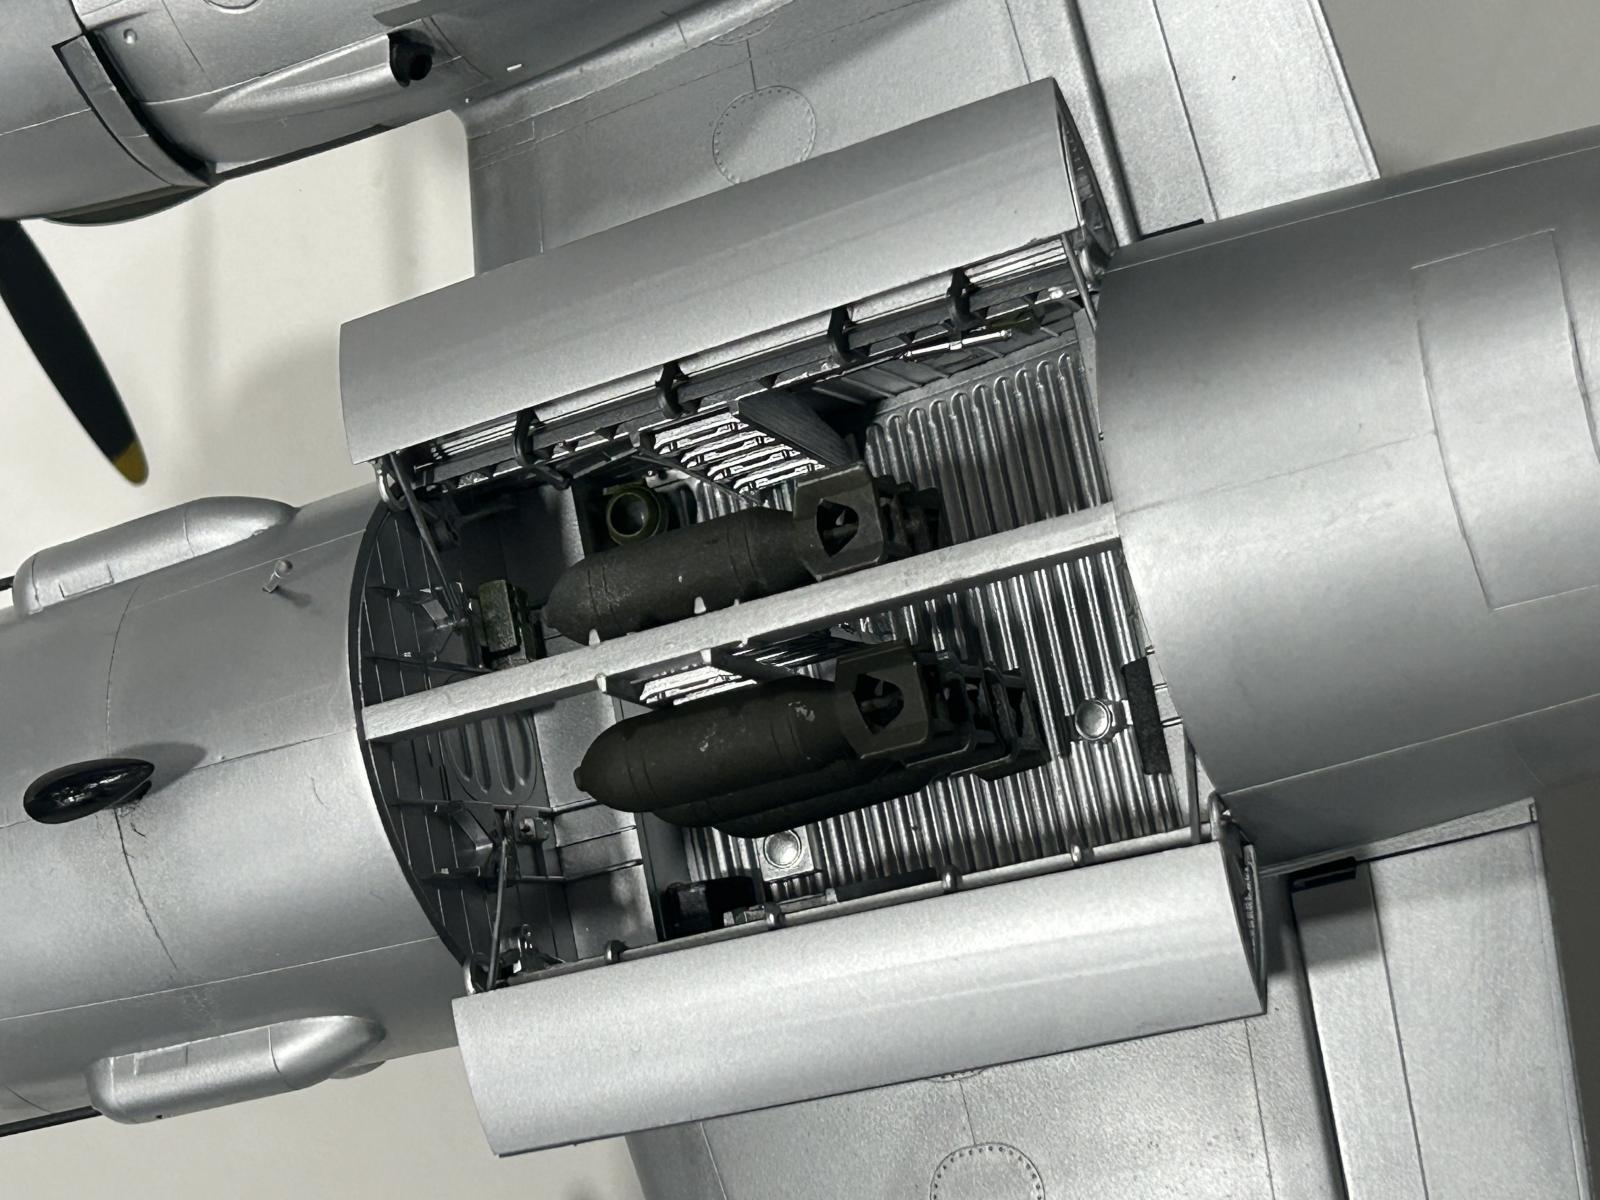
The Bombay section with forward and rear bulkheads and an upper roof section, along with the bomb racks and 500lb bombs are assembled as one unit.
With that done, the cockpit, Bombay and a couple more bulkheads are installed into the left side fuselage.
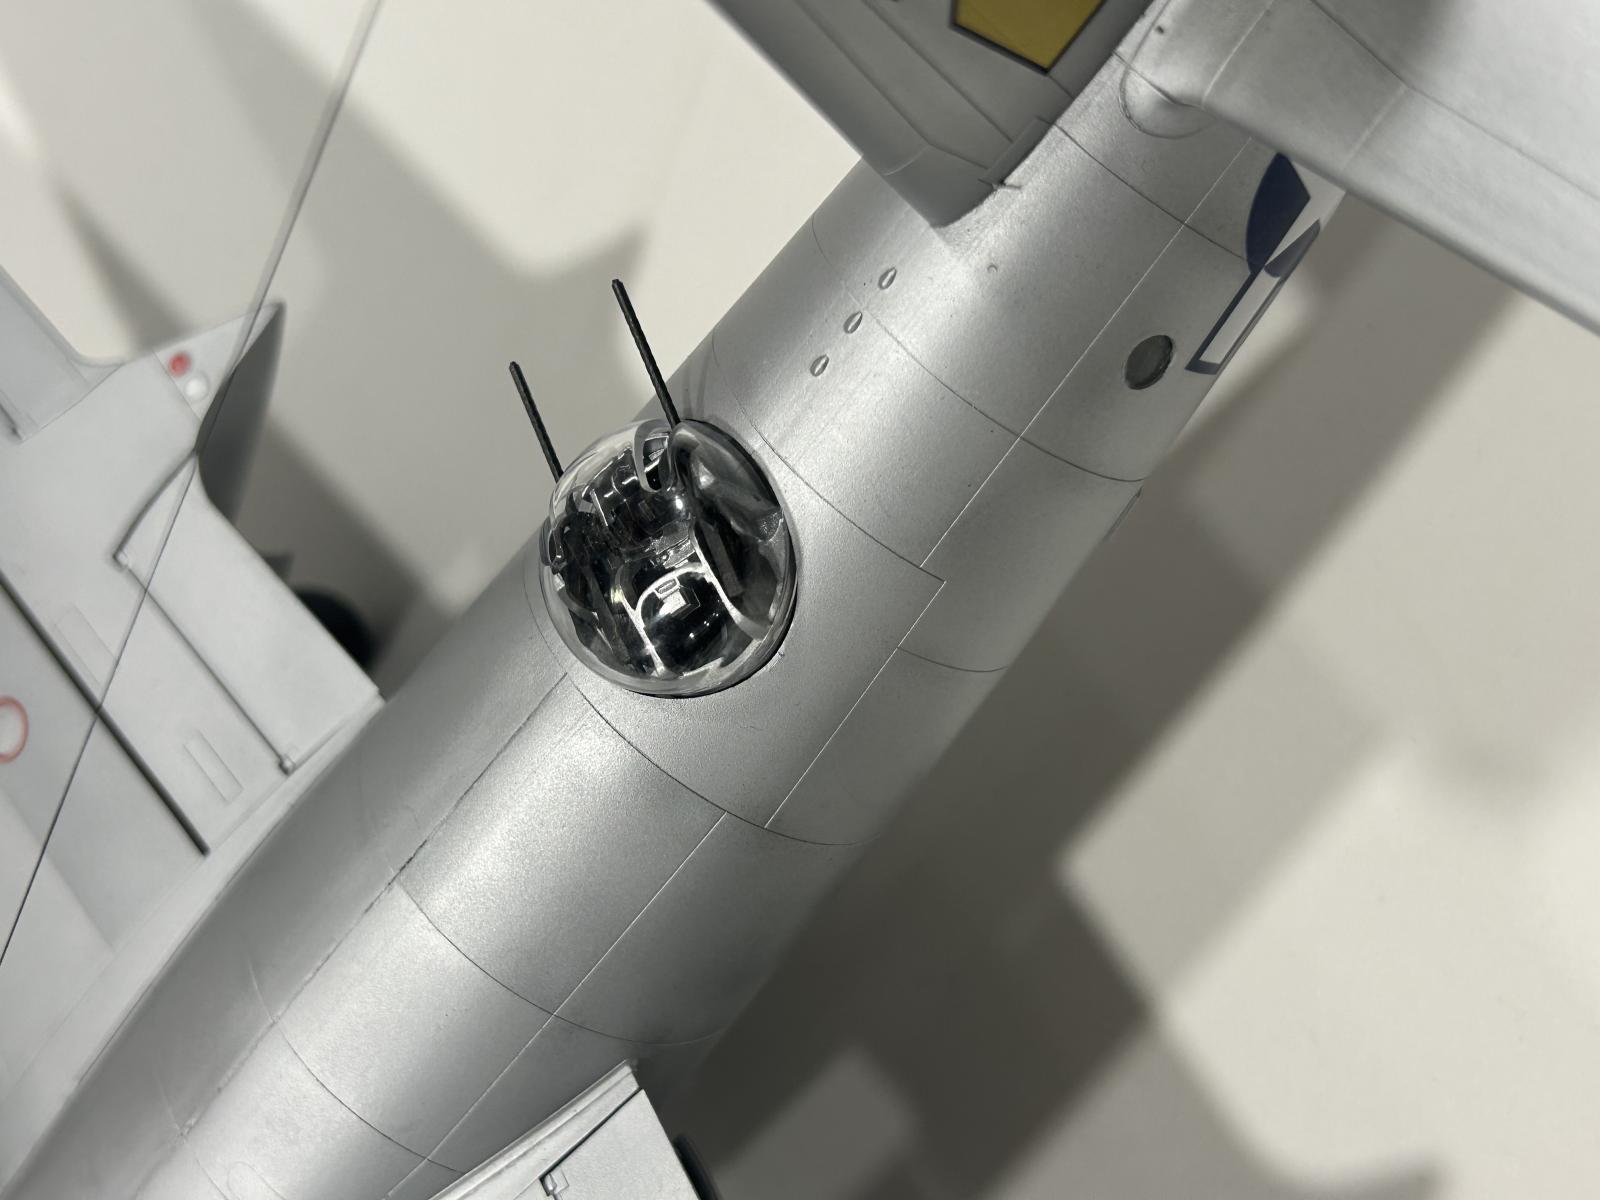
The rear tail gun and the two side lower gun positions are assembled and installed into the left fuselage.
The top turret is assembled and also attached to the fuselage, along with another rear bulkhead and the bulkhead between the cockpit and nose section.
On step 38, they have you drill a couple of holes into the left side of the fuselage in specific areas.
Now comes the right side fuselage and all the two dozen detail parts. On both fuselage halves they give you the option of open or closed bomb bay doors and associated parts.
Now comes the big part of gluing the two fuselage halves together and saying goodbye to all the interior detail you’ve just spent a couple of hours painting and gluing together.
The fuselage went together OK. There were a couple areas near the bulkheads that needed some massaging to get things tight but in the end, things looked good. One nice thing they added on step 48, is letting you know it's going to take 50 grams of weight to keep this kit from tail sitting. I found out in the end that probably 55 grams minimum would be better. I realized that mine just needs a little touch and it goes back on its tail.
One other thing that I was surprised by was that there is a radio room section that is completely empty. If they put all this detail in everywhere else, why not in the radio room. Things that make you go HHMMM.
Next are the tail feathers. They all went together and on to the fuselage with no issues.
There is a top section of the fuselage that covers the radio room that needs a hole drilled before installation.
The next step was installing the bombay doors, but I waited until the wings were installed and paint was done so as to not knock them off. The Bombay doors and their associated parts were so fiddly that I almost closed everything up but realized that the closed Bombay doors did not fit well, they were too small.
The cockpit glass has two different variants to choose from along with the gun pods on the sides of the fuselage. There are also two separate windows that are part of the cockpit that should have been molded into the main front window.
The nose glass and gun should be installed here, but I waited until the end so as not to break off the gun while handling. There were two variations of the nose glass but the instructions only mentioned one of them. I’m guessing it is for an earlier version.
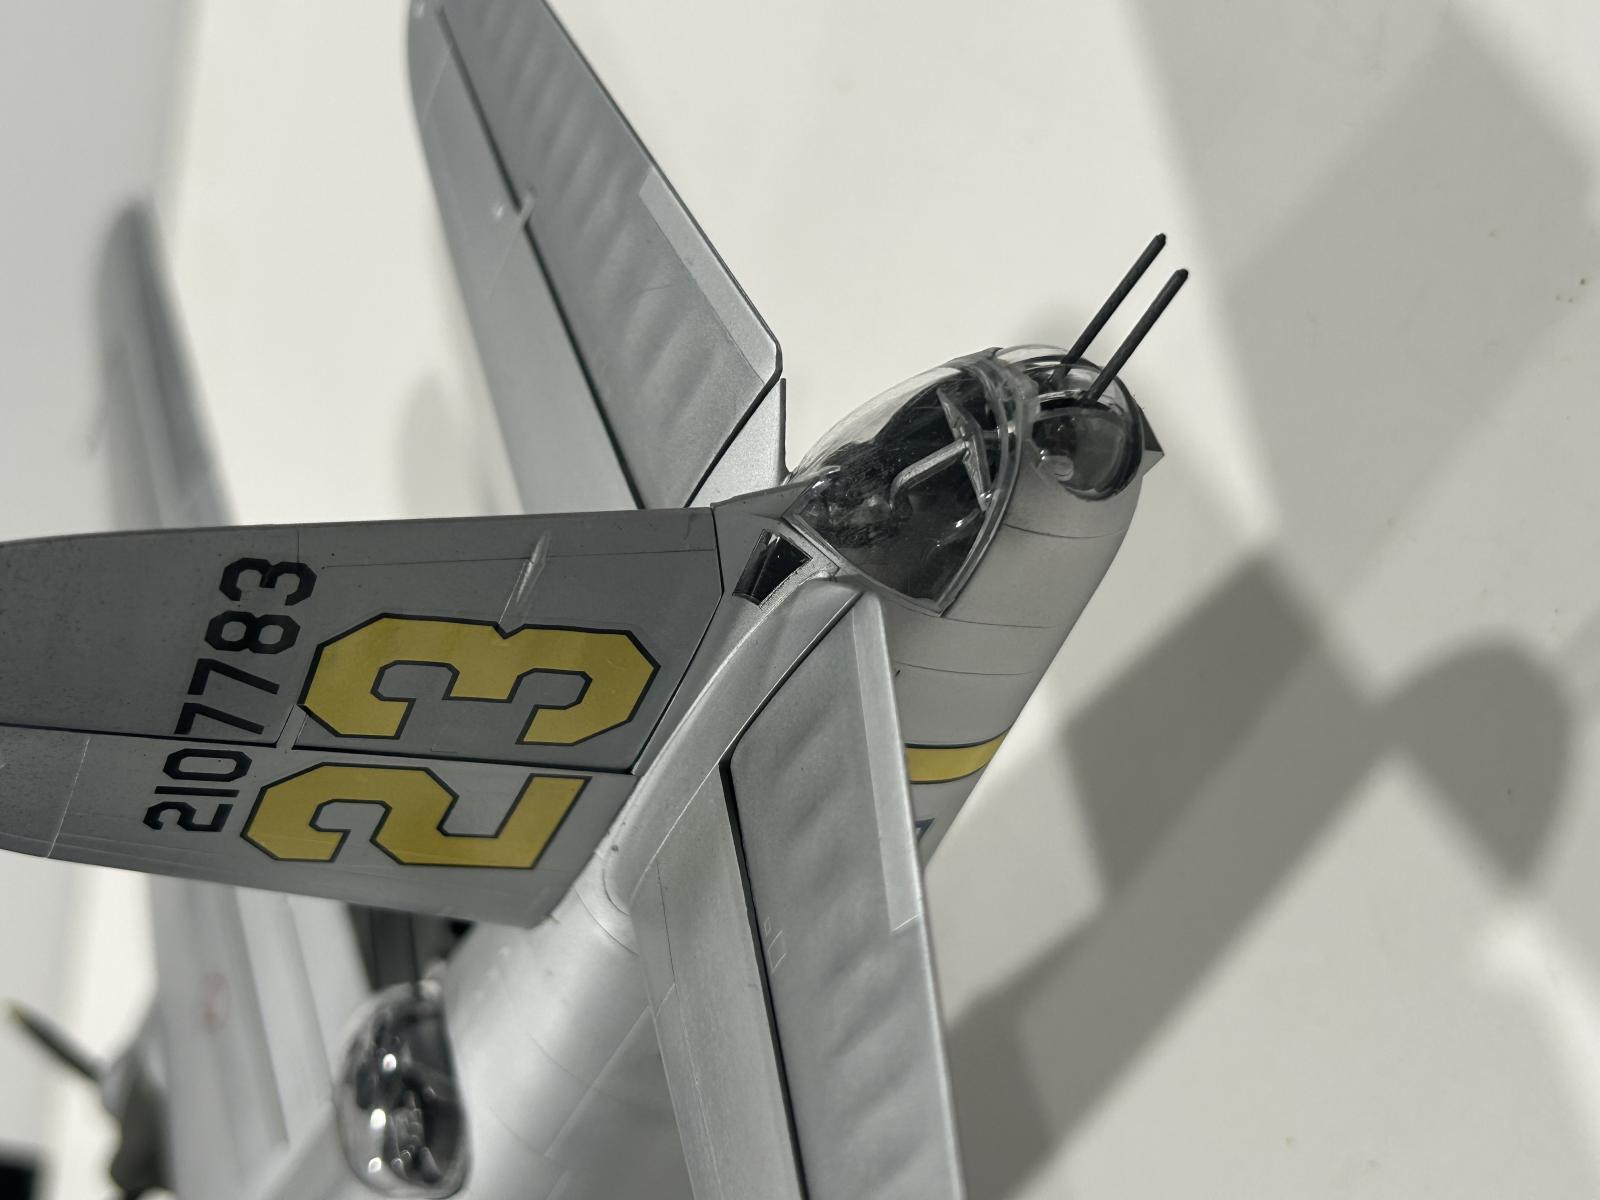
The tail gun glass was installed with the twin tail guns sticking out the back just waiting to be knocked off.
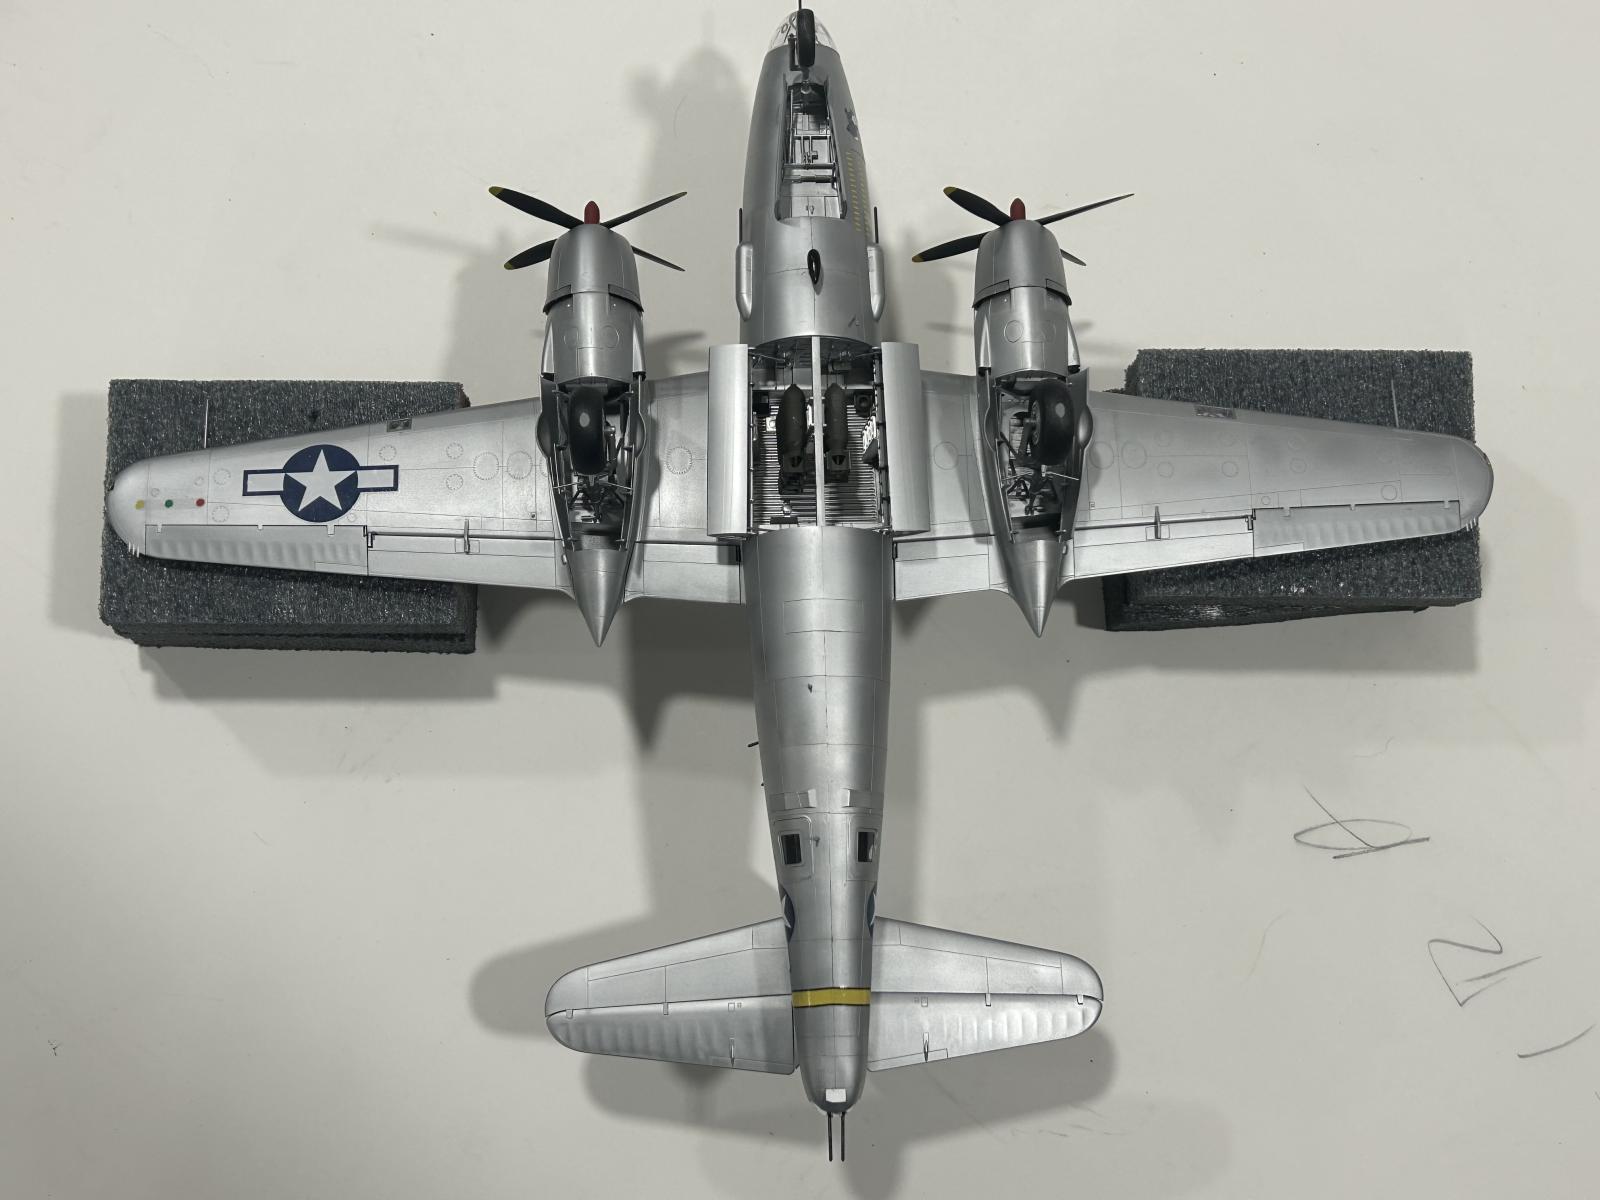
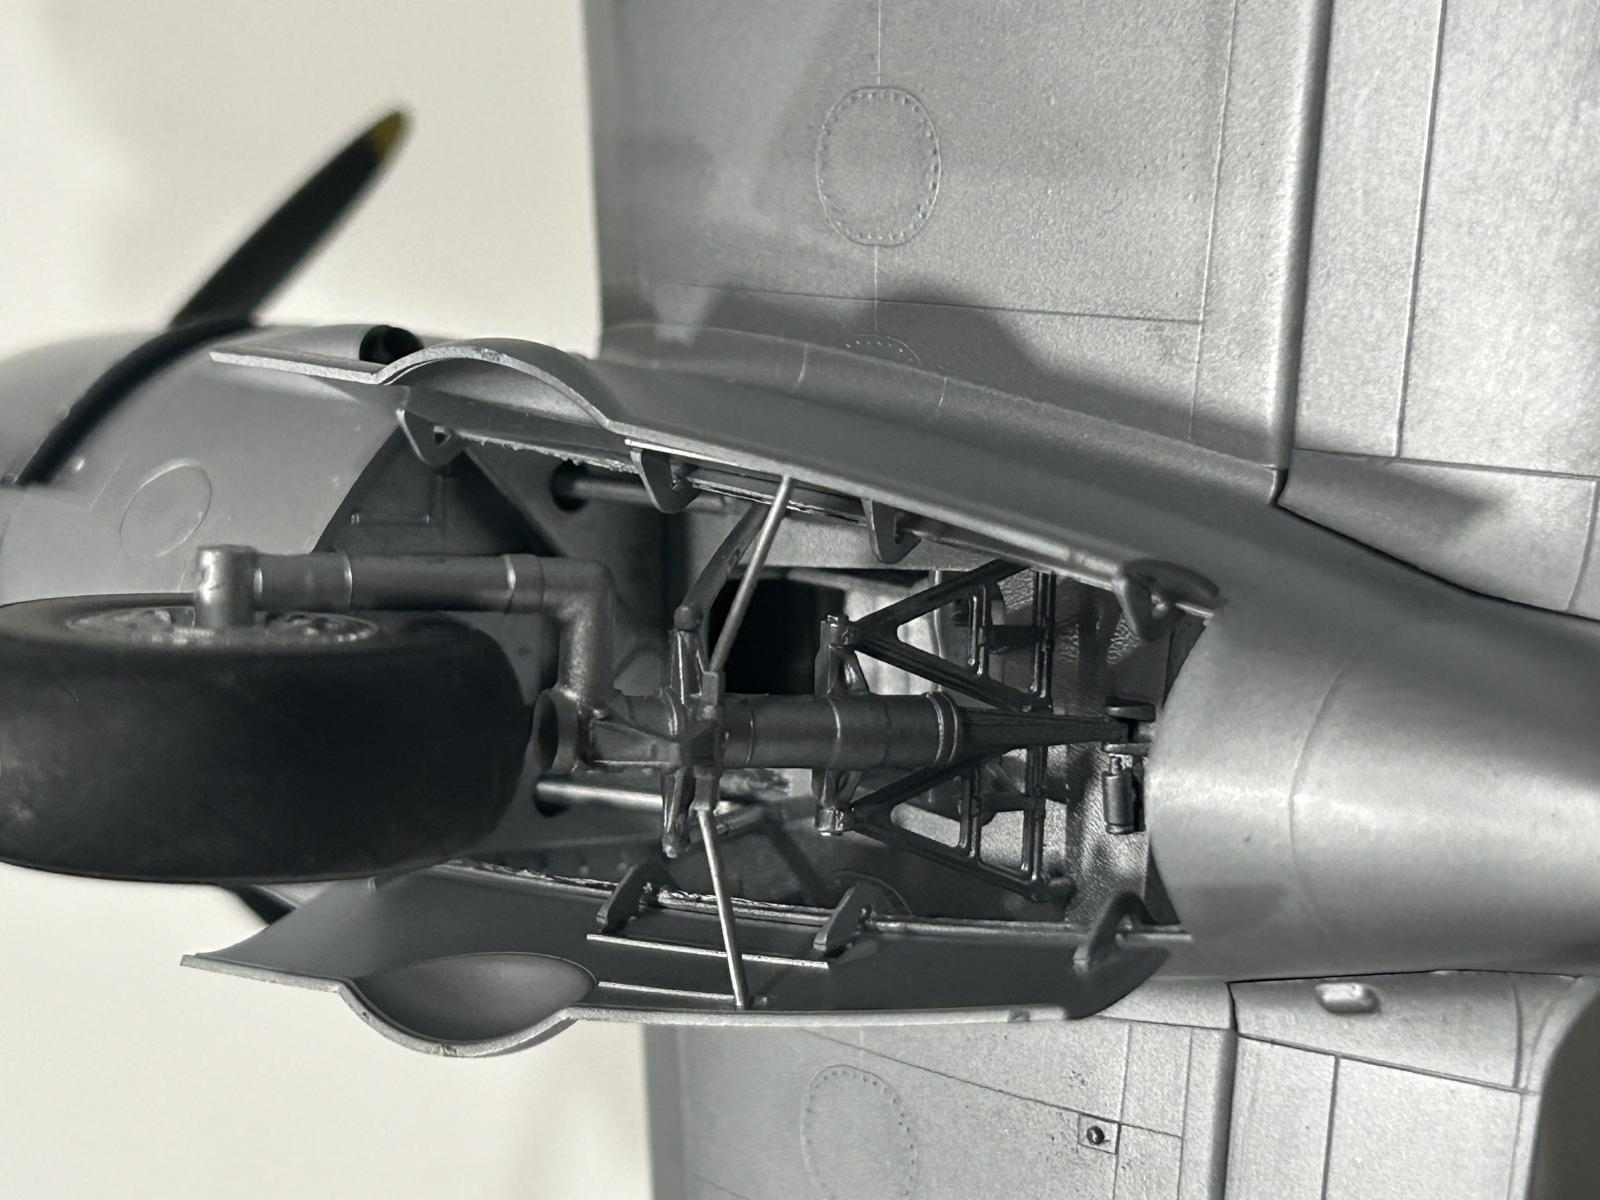
The wings had multiple parts to be added, starting with the nacelle landing gear area, ailerons, flaps and other miscellaneous parts.
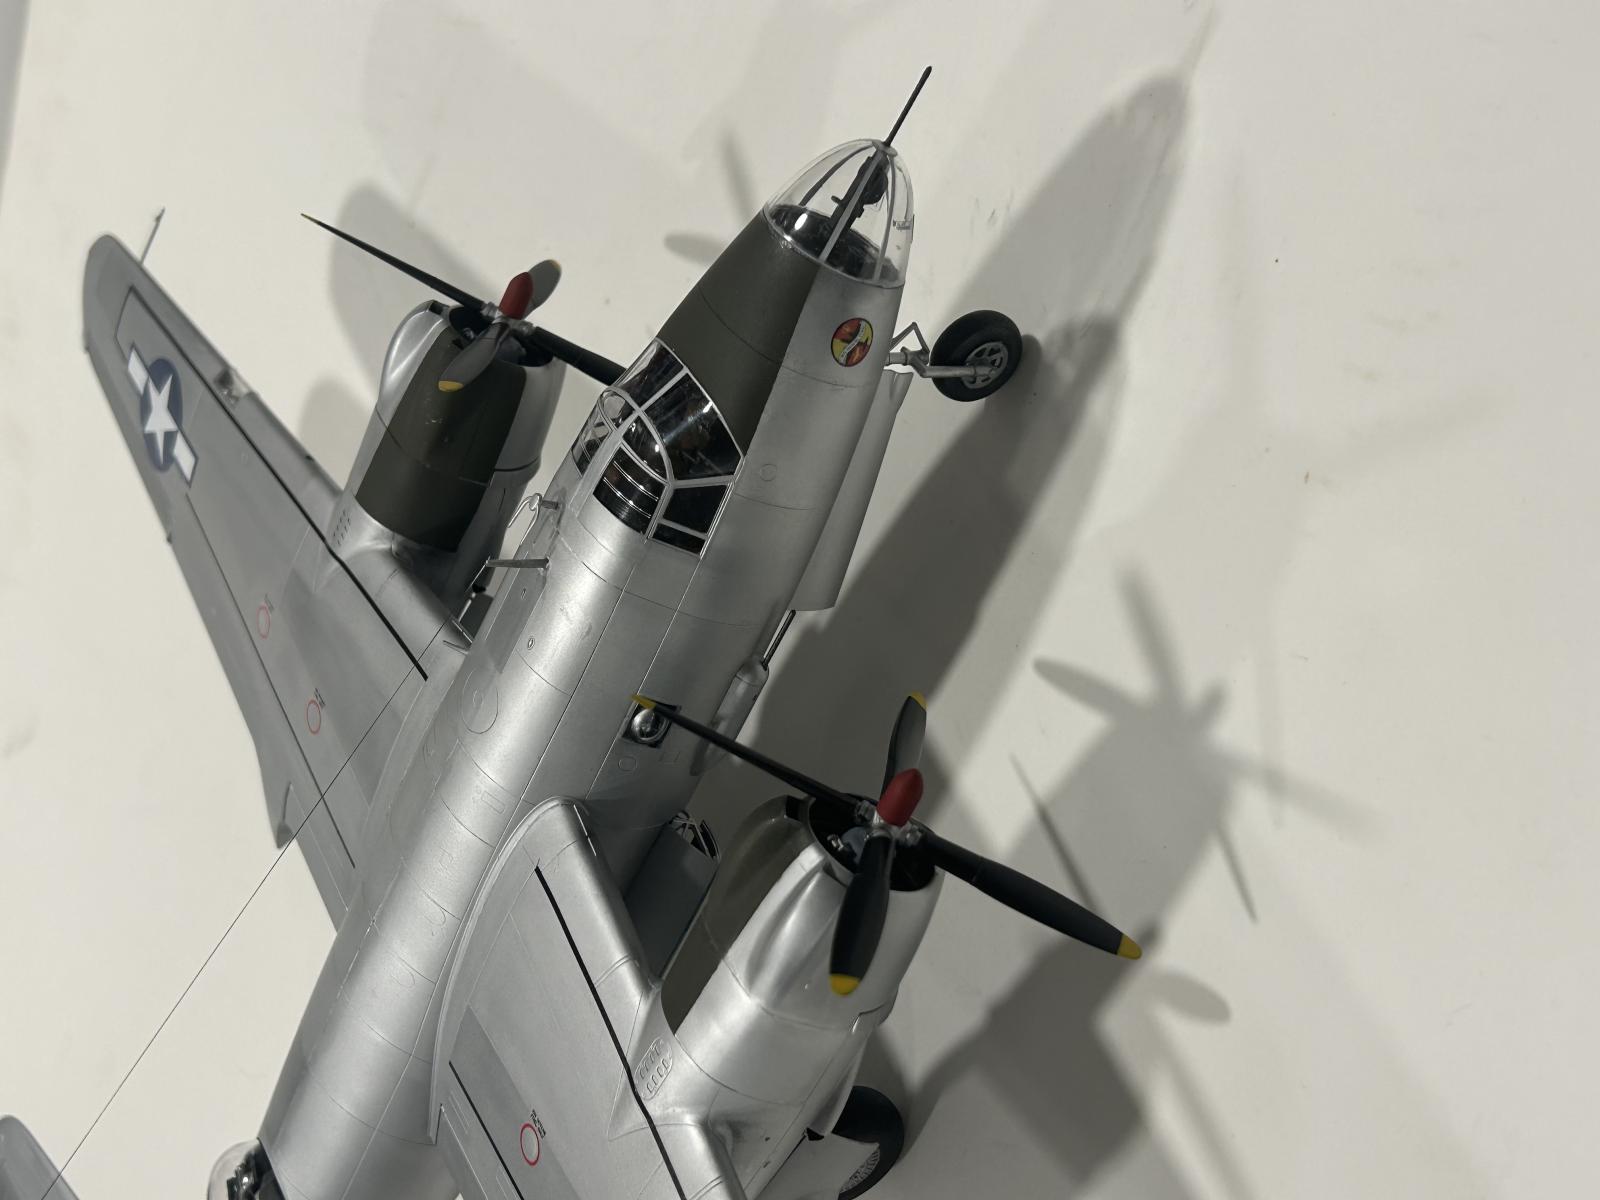
Engines were fairly detailed, but steps 85-86 had part D3 and D4 and part D8 and D9 which easily could have been molded as one piece and step 87 with part D27 and D7 could have been one piece. Once built and painted the engine looked pretty convincing.
The nacelles had multiple sections that built into some well-detailed pieces. Once assembled, the nacelles were glued to the wings. There were no major problems with fitment and looked good once attached.
The wings were attached next with some well-engineered wing spars that slid into the wings to give some strength once together.
The front nose gear was a headache trying to figure out where part #G73 was located in step 114 and there should be a close-up detailed drawing of this step.
The nose gear doors were next but I left them off until after paint.
Now to the really fun part trying to figure out how this complicated main landing gear goes together. Again, there should have been close-up drawings of the gear bay so you can see where everything gets glued to.
The main gear doors were next, and again I waited to install until later.
The nose and main landing gear wheels were assembled, painted, and set aside along with the two propellers.
I prepped the model to be painted and bought some aftermarket masks for the glass areas. I noticed in the instructions and in the masks they did not have a mask for the rear tail gun glass which I had to make myself. Strange?
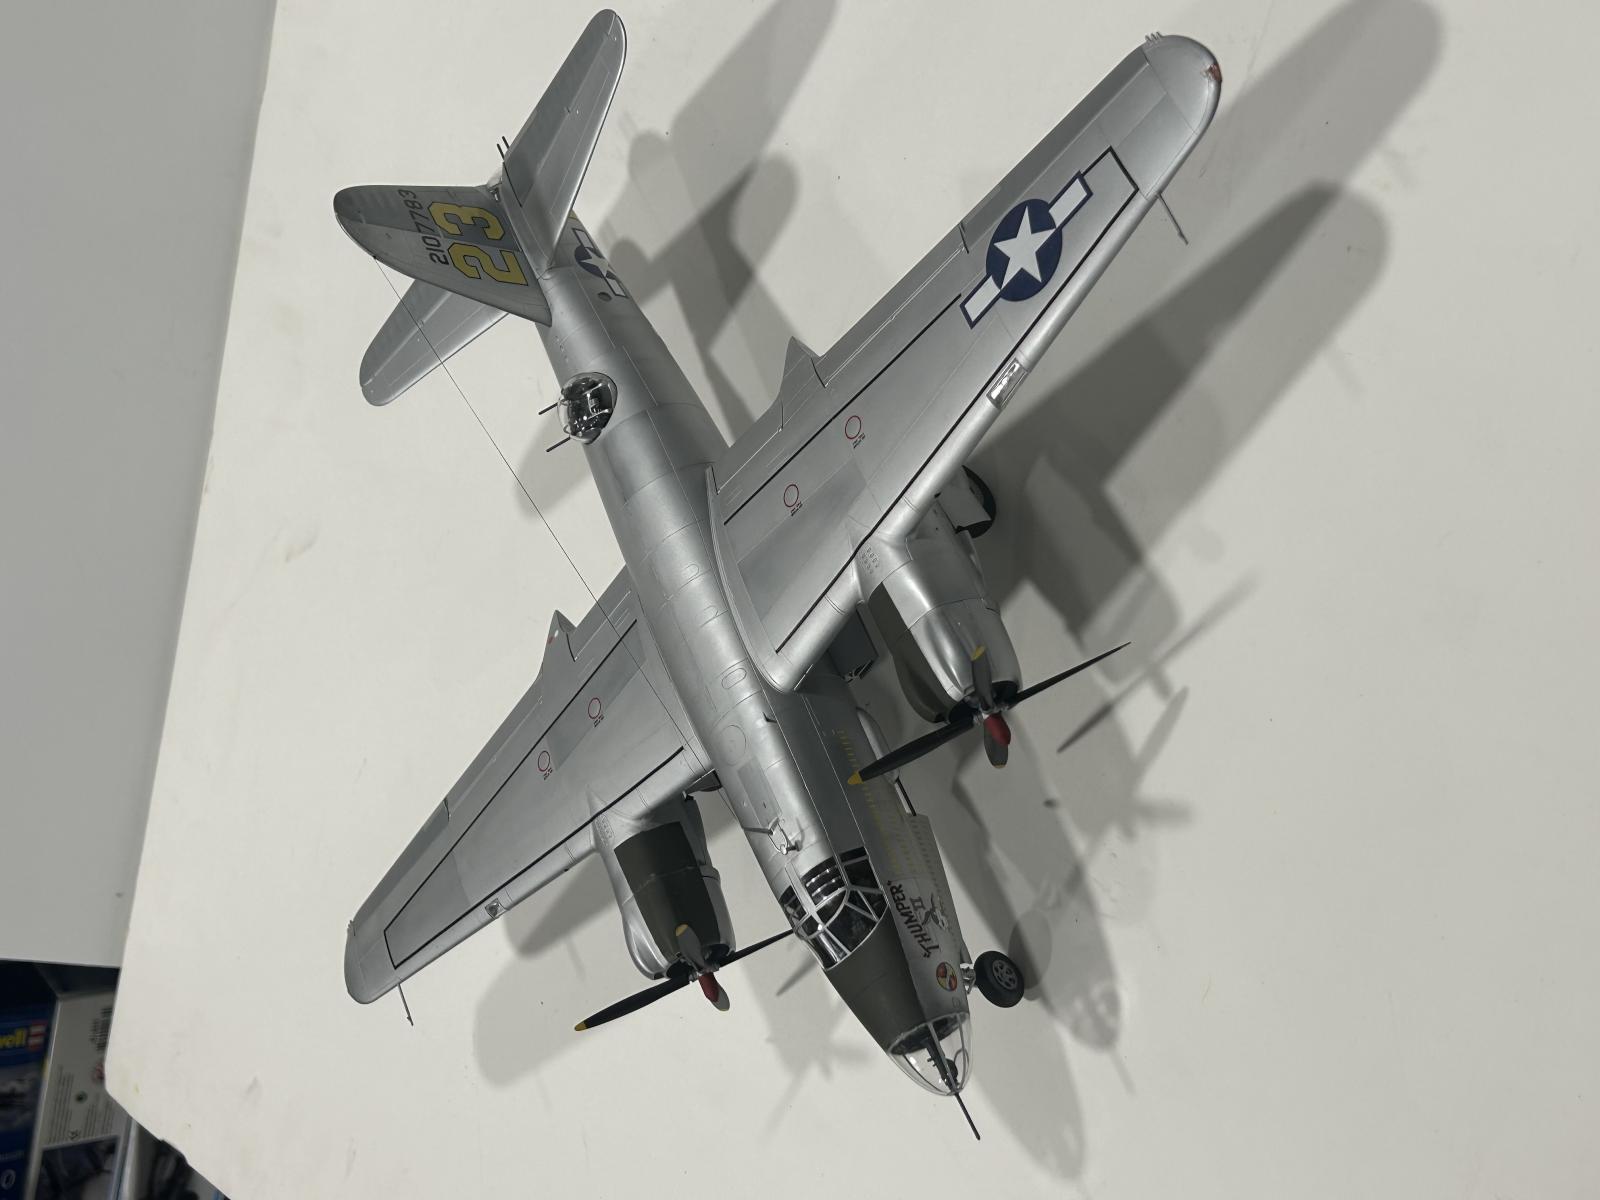
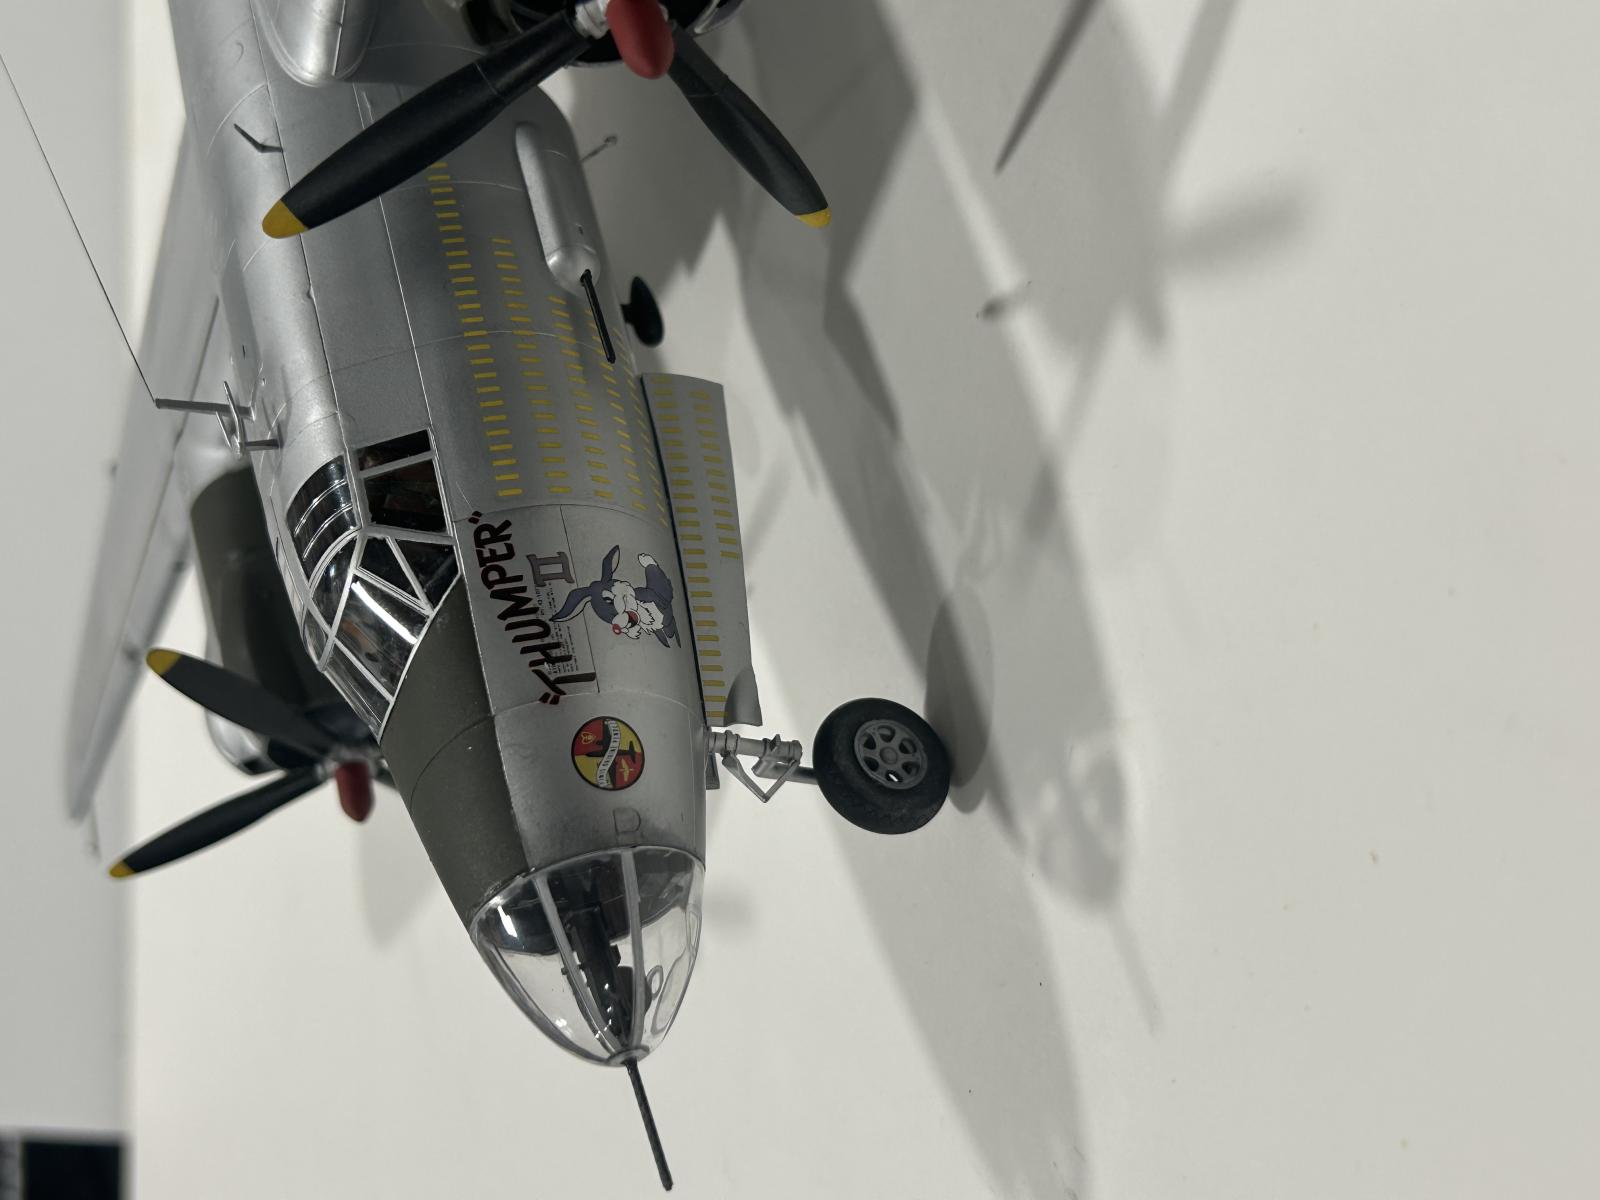
I sprayed everything aluminum lacquer for version 1 which is “Thumper II” from the 320th BG 441st BS France 1945 and dark green anti-glare panels on the nose and sides of the nacelles. After everything was dry, I clear sealed the aluminum lacquer and applied the decals which went on with no issues.
All exterior parts not attached were now attached in their respective places including an EZ line antenna and the ship was completed.
I have to say this build was a challenge with all the detail parts and all the painting of these parts and assembly. The only small issue I have is there is no radio room detail, there is all this detail in the rear fuselage but nothing but an empty space in front. Overall, the kit is very good and I recommend it to any above average modelers.
Pros
- Very well detailed kit
- Nice recessed panel line detail
- Good register decals
Cons
- Instructions were unclear in some areas
- Small parts with two pieces need to be molded as one
- Lots of small fiddly parts
- No detail in the radio room area
Thank you to ICM Models for the kit and to IPMS for the opportunity to build this model for review


Comments
Pity many of the photos are…
Pity many of the photos are not oriented correctly!
I will see if I can correct…
I will see if I can correct that.
Eric
That's better! Thanks, Eric!
That's better! Thanks, Eric!
Add new comment
This site is protected by reCAPTCHA and the Google Privacy Policy and Terms of Service apply.
Similar Reviews