
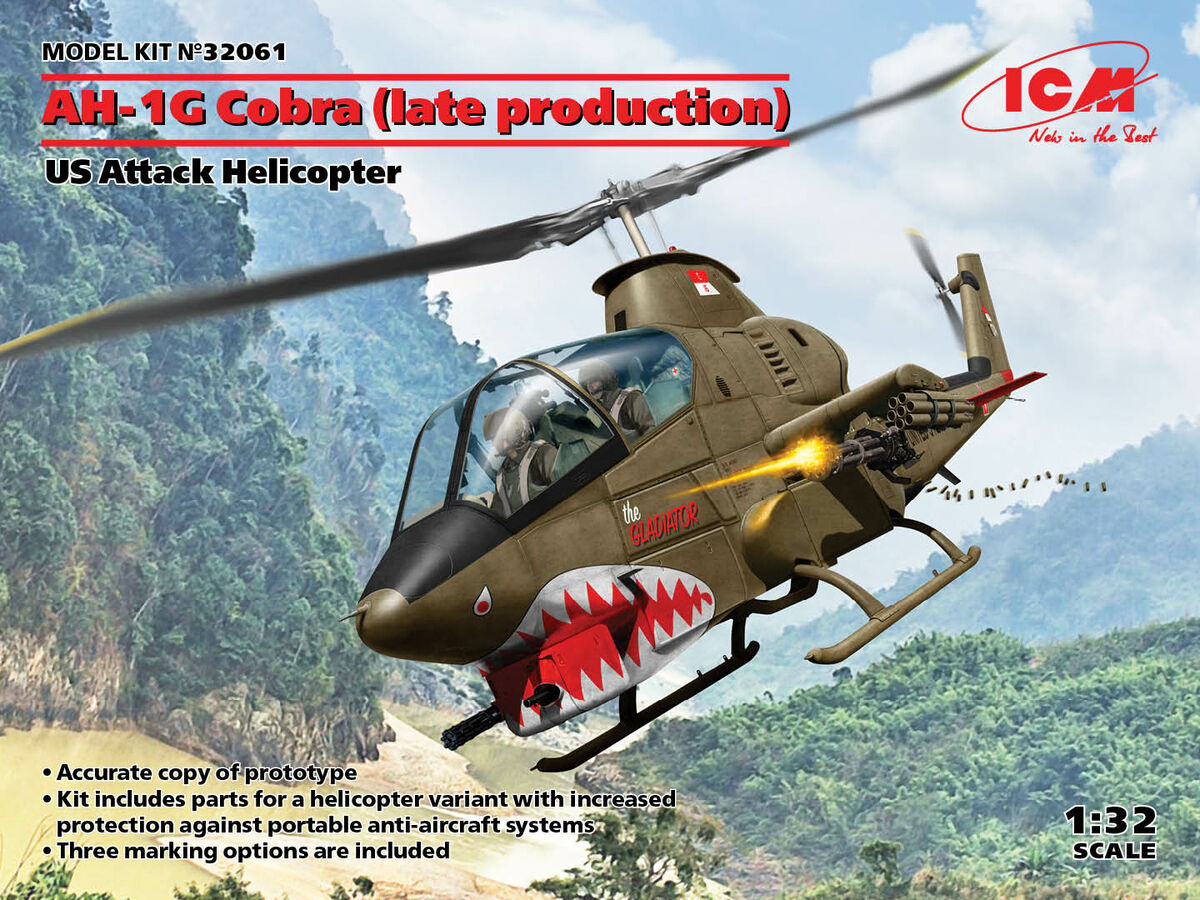
AH-1G Late Production
Before I begin this review I think it is important to know that I flew Cobras in the Army and now fly them with the Army Aviation Heritage Foundation, so I am intimately familiar with them. So I tend to be a little bit of a nit picker or rivet counter when it comes to Cobras. Please forgive me.
When ICM released the AH-1G Cobra in 1/32nd scale there was much rejoicing in the helicopter modeling world. We had waited so long for a replacement for the venerable Revell AH-1G. The Revell kit was released in 1968 and it was very basic. Accurate in outline but lacking in any detail. It needed lots of aftermarket to bring it up to speed. Would ICM be better? Oh heck yeah.
Packaged in a sturdy cardboard box with a boxtop that slips over that the model is well protected. Inside of this boxing are six sprues of light grey plastic that is blemish free. The only difference between this boxing and the Early one is the inclusion of a whole new sprue, Sprue F, which contains the XM-35 20mm cannon system. A sprue of clear plastic has the perfectly shaped canopy in five pieces and various lenses for the lights.
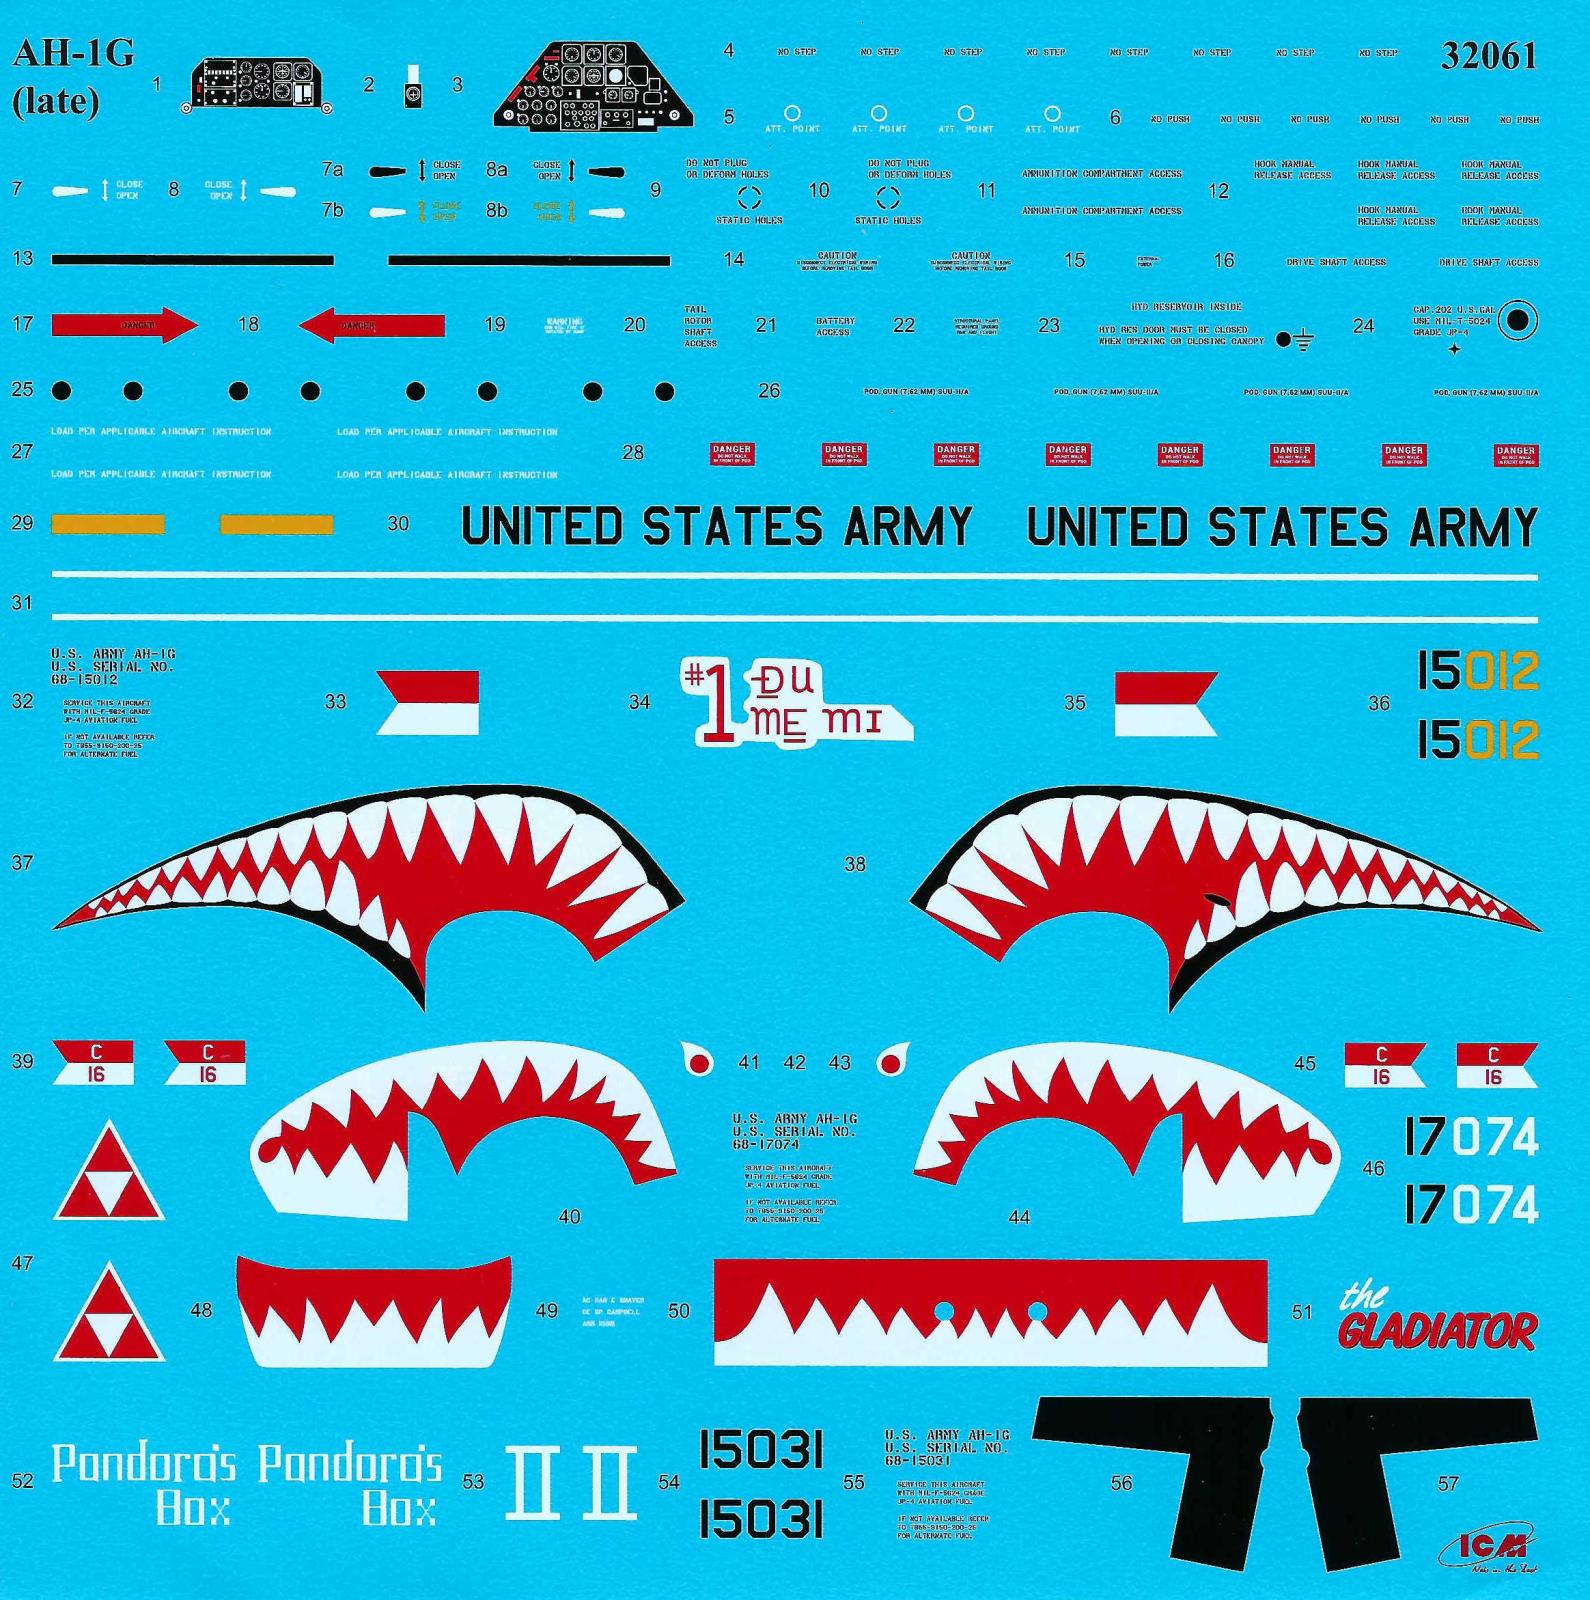
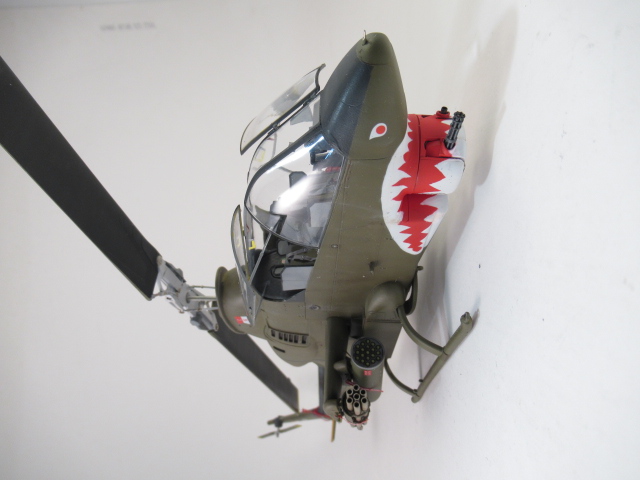
The instructions are printed on high quality paper in color and are easy to follow. A load out chart is included so you can properly load your Cobra as well. Inside the instructions are templates for the canopy masking. Simply lay the tape down and trace and cut the masks. Markings are provided for three aircraft, two with shark mouths. I love shark mouths on Cobras.
Let’s also mention the aftermarket items I used on this kit. I started out with some Werner’s Wings parts in the cockpit and debris deflectors on the main rotor blades. I also used Quinta Studios set, along with the interior and exterior sets from MicroDesigns. SAC landing gear were included for review. I also used Eduard masks and photo etch sets. HGW provided the Remove Before Flight streamers. That may seem like a lot of aftermarket for a new kit but I wanted to throw as much stuff at the kit as I could.
So how does it build? Out of the box, it builds very well. End of review.
No let’s start in the cockpit. It is a little sparse for my taste, but it isn’t too bad. The fit is perfect. It is missing seatbelts which you’ll have to source elsewhere. I used the Quinta Studios set on those and the instrument panels. They fit perfectly and look great as well as providing some other really nice additions to the cockpit. I did use a lot of the MicroDesign interior as it had actual switches and I thought they worked really well in the kit. Pay attention to the instructions, which are in Russian but understandable. I missed some cuts for the side panels, which the kit, Eduard and Quinta didn’t get quite right. The MicroDesign side panels are perfect. Even more perfect if you make the cuts. Some things missing from the kit are the side arm cushions, breakout knives and the fire extinquisher. I did not really care for either gunsight and grafted a Cobra Company one onto the kit mount along with some Quinta parts. Overall, it looked pretty good when done. I’ve built the kit cockpit without all that stuff and it does look the part, however with the Quinta and/or the MicroDesign parts it is much nicer.
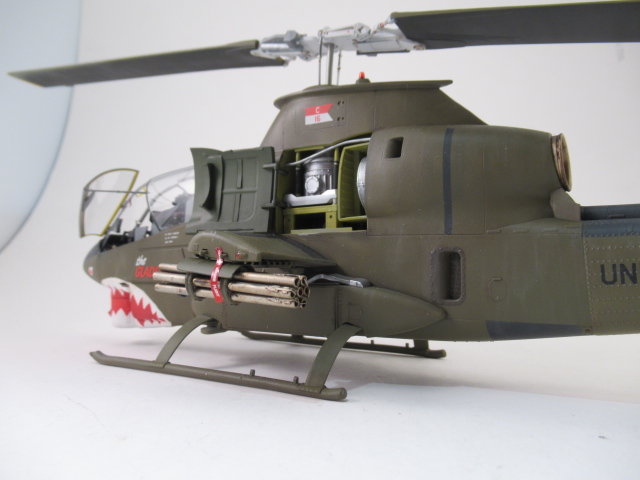
Next up is the transmission and engine inlet. I recommend that you paint the inside of the inlet Marine Green. I used a zinc chromate for mine and that is correct for a late version but probably not for Vietnam era. This kit is the first to add the trransmission doors open. I was originally going to have both sides opened up but later on I realized that you can’t have the pilots door and the transmission door open so I ended up closing up the right side transmission door.
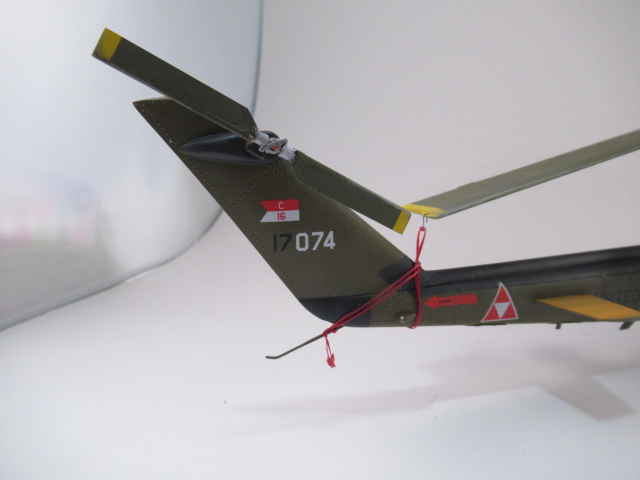
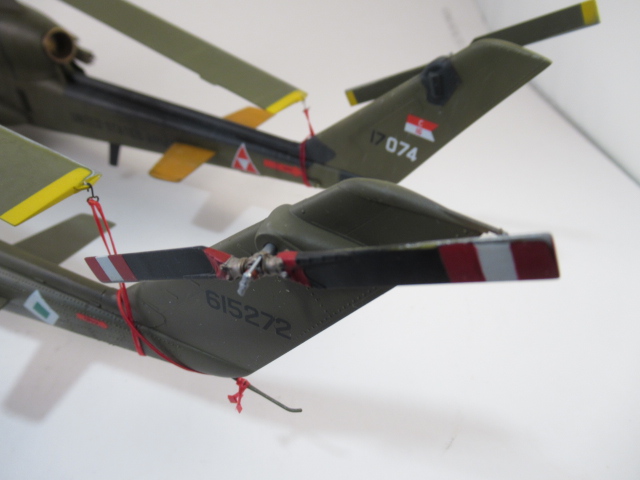
Before adding all this stuff to the fuselage halves it is important to note which side tail rotor you need for your model. Earlier Cobras had left side tail rotors. They found that this wasn’t as effective as having a right hand tractor type tail rotor so it was switched. Also while you have the fuselage halves open, if your aircraft has the sugar scoop IR suppressor system, aka toilet bowl, you will need to open up a hole for the inlets.
Do NOT install the tail rotor at this time as the instructions recommend. That will make your life a living hell with possible breakage. You can add it at the end of the construction. The fit of the parts in the fuselage halves is perfect. Do not forget to add the engine exhaust prior to closing up the fuselage. The exhaust is not straight up and down but offset at an angle when you look in the exhaust.
The fuselage halves fit perfectly together. I didn’t have any issues. I always squeeze out melted plastic and where I couldn’t get that to do that I did fill with superglue and talcum powder. This just ensures the seem is completely hidden.
A couple of notes, there is a small raised portion just above below the exhaust. That needs to be removed if your helicopter didn’t have the toilet bowl. Second note is that DO NOT use ammo bay door A9. I don’t know where they got the thought that it was added but it is not. Add A4 the blast deflectors below the cockpit on the left side where the big gun is, IF the big gun is installed on your helicopter, otherwise just leave it off.
The belly pan fits perfectly and is one of the reasons I love this kit. It contains some great detail. Leave off the antenna on the tailboom and the tail stinger until the final part of the build or you will be replacing them.
The fit of the turret moveable parts ( D36 and D37)was weak but it is accurate so be careful when installing them. I thought the 40mm grenade launcher protruded too much so I replaced it with some metal tubing. If you don’t have metal tubing just cut off the front smaller portion, drill out the tube and add it.
The wings go together with no problem whatsoever. The fit is phenomenal. I love that they included the jettison mount for the inside pylons. The wings fit perfectly into the recesses in the fuselage.
My aircraft did not have the toilet bowl exhaust so I left that off for another build.
The big gun builds up nicely. I was not impressed with it initially but after assembly and painting it was beautiful. I painted mine up with Model Master Titanium and then dry brushed it with some graphite. The cheek ammo trays for the big gun assemble perfectly as well. They are positioned with the wings so the fit is perfect with the compound curve of the helicopter. Part F5, the ammo chute, was the only disappointment to me. It fit perfectly don’t get me wrong, but it is an ammo chute which is made up of individual links but the kit has it molded as a solid piece with no relief on it. Not a big deal but it would have looked nicer than the kit part.
One thing that I made a mistake was I followed the instructions and made the horizontal stabilizers as depicted. The instructions have the larger horizontal stabilizers (Part C37-40) of the AH-1S. I should have used the smaller version which are Part 33-36, this doesn’t have any rivets on it. I missed that until too late. It isn’t a big thing, the AH-1G had a span of 6ft 2 inches, the AH-1S had a span of 6ft 11 inches.
The landing gear are nice. I wish ICM would have had the steps as separate pieces but they aren’t bad. I removed the protrusions on the front of the skids. The real helicopter has a ‘ring’ at the end of the skid tube. After cutting off the nub, I drilled out the hole. Normally in Vietnam the AH-1G had shrouds around the landing gear. SAC provides some shrouded metal landing gear in white metal. Actually, after some research I think my aircraft actually had the rounded landing gear without the shrouds but I had the gear so after a little of sanding they were added without any issues.
The five piece canopy is the next item to add. Adding the center piece is the first thing to add. Then the right front and left rear canopy frames. They fit is phenomenal. I wanted my canopy doors open so I added them just for painting. I had Eduard masks for the kit so I used them and they fit perfectly.
I built up most of the armament. Of course I needed the XM-35 20mm cannon, but what else was on the aircraft. In the picture you can see the XM-158 rocket pod on the one side but the other side of the aircraft is hidden. So it could be either the 19-shot M-200 pods or the XM-18 mini-gun pod. Likely it had another XM-158 pod. I elected for the rocket pod.
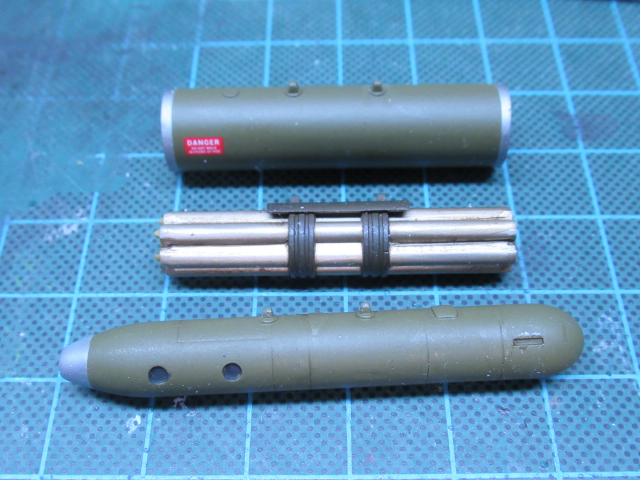
I started with the XM-158 rocket pods. They come in five pieces. The problem with them is that the front and back parts are not the same size as the tubes. The tubes are continuous from front to back so you have to smooth them in and that creates an issue. The other issue with the XM-158 pods is that the tubes are designed strangely shaped. I was able to build them up to the point that they were useable but didn’t overly like them. I opted to build up a set of rocket pods from Fireball Modelworks. These are absolutely perfect but you have to have experince in multimedia parts. They are easy to make. I could have used the kit ones but the Fireball ones were superior so I used them.
The XM-200 19-shot rocket pods fit perfectly. No issues were found and they looked good for me. There is no reason to suspect the XM-157 7-shot rocket pods are any different.
The XM-18 mini-gun pod was also easy to build up. The only thing that I had to do to this one was scribe a new panel line for the metal deflector on the end.
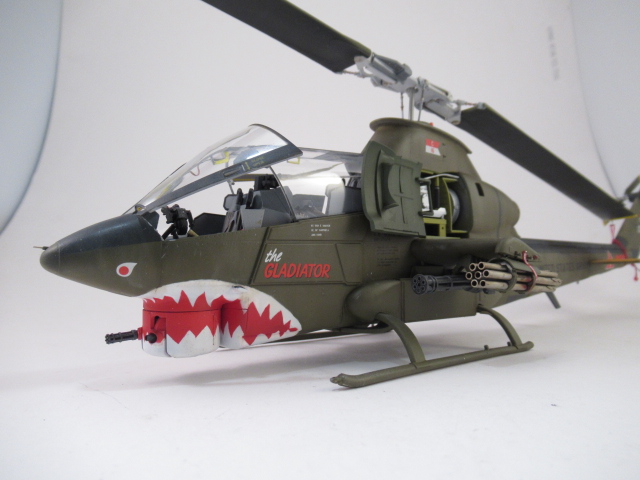
This brought the model ready for paint. The openings were blocked with tape and foam. The model was primed with Alclad Grey Primer and Microfiller. There was very little to fix, but something I was not happy with was the panels under the tailboom. It seemed that they were too soft and not as nice as I would have liked. What to do? Well fortunately for me I run Werner’s Wings and have an AH-1F Super Conversion with photo etch panels so I used my panels to replace those panels. They look so much better. No I don’t have plans to release those PE panels. After checking the only photo I was able to find in Jon Bernstein’s book “AH-1 Units in Vietnam”, I preshaded with Tamiya NATO Black. After studying the photo and the instructions I determined what I thought the color scheme was, which differed from ICM’s interpretation. Areas that were black like the canopy framework, areas and access panels on the tailboom along with the turbine markings were sprayed and when dried masked off with Tamiya tape. The fuselage forward of the tailboom was painted in Model Master Olive Drab enamel. The one panel on the left side was masked off and painted MRP FS34087, which is too dark for an early Vietnam era, but was probably correct for later versions in late ‘72/73 when the colors were made darker. I masked this off and painted the tailboom AK paint Faded Olive Drab, which was slightly lighter than the Model Master paint. Then I realized I did something stupid. In my haste to paint the model I forgot that the bottom of the tailboom needed rivets and some panel lines scribed. ICM didn’t model the raised rivets on the bottom side of the tailboom. Luckily for me I had access to a real Cobra and could photograph the rivet pattern. I used some MicroMark and Archer rivets to replicate the pattern seen. Then went back and repainted the tailboom again. Adding the rivets was a pain in the, well you know. They look okay but not perfect. I think the top of the horizontal stabilizers were orange, but I could be wrong, so I painted them Tamiya Orange.
I had my fears about the shark mouth decals fitting properly so I decided to cut masks and paint them myself. I traced the kit decals with some thin paper and then transferred it to some Tamiya tape. I painted the white first using Alclad White Primer. This gives you good coverage with minimal paint. It is my favorite white. Adding the masks for the teeth was easy enough. Then I painted the red portion with Tamiya Red. There were some areas that required touch up but nothing too bad.
A coat of Tamiya Clear thinned about 50/50 with Mr. Leveling Thinner prepped the model for the decals. The kit stencils were about 50% too big. Again, lucky for me that I own Werner’s Wings as I had AH-1 stencils available and used them instead of the kit ones. The kit decals performed perfectly for the other markings. I used a lot of water to keep them from sticking before I needed them to. They all reacted well with Solvaset. Everything was sealed with another coat of Tamiya Clear. After waiting overnight I added a coat of Alclad Matt Flat.
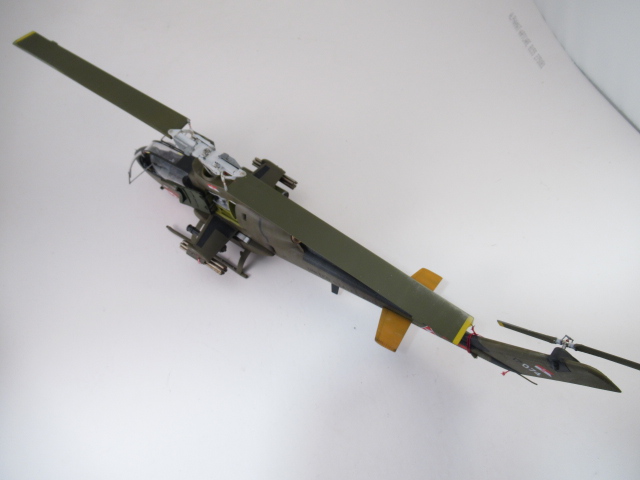
While that was drying, I assembled the main blades which are in halves. This presented no particular problem. I drilled a hole in the one end for a blade tiedown. While I was at it I needed to paint the tail rotor blades as well. The blades were then primed with the Alclad grey primer. This was followed up by Alclad Aluminum. Then zinc chromate primer was next. Testor’s little bottles of Olive Drab were used to paint the topside of the blades to give it a slightly different look. The bottom was painted Tamiya NATO Black. Then the tip was masked off and painted yellow. This may seem laborious but when I sanded back the paint it would be just like the real thing. After drying I use soft sponge sanding sticks 800 grit is best and then slowly sand from the tip inboard and front to back. This takes off just the right amount of paint to make it looked used and worn by the Vietnam terrain.
The rotor head and various rotor parts were painted FS36495 a very light grey. The rotor system was assembled and set aside until later.
I did not build up the ground handling wheels or the tow bar. These would add visual interest in a diorama but are not normally fitted to the helicopter and are removed once it is repositioned where it is supposed to be.
The next step was weathering. After studying the one photo I had it looked like the helicopter wasn’t very worn so I kept my weathering to a minimum. A small pin wash of burnt umber artist oils was thinned with Turpenoid along panel lines and on various parts that get worn by the mechanics. After letting that dry for a little bit a dot filter was added using buff artist oils. These were blended in mineral spirits, first swirled and then dragged from top to bottom. This gave a sun bleached and replicated rain streaks of a dusty aircraft after a rain. Chipping came next with a silver Prismacolor pencil. More wear was added where the ground handling wheels attach as there is a lot of wear there on all Bell skid helicopters. A coat of Alclad Matt Flat was added to seal everything in.
After that dried I used some AK Smoke and a very soft brush to replicate the exhaust streaks on the tailboom. I didn’t want to overdue it but I did want to notice it.
After that I just needed to add some small parts here and there. Now I added the tailboom FM antenna on the bottom. I still managed to knock it off a few times. The hardest part to add were the canopy support rods on the open canopy, but even that wasn’t that difficult. The front door was the hardest of the two, because it at an angle and it only has one support strut. I used Tamiya tape to hold them in place while the glue dried. I added a lens to the belly light and all the various lights.
I added the big cannon to the left side inboard station and the Fireball Modelworks XM-158 pod outboard of that. The kit XM-200 19 shot rocket pod was added to the right side inboard pylon and the other XM-158 was outboard.
I added some weight to the turret. It wasn’t needed but better to be safe than sorry. . The minigun for the turret was added after drilling holes in the end to represent the guns and adding very thin tubing. The 40mm grenade launcher was added from tubing as well. The completed turret was then added it to the bottom of the nose
The last parts to add are the main and tail rotors. The main rotor is unique in that it is rounded on the mating surface. This allows you to either just let it sit level or be pulled down to ‘tie it down’. I elected to have them tied down like they would have been in theater. That typically is just an aft tiedown. The tail rotor is easy enough to add to the appropriate hole with no issues.
I added the main rotor tiedown from unwaxed dental floss colored with a red Sharpie marker. It has to be unwaxed and it has to be a Sharpie permanent marker. I tape it to my desk and run the Sharpie sideways on it then let it dry for a day. I made a hook with some fine floral wire bent to shape. The floss was then wrapped around the hook and added to the blade end. It was then wrapped around the tailboom and around the tail stinger. At the end of the ‘rope’ I added some Tamiya tape to represent the weight bag typically at the end of rope. I had painted it Tamiya Red prior to cutting it. With that the model was done.
Remember I fly these aircraft for a retirement gig so my nitpicks are based on being intimately familiar with the subject.
This is my second ICM AH-1G. I built the early version before and now this late version. I thoroughly enjoyed both kits. It does benefit from the Quinta, PE, and resin bits, but it doesn’t really need them. One thing the kit does need is seatbelts though. The rest of the stuff really just adds icing on the cake. This kit is far superior to the old Revell kit in fit and detail. I would have liked to have had the rivets on the bottom of the tailboom but really that is about it. Could the cockpit and armament have been better? Yes and I’m sure there will be resin sets for that but this is still the best AH-1G in this scale. Period. Great job ICM. Let’s do the rest of the Cobra family. I’d love to see what you can do with the AH-1F/S and the AH-1J. It’s a great time to be a helicopter modeler.
Highly recommended
Thanks to ICM and IPMS/USA for the review copy. You can obtain yours at your local hobby shop or online retailer.


Reviewer Bio
Floyd S. Werner Jr.

Building models since the age of 7, I’ve become known for my Bf-109s and helicopters. I currently run Werner’s Wings. I was previously the ‘star’ of the Master Class Model Building Video series. I’ve been published numerous times on various website, including Hyperscale and ARC. My work has been in FSM and Great Scale Modeling 2001, as well as, numerous other model magazines. I’m a published author with my Squadron/Signal Walkaround book on the Kiowa Warrior. My models have continuously won many regional and national awards. My unique model photography gives my models instant recognition for their historical perspective.
I’m a retired from the Army after 21 years of flying Cobras and Kiowa Warriors, including tours in Iraq, Bosnia, Korea, and Germany. I’m also a retired Flight Officer for the Baltimore City Police and flew their helicopters chasing bad guys. I’m currently flying Cobras and Hueys with the Army Aviation Heritage Foundation.
I’ve been married to my high school sweetheart, Yvonne, for 42 years. Our daughters have blessed us with six grandchildren. My passions continue to be his family, friends, helicopters, models and airplanes, especially the Bf-109 and my beloved AH-1 Cobra. My motto has always been - MODELING IS FUN!
Comments
Your review of the ICM 1/32 AH-1G
I wish I had stumbled onto your review earlier. I am making the ICM 1/32 AH-1G (LATE) kit for my friend Neal Thompson and trying to replicate it as best I can. His helicopter was in the photo in publicity pictures before releasing the kit. He was also one of the first, if not the first, Cobra pilots to destroy a tank. The interior I have constructed looks okay, but I wish I had found the MicroDesigns version. That’s wild. You answered some questions I had, mainly about the fit of parts D36 and D37. Never having been in a Cobra, I didn’t realize the parts weren’t flush fitting. You have some other excellent tips that I appreciate, especially about the tail rotor, which was my next step. I had decals of the HammerHead name made by a company in Australia (http://www.customhobbydecals.com/). They seem to be fine, but I’ll have to wait until I mount them to be sure. I wish you had included some more photos, particularly when talking about parts that those who have never flown a Cobra know nothing about. Anyway, great work. Thanks.
Thanks
Glad we could help some. The author is a Army veteran helo pilot who owns Werner Wings and sells add on resin and decals for, not surprisingly, helicopters and currently flies for the Baltimore PD last I spoke to him. His web site is Home - Werner's Wings (wernerswings.com)
Thank you
Sorry it has taken me so long to reach out, I did not see the comment until today. Feel free to reach out to me via the Werner's Wings website or Facebook page. I love Cobras and will gladly answer any questions you have.
Add new comment
This site is protected by reCAPTCHA and the Google Privacy Policy and Terms of Service apply.
Similar Reviews