
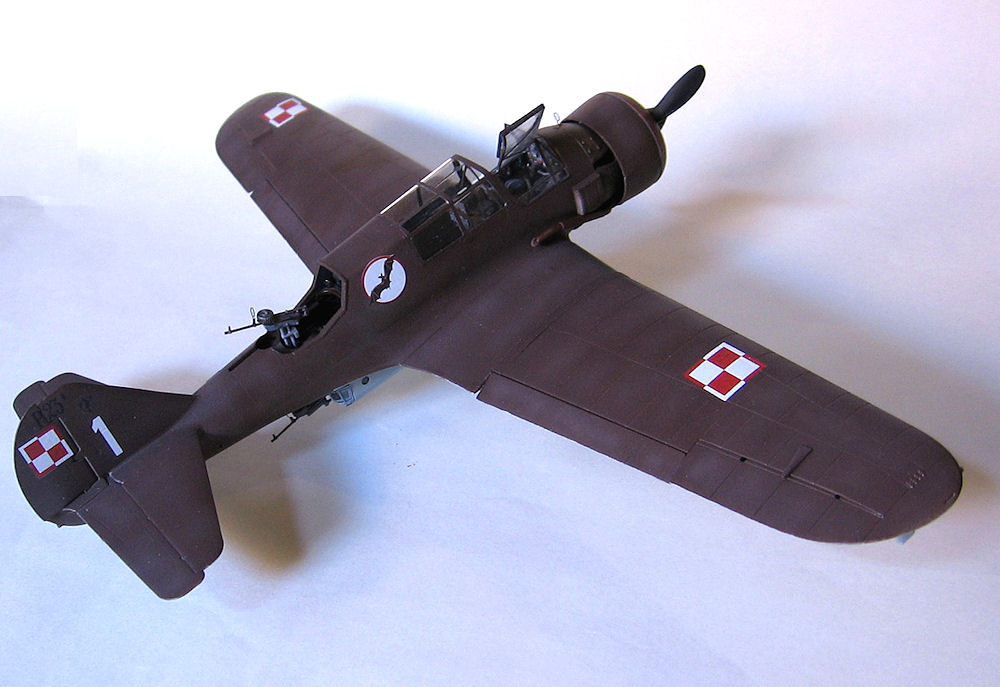
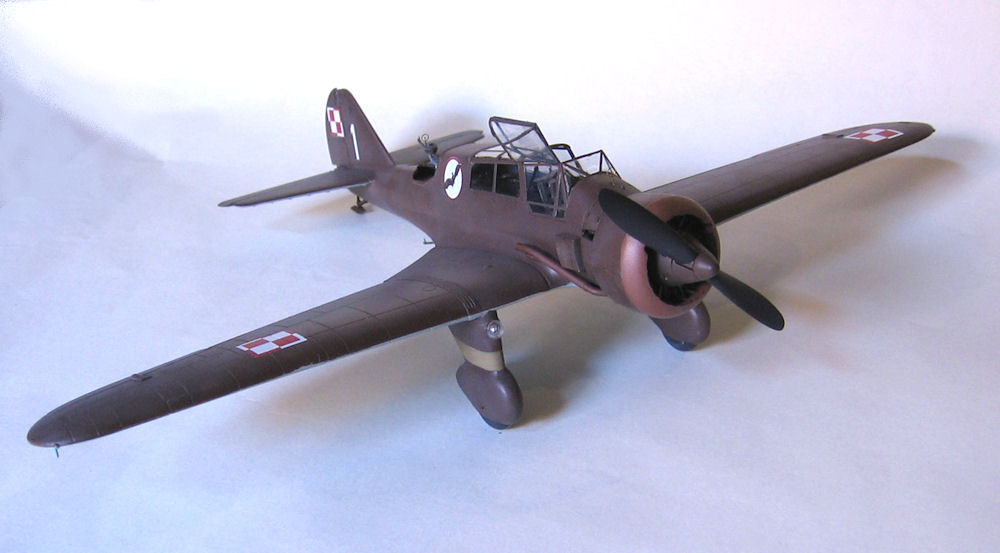
PZL.23B Karas
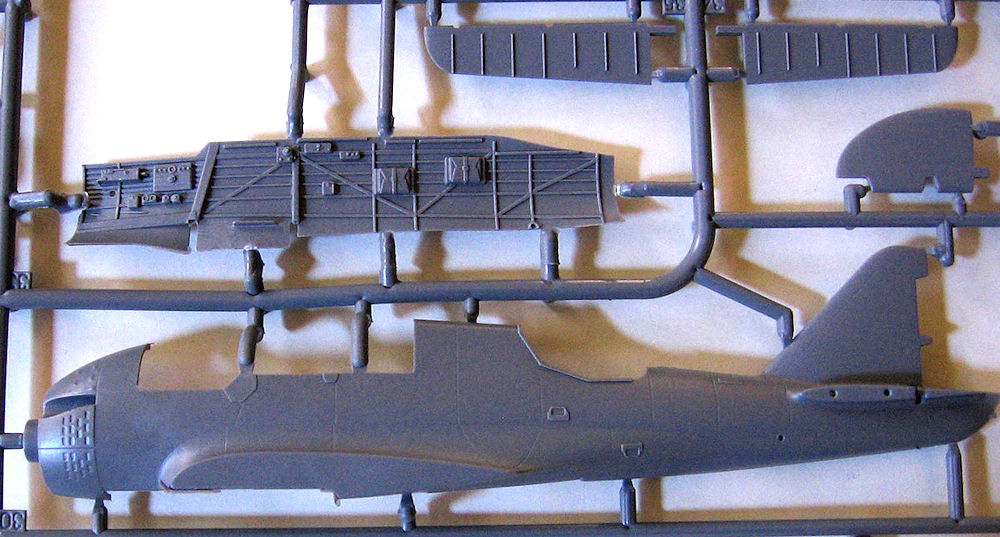
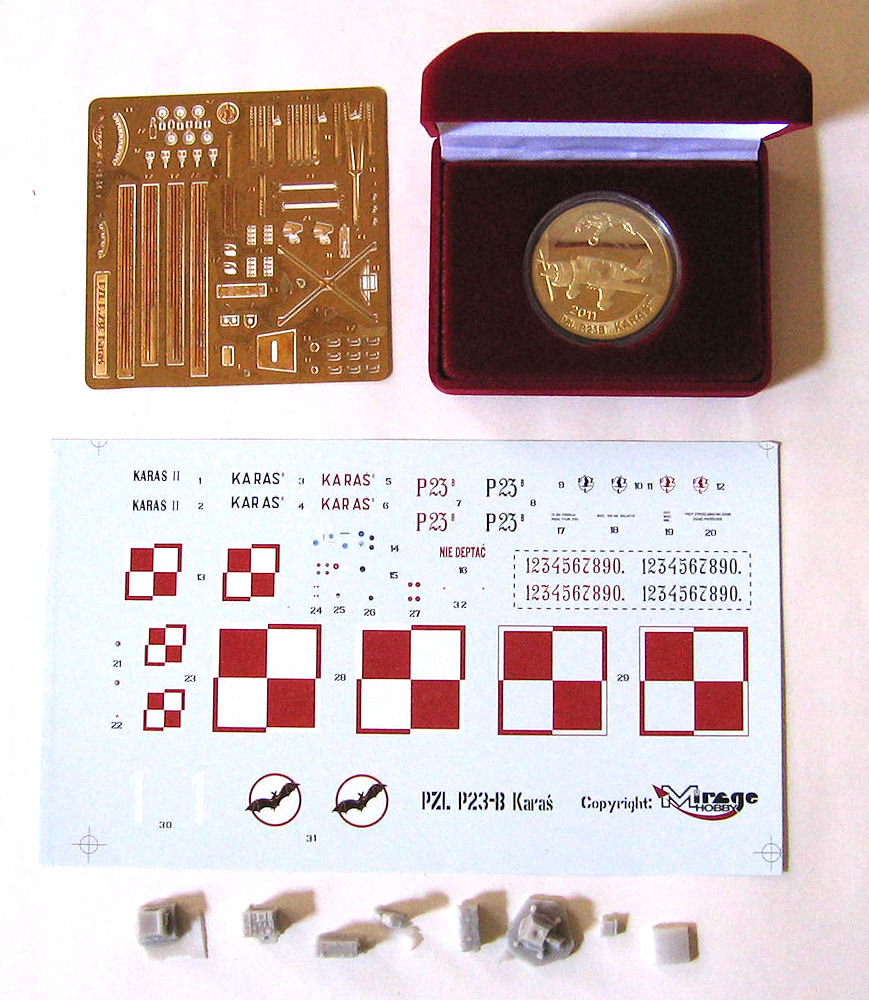
The kit comes in an attractive box with a profile of one of the marking options on the box top. This is a special limited edition and includes a very nice gold colored coin that is packed separately in a fancy red box similar to what you would get a piece of jewelry in. I am not sure what the parts count is, but I'm sure there are well over one hundred parts. The parts are molded in a medium blue-grey color and they have a slightly rough texture. The plastic is a little on the soft side, so care must be taken when sanding and cutting. There is a small photo etch fret with seatbelts and other detail parts. I did not use all of the PE parts because some of them were so thin that they came apart when I cut them from the fret. There is also a small bag of resin parts comprising oxygen bottles, various boxes, and some things that look like duffel bags. The molding on the resin parts is not up to the standards of Aires or CMK, but it is decent. The instructions are very well printed and colors are listed by name and Vallejo paint numbers. The clear parts are pretty good, but they could probably do with a little polishing to take out a few imperfections.
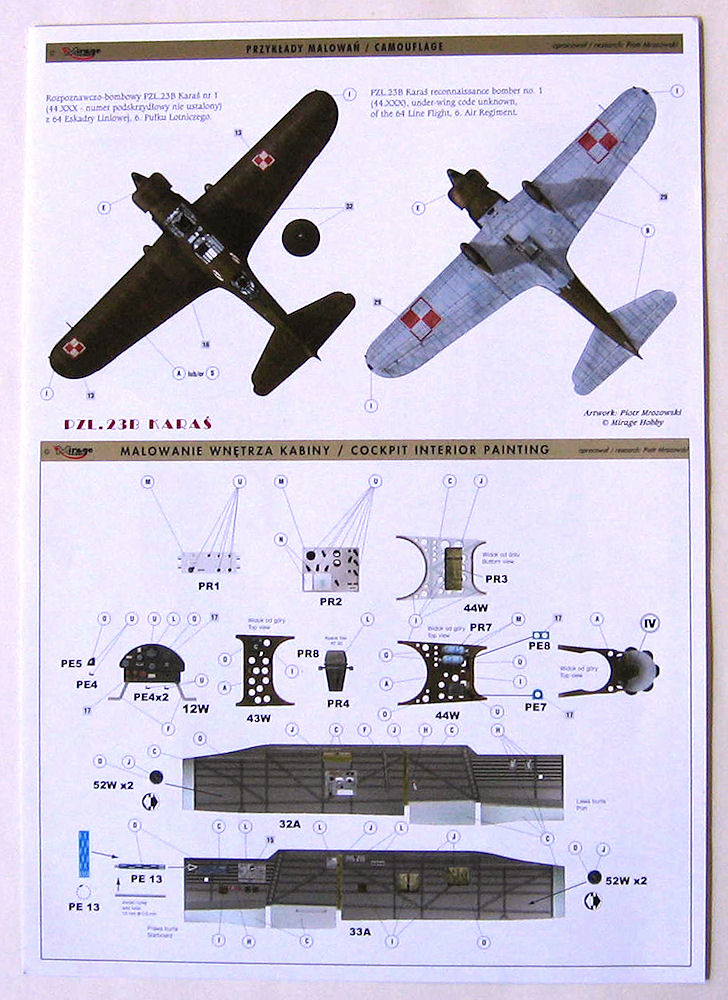
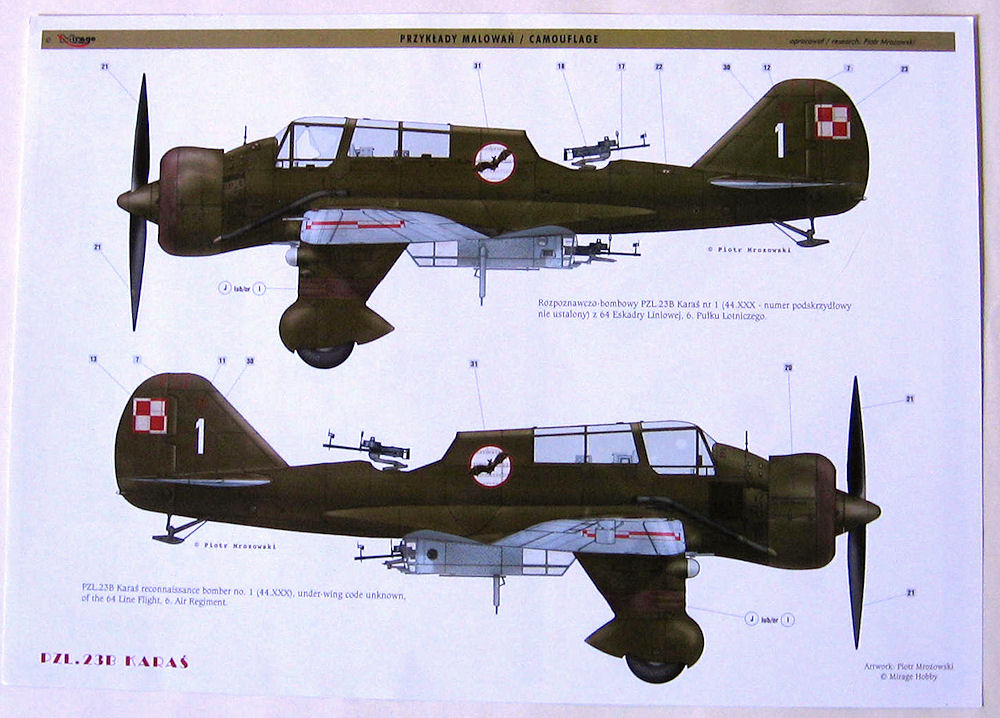
The decal sheet is well printed and appeared to be in register. Markings are provided for only one Polish machine. It would have been nice to have an option for a Romanian machine. For reference, I used the excellent Mushroom publication on the subject. There are several detail photos in the book, but unfortunately none of them are in color. There are also a bunch of profiles, so if the kit-provided markings are not your cup of tea, you can probably find something that interests you in the Mushroom book.
Construction began with the engine, which is nicely detailed. Careful painting will really bring out the details. The cowling is provided in two pieces, so I suppose you could go to town in this area and expose a portion of the engine. At some point during the build, I managed to break the lower cowling into two pieces. I’m not really sure when or how it happened, but the break was clean and I was able to glue it back together with some Tenax. I thought I was very careful when fixing the break, but I must have misaligned it slightly because in the end it didn’t fit quite right. Sadly, the cowling was one of the last things that I attached and I didn’t notice the misalignment until after everything was painted, etc. Oh well, I guess I won’t be entering this one in any contests!
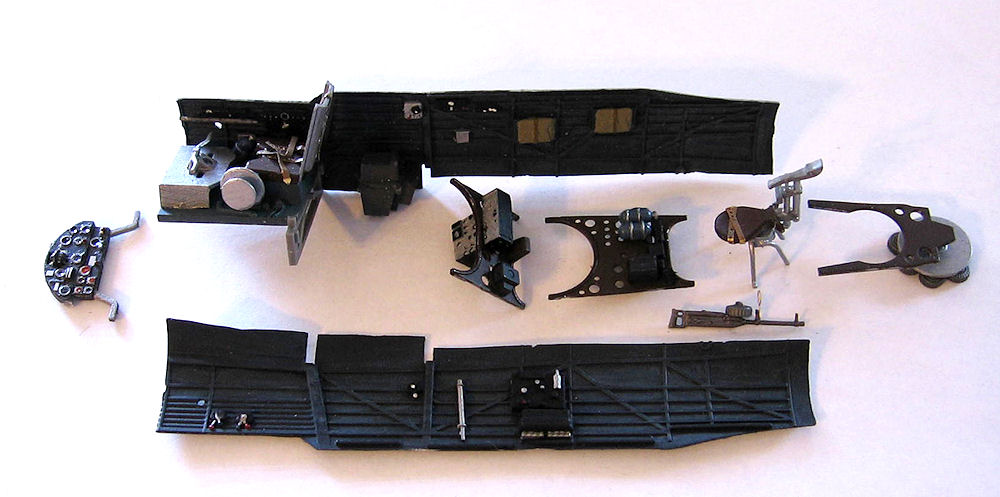
The cockpit was tackled next, and this is where I seemed to get bogged down. There are a lot of parts to paint and assemble, including several photo etch parts. The interior color is labeled as dark blue-grey, so I made a mixture of Lifecolor FS35044 and 35042. At first, I mixed it 50/50, but it seemed a little too dark to me, so I added more of the 35042 until I was happy with it. Initially, I was a little disappointed that the instrument panel dials did not have faces. I painted them as best I could, then discovered that there was a very nice decal included for the instrument panel. The assembly instructions don’t make note of this, but it is called out on the separate painting instructions. I also discovered that there were a few other decals that needed to be applied in the cockpit area. Some of the decals are mis-numbered, so check them carefully.
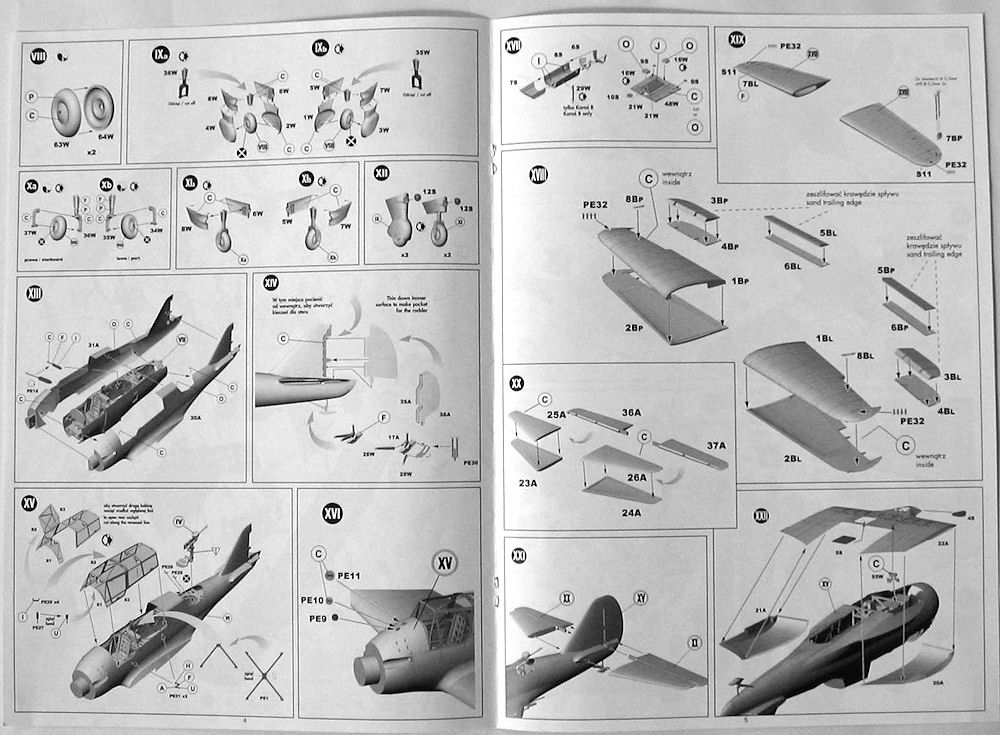
Another thing that was slightly frustrating was the vague placement instructions for a lot of the parts. Being a limited run kit, there are no locating pins. This is generally not a problem for me, but there were a few cases where I felt the instructions could have been more accurate in regard to the placement of certain parts. A case in point is the back of the pilot’s seat. After I got the whole cockpit tub assembled, I discovered that I had attached the back of the seat too high and it covered part of the headrest.
After finally getting all of the cockpit stuff painted and assembled per the instructions, it was time to fit the assembly in to the fuselage halves. This was probably my biggest stumbling block in building the kit, and took me quite a while to sort out. I can’t say for sure whether it was my fault or a fault of the kit, since I also think that the cockpit sidewall parts were slightly warped to begin with. As it was, I forced the thing in between the fuselage halves and with the aid of some creative clamping managed to get it looking passable. Thank goodness I had the foresight to invest in those Berna Assembleurs many years ago. If I had to build the kit again, I think I would glue the cockpit sidewalls to the insides of the fuselage halves first, rather than gluing the sidewalls to the floor per the instructions. As it was, I glued the cockpit assembly to the port side fuselage half, then when I offered up the starboard fuselage half, I had an unsightly gap where the cockpit sidewall did not touch the inside of the fuselage.
After dealing with that, the overall fit of the parts was pretty good. It was just hard to figure out the exact location of some of them. The molds were slightly misaligned, and it really showed up on some of the smaller parts. Since I had to use quite a bit of persuasion on the cockpit assembly, I was a little worried about the fit of the large glasshouse canopy, but as it turned out I was impressed with how well it fit. I had decided early on to invest in the Eduard canopy mask for this kit and I’m glad I did. The masks fit very well and masking all the clear parts went quickly and easily.
All of the flying surfaces come with separate flaps. There were a lot of photographs in the Mushroom book which showed PZL.23s on the ground with the landing flaps slightly down, the rudder deflected, and the elevators down. I had no trouble positioning the landing flaps and rudder in the manner that I wished, but because of the method of attachment for the elevators I would have had to do much more work than I was willing to do in order to position them in the deflected position. All of the wing parts fit together well and only required minimal cleanup. There were a couple of long photo etch braces that had to be shaped and glued to the upper and lower wings, and bending them to match the shape of the wing was a bit of a challenge. With a little patience they finally looked good and were attached with CA glue.
Step 17 was a real mystery to me, and it took me a while to figure it out. The picture on the left instructs you to glue the clear pieces on to the front and back of the lower gondola. The picture on the right gives you painting and assembly instructions for part 48W, which is a flat plastic piece with detail on one side that seems to match the interior detailing. I couldn’t for the life of me figure out where part 48W attached on the fuselage, and I also couldn’t find the part for the lower gondola. Then the light bulb went on and I realized that I had to bend part 48W into the shape of the lower gondola. Did I mention that the instructions were a little lacking in places?
The kit gives you the option to assemble the landing gear with full spats or with part of the landing gear leg exposed. Most of the photos I saw in the Mushroom book showed full spats, so that is the way I went. I assumed that the clear half-dome on the front of each wheel spat was some sort of light, so I glued a chunk of sprue behind it and painted it silver. I’m not sure if that is right, but I thought it looked better than just having a hole behind the clear part.
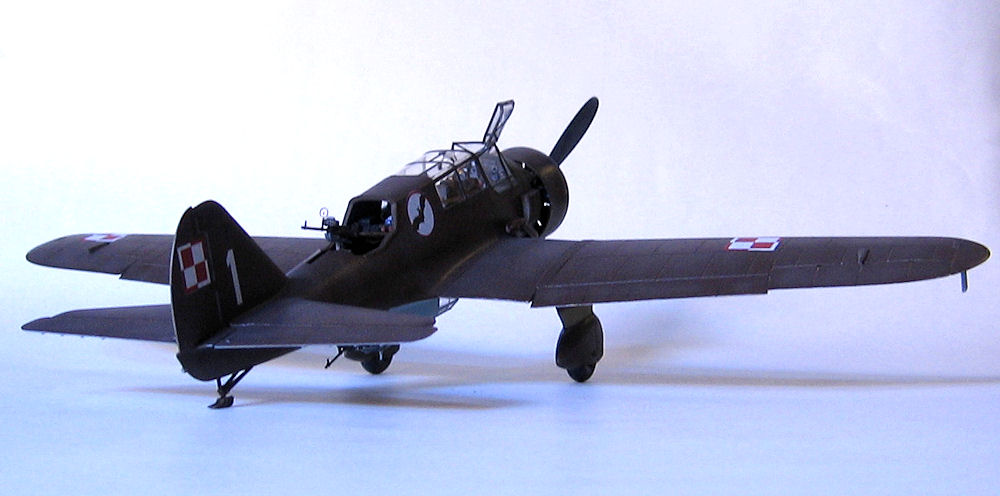
After a coat of Tamiya primer and the usual tidying up of shoddy seam work, it was time for some painting. I was fresh out of PZL light bluish-grey, so I opted for some Gunze RLM 76 because I thought it looked closest to the color chip on the Iliad Design Polish Air Force color chart. For the upper surfaces, I decided to use the mixture of Vallejo colors listed in the instructions. It seemed kind of dark, so I added a little buff to lighten it up slightly. I’m not sure how accurate it is, but I’m happy with the results. I then applied a coat of Future in preparation for the decals.
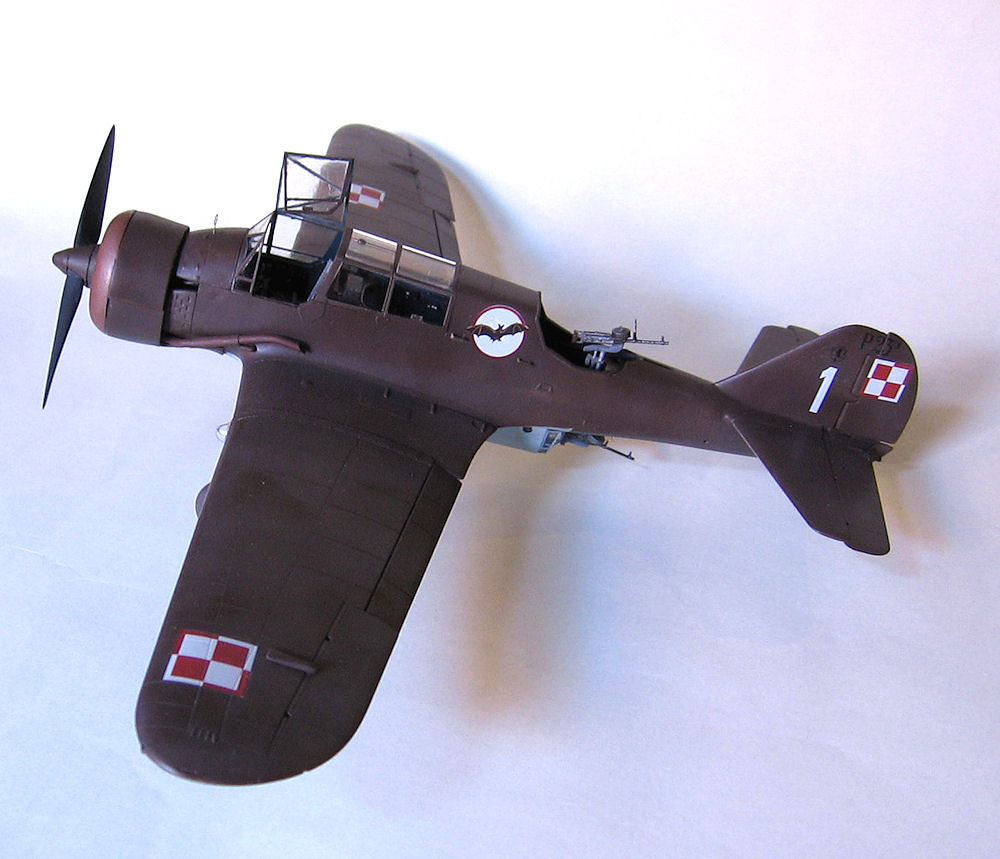
I had initially thought the decals were in register, but after applying them it became apparent that they were not. A small sliver of white showed up on the edge of all the decals that had red areas, which is most of them. There were a couple of extra national insignias that I was able to cut small sections of red from and apply them over the offending white slivers on the national insignias that I had applied to the upper surfaces of the model. At the time the pictures were taken for this review, I had not yet attempted to touch up the areas around the bat emblem.
For the most part, the decals went on well and they snuggled down perfectly with Micro Set and Sol. I moved a couple of them around for too long and they started to come apart. For the most part, I was able to piece together the ones that came apart, but I did have to do some touch up painting on the bat decal on the port side of the fuselage. Luckily, my old tin of Humbrol 34 was almost a perfect match for the white of the decal.
I applied a coat of Testors Acryl flat to the entire model, and then it was time for removing the masks and adding all the final details like the machine guns, tail skid, etc. The machine guns are well detailed and include PE gunsights, which look cool. The pilot’s portion of the canopy can be posed open or closed, so I chose to pose it open to show some of the nice cockpit detail.
I would definitely recommend this kit for experienced modelers. I’m sure that a more skilled modeler than myself could make a contest winner straight out of the box. The detail and fit of parts is very good, but I felt that the instructions could have been a little more helpful in a few areas and it would have been nice to have one or two more marking options. Highly recommended for fans of early WWII aviation. I noticed on their website that they have now released a PZL.43, which is an improved variant of the PZL.23. Maybe when my skills improve a bit more I will try tackling one of those.
I would like to thank Mirage Hobby for the chance to build this fine kit, and IPMS/USA for the opportunity to review it.


Comments
Add new comment
This site is protected by reCAPTCHA and the Google Privacy Policy and Terms of Service apply.
Similar Reviews