
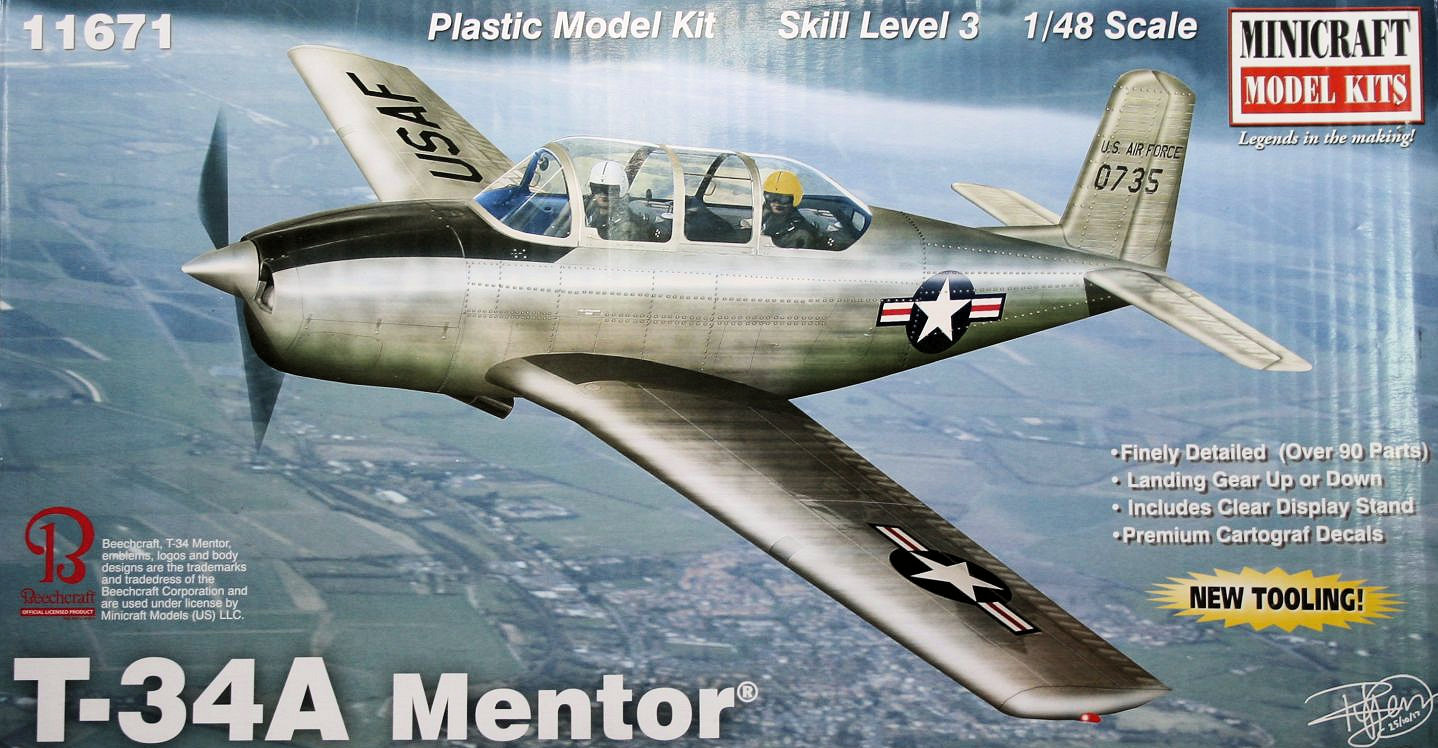
Beechcraft T-34A Mentor
Aircraft and History
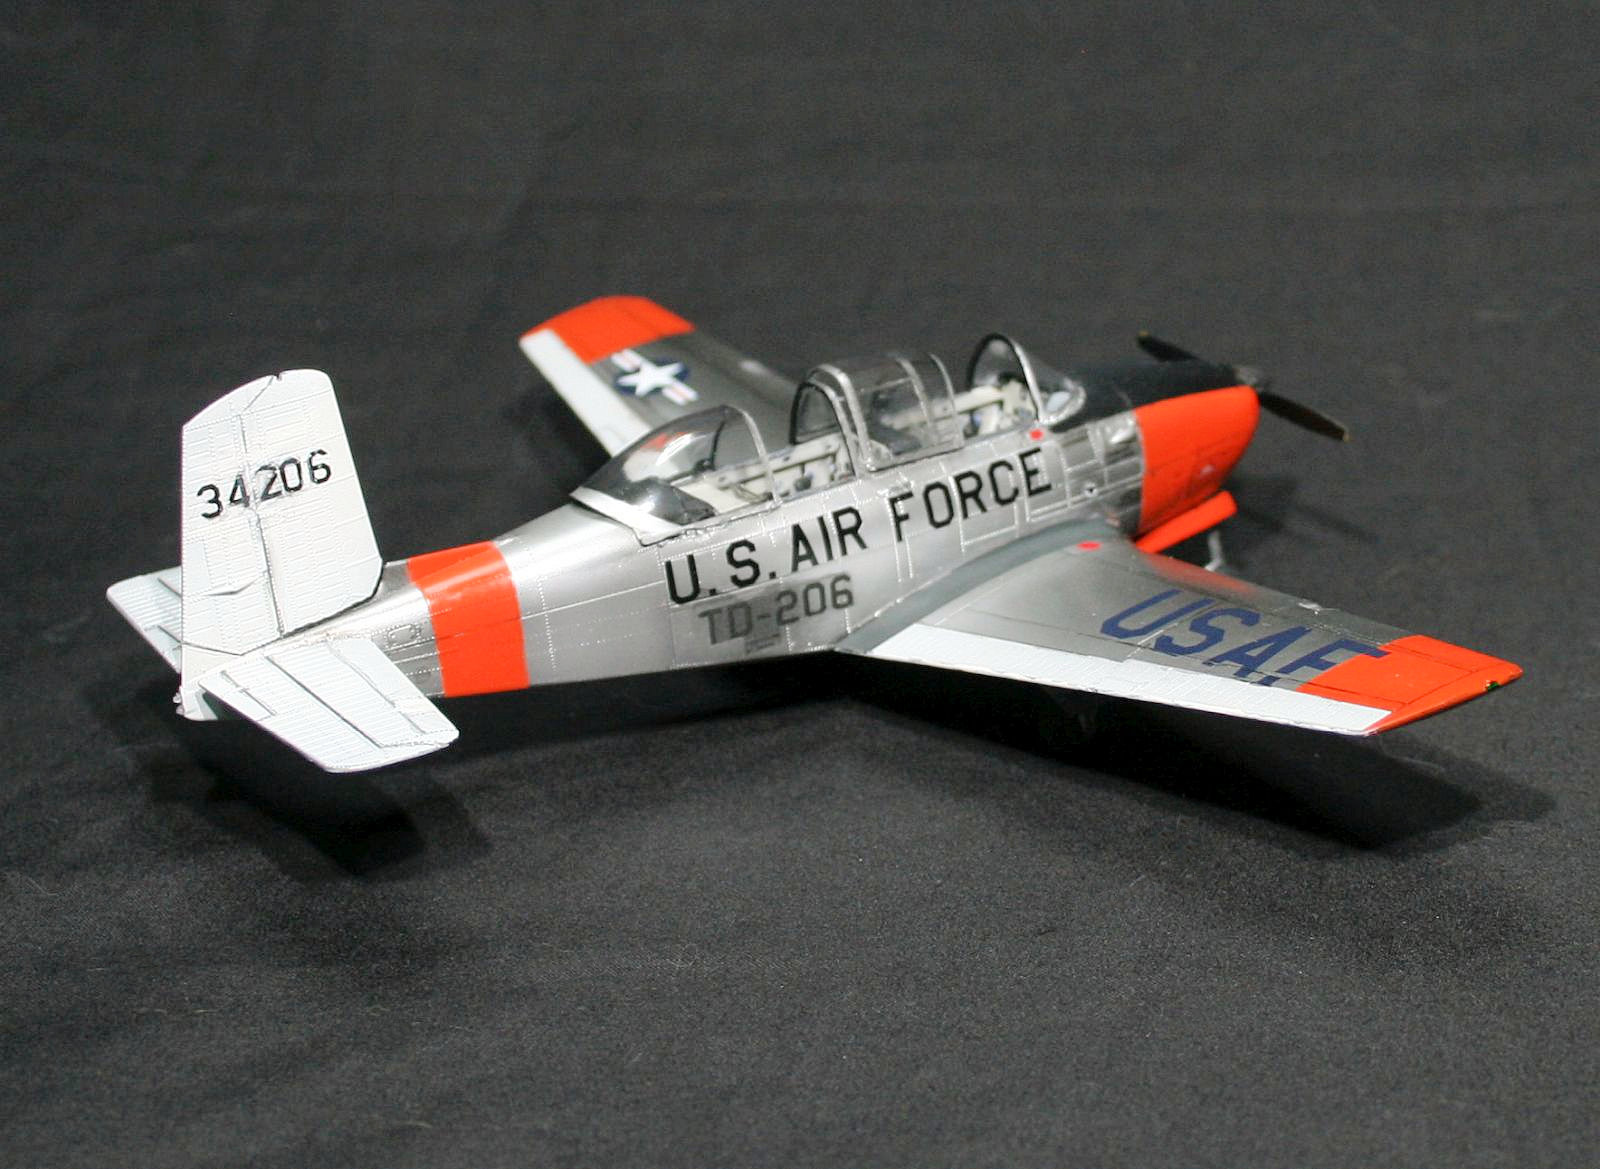
The Beechcraft T-34A Mentor is a single engine, two place (tandem cockpit) military trainer developed in 1948. The design is based on the highly successful Model 35 Beechcraft V-tail Bonanza but uses a conventional tail and narrower fuselage seating two in a tandem arrangement. The T-34A first entered service with the US Air Force in 1953 and replaced the North American AT-6 Texan as the initial primary trainer. Two years later the Navy ordered the T-34B for the same role at the Air Force. The T-34A remained in service with the USAF for just a few years until it was replaced by the T-37 “tweet”. T-34’s that were not sent to flying clubs or foreign military sales were transferred to the USAF auxiliary Civil Air Patrol until they were retired in 2003.
Kit
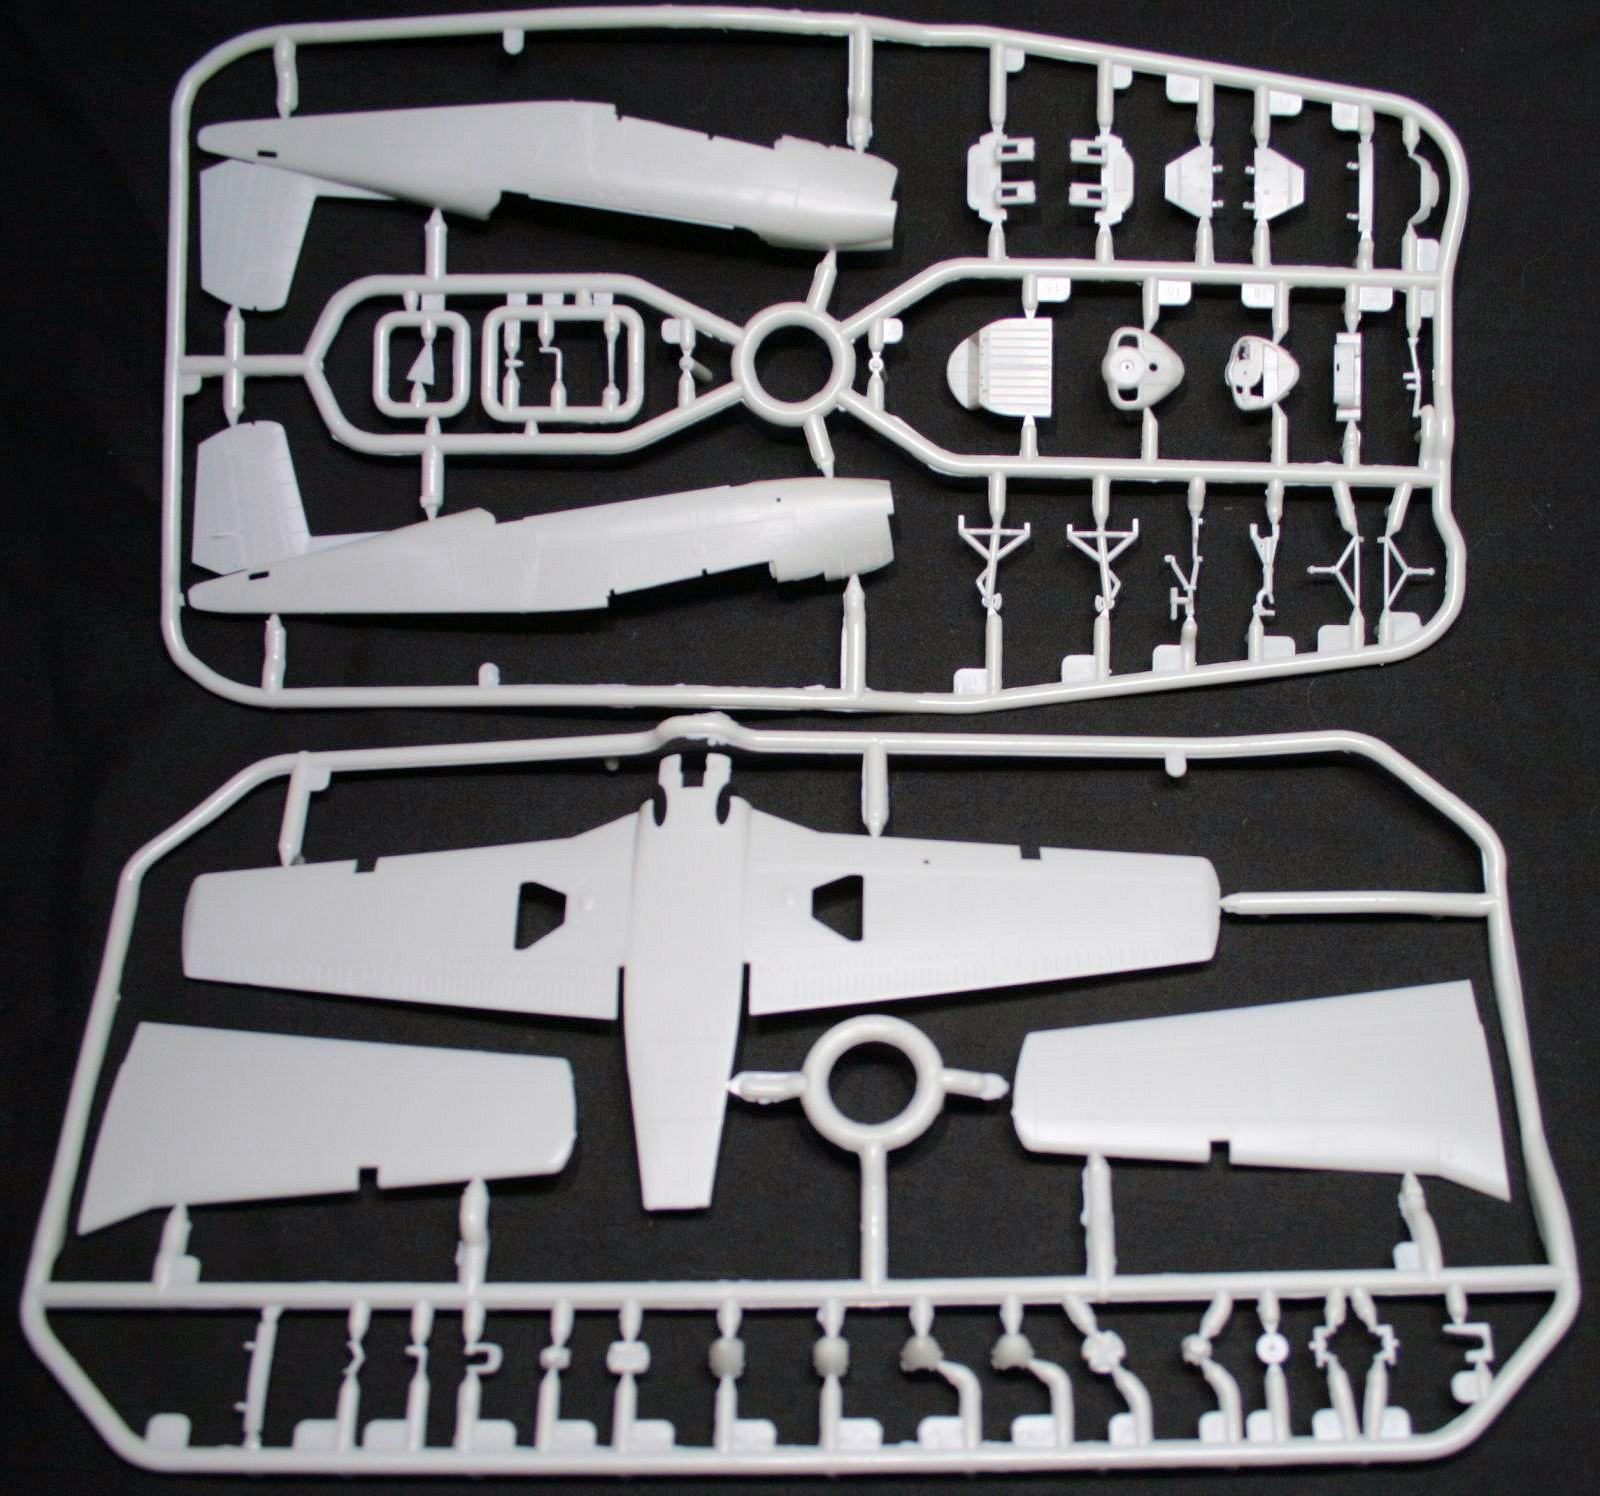
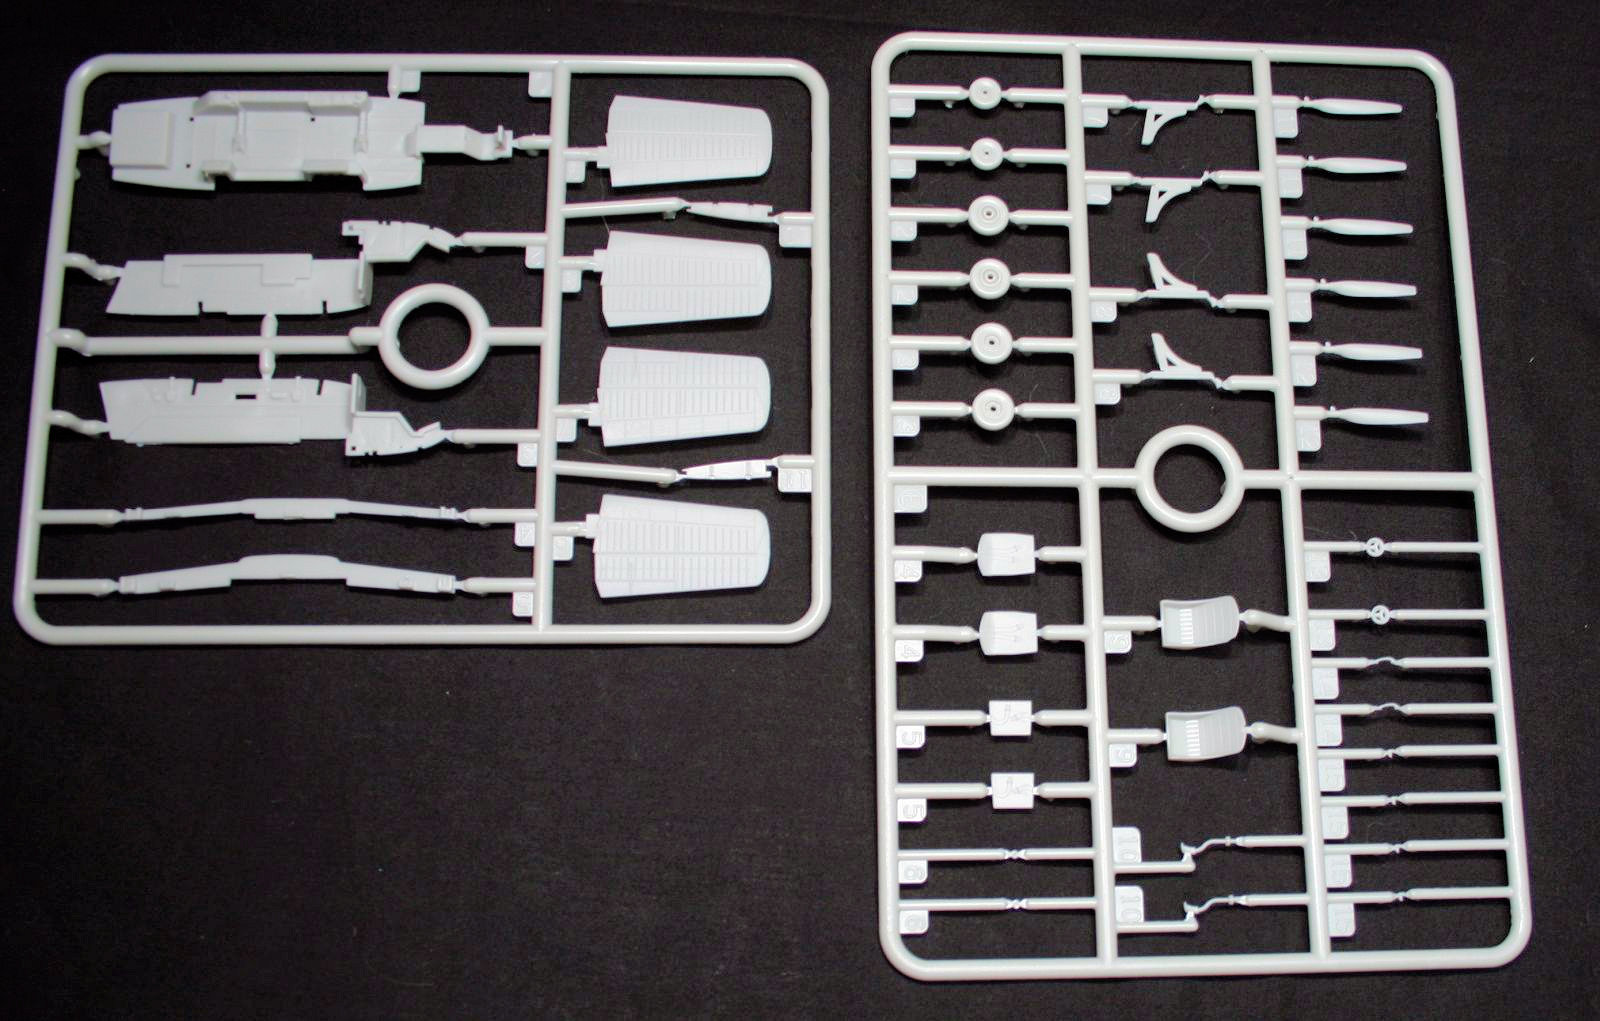
The kit contains 6 different sprues and a nice but small decal sheet. The parts are virtually flash free and there are some very thin areas with impressive details. An optional clear stand is provided if you build the plane in flight. One area I wish there was more detail is with the gear struts and where the “oleo” portion (chrome plated section). It would be nice if there was more of a distinction between where the strut is and the gear housing, the two areas appear as one surface. That is really a minor detail and in that scale, paint will give a respectable look to that part. One area I have mixed opinions on is the raised rivet detail, which is a little exaggerated but not too bad. Oddly enough there are a few bare areas on the aft fuselage that the rivet detail skips then starts again.
Build
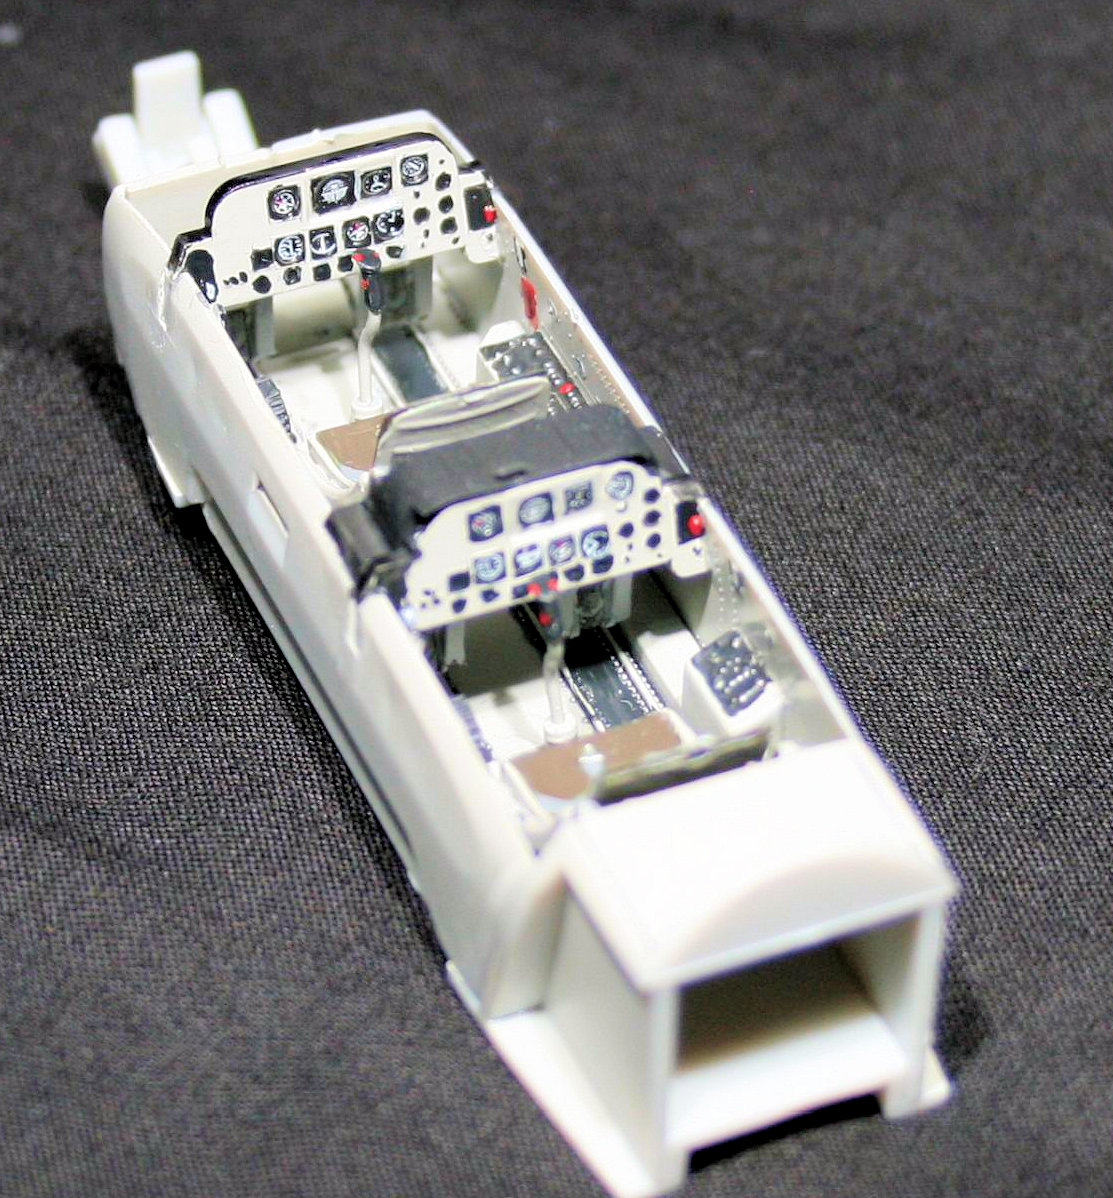
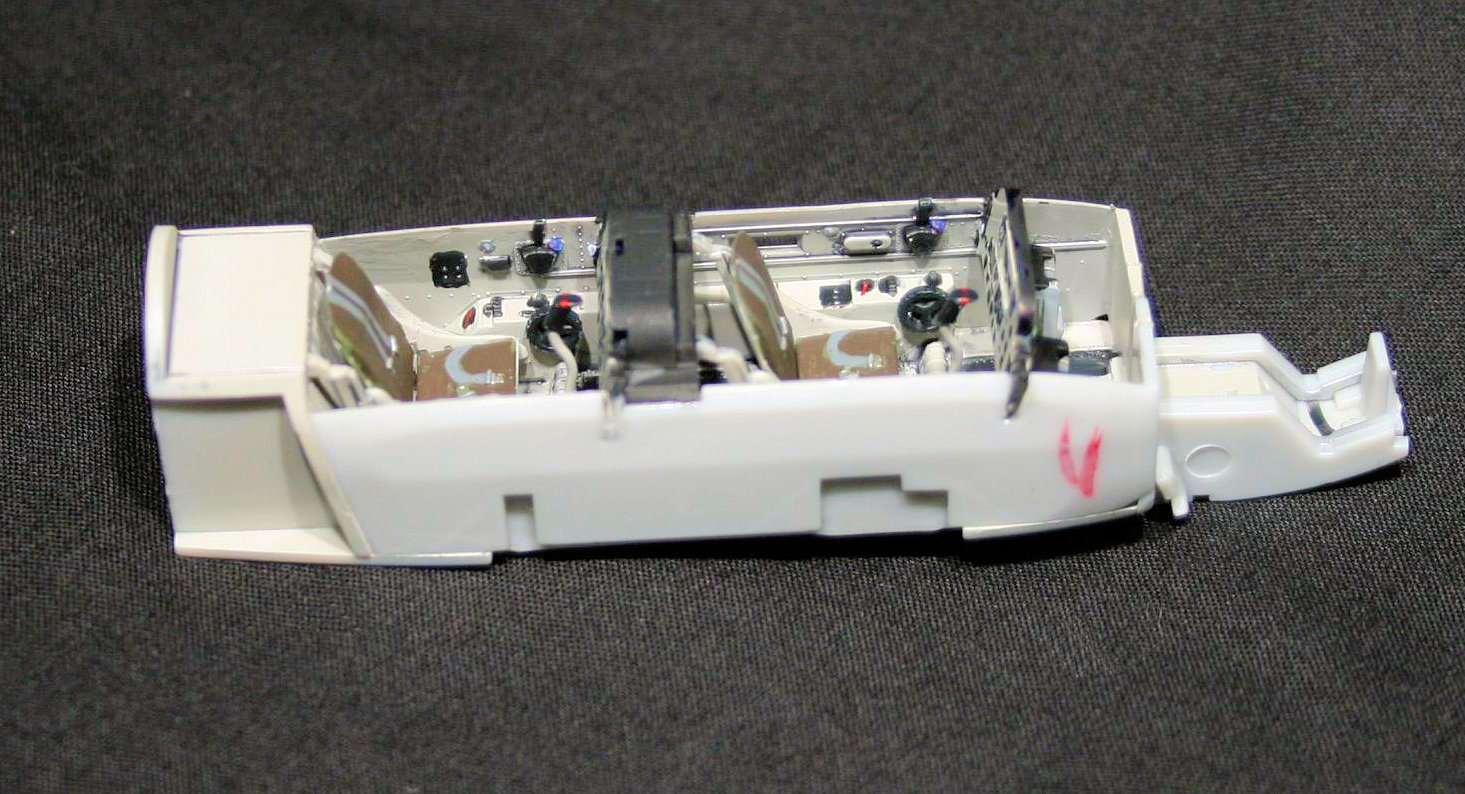
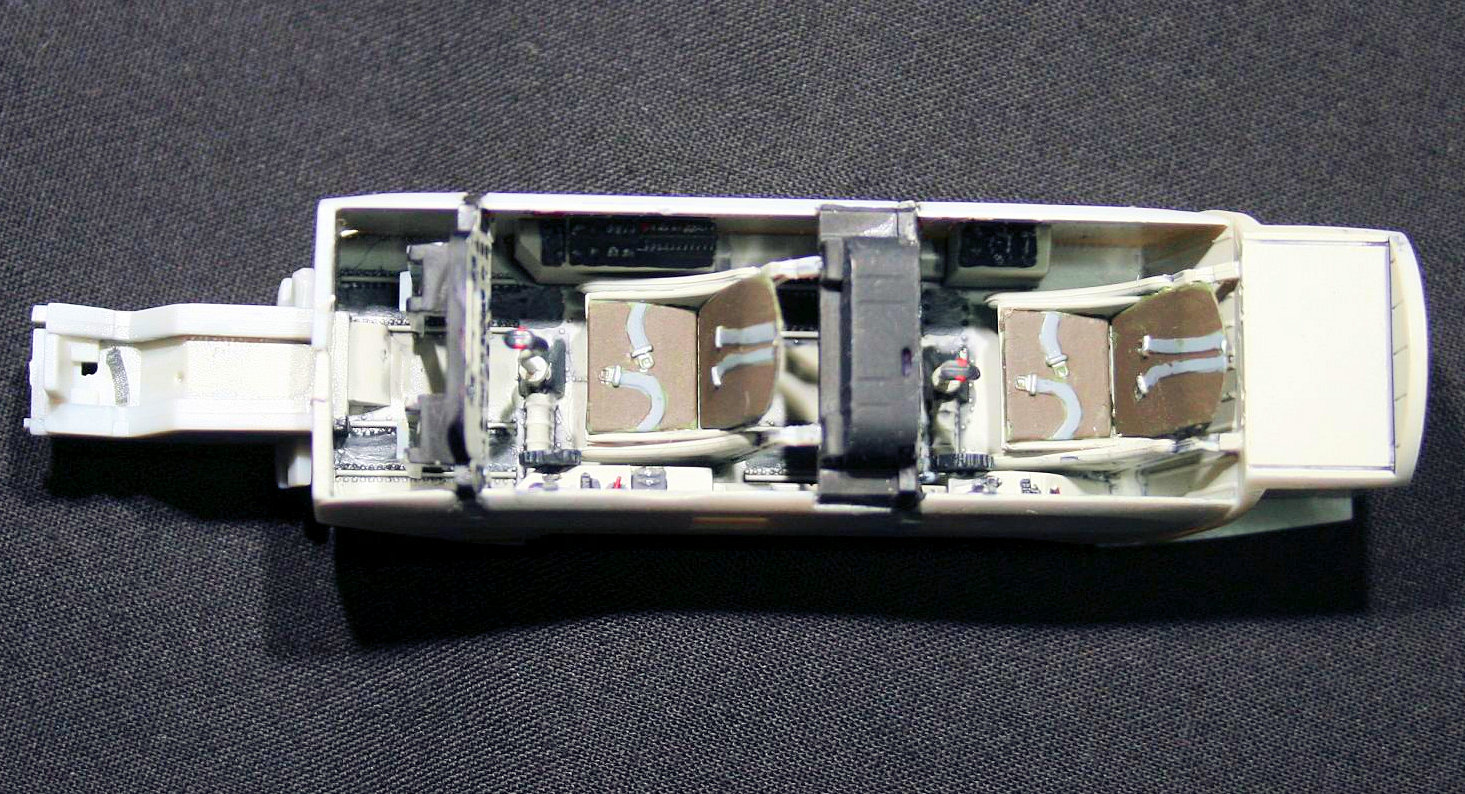
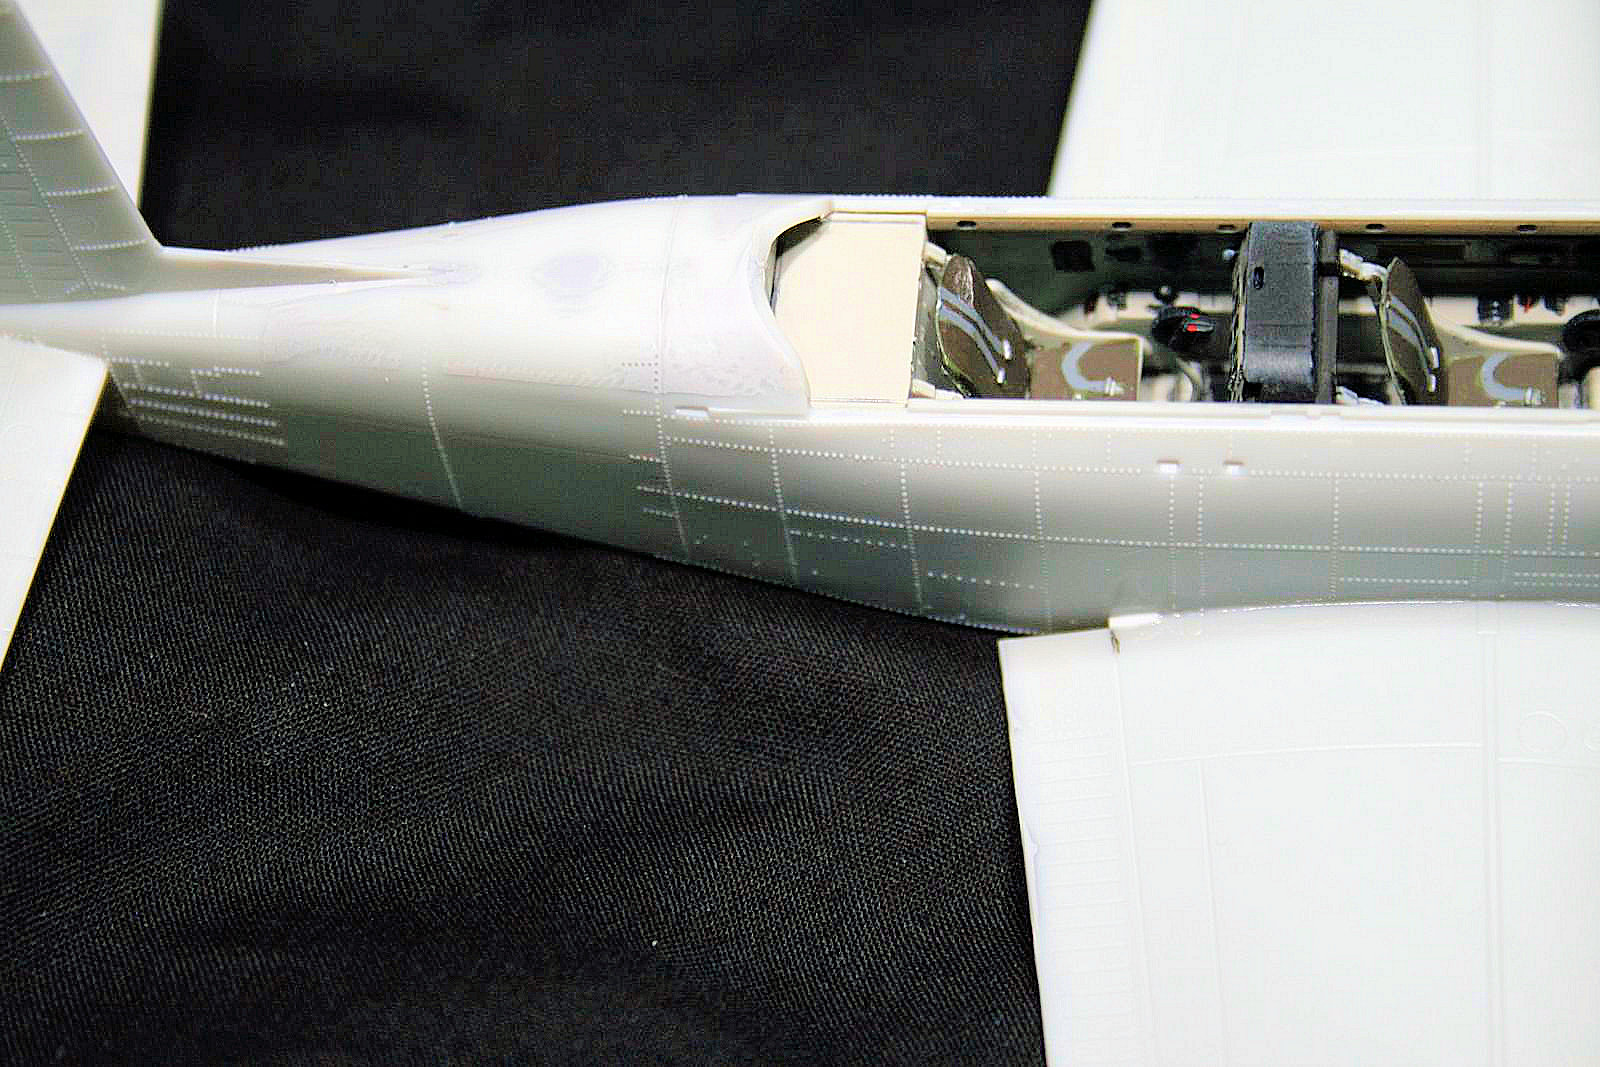
First step in building this kit is with the cockpit which has some nice details and is simple to assemble. I do not have photos of the interior colors on USAF aircraft back in the 50’s but the instructions state to paint the interior green. Basically all the photos I have seen show a light gray interior which is what I decided to paint using gull gray FS16440. The interior panels have raised areas for the instruments and switches with crisp details for trim wheels and seats. I did add aftermarket instrument dials on some of the larger instruments since there are not any dial details or decals that can be added for additional detail. Hopefully Minicraft will offer instrument dial decals on future releases. Seat belts are molded into the separate cushions and are a decent representation. One note has to do with the forward glareshield (also known as coaming or dash) which the instructions indicate to install on top of the front instrument panel. There are two notched in the glareshield which line up perfectly with the windscreen so keep that in mind when you install the glareshield. Once the cockpit was completed, I sealed it into the fuselage and the fit was perfect. The rudder is extremely thin and detailed so be careful when adding glue to that area so you do not damage the thin areas.
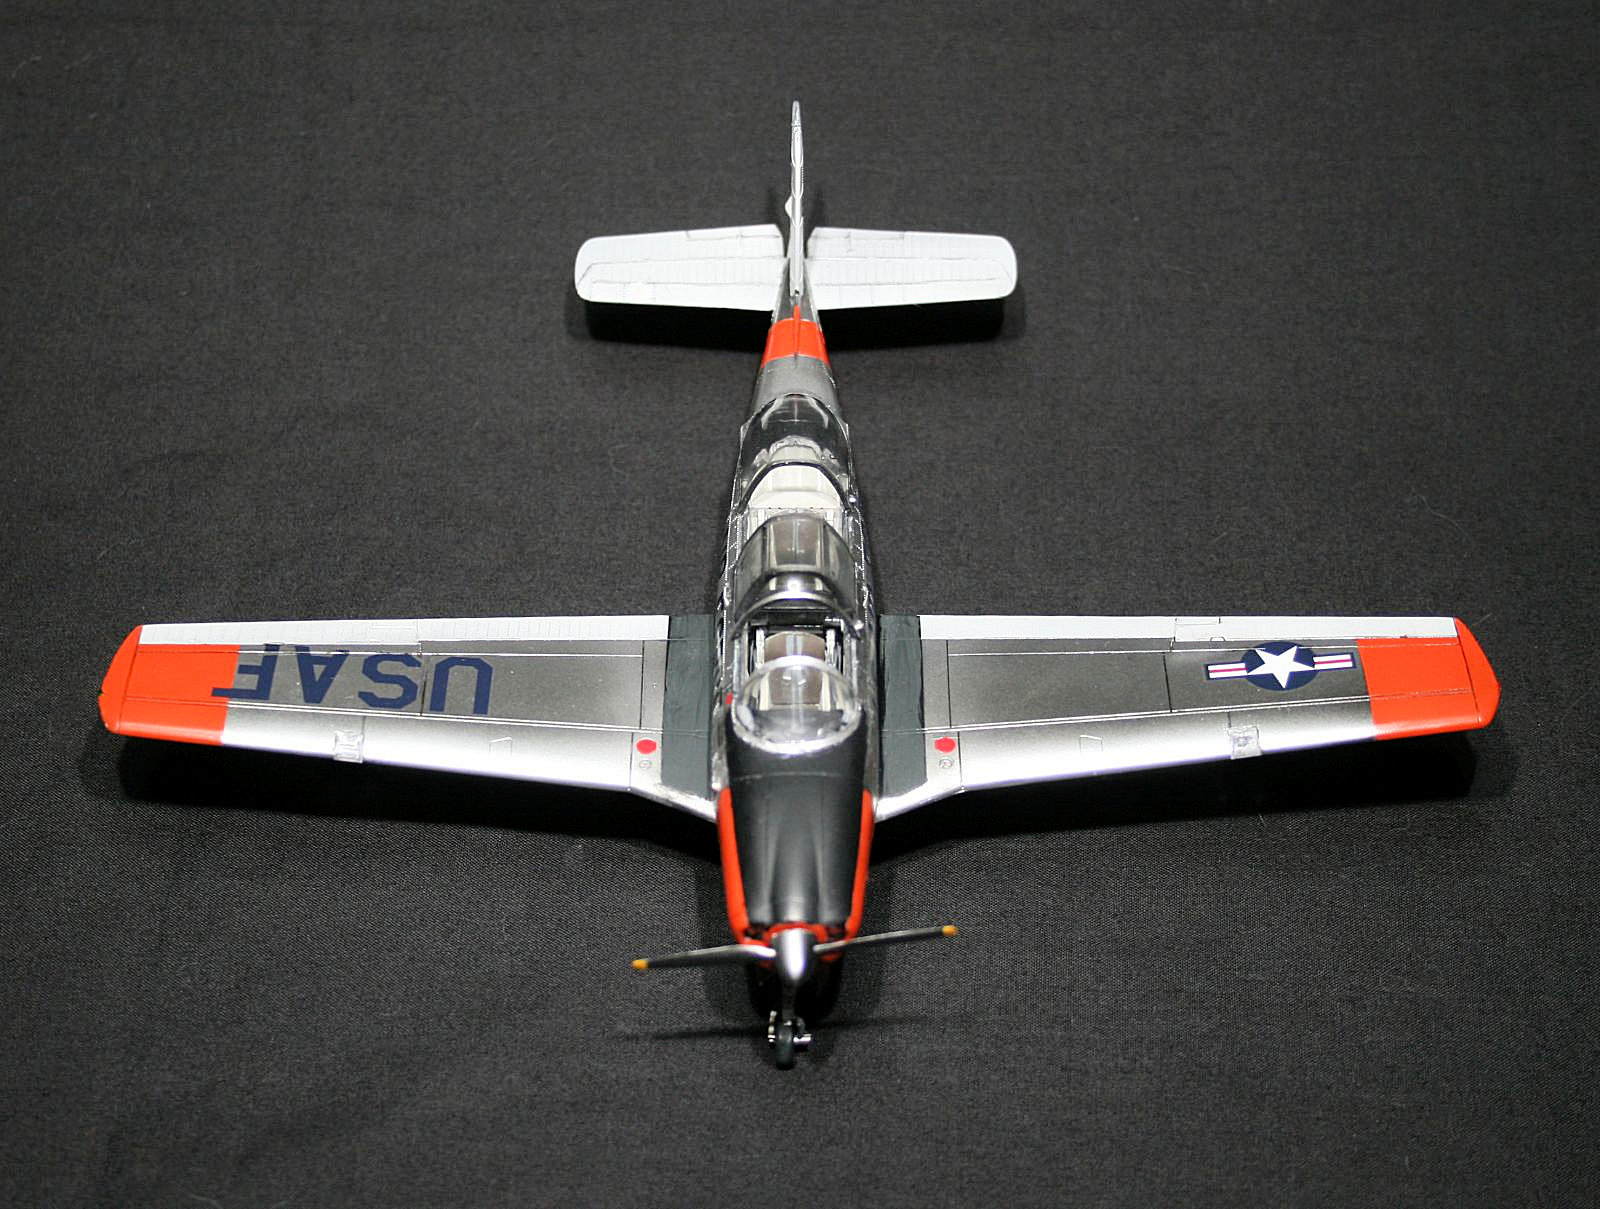
Now the next step is something I accidentally overlooked which is the addition of nose weight. This needs to be installed before you install the front cowling and engine face. I did not catch this until after the model was painted but luckily before I added decals. The rest of the build went together with little issues and minimal gaps. One are that had a gap was between the flaps and the fuselage on top of the wing. The flap appears the have a gap run full length on top and bottom or the wing but the gap only goes full length on the lower side. A small strip of scrap plastic will fill that and is a simple correction. Just below the rudder, a small tail fillet, which exists on the T-34A models is installed which I installed before the fuselage halves were assembled. If you are building a T-34B version, this fillet is not used. A real nice touch is a wing spar which aids in keeping the correct dihedral. Just like the ridder, take care when gluing the elevators and note left and right since they are difficult to tell apart once glued together.
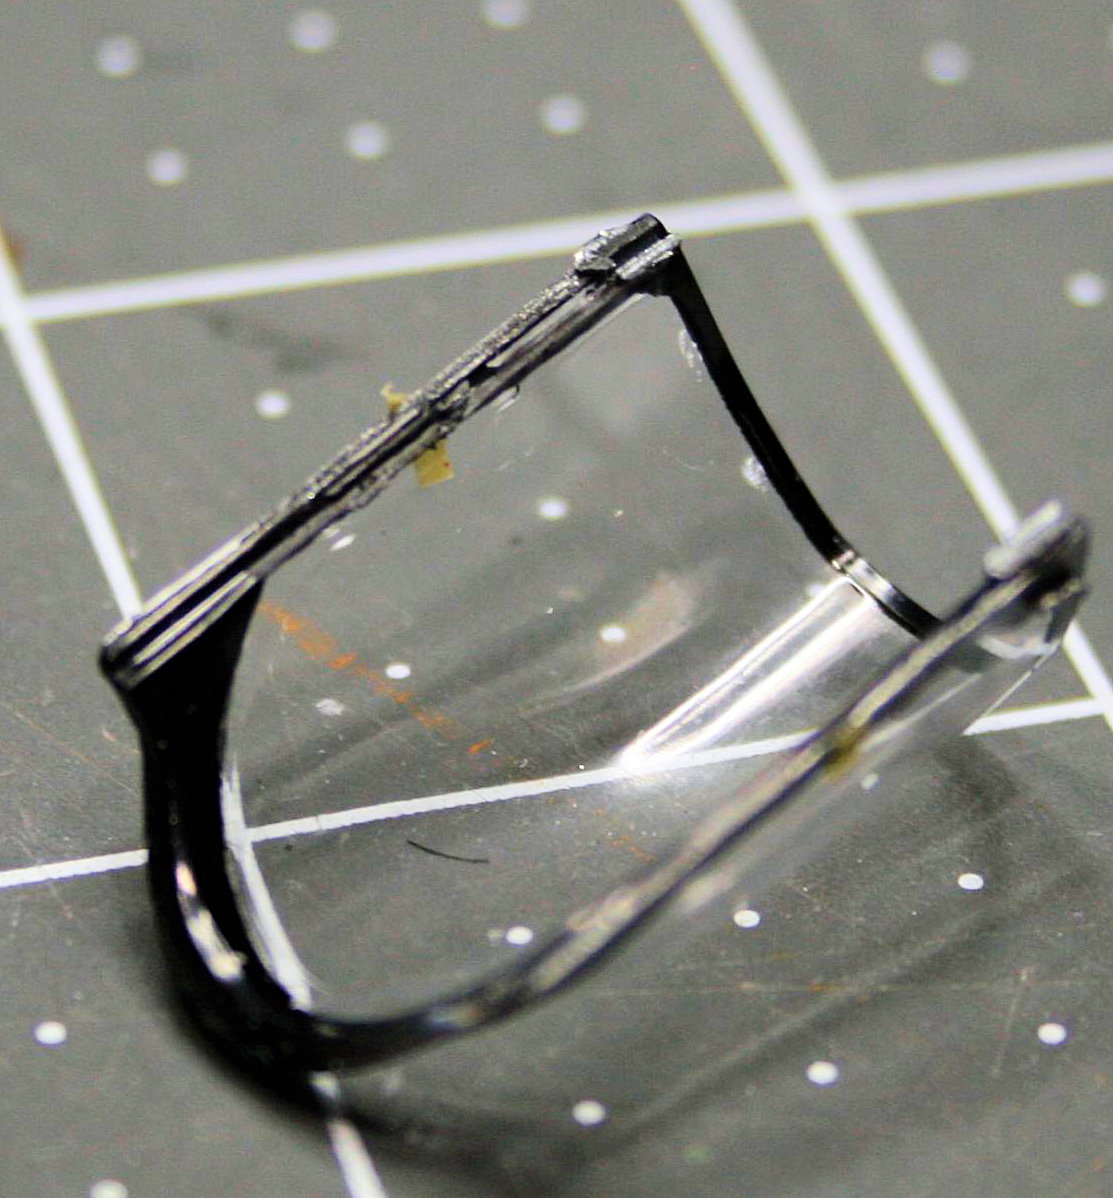
Adding the canopy or “glazing”, temporarily locate the center canopy (part D2) first to assist in locating the remaining canopy parts. If you decide to open the canopy, you will need to thin the aft fuselage and inside the aft canopy. If this not done, the canopy will sit too tall and outside the canopy guide track. The forward canopy needs the same treatment however I did not get it to sit exactly where it should. If a vacuuform canopy becomes available, that would solve this issue for the movable canopy portions.
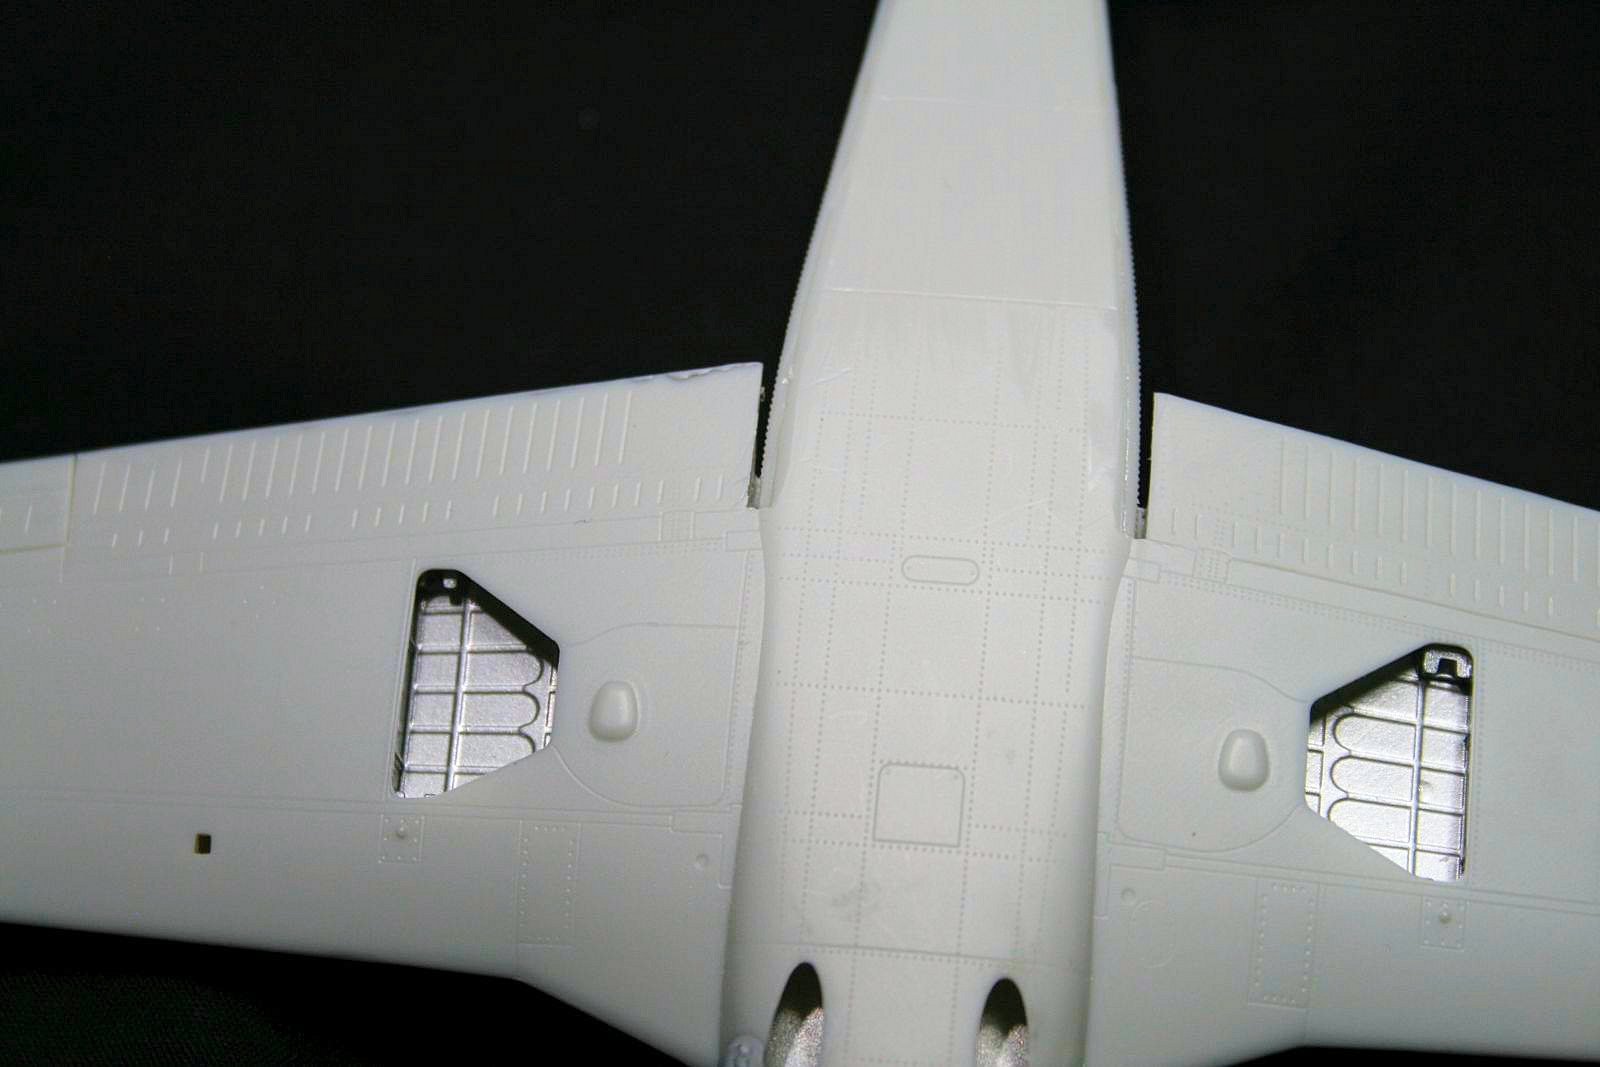
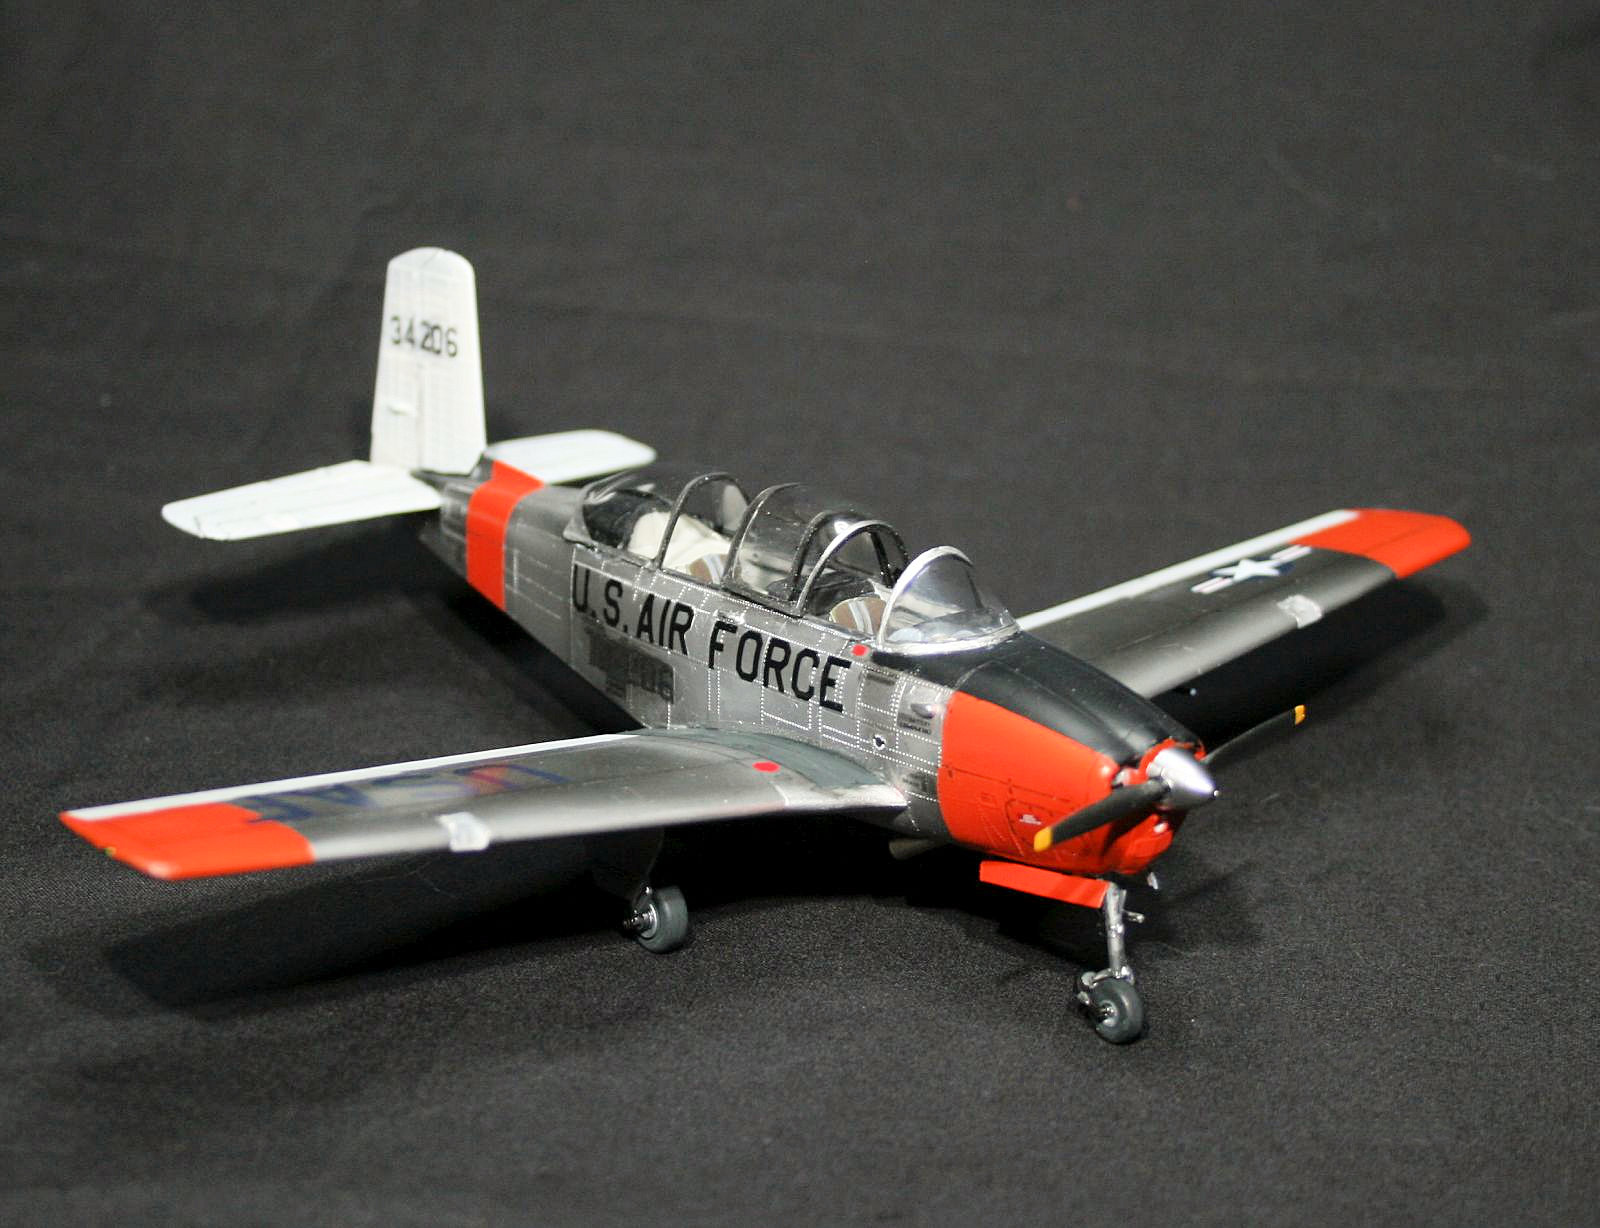
Landing gear and wheels are nice but as noted earlier, the oleo struts need a little more definition. The landing gear wheel bays have plenty of detail and linkages which the modeler will enjoy the possibilities of super detailing. The nose gear has a small wheel guard but it was difficult to find reference photos of this feature. I did have to thin portions of that since they were a little thick in scale. I do not think the modeler would be wrong in removing that feature. Final parts to install is the propeller which you have a few options. Two different spinner shapes and a choice of three bladed prop or two bladed prop. Either option will allow you to make the blades variable pitch which is nice. The instructions offers a nice description on the different propellers and spinners. Little comments as stated on the propellers are fairly common throughout the instructions which is really helpful.
Painting and Decals
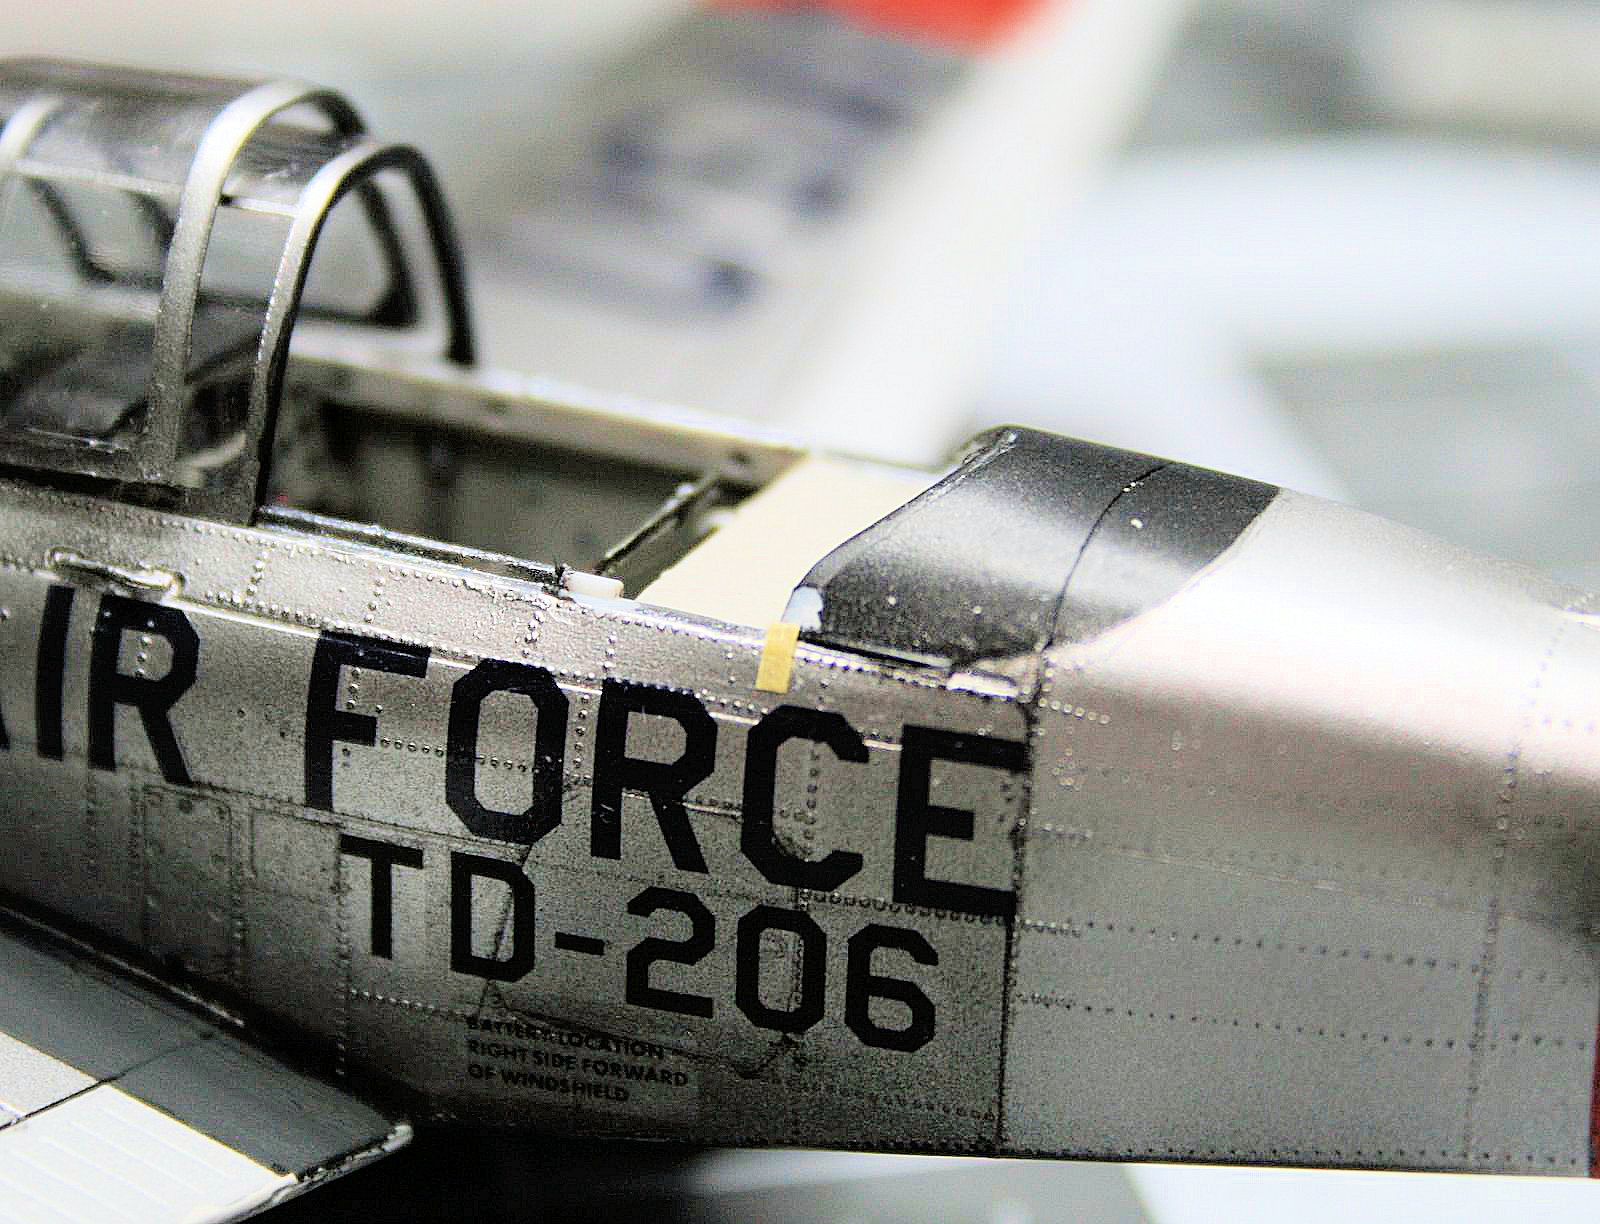
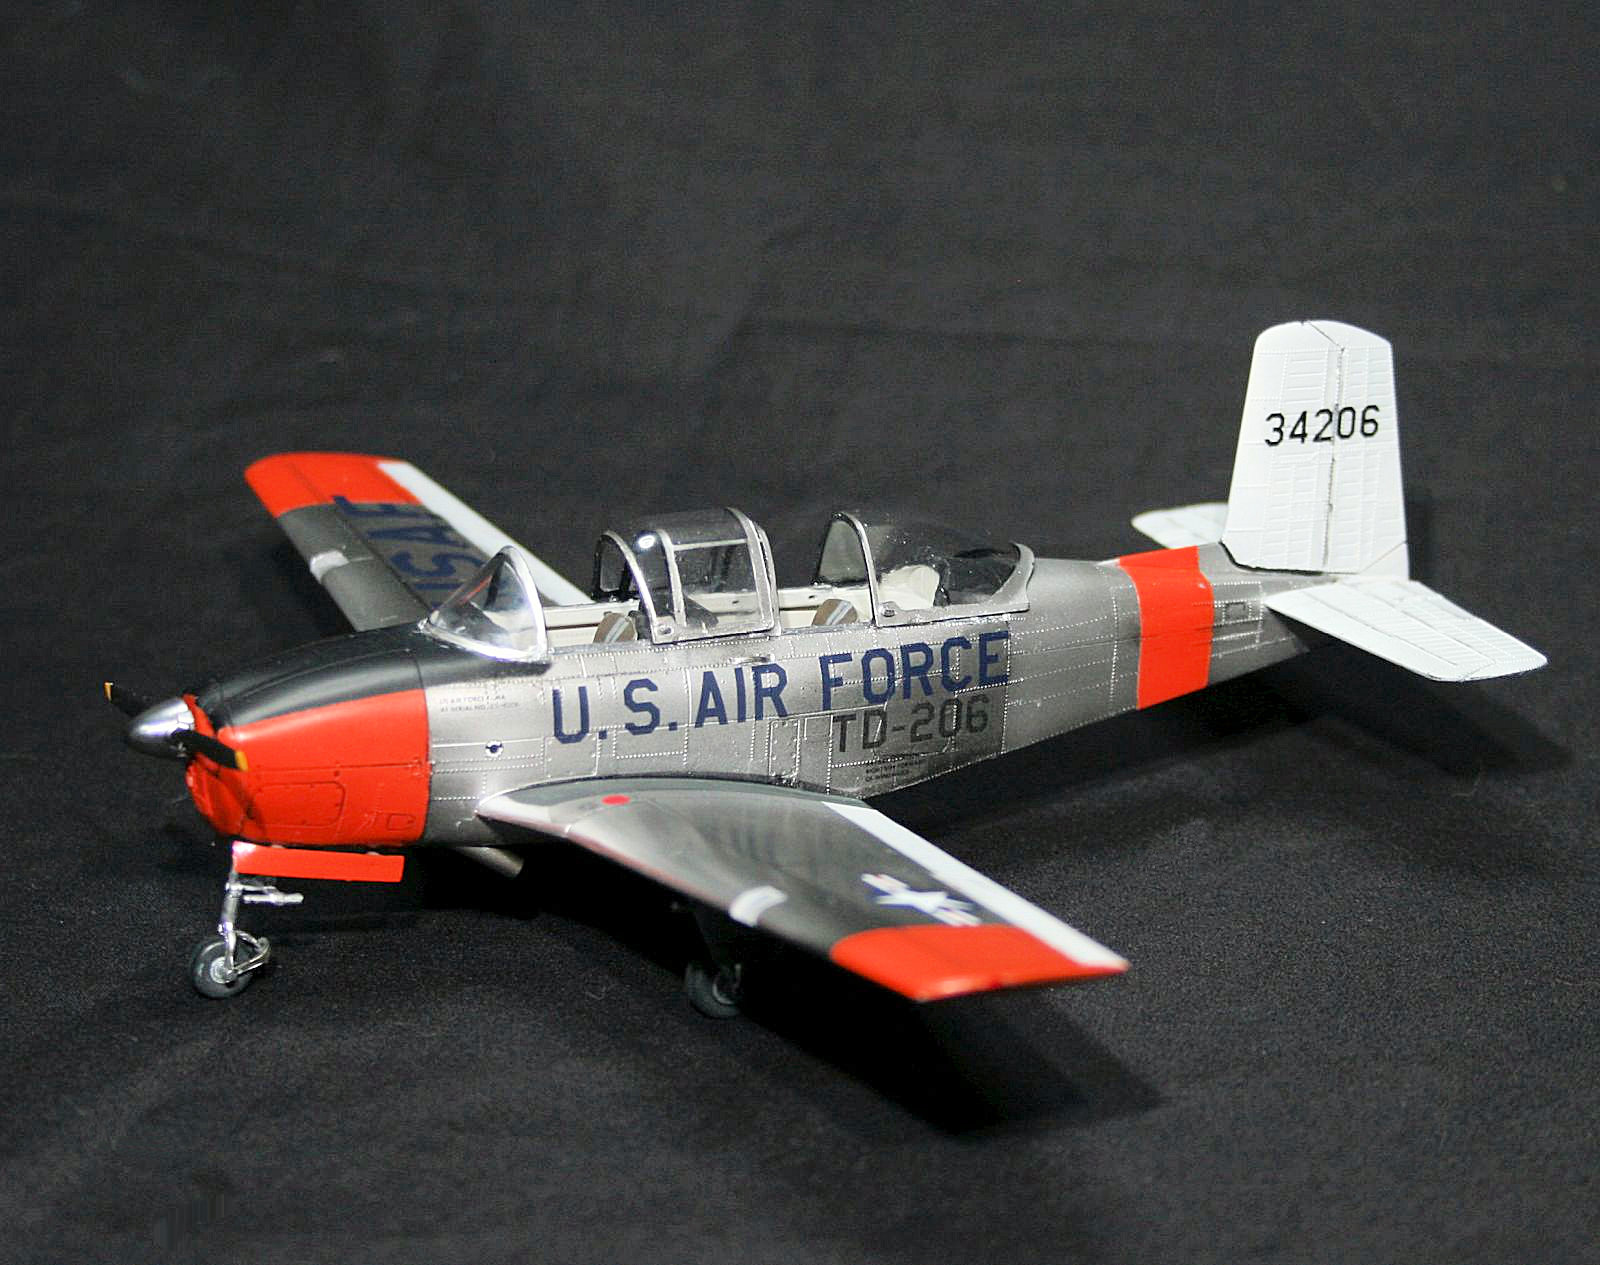
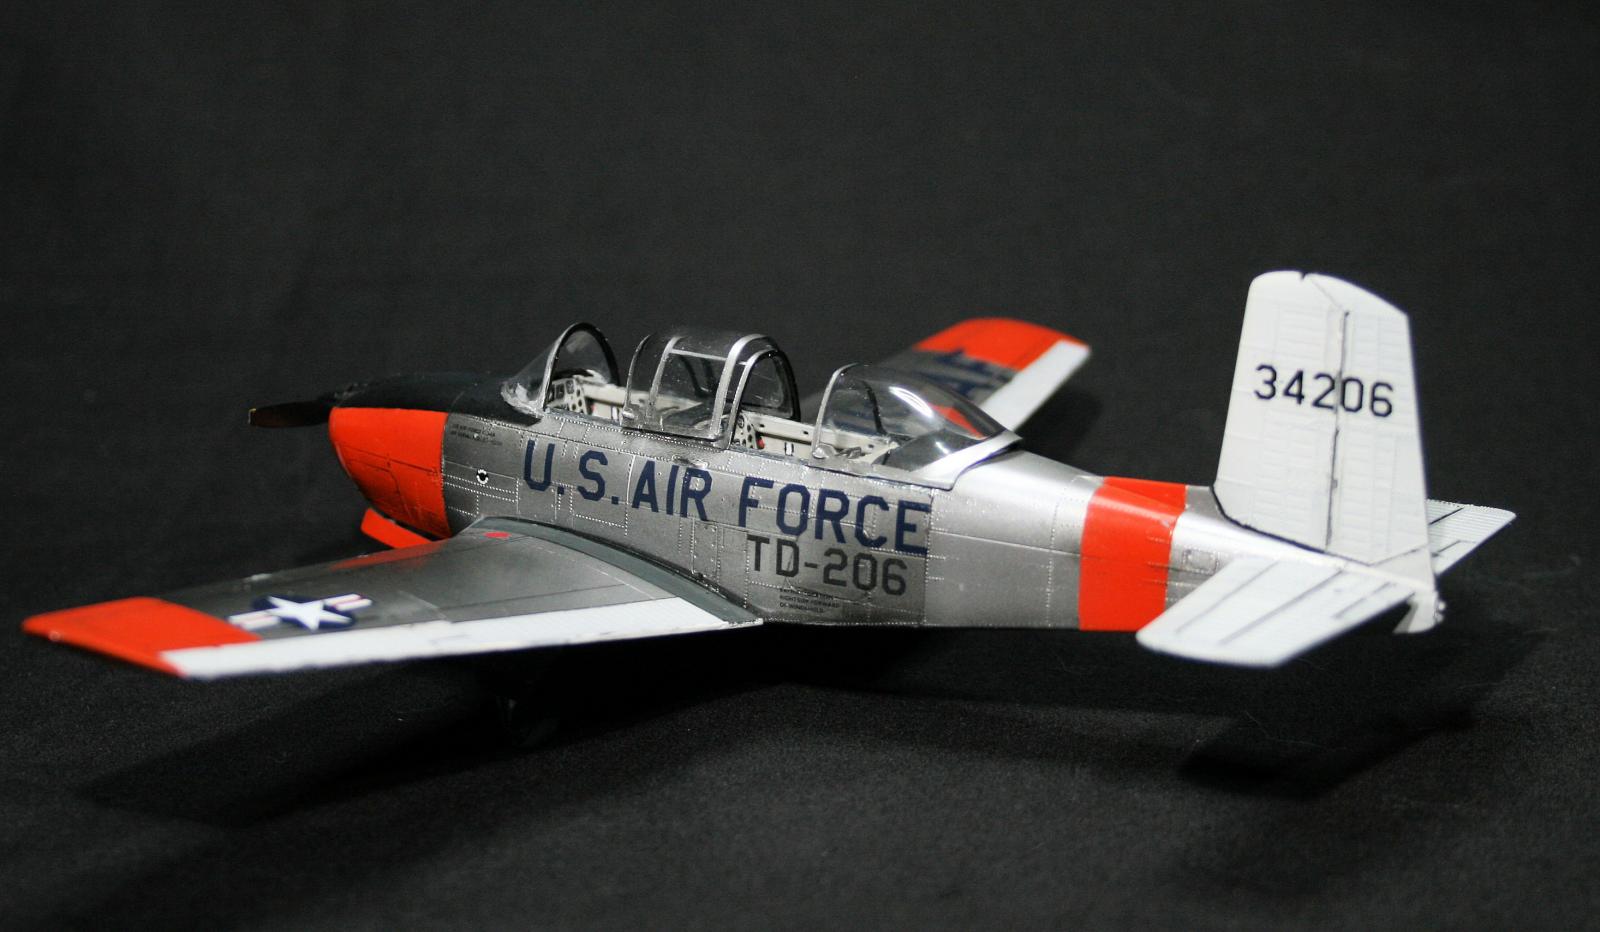
The USAF aircraft were typically natural metal finish and the box art is fairly boring so I decided to add a little color. Caracal Decals released a nice decal sheet (CD48082) for the T-34A and T-34B versions offering some colorful USAF and US Navy options. I decided to brush up on my NMF skills with a little color so NMF and orange was my choice. The model and decal directions both indicate the rudder and control surfaces have the same NMF as the rest of the plane but using the T-34A at the US Air Force museum in Dayton and other reference photos, they appear to have a light gray rudder, elevator and other flight control surfaces. The closest color I could determine was 36622 camouflage gray. This may not be correct but it looks closer to the reference photos I found on the T-34A.
After all the seams and gaps were filled (care taken to avoid damaging the raised rivet detail). A few panel lines needed to be added. On the engine cowling. The panel line (hinge location) was missing so I added that panel line. One area I was confused about is with some areas that had raised rivet detail but on the aft fuselage, where there are rivets, the fuselage area is smooth plastic. I used a riveting wheel to add a few recessed rivets in a few areas to address this issue. Once all the prep was done, a coat of gloss black was used to paint the entire model in preparation for NMF ( Alclad II). Areas that remain black were masked and Alclad II was applied. The first color I used was “airframe aluminum” which was a little dark. The mistake I made after that was not using a lighter aluminum and continuing to add the orange. That is when the “lack of nose weight” appeared and it went downhill from here. I removed the front engine cowling and added loose weights then sealed it up again repainting the orange and black portions on the nose. Thinking I was safe, I added the decals which were very nice and did a great job of conforming to most of the features however the raised rivets did create some issues. The corrugations on the rudder along with raised rivet detail created some issues with the decals from settling down. In hind sight, I should have trimmed each number and applied it one by one but I continued.
After the aircraft was painted and decals applied, I forgot to add panel line wash and just as I expected, the panel line wash wicked up under some of the decals and that needed to be cleaned up. That is when I decided the NMF was too dark and decided to shoot a lighter silver over the NMF. To male a long story short, touch up of NMF, orange, black, gray and replacing a handful of decals, having weights loosen and fall out my little mistakes grew exponentially.
Conclusion
This build was very pleasant without too many issues which had nothing to do with the kits design or decal manufacturer but poor planning on my part which caused all the problems. As for future versions, I am sure a Navy “B” model can be made using this kit but what I am waiting on is the T-34C which used a PT-6A Turboprop engine. Hopefully someone will offer a resin cockpit, updated landing gear and instrument dial details but the kit is still the best T-34A kit out there. A novice should not have any problems making a show stopper build!
Many thanks to Minicraft Models for providing this kit to IPMS for review.


Reviewer Bio
David Horn

I have been building models since at least 8 years old and with a brief break after high school, model building started again late in college. My preferred subjects are aircraft of all eras and scales but a majority of my builds are 1/48 scale. I am the son of a USAF navigator who flew tactical airlift in Vietnam then his last 8 years he served at Altus AFB where he retired. My love of aircraft comes naturally and try to build subjects that I have a personal connection to. My day job parallels the hobby where I design full flight simulators ranging from small corporate jets, military fighter jets to the C-17. I hold a commercial pilot certificate and fly as a volunteer with the Civil Air Patrol. I really enjoy flying cadets, passing on the love of flight and inspiring future aviators.
Comments
Minicraft T-34 Beech
Excellent build! My only quibble, which you alluded to , was the paint color of the rudder, vertical stab , horizontal stab, elevators, flaps, and ailerons. These were all originally magnesium in military service and thus painted that color, otherwise the rest of the plane was bare aluminum. Nowadays all those magnesium parts have been reskinned in aluminum except the vertical stab and rudder are still magnesium for weight and balance reasons. The rest of the USAF scheme is correct for the last years of US Air Force service with the day glow orange/ red bands. I’ve never seen a private owner use that scheme yet!
I own a Beech T-34A, but painted it Navy trainer yellow for visibility but with USAF markings.
I too bought the Minicraft T-34 model and will use your pointers, especially the nose weight, hopefully to as good effect as yours,
Thanks.
Minicraft T-34 Mentor build
Thank you for this interesting review, David. I wish I'd seen it earlier! I am about 80% finished with my own Minicraft T-34 Mentor. I haven't done any "serious" model building since I was about 16, and was 60 years ago! My T-34 project is intended to get me up to speed with current materials and techniques. I'll offer these observations:
Final note: I have a very personal connection to the T-34B I'm building. The ride I got in the Forest Service T-34 lasted just 20 minutes or so. Moments after our second pass over a small fire in the Gila National Forest in New Mexico, it apparently stalled and fell into the forest. Amazingly, both the pilot and I survived. The crash occurred no more than a couple of hours before sunset, at 8,000 feet altitude. We were rescued by two volunteer smokejumpers who volunteered to jump to the crash site, and the next morning we were flown to hospital in Silver City by helicopter. See my web page at http://www.ephemeraltreasures.net/crash-part-1.html. Bob Ingraham
Add new comment
This site is protected by reCAPTCHA and the Google Privacy Policy and Terms of Service apply.
Similar Reviews