
Nakajima Ki-34 "Thora"
History
After Nakajima obtained a production license to manufacture Douglas DC-2 airliners in 1935, the Japanese airlines decided to sponsor the development of a smaller airplane to serve routes that they perceived the DC-2 to be too large for. The result was the development of the AT-1, an eight passenger twin engine aircraft which closely resembled a scaled-down DC-2. The prototype first flew in 1936, and was of all metal construction except for the control surfaces, which were plywood. Power was originally provided by Nakajima Kotobuki 2-1 radial engines of 580 hp. with fixed pitch wooden propellers. Production models used the Kotobuki 41, rated at 710 hp, with variable pitch metal props. These were designation AT-2.
Imperial Japanese Airways (Dai Nippon Koku KK) took delivery of 32 AT-2’s, and these served the airline until the end of the war. With the beginning of the Japanese attempts to take over China in 1937 to expand their empire, the Japanese Army saw the need for a military version of the aircraft, and this resulted in the Ki-34, Army Type 97 Transport, with higher powered Nakajima Ha-1b engines. Nakajima produced 19 aircraft, followed by 299 built by Tachikawa. Production ended in 1942, and these planes were used throughout the remainder of the war for transport, parachute jump training, and special operations. During the war, a few were transferred to the Imperial Japanese Navy, where they served under the designation Navy Type AT-2 Transport, Nakajima L1N1. Also, a few were given to the air force of the puppet state of China-Nanjing. Following the war, the type was to be seen on Japanese airfields in various camouflage schemes, and apparently a few were flown postwar in white cross surrender markings. However, none survived the war, and no example exists today.
References
There isn’t a lot of information available on this aircraft. R.J. Francillon’s Japanese Aircraft of the Pacific War has a good account of the plane’s career. Basil Collier’s Japanese Aircraft of World War II has some details plus a good photo of the civilian airliner version. Bill Gunston’s The Illustrated Encyclopedia of Propeller Airliners also has some good information. On line, using google, there are numerous photos and short articles that may be useful. Use “Nakajima AT-2 Ki-34”. There is a good “in box” review of the kit with a lot of useful information on Scott Van Aken’s modelingmadness.com website.
Instructions
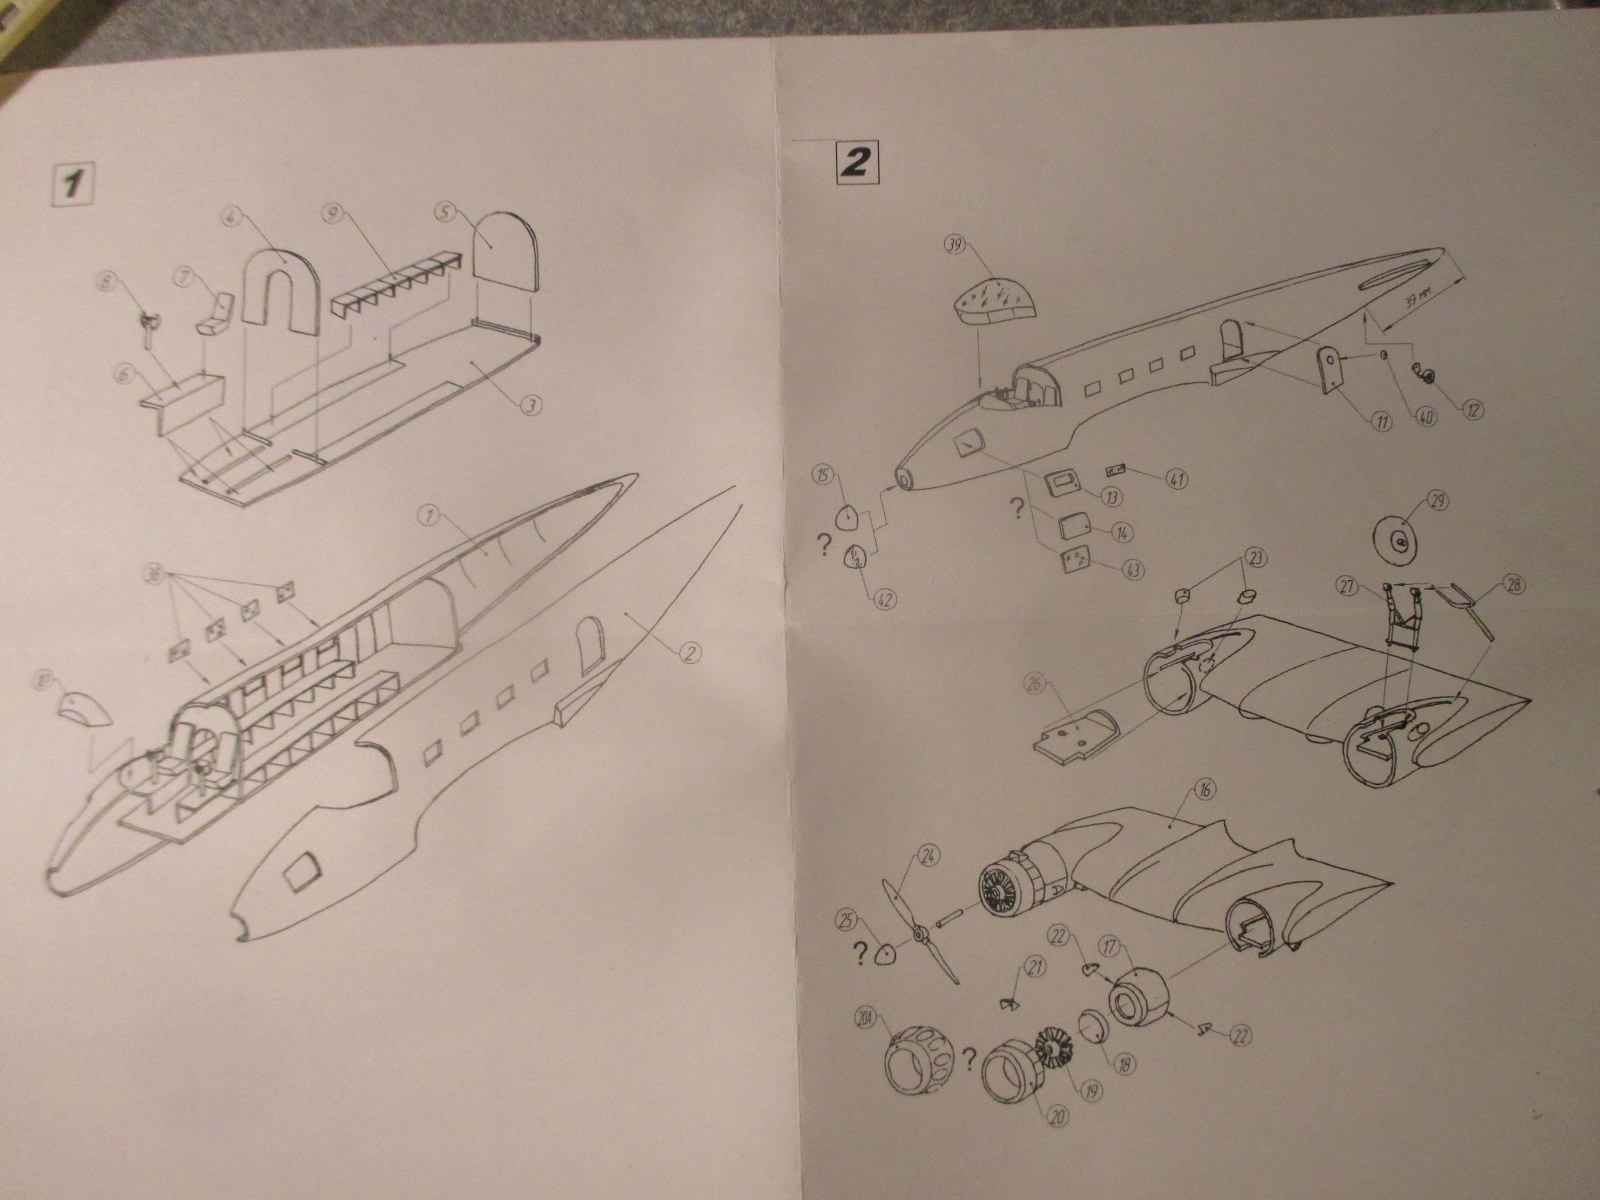
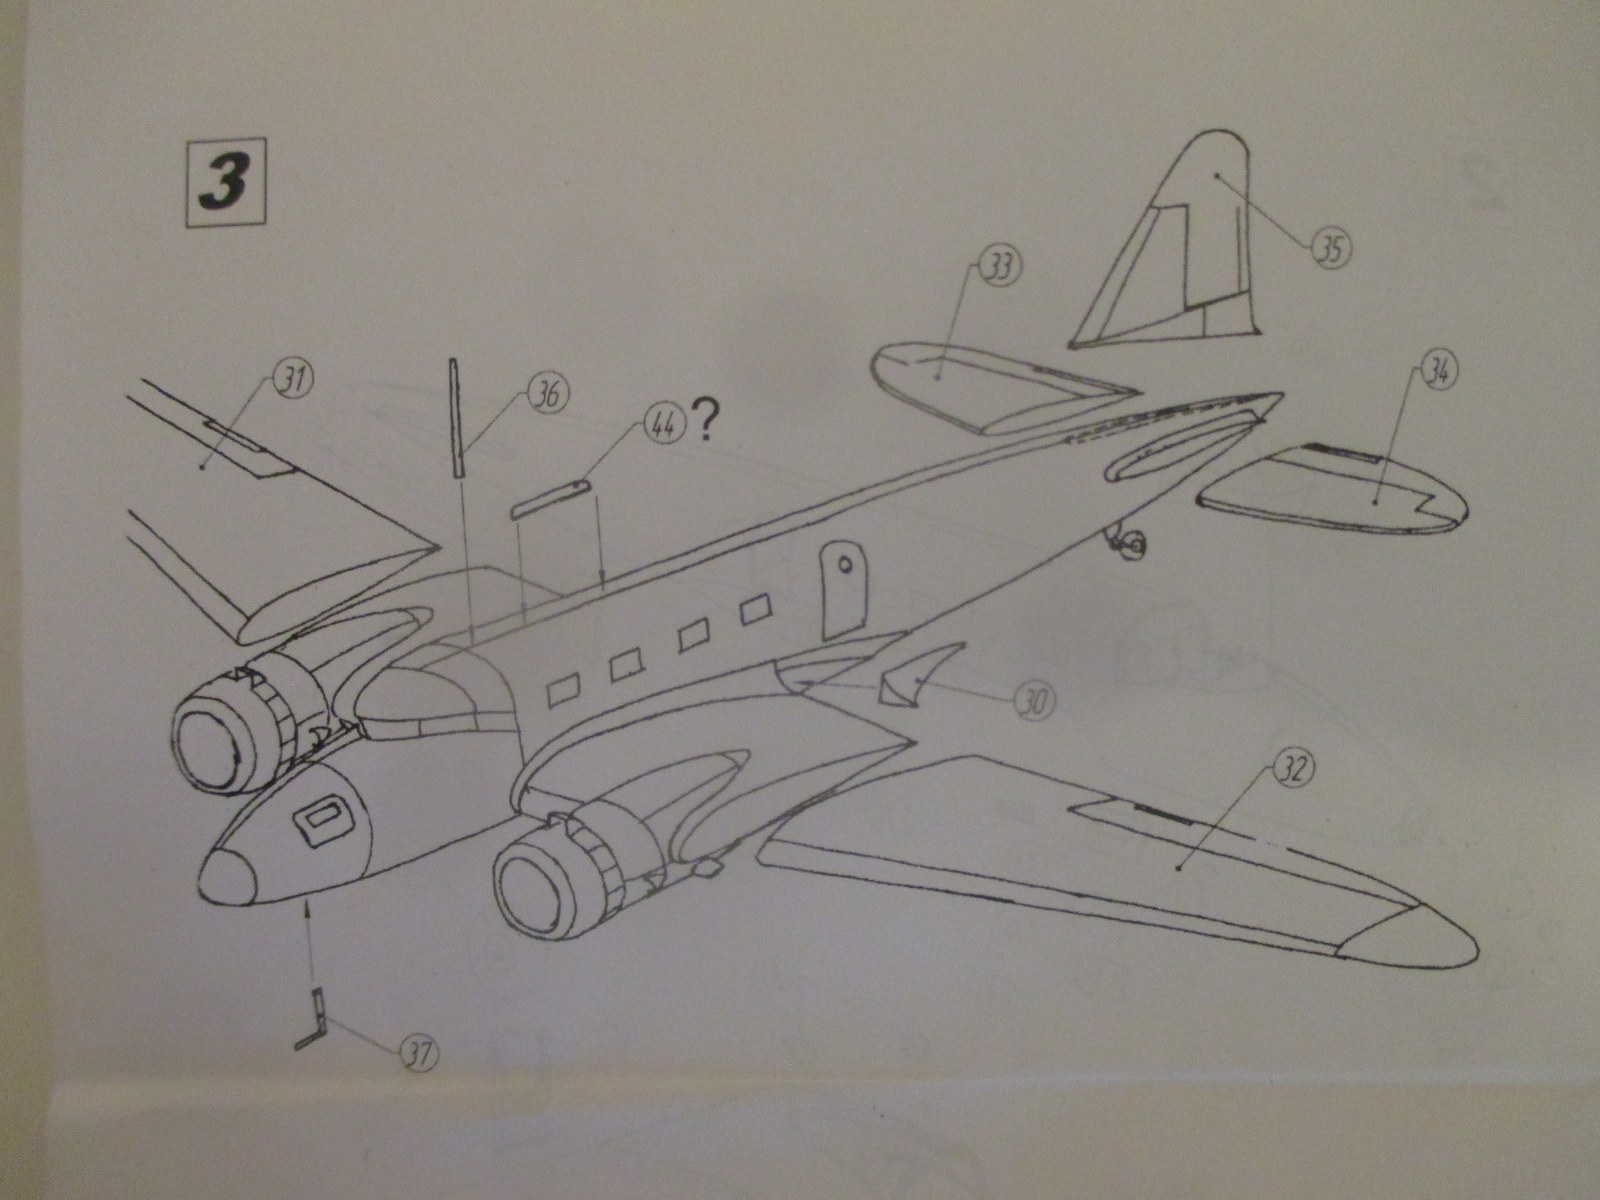
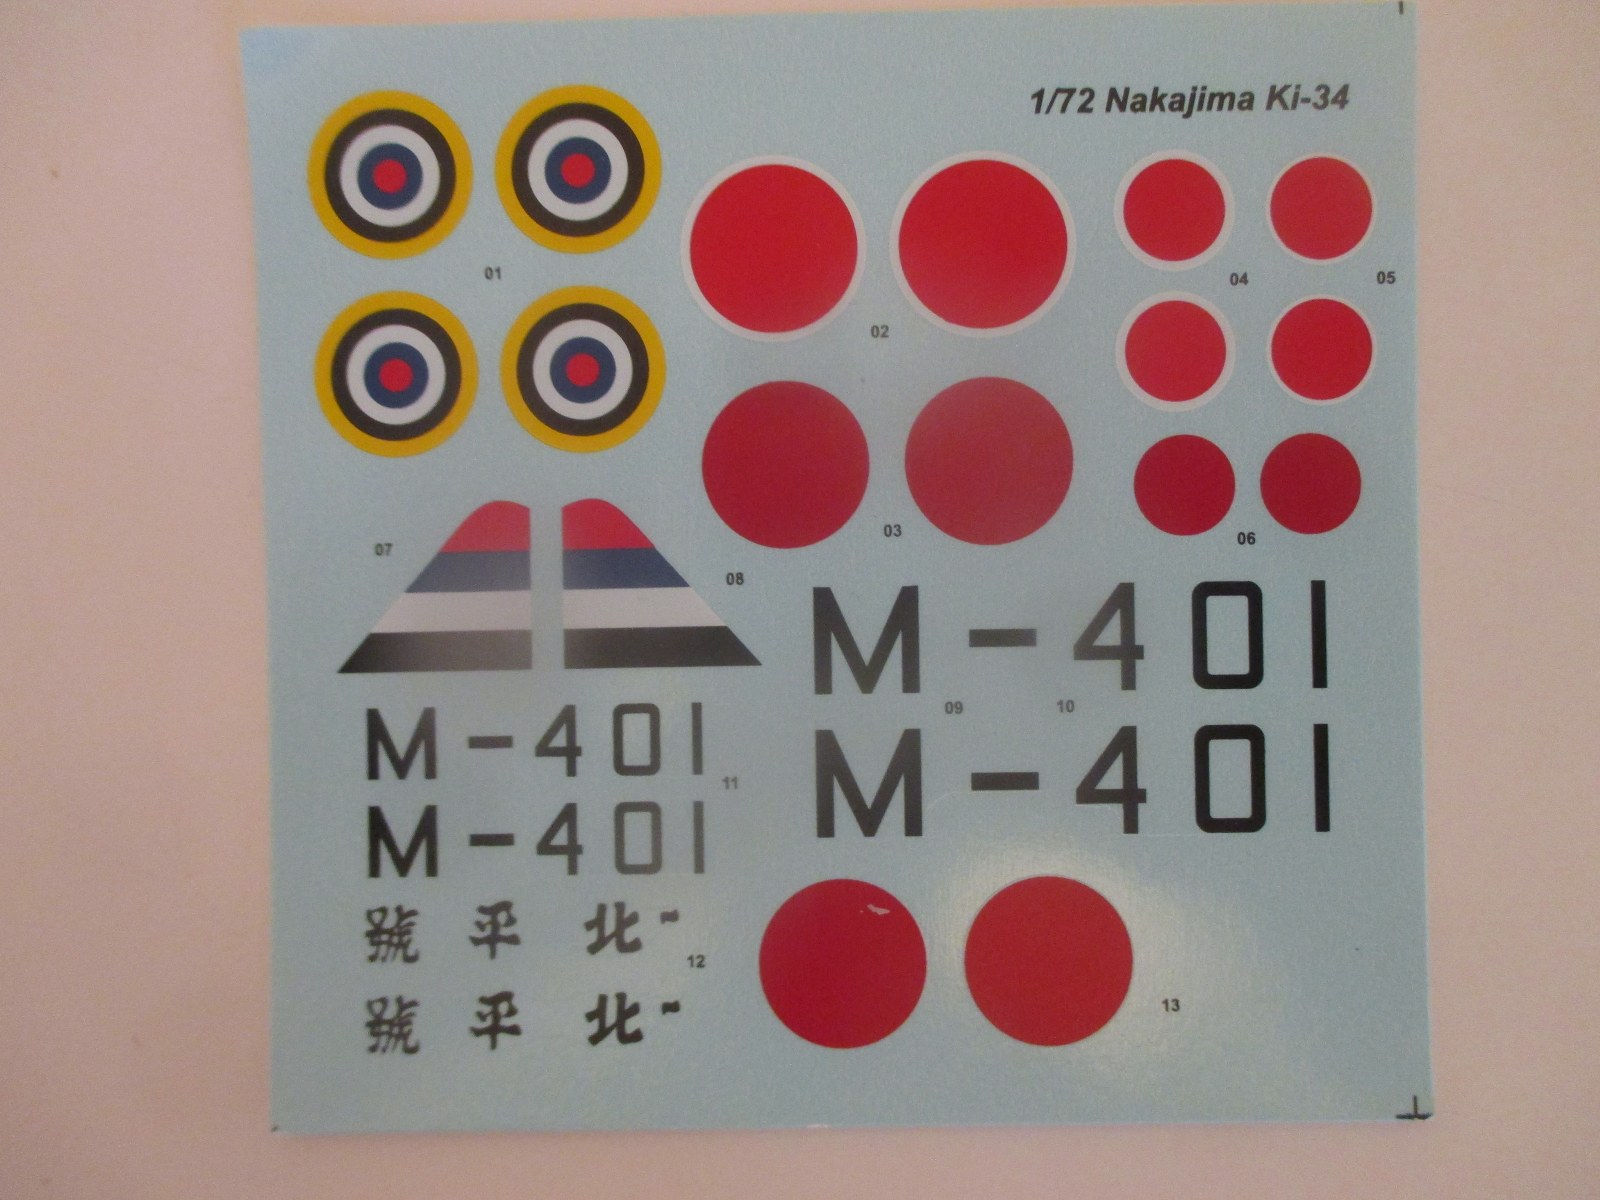
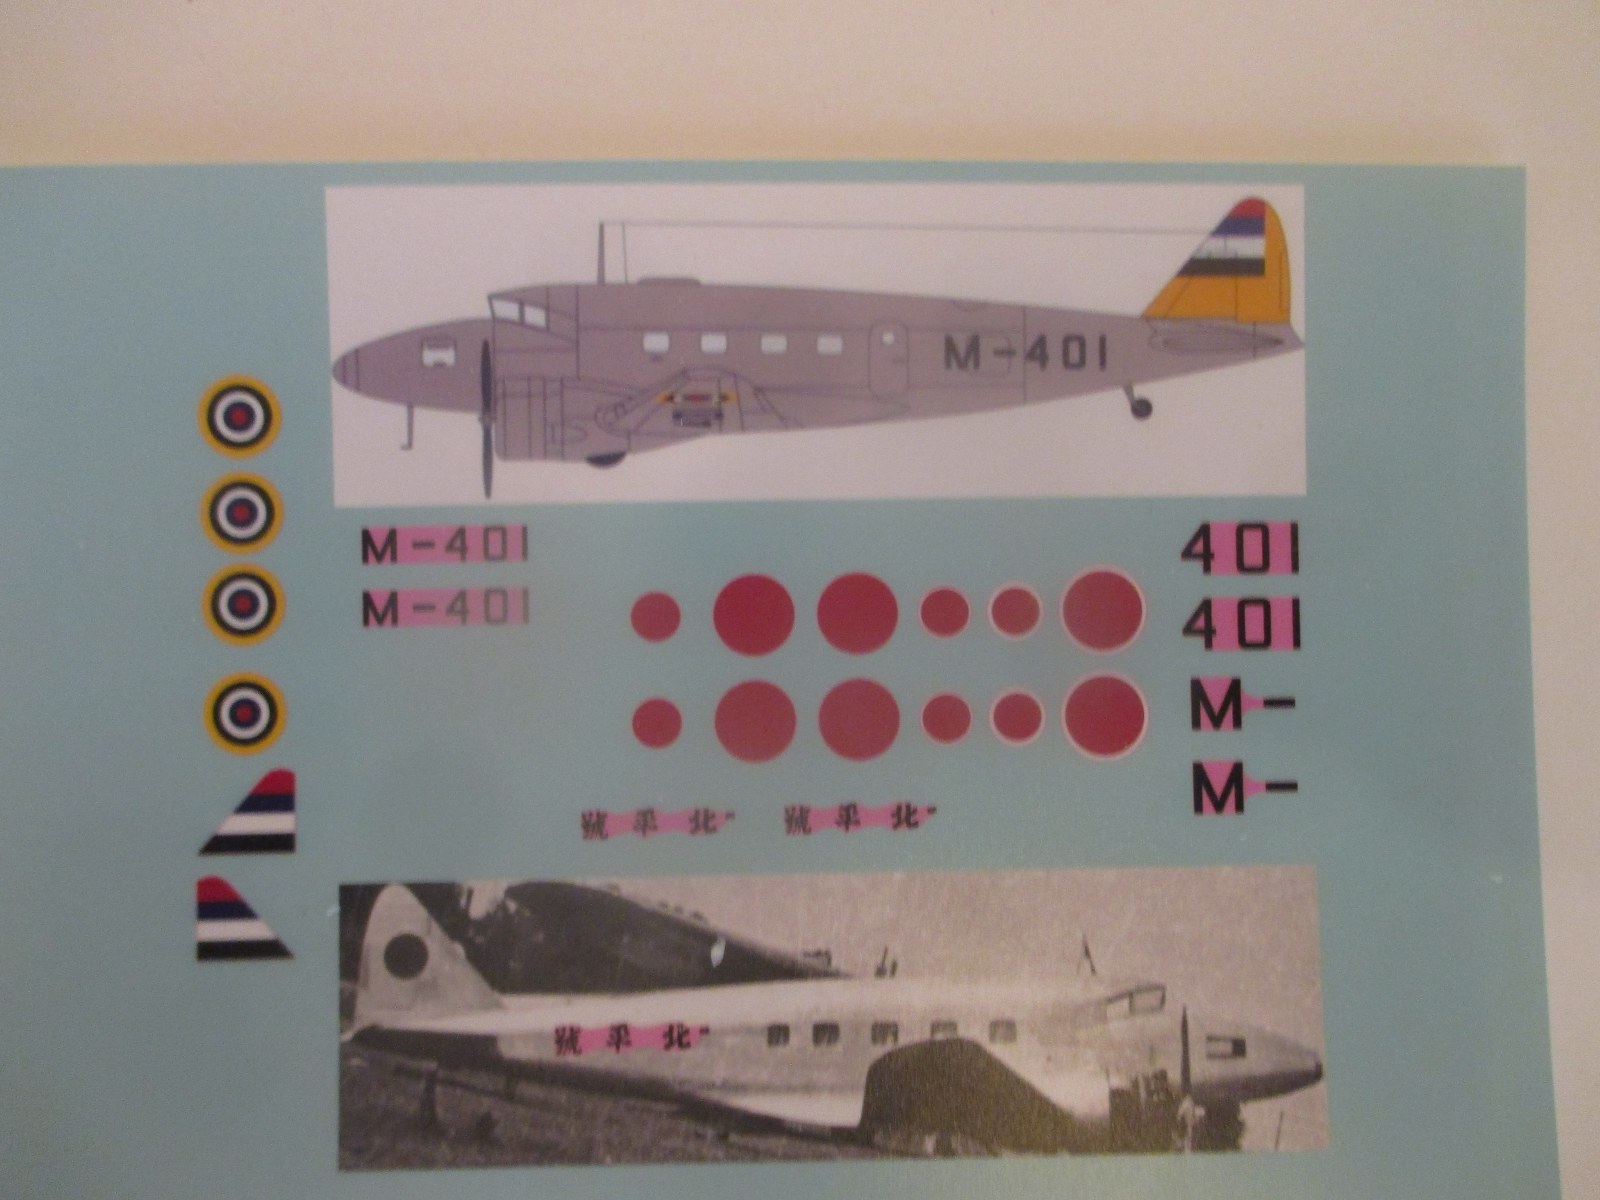
It is a good thing that there is quite a bit of information available on this airplane, because there is practically no information available in the kit instructions. The kit comes in two parts, and the original issue only has a couple of photographically produced drawings showing the assembly process. The second part shows pretty much the same information on a printed page. In reality, there is no historical information whatsoever, and no color or marking information, although there are decals included for three different aircraft, all military. The box art has a photo of a formation of Ki-34’s dropping parachutists, although no color information is given. And there is no interior color information given, so you are on your own in this area. Truly, this is NOT a kit for beginners.
The Kit
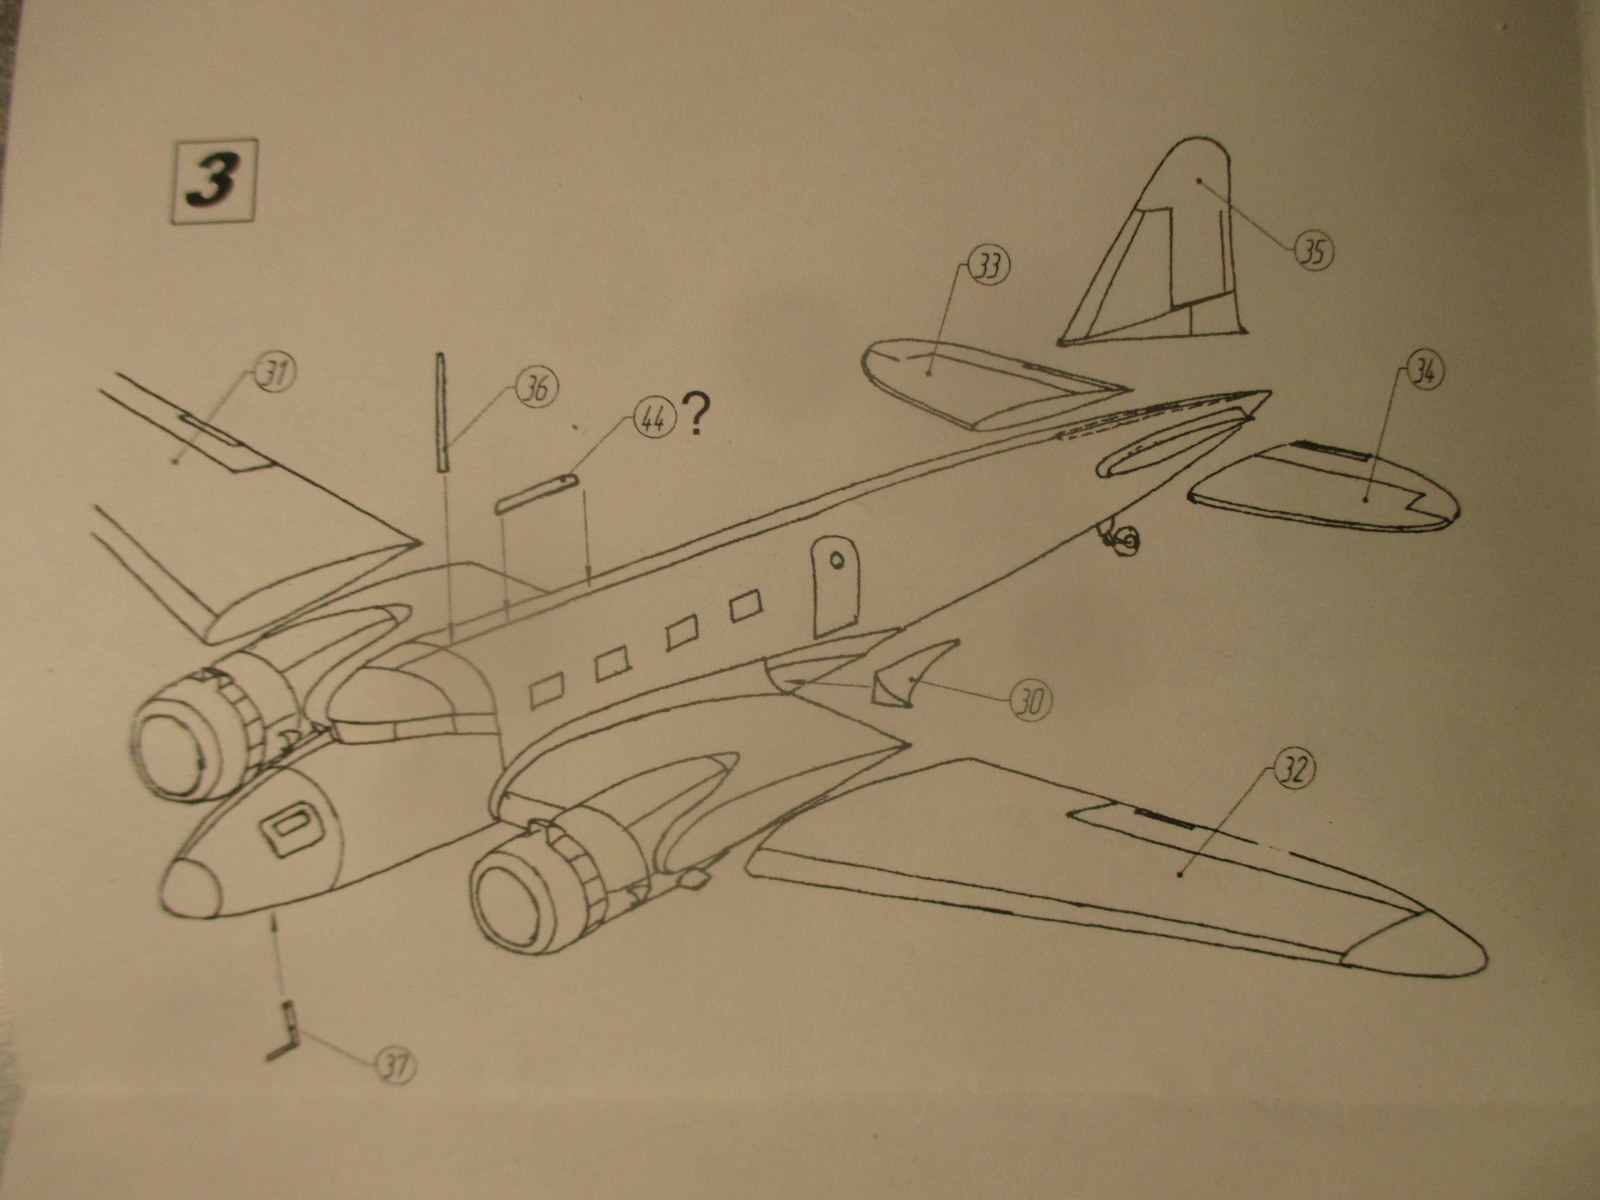
This is a resin kit, one of the first few issued by this producer. The moldings are relatively clean, and have recessed panel lines. There is a certain amount of flash, which is easily removed, but attaching the major components requires a lot of effort to clean up the attachment points, especially the tail section. The wings come in three parts, including a center section with engine nacelles and wheel wells, and single piece outer wing panels, which require a lot of trimming and should have some kind of reinforcements drilled in to add strength to the structure. All parts should be attached with some kind of “Super Glue”, as regular styrene solvents will not work.
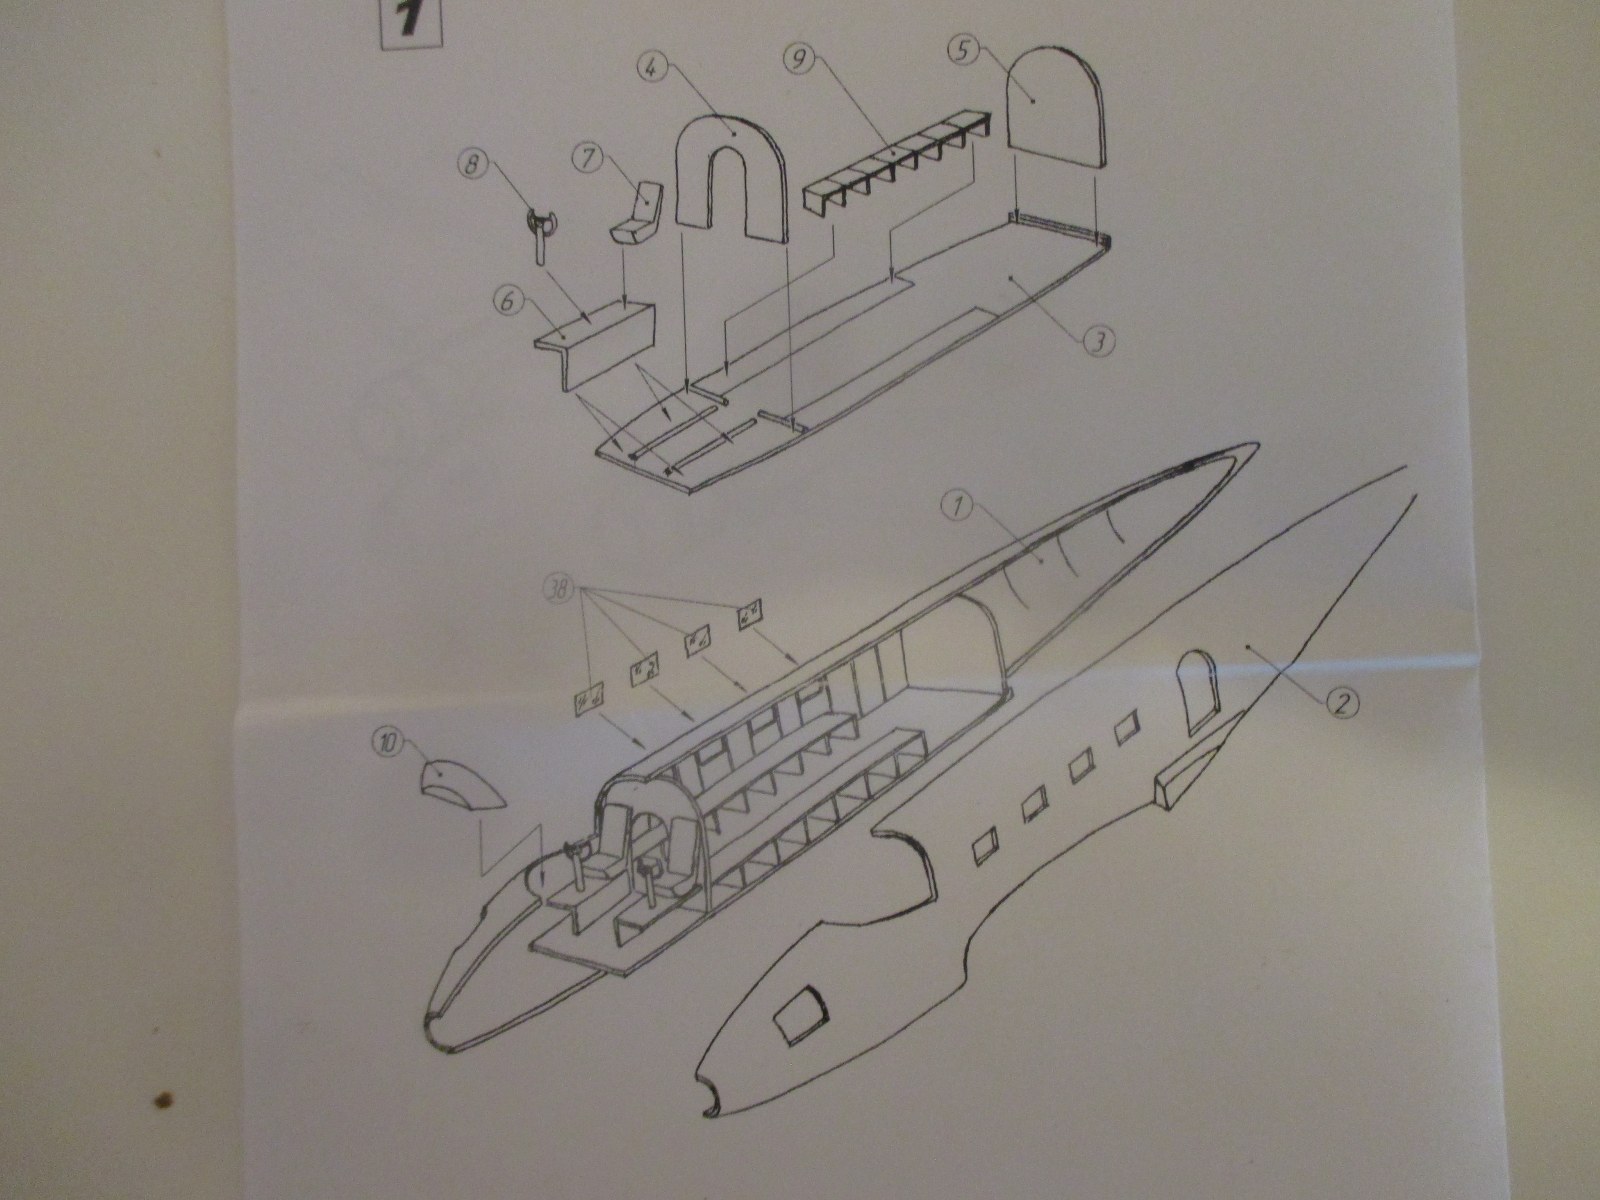
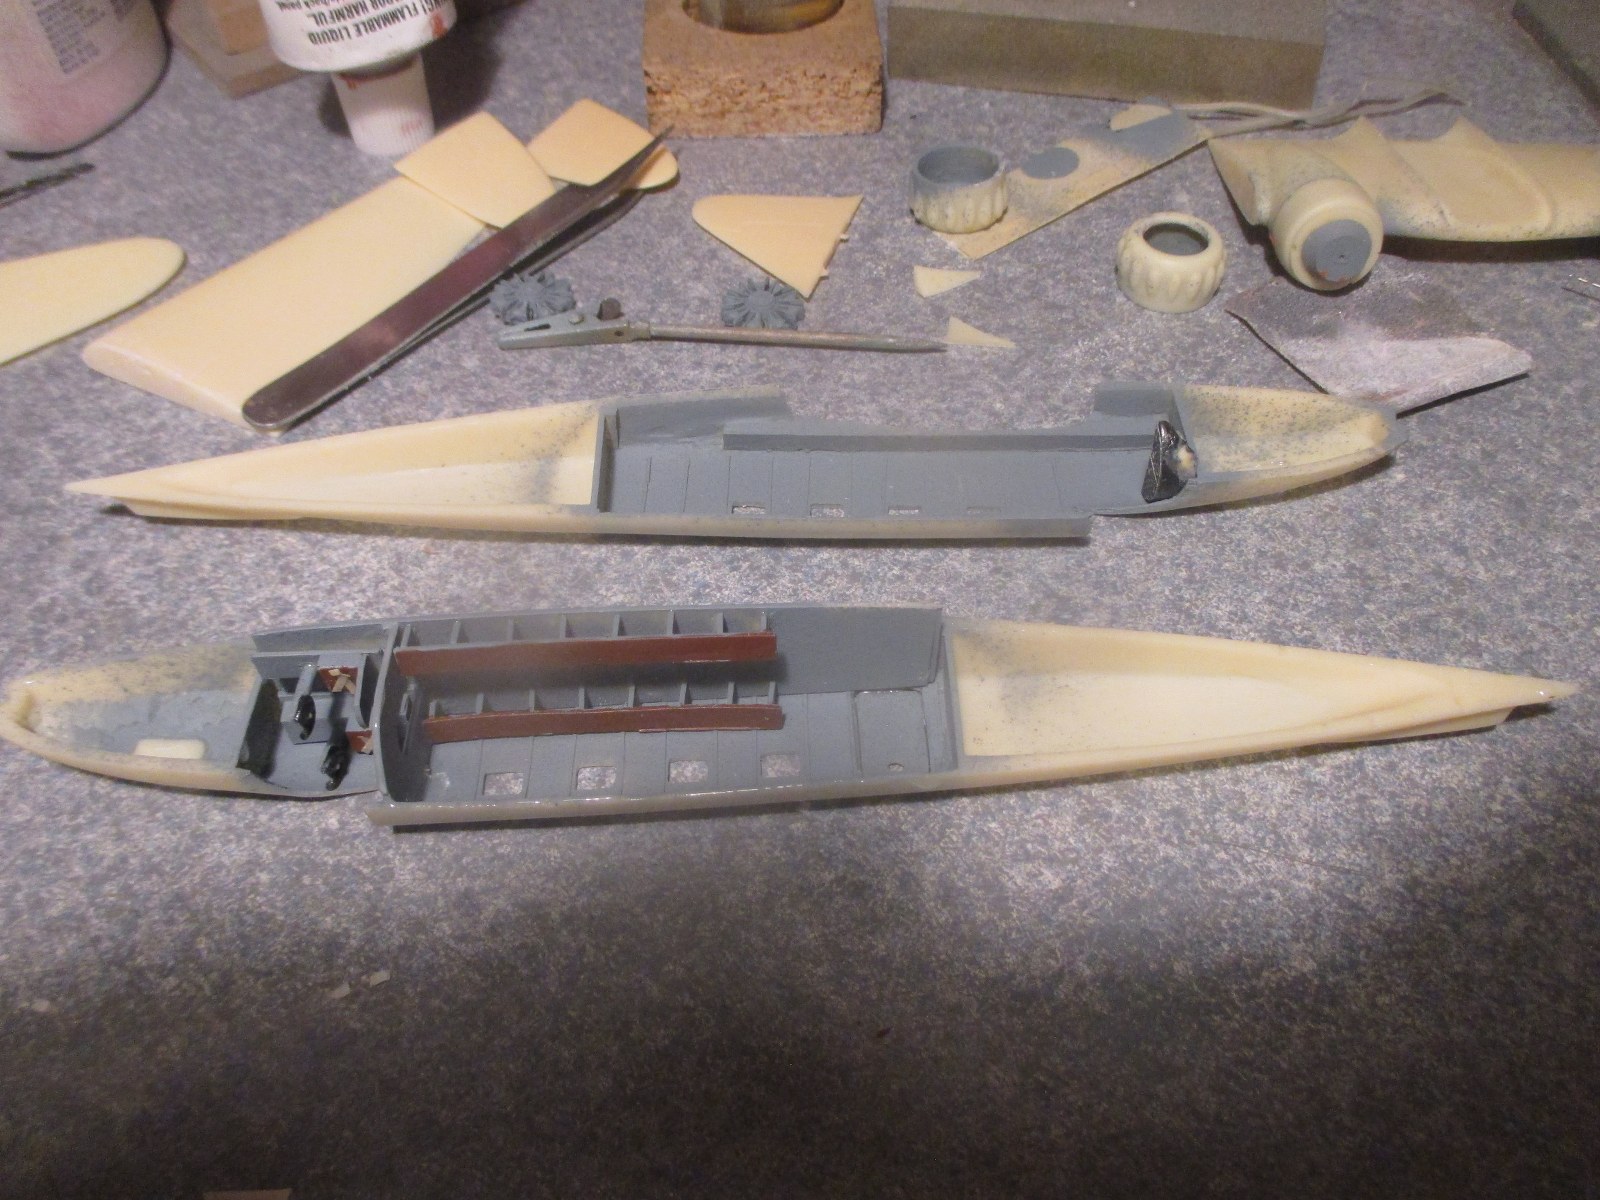
The cockpit interior is somewhat detailed, with a floor, seat bases, and seats. There is also an instrument panel, but there is no real way of attaching it to the forward fuselage, so getting it lined up was a tedious task. While control wheels are shown in the instructions, none were included in the kit I received, so I had to find some in the spares box. Vacuform parts are provided for the cockpit and side windows, and a small clear dome is provided for the commercial version, while the military Ki-34 has a solid nose. The original landing gear parts were solid resin, while the replacement parts on the second issue were braced with very thin wire to compensate for the weight of the model.
Assembly
Assembly without specific instructions is not easy, and each of the attachment points needs to be smoothed out and fitted carefully. The fuselage interior has a cabin floor and a structure that is intended to represent seats, but it is just a long bench that glues to the edges of the floor. The whole thing fits pretty well into the fuselage. A new fuselage is provided in the second issue, which includes several interior bulkheads which aid in bracing the structure. The vacuform cockpit canopy is difficult to get trimmed and lined up properly, and is probably one of the worst features of the kit. Side windows and clear parts of small doors are also provided in vacuform, but I just used Micro Crystal Clear instead. Even with vacuform parts, it is difficult to see anything inside anyway. Don’t install the clear parts until after the model is painted, although the cockpit cover should be installed first, followed by masking off the cockpit windows.
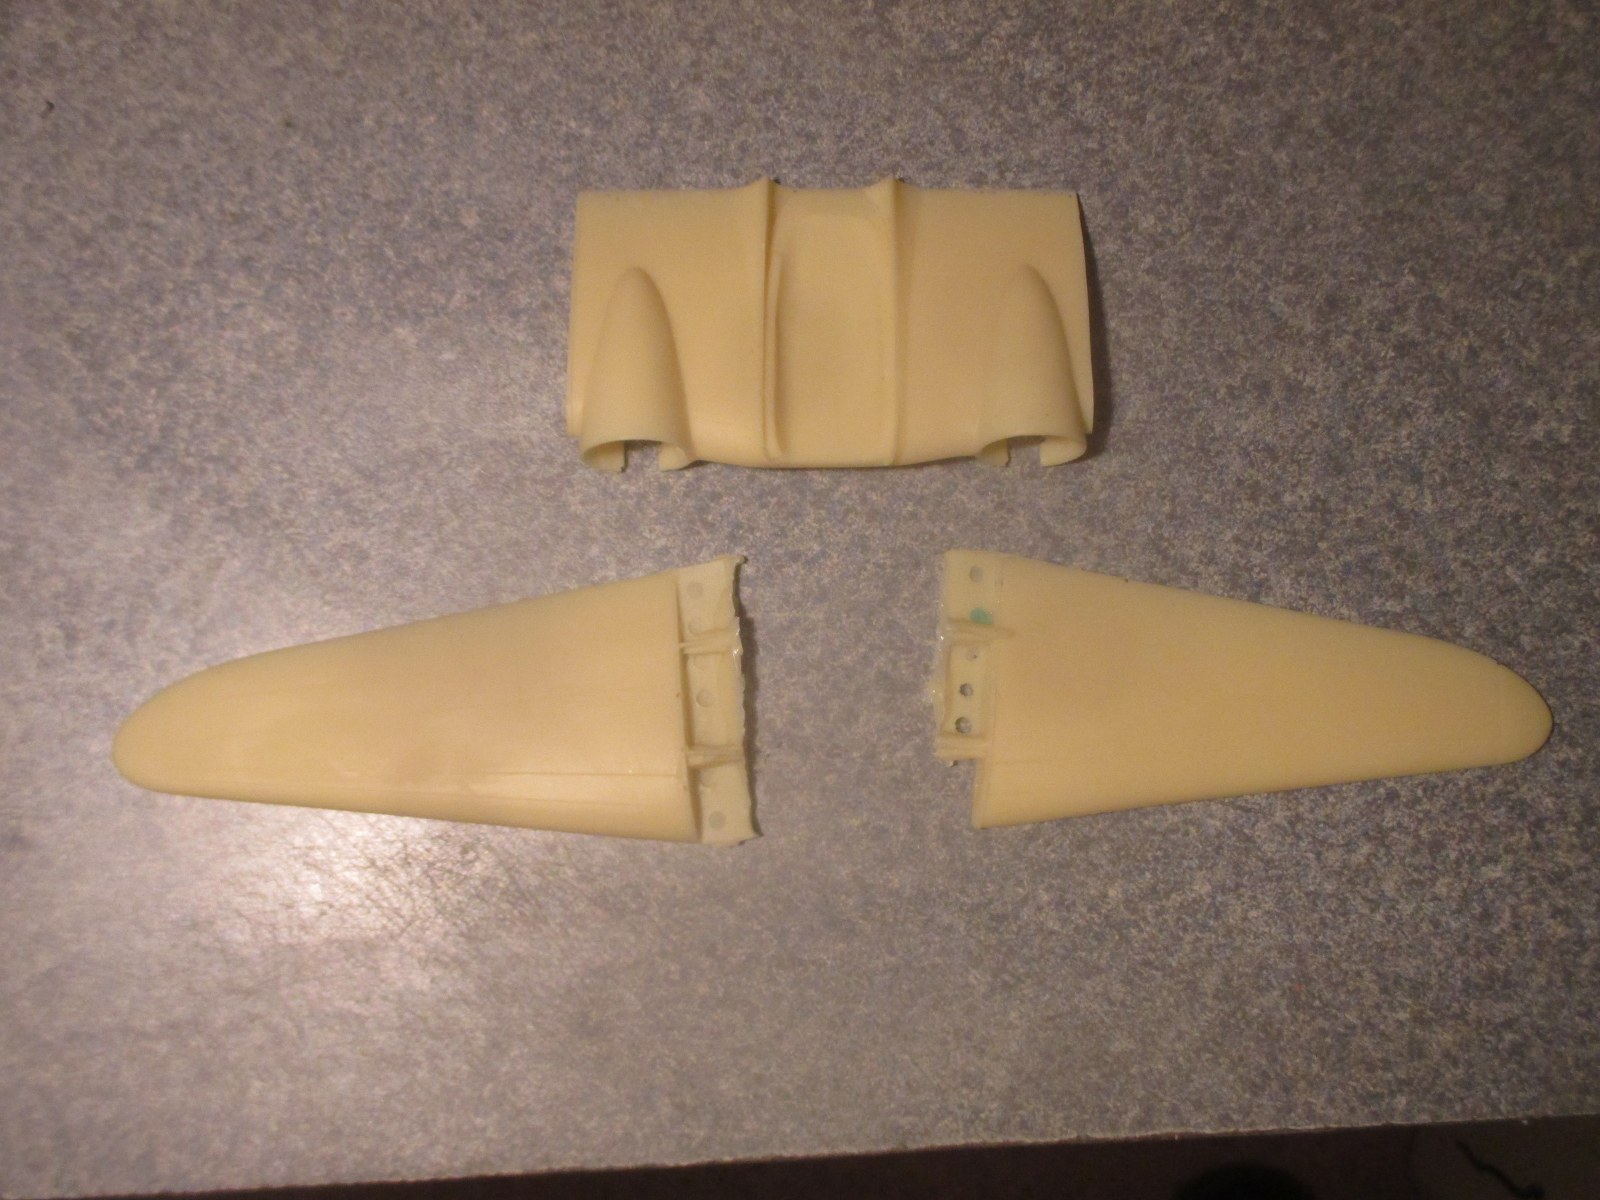
Two types of engine cowlings are provided, the smooth cowls for the military versions, and the bulged rocker arm cover cowlings for the commercial model. The engines are nicely detailed, although they need some trimming to fit into the cowlings. I had one cylinder break off during this process, so treat these engines with respect. The propellers provided were mounted on some fairly thick resin card, and they were impossible to trim off without damaging the prop blades. I ended up replacing them with props from the spares box. The landing gear assemblies are very delicate, but the ones with the wire bracing held up. The new issue has smaller wheels provided, as the old ones were simply too large. The new tailwheel, also wire braced, is extremely small, possibly too small for the model.
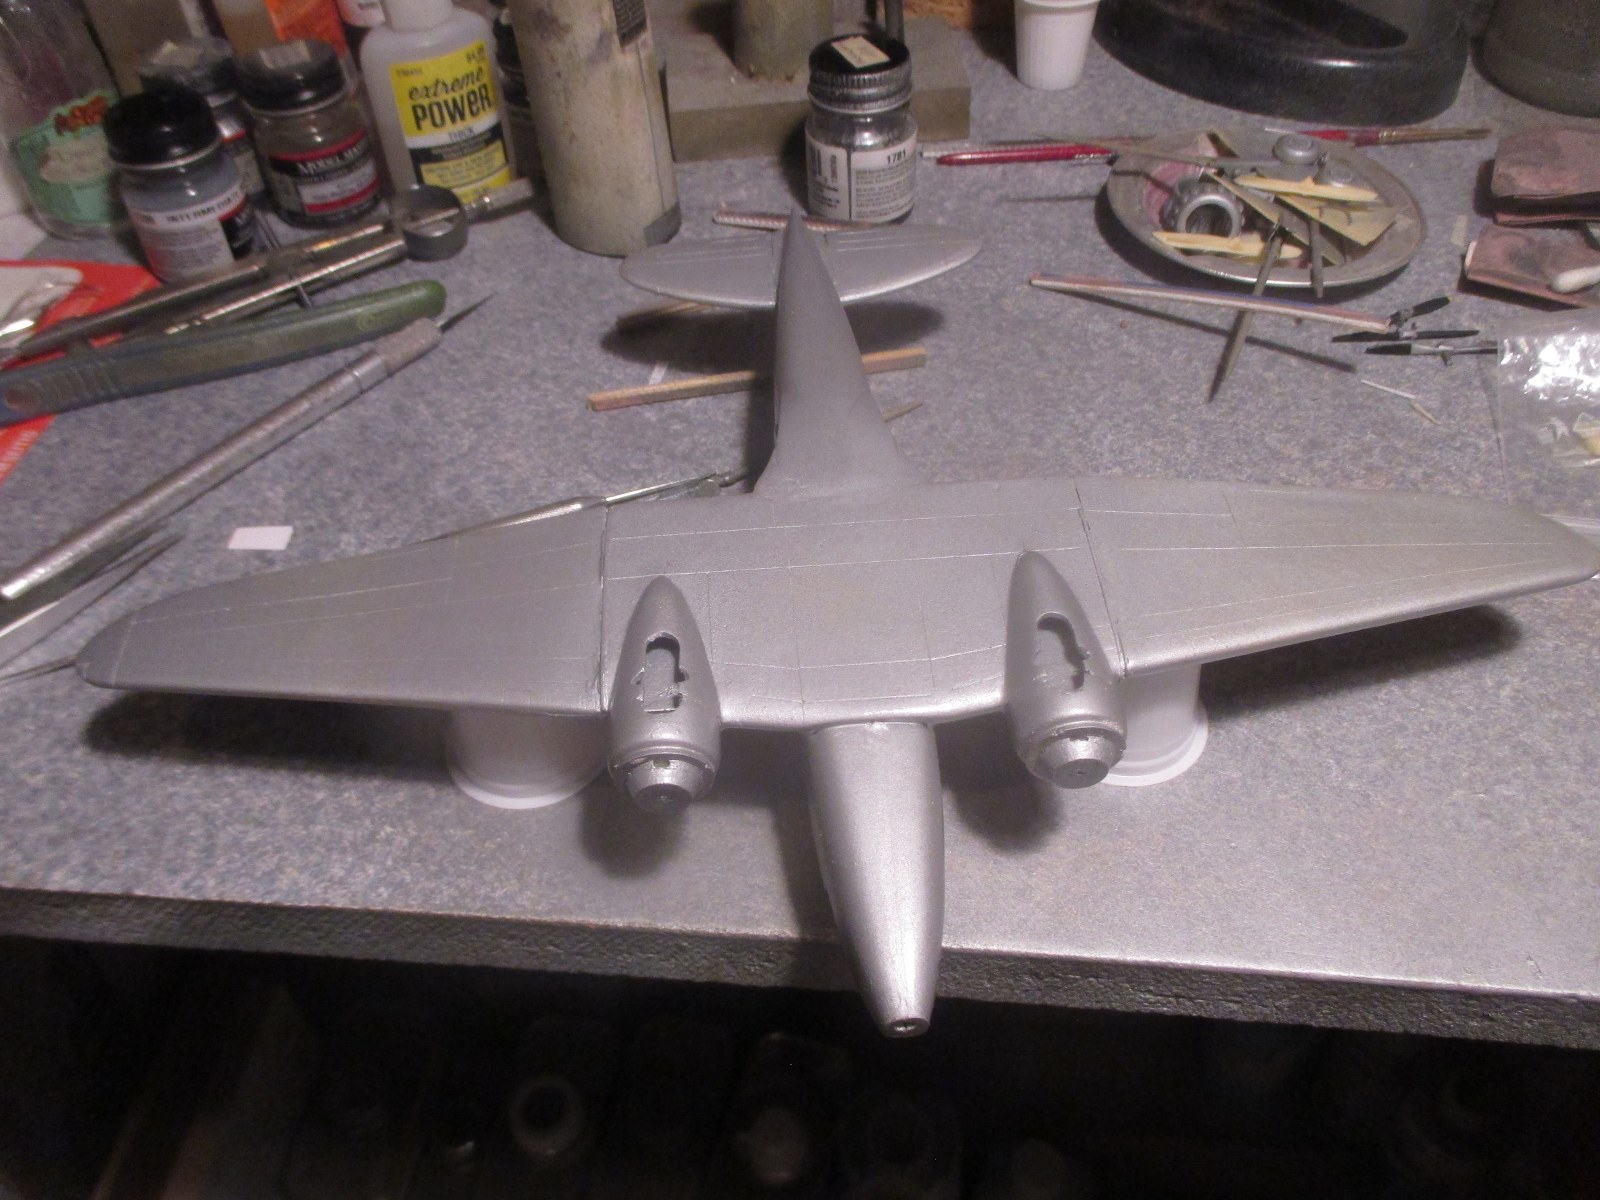
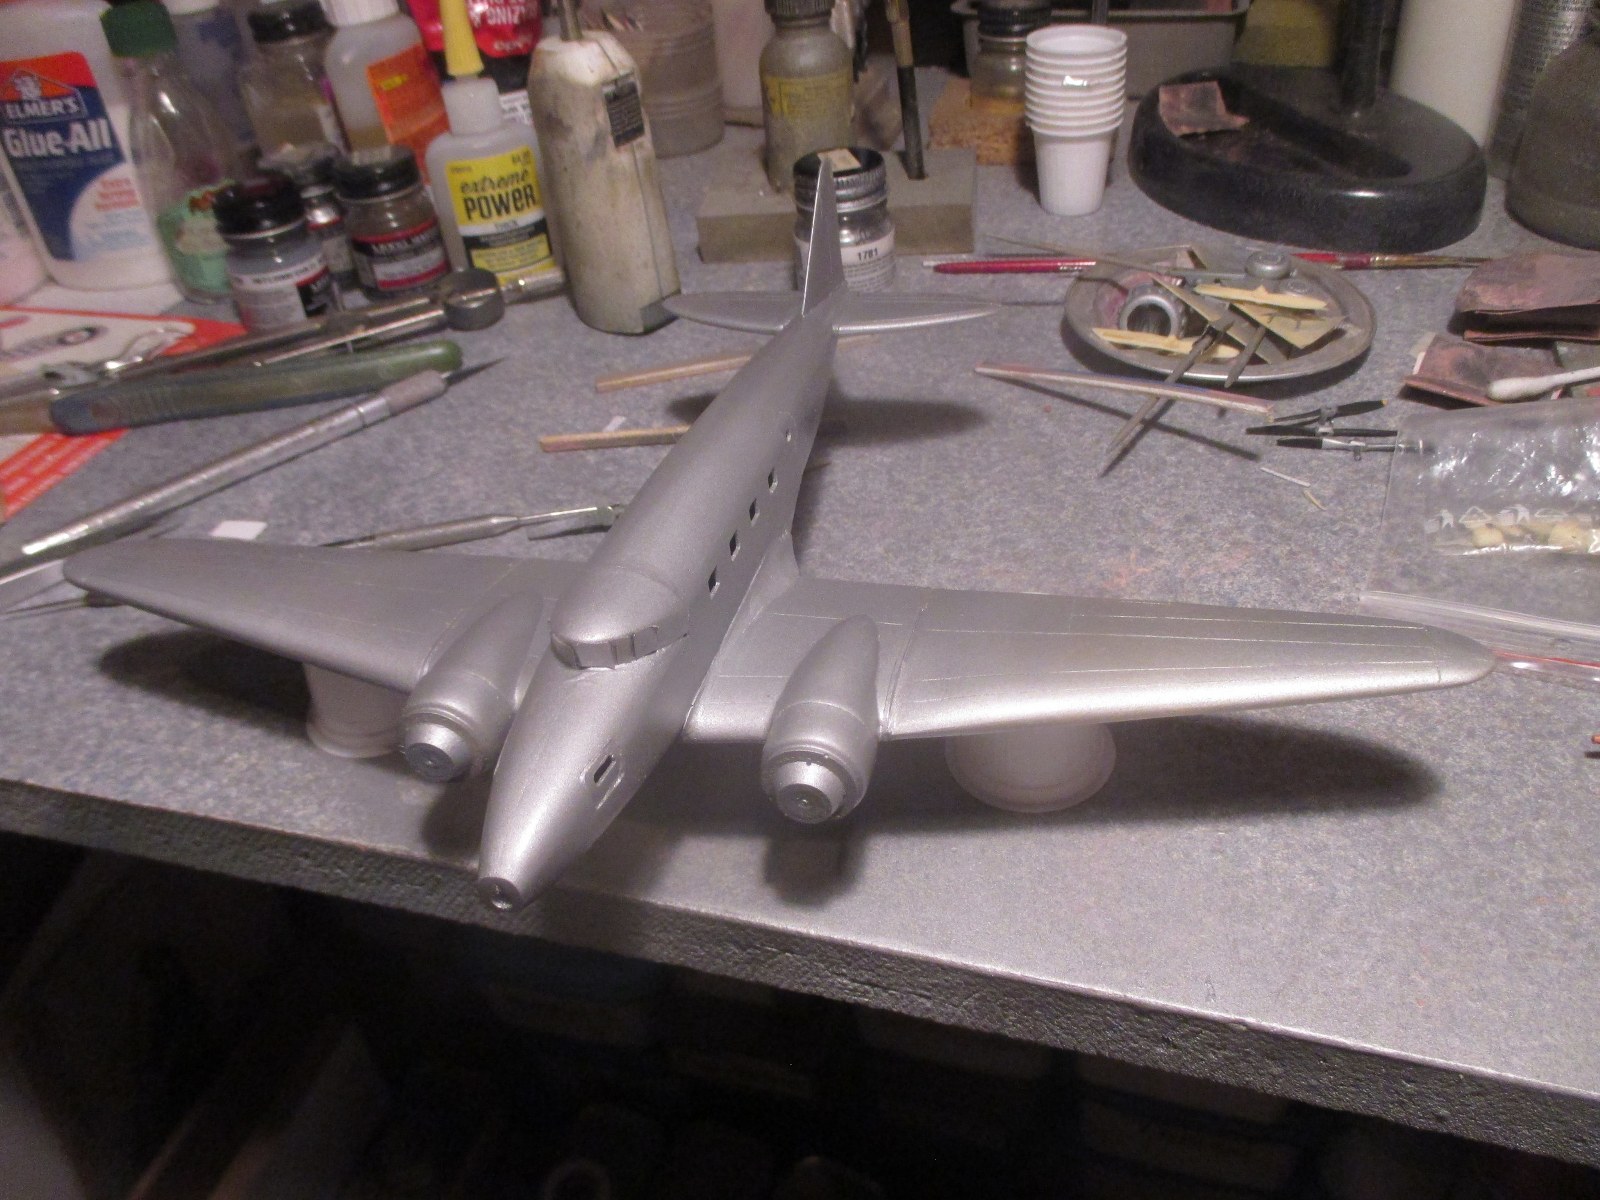
Overall assembly requires a lot of care and patience, and most of the attachment seams will require some filling. I have always used regular automotive Bondo to fill seams, and although it did stick to the resin, smoothing out the seams took quite a bit of work.
Painting and Finishing
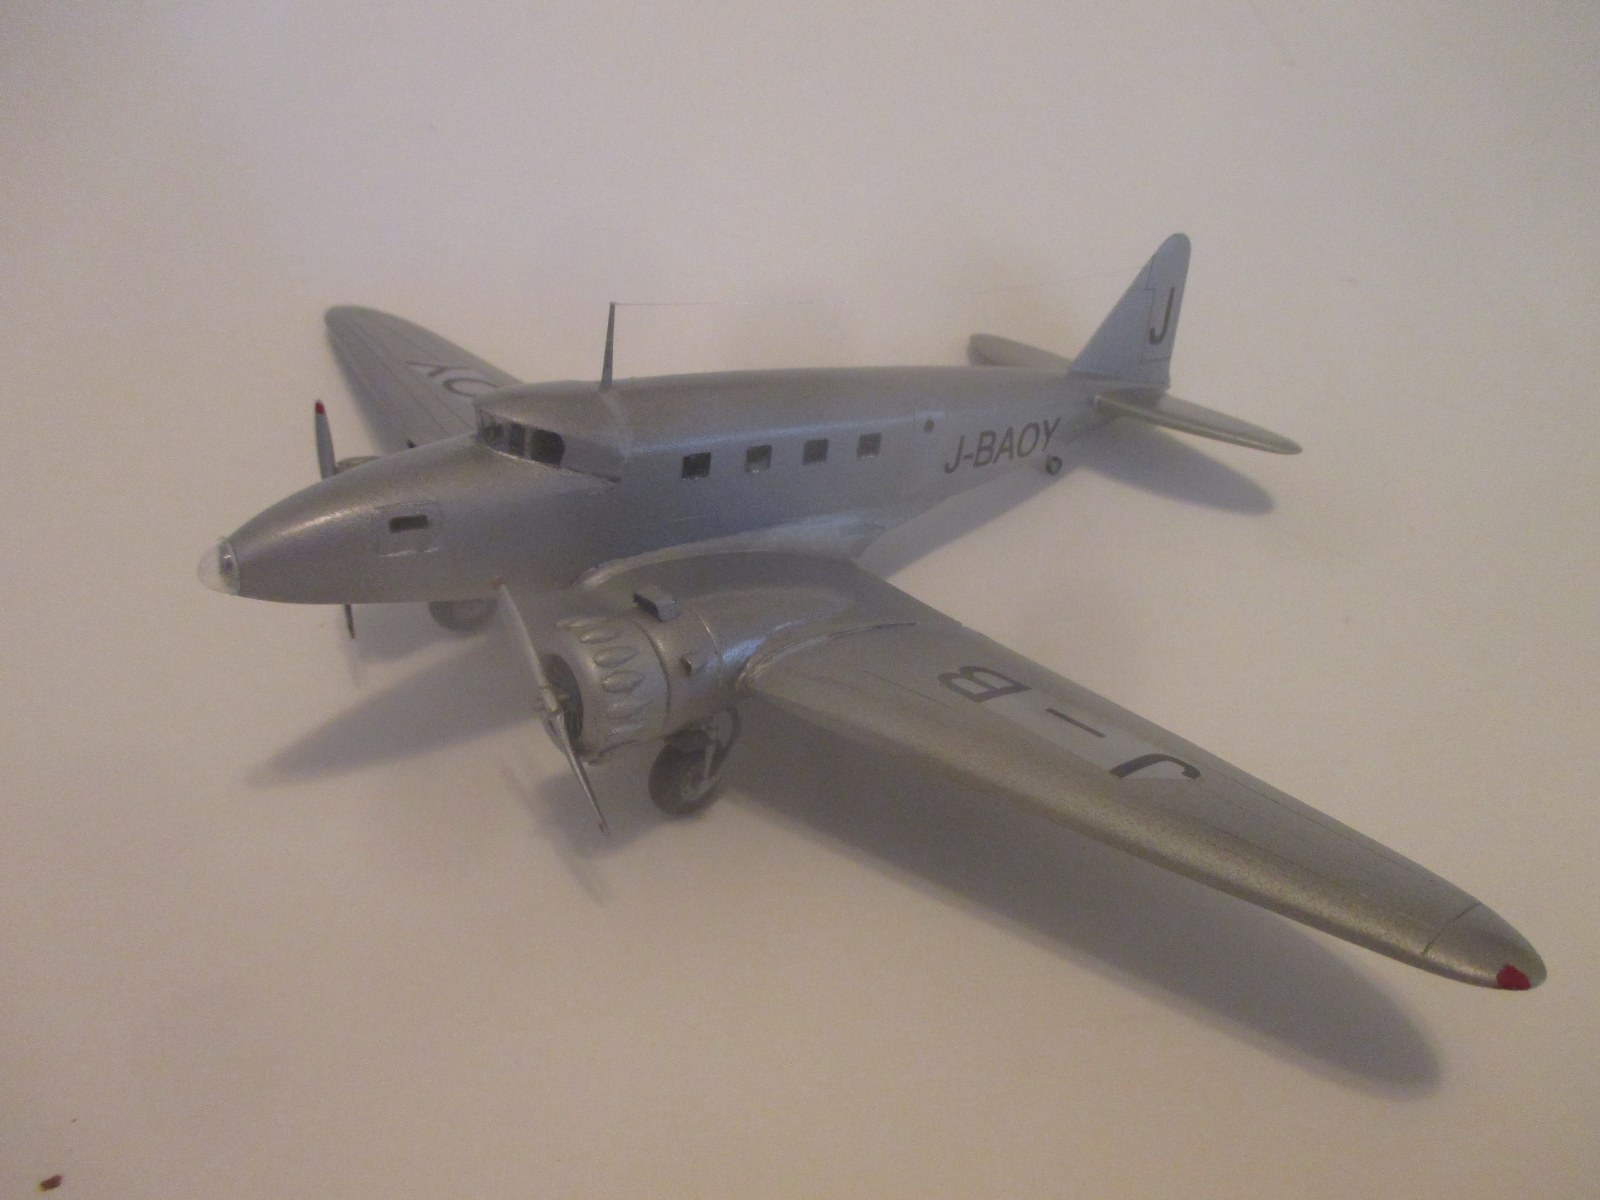
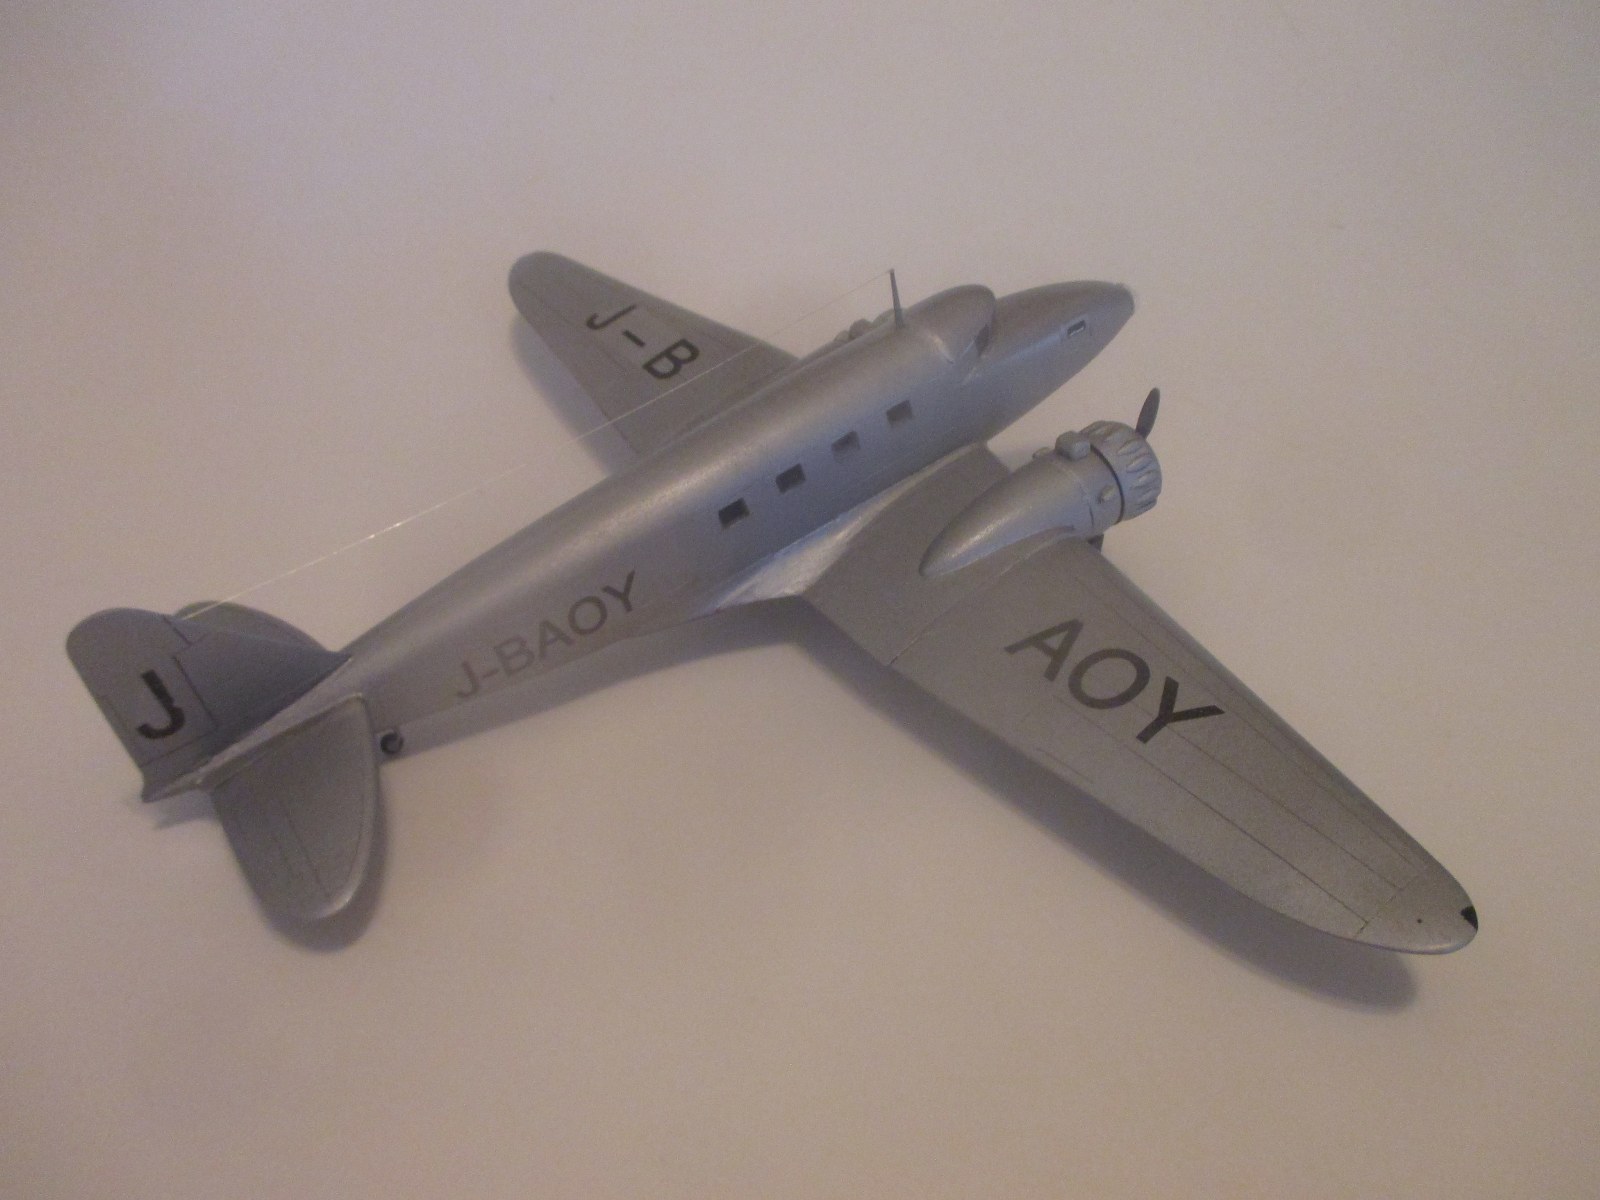
Although there were markings included in the decal sheets for four military aircraft, being a lover of civilian aircraft, I chose to do a commercial version. Good photos were available in the sources listed, and the entire plane was silver. All I had to do was to make black decals of the registration, in this case, J-BOAY, along with a large “J” for the rudder. No other markings show in the photo. I could use the “bumpy” cowlings, and I think it makes a cool looking airplane. It looks a bit like an under nourished Douglas DC-2, which indeed, it is. It is actually a Nakajima AT-2, not a ki-34, probably dating from the late thirties.
Recommendations
This kit will be a challenge, even for an experienced modeler. However, if you are masochistic enough to want to do one of these, by all means go for it. You’ll be the only kid on the block to have one. Go for it.


Comments
Add new comment
This site is protected by reCAPTCHA and the Google Privacy Policy and Terms of Service apply.
Similar Reviews