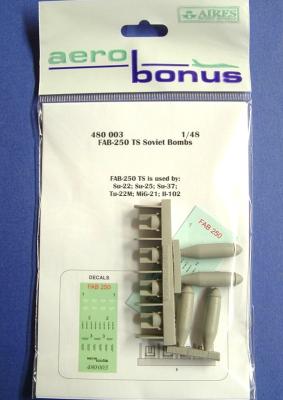
The Academy 1/32ndscale F-16I Sufa is a very nicely done kit, with lots of detail and lots of extra bits and pieces. But, Aires isn’t satisfied with good detail, they want great detail. And, that’s what they have done with this wheel well detail set. There are four resin cast pieces to the set, along with four pieces of copper wire to use for various hoses that would be virtually impossible to cast. Although, I’m sure they tried to figure out a way to do it. The main wheel well has so much detail molded in the one piece of resin, that I am still scratching my head on how they made the mold, with all of the undercuts that are present in the casting. What Academy takes seven separate molded parts to do, Aires has done in one. All of the hydraulic lines are there, as are the pumps, wires and junction boxes. There is a casting plug on it that’s a big as the gear well itself that has to be removed, but that’s it.
Aires continues to produce some very finely detailed resin parts that upgrade the accuracy of model manufacturer’s releases. The Aires Hobby Models F-100C/D exhaust nozzle for the Trumpeter 1/72 F-100 is no exception. It is molded at the correct length, and comes with a very nice turbine complete with fins and a photo etch flame holder, plus a really nice ribbed burner can and exhaust. The interior of the burner can has only one barely perceptive seam on the inside, but I can certainly deal with it being there. When compared with the short, two pieces can from the kit, it’s a no brainer. I’m still trying to clean up the seams in the 1/8thinch space between the internal ridges. And there are no nasty ejector pin marks to clean up, either. I don’t know how Aires made the mold, but I’m happy with it. The kit burner can has two locator rings molded to it and corresponding grooves on each of the fuselage halves, which lock and align the can in place.
Quickboost added the top antenna for the tail of the FW 190A-4 to their line of resin aircraft accessories. This latest addition is molded in a cream colored resin, smooth, seamless and bubble free. One thing of note is that they are easy to remove from the mold block taking only a couple of minutes with a saw blade to remove them.
The package states that it is for the Tamiya kit but should work with any kit that you want to covert past an A-3 model. From what I’ve researched about the Tamiya kit, the 1/48thkit comes with the option to do the A-3 or A-4 but the 1/72 only comes as an A-3. Once again Quickboost comes to the rescue to let the 1/72ndmodeler have the same options. All that is needed is to cut along the seam line of the A-3 antenna and glue the A-4 antenna in place.
Format
This paperback publication contains 196 8.25” x 11.75” pages, and includes more than 120 black and white photos, scale plans, maps and several color profiles. This is the second volume in this series that addresses the war in North Africa from December 9, 1940 - February 7, 1941 before the Germans became involved to save their Italian allies. I personally have always been interested in the North African combat theater, especially the Afrika Korps, but this publications offer some insight into the battles before the DAK became involved.
Contents
There are numerous photographs of aircraft, mostly Italian, and the pilots, again mostly Italian. There are several color profiles of Italian aircraft and two maps of the area at the back of the publication.
Short History
The Bf 109E-4 was an upgrade from the earlier E-1 and the E-3. Units in the Western Europe Theater requested more firepower, so developers added two MG-FF/M cannons in the wings. The new guns were able to fire explosive rounds, along with two large caliber MG 17 machine guns; this gave the aircraft a significantly increased amount of firepower.
The Kit
When I opened the box, each of the 6 spurs totaling 165 parts and 1 transparency with 9 parts were individually wrapped along with 2 decal sheets. This is the basic 1/32 kit, so no mask or PE. But you can find Aftermarket Accessories (PE and resin) for the kit with a little searching on the internet.
Each spur was clean with very little flash. The first thing I noticed was the control surfaces; the simulated fabric areas look nice. The kit has lots of details; the engraved areas are cleanly made. I don’t see any ejection/sink marks that interfere with visible surfaces.
Wingnut Wings is now offering decal sheets for markings that go far beyond those included in their growing line of WW I aircraft kits. The decals are packaged in zip-lock sleeves along with a comprehensive full color 4-page instruction booklet that includes application instructions, aircraft profiles, top and bottom wing plan views, historical information and period photos of each of the aircraft covered by the decal sheets. These sets exhibit the same high level of quality as do all of the kits marketed by Wingnut Wings.
Set 30011 provides markings for five Albatros D.V fighters from Jasta 18. Some of them require upper and under wing lozenge patterns (and rib tape) that Wingnut Wings sells separately.
The markings are for:
A) Albatros D.V 2117/17 flown by Oliver Beaulieu-Marconnay, Jasta 18 in late 1917 (who was credited with 25 victories)
B) Albatros D.V 4594/17 flown by Paul Strähle, Jasta 18 from 1917-1918 (credited with 15 victories)
Ever have to rob a perfectly good kit for just the bombs? I have and I regretted it later when I either wanted to build it or sell it. Italeri has a solution to this problem, bombs and lots of them. The latest release contains two identical sprues of 53 parts each and the decals that go with them. You can build AB70, AB-250, AB500, the ER-4 Bomb rack, ETC 50 bomb rack, PC1400, PD500, SC50, SC250 with Dinort fusing, SC500, SD250, SC1000, SD1700, Pfeife Geraete, 300 and 900 liter Fuel Tanks and WB81 gun pods from the kit. That is a lot of ordnance. There are multiple aircraft that can be armed with this set. Included in the instructions are the load out plans for various aircraft such as the Ju-88, He-111, Ju-87, Hs-129, FW-190, and Me-262. As an example, you can use the bombs and gun pod on Italeri Stuka.
I would like to express my sincere thanks to Minicraft Model Kits for providing this kit to IPMS/USA and to them for allowing me to review it.
In the mid-1930s United Airlines decided they needed a larger plane than the DC-3s they were using. They contacted Douglas Aircraft to develop such a plane. Douglas designed and built a large aircraft they called the DC-4E (E for experimental). It flew for the first time on June 7, 1938. More than twice the size of the DC-3 (138 ft. wingspan and 97 ft. long) the cabin had a wide pressurized cross-section, a tricycle landing gear, and triple vertical stabilizers similar to the Lockheed Constellation. With its four Wright R-1820 engines developing 1450 hp each, it could potentially fly nonstop from Chicago to San Francisco.
Editor's note: P/N U72-110 = $7.50; P/N U72-109 = $5.50
It was with great anticipation that I awaited the release of the Hobbyboss 1/72 Westland Lynx HAS.3. When it hit the street, I was not surprised to learn that it was a nice kit with some curious accuracy issues as this seems to be typical for this manufacturer. Pavla has addressed two of the major hiccups with these two resin sets and I jumped at the chance to incorporate them in my build for this review.
The first shortcoming addressed by the two sets reviewed here is the lack of BERP rotor blades applicable to this variant. The kit includes the older straight style on a separate sprue just for the rotor blades and this is particularly frustrating as other boxings of this kit have the correct BERP rotor blades – a simple mix up that should have been easily avoided. The second issue addressed in this review is more of a design flaw as the shape of the sponsons is inaccurate and simplified.
The cockpit set comes in four cream colored pieces – tub, seat, stick and panel/coaming. The parts are nicely detailed and well-cast, if only a tad rough on the surface. The texture was not an issue with parts this small and I did nothing special to prepare the parts for painting, including skipping the washing stage often recommended. The parts were prepared simply by cutting them from their casting blocks.
