Westland Whirlwind
History Brief
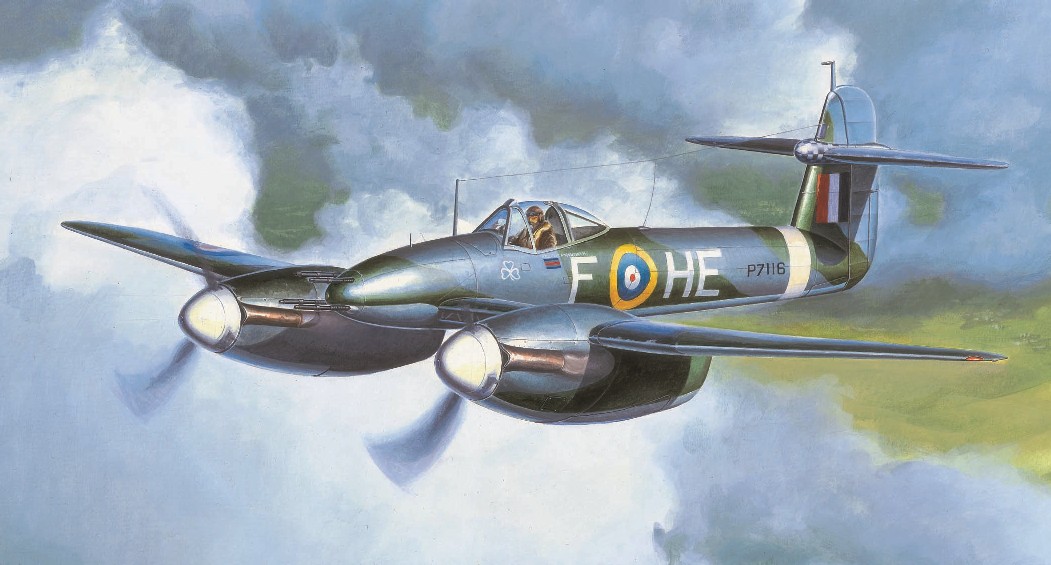
The Westland Whirlwind was a British heavy fighter. Designed by Teddy Petter from the RAF's specification drawn up in 1937, the Westland Aircraft Company produced a single-seat, twin-engined monoplane, prototype which flew on 11 October, 1938 with Whirlwind production starting early the next year.
It was the RAF’s first single-seat, twin-engined, cannon-armed fighter and a contemporary of the Supermarine Spitfire and Hawker Hurricane. The aircraft’s small tube fuselage with its 'T'-tail was an advanced design for its time and the entire plane was built of stressed-skin duraluminium2. The pilot was seated in one of the first 'bubble' type canopies, giving the pilot an almost 360 degree view, and the low forward position of the wing gave the pilot excellent visibility.
In the fuselage nose were four 20mm cannons, making the Whirlwind the most heavily armed airplane at the time. By placing the armament in the nose meant aerial gunnery problems were greatly reduced, all the pilot had to do was point the Whirlwind in the target’s direction and fire. The small airframe was surprisingly strong too, as it could carry up to 1,000lbs of bombs on two under-wing racks. The Whirlwind also had fully retractable undercarriage, giving the plane a very clean, streamlined look.
Powered by a pair of Rolls Royce 'Peregrine' engines, it was one of the fastest aircraft in service when it flew in the late 1930s. However, persistence problems with its Rolls-Royce Peregrine engines delayed the entire project. The Whirlwind basic design had its fair share of problems too. It had a very short range for an escort fighter due to its small compact frame leaving little room for fuel. And while the Peregrine engines provided the Whirlwind with its uncompromising speed, they also became the end of its existence. Continual problems with the Peregrine led to its eventual cancellation.
Westland pushed for the Whirlwind Mk II, fitted with RR Merlin engines, but was denied and only a small number were ever built. 112 Whirlwind Mk Is were produced for the RAF. During the Second World War only two RAF squadrons were equipped with the Whirlwind and it was withdrawn from service in 1943.
The Product
My sample arrived in a sturdy, standard sized box featuring a Whirlwind flying through the gloomy skies of Great Britain. On the side panels you’ll find the two decal options. Inside the box I found the kit consists of over 70 parts, including 2 clear parts with finely engraved panel lines. Upon a closer inspection I noticed a few oddities besides all the rivets and I’ll cover those items in the build. The instruction sheet is clearly printed and simple to understand. There’s also a separate painting and color guide showing the two decal options beautifully printed on each side. Lastly, I found the decal sheet to be very nice in every regard.
The Build
Starting at step one I soon had the cockpit pieces cleaned up and ready to go together but I detoured just a bit. First I decided that the kit-supplied seat would have to go. So I found a suitable resin replacement in the spares drawer and used it. The kit offers a very sparse cockpit omitting obvious details like the throttle control. And despite the cockpits toy like flavor it has great potential. I could’ve dressed it up a bit more if I would’ve spent more time researching online. The kit includes a decal for the instrument panel but it’s useless. The decal is not representative of the kit part and has no merit (see attached photo).
Once happy with my progress thus far I then built up the landing gear and landing gear wells/engines nacelles. The nacelle halves didn’t mate up very well and required putty. So at this point I jumped ahead of the fuselage build steps and concentrated on mating the nacelles to the wings, after which I built up the wing sections with great results and no problems until I attached the nacelles. Creating another issue, I encountered a nasty step up at the wings leading edge and an unforgiving seam. I found the only solution was to use filler, completely sand the darn things down and rescribe the lost detail (see attached photos).
Fuel Cell Covers
I noticed that they are slightly raised at the trailing edge. I looked at several online photos and determined it’s a kit design error. Noting this I left them alone and decided to see if they offend me when finished.
After that I built up the fuselage with the T-tail, every thing went together pretty well and only needed a little putty. I then added the wings to the fuselage without any problems.
Then I finished up by adding all the smaller bits and found the last issue: Canopy deck and the open position. There’s a small inner canopy deck that mounts to the fuselage and that’s fine if you close the canopy, but in order to pose the canopy open you’ll need to fill the locating holes in the fuselage, remove locating pins from the deck and glue it into the canopy. Not really a big deal and I opted to add a small photo-etch canopy track from the spares box.
The Bottom Line
All in all not a bad kit and I really like the finished product. Sure it has a few issues but nothing that can’t be corrected. I recommend this one to the neophyte and the seasoned modeler alike. I would like to thank Trumpeter, Stevens Int. And IPMS for the opportunity to present such a fine model.


Comments
Add new comment
This site is protected by reCAPTCHA and the Google Privacy Policy and Terms of Service apply.
Similar Reviews