
De Havilland Sea Venom FAW.21
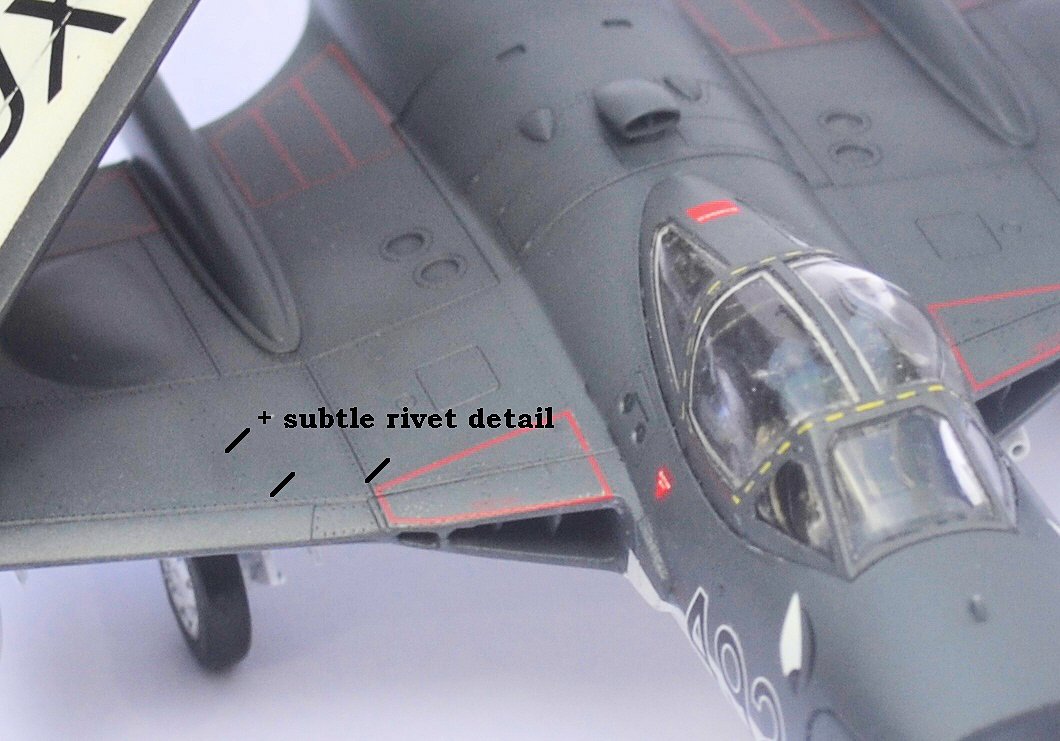
This new injection molded plastic kit is a great example of modern engineering that exhibits fine surface detail and great fit of parts. It is a builder’s kit, to be sure, and it was indeed a pleasure to build. The design of the parts is excellent and thoughtful allowing easy construction and clean up for a smooth finish. For example, the sprue attachment points are on the inner mating surface of many of the major components which makes cleaning up these areas as easy as it can be. Design features allow the wings to be posed folded, flaps posed up or down, the tail hook posed up or down and there are separate parts for posing the landing gear in the retracted or extended position (although this is not addressed in any way in the instructions). Slide molded parts provide for hollow details and single unit pieces that don’t require assembly and clean up of two halves. Overall, the kit is cleverly designed and simple to build.
Not all is rainbows and unicorns with this kit though. There has been great gnashing of teeth from the experts about shortcomings in the accuracy of the kit, some of which are obvious to even this somewhat untrained eye. There are a number of errors and omissions in the instructions for the kit as well. A feature disappointingly left out of the kit is the ability to display the canopy open despite a comment to the contrary on the bottom of the box. In the end, these issues balance out the positive aspects of the kit and it really comes down to what the builder wants from the project: ease of construction or accuracy.
There are some excellent in-the-box reviews and insightful commentary on the kit’s accuracy that has already been published elsewhere on the internet. This review is, therefore, focused on the build and finishing of the kit highlighting the positives and negatives of that experience. For some excellent sprue shots see Britmodeller.com’s in-the-box review.
The article you are reading, however, covers ground that to date has not been covered elsewhere on the internet: documenting the actual build and finished product.
The build sequence in the instructions is odd. It begins with the landing gear which, in planning for the painting stage, was actually left for last on this build. It is suggested that the builder study the instructions and plan a build sequence of their own as the one given in the instructions will complicate painting and leave fragile parts exposed to heavy handling during the finishing phase of the project. Not only is the sequence ill-advised, the instructions fail to mention some parts and others magically appear in the drawings without mention of the part number or placement. Here is a list of the instruction errors indentified during this review:
- Part C42 appears under the port intake in the drawing of Step 1 without being identified.
- Parts C5, 6, 7, and 8, which are the air intake vanes, also just appear in Step 1 without other mention leaving the builder to sort which goes where.
- Parts C35 and 36 are not mentioned at all or shown in the drawings. They are small bits that are hard to indentify and their placement is mysterious. They were left off of this build as their placement remains a mystery.
- Parts B5, C33 and 34 are gear bay doors molded in the closed position, but this option is not mentioned in the instructions. Their application is fairly clear though if the presence of the parts on the sprue is noted by the modeler.
- There is an instrument panel decal that fits very well, but is not mentioned in the instructions.
- The paint scheme applied for this build is the subject of the box art and the instructions show checks on both sides of the wing tank which is wrong. The box art is more correct showing checks on the outer half only, but still misses the wrap-around of the colors on the inside of the tank tips.
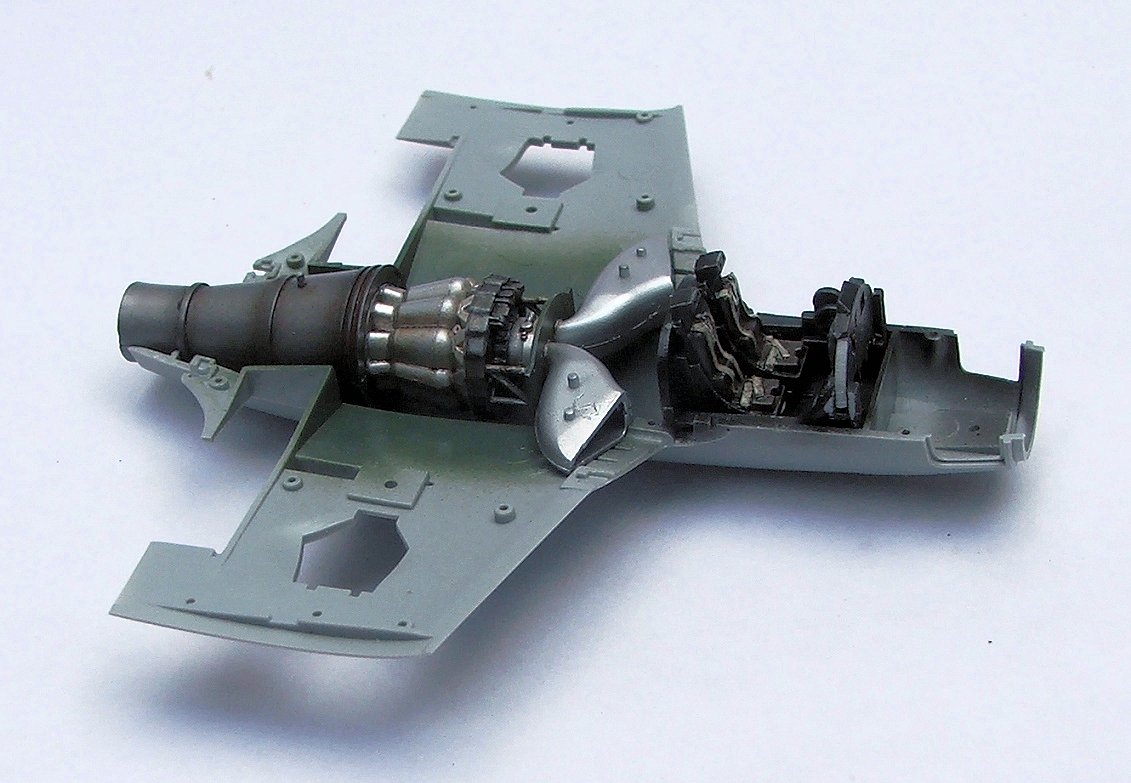
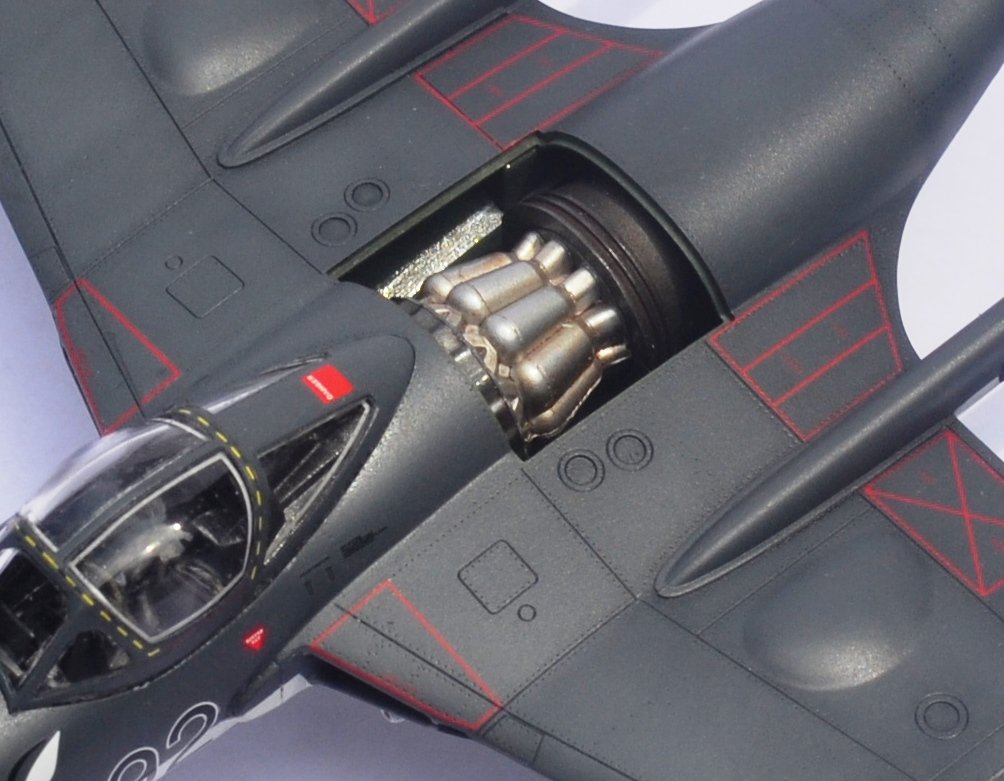
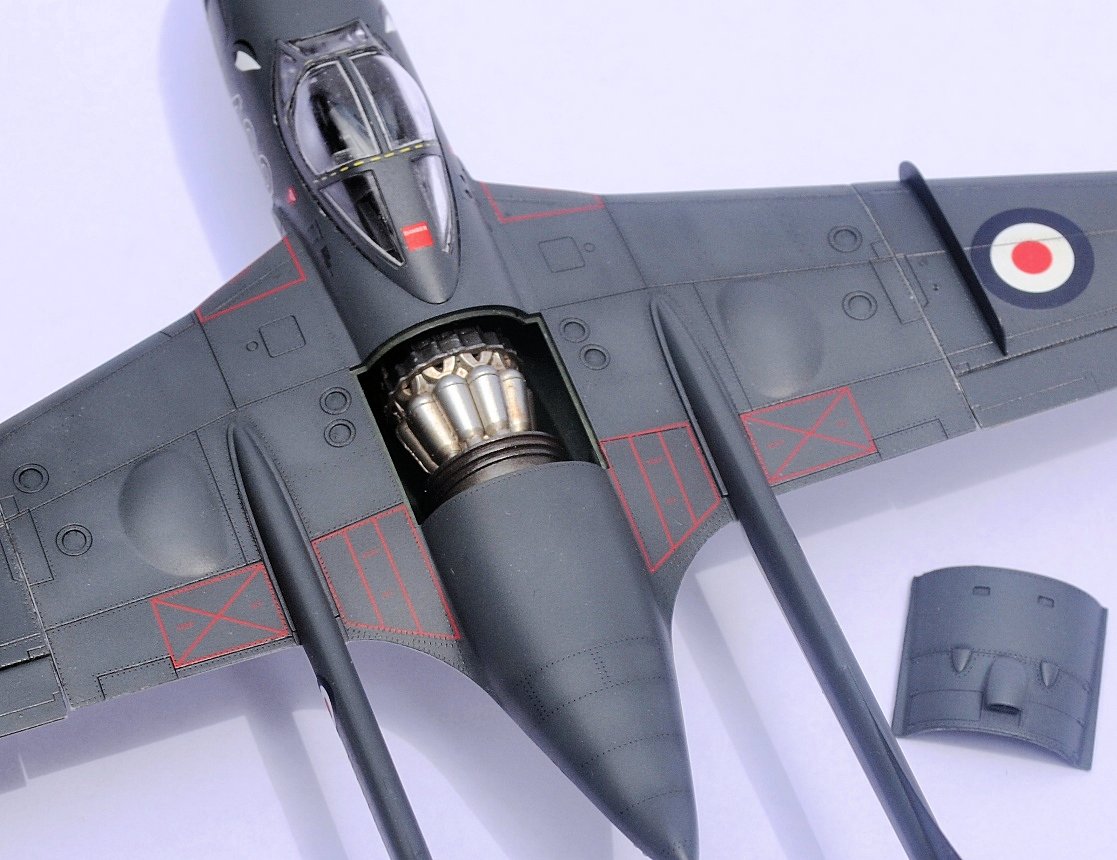
The kit features a full engine with a removable panel for viewing and this is where the build for this article began. It is a neat feature, but the engine is simplified as is understandable for the scale and medium. The engine was painted and the panel left removable for the purpose of demonstrating the feature in this review, but others may wish to glue the panel closed if the simplified detailing is found to be undesirable. The fit of the removable panel is quite snug though and it is relatively undetectable even if not glued shut as on this build.
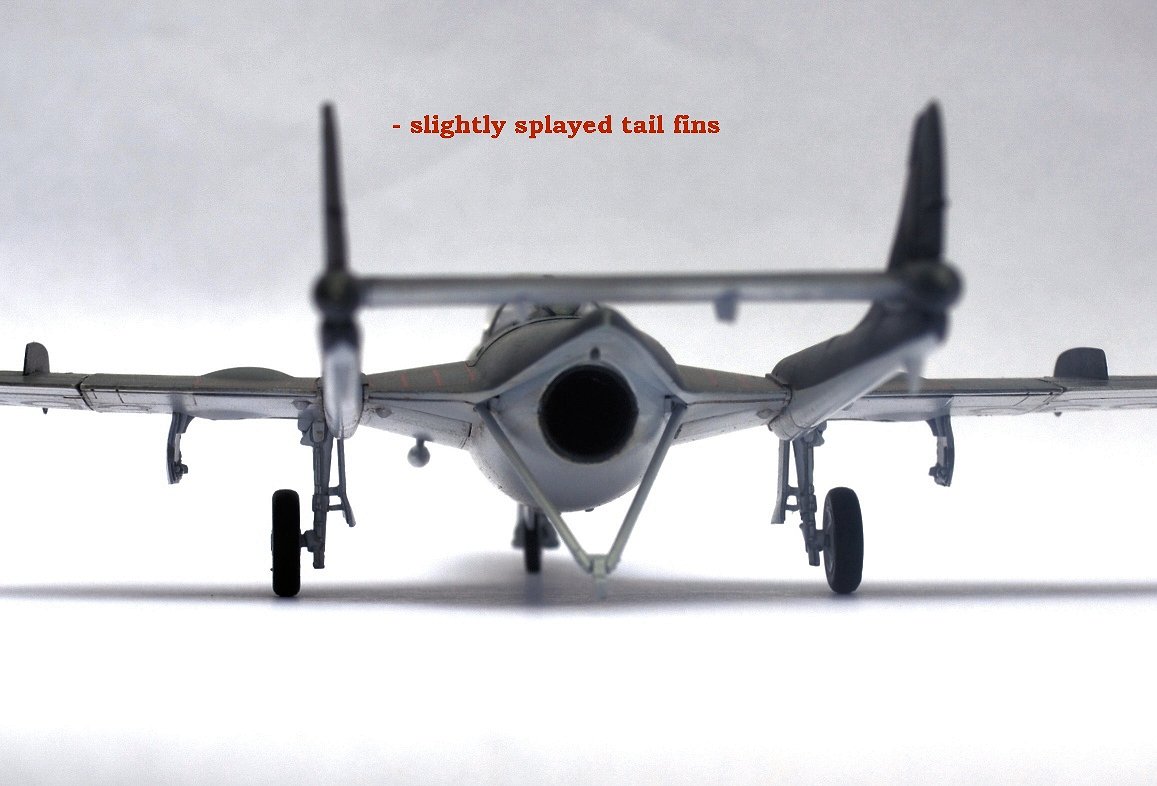
The fit of all the interior detailing is very good. This includes the cockpit, engine and wing fold inserts. The fuselage is split horizontally and with most of the seam at the edges of the wings which is easier to clean up for a smooth finish. There was a bit of an overbite along the fuselage ahead of the intakes that required filing and smoothing. The two panels at the nose are separate parts which fit well and eliminated seam clean up in the area. The nose cone attaches at a natural panel line as do the tail booms and are both molded as one piece. The fit of the nose cone is snug and a bit of sanding around the rim was needed to get a good join. The tail booms fit very nicely onto the wings, but the tail fins appear to be slightly splayed outward which was not addressed in this build as a fix would be complicated. It is not terribly noticeable, but may get a sour comment from an IPMS judge at a contest.
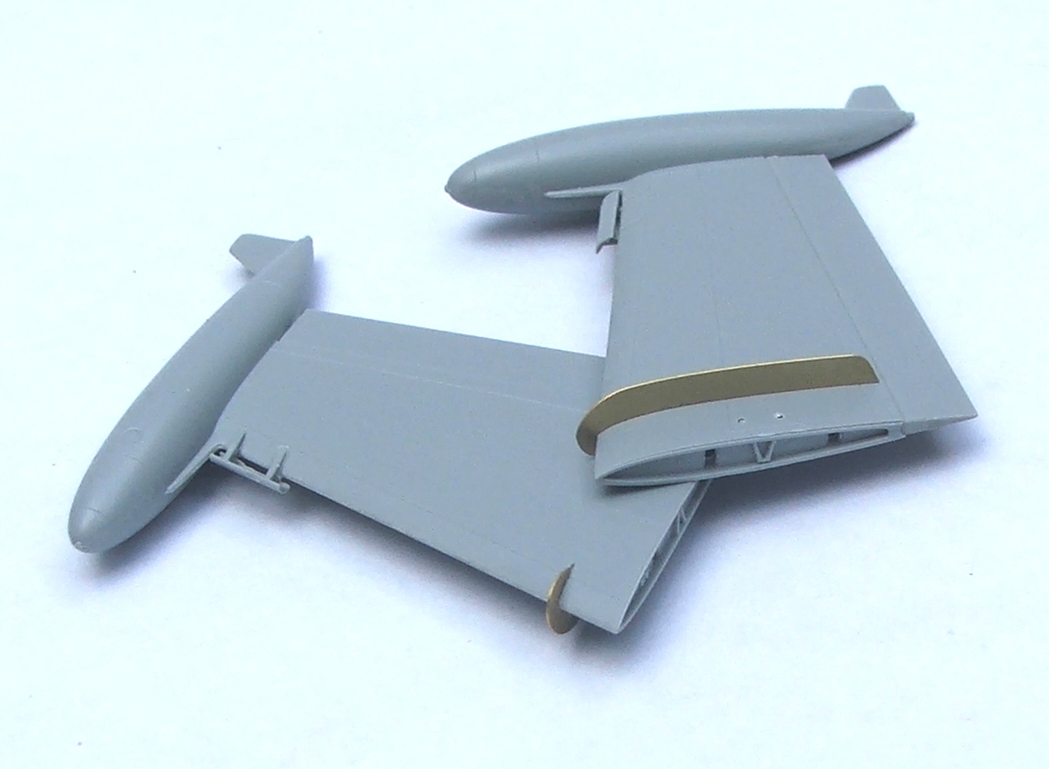
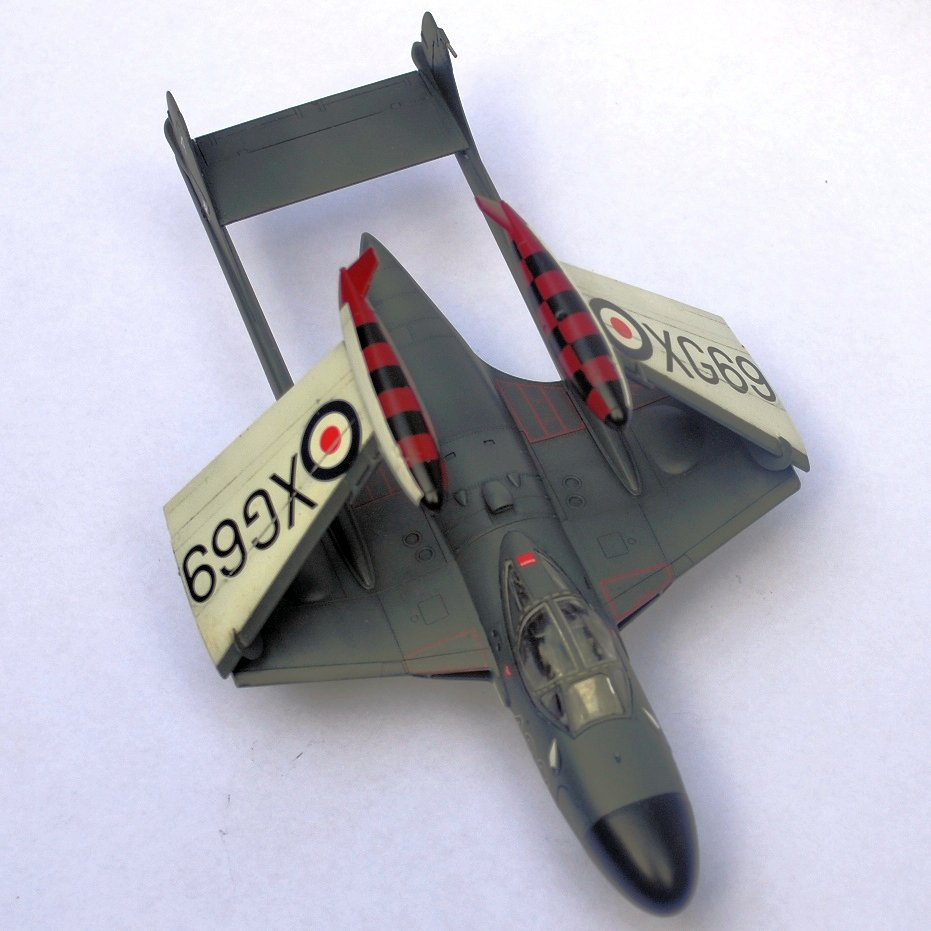
The wing fences are supplied as photo-etched brass parts and fit well. The flaps are separate items, but there is no positive location for them in the down position or detail in the bay. The flaps fit well in the closed position. The wing fold parts are simple, reasonably detailed and fit well with certainty of placement and angle. The parts used to align the wings in the down position do not, however, allow for a very good fit and required some modifications.
The cockpit is detailed with a stick, some sidewall detail, instrument panel and seats. The seats seem a bit undersized, but this model was built pursuant to IPMS out-of-the-box standards and, therefore, this was left unaddressed. There are holes in the head rest for placing wire to depict the ejection handle, but it is not suggested in the instructions and was left off of this build for the same reason. Tape seatbelts are, however, allowed for an IPMS out-of-the-box build and were used for this project. As mentioned, the instrument panel decal fits well, snuggles down appropriately and looks convincingly busy especially given what little will be seen through the closed canopy.
The canopy fits into a recessed rim for the cockpit. The fit is not perfect and a bit of a gap results at the edge. Not much of a gap, but it is worthy of a spot of filler. The front and rear portions of the canopy fit snugly. The white seal around the clear parts that is a prominent feature of the original is not mentioned in the instructions or provided on the decal sheet. White strips of decal were scavenged from spare sheets and applied to the inside of the canopy on this build. The middle section of the canopy is thick and obscures the view of the cockpit, but this seems to be inevitable due to the blown humps of the original which are depicted on this model.
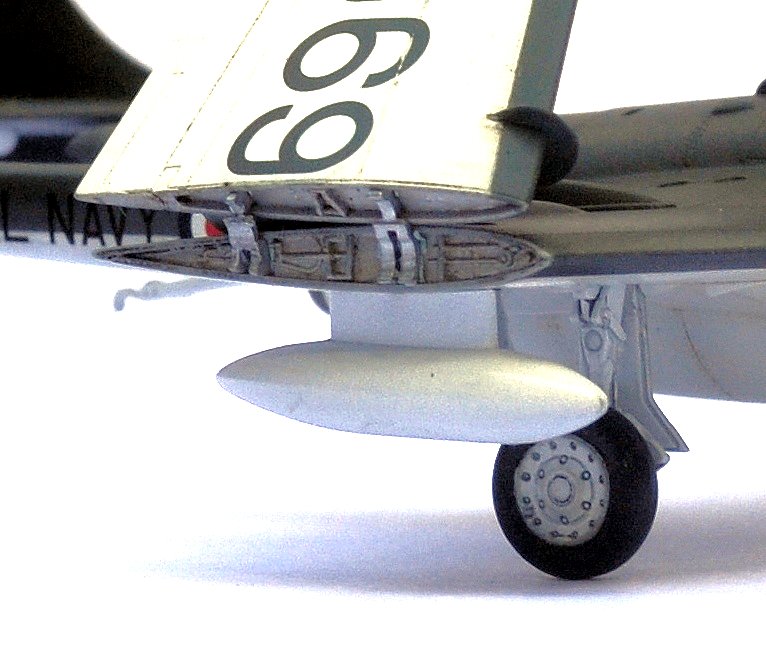
Landing gear placement is not quite as precise as some kits, but they can be aligned with care. The gear bay doors fit well with precision in placement and alignment. The hole for the nose gear is not present, but the detailing in the nose gear bay stops where it should be and shows the builder where to drill one out. The nose gear bay is shallow, but the parts are reasonably detailed and realistic in appearance.
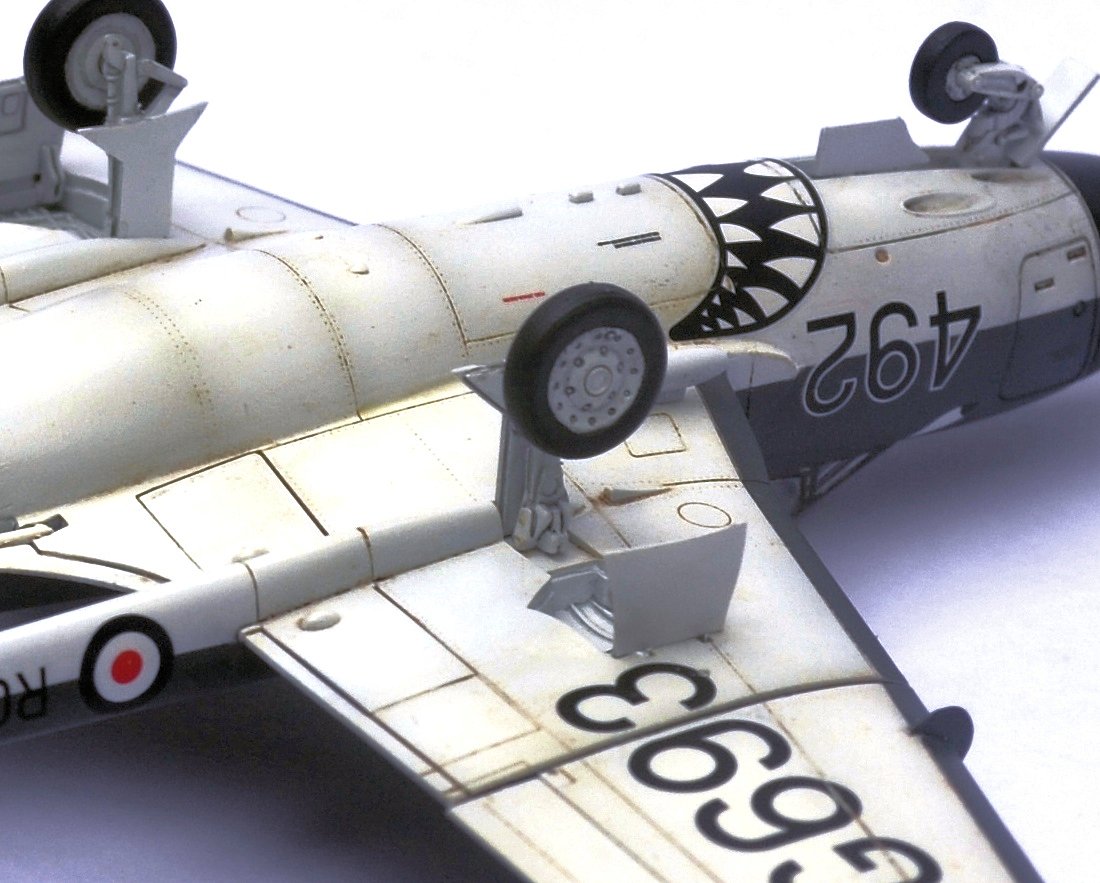
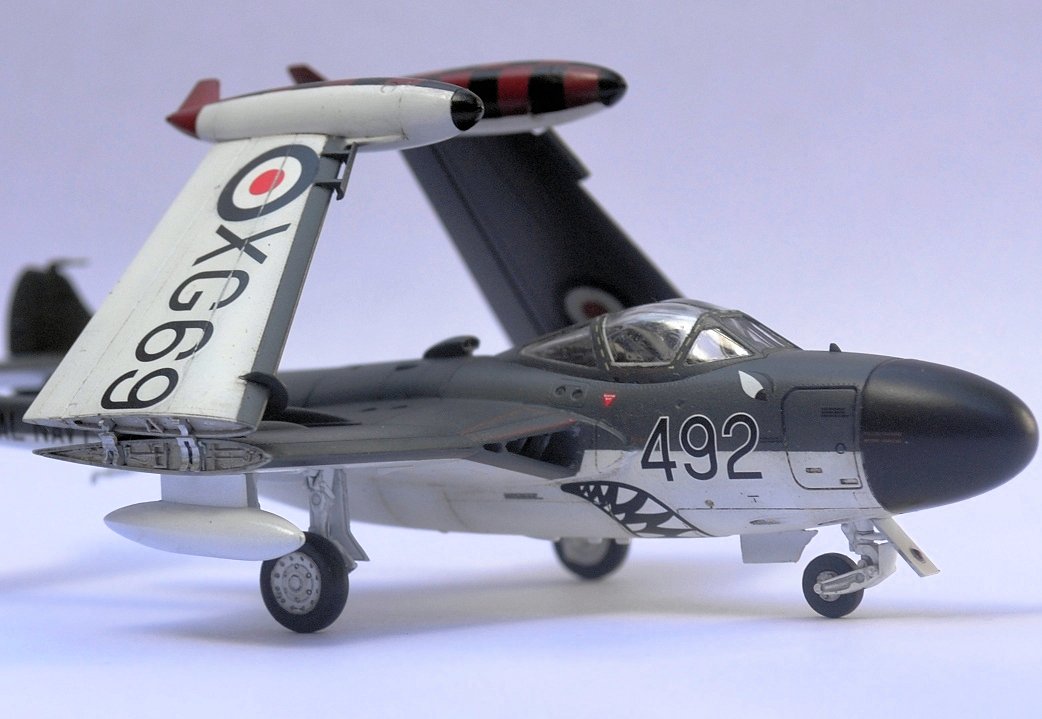
The kit decals are of generally good quality with good registration, clarity and color. The yellow for the invasion stripes on the alternative scheme seems a bit off, but the decals used for the scheme on this build were primarily black and white with the exception of the roundels and red stencils. The roundels are a bit transparent. For the roundels on the tail booms, mask off a white disc for a background or double up with a spare decal as was done on this build. The checks for the wing tanks do not fit at all and it is suspected that the same would be true for the decal invasion stripes as well. Masking and painting these features will achieve a better result with less effort in the end. The decals settled in well with Mr. Mark Setter and Softer and resulted in a nice finish.
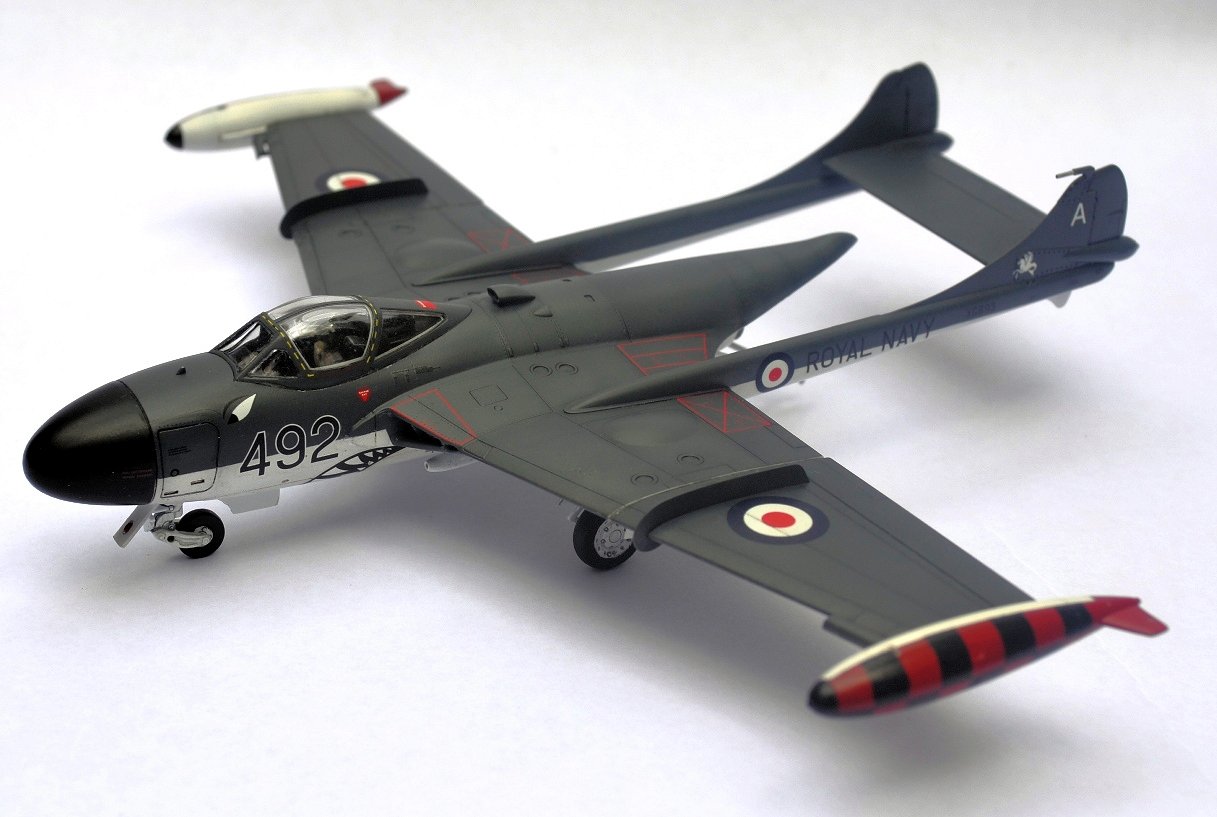
The end result is a nice caricature of the original with convincing details that convey realism. They are not accurately reproduced in many respects, but the finished model does have a nice presence. Without carefully comparing it side by side to photos or the real thing, the model has the look of an authentic replica. Even a casual comparison will give the impression that it looks like a Sea Venom; of course, growing familiarity with the subtleties of the shape and dimensions of the original will lesson this impression.
The kit was certainly fun to build. The parts fit together very nicely and the kit is well engineered to accommodate a good finish with well aligned parts. It is a relatively easy kit with which to accomplish a good finish. The value is good at the usual discounted prices, although the list price is less competitive. Overall the kit is recommended for all but those who are most familiar with the type and for a less challenging build than the alternative options for building a Sea Venom in 1/72 scale.
Many thanks to the Dragon Models USA and IPMS USA for the opportunity to build and review this kit.


Parts trees
Cockpit and engine
Wings

Cockpit
Folded wing

Completed Model
Completed Model

Completed Model
Completed Model
Completed Model

Completed Model

Completed Model
Completed Model
Completed Model
Completed Model
Completed Model
Completed Model

Completed Model

Completed Model

Comments
Add new comment
This site is protected by reCAPTCHA and the Google Privacy Policy and Terms of Service apply.
Similar Reviews