
Scale Model Details - Sherman Set #16
Value Gear is known as a supplier of high-quality detail parts for armor kits as well as other subjects. Their accessories add to the detailed interest of any armor kit.
All the parts in this kit are resin and have an amazing amount of detail in them.
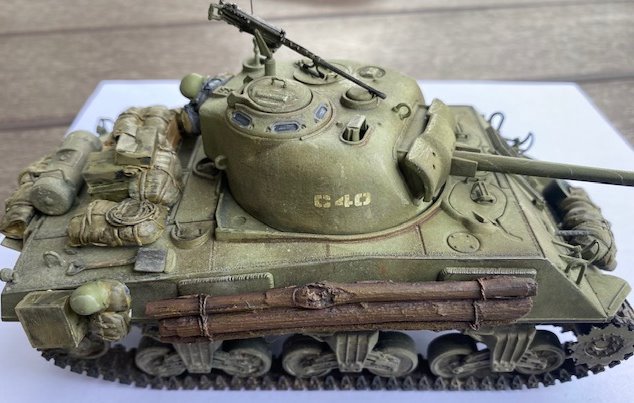
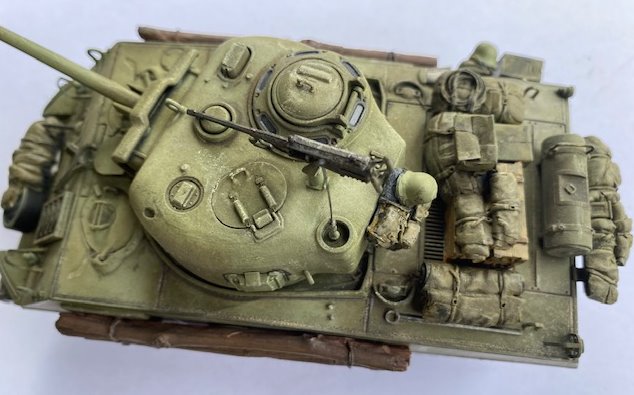
These accessory items are directed to the M-4 Sherman Easy 8 tank. I say items “directed to” because there are several armor kits that these items could be used on.
Package contents
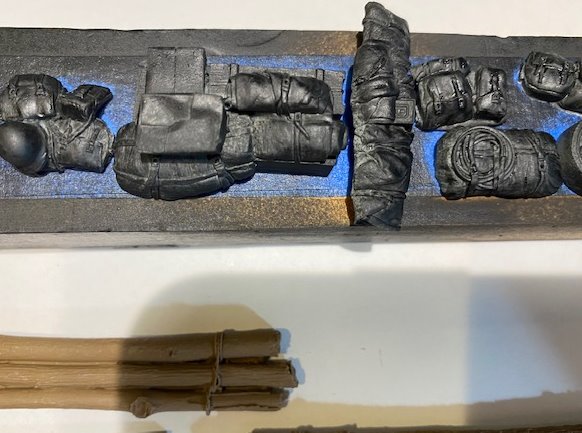
The package contains 2 bundles of logs, 2helmet ruck sack combinations, bundle of tarps and storage boxes, a large tarp and 5 bundles of blankets.
Painting Materials
The first thing I did was to wash the resin barrels in soapy water to remove any residue that may be on the pieces.
I decided for ease of handling that I would attach the items to a small piece of wood with sticky tape ready for painting.
The following are paints that I used
- Black Stynylrez - primer
- Vallejo Black
- Black Brown
- Wood
- Canvas
- Light Brown
- Khaki
- White
- Mission Models Paint
- Olive Drab faded 2
- NATO Brown
- Mission Models Clear Coat
- Clear Primer 30% mixed with MMP thinner – CP30
- Acrylic Wash
- 50% water, 50% Aquagloss, 1 drop Sepia Daler Rowney acrylic ink, 1drop Liquitex retarder.
- AK Acrylic Matt
- Paint procedures
Once the parts were primed in black, I assembled all the paints listed onto a wet palette. By putting the acrylic paint on a wet palette, you can keep the paints from drying out for days and keep them fully workable.
On the palette with the paint drops I also put some water to blend the paints with, the paints should be diluted making a glaze.
A glaze is thinning the paint with water where it is between a filter and a wash. The idea with a glaze is you put on the paint and it is very translucent, enough you can see the color under it easily. If you get puddles of paint in areas, you can use a dry paint brush to remove any excess.
Using a glaze means you will need several layers of paint to bring up any opacity on your subject. My first base color was Canvas for the tarps and bags, once the first layer was down, I could see some of the black primer providing a shadow effect under it. When using a glaze, you are going to be painting at least 5 to 10 layers depending on the opacity you want.
I used the appropriate color glazes for the tarps, helmets, logs and wood boxes still getting a shadow effect in different areas on the pieces. I painted the colors starting from the darkest to the lightest.
A clear coat came next using the CP-30 mixture to give a wash a shiny surface to apply to.
The pin wash was next after the clear coat had dried. The pin wash was used to bring out areas of folded material without giving the pieces an overall darker color like as if I had used a wash over all the pieces complete surfaces.
Once all the paint and clear coat had dried, I dry brushed the appropriate colors over the pieces. This procedure brought out the higher and highlight places on the pieces.
Next came the applications of AK pencils to add just a little more of highlights.
Finally, after all the work had dried, I sprayed the parts with a light coat of AK Acrylic Matt thinned 70%.
Summary
This was my first attempt at painting any kind of stowage, and for me the lesson learned was the use of colored glazes especially when painting any kind of fabric material.
These pieces would be a great asset to any armor kit you wanted to build.
Thank you to Value Gear and IPMS/USA for the opportunity to review this kit accessory.


Comments
Add new comment
This site is protected by reCAPTCHA and the Google Privacy Policy and Terms of Service apply.
Similar Reviews