
P-51B Mustang
History
The P-51 Mustang is probably the most well-known fighter aircraft ever built. Originally designed to fill an order from the British government, the P-51 was built by North American Aviation. The first examples did not show much promise until a switch was made to the Rolls-Royce engine. By 1944, the skies over Europe were dominated by the allies thanks to fighters like the P-51.
The Kit
Upon opening the box I was transported back to 1973 when my brother built this kit! I remember thinking how cool it was to get not only cockpit detail but an engine too!! How cool was that?! Never get any better than this, NEVER!!! This kit dates back to the late 1960s and it shows, however, it’s still a fun kit to build and younger modelers might like this due to its size. All 3 ½ sprues of light grey plastic are bagged separately as are the clear parts. You also get a nicely printed, but thick, decal sheet and a 15 page instruction book. The plastic has raised rivets and panel lines, many pin marks, a few sink marks and lots of flash. (You will too when you get this old!)
Construction
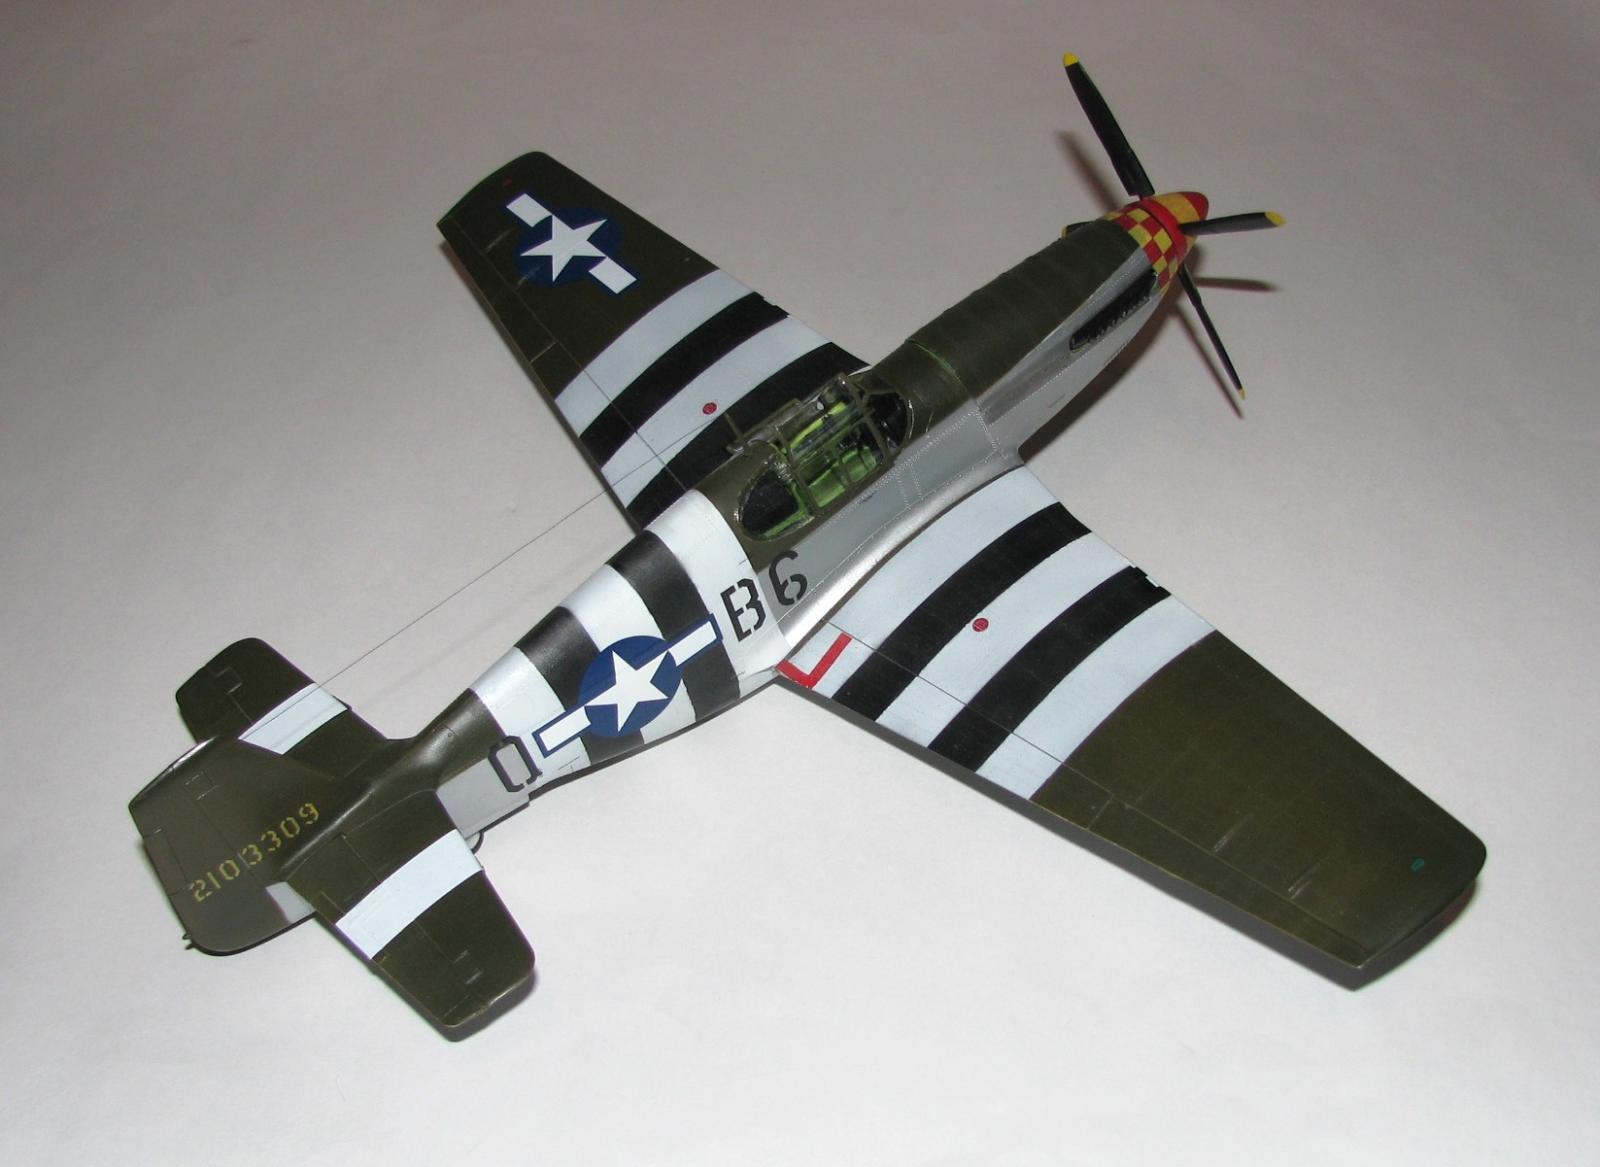
It all starts with the engine. 7 parts make up this assembly and when the parts were cleaned up they fit together pretty well. Next is the cockpit with all of 6 parts, as the seat pan is molded onto the floor and all of the side panel boxes are molded on their respective parts (17 & 26). You are given a decal for the control panel and this was my first problem. The decals are a bit thick and did not want to settle down, even after Micro-set, Micro-sol and Solva-Set were used. It took some doing but I finally got it (More on this later). Now on to the rest of the fuselage interior (firewall, tail wheel, radio deck & underwing cooler outlet door), and all of this is attached to the right side of the fuselage. My second problem area was the tail wheel as it looked fragile to me….and it is. Once the kit was standing on its own there is just too much weight for the tail strut to hold and it cracked. I fixed this by placing a clear disc between the wheel and the bottom of the strut (The gear doors pretty much hide it). The instructions say to add the horizontal stabilizers before assembling the fuselage, but I waited till after as it was easier for me. The fuselage was assembled with little fuss but I will say you must pay attention to the radio deck (part #19) as it had a way of slipping underneath the tabs of the left half of the fuselage.
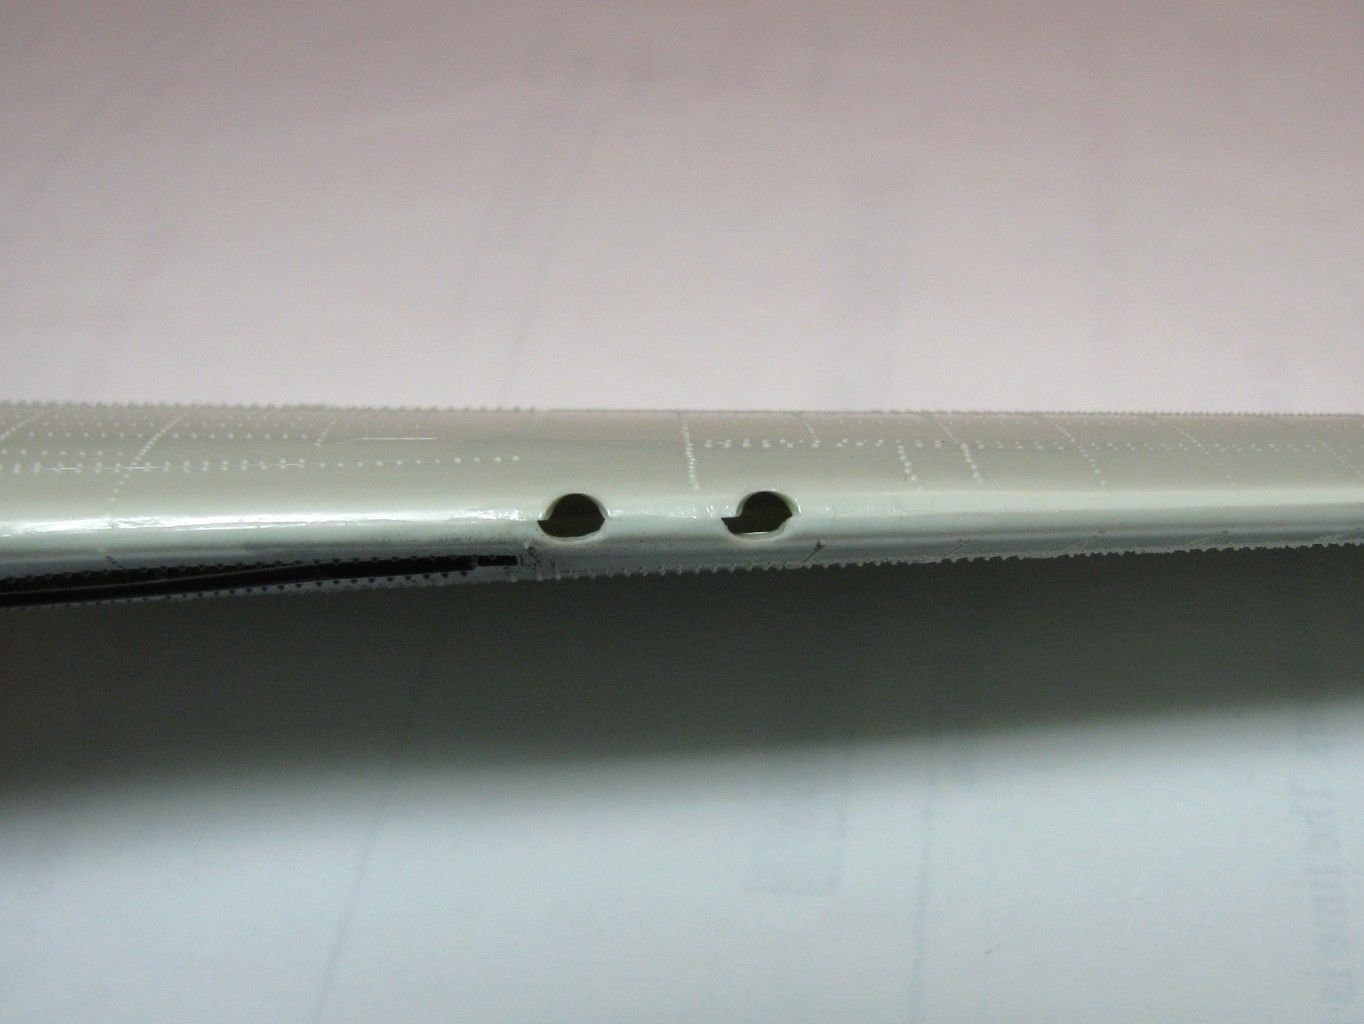
Next up are the wheels & struts and the assembly for these is basic but be warned, there is a decal for the tire that really should go on BEFORE attaching it to the strut...ask me how I know! On to the wings and they needed a little sanding due to some pin marks but otherwise went together well. The gun ports, however, were slightly off line (see photo) and needed to be fixed. No guns are supplied so I decided to cover the ports with tape. One thing to note here is that you are supplied with pylons for the drop tanks but no tanks and the instructions do not show where or when to place the pylons. The wing fit to the fuselage with little fuss and to my joy no filler was needed. I decided to attach the stabilizers now, fill/fix any seam lines & sink marks and sand down the raised detail. Once the kit was painted I then added the canopy and this is my 3rd and biggest problem area. The clear parts do not fit quite right, especially the windscreen, and because of this the side pieces didn’t fit well. I ended up having to add a small strip of Evergreen plastic to the right side of the windscreen to get it looking a little better. You may want to get a vac. canopy to replace this.
Finishing
You are given two marking options:
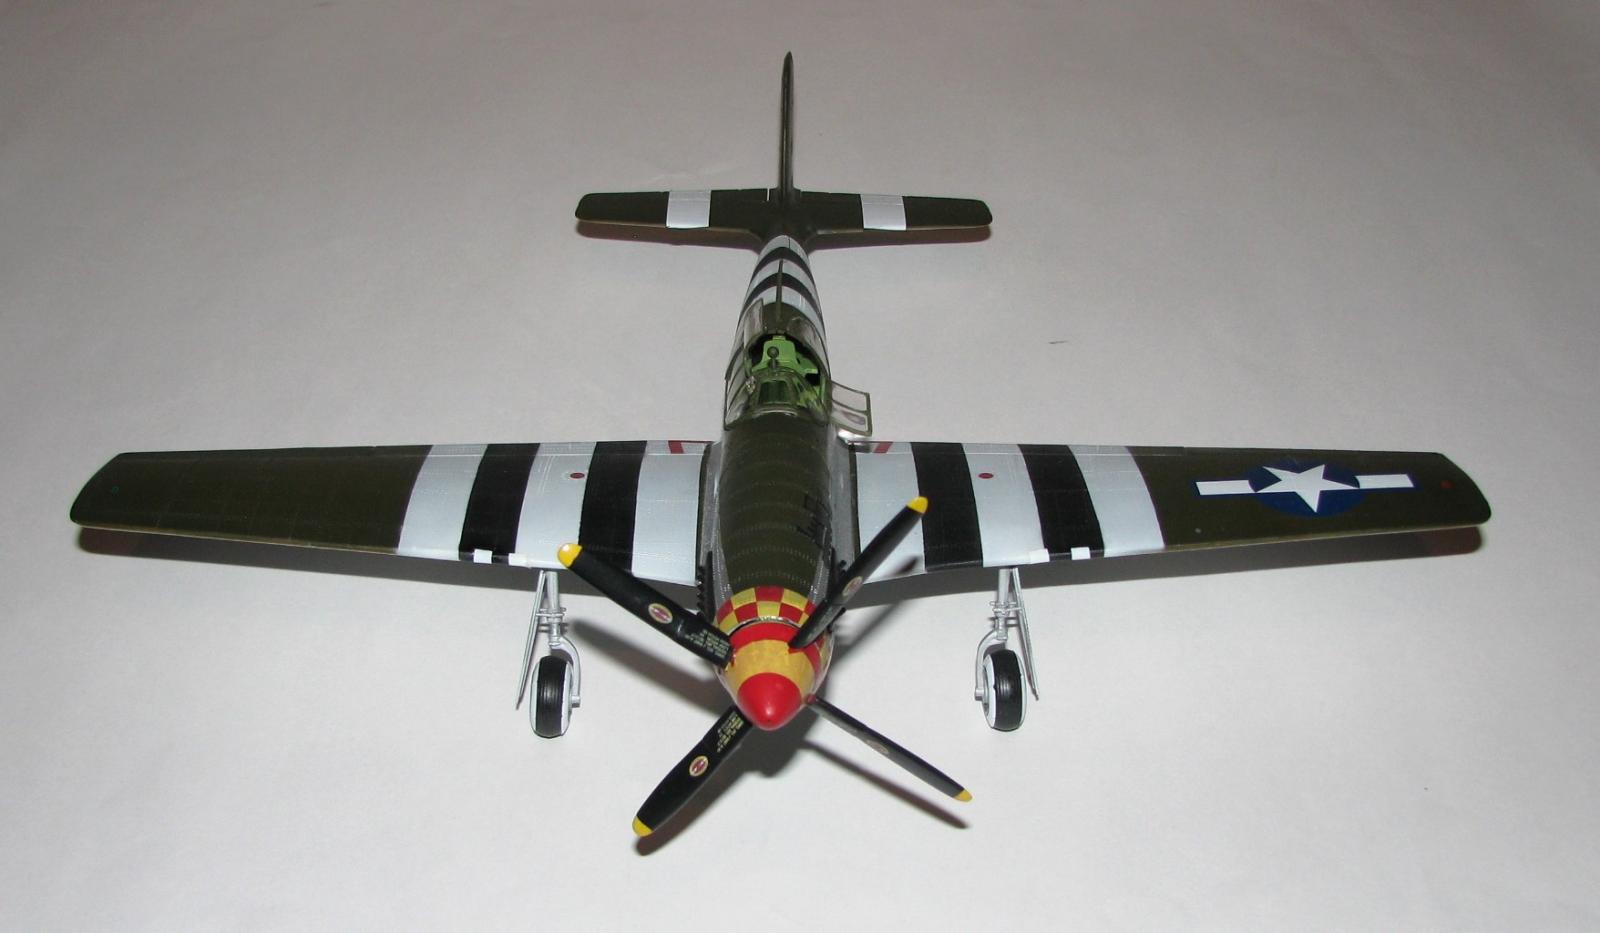
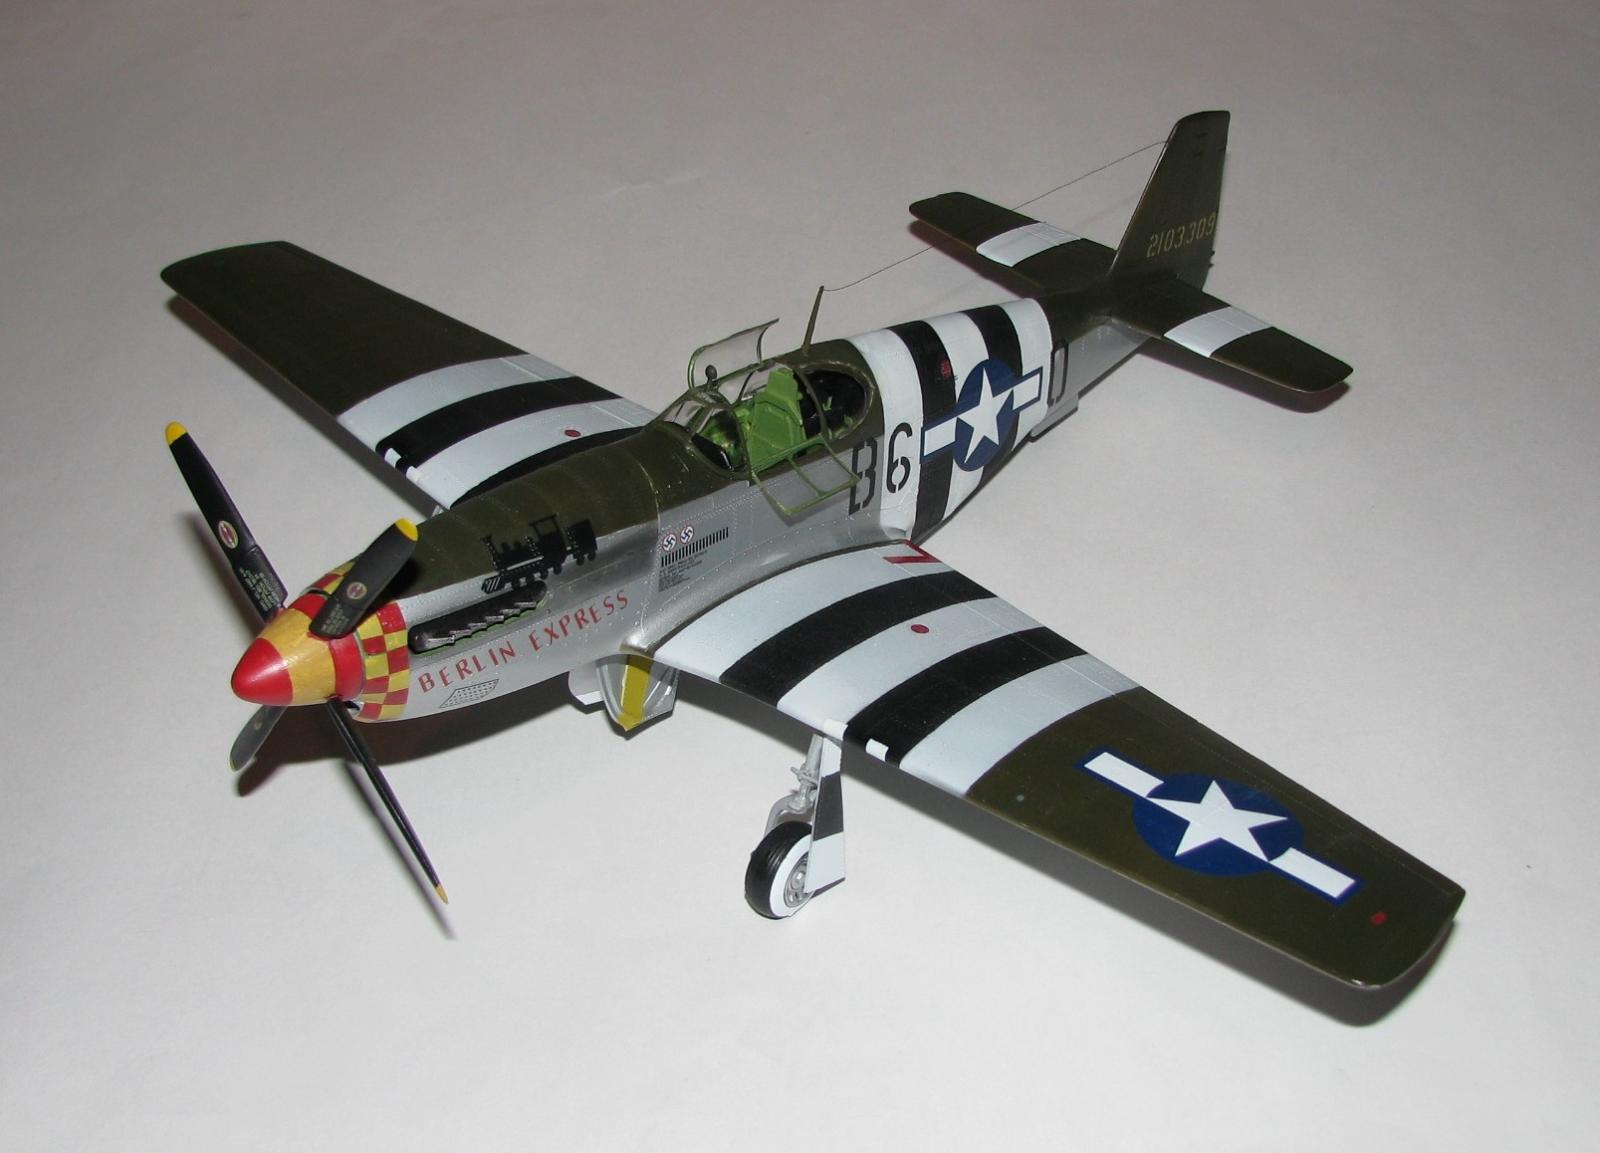
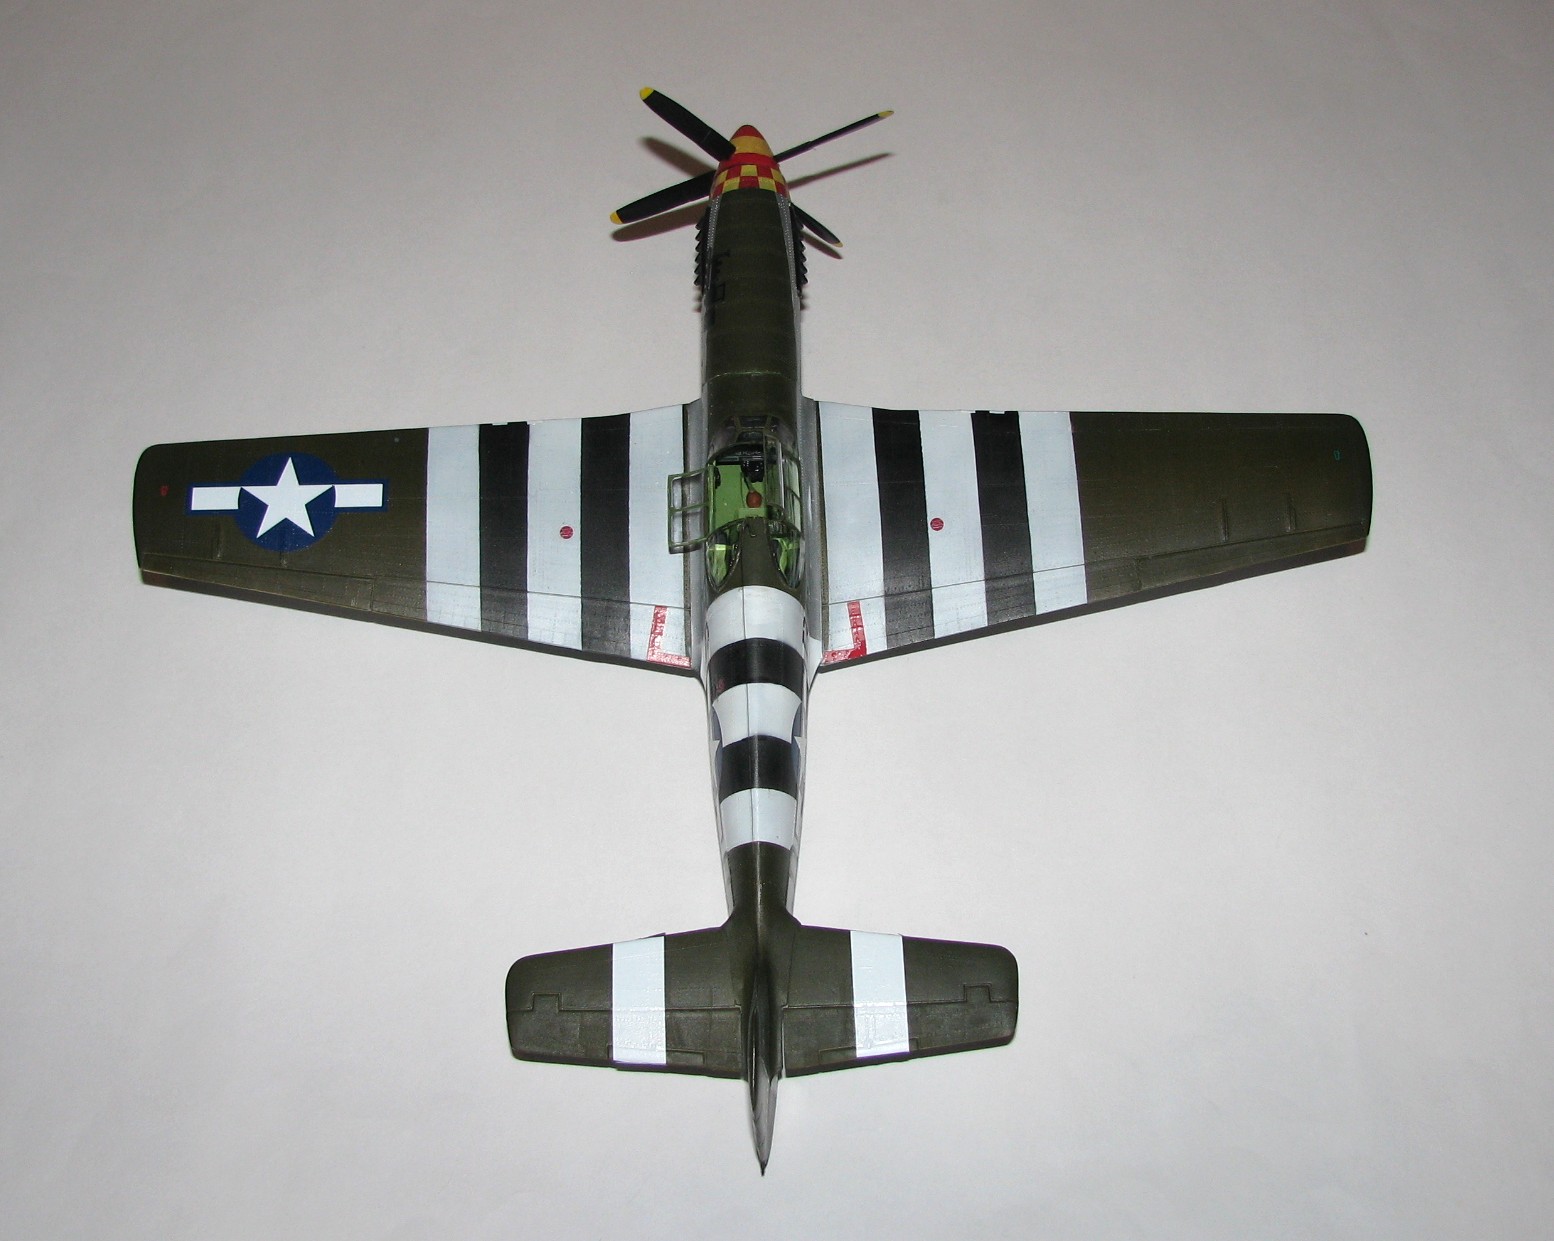
- #1. ‘Berlin Express’ OD over NMF. (The one I chose)
- #2. ‘Miss Lace’ NMF with a blue nose.
I used Tamiya AS-12(Bare Metal Silver), XF-58 (Olive Green), XF-1(Flat Black) and XF-2 (Flat White) for the color scheme. The decals are the final problem area for me. After fighting the control panel decal I decided to try something different...for me anyway. I applied Micro-set first then dipped the decal in not-quite boiling water. After placing the decal, I hit it with more Micro-set then Micro-Sol and this seemed to do the job. So lesson learned, VERY hot water is needed for these decals.
Conclusion
An oldie but still a goodie and with a little work can be made to look pretty good. I recommend this to all modelers of all skill levels.
I would like to thank Revell for supplying this kit, the review corps for letting me build it, and all of you for reading this. Model on!


Comments
P-51B Mustang
The kit is pretty good when you consider the AGE! I believe the instructions show putting the radio shelf in backwards? I am building it now—2022! Hobby Lobby sold it for $7.49 so I felt like I could not lose. I did order some drop tanks. I found pictures of a pro model online that shows positions. Thanks for your review—it was very thorough!
Add new comment
This site is protected by reCAPTCHA and the Google Privacy Policy and Terms of Service apply.
Similar Reviews