
HP.52 Hampden TB.Mk.I
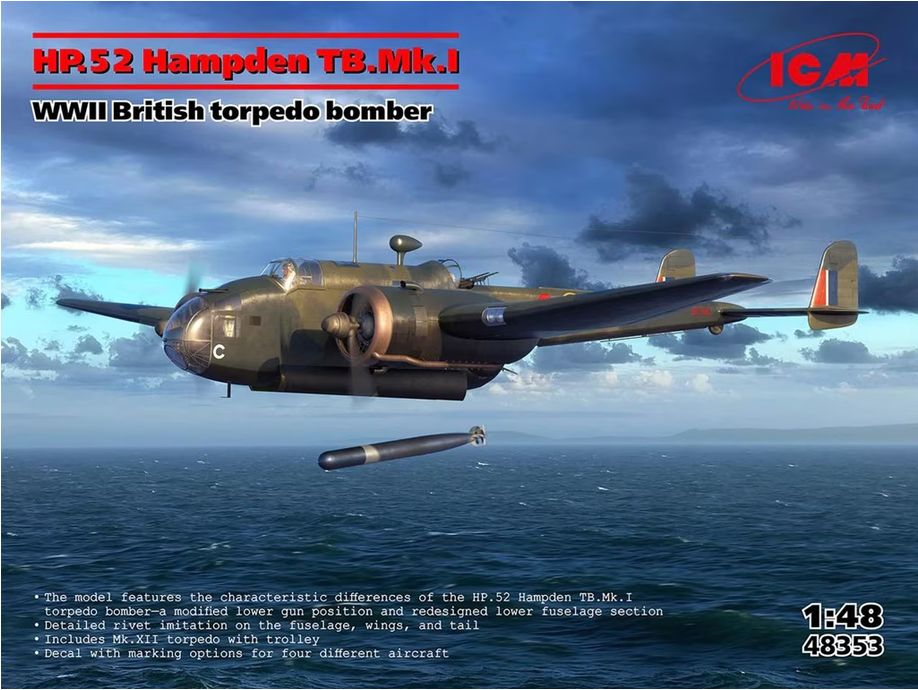
ICM has been producing a series of high-quality twin-engine bombers on a 1/48 scale, like the Ju-88, He-111, Ki-21, Beaufort, just to name a few. Now the Handley Page HP.52 “Hampden” has joined the club!
This boxing is for the Hampden TB.Mk.1 (TB stands for Torpedo Bomber) and has markings for 4 different Hampden airframes, likely covering all the different camouflage schemes used by the Torpedo Bomber variant of the Hampden.
The kit arrives in a sturdy white box (no markings in the box) with a separate lid providing the cover art and details of what is inside the white box. There is a total of 12 sprues with 301 parts, plus a decal sheet and an instruction book which also provides you with mask templates for the complex nose, canopy and defensive gun turrets.
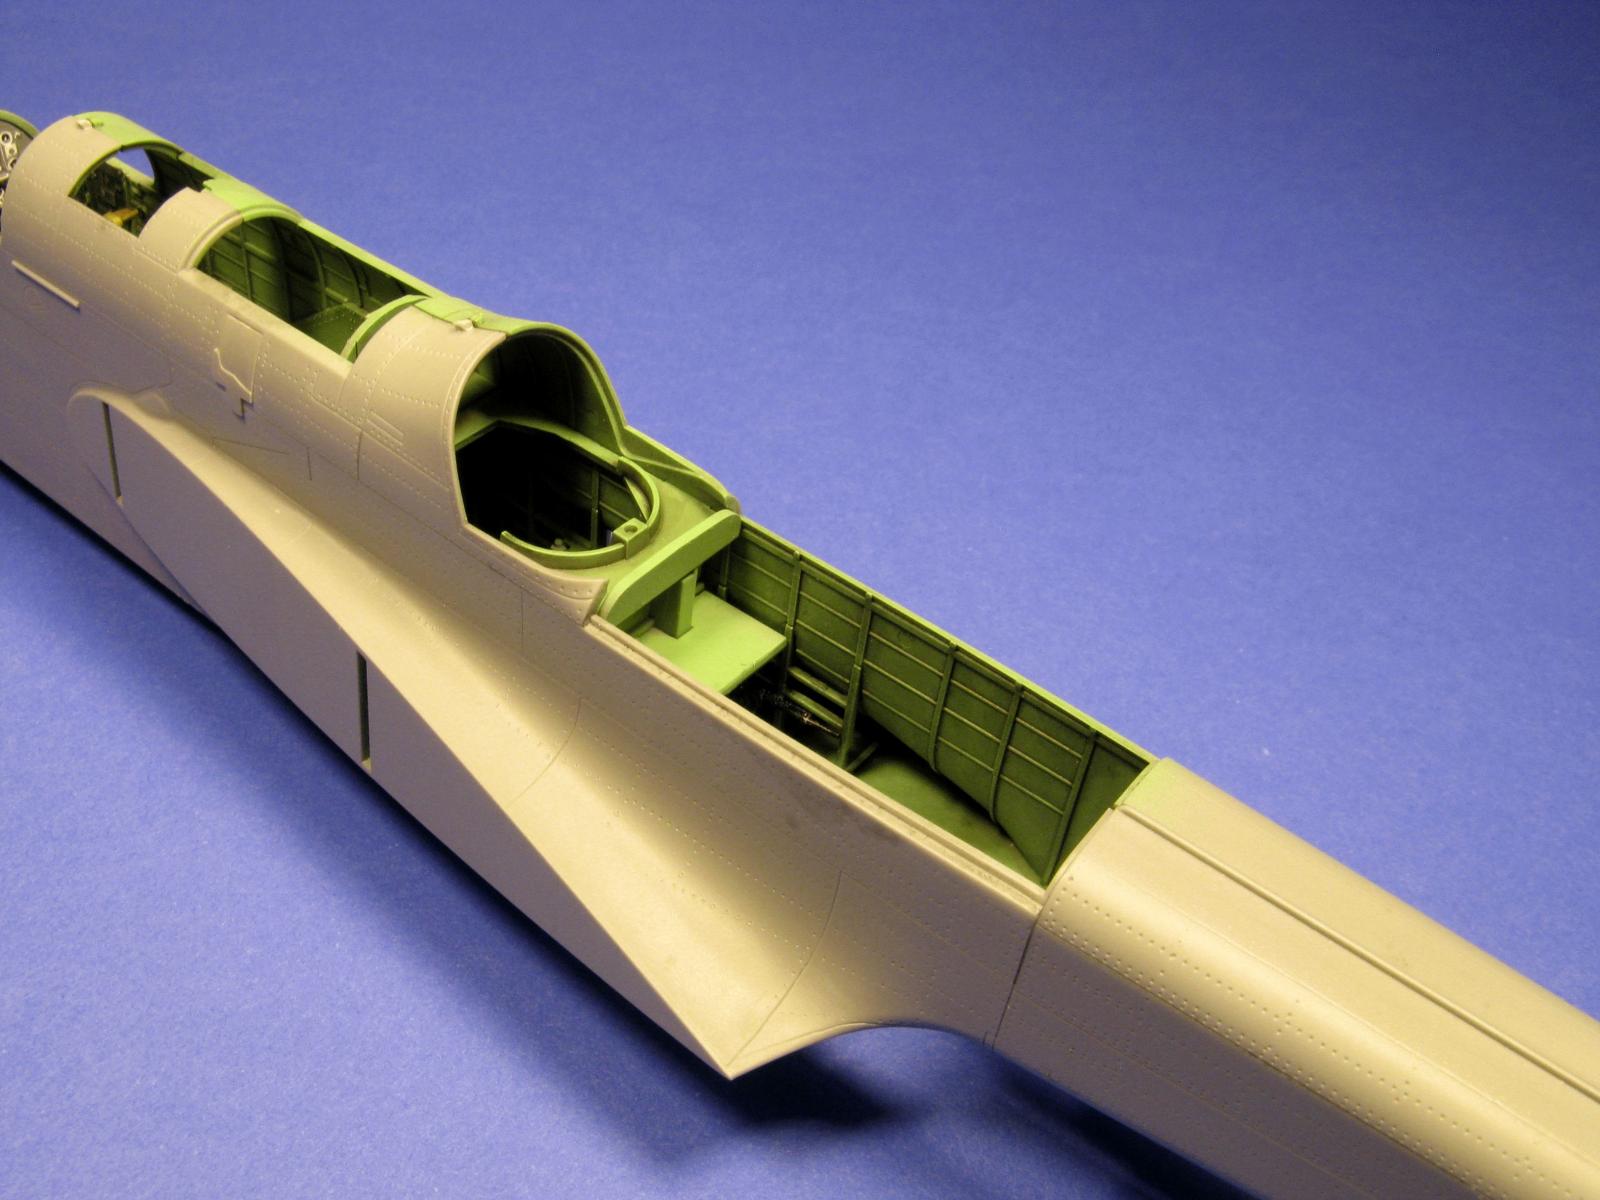
Construction starts with a full interior for the model. This is not just the cockpit but a whole interior with detailed positions for the crew: Pilot, navigator, upper gunner and lower gunner. Even a small toilet is included! I added seatbelts made out of Tamiya tape and the metal buckles were made by repurposing links from a small necklace chain. It is not perfect but is better than nothing, considering that there are no seatbelts provided in the box (either molded on the seats or as decals).
Do not underestimate the time that would take you to assemble all those interior details. It took me about 12 hrs over several modelling sessions to prepare the parts, dry-fit them, mount and paint them. Although most of them are not visible once the model is completed, I know they are there!
Be careful with the alignment of the interior parts or the fuselage halves might not properly close. But don’t be afraid of these steps either! Fit is excellent all around and by cleaning the parts and properly dry-fitting them you should have little to no-problem.
Having said that, I did run into a small issue when closing the fuselage: The tail wheel struts support (part D.43) seems to interfere with a small tab molded in the starboard half of the fuselage. I was unable to figure it out what I might have been doing wrong but by filing that small tab (the closest to the tail, as shown in the picture) then the tail wheel strut support (part D.43) assembly fits perfectly in place and it gets sandwiched by the fuselage parts.
The twin tail assembly really presents no issues but beware that you can have the twin rudders located in any position (ie, neutral, or deflected). Given that they are twin rudders, I choose to go with neutral, and I glued them in that position. It is easier to ensure both are in a neutral position than having them deflected the same angle in both tails.
Moving onto the wings: The wings themselves present no problem during assembly. The parts have excellent fit and only require proper clean-up of the attachment points to the sprues. I do recommend painting the landing gear bays areas before you assemble the wings and landing gear enclosures. Otherwise, it will be difficult to get your airbrush to cover with paint all the deep corners of the landing gear bays.
The instructions call for mounting the main landing gear at the time of assembling the wings. It is correct that if you don’t mount the landing gear while assembling the wings, then it will not be possible to add them later.
However, I would rather have the landing gear be a subassembly separated from the main model during painting, decaling and weathering. It is possible to do so, if you are willing to modify the landing gear and sacrifice accuracy a little bit. Part E22 has a “rod” which prevents the whole subassembly from being mounted after painting and decaling. I think the rod represents an acting lever that helped the landing gear rotate. If you simply cut it off (I know, it is a trade off with accuracy) as shown in Picture 15, you can then mount and glue the landing gear as part of final assembly. Honestly, the rod that is removed from part E22 is virtually impossible to see in the finished model as its view is blocked by parts C11 and C4. I leave that decision up to you.
While on the topic of the wings, I decided to make another small deviation from the instructions when it comes to the engines. You are instructed to mount the engines and then assemble the circular cowling around the engines. However, it is possible to mount the circular cowling and cowling flaps independently from the engine and streamline the whole assembly and painting processes. Just make sure you align those parts properly, so the engine will “slide in” without any interference. Using the cowling flaps ring part will help you do so.
The engines themselves are nicely detailed, and they have plenty of small rods and parts that need some clean up to fit properly. There are 3 sets of brackets in each engine that I had trouble understanding how to mount (parts E43 and E63). They sit between the crankcase and the cooling ring. I couldn’t figure out how they are mounted until I visited the ICM holdings website and found a CAD drawing showing the parts already mounted (See Picture 16)
The last step before priming was to mount the wings. They mount against the fuselage in a firm way that set the proper dihedral. I did have a small gap in the starboard wing root. It was and easy task to take care of with putty, as the gap was barely visible.
The next task was to assemble and mask all the clear parts. The nose assembly is somewhat complex. I decided to use UV curing resin to assemble the multi-part nose, as it provides extra strength relative to using white glue. The instructions provide you with templates from which you can create masks. I chose an even simpler way: I purchased an Eduard mask set, which had the mask pre-cut. The Eduard set I got was for the Bomber version (not the Torpedo Bomber version) but almost every clear part is the same in both models, and it saved me lots of time and effort.
Painting was accomplished with Tru-Color paints, and it was followed by a clear gloss coat in preparations for decals. The provided decals behaved well and responded well to Micro Set/Sol, although no decal had to conform to a particularly challenging curved surface. Weathering was accomplished with Tamiya Panel Liner, which highlighted all the amazing surface detail.
At this point I was almost to the finish line! Only to realize that I still have to assemble the torpedo dolly and the actual torpedo. The dolly itself presented no challenges. While assembling the torpedo, ensure there are no visible seams. I just had to take my time sanding them off and rescribing a bit some lost detail. The dolly and torpedo were primed and finished with ICM paints. Please note that you get one dolly and one torpedo in the box. I happened to have an extra torpedo (from ICM) from a different model which I used for the pictures to show off the dolly.
A final flat coat was all that was needed to complete the model. I sprayed two flat coats. I wanted the model to look really flat and weathered as it would have been operating over the North Atlantic.
I would summarize my experience building this kit as follows:
Given the high number of parts, many of them small, plus the need of careful alignment required to close the fuselage with all the interior parts, I would recommend this kit to the seasoned/experienced modeler.
I want to make clear this kit is elaborated but it is not difficult. No modifications were needed anywhere (except where I choose) and the fit was superb all around (only a small amount of filler used in the starboard wing root).
The recommendation of this kit for the seasoned/experienced modeler is based only on the sheer volume of parts and significant number of steps needed to finish the model. As with any model with a high part count, some level of determination is required to get the build to fruition. I estimate around 70 hours went into finishing this kit.
Highly recommended.
I want to thank ICM Holdings and IPMS/USA for the review sample.
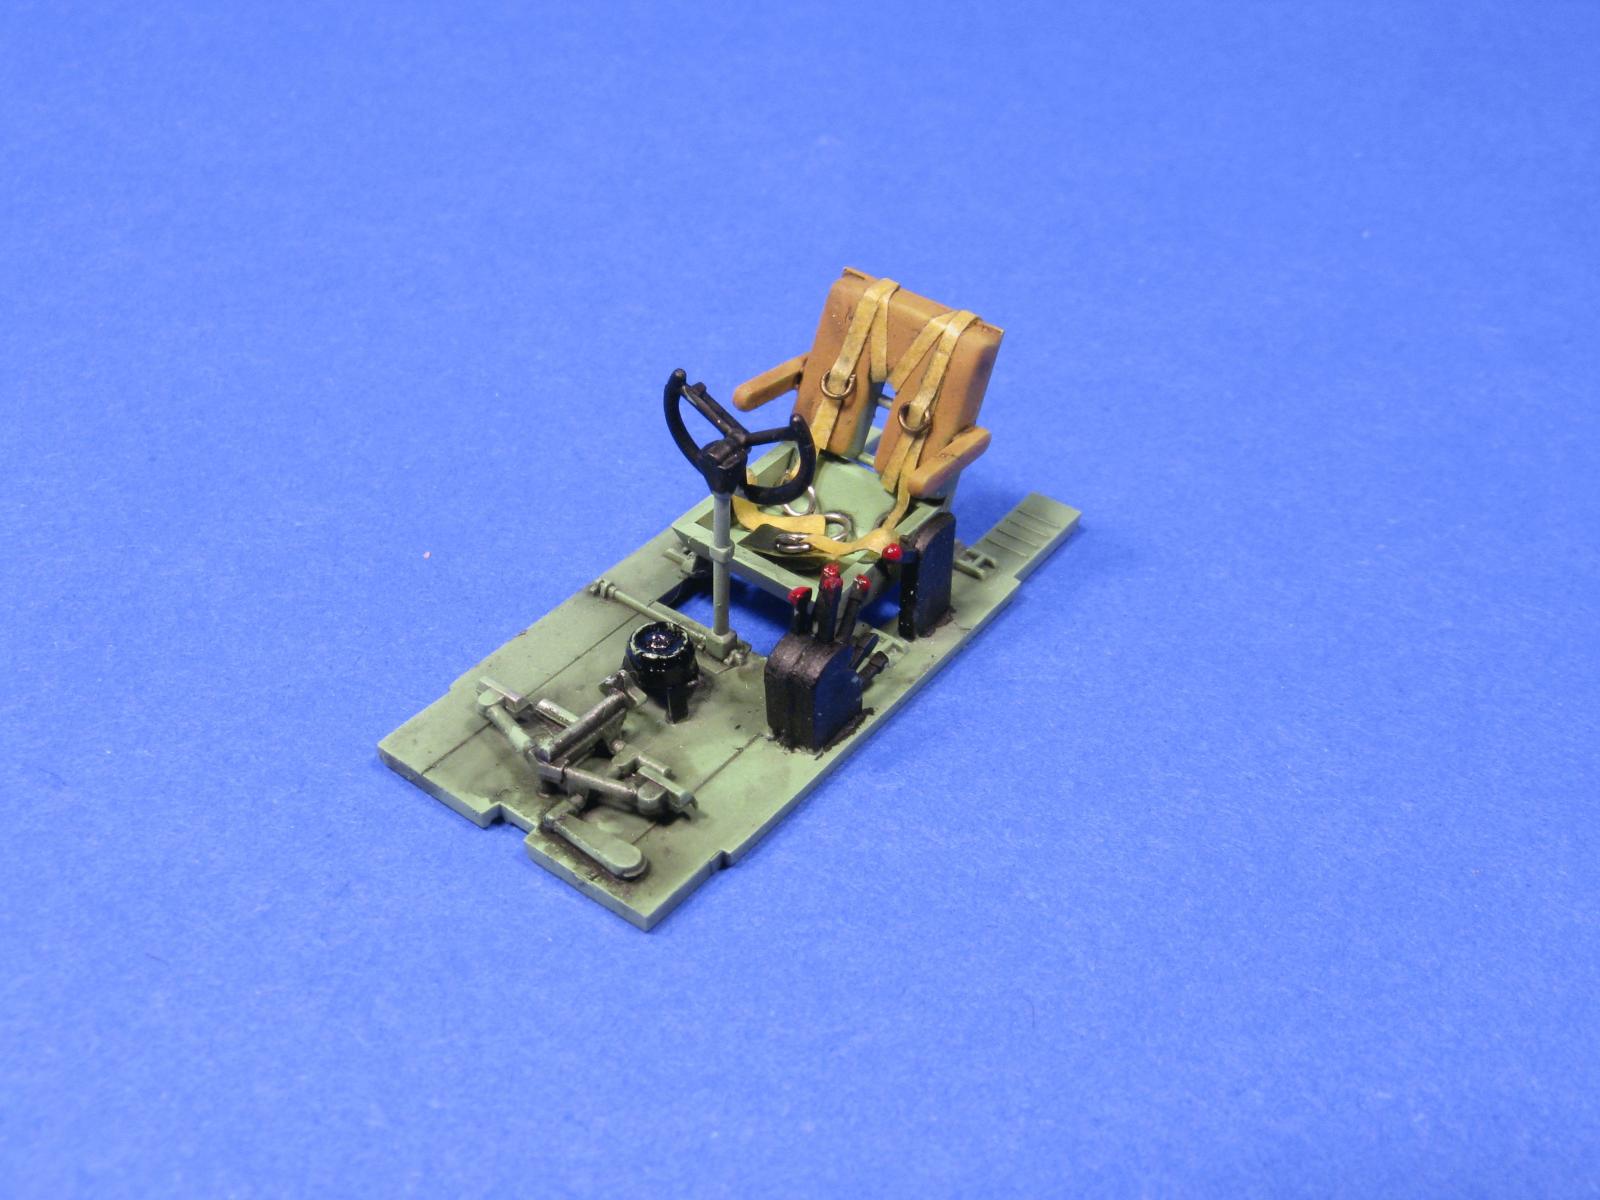
Pilot position – Seatbelts were scratchbuilt
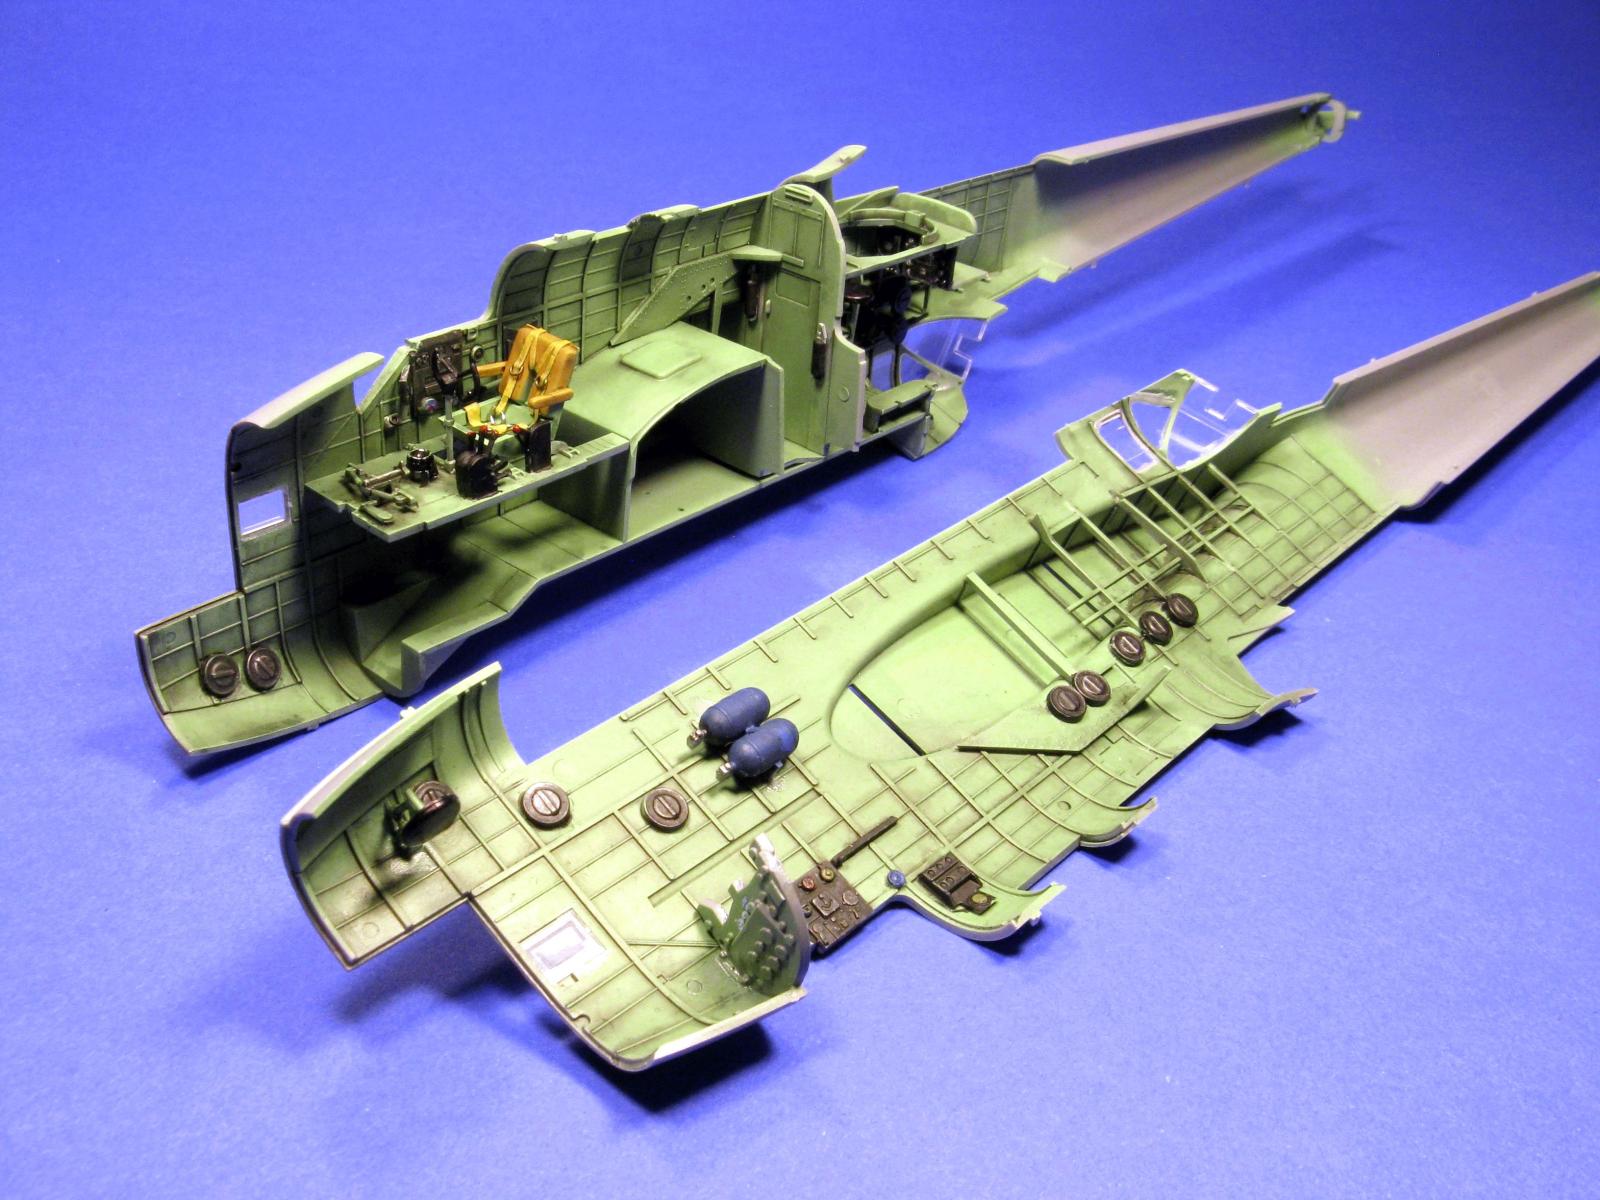
Interior before closing the fuselage – View towards the tail
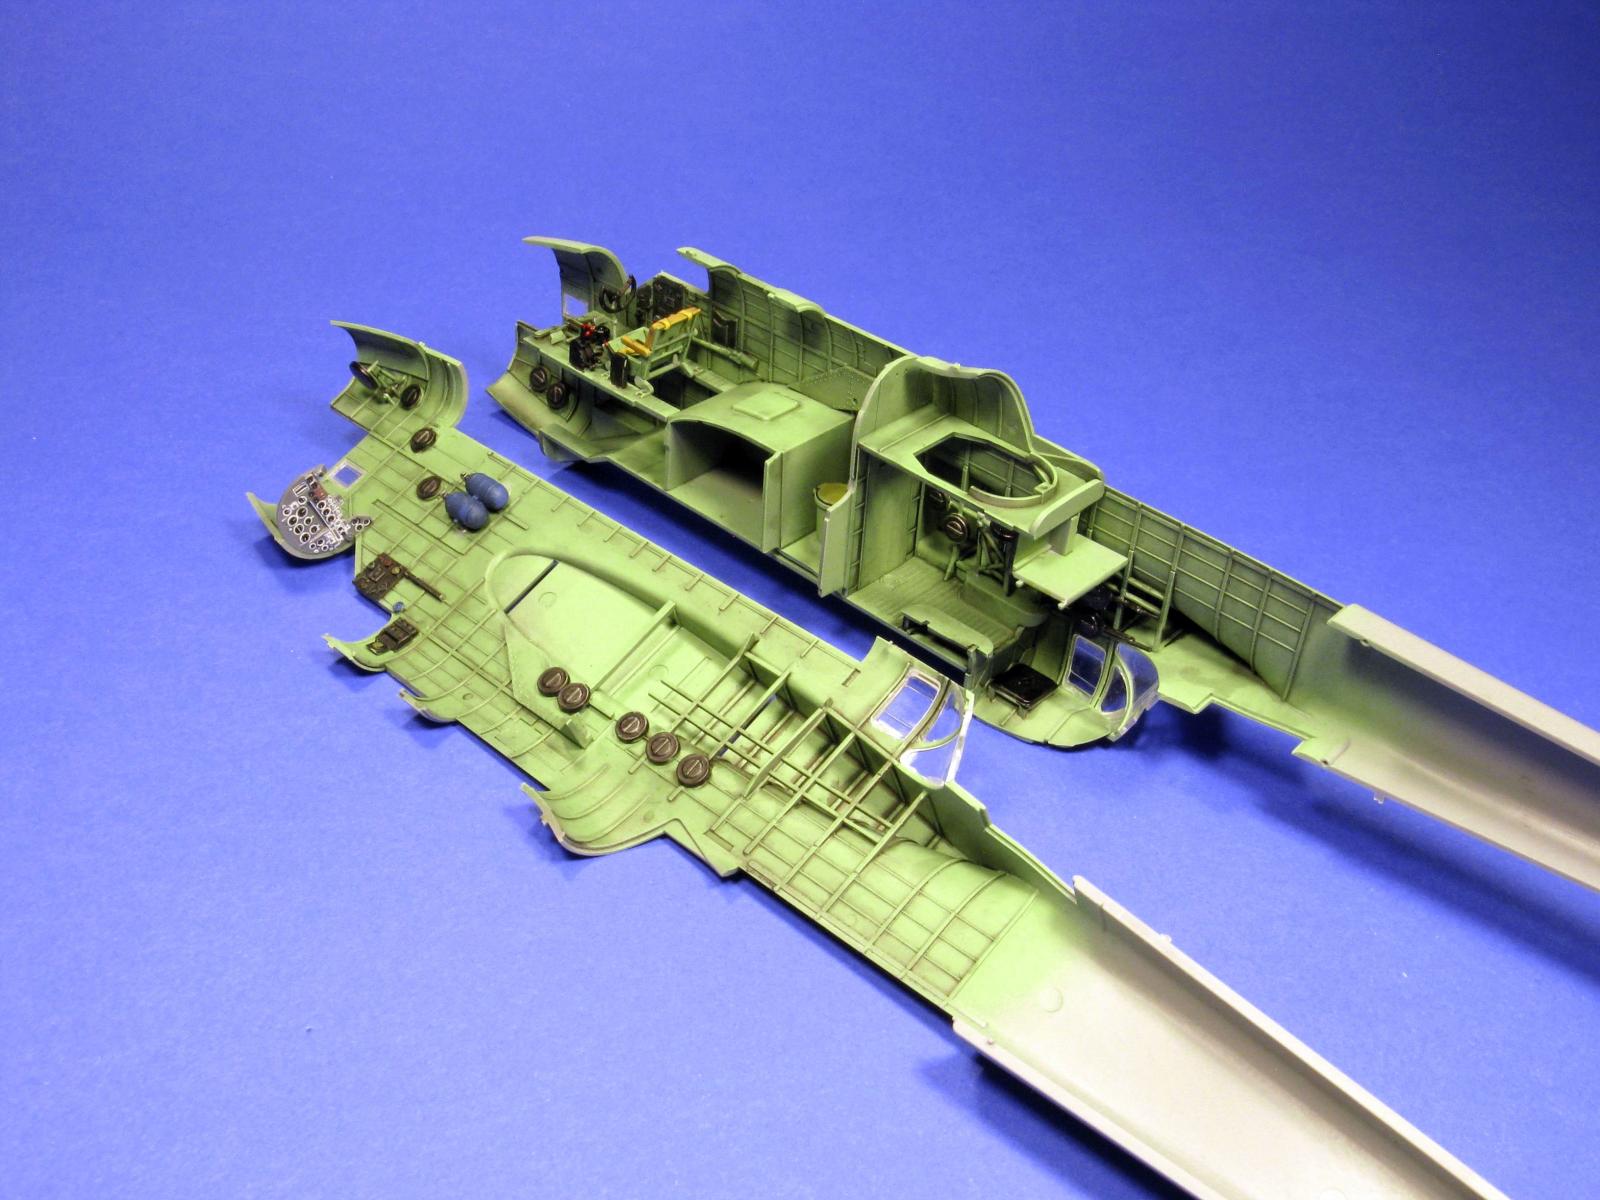
Interior before closing the fuselage – View towards the front
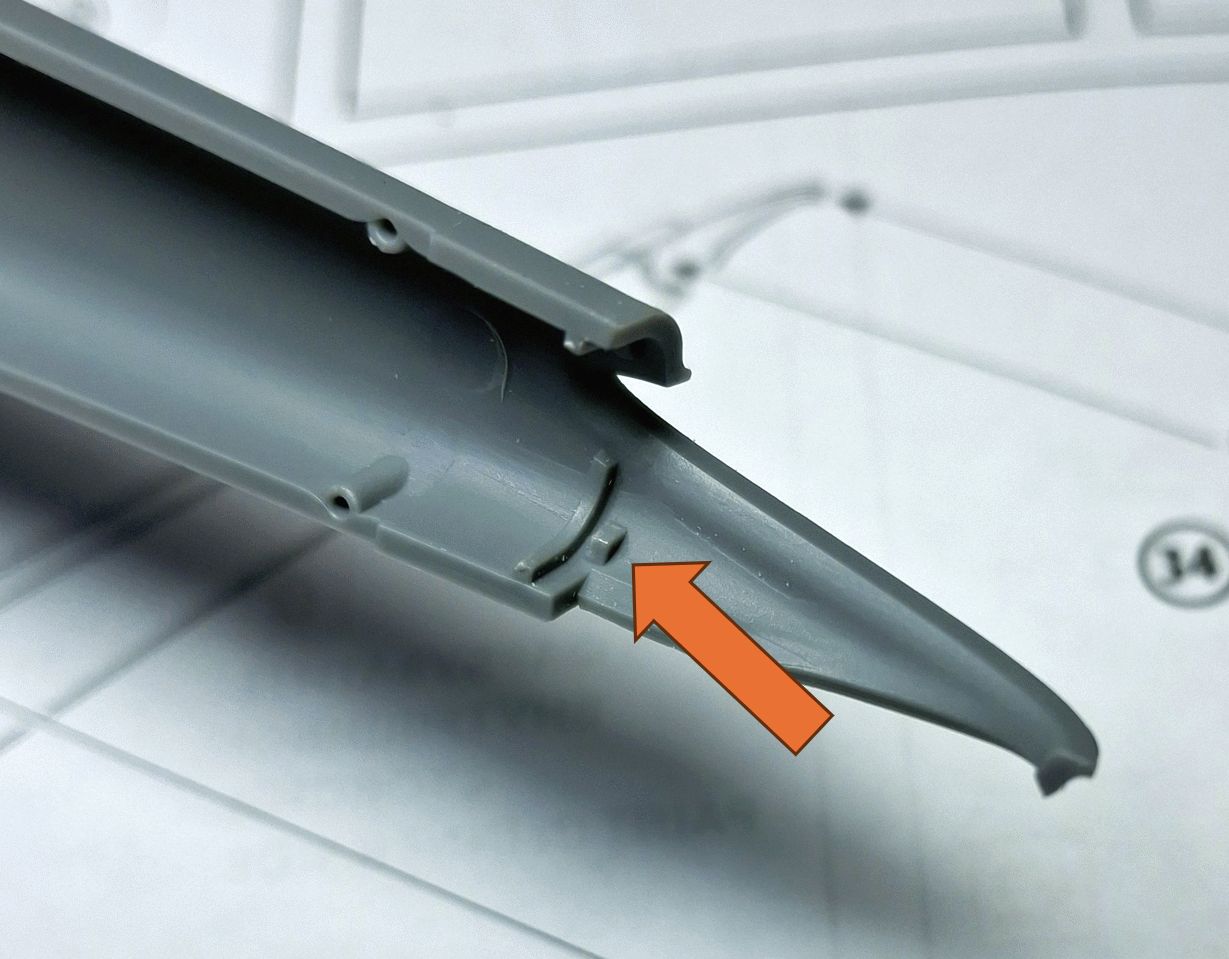
Remove little tab as indicated by orange arrow for a better fit
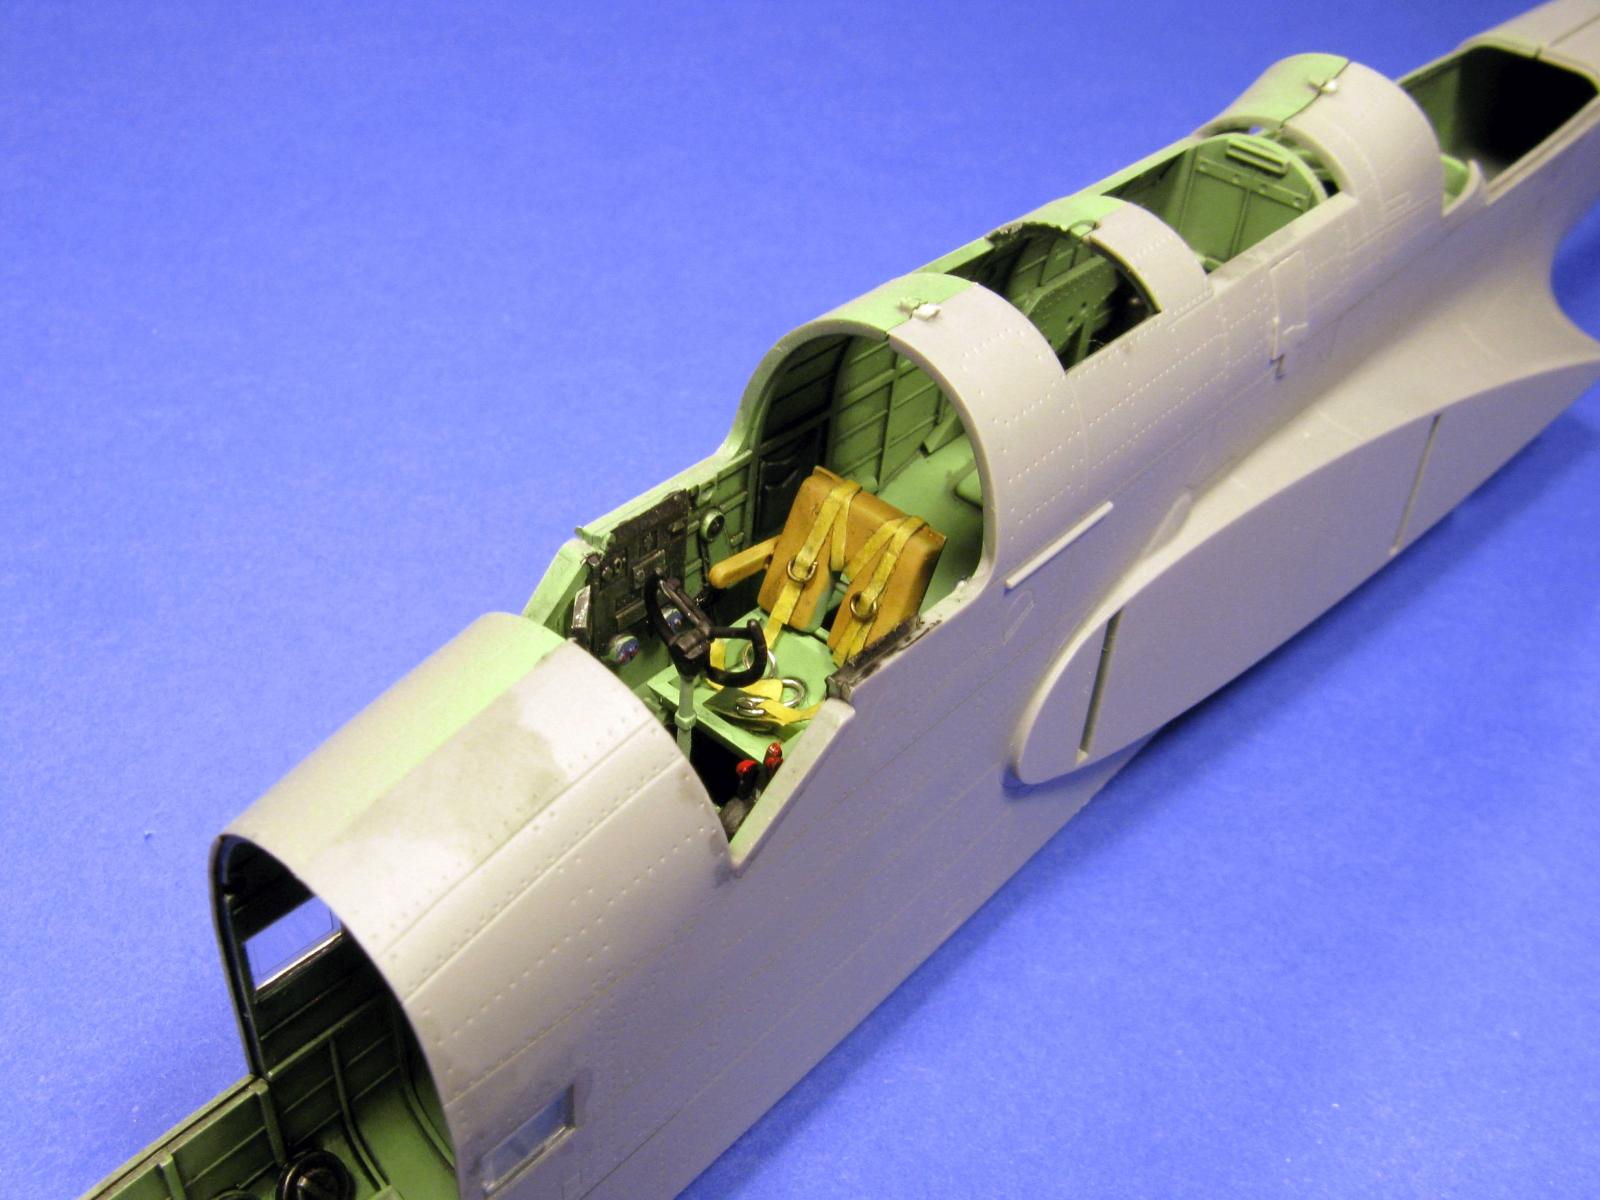
Pilot position – View of the seat
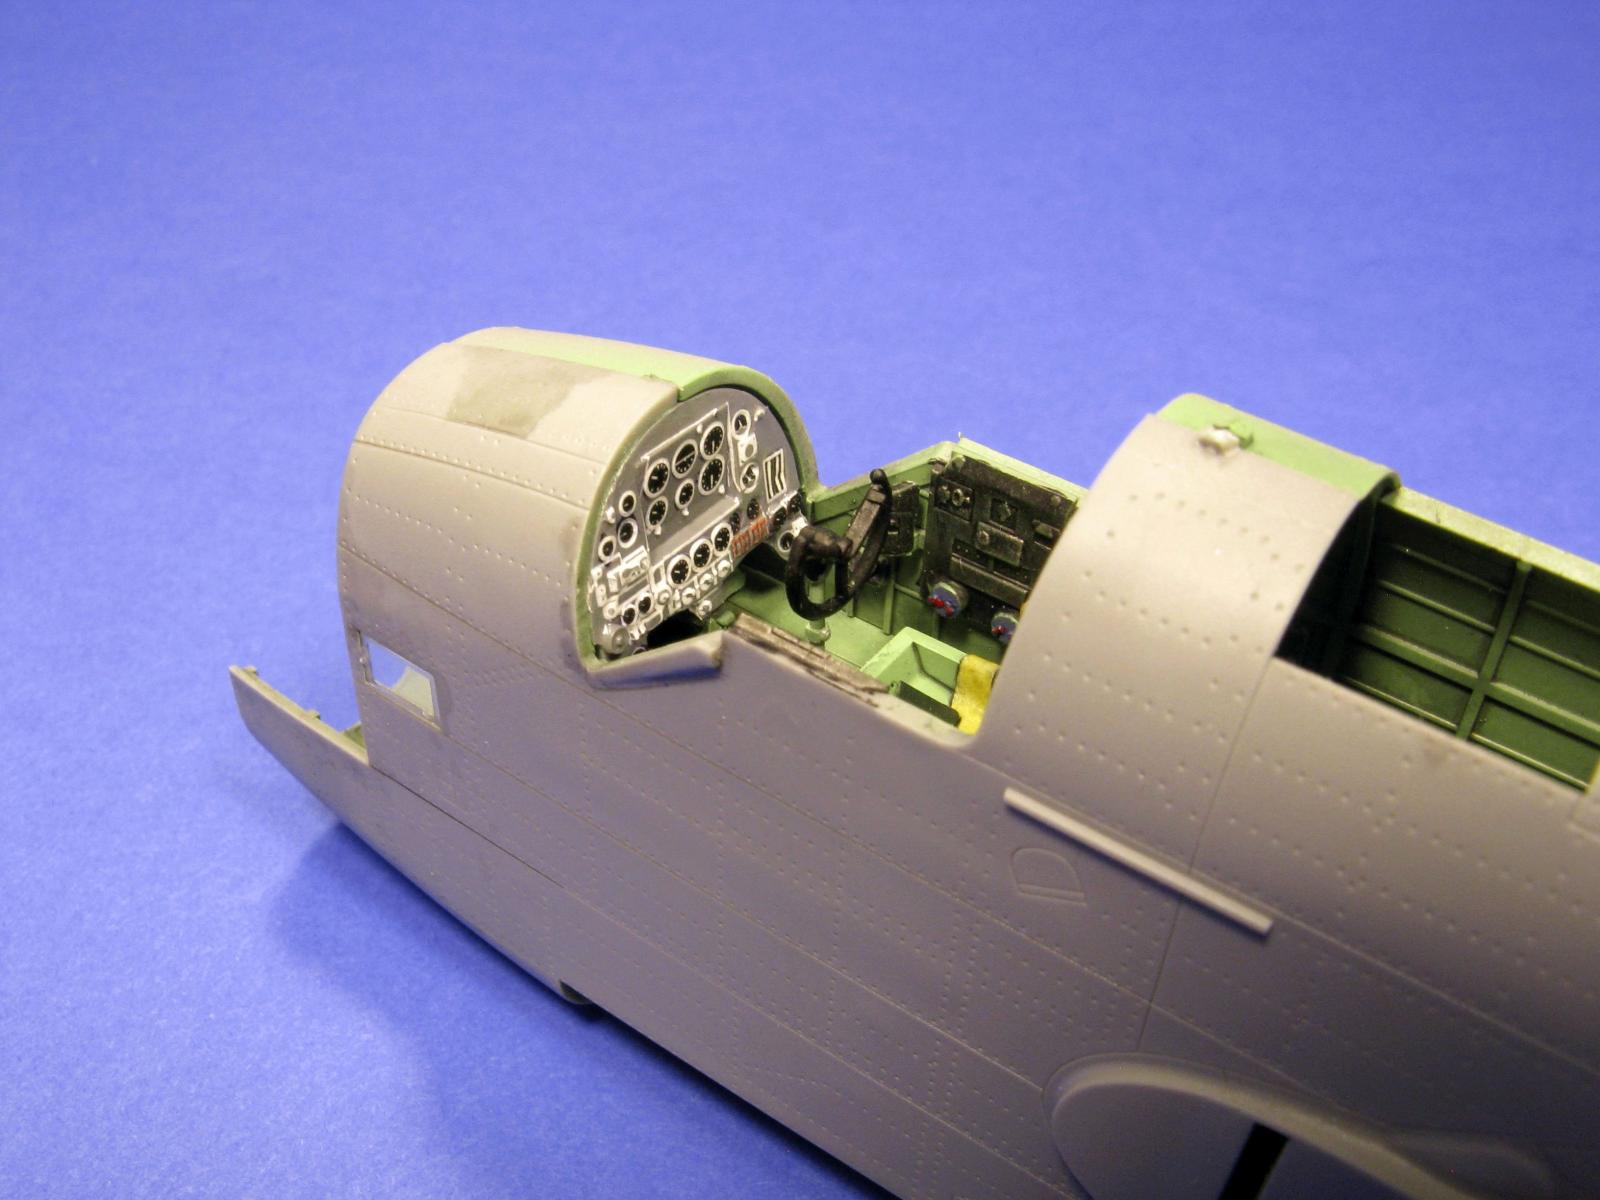
Pilot position – View of the instrument panel
Pilot position – View of the instrument panel
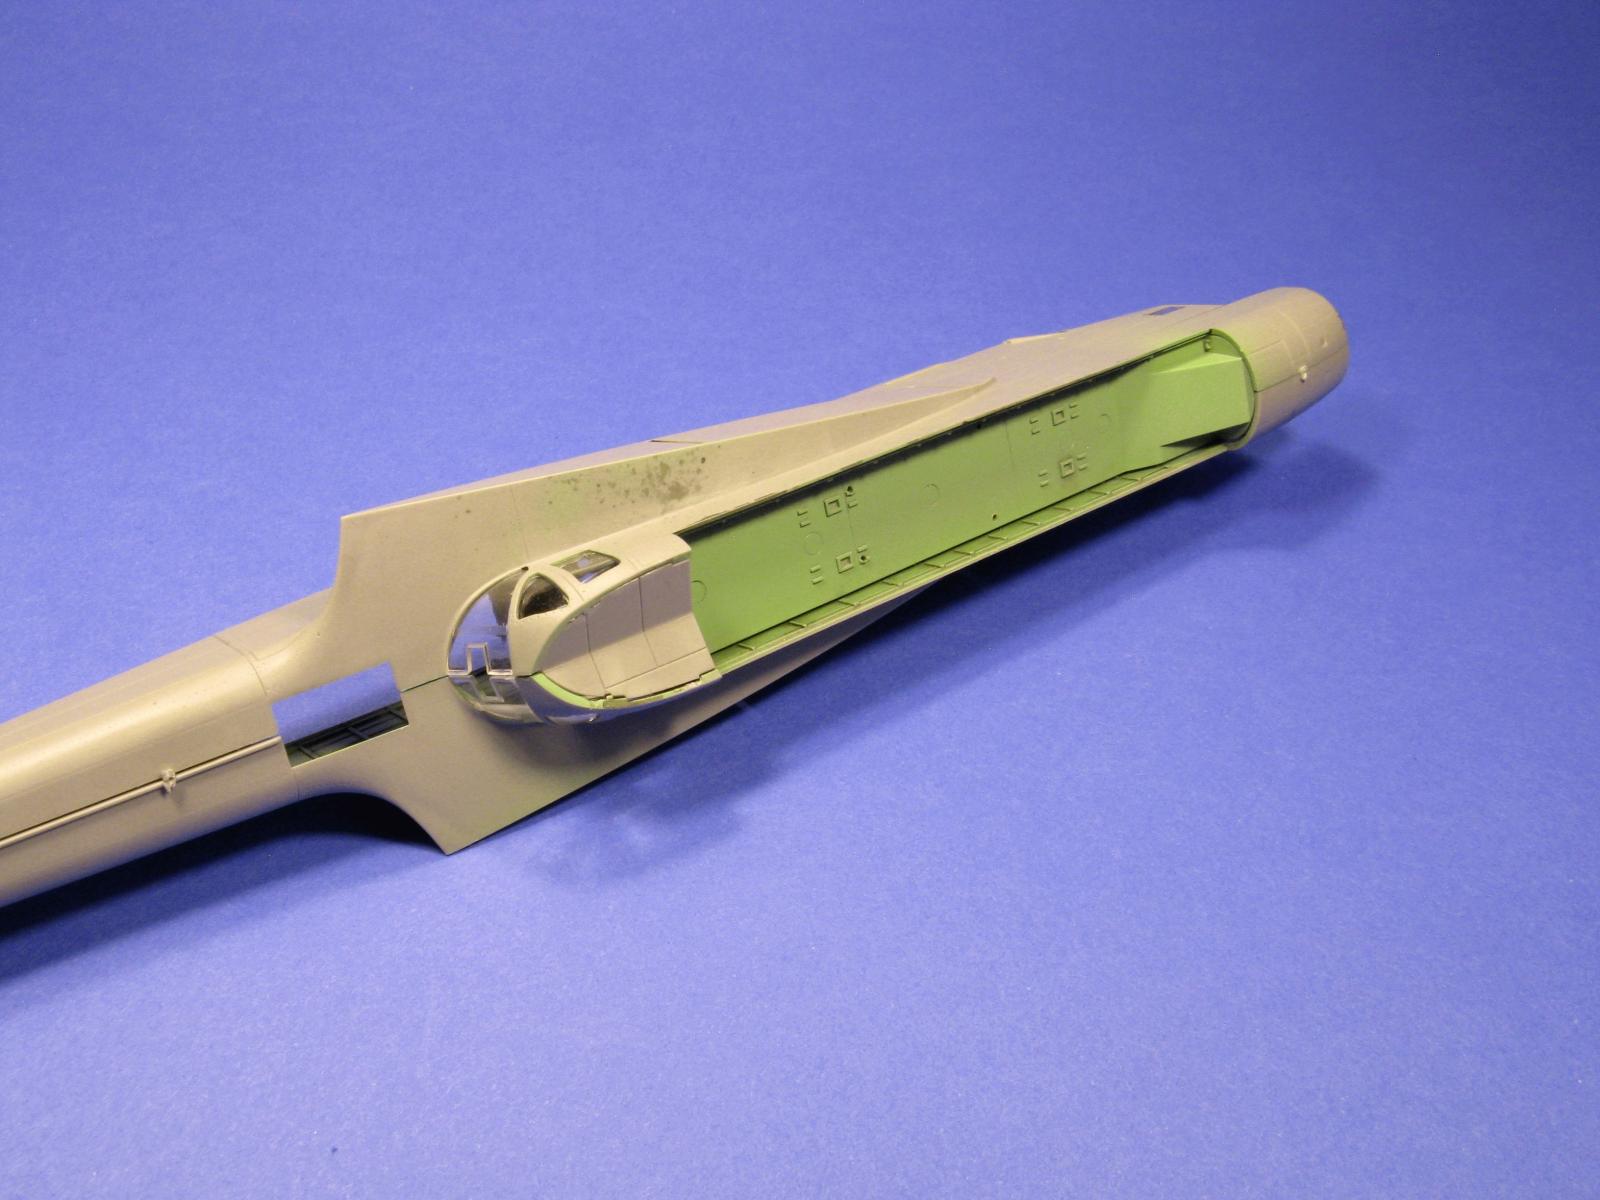
Pilot position – View of the instrument panel
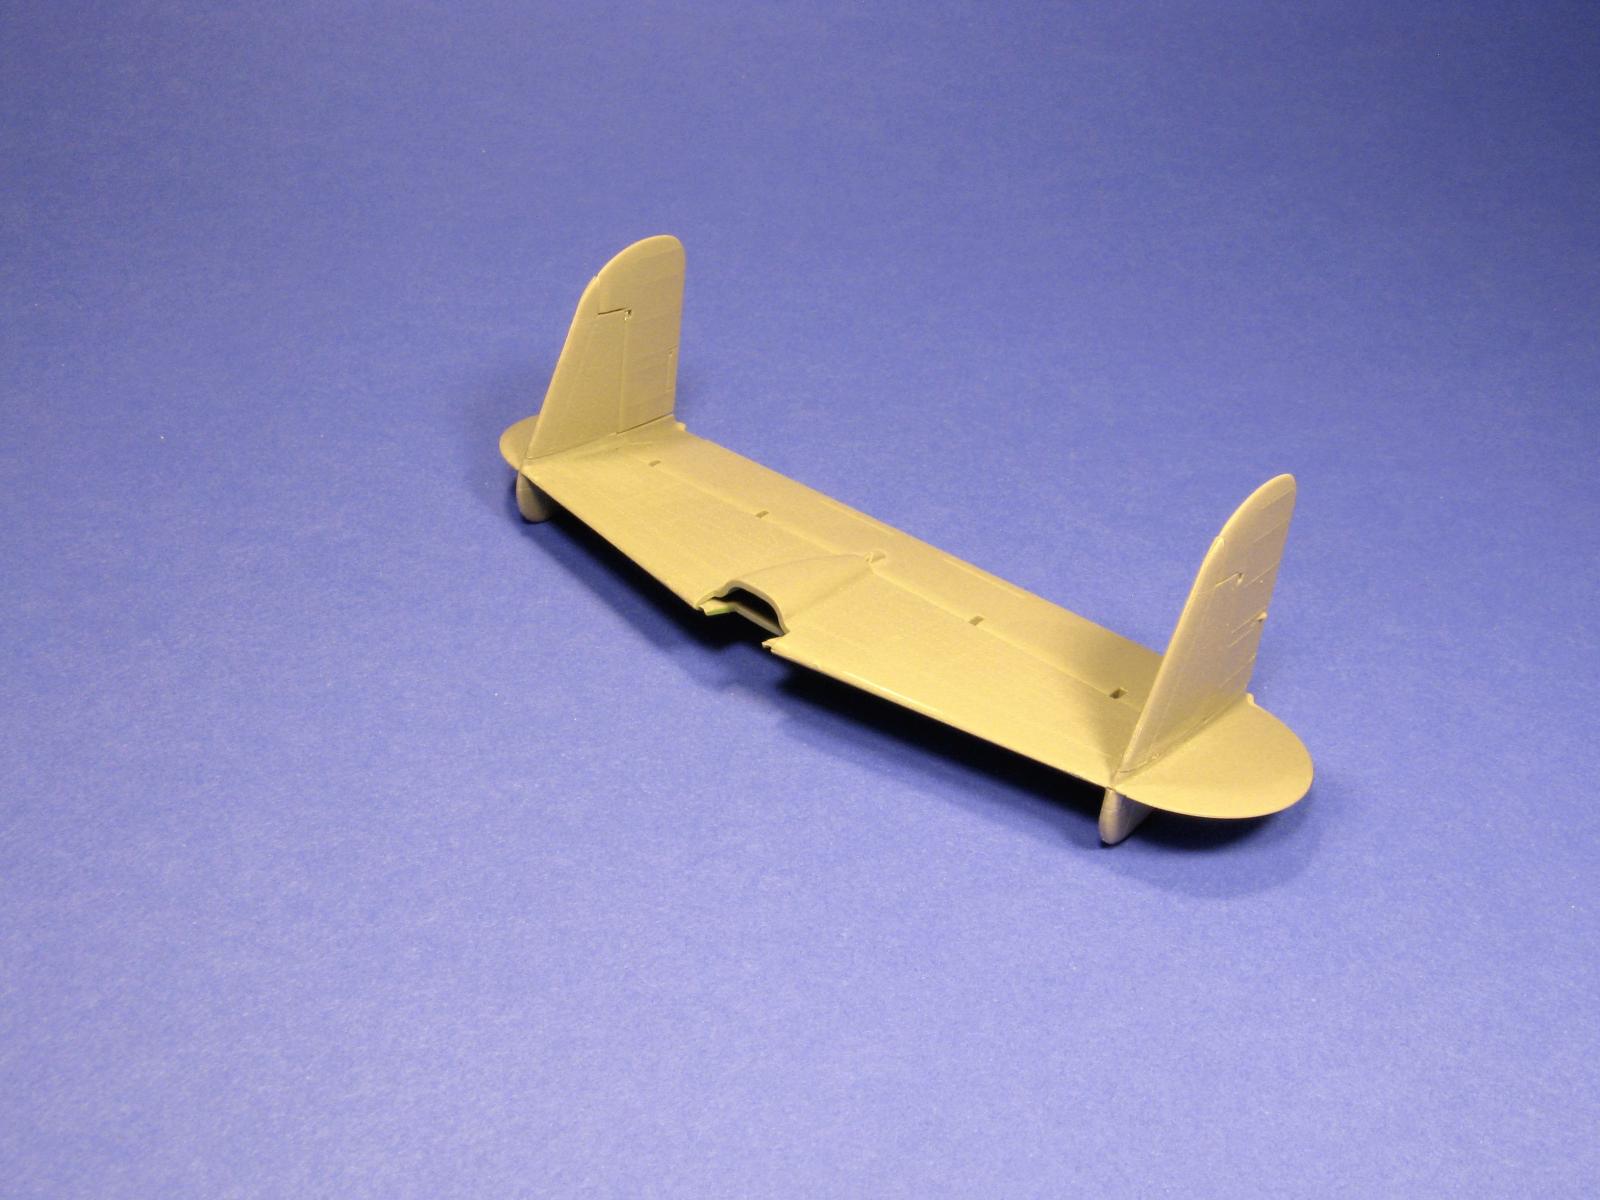
Twin tail subassembly
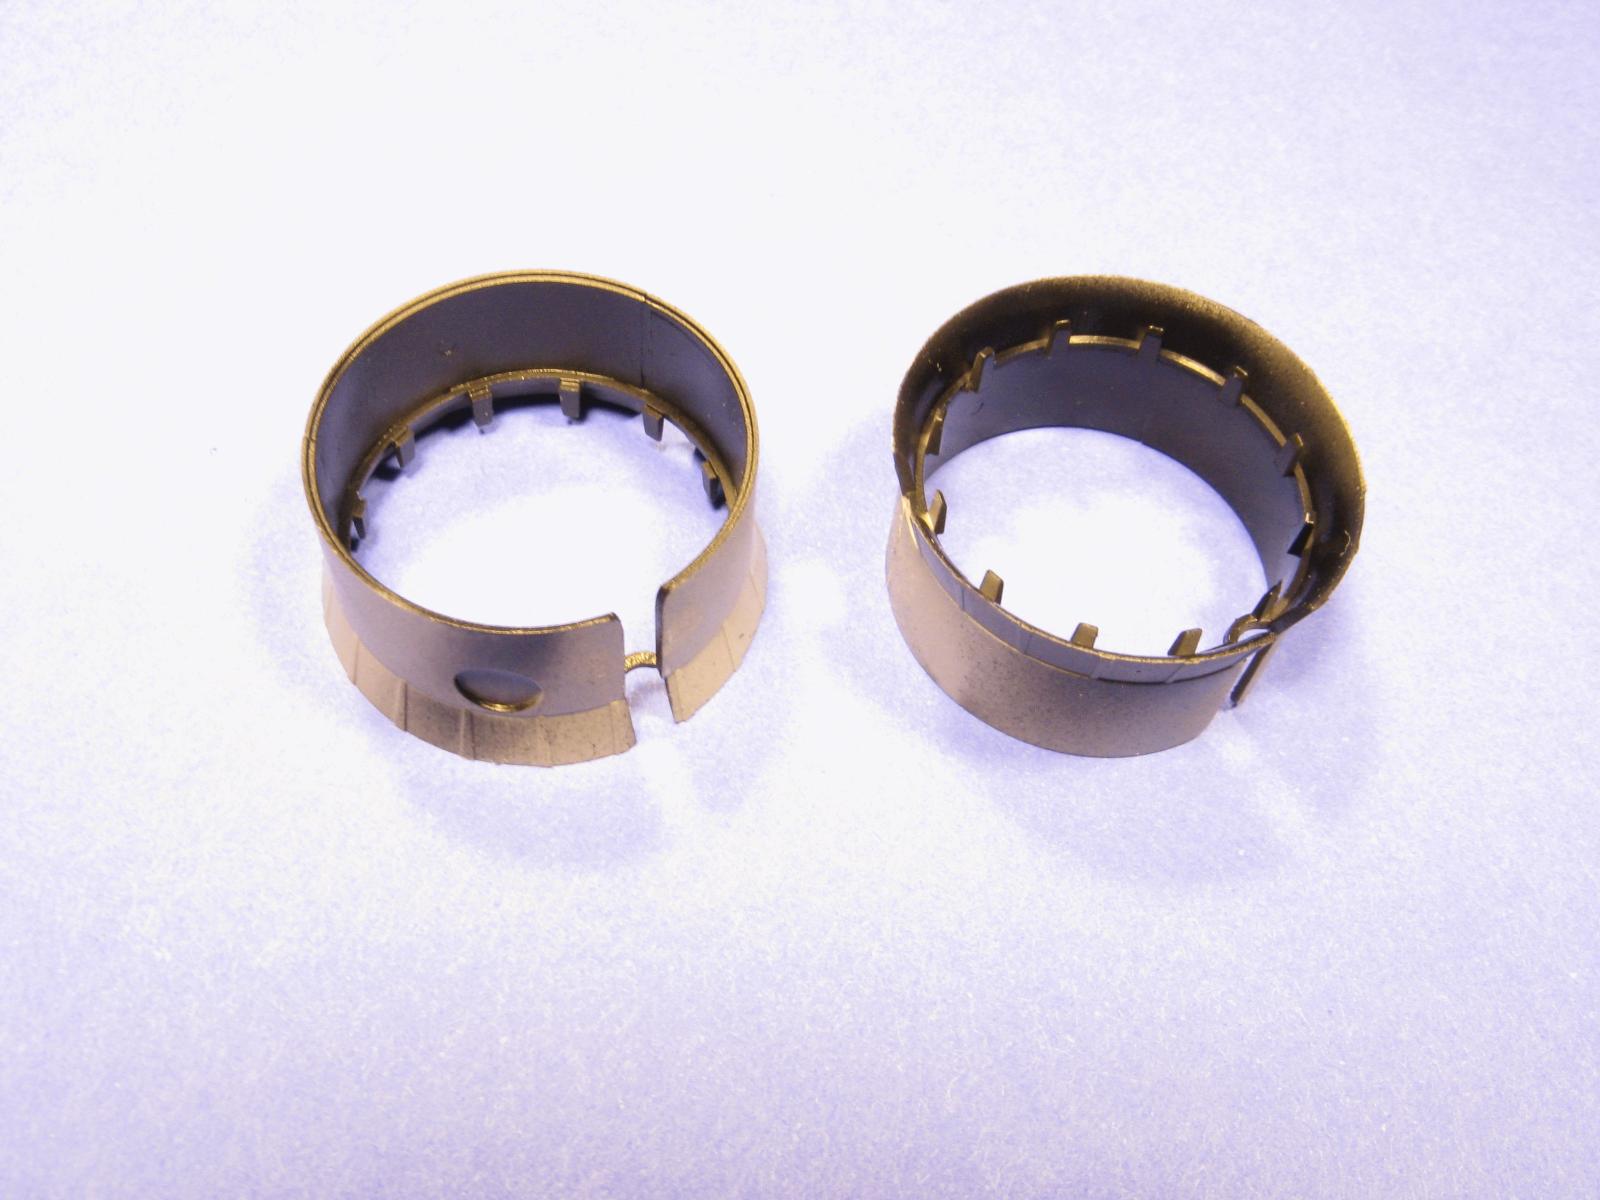
Engine cowlings – View from the front and the back
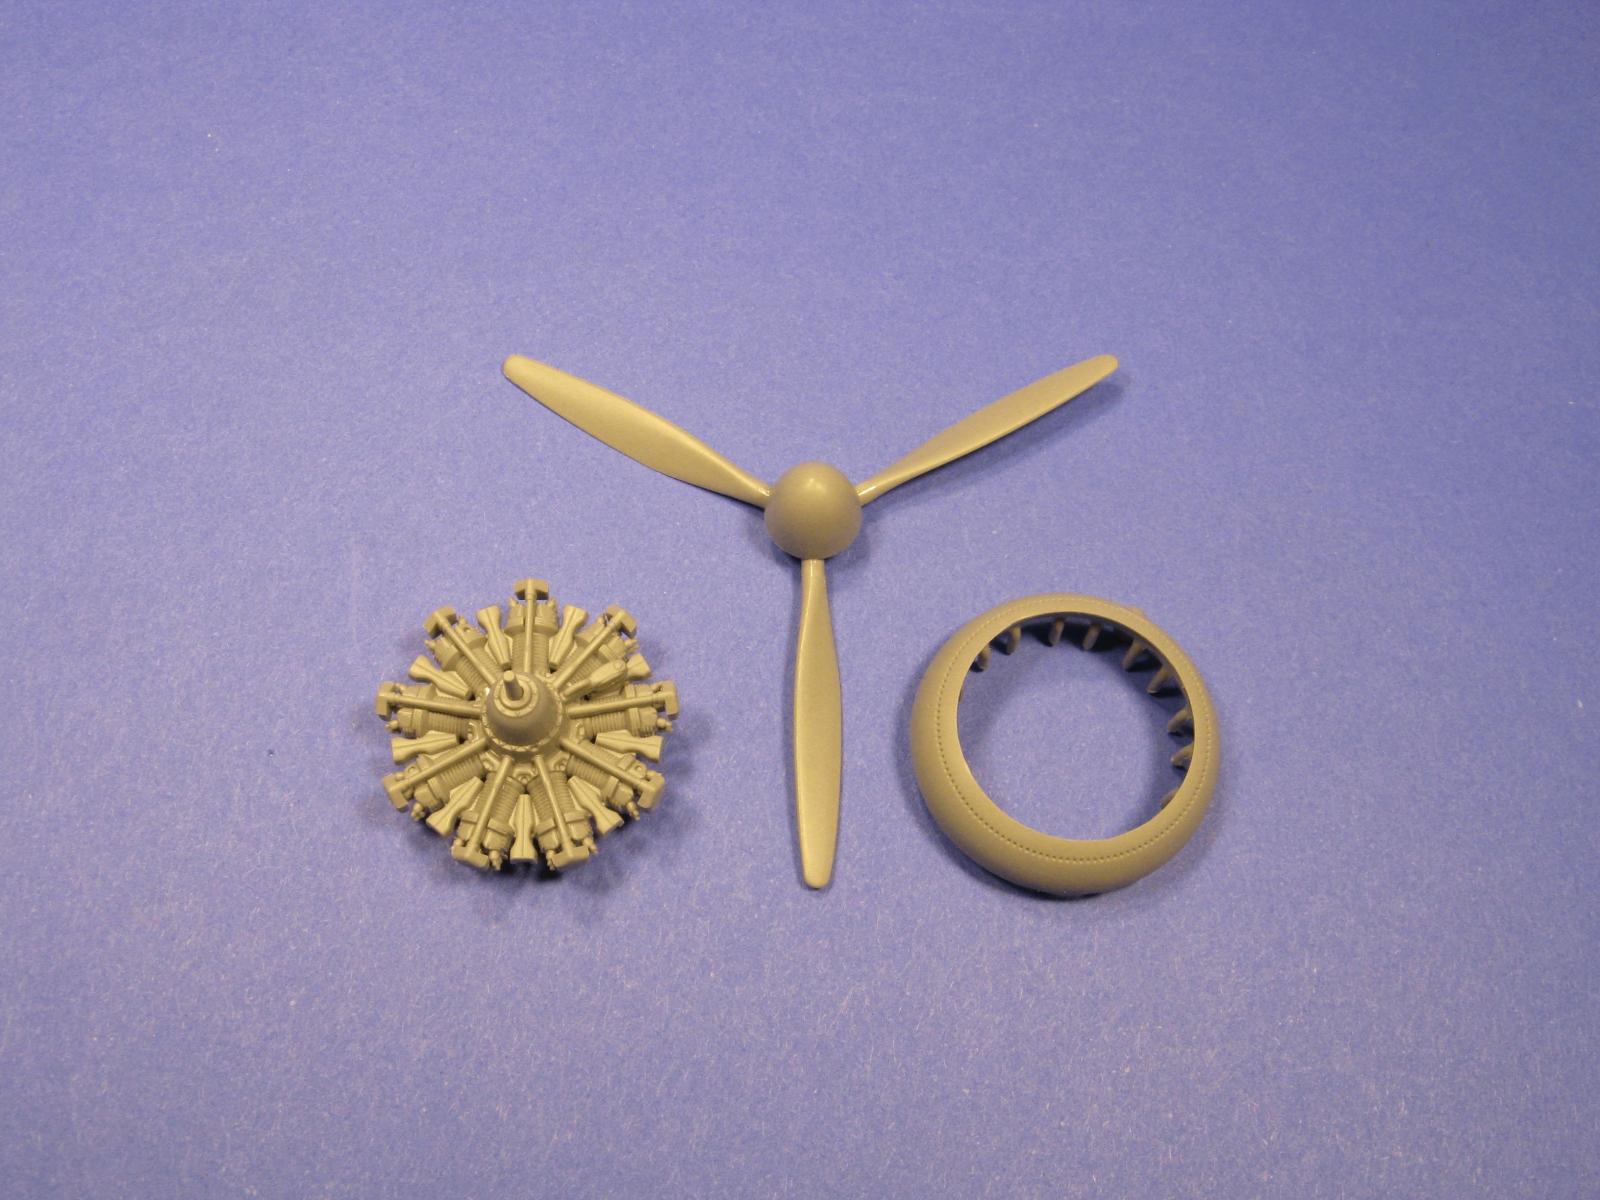
Engine, propeller and cooling ring subassemblies
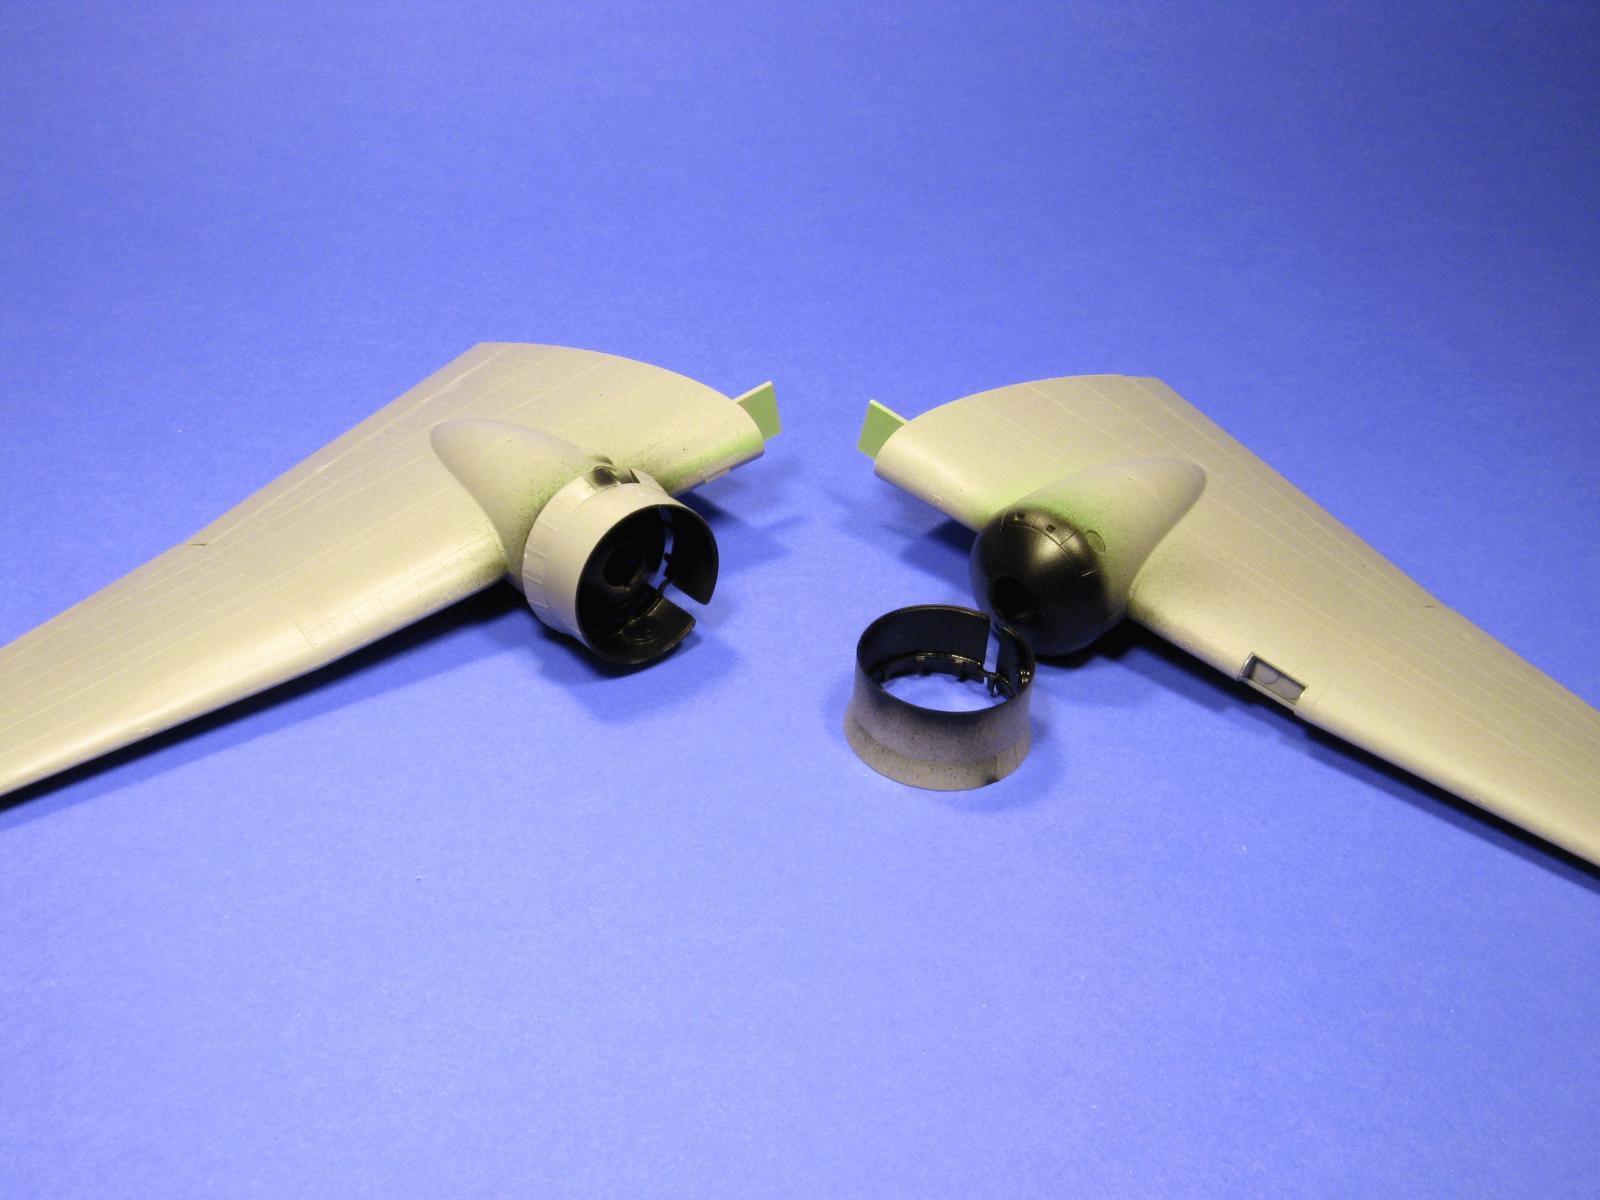
Wings with cowlings being dry fitted
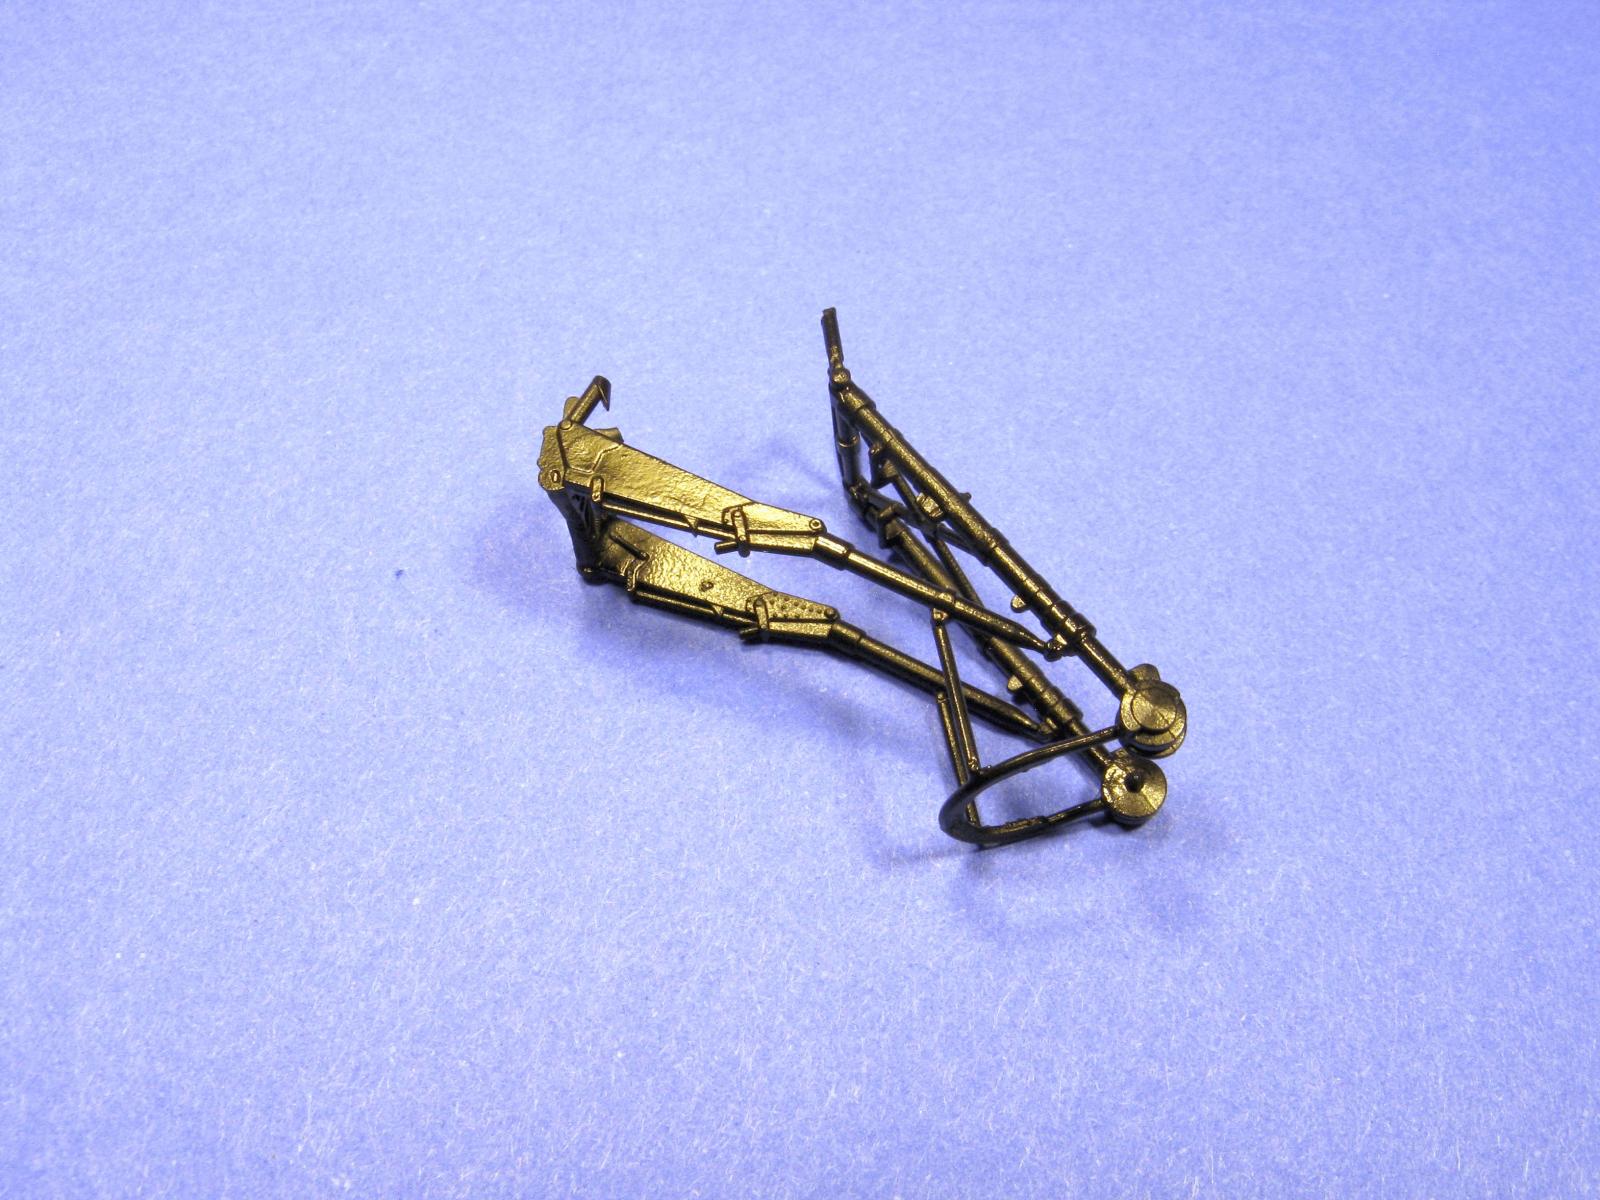
Main landing gear subassembly
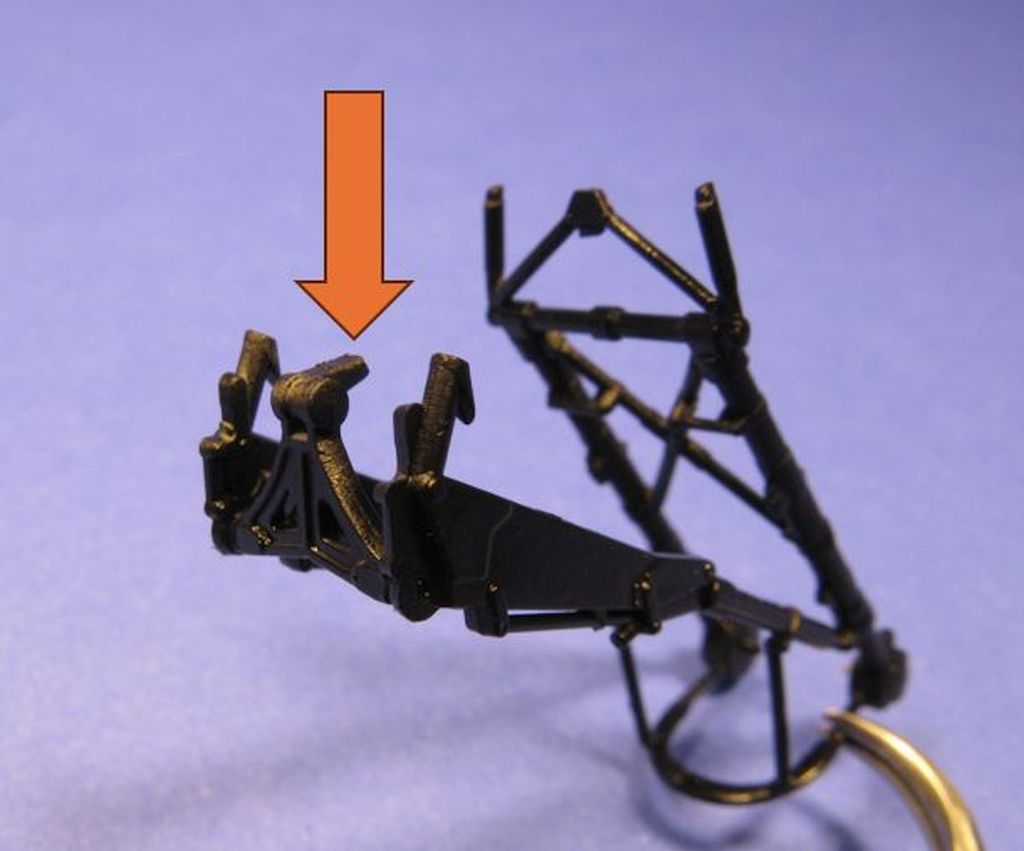
Trim center rod as indicated to be able to install the landing gear after painting and decaling (see main review for details
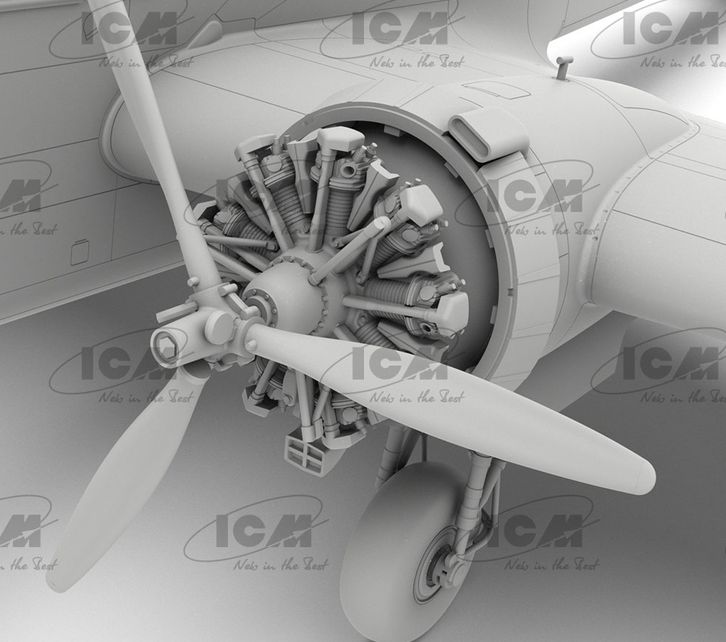
Detail of the engine and support rods
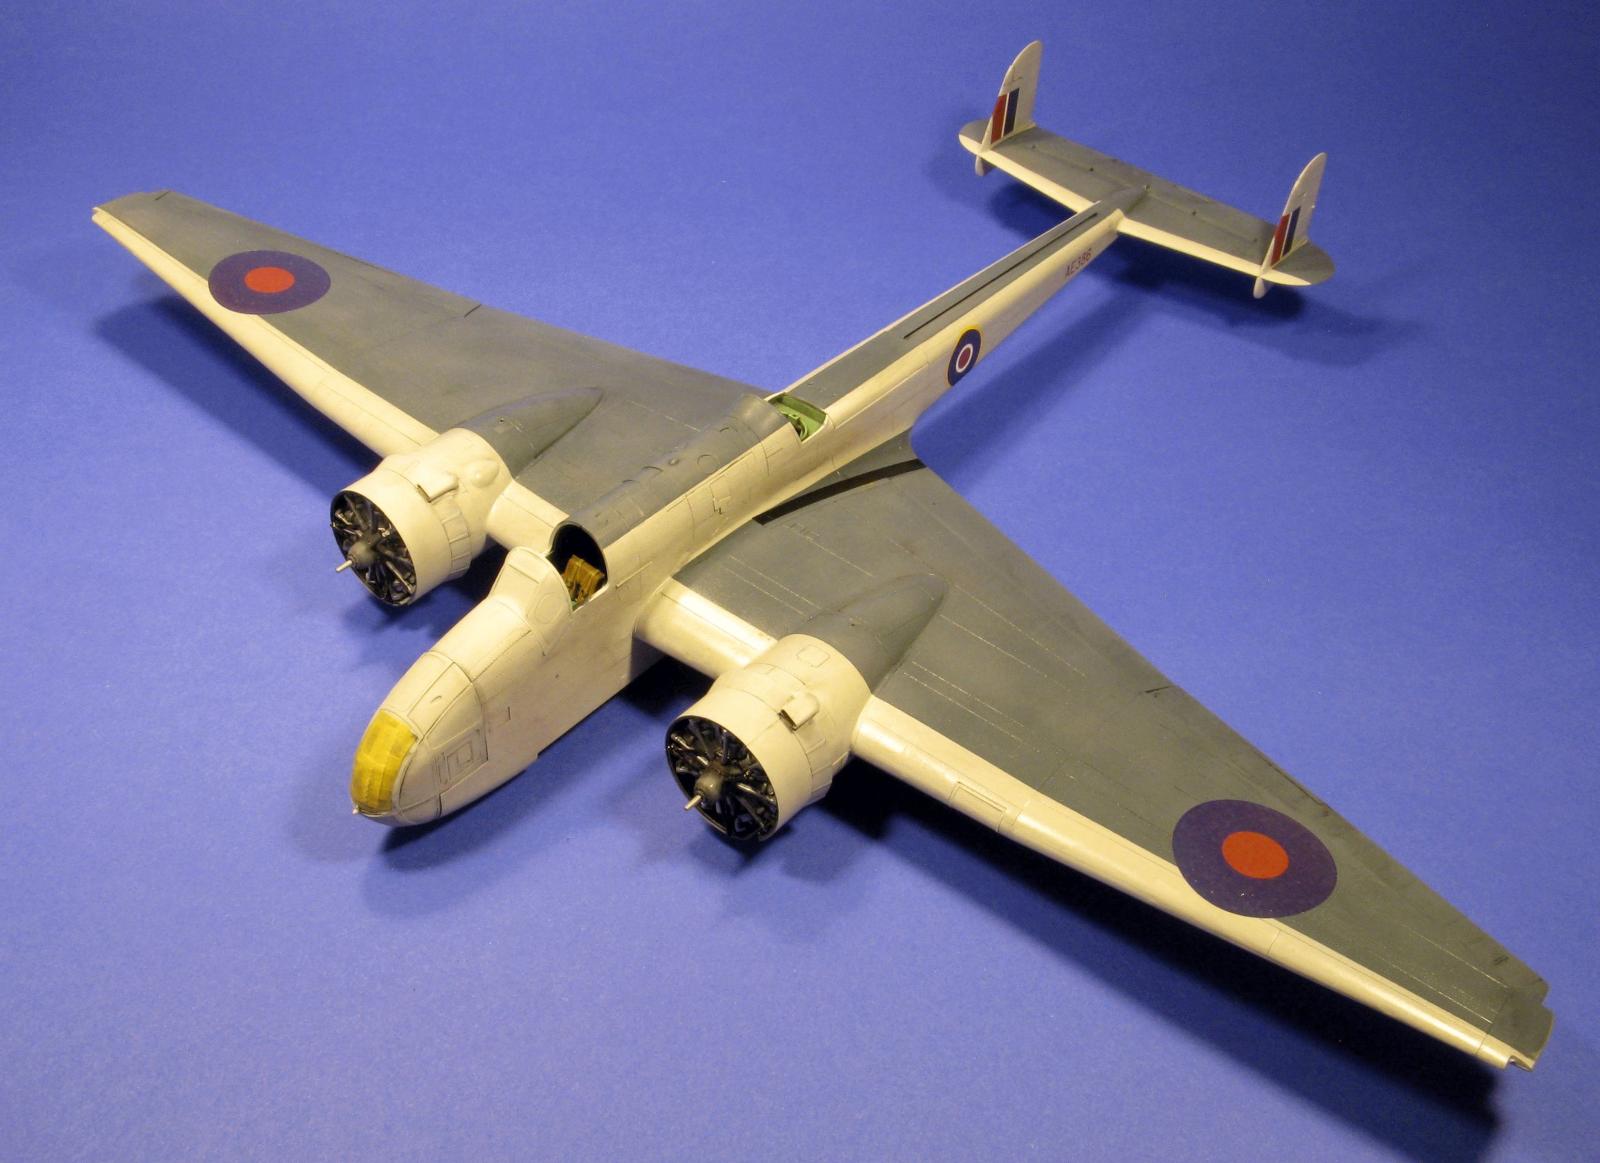
View from the front
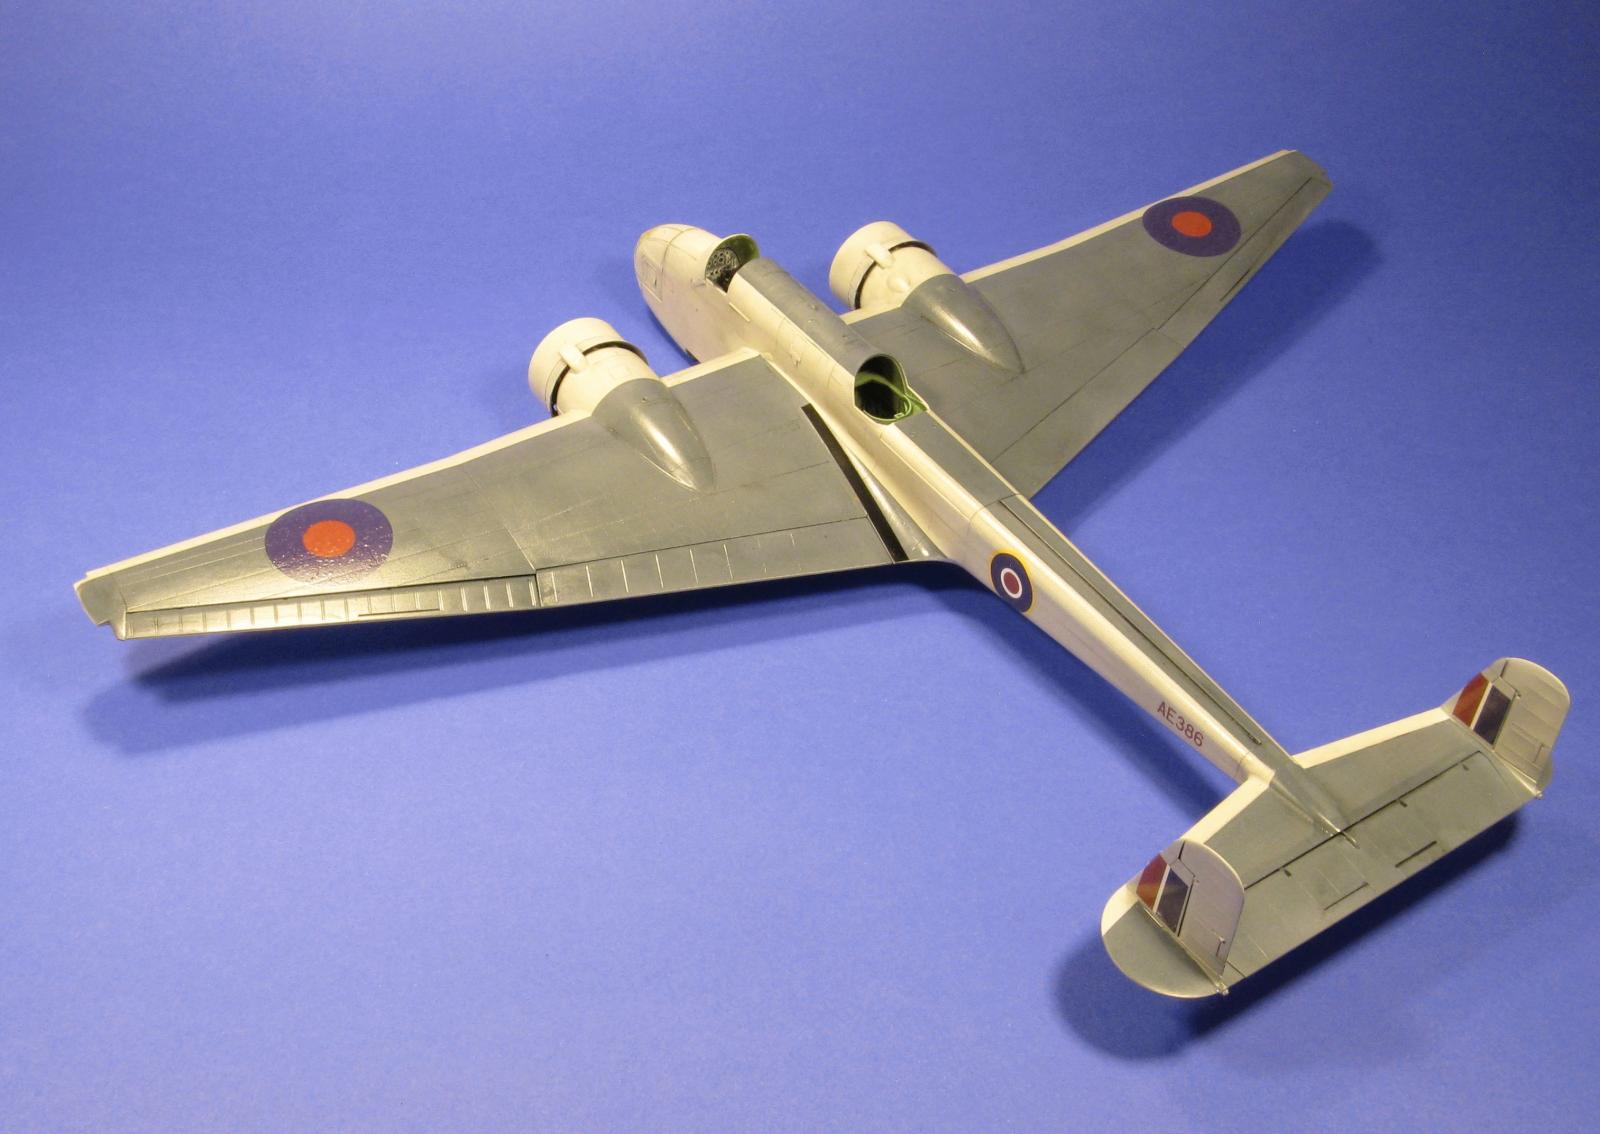
back
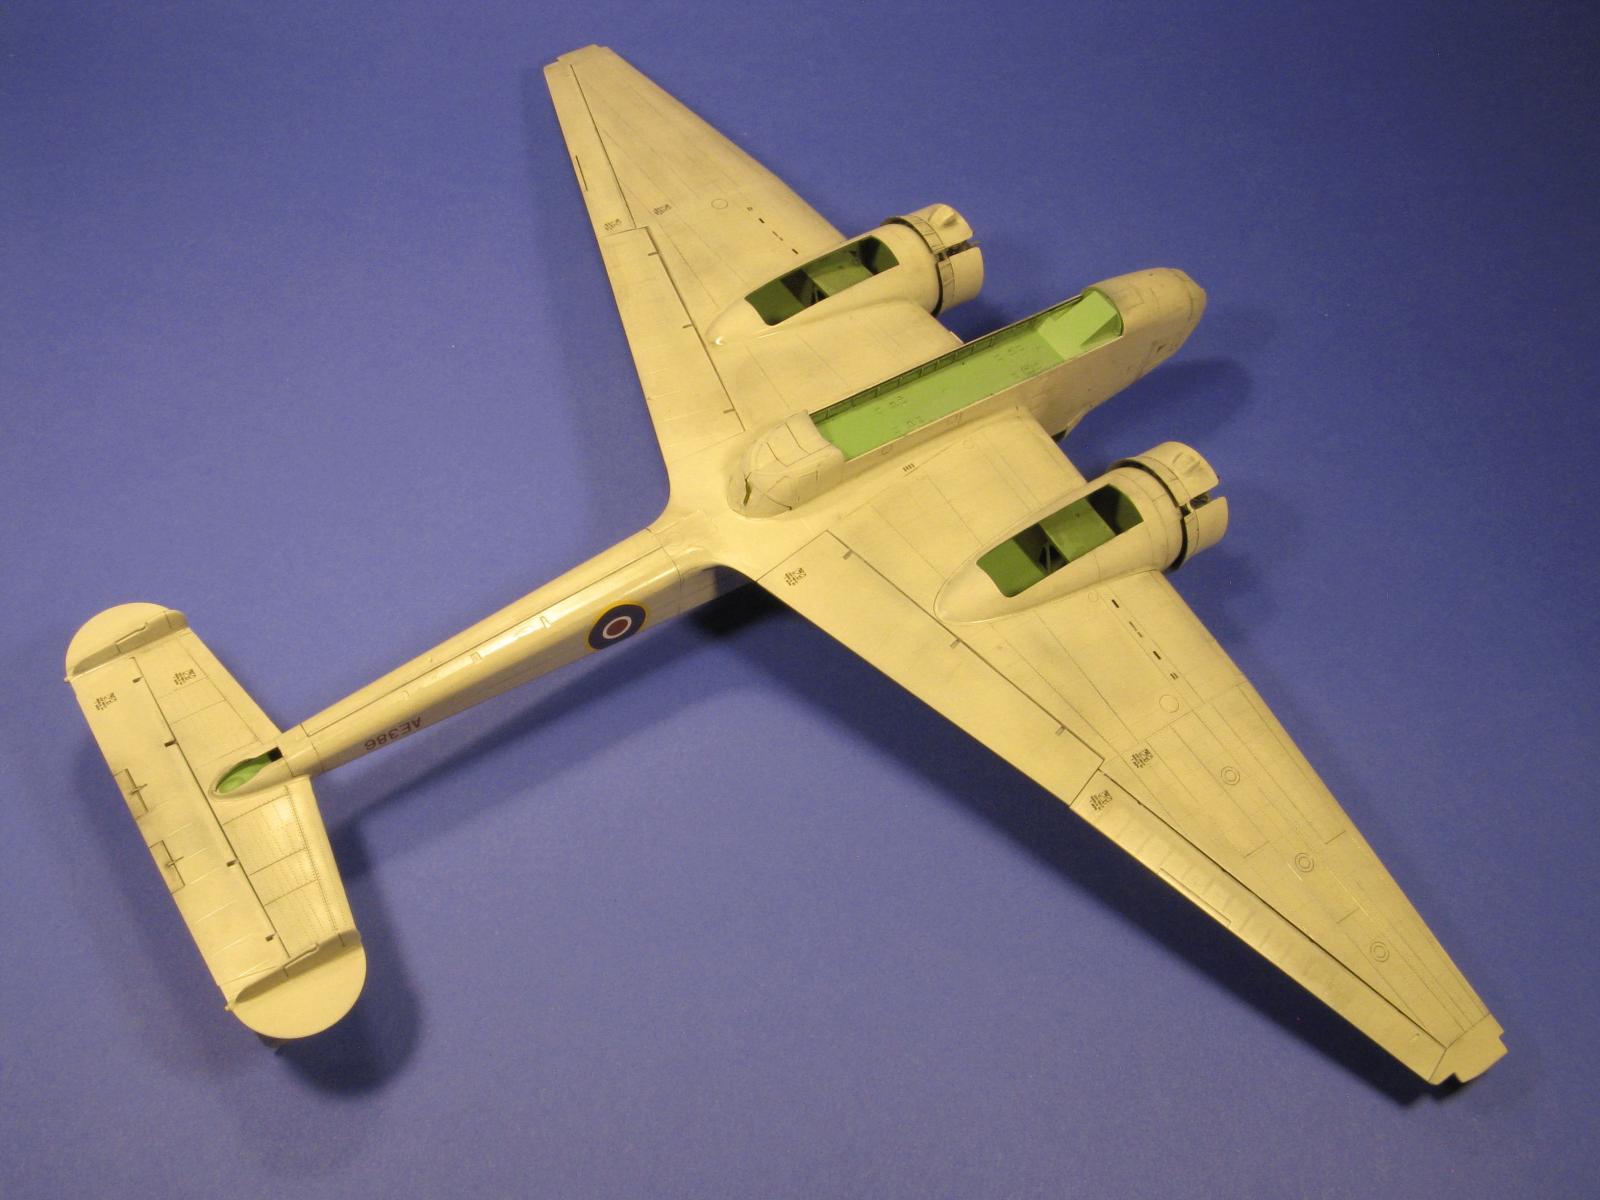
Bottom view
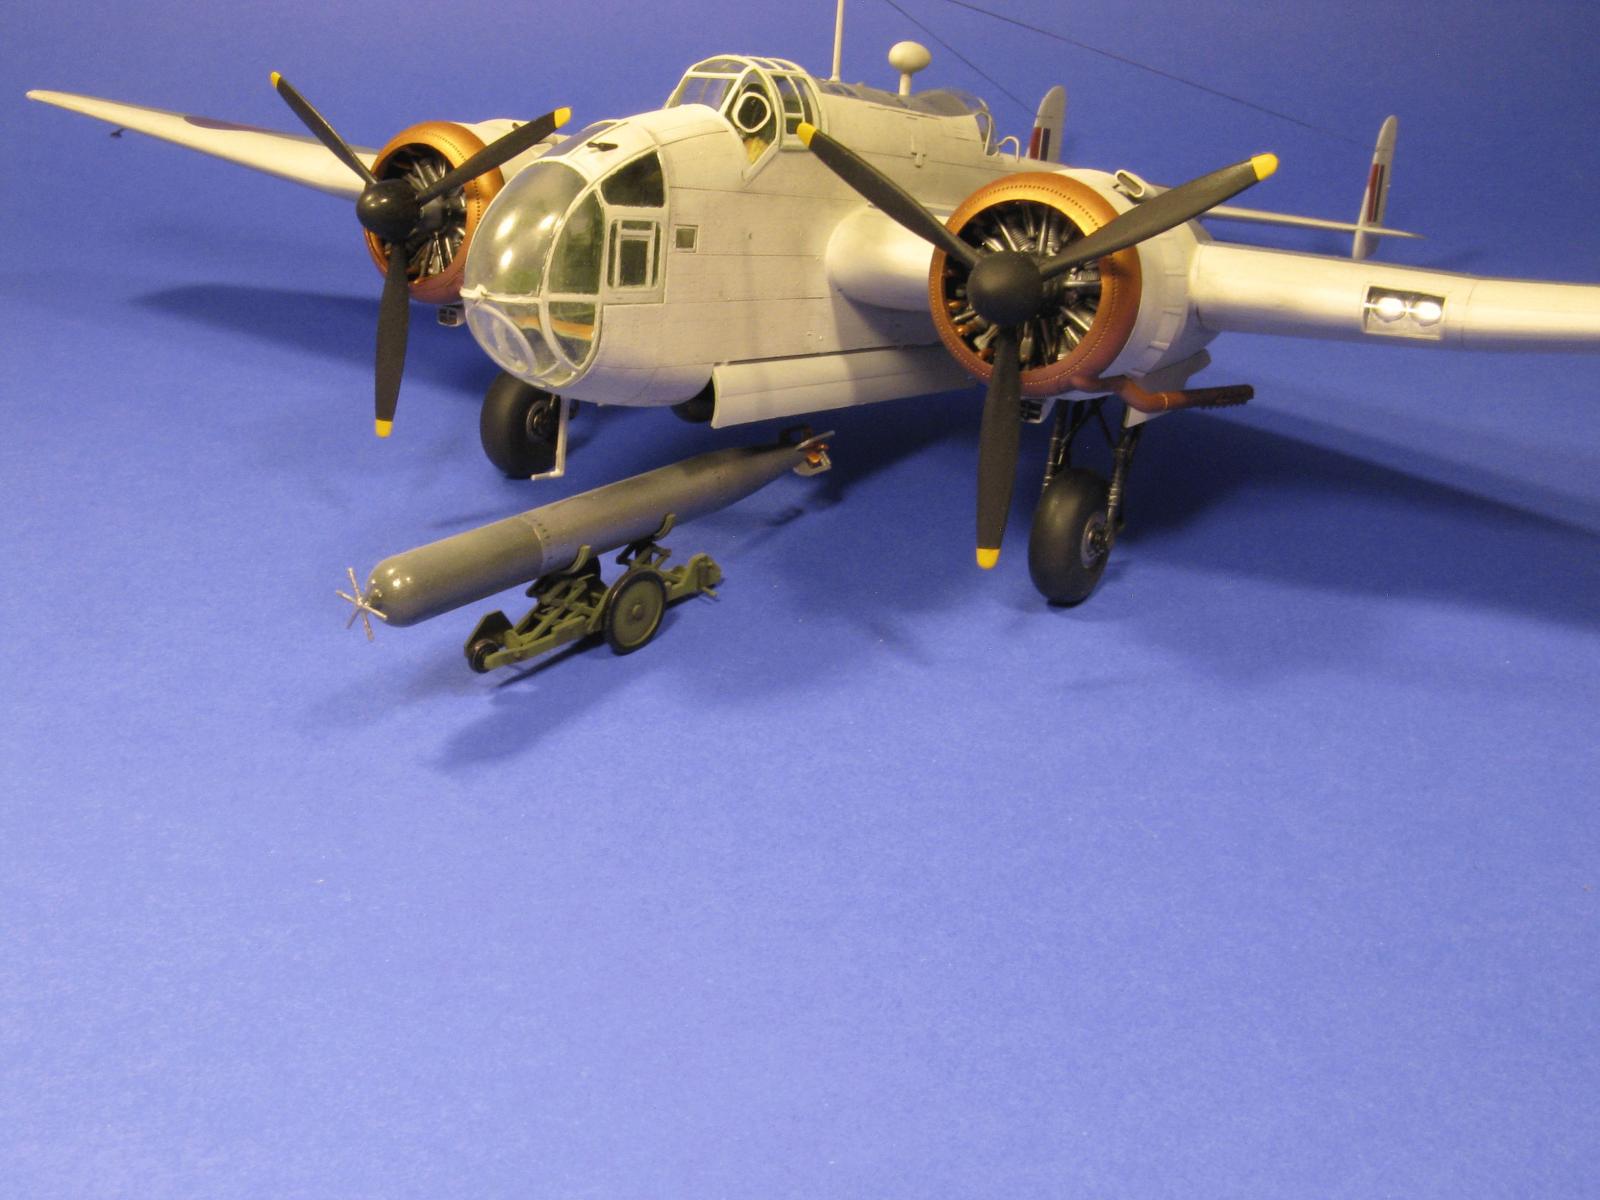
Comments
Add new comment
This site is protected by reCAPTCHA and the Google Privacy Policy and Terms of Service apply.
Similar Reviews