
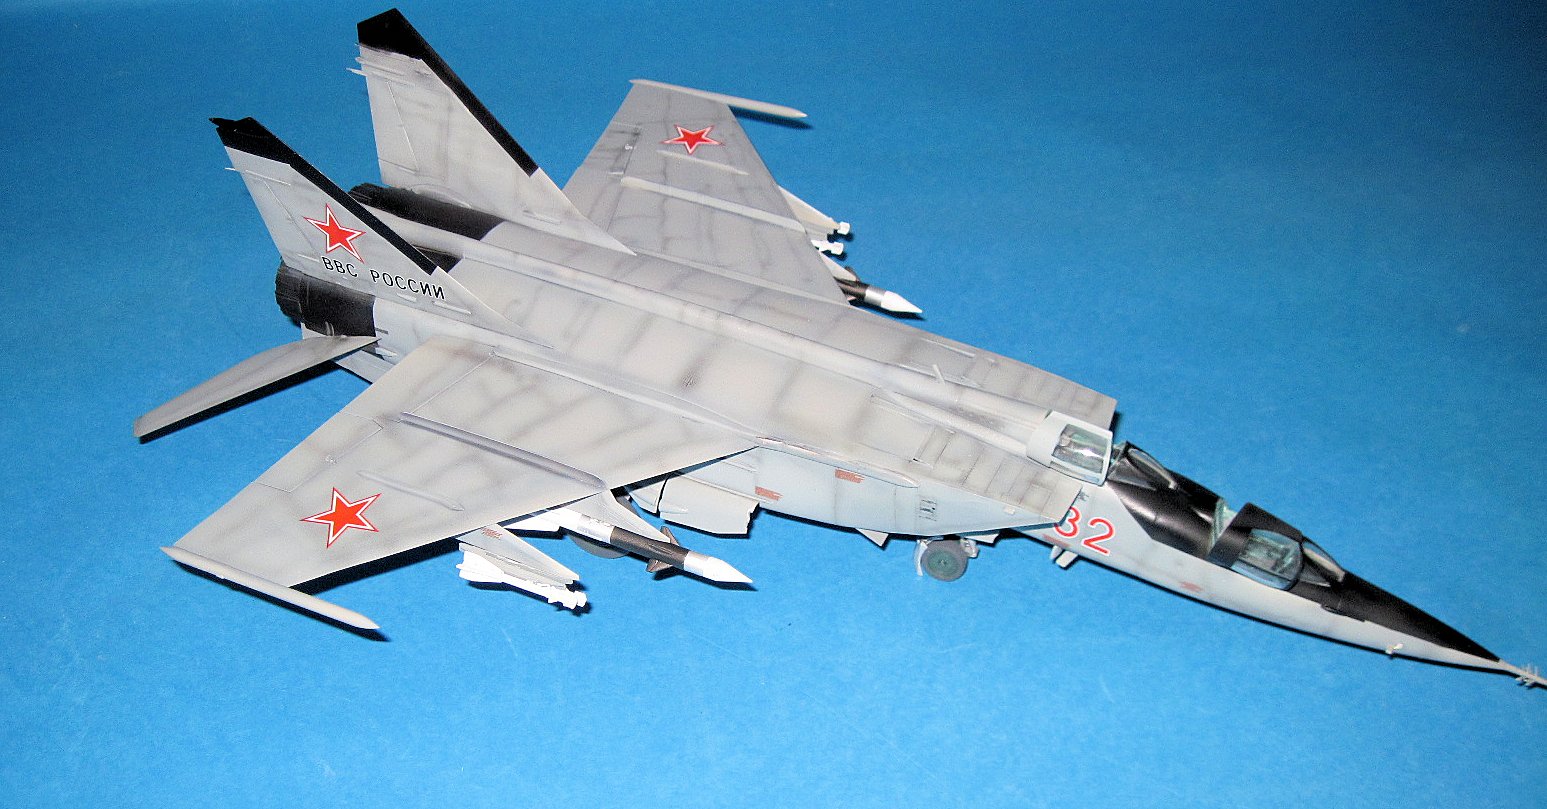
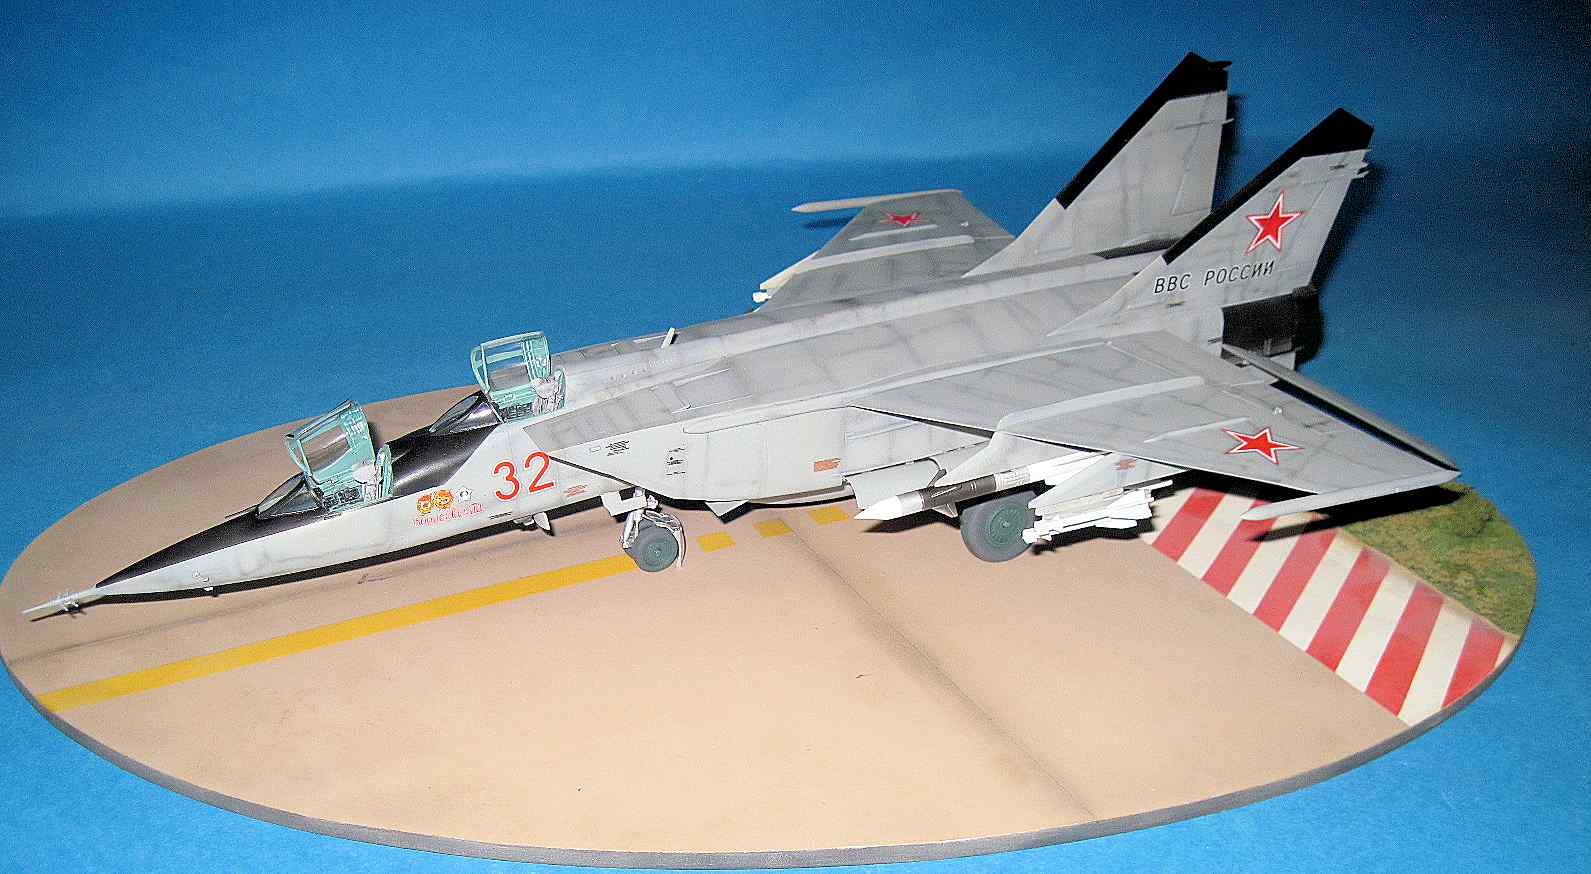
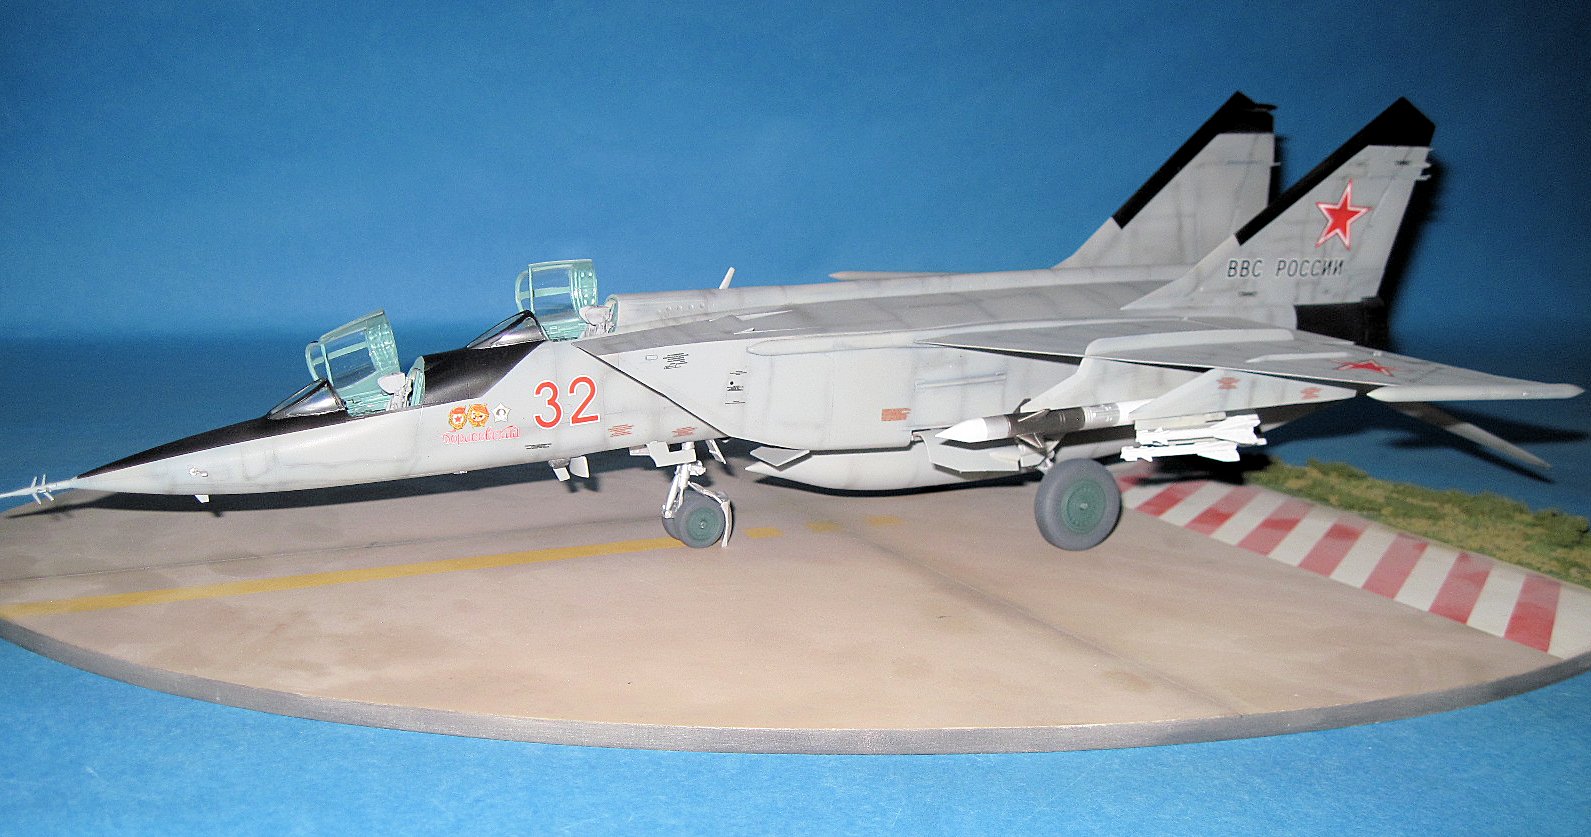
MiG-25PU Foxbat-C
Kitty Hawk continues their release of the MiG-25 line with the MiG-25 PU Foxbat-C version. This version was a 2 seat conversion trainer for the MiG-25 P interceptors. It has a new nose section with 2 separate cockpits and has no combat capability.
Looking in the box, you get lots of sprues. There are sixteen gray sprues with well done parts with nice engraved panel lines. There is also two decals sheets representing the four markings included. There are resin parts supplied for the landing gear, cockpits and two superb pilot figures. Lastly, there is one sheet of photoetch. The markings allow the building of:
- Ukraine Air Force 001
- Russian Air Force Red “32”
- Russian Air Force Red “34”
- Indian Air Force
IPMS/USA did a great review of the Kitty Hawk MiG-25RB/RBT so I will concentrate this review on the differences.
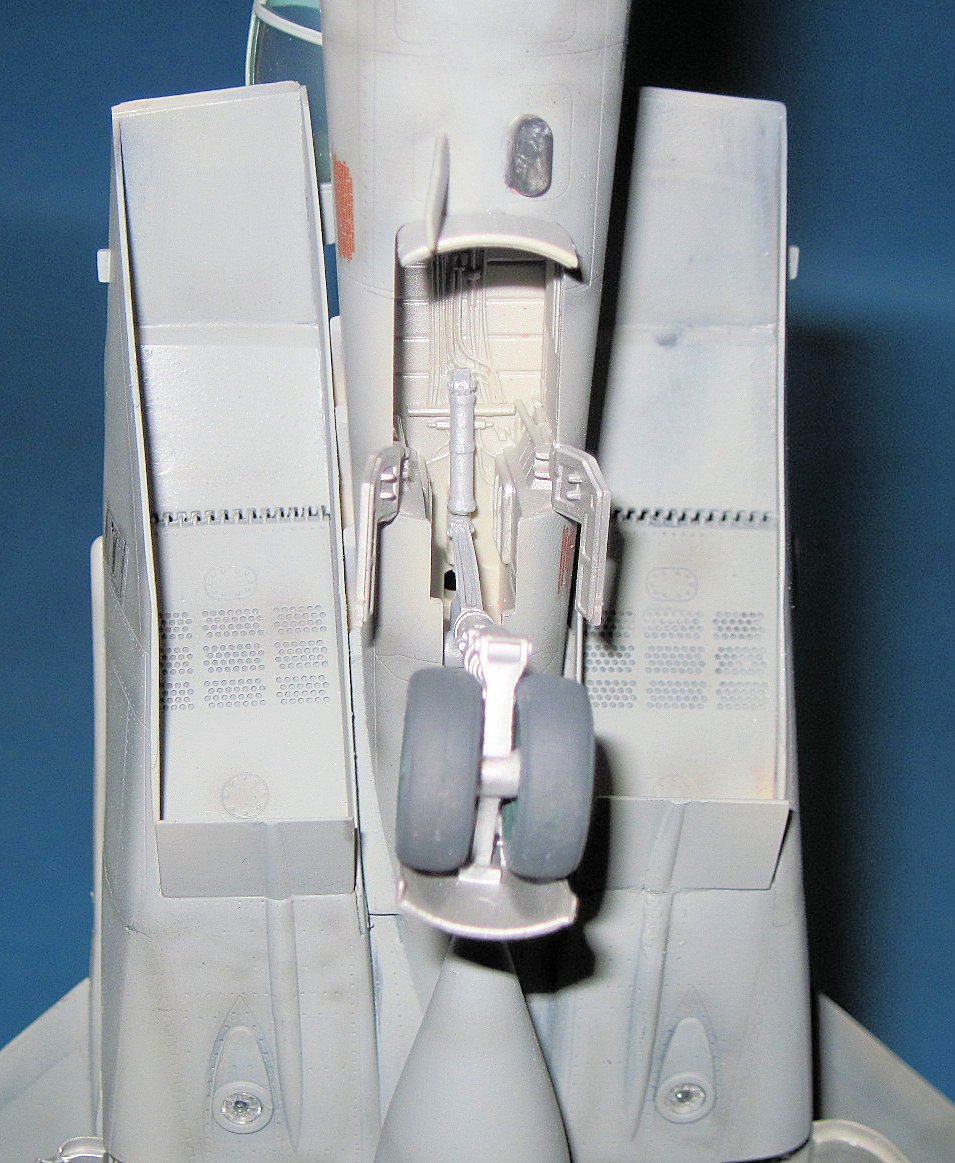
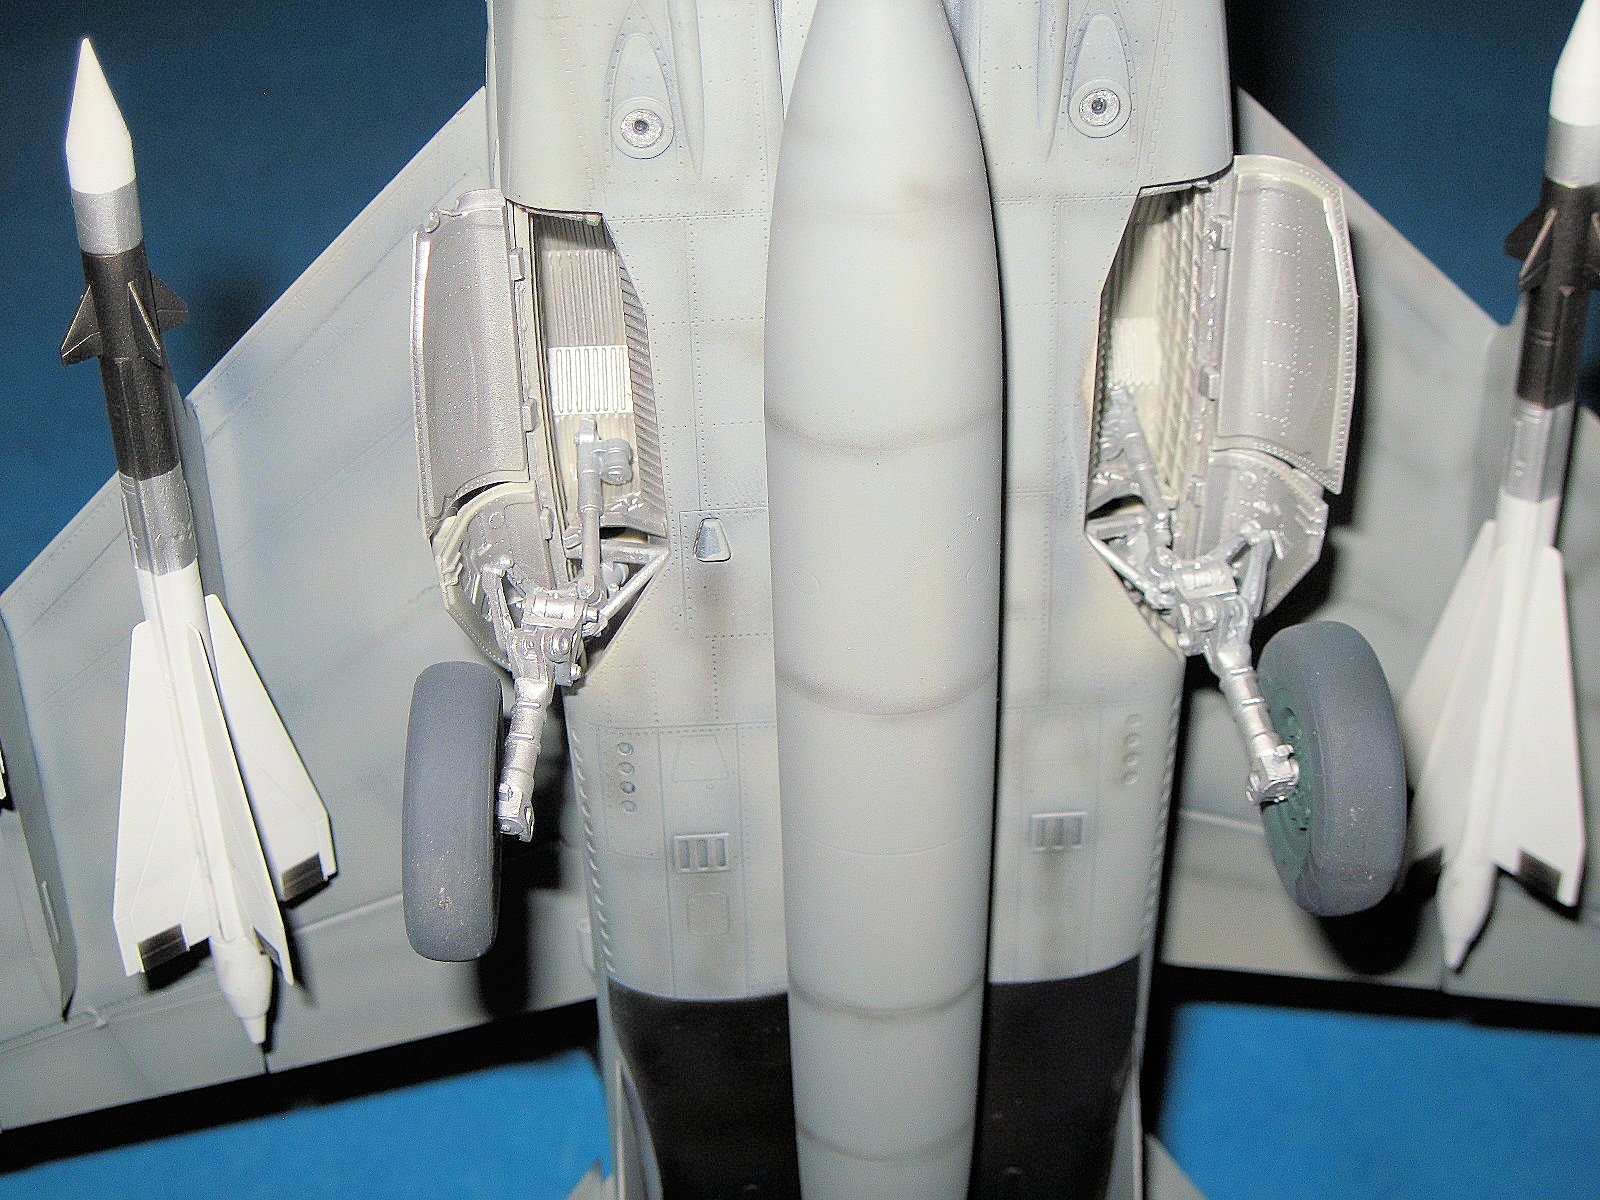
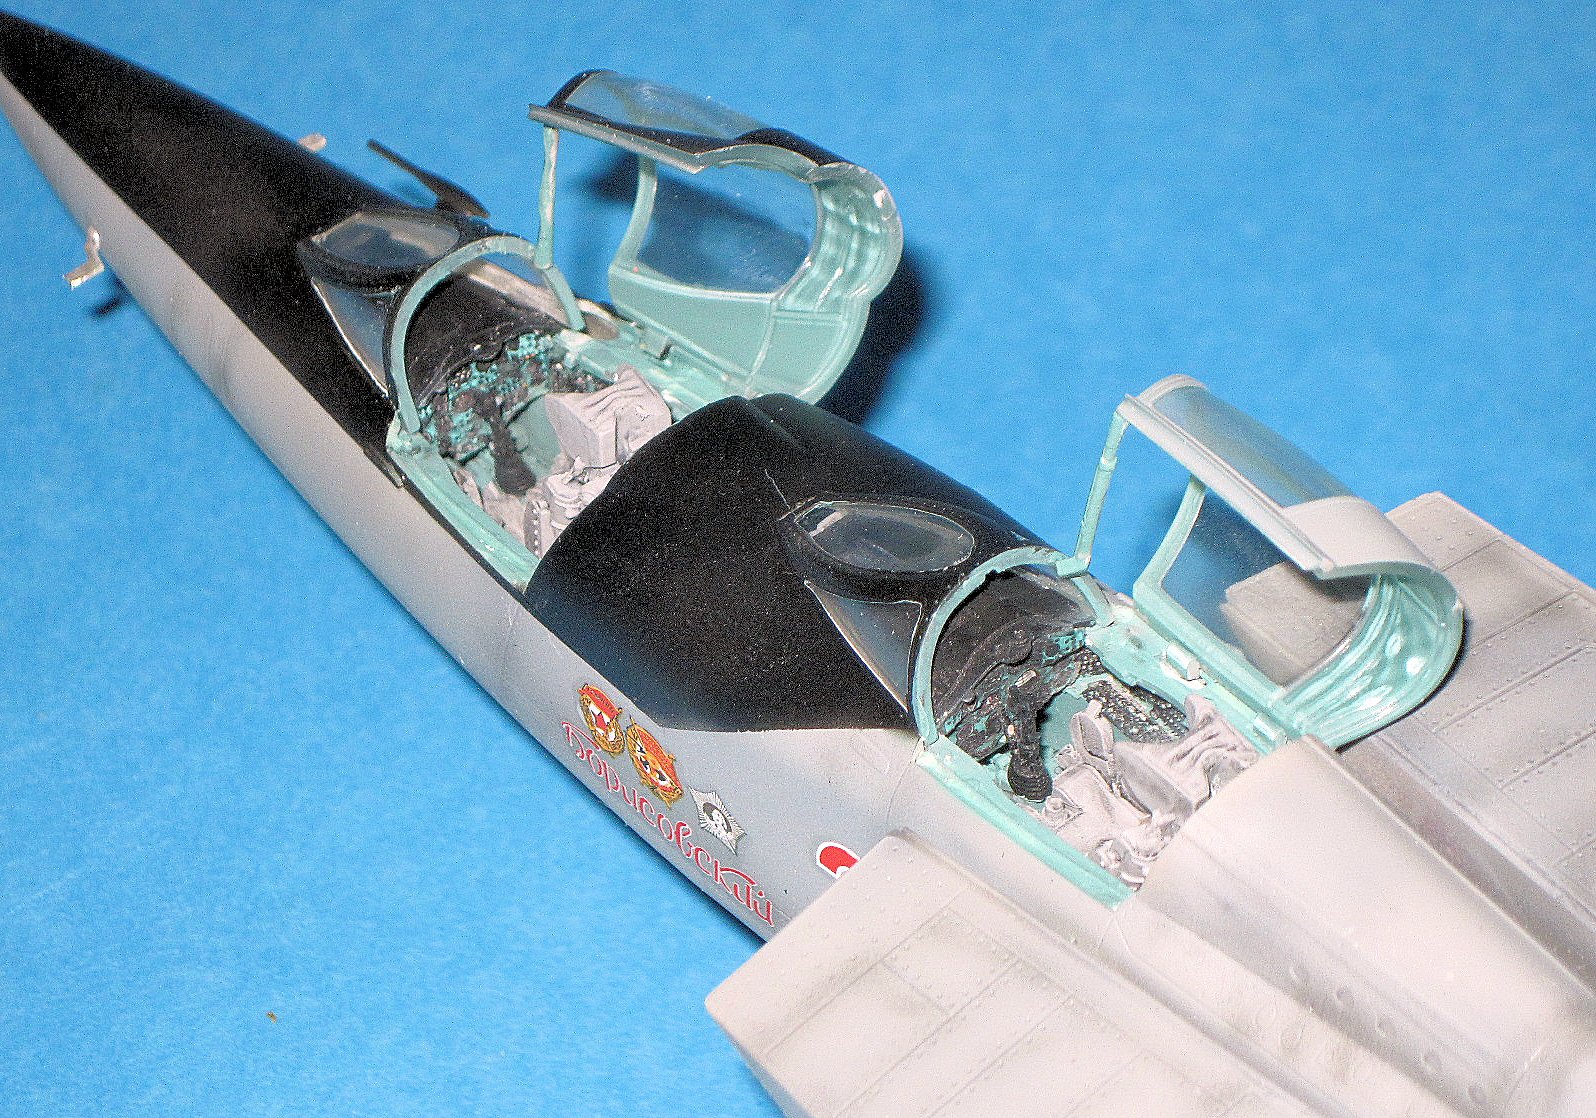
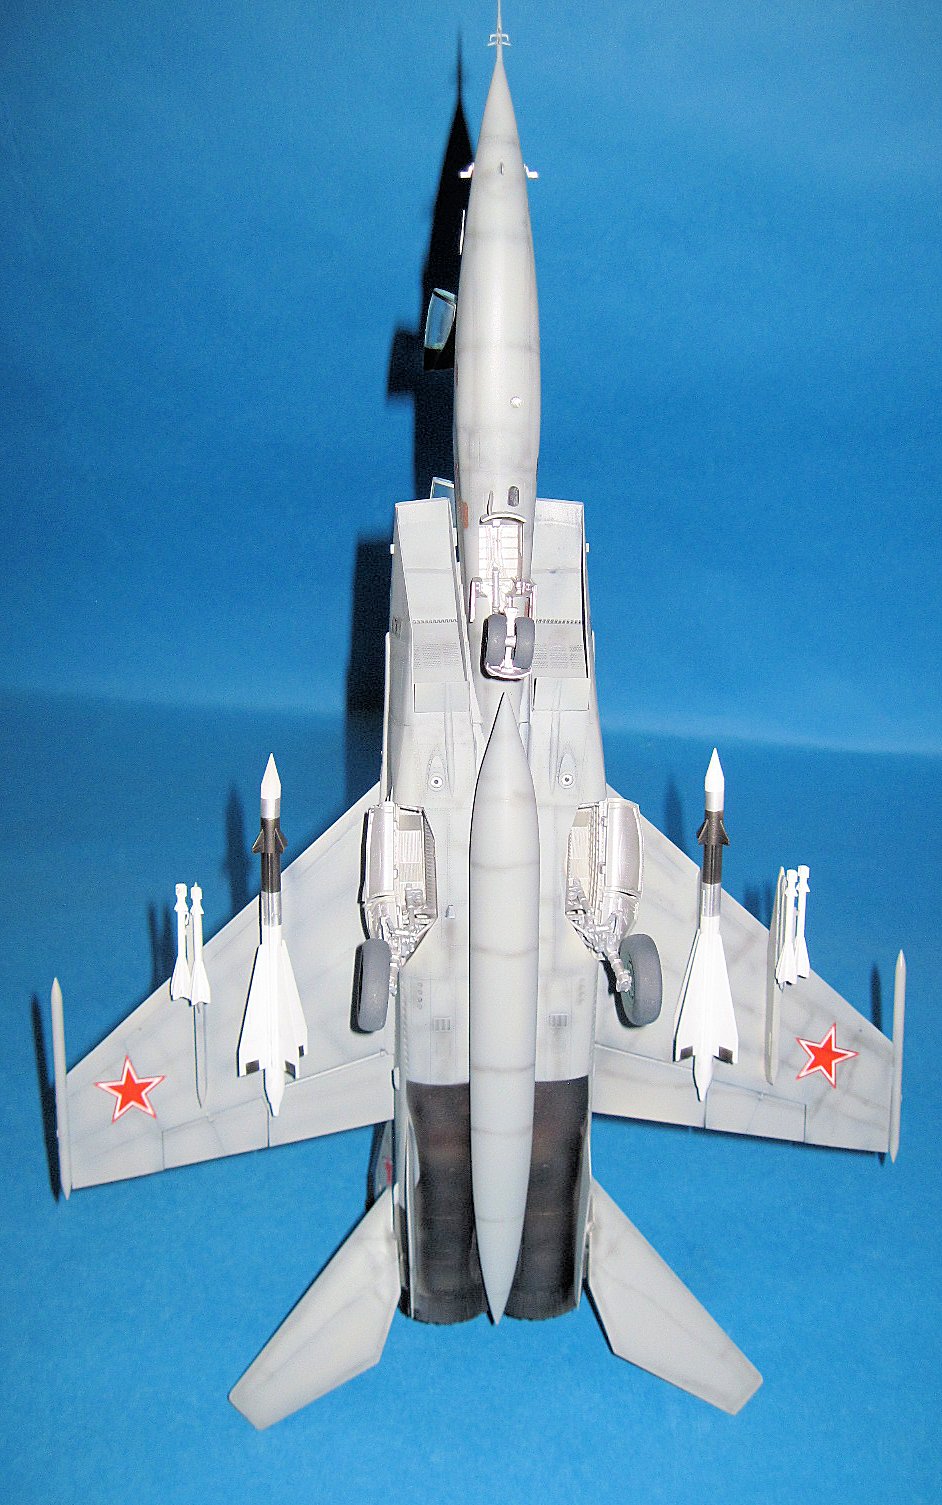
The first change starts in step 1 when you do the resin cockpits instead of the kit supplied plastic ones. The resin parts are very well done with crisp casting and minimal to no removal needed. Both fore and aft cockpits are included in resin and contain the tub, stick and rudder pedals and full instrument coaming. Sidewalls are also included. These fit well and are primed and painted with no issue EXCEPT there are no color call outs for painting the cockpit. A quick Google search and it is the standard Russian interior green color. The next change was building the main and nose landing gear bays. All are built with individual sidewalls and trap the resin gear struts in place. Since this supports a very beefy plane and I could not find a way to suitably add the gear later, the gear was added, and the bays built and set aside.
The intakes were next and are posed closed as there is no intake trunking back to the engines. No issue here but they would have you add then to the front fuselage and glue which I did. I have large fit issues with the intakes mating to the fuselage so I would suggest leaving them free to add later. The front fuselage traps the nose gear and aft cockpit. It is a bit of a balancing act, but they fit well.
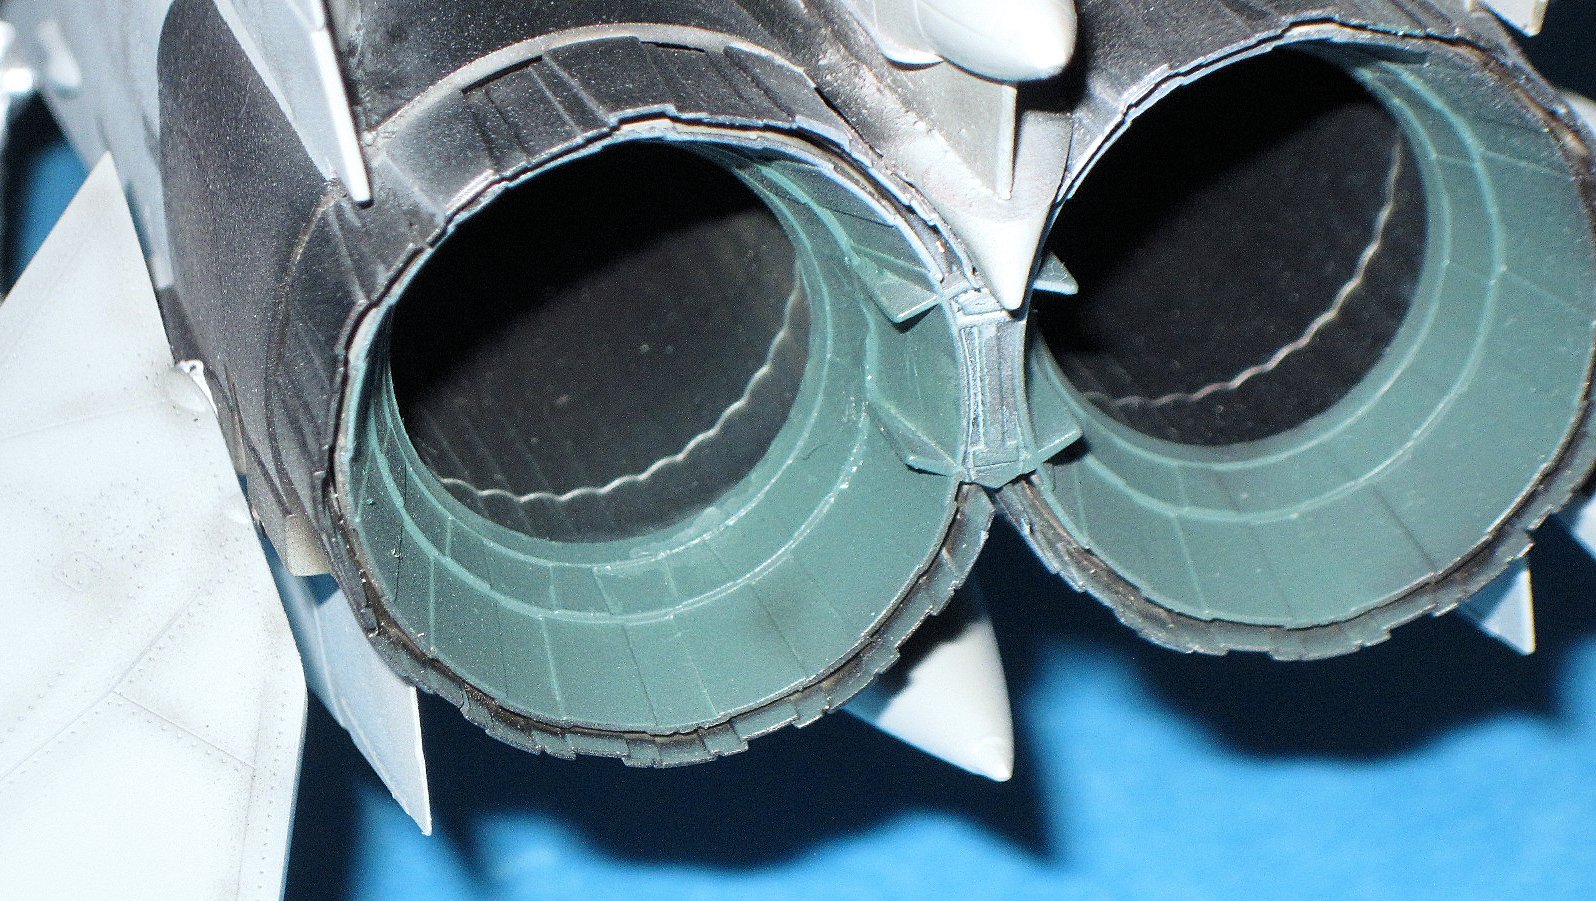
The engines are built and added to the bottom fuselage and then the top fuselage added and then the front with the aft canopy. I had pretty significant steps by the intakes and wish I had added the fuselage and then the intakes as mentioned. Part of this might be me hurrying also to meet deadlines. The wings, gear doors, etc. were all similar to the other build.
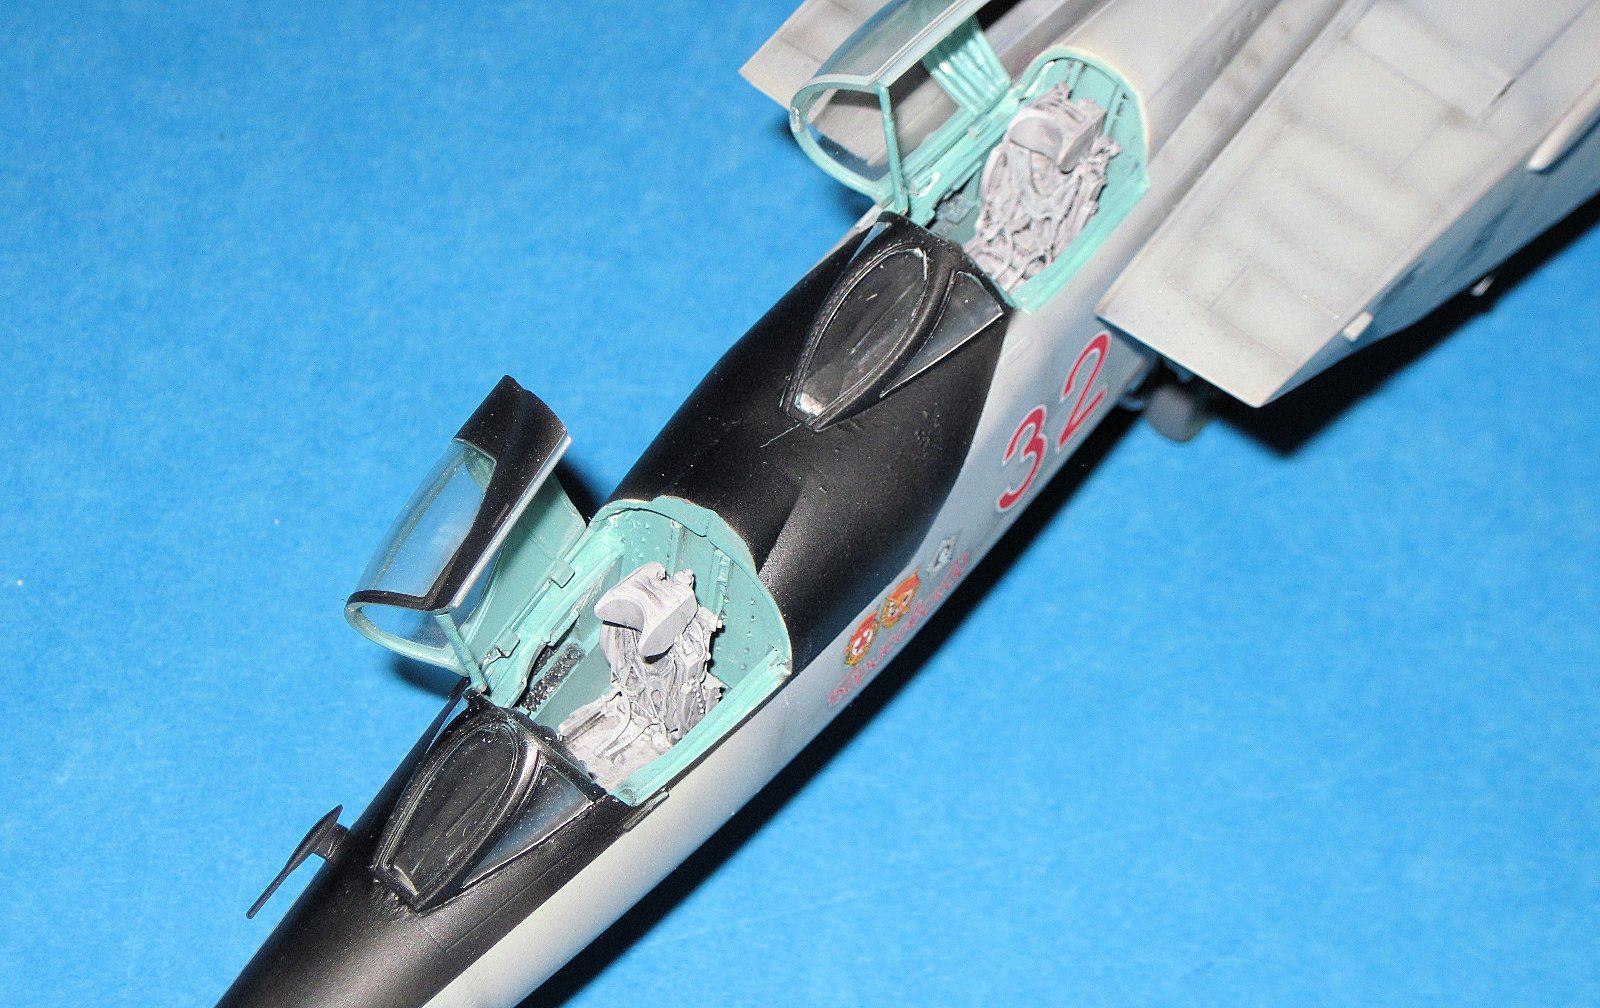
The next change was the addition of the second cockpit to the new long nose. This took a little time to fit and in the end was OK. One thing to note, the instructions clearly have you add the resin cowling over the instrument panel. Fact is, it is a single part and the instructions look only partially revised as the plastic parts are this way. Not a big issue but we aware of it as you build.
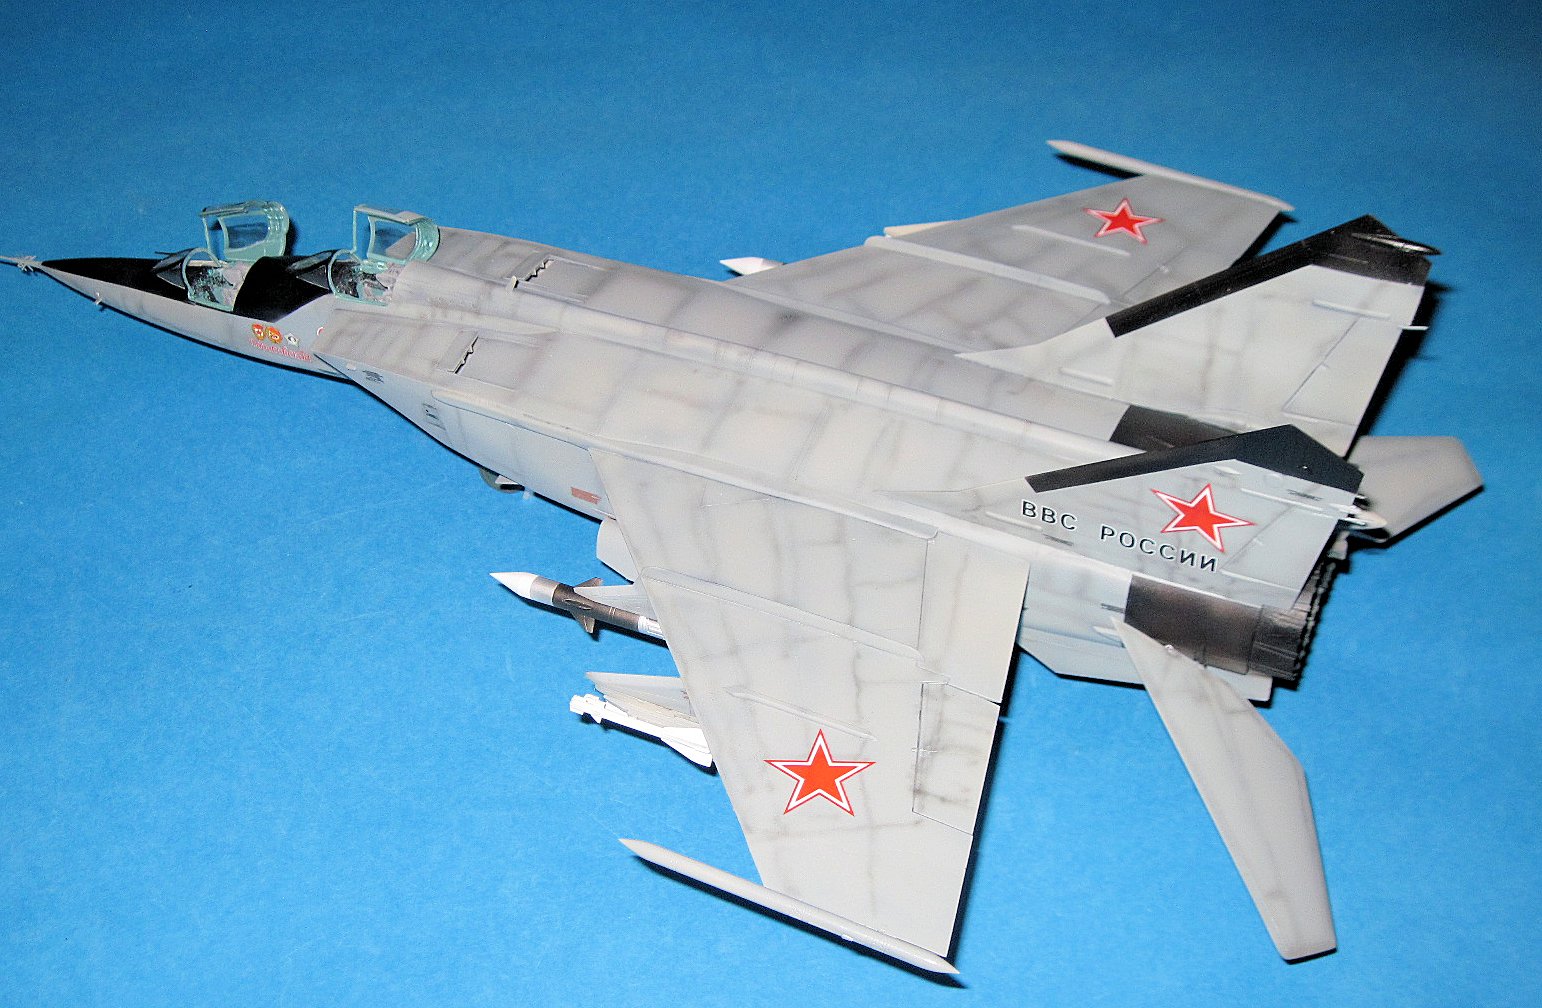
I added the very nice wind screens and it was paint time. I used Light Compass Gray with pre-shading for the main parts. The engine sections were masked off and sprayed gloss black and then finished in burnt iron with several colors added to show heat. I chose Red “32” and masked off the black sections around the vertical stabilizers and cockpits. Once shined up, it was time for decals.
The decals had a little mottle look to them and I was concerned but this was unfounded and they worked very well. A little more weathering and a flat coat and we are ready to finish it off.
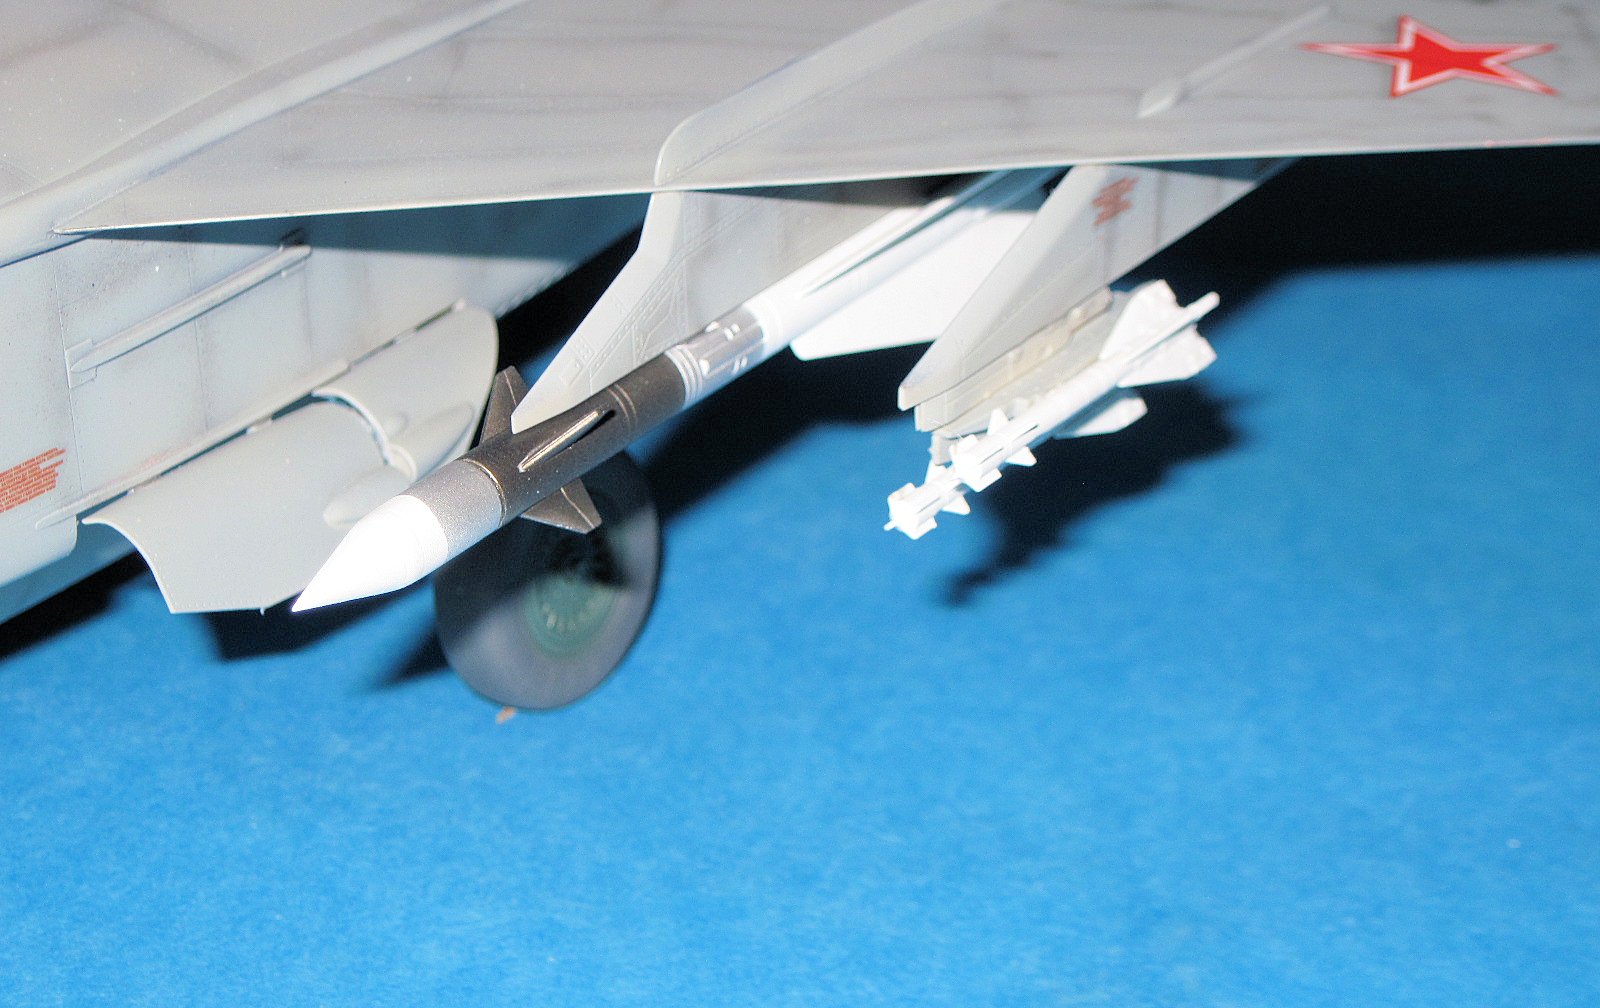
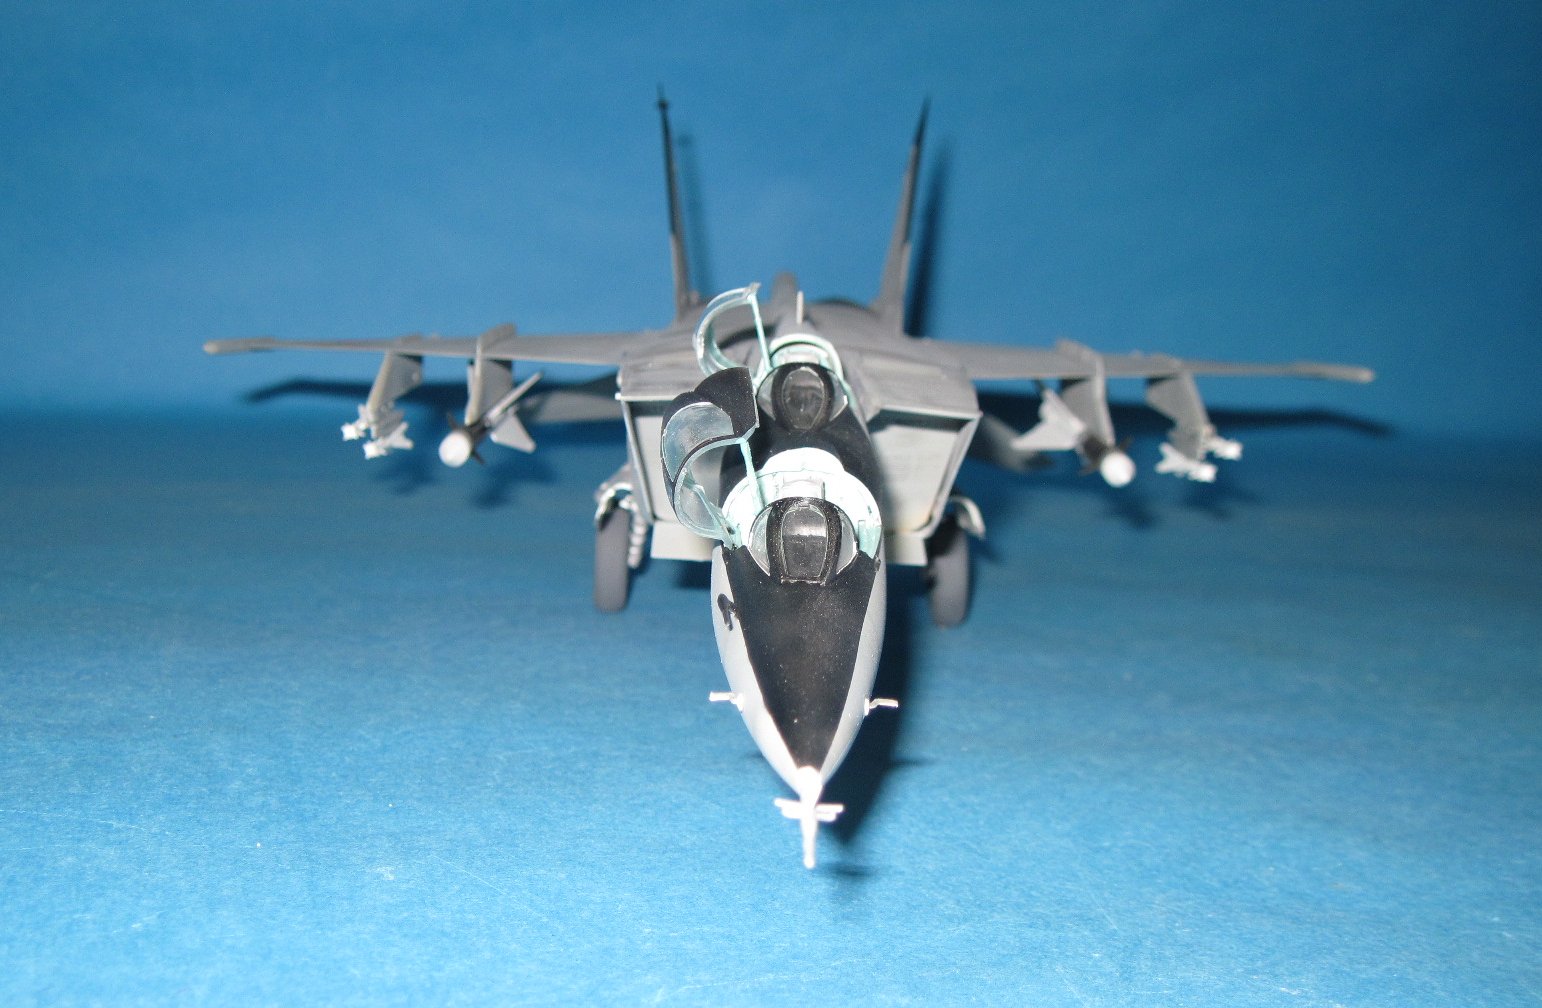
The canopies were added along with their struts as well as a pitot tubes and a few miscellaneous parts. Included in the kit are multiple sprues of weapons including R-60, R-40, KH-31, KH-58ME and KH58 missiles along with a large drop tank and two EW pods. There is also a great instruction showing what goes on which pylon…problem is, this version was unarmed. Yup- discovered that AFTER I added R-60 and R40’s to the wing pylons. Look better that way but no accurate.
Another flat coat and only the seat left to go. The seats are resin and are very beautiful and delicate. Paint is simple. Wait a minute, didn’t I see seat belts on the PE fret. Yup. Beautiful belts and no mention of them anywhere in the instructions. They were added and the seats glued in place.
The first thing I noticed after I stepped back was how big and beefy this plane is- stocky to say the least. It builds into an impressive model. The fit is generally very good with the intakes being an exception to me., Other have not reported the same issue. The only let down to me was the instructions- so many misses like the seat belts. Experienced modelers won’t find it an issue but newer modelers might follow the instructions and leave the bets off entirely which is shame as they are very nice.
I can definitely recommend the kit to medium to experienced modelers. There are some great shots on the Internet of really worn and faded kits and this would be a great jumping off point for that build.
My thanks to Glen and everyone at Kitty Hawk for the opportunity to add this to my Russian collection.


Comments
Add new comment
This site is protected by reCAPTCHA and the Google Privacy Policy and Terms of Service apply.
Similar Reviews