
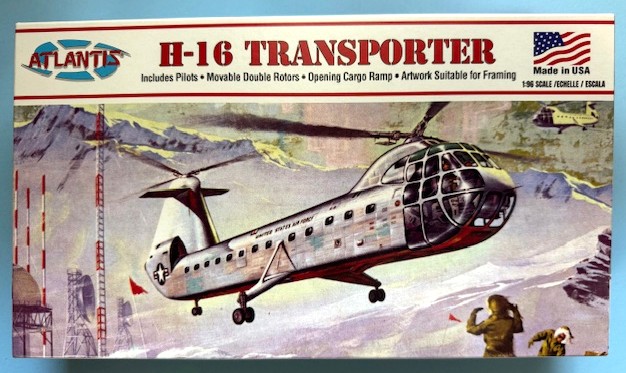
H-16 Transporter
If you are looking to relive the past with your modeling, one of the recent releases from Atlantis Models is the H-16 Transporter that was first released in 1955. Containing a mere 59 parts and measuring 9–3/4 inches when assembled (helicopter body length excluding rotor blades), the kit can take you back to a simpler time in the world of modeling. Just like the original release, the parts are molded in silver plastic along with a clear plastic nose canopy, observation blister, and left and right windows (placed behind the cockpit). This new kit includes a collectible trading card showing the box art as well as a stand that can be positioned. Built out-of-the-box, this kit can be fun for beginners as well as those experienced modelers looking to experience building the kit they may have built as a kid or just missed out on when they started modeling.
Information and History
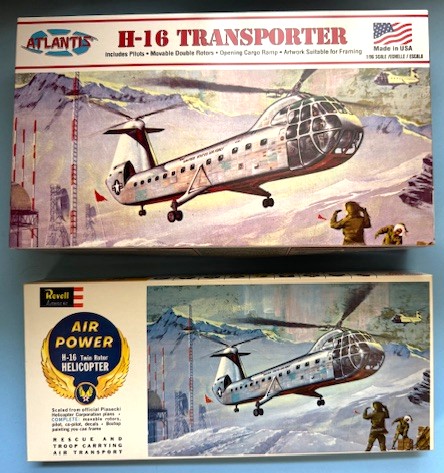
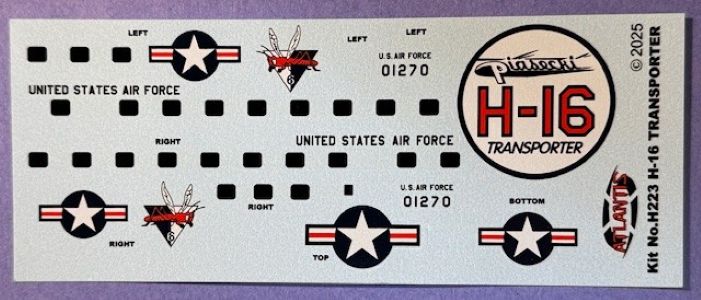
I requested this kit to review as I happen to have an original boxing of this kit that I am building for a friend of mine. In the 70 years that have passed since the original kit was released, you will now find all the parts contained within a clear plastic bag along with a trading card and a stand. The original directions were printed on off-white paper while the new ones are printed on glossy white paper. The new decals also provide a label for the stand, if you choose to use it.
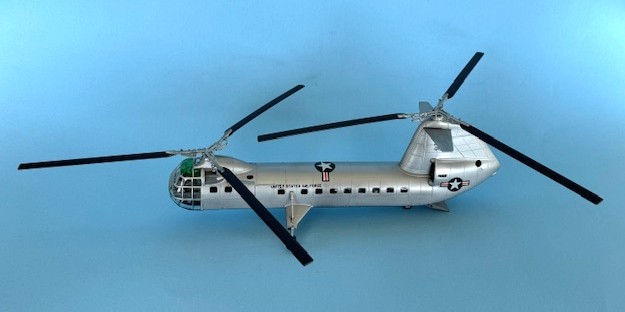
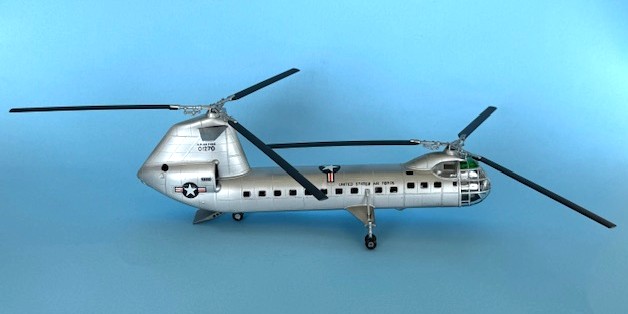
The original box uses the name “H-16 Helicopter”, while the original instructions more properly call it “YH-16A”. Piasecki created this helicopter and first introduced it to the public in September 1953. Designed to carry 40 troops, 32 litters, or three jeeps, it had a gross weight of over 15 tons. The helicopter was 78 feet long with a combined rotor span of 134 feet.
The original kit represented the aircraft with two turbojet engines, which replaced the original reciprocating engines. The helicopter could also be equipped with a sling to carry equipment that the pilot could release while in flight. The transport capabilities of this helicopter drew the attention of both the Army and the Air Force.
Two of these helicopters were built for testing, and after the second prototype crashed in 1956, the project was canceled before production could begin. The accident occurred as the aircraft was returning to Philadelphia from a test flight over New Jersey. The cause of the crash was determined to be seizing in the aft slip bearings, which led to the rotors falling out of synchronization and colliding. The helicopter was a total loss along with the crew of two pilots. In addition to the cancellation of this project, the accident also caused the cancellation of the proposed “H-16B”, which would have carried up to 69 troops.
Construction
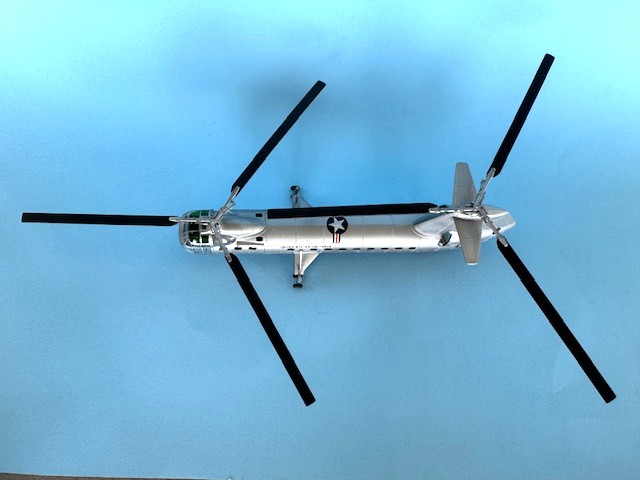
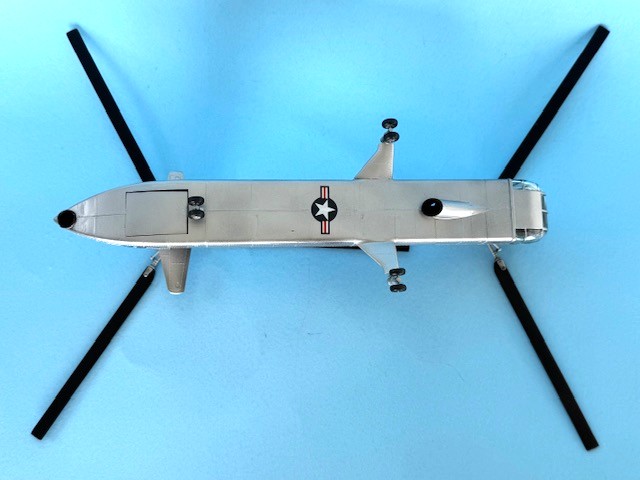
Construction is straightforward with only 59 parts and begins with assembling the two rotor hubs followed by the cockpit. Check the fit of the hub assembly and the fuselage halves as you may need to lightly sand or file between the bell housing and hub shaft retainer. Although the directions have you install the loading ramp in step 4, I glued the two pieces together and installed them in step 3 when I was gluing the fuselage halves together. Pay attention to the rotor blades as they are keyed for the two separate hubs and fit nice and snug when installed correctly.
Painting and Decals
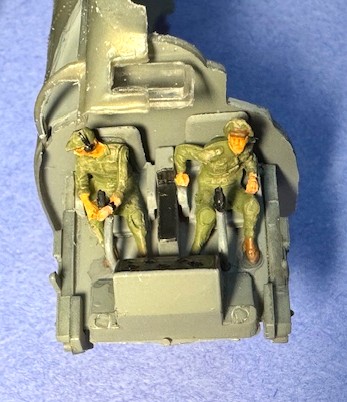
Painting consisted of airbrushing the interior parts with FS 36231 (Gunze 317 Dark Gull Gray), which I based on interior photographs of other Piasecki helicopters of this era. I used Ammo by Mig US Modern Uniform Light Green (AK 11428), AK Playmarker Light Flesh (AKM007) and Leather (AKM023) for the pilot figures as well as AK Marker Rubber Black (RCM001) for the instrument panel and later the tires. The instruments were touched with a Gundam Black Marker (GM01) and then given a drop of UV Resin.
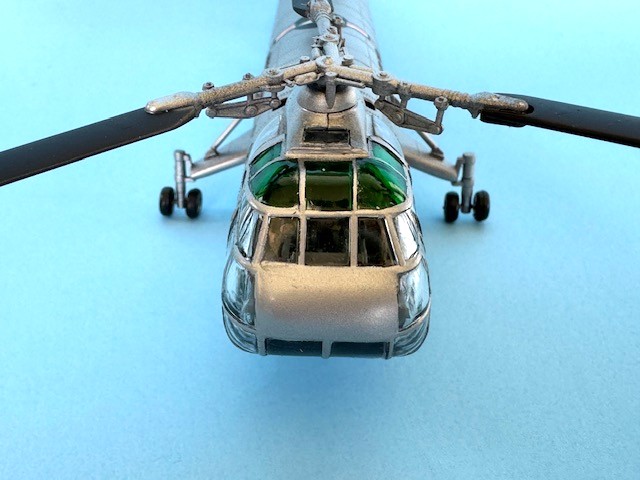
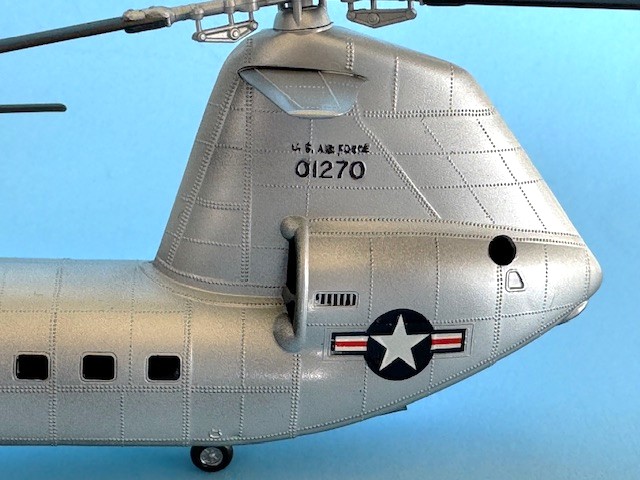
The exterior was primed with Stynylrez Gloss Black Primer, then top coated with Tamiya Lacquer Gloss Aluminum (LP 70) followed by Alclad Aqua Gloss, which was also used to seal the decals and lettering. In place of using the black window decals, I used an artist’s painting pen filled with Stynylrez Gloss Black Primer, which I covered with UV Resin to simulate a glass appearance.
When I applied the decals for the national insignia, I found that they did not completely fit the molded markings on the helicopter for the fuselage top and sides (there was no molding on the underside). I opted to use a Gundam Black pen to take care of the lettering on the fuselage sides as I expected the decals to not fit just right, and the decal font did not match the molded lettering font. I think that the intent back in the day was for the modeler to paint these items themselves, even though decals were included. The decals worked well with Micro Set and Micro Sol.
Summary
Taken for what it is, this kit is meant to be both easy and fun to build so that you can get it from your stash and into your collection quickly. The detail does not match what you would expect from an Academy, Dragon, MRC, Takom, or any other newer manufacturer of helicopter kits, but it does represent something first released 70 years ago that is not likely to be produced in a modern kit. Atlantis includes in their instructions the following, “Preserving the Past while Building the Future”, and this kit absolutely accomplishes this goal.
In conclusion, I highly recommend this kit for the “fun factor” alone. Modelers with varying skill levels should be able to create their own copy of the YH-16A using this kit and can enjoy the simplicity of building a good model without needing to go overboard with detailing. My thanks to the folks from Atlantis for providing this kit and to the IPMS/USA for allowing me to complete this assessment.
Reviewer Bio
Scott Hollingshead

Scott retired from the commercial nuclear industry with over thirty years of experience in Maintenance, Engineering, and Training. Prior to that he served on two aircraft carriers during his time in the U.S. Navy. He has been building models for over 50 years with his first kit being purchased with money from his grandparents for his sixth birthday. With a stash that consists of more aircraft than anything else, Scott still enjoys building a little bit of everything (including but not limited to tanks, cars, show cars, military vehicles (aside from tanks), ships, figures, real space, and some science fiction), which keeps his stash growing. Scott and his wife Fern reside in southwest lower Michigan, not far from South Bend, Indiana, and have three adult children and currently three grandchildren as well as a small dog and a large cat.
Comments
Add new comment
This site is protected by reCAPTCHA and the Google Privacy Policy and Terms of Service apply.
Similar Reviews