
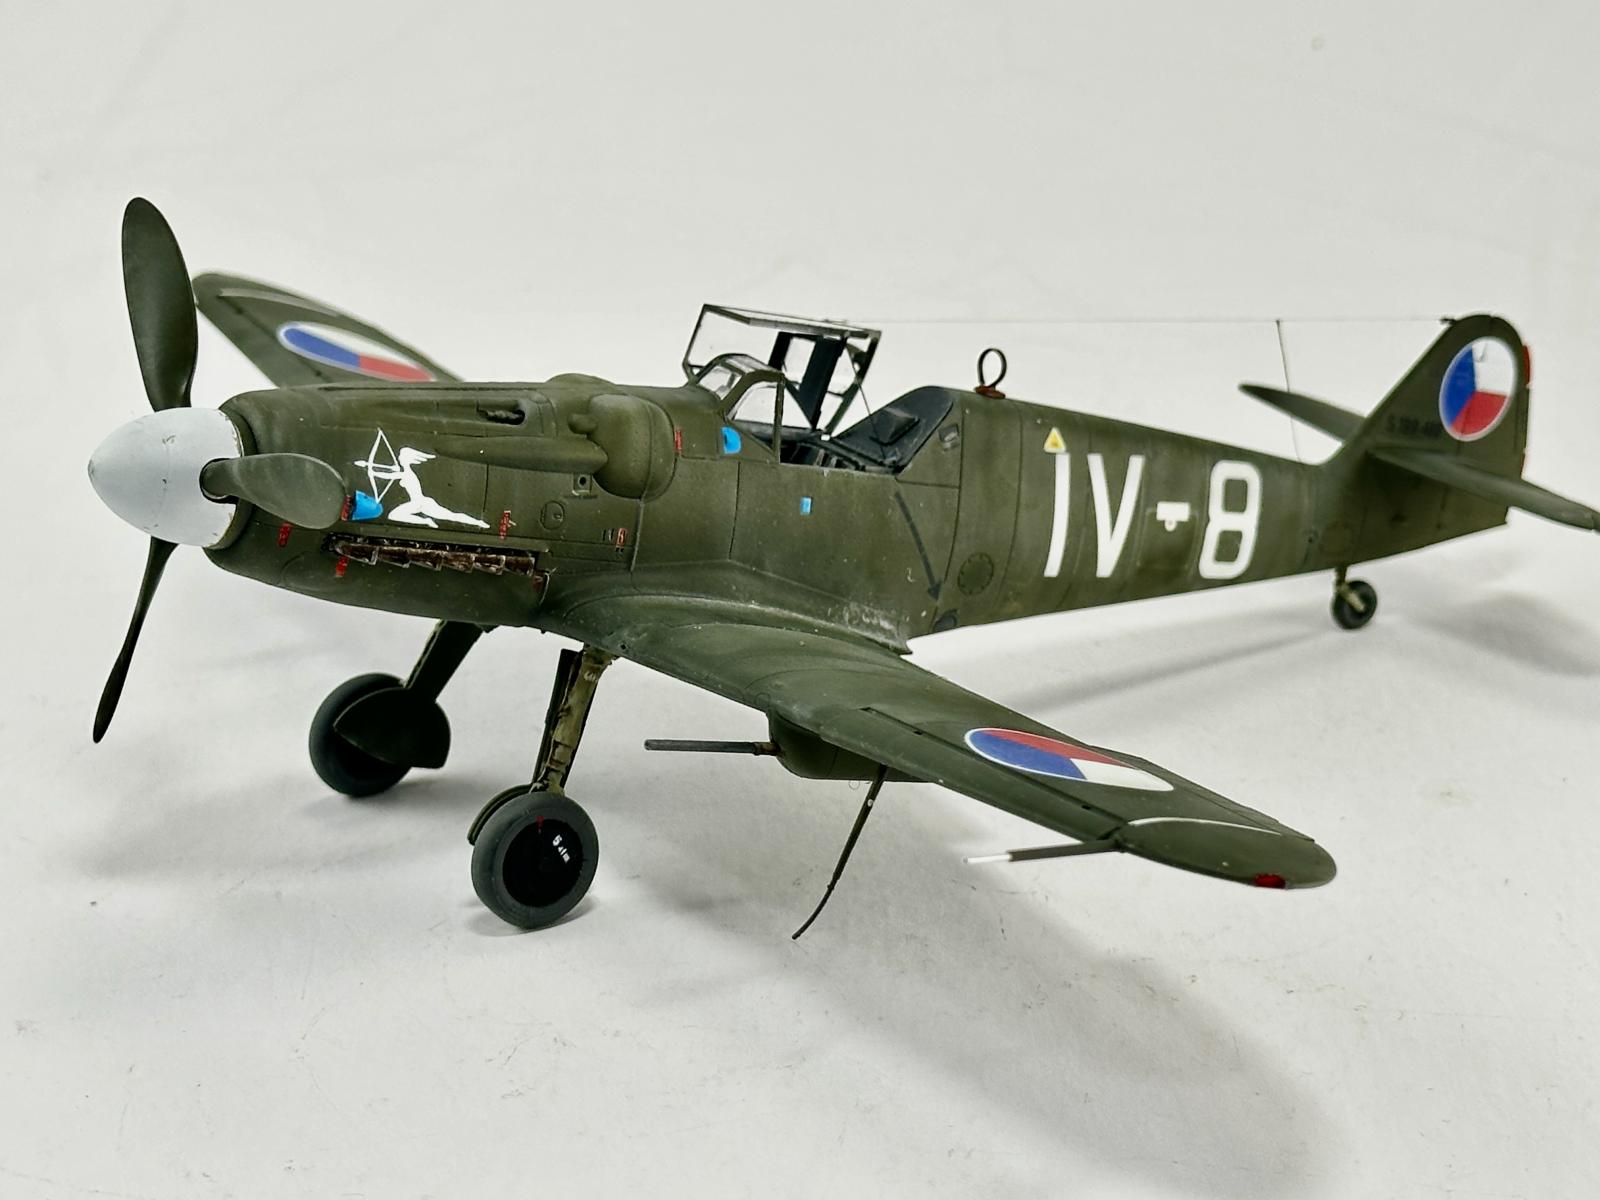
Avia S-199 Erla Canopy
The long-awaited Czech variant of the Bf-109 family, the Avia S-199, has finally been released by Eduard. It is the first of the new Hybrid Line of kits. This touts less plastic parts and more resin pieces. One thing that stuck me as funny is there is no photo etch, not because it was needed but considering that Eduard started out as a photo etch company. I found this interesting and shows just how much Eduard has grown since its conception.
Inside the usual Eduard box are three light grey plastic sprues containing 61 parts, some not being used, one clear sprue and 38 resin parts along with masks, decals, and instructions. There are marking options for six aircraft, three Israeli and three Czech. The instruction book is printed on high quality paper as usual with pictures and callouts on there. It is important to determine which subject you are going to model because there are some changes between the variants. The decals are the latest Eduard ‘peelable’ style.
The plastic parts are beautifully molded with the customary fine rivet detail and recessed panel lines. The clear sprue has the canopy for both variants, but you’ll only need the Erla one on this kit. The parts breakdown ensures a quick build.
The thing that makes this a Hybrid kit is the inclusion of a large amount of 3D printed resin parts. There are 38 resin pieces. Some are exceptionally fine and fragile. My example had broken rudder pedals, and some other small items broken upon arrival. Nothing dramatic. The detail on the parts is phenomenal. Things you couldn’t do in plastic are beautifully rendered in resin. Notable parts are the entire cockpit, along with the landing gear, wheel wells and wheels.
The Build
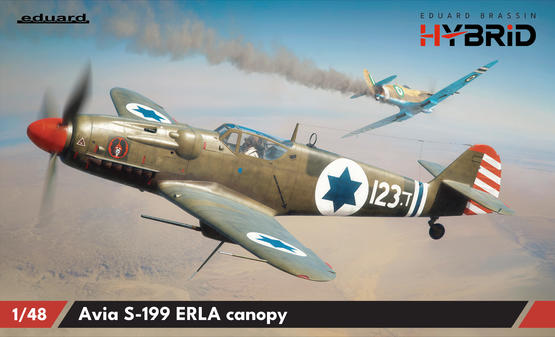
As usual the kit starts in the cockpit. However, this is quite different with the complete use of resin parts throughout. My example had broken both rudder pedals in transit, but luckily, I had previously purchased Luftwaffe pedals and they were easily replaced. The rest of the resin pieces were removed from the build plates by one of THREE different methods. The first was with a typical fine sprue cutter, I used a Tamiya one. The second was with a sharp NEW razor blade and lastly, and I think the best way, was with a heated new knife blade. It puts the least amount of stress on the parts when separating them. Was it all perfect? No. I did have a few parts that broke but overall, I was able to remove the components without major issues. I do suggest that you leave off the cockpit sill lights as they are just gonna get broken in handling. Add them later.
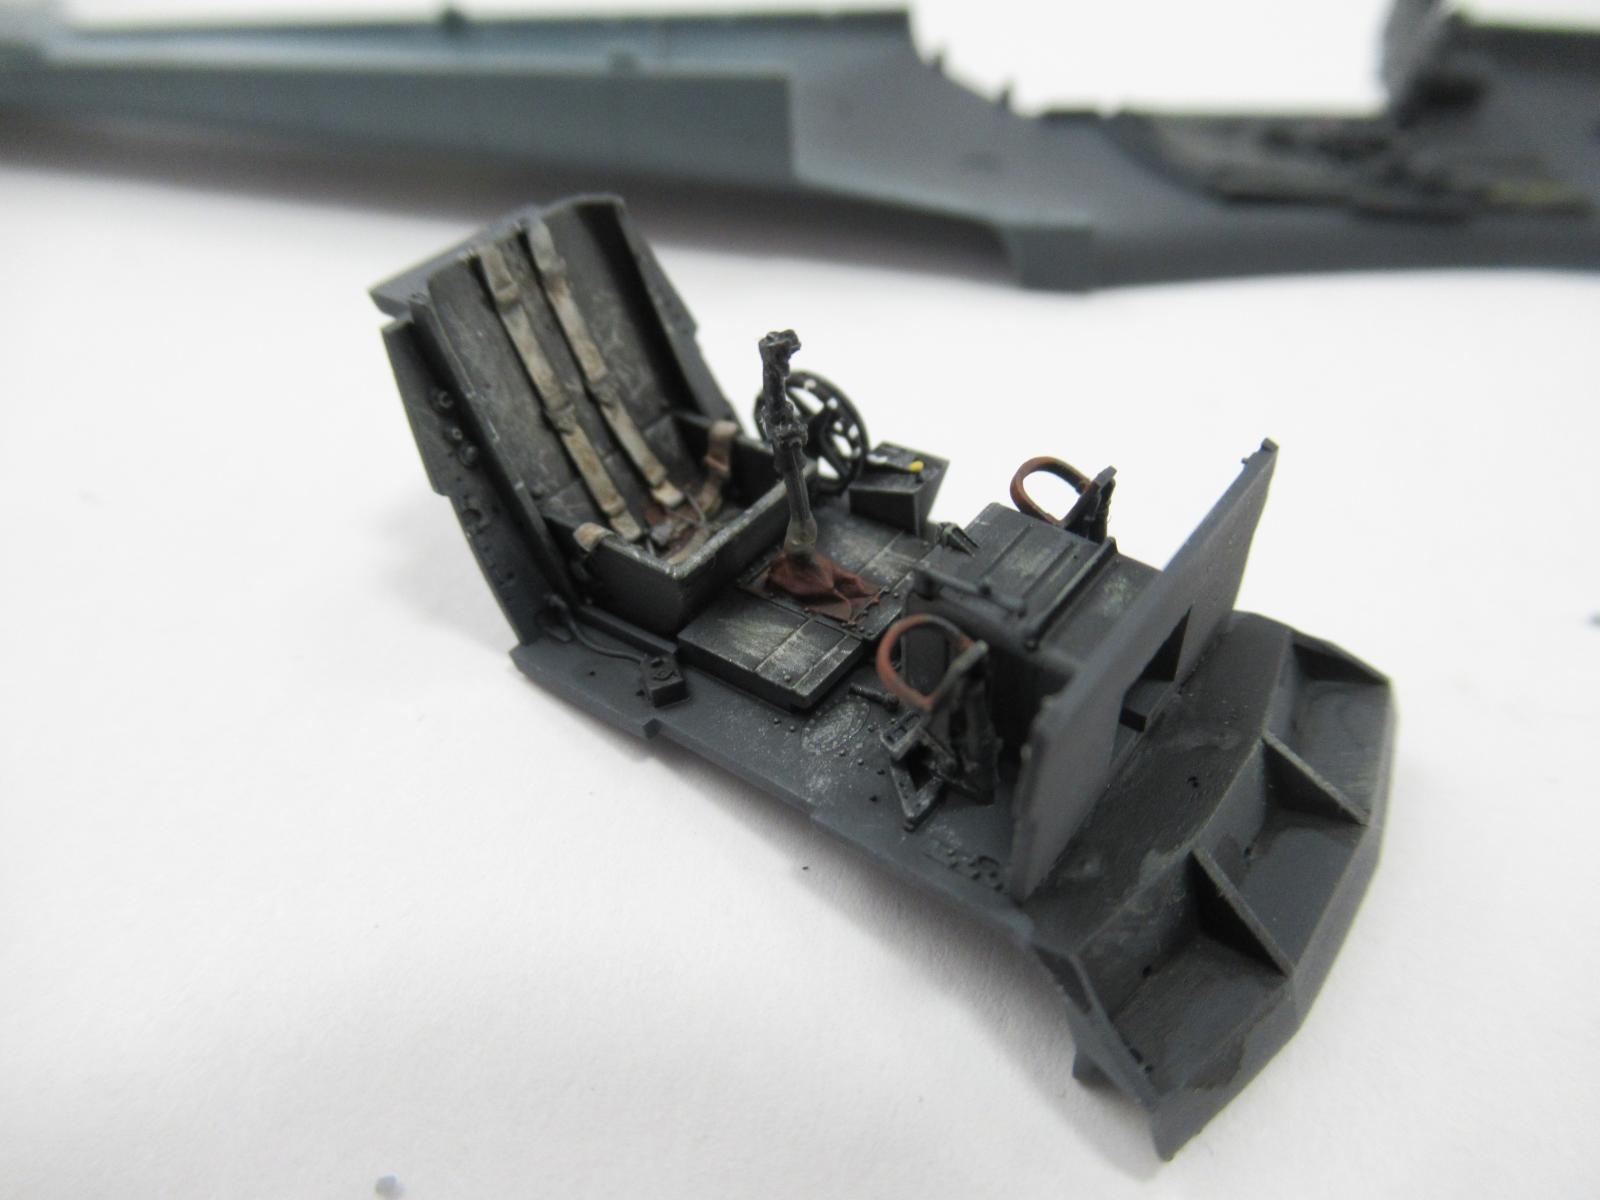
Painting the cockpit was done in Tamiya Dark Grey, which is a lighter color than RLM 66, but, in scale, looks the part. Interestingly, the instrument panel requires a decal. This was a unique technique, but it worked by cutting the decal into sections and applying strong setting solution, like Tamiya Mark Setter while tamping them down with a cotton bud. This was then sealed with Alclad Flat and the gauges restored with a drop of Krystal Kleer.
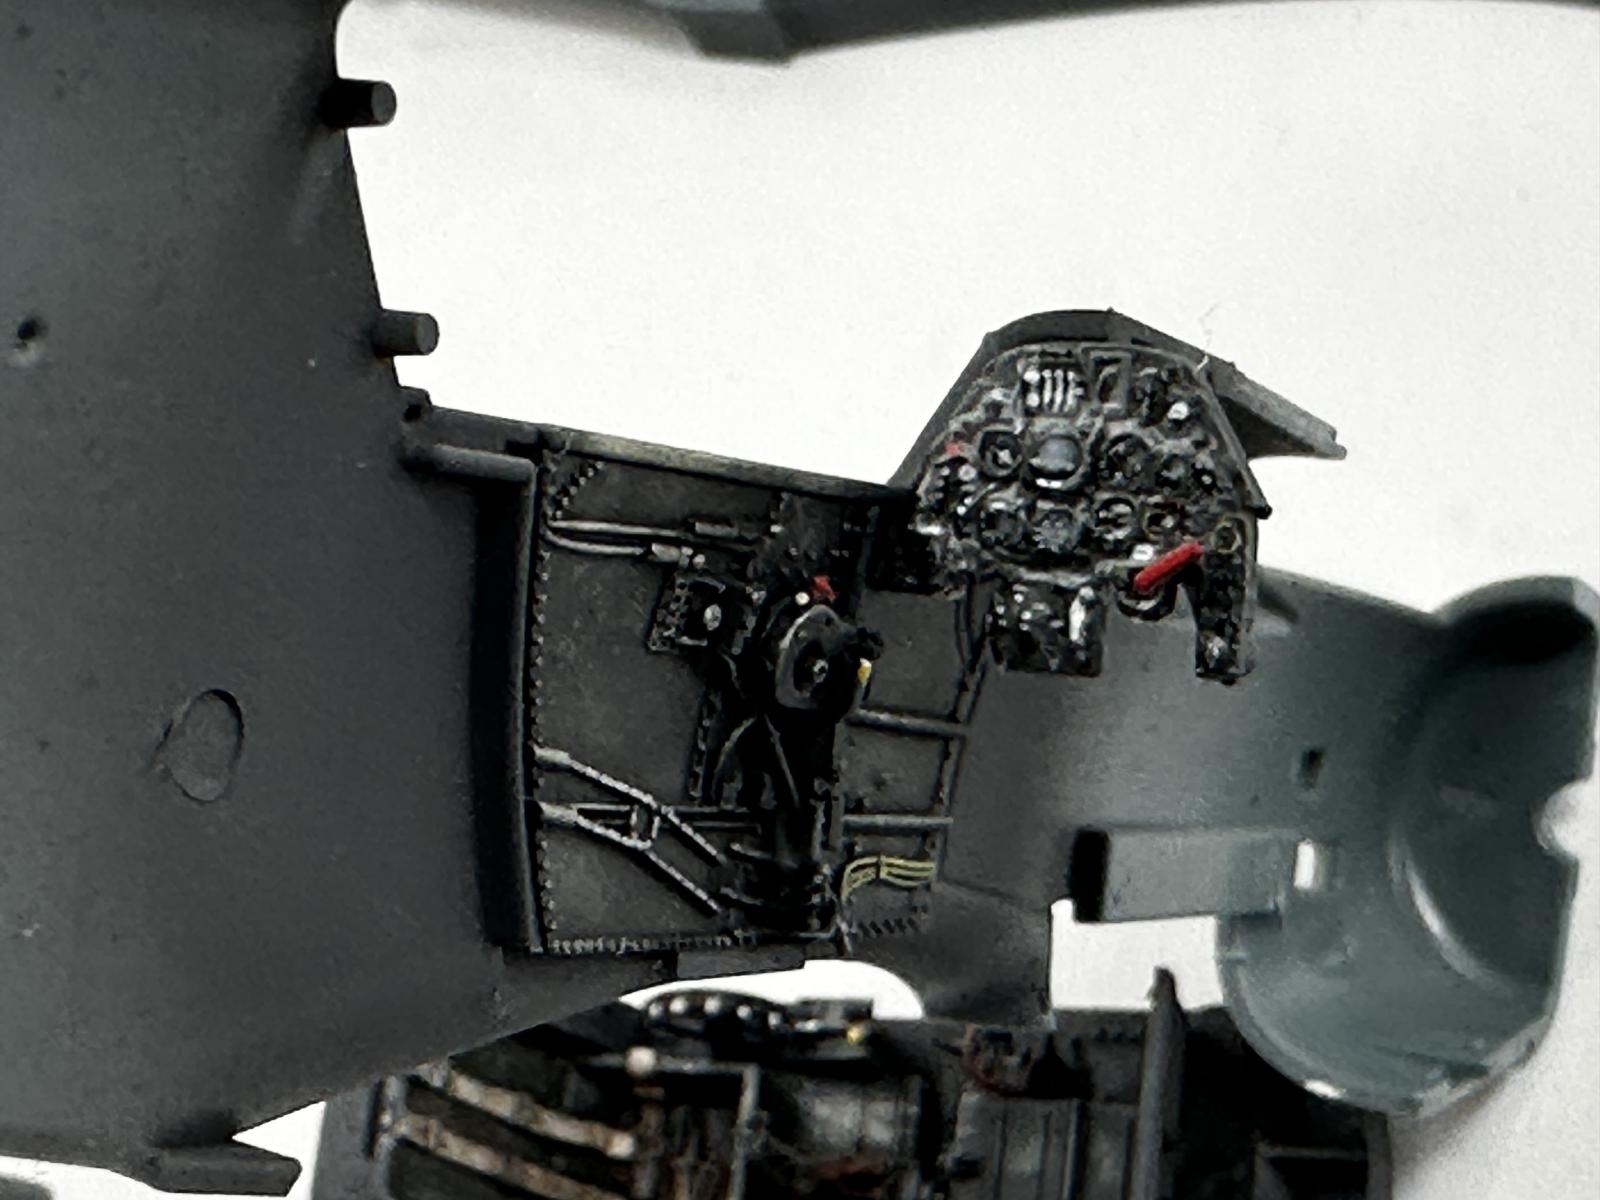
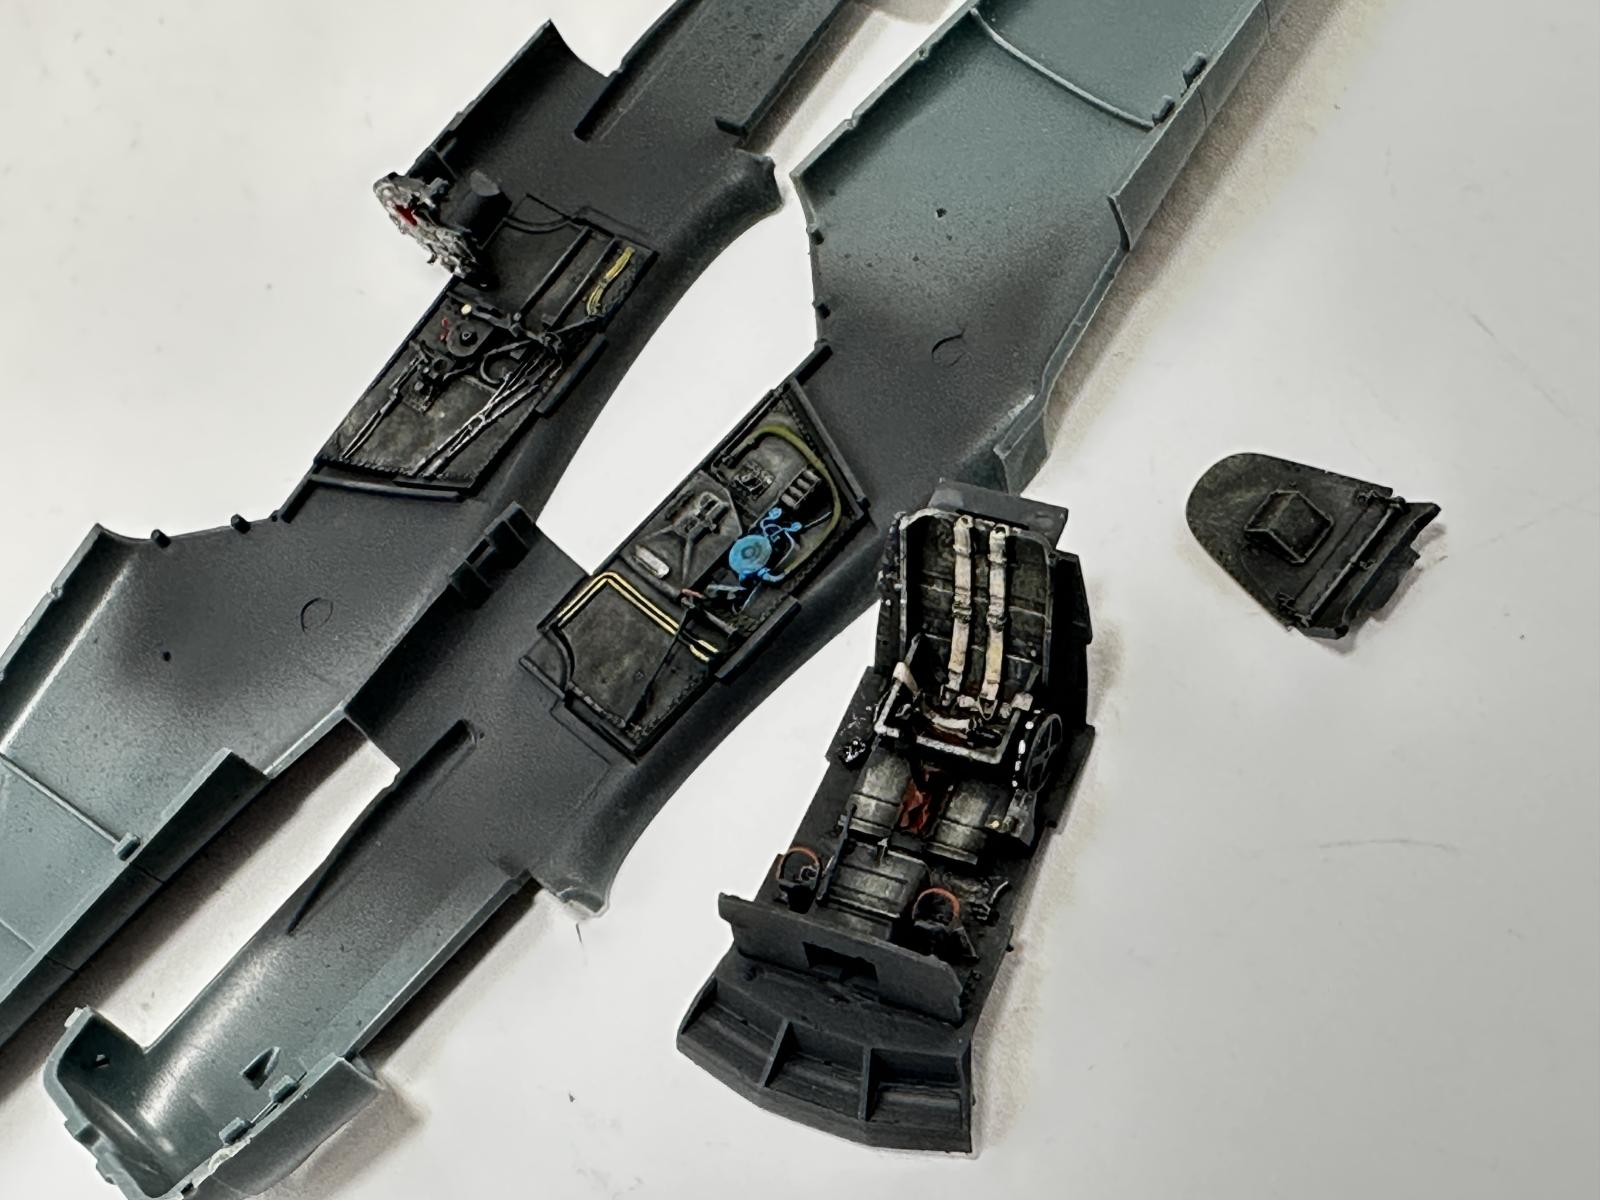
Prior to closing the fuselage, don’t forget the tail wheel inserts and I do suggest that you open the holes now while you have the halves apart for the DF Loop antenna in the roof. The position is marked on the inside. Eduard would have you open them up much later and you can’t see where the hole should be. The fit of the fuselage is perfect. Do NOT add the back of the cockpit where the battery goes at this time. The cockpit is added from the bottom, which requires some finagling, but results in a perfect fit. Take your time and it literally snaps into place with the sidewalls, which were added to the plastic fuselage halves.
Next up the wings. I got here rather quickly, actually, which is one of the design concepts of the Hybrid kits. The wings fit perfectly together. There is very little area on the leading edge to make sure is filled. Pay attention as there is some detail on the leading edge that could be sanded off if you aren’t careful.
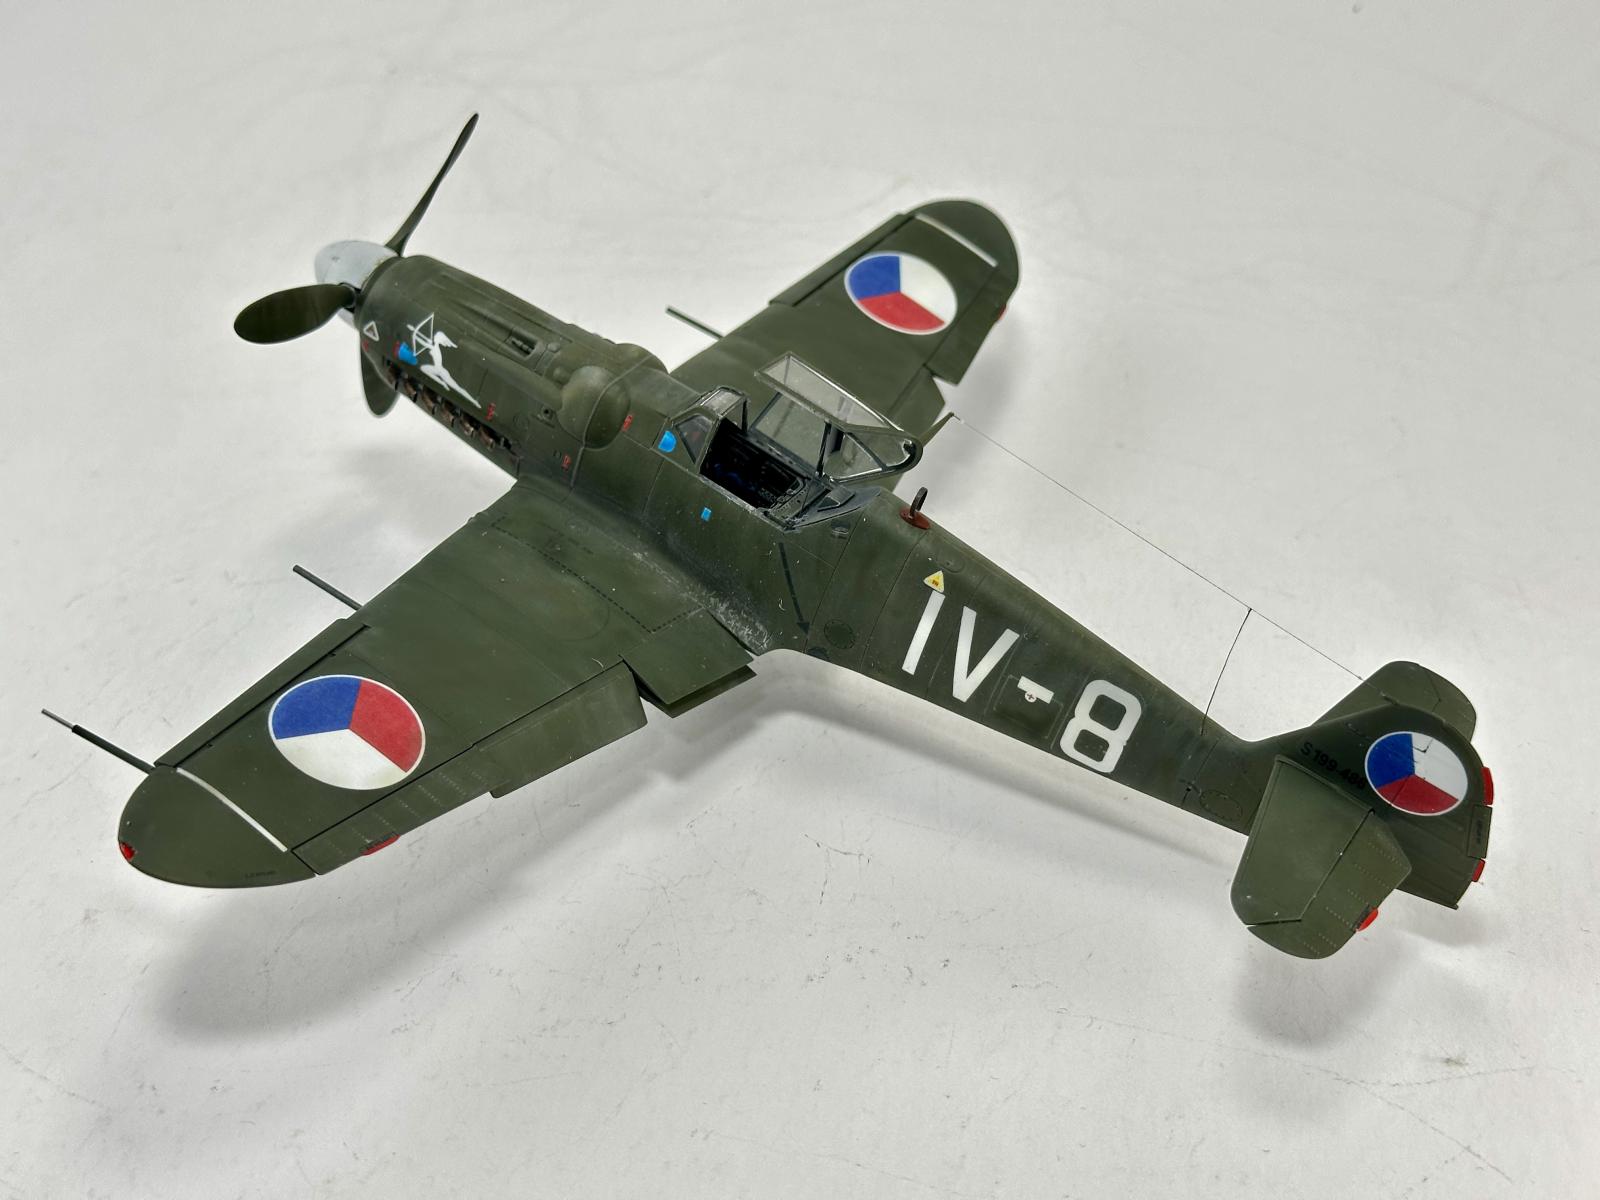
Just like that, it was time to add the fuselage and wings. The fit, shall we say, was PERFECT. Don’t forget to open the holes for the battery on the angle piece of the cockpit (RP6). The tail assembly is the same as every other Eduard 109 I’ve built. No surprises here, other than the actuator rod on the right side of the rudder is resin and very fragile. I would HIGHLY suggest that you don’t add it now as the instructions have you do, especially if you are building a Czech machine, because the decal will not fit over it. Add it after decaling. All the flight controls fit into place perfectly. You get an option on this kit to bend the inner flaps into whatever position suits you. I looked at photos and chose a different setup than the usually fully dropped seen on Eduard’s previous 109 kits.
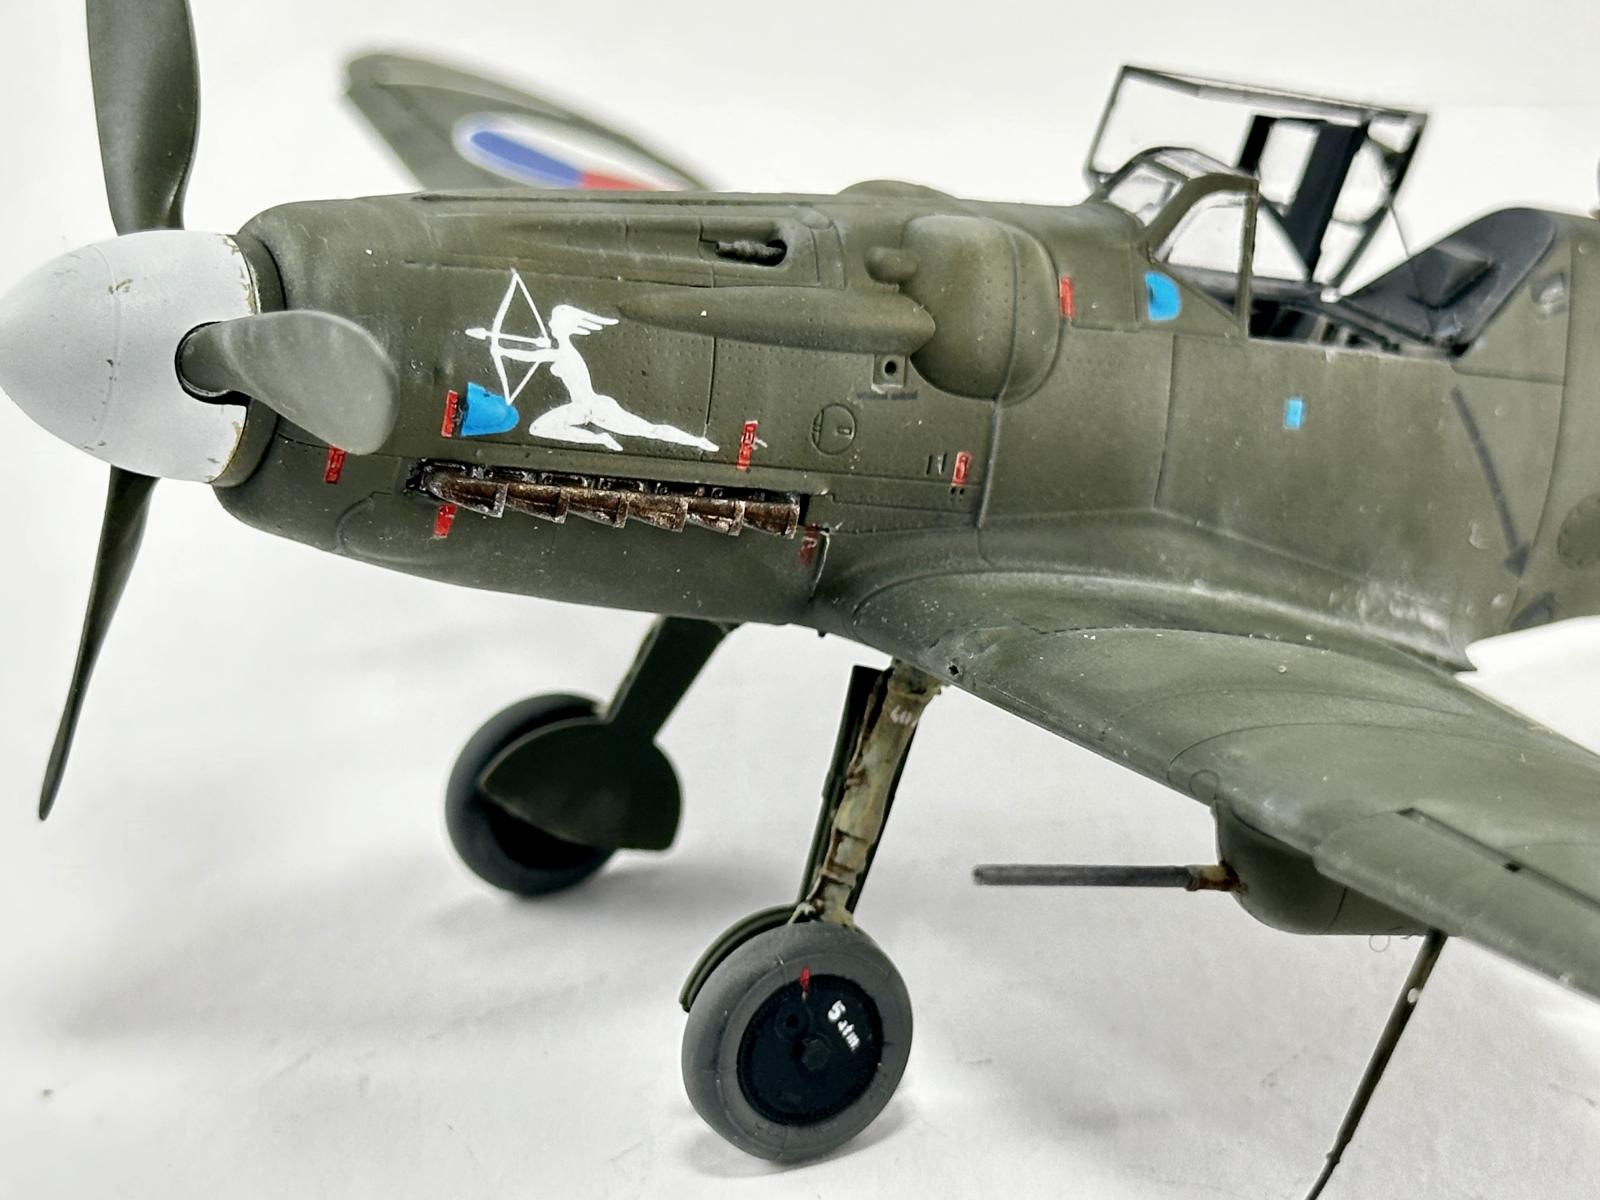
The forward upper cowling is an area you have to be careful with. The cowl bulges are different for different aircraft. The Czech ones tend to have the one with the additional forward bulge. You’ve been warned. In addition to that, the upper insert doesn’t fall on a natural panel line so some work will be needed to fair it in. I used Perfect Plastic Putty. The rest of the construction was easy.
If you assembled the cockpit properly, adding the landing gear was easy and it locks in place with slow setting super glue. The resin is slightly different than the other resin, its dental resin and doesn’t give as much. I managed to break both of my struts, twice and in the same place, and it was a pain to pin and glue and I never really got it right. Again, that was my fat fingers fault and not the kits. So just be careful and you’ll be fine. I might have liked to have a less detailed strut in plastic available, but the detail on the resin one sure is nice. Next time I’ll leave these off until later in the build, just in case. The resin tail wheel assembly was inserted from the bottom, but the fit is very tight. Paint it after you assembly it. Once you test fit it, it will not come out.
Adding the lower front cowling was the only other place for filler. The fit of the part is very good, but it does not land on a natural panel line. It will require some slight filling and care in alignment. I added my lower cannon gondolas now since they were the same color as the plane. They do not have alignment pins so care must be taken when adding them to keep them aligned and in the proper place. Care must be used with the resin cannon barrels as they have to be installed when building up the assembly and can’t be added later. They stick out there pretty far. I elected to replace the pitot tube on the left wing with Albion Alloy tubing. I just thought the plastic and the resin were too fragile for my meat hands.
There are minor things to add now, like the gunsight, wingtip lights and front canopy. The masks fit perfectly. The cockpit opening was covered with Tamiya tape and it was time to prime. Before that though I painted the canopy area with Tamiya Dark Grey, which is slightly lighter than RLM-66, but looks the part. Then the whole model was wiped down with Polly-S Plastic Prep and given a coat of MRP Primer. I had never used it before and found it to be perfect and my new primer of choice. This was followed up with some MRP RLM 66 and White as a way to break up the monotone finish. The paints were squiggled on the panels and along the panel lines. I also add more white to the fabric control surfaces to show that they fade at a different rate than the rest of the airplane.
Since I chose option F, a Czech bird in a dark green color. I used the recommended color from Edaurd, Gunze H421 RLM81Brown Violet, but found it too brown for my liking. I went back over the model with MRP RLM 71 (MRP-61). This was much better in my opinion. Adding the light blue ‘highlights’ around the airplane brought the model to life.
A quick coat of Tamiya Clear thinned with Mr Leveling Thinner brought the aircraft ready to decal.
I had no issues with putting the decals on, but I did have to remove the rudder actuator rod to add the Czech tail marking. I used Microsol and Solvaset to apply the decals. I decided to see how the decals look if you don’t remove the film. I have to say that they looked great. Could I have peeled them? Of course, but for those that are scared of doing that, it really isn’t necessary. Sure, they look great peeled, but you don’t have to peel them. Once dry, the decals were sealed with another coat of Tamiya Clear and then after a day oversprayed with Alclad Flat.
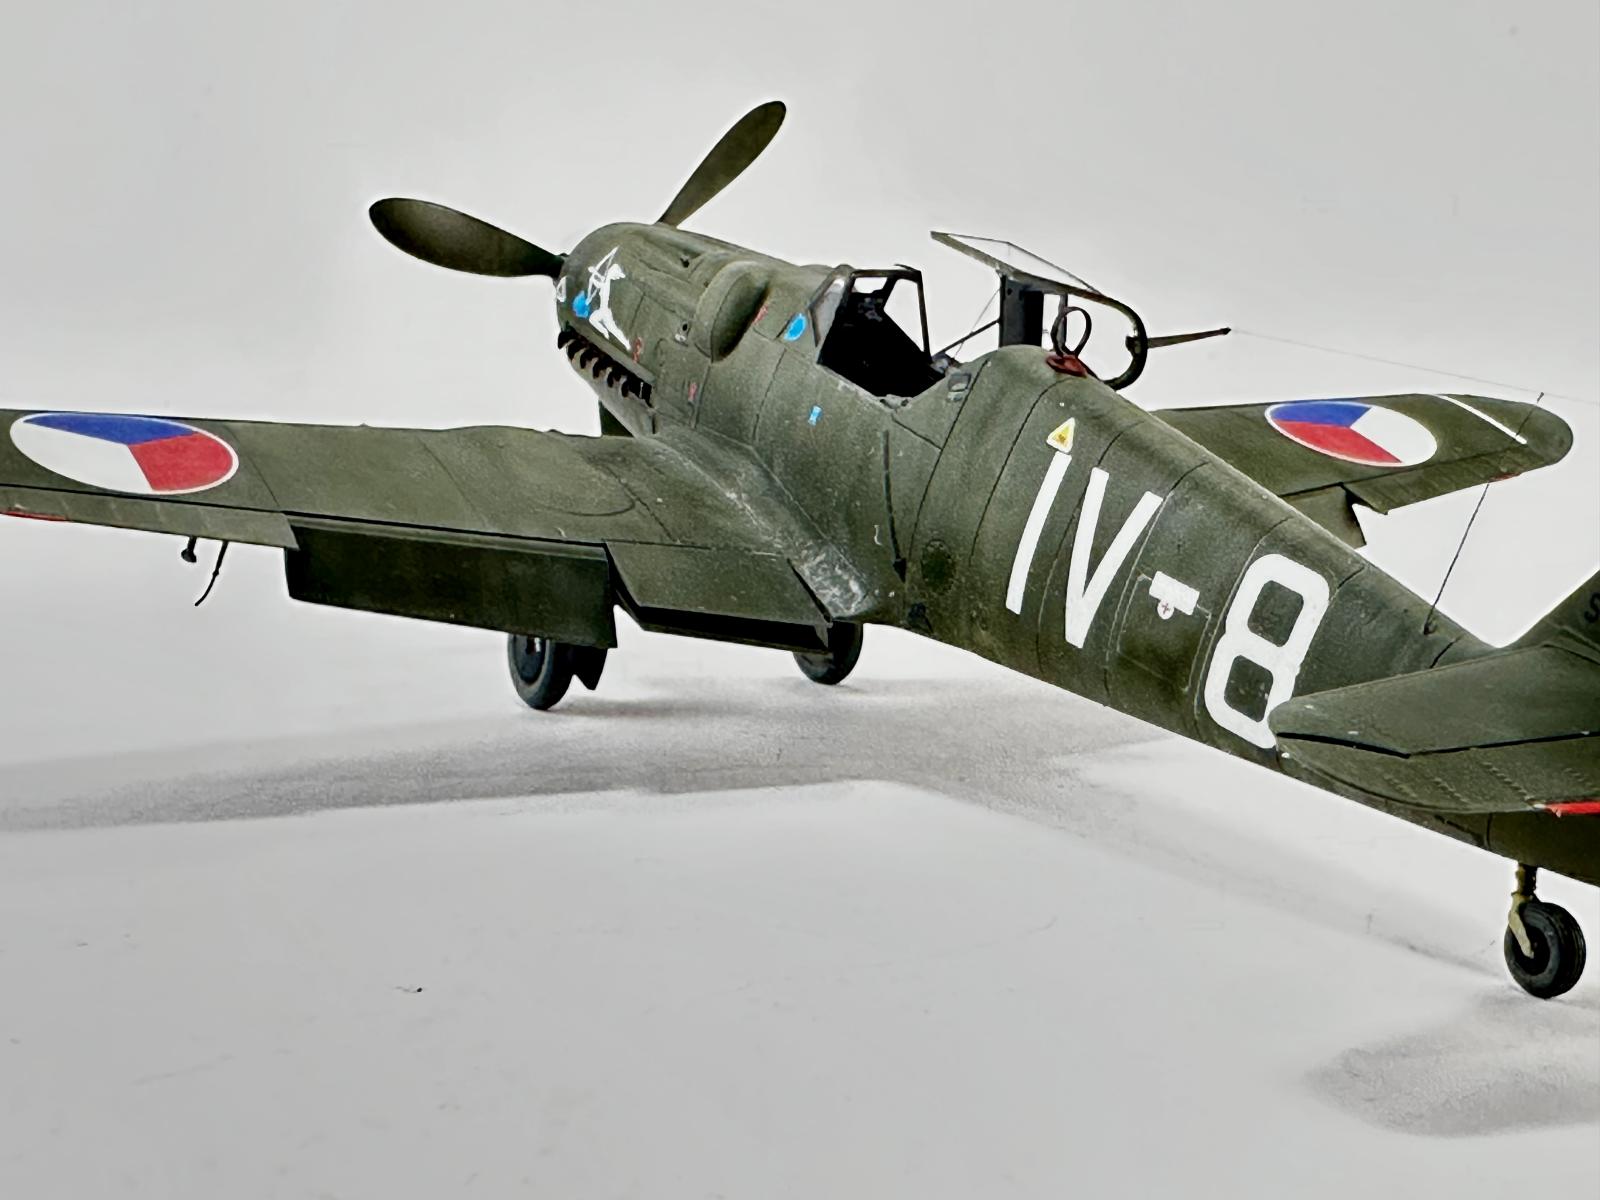
It was time to weather the model. Since the entire aircraft was monotone, I had to use a couple of techniques to break it up and make it visually interesting. First was a panel line wash from Burnt Umber artist oils heavily thinned with Mineral Spirits. This was added and splattered on various panels. A dot filter of Buff artist oil and AK Oilbrusher Starship Filth were blended on certain panels with mineral spirits. They were then dragged aft on the wings and down on the fuselage to replicate airflow and rain streaks. Some Tamiya weathering pastels were used here and there, particularly the prop, top of the wings and highlights. A Prismacolor silver pencil was dotted in spots and used to show wear on the wing roots and various panels. I used MRP Exhaust Soot to build up the exhaust streaks slowly. The Avia did not have the same black exhaust staining as the German 109s due to better fuel. Artist oil streaks were added aft of the engine and in the direction of airflow on the belly.
After that a highly thinned sealer coat of Alclad Flat kept everything tidy and blended the effects together.
Final bits and bobs were added, like the canopy, antennas, exhausts and such. I did manage to lose my resin rudder actuator, so I had to hit up my spares box and used a plastic one from an older Eduard 109 kit. With the prop added this Mule was done.
Overall, I’m happy with the results. The Hybrid design is an exceptional idea, and this is a good first go around. Could there be some things handled differently? Sure, but like many things, Eduard leads the way and learns from every release. I suspect as they go from strength to strength that we’ll get better and better kits. I would have liked the option of some things in plastic and resin, but the resin worked very well. The only challenge with this kit was breaking up the monotone look. The issues I had with the landing gear were all my doing. I’m really looking forward to the Avia S-199 Bubble Top. This is another great kit from Eduard. My credit card is groaning with anticipation.
Highly recommended
Thanks to Eduard and IPMS/USA for the review copy.


Reviewer Bio
Floyd S. Werner Jr.

Building models since the age of 7, I’ve become known for my Bf-109s and helicopters. I currently run Werner’s Wings. I was previously the ‘star’ of the Master Class Model Building Video series. I’ve been published numerous times on various website, including Hyperscale and ARC. My work has been in FSM and Great Scale Modeling 2001, as well as, numerous other model magazines. I’m a published author with my Squadron/Signal Walkaround book on the Kiowa Warrior. My models have continuously won many regional and national awards. My unique model photography gives my models instant recognition for their historical perspective.
I’m a retired from the Army after 21 years of flying Cobras and Kiowa Warriors, including tours in Iraq, Bosnia, Korea, and Germany. I’m also a retired Flight Officer for the Baltimore City Police and flew their helicopters chasing bad guys. I’m currently flying Cobras and Hueys with the Army Aviation Heritage Foundation.
I’ve been married to my high school sweetheart, Yvonne, for 42 years. Our daughters have blessed us with six grandchildren. My passions continue to be his family, friends, helicopters, models and airplanes, especially the Bf-109 and my beloved AH-1 Cobra. My motto has always been - MODELING IS FUN!
Comments
Add new comment
This site is protected by reCAPTCHA and the Google Privacy Policy and Terms of Service apply.
Similar Reviews