
DO 217N-1
Kit
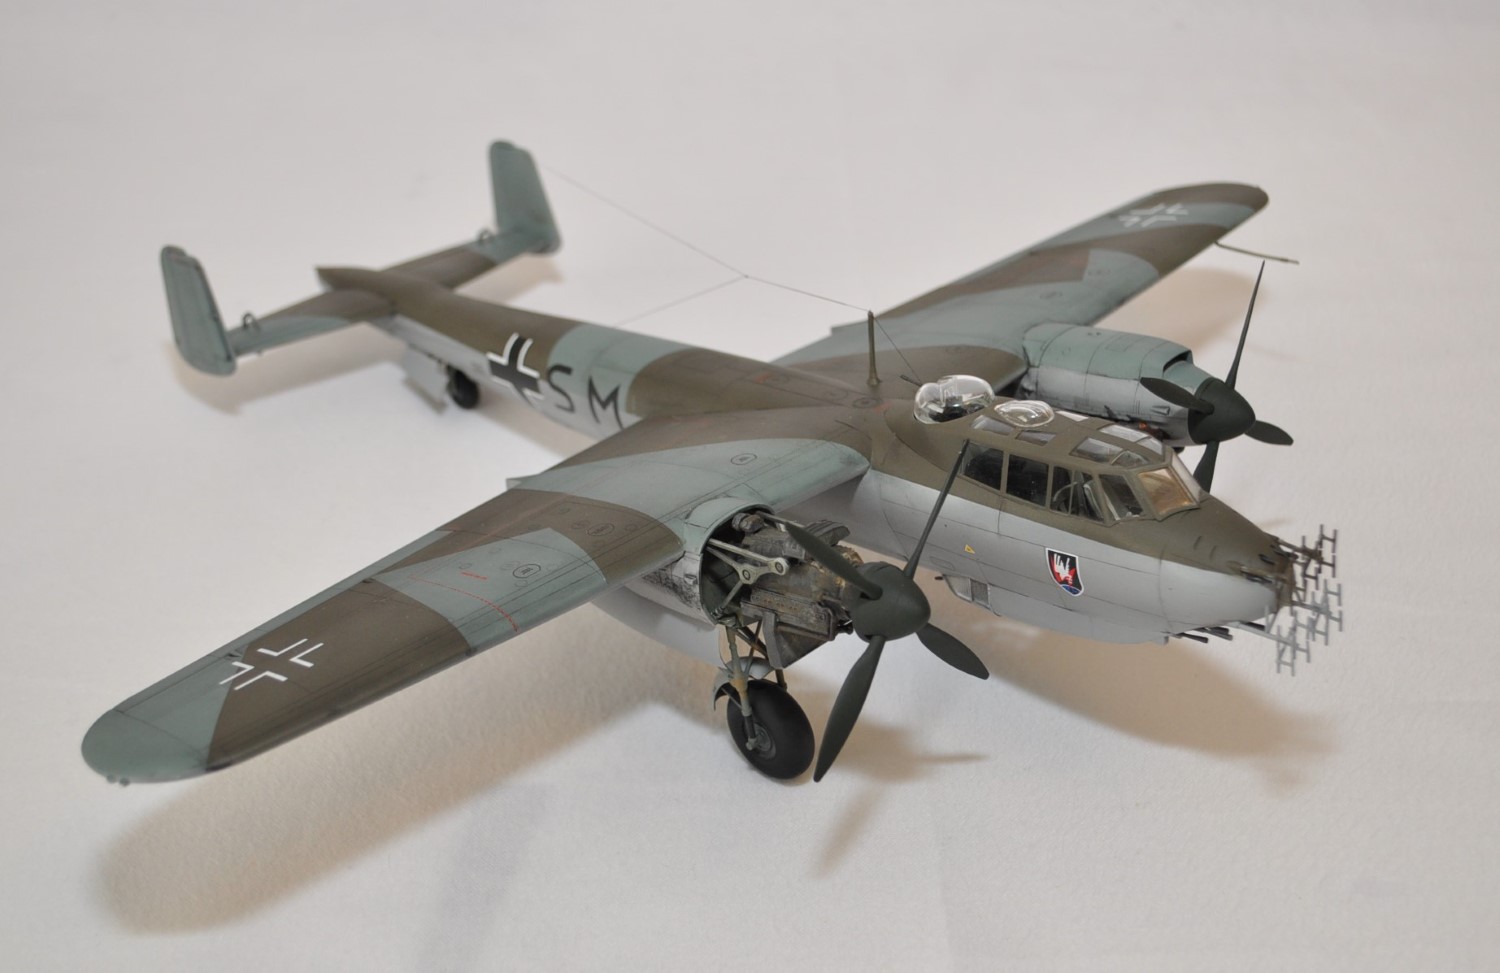
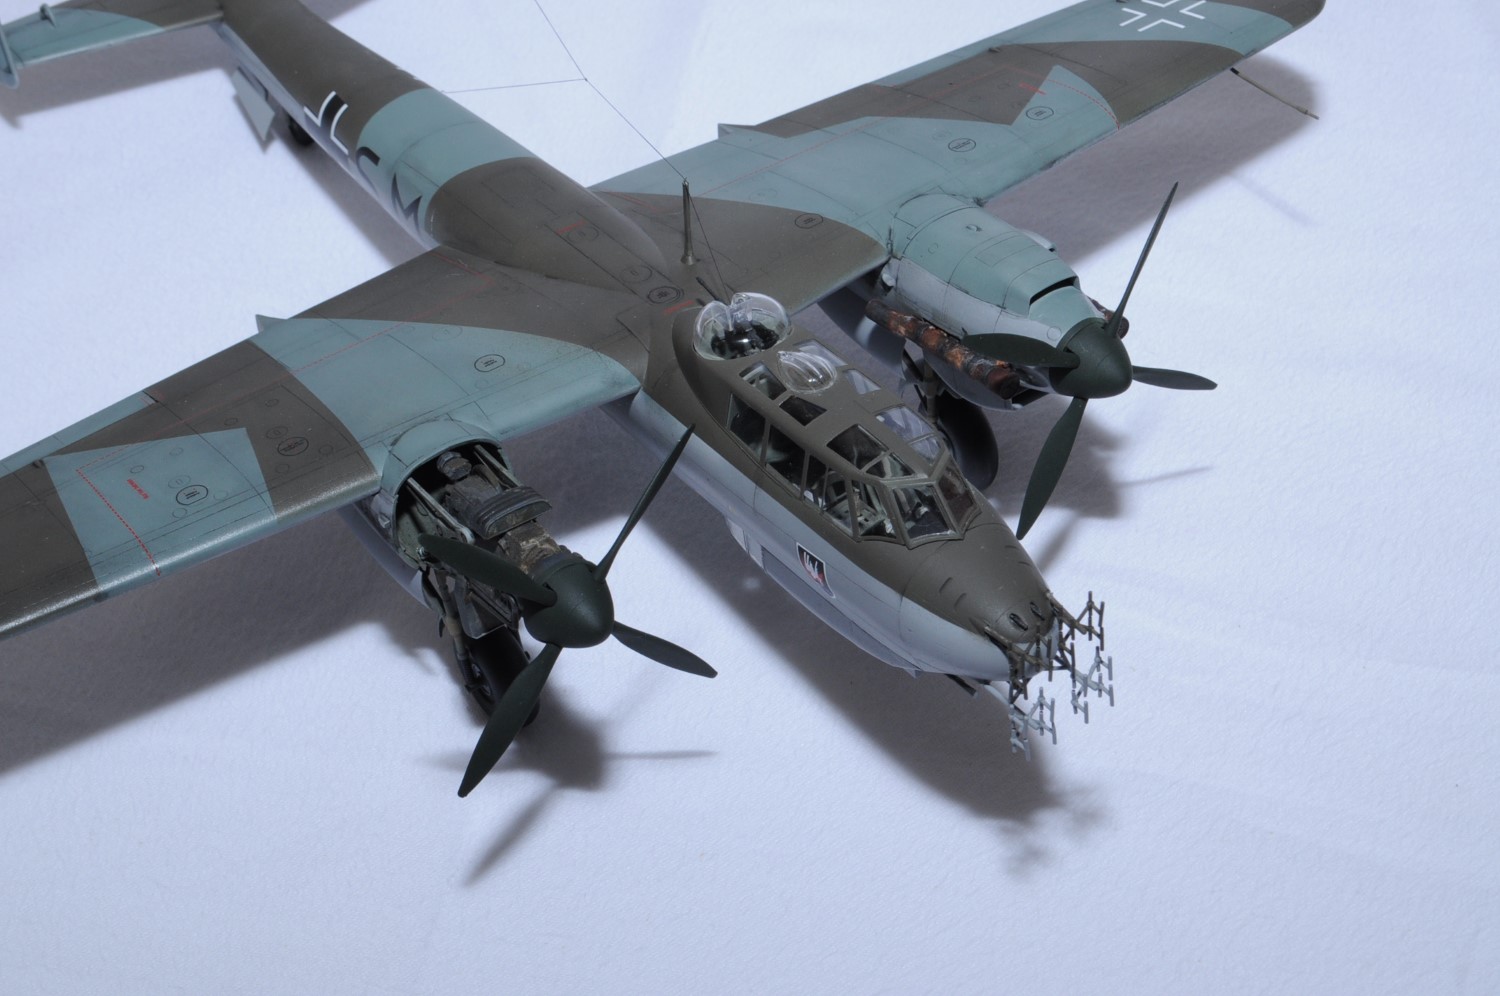
The Dornier DO 217N-1 was a German multi-purpose bomber of the Second World War and was produced between November 1940 and May 1944. The DO 217N-1 was a night fighter based on the DO 217 which had powerful armament and radar.
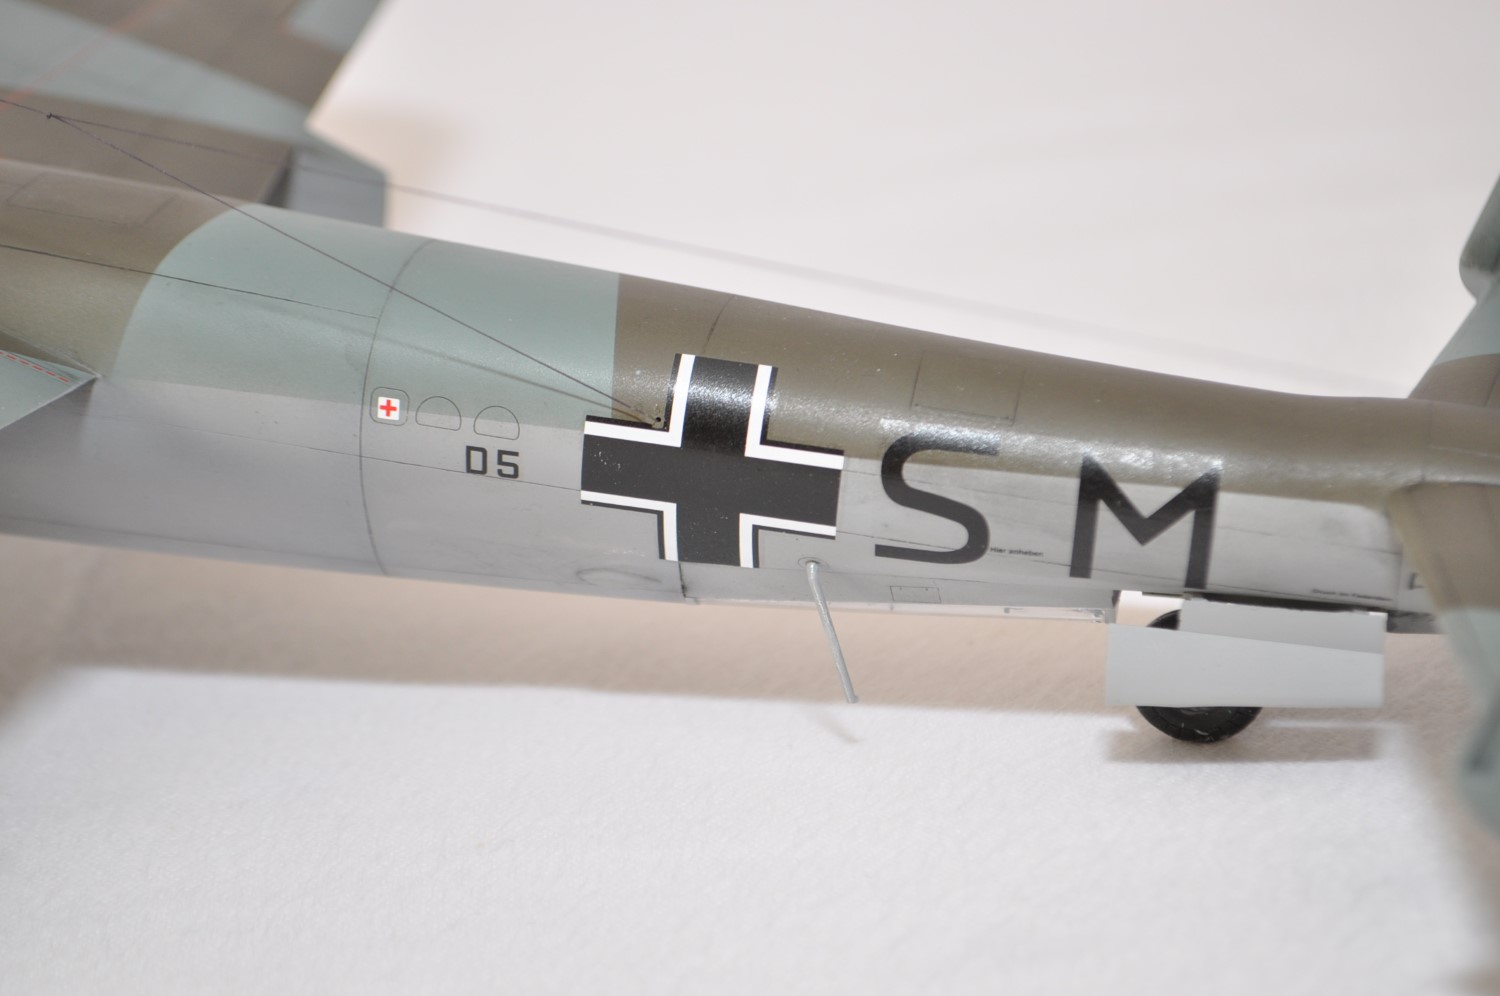
ICM Holding, a Ukrainian-based company known for outstanding quality, has produced a very fine plane with the release of the DO 217N-1. The finished kit will measure to approximately 14.8 inches length x 15.59 inches wingspan. Contained in the box is one sealed bag containing seven highly detailed gray styrene sprues and a separately bagged clear sprue. The kit contains a total of 233 parts which were all flash free and showed no injection marks or sink holes. Panel lines are finely recessed. A note of caution: in the review sample several small parts had become detached from the sprues. Be sure to carefully check the plastic wrapper before discarding. The 24-page assembly guide follows the typical aircraft building methodology. A very nice feature of ICM Assembly instructions is the full color painting and decal diagrams at the end. Assembly begins with the cockpit moving to the fuselage, wings/control surfaces, nacelles, wheels, engines, armament and lastly clear parts. Paint schemes and decals, also produced by ICM, are provided for four aircraft: D0 217N-1, Rechlin, Germany Spring 1943; D0 217N-1, Rechlin, Germany Summer 1943; D0 217N-1 I./NJG 3, Denmark 1944; and D0 217N-1 II./NJG 4 Germany late 1943.
Reviewer’s Comments
The review kit was completed with Eduard photo etch interior, exterior, seatbelt and canopy mask sets. Each of these is covered in separate reviews.
An important note about this kit to the builder is this: review the assembly instructions prior to construction. There are several build decisions you will need to make, and knowing how you want to build your plane in advance will be of great help. Additionally, decide in advance if you wish to incorporate and of the available Eduard photo etch sets. If you do, you will need to make some alterations to your assemblies.
Assembly begins with the cockpit, which is adequately detailed. Please see the review for the Eduard PE interior set for this ICM kit to obtain more information. It is important to test fit everything. In some instances, it is difficult to determine the exact placement for some of the parts. By test fitting, you will be sure that you have your part in the proper location and avoid errors.
The dials for the cockpit are contained on the enclosed decal sheet. Caution: each dial decal is printed separately. Use caution when working with them. The completed kit cockpit looks very nice. If you incorporate the Eduard PE interior set, you will want to alter the assembly. For example, do not attach the PE radios until the end of your build (they are prone to being broken off), do not place all of your seats until you have other PE elements in place.
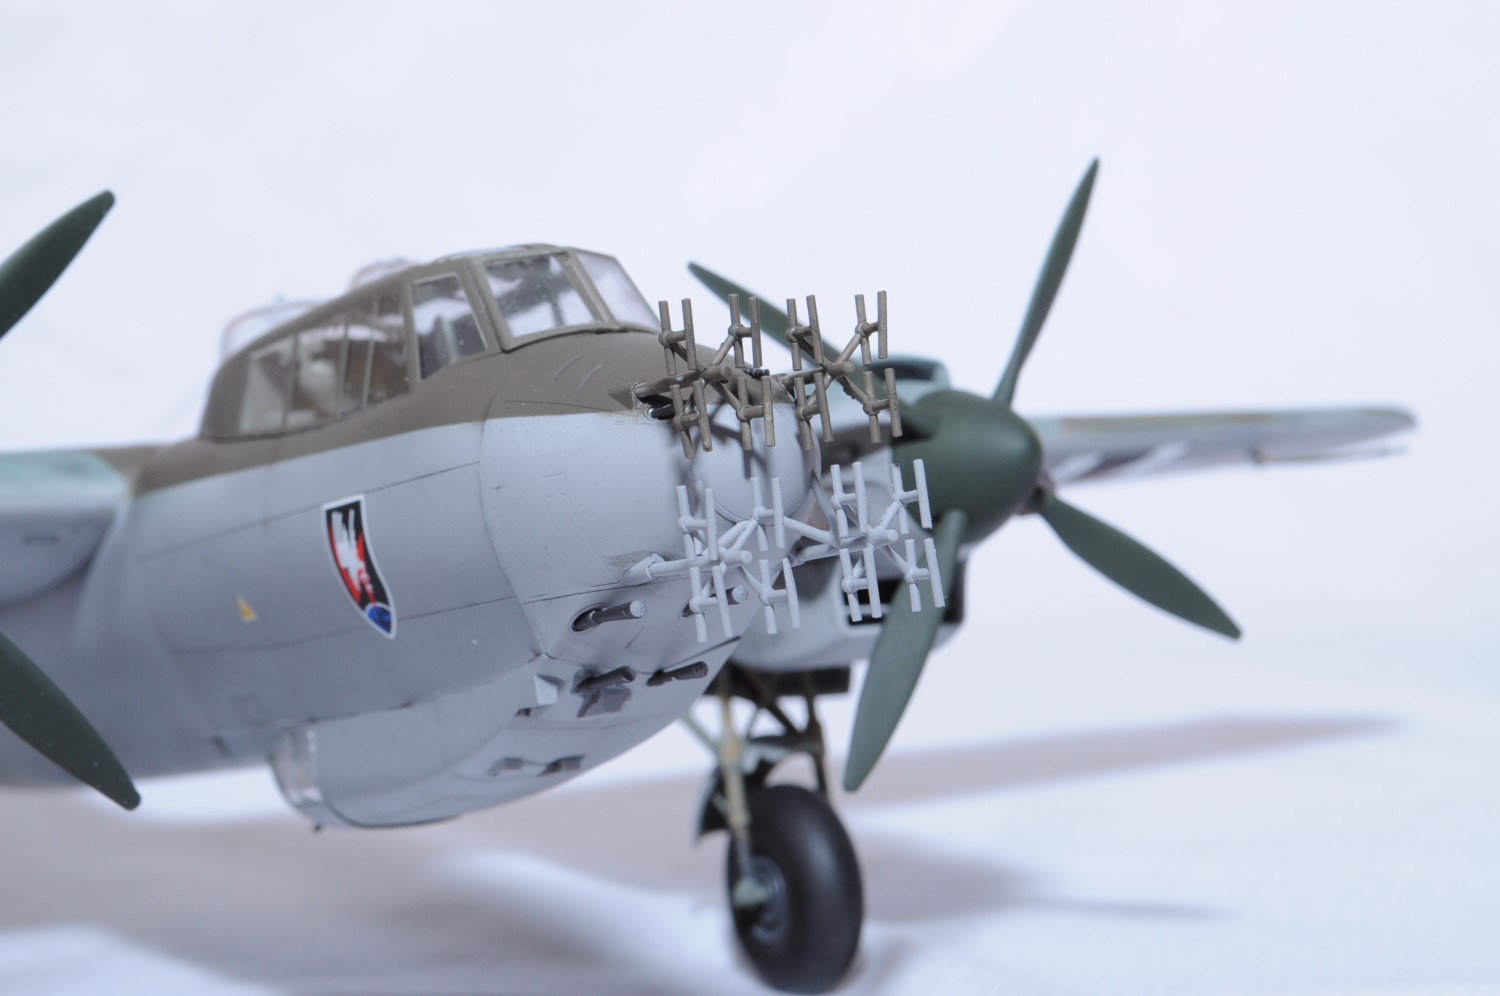
On pages 6 & 7, you will make your first construction choice: open or closed bombay. There is a serious instructional error (this is not the only one). Regardless of which option you choose, piece C7 is to be set into place. It is one of the bombay bulkheads with one plain side and one detailed side, and it has two arms to support the wings. As it is shown in the instructions, the detailed side as well as the “stair step shape” is shown facing the cockpit. However, on pages 8,9 and 10, this piece is shown with a different orientation. This problem was encountered during the test built and was not discovered until too late. The drawings on pages 6 & 7 are wrong. The builder must make sure that the detailed side of kit part C7 is facing the opening of the bombay and not the cockpit.
Another instructional error is found on page 7. In step 10, the navigator seat is assembled and in step 11 it is shown to be attached to the right cockpit panel. The placement for this piece is a bit unclear, so test fitting is recommended. The confusion around this step appears in step 12 where the seat’s legs are shown facing toward the left fuselage. When consulting the ICM website and looking at their build examples, this piece is shown with the legs facing left, yet the instructions show them facing right. ICM needs to provide clarification in future publications of these instructions.
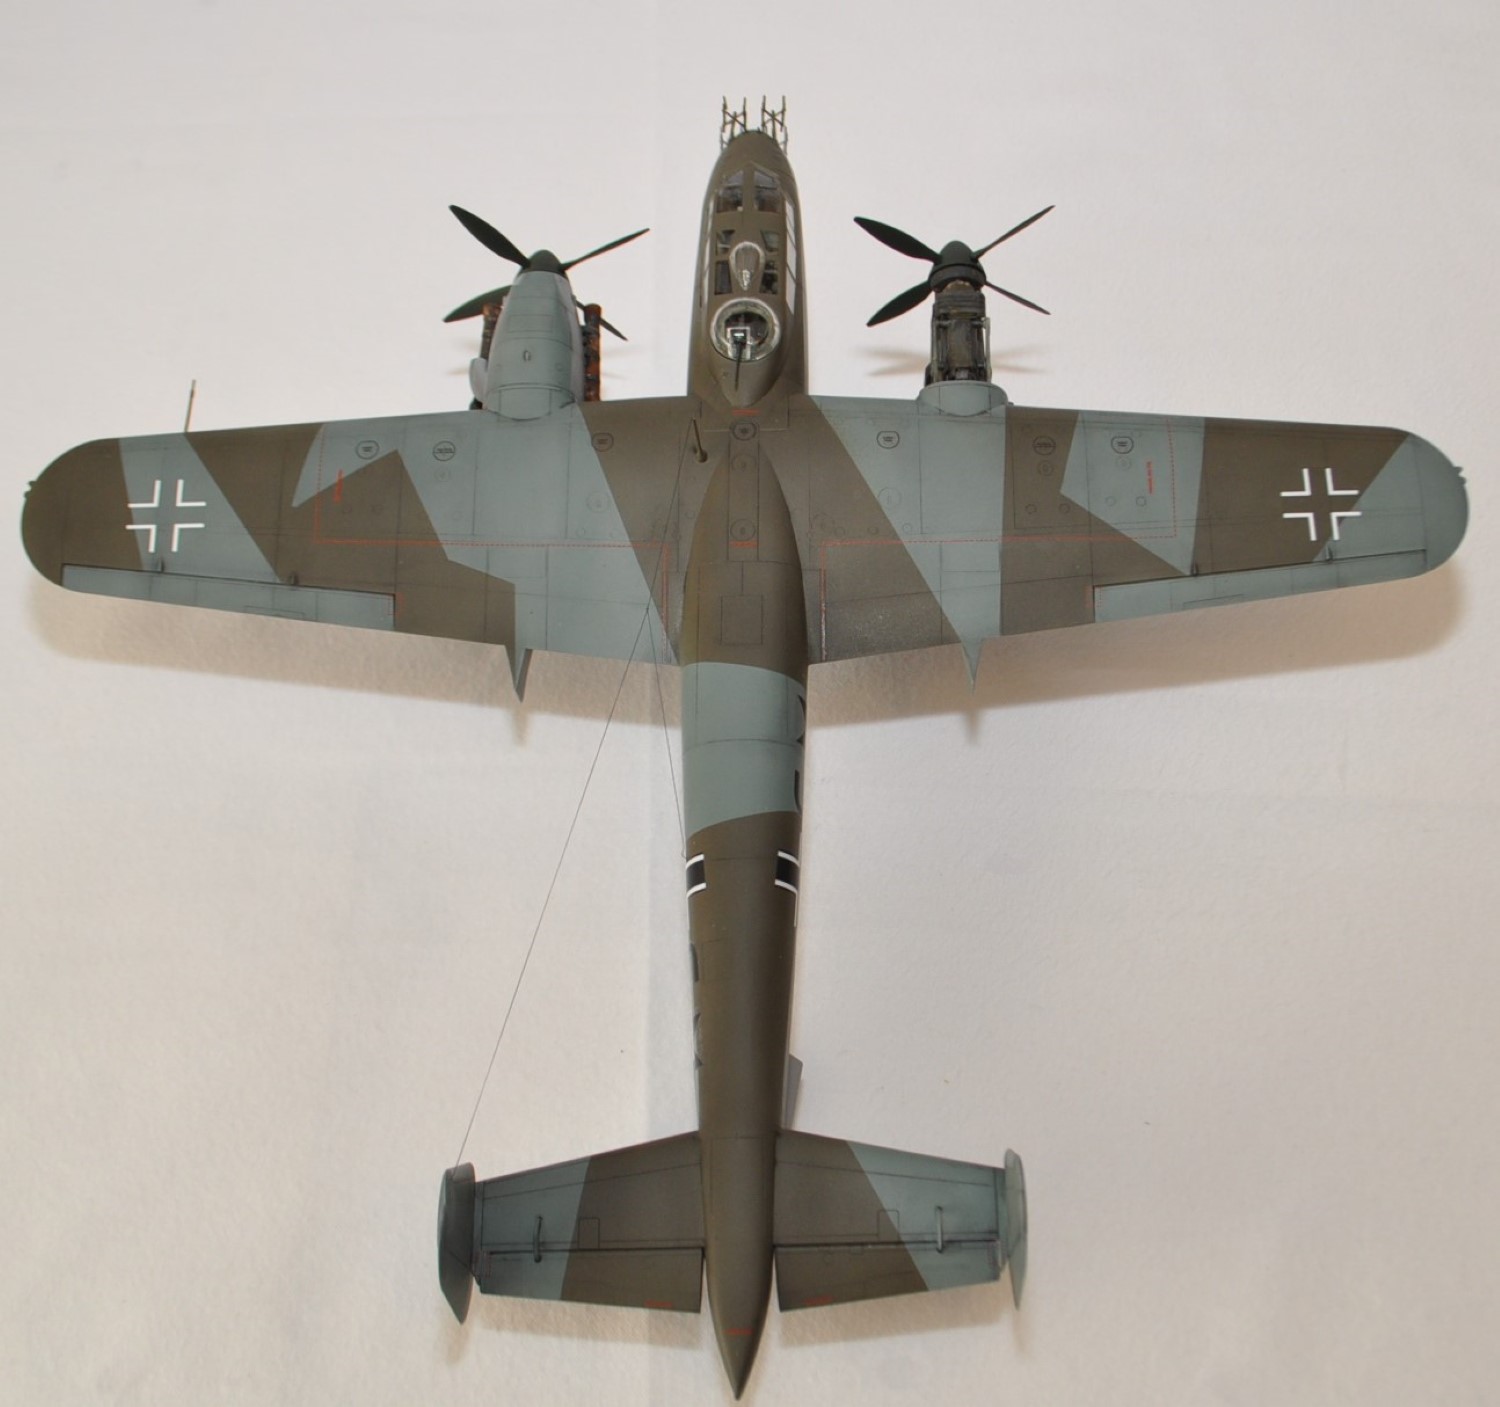
The fuselage halves fit together nicely and required only minimal filler and sanding. When placing the top wing piece, part B1, the parabolic shape for the upper fuselage had to be slightly adjusted to make this piece fit properly. I was able to carefully heat this piece with a heat gun. As with other parts, test fitting will serve you well. The lower wing halves, parts B1 & B2 fit precisely. The leading edges needed only minimal filler and sanding.
The ailerons, horizontal & vertical stabilizers all fit well and the seams/joints are nearly perfect. The tail assembly (step 29) fit precisely and did not require any fillers.
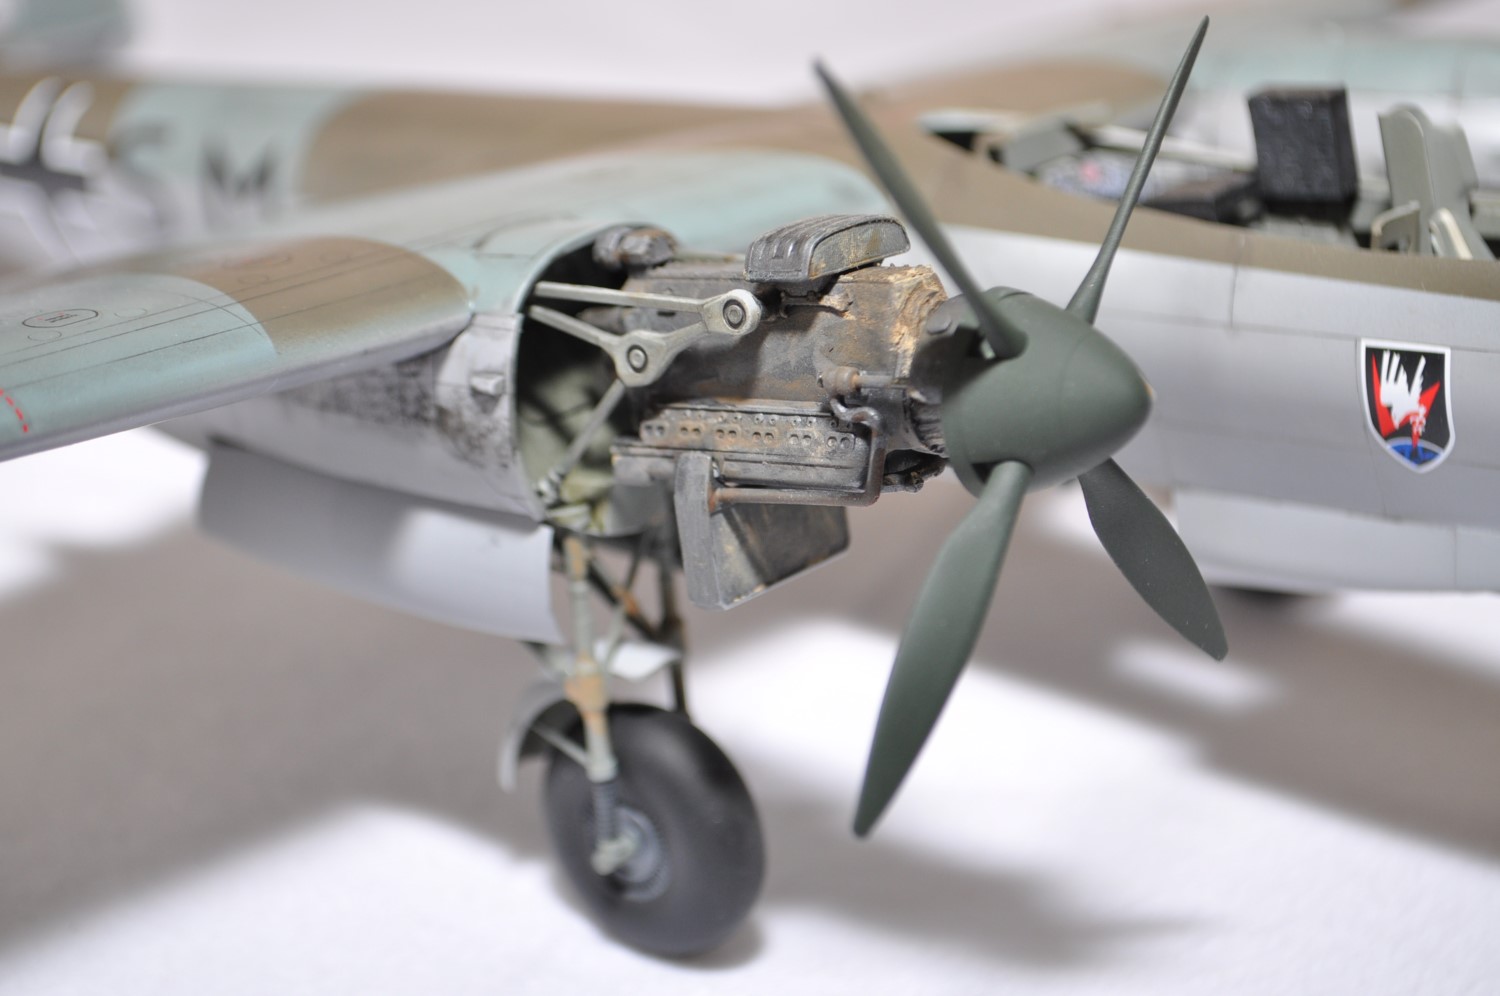
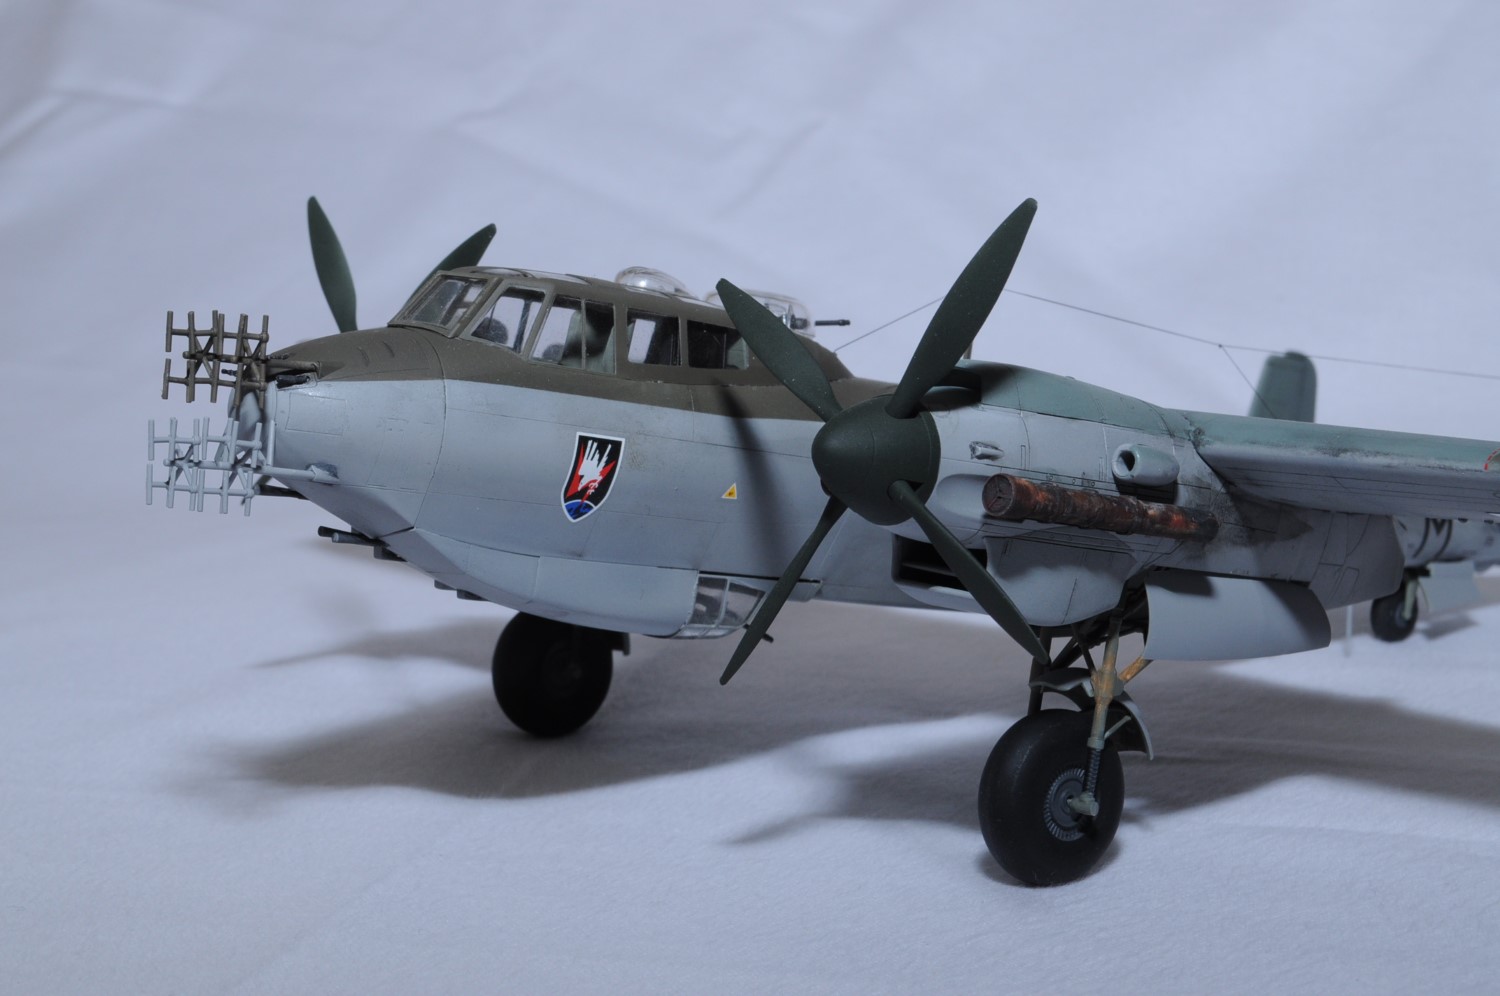
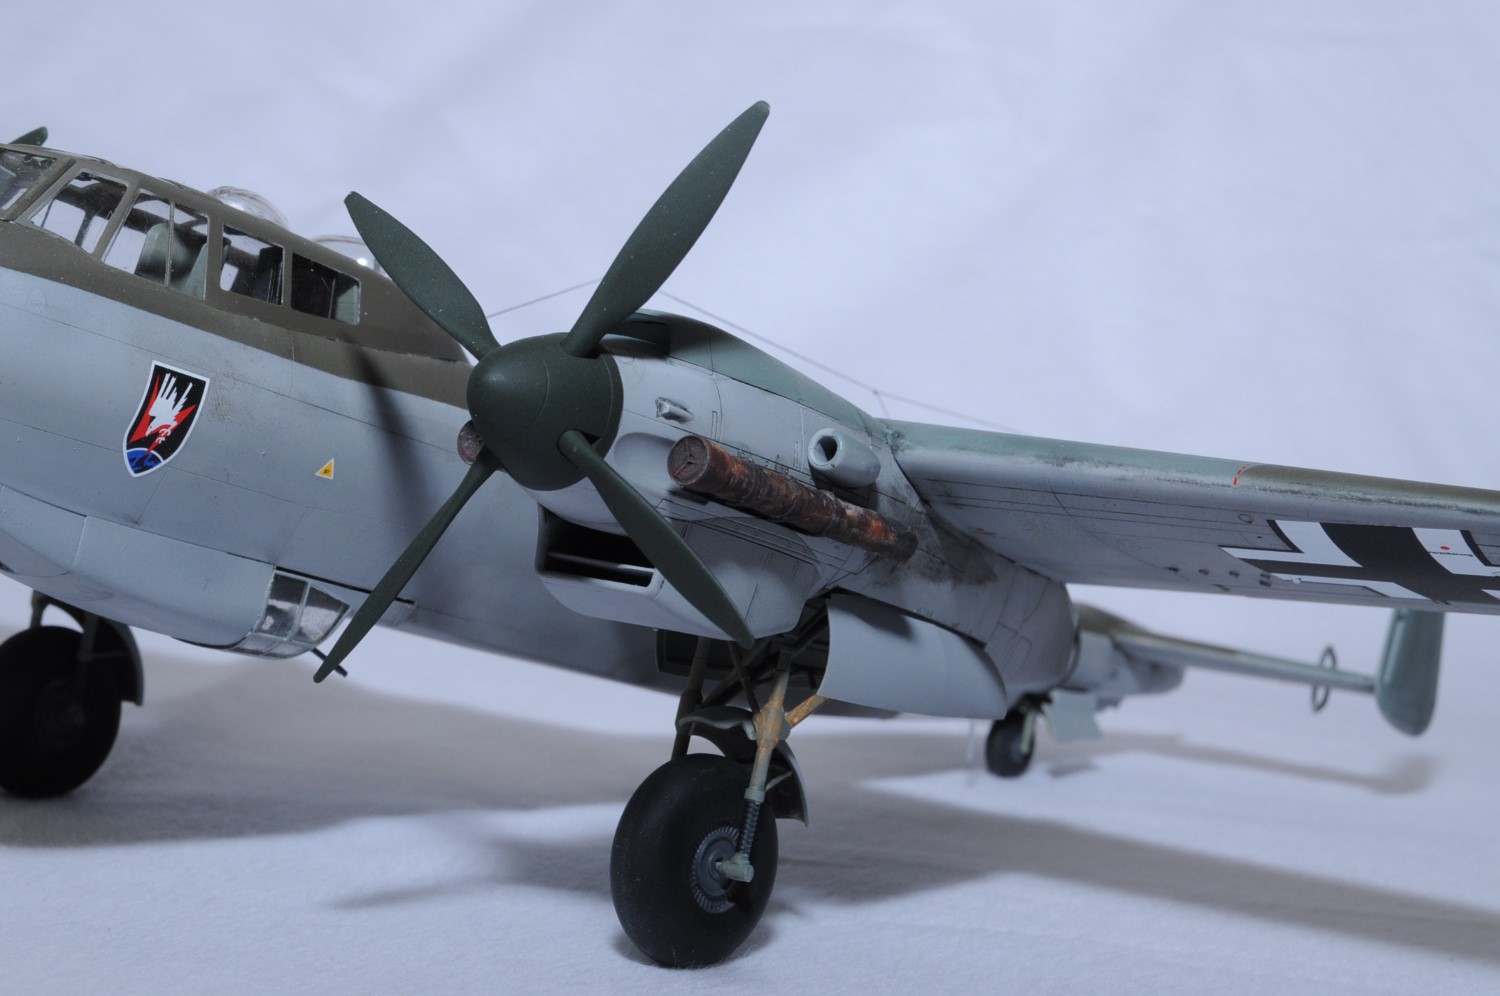
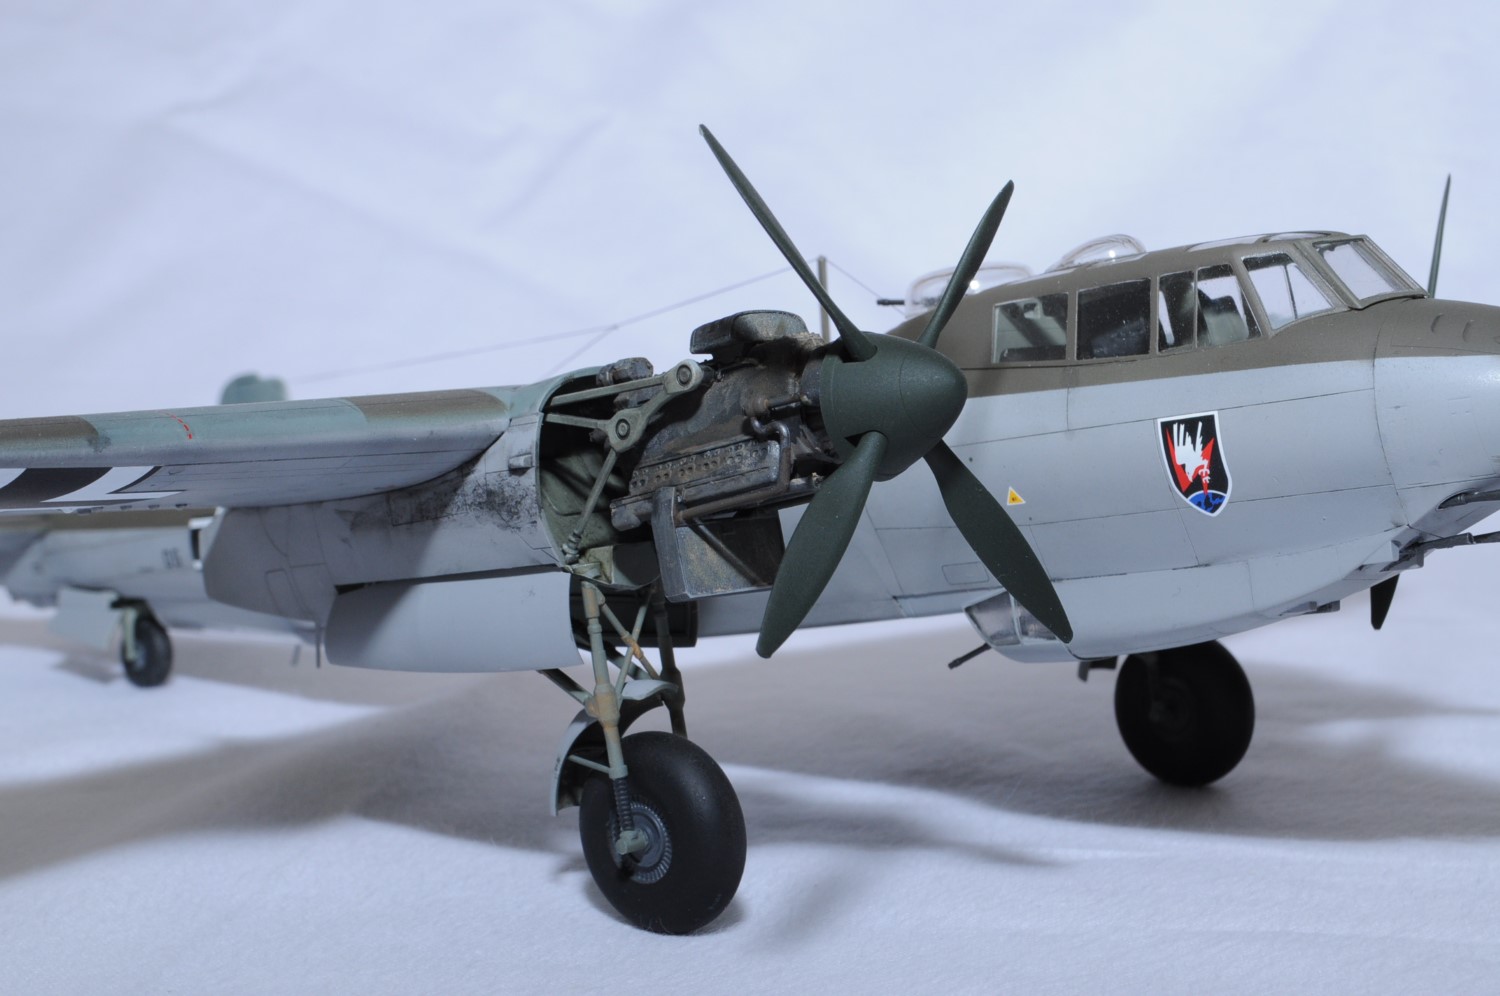
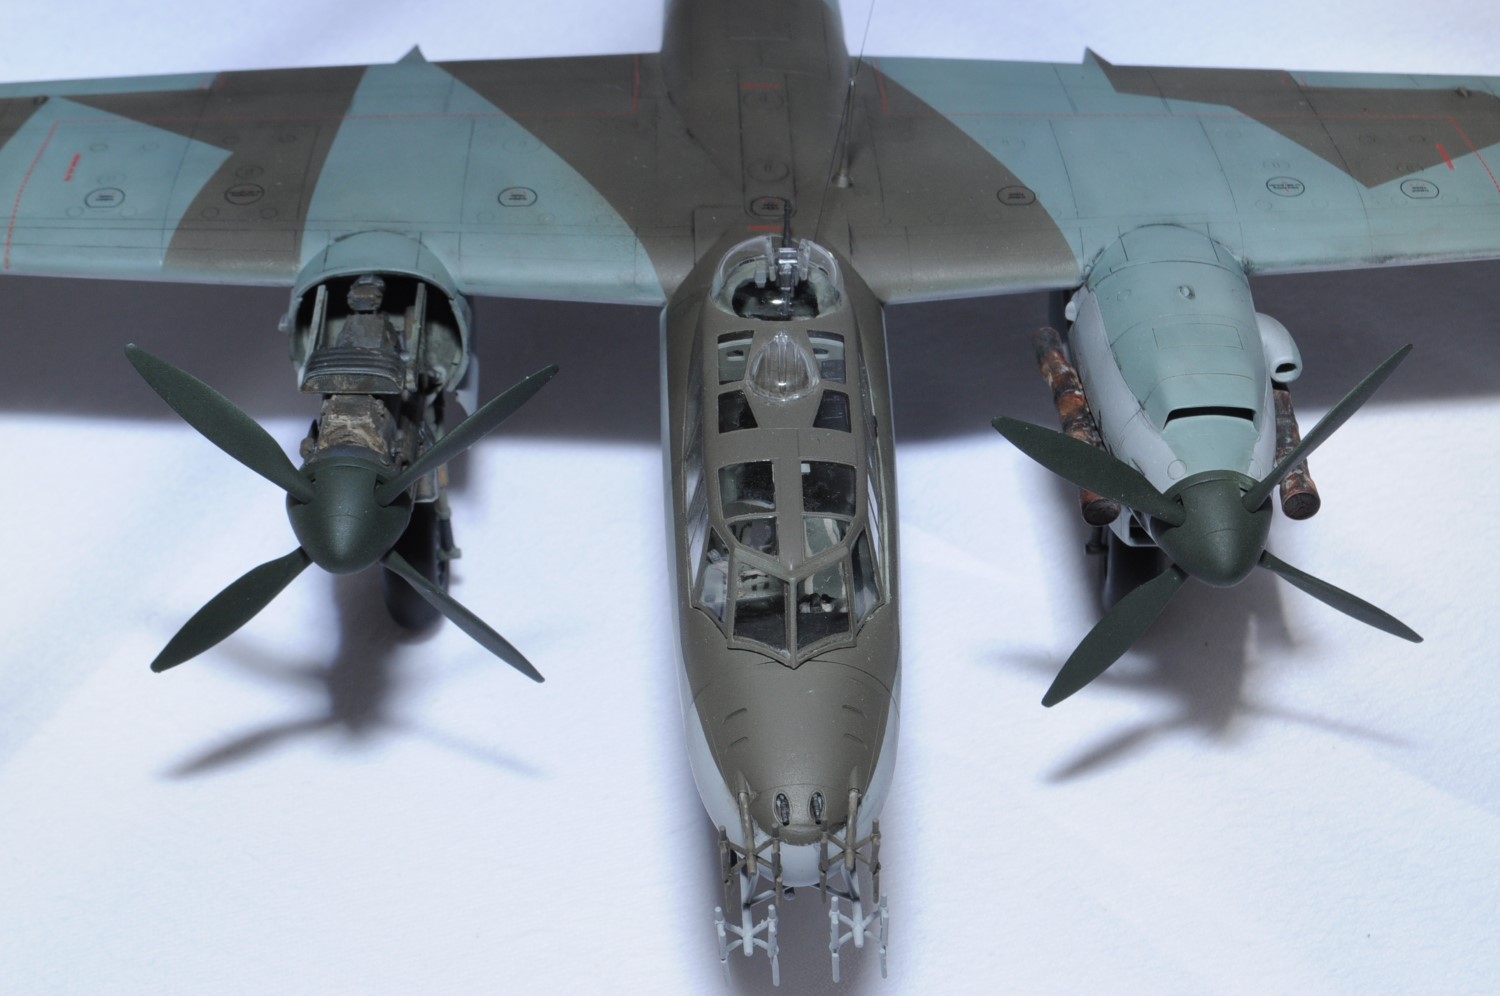
Pages 12 & 13 provide the builder with several options dealing with the engines. It took some time to study these pages, as there are multiple steps with the same numbers and lots of questions marks. These pages are essentially guiding you through three options. They are: Option 1: building the plane with two closed cowlings and propellers. If you decide to go this route, do not spend time building the engines as they do not fit inside of the cowling pieces. You will discover that there is no stem on which to mount the propeller, so you need to adhere the propeller directly onto the cowling. Option 2: building the plane with two exposed engines. If you chose this, you will cut off the front portions of parts C10 & C14 as well as making a modification to parts C2. You will not be able to cover the engines with the cowling pieces, but you will be able to mount the propellers. Option 3: This option is depicted in the review sample. This option allows you to mount one exposed engine and propeller, and one closed cowling with propeller.
An important note about these steps: If you wish to use the Eduard PE exterior set, you will be given the choice of posing your plane with open cowling vents. Please see the separate Eduard PE exterior review for more information on this.
The landing gear assemblies were easy to mount into the nacelles and once they are in place are sufficiently strong. Since this plane sits on its tail, no counterweights are needed.
There are several steps for assembling the open bombay, but if you choose a closed bombay, you will naturally skip these steps.
On page 19, step 14, you are to mount the gunner’s seat into position. This step requires some forethought. If you stick with the kit’s cockpit and do not add any PE parts, you should be able to proceed with this step as it is written. However, if you use the Eduard PE interior set, it is recommended to delay adding the large black PE radios until after the gunner’s seat is in position. The PE radios are fairly large and working the gunner’s seat around them is challenging.
The canopy and all clear parts fit extremely well as do the forward guns and the antenna array. There is the option of replacing the antenna array with Eduard’s PE version. This is discussed in a separate review of the Eduard PE exterior set for the DO 217N-1.
The review sample was painted with Tamiya acrylics.
ICM has again produced another excellent kit, and the DO 217N-1 is an interesting plane--“The Flying Pencil”. It is a straightforward build with parts that fit together precisely with a few exceptions.
ICM, however, does need to take more care with instructions and proof reading. In reviewing instructions for other kits, I have found mislabeled parts and other instances where drawings seem to be reversed.
Thank you very much to ICM for the honor of reviewing this very nice D0 217N-1 kit and thank you to IPMS for the opportunity.


Comments
Add new comment
This site is protected by reCAPTCHA and the Google Privacy Policy and Terms of Service apply.
Similar Reviews