
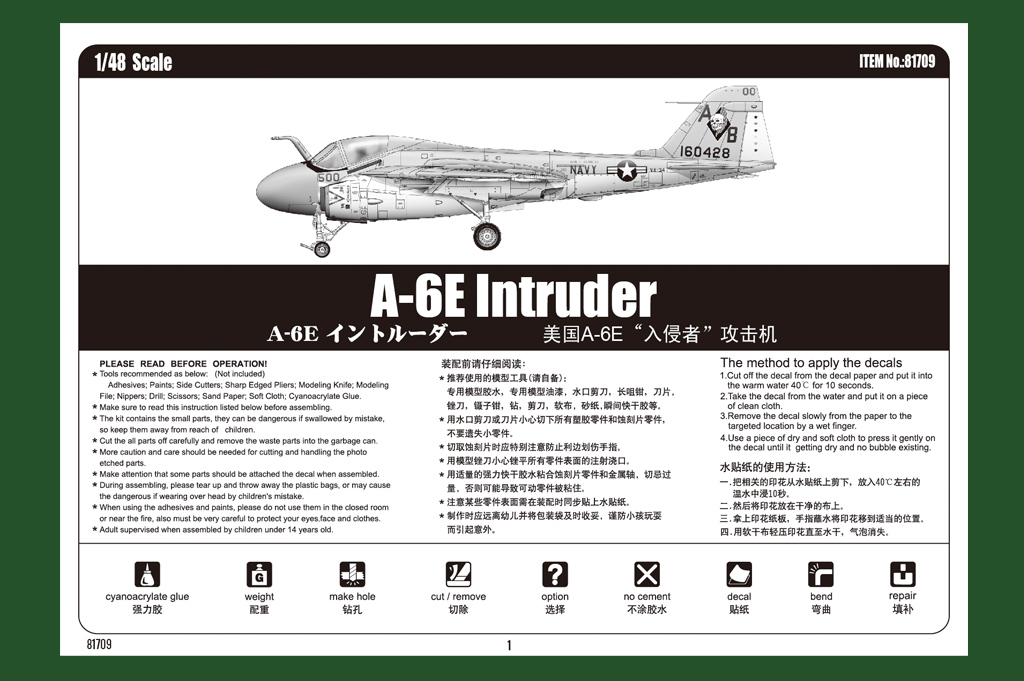
A-6E Intruder
History Brief
During the mid 1950's the U.S. Navy's need for an aircraft that could attack both ground and sea based targets in any weather, day or night, attracted a lot of proposals. In 1956, eight aircraft companies submitted at least twelve designs. Grumman Aerospace A-6 Intruder answered the call, design number 1280 was the winning entry and a contract was issued on March 26,1959. The aircraft was originally designated the A2F1, and the first flight of BUNO 147864 took place on April 19, 1960. The first A6A entered service with VA-42 in March 1963.
The A-6 was a sturdy mid-wing design featuring twin Pratt & Whitney J-52 P-8B turbojets and a two crew side by side cockpit. Max Speed (clean): S/L 563 kts (648 mph) and a Ceiling: 42,400’. The A-6E was the definitive attack version of the Intruder featuring highly sophisticated DIANE radar navigation and attack systems. A new AN/ASN-92 inertial navigation system was added, along with the CAINS (Carrier Aircraft Inertial Navigation System) for greater navigation accuracy. The A-6E was introduced in 1970 and first deployed on December 9th 1971. A-6E models totaled 445 aircraft, about 240 of which were converted from earlier A-6A/B/C models. Finally after a successful career the A-6's were retired, 28 April 1993 (USMC) and 28 February 1997 (USN).
The Product
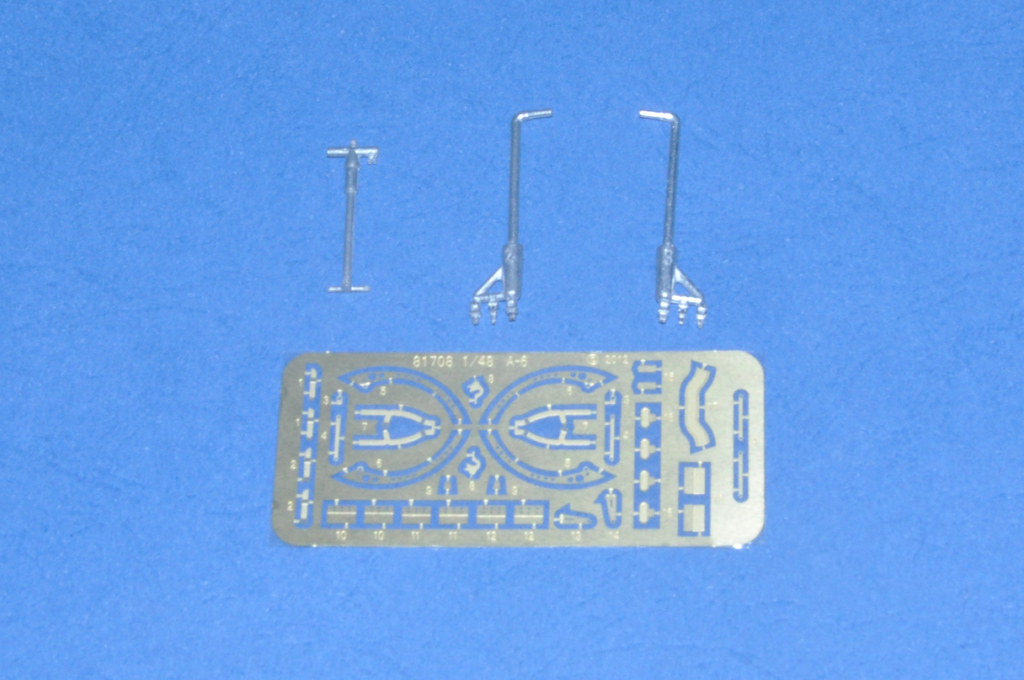
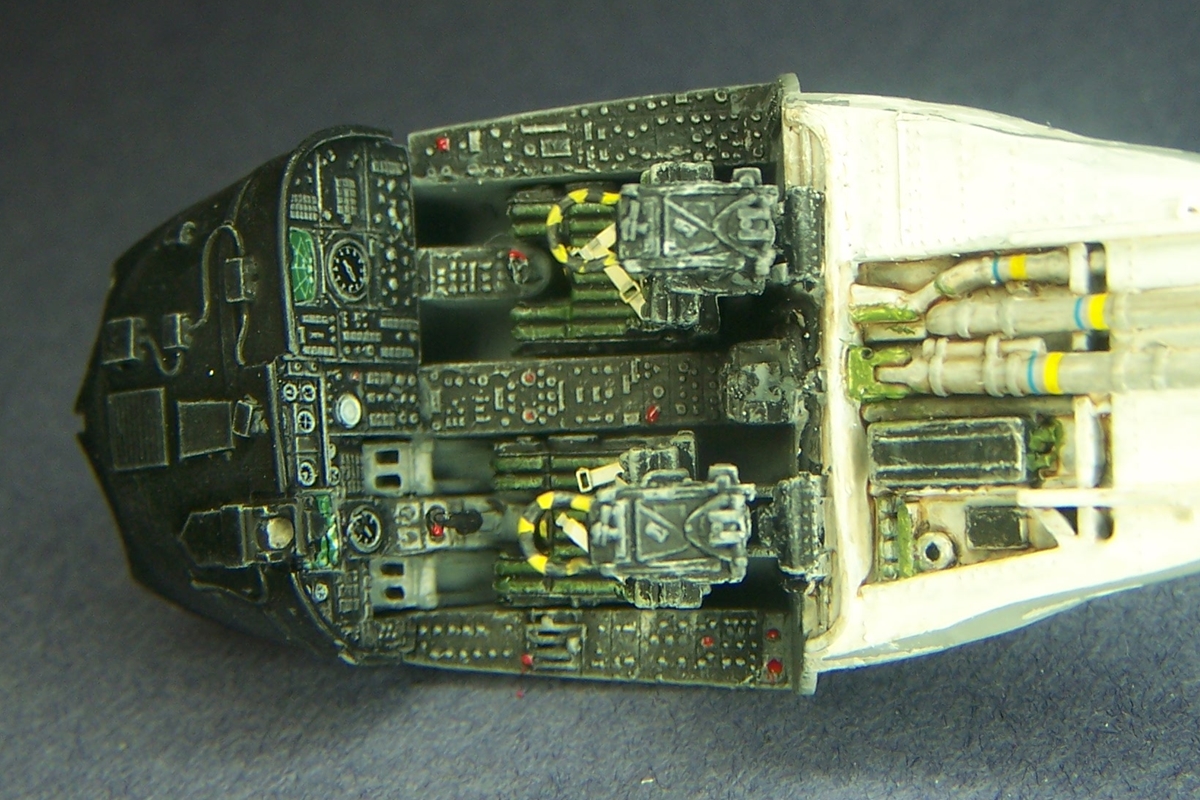
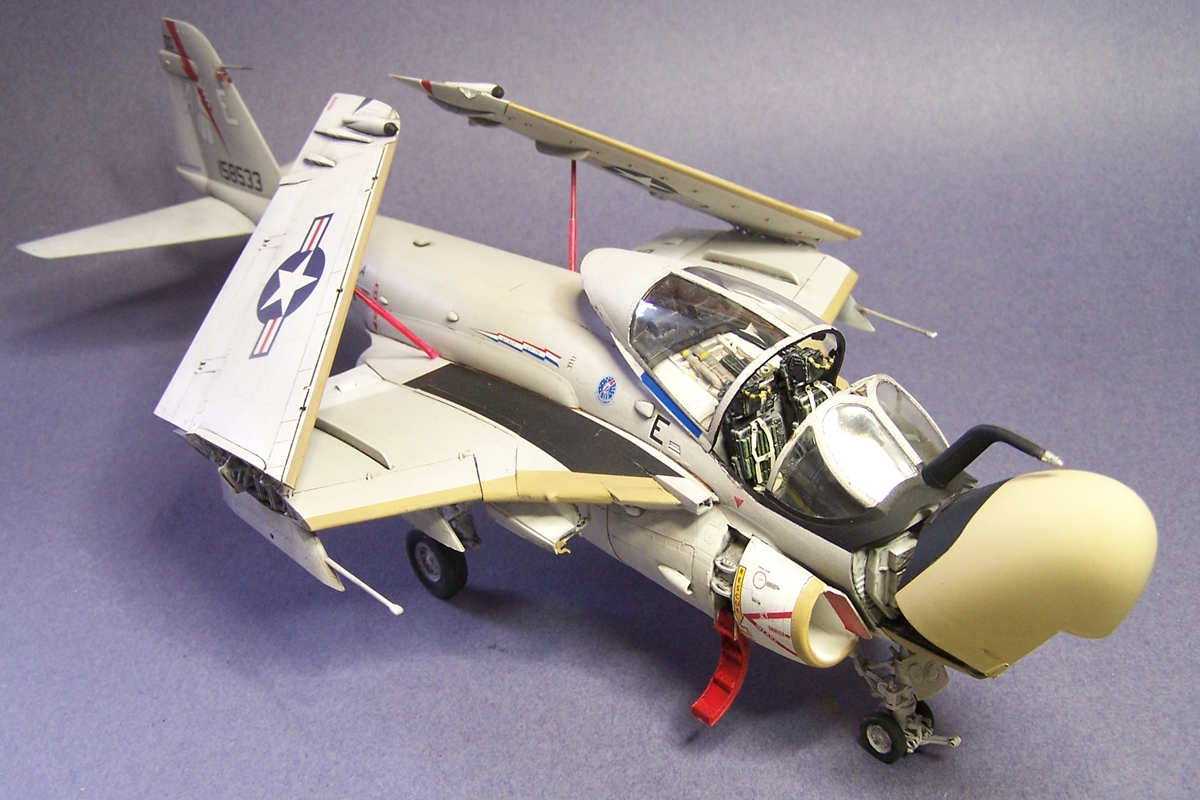
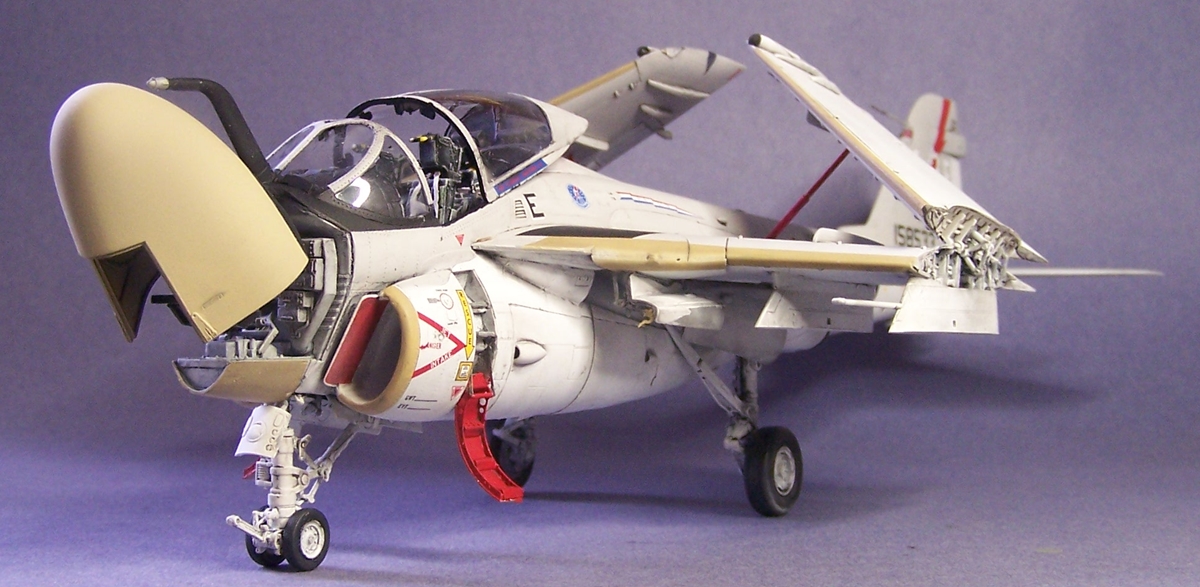
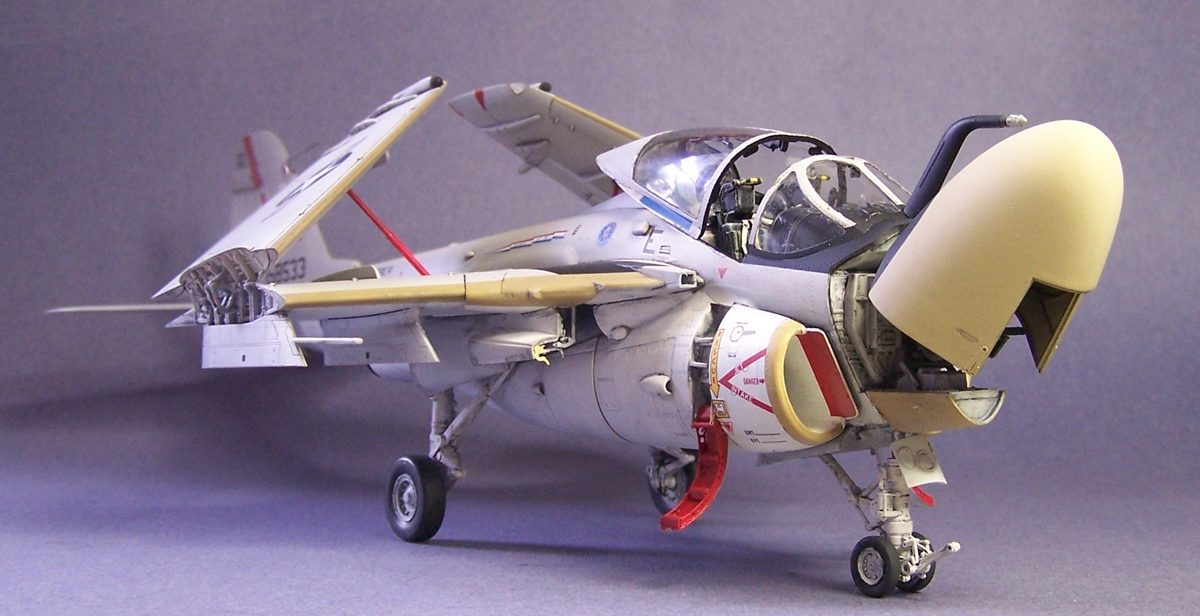
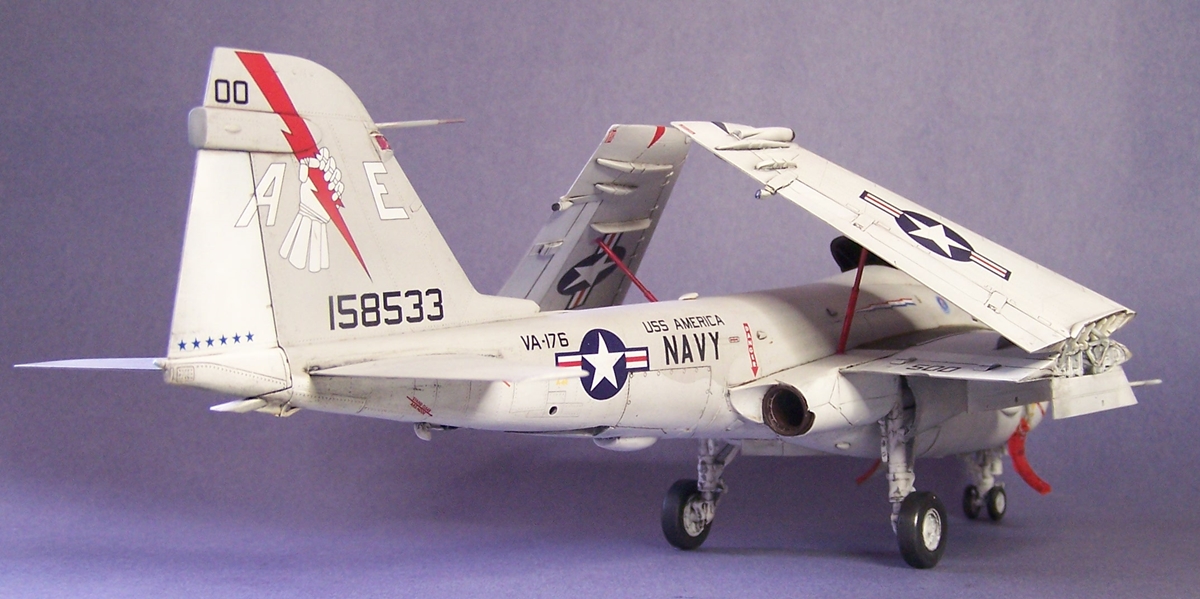
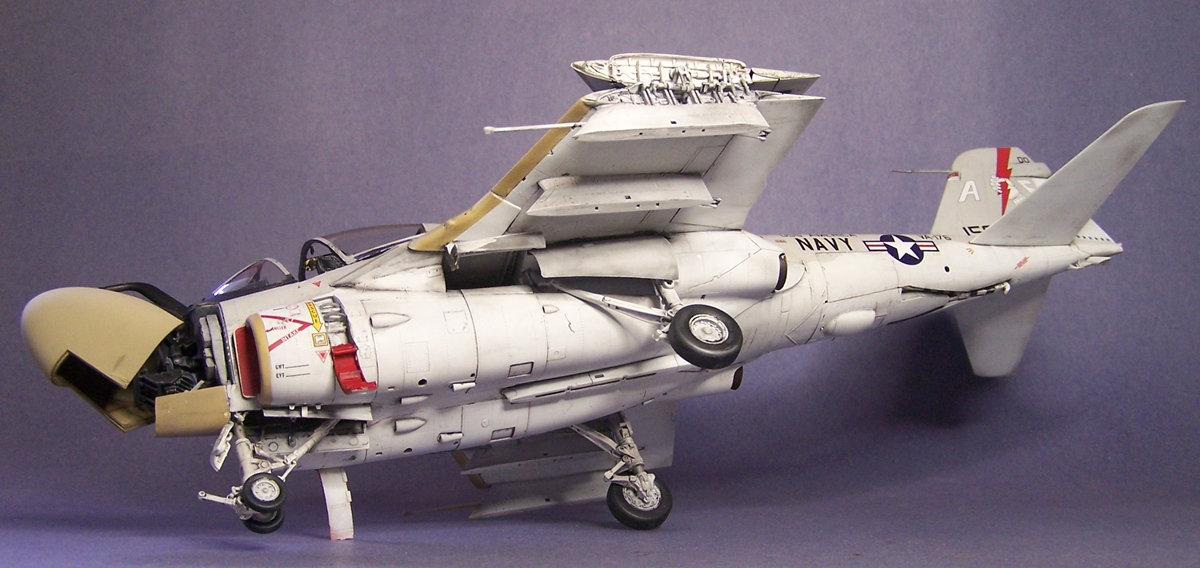
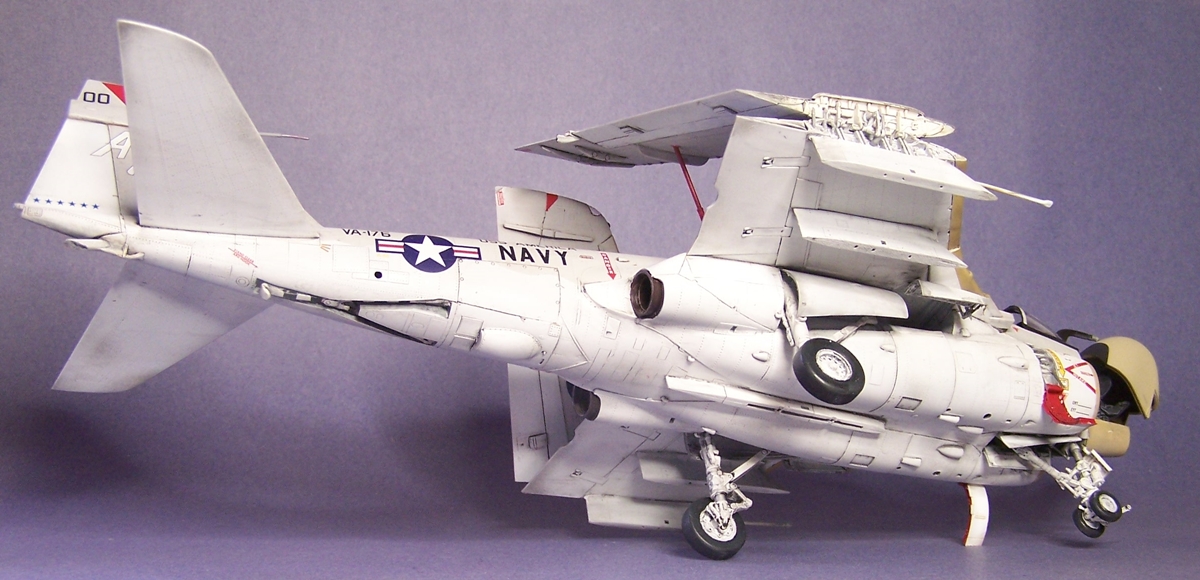
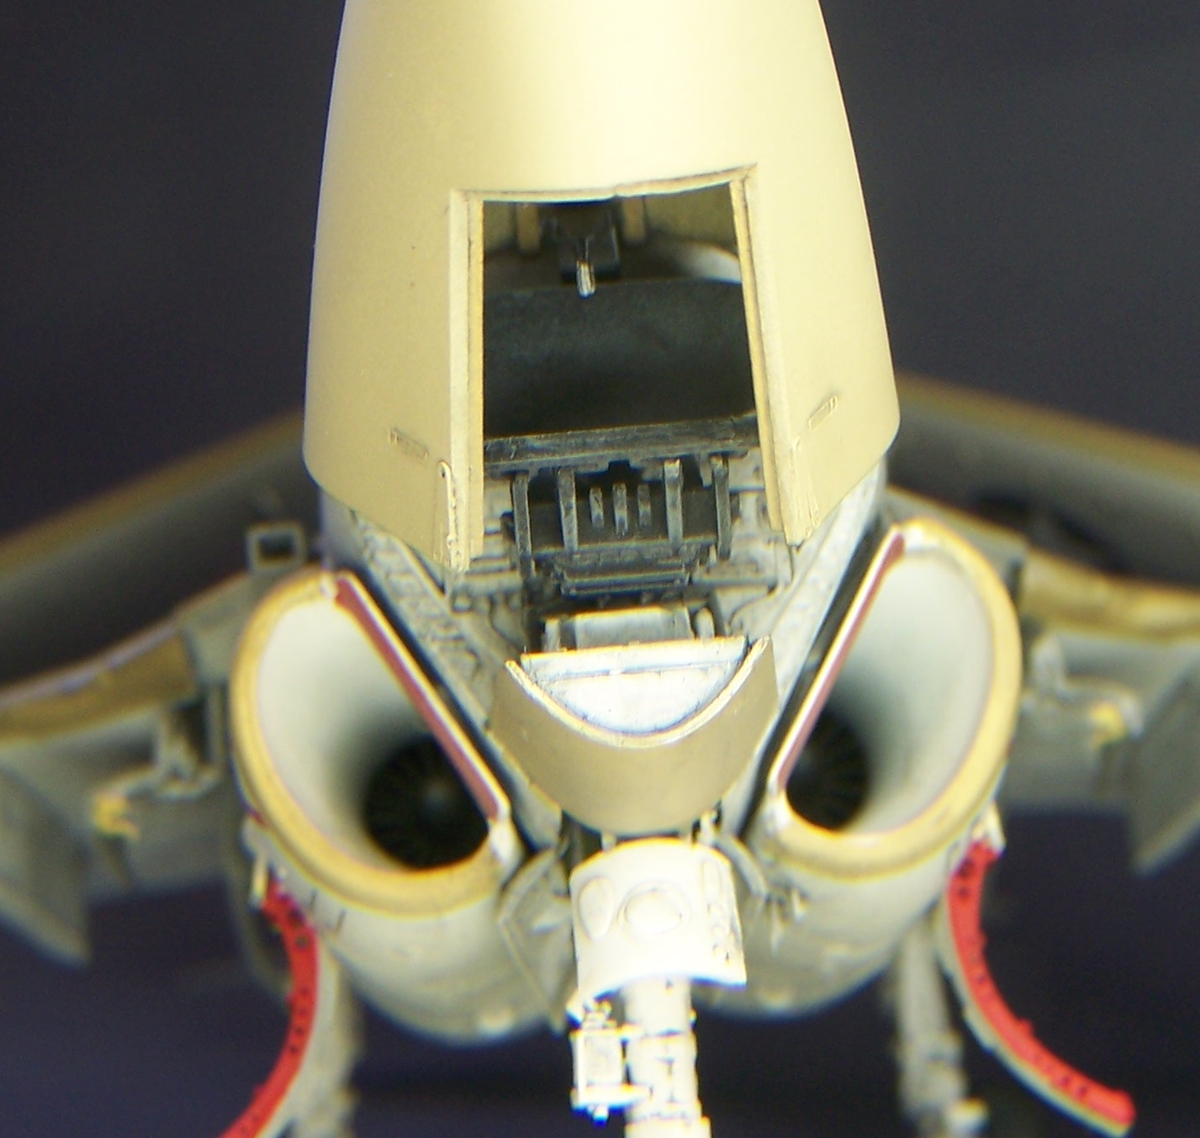
My sample arrived in a large study corrugated box. The box-top greeted me with a nice painting depicting a crew standing alongside their A-6E Intruder with the wings folded on a flight deck. Inside I found the contents to be well packaged and protected. Upon close inspection of the parts I found the level of detail impressive. The parts are flash free with no visible sink marks or other deformities except for a few injector pin marks and a couple incomplete panel lines on the bottom fuselage halves. The kit features well-appointed side-by-side cockpit, excellent instrument panel, with optional open/closed radome, complete radar array, intakes with engine faces, white metal insert parts for the landing gear legs and detailed gear bays, pivoting arresting hook, hinged rudder, optional position slats and flaps, your choice of extended or folded wings, nice inner wing fold detail, segmented canopy, white metal landing gear struts and photo-etch parts.
Also included are:
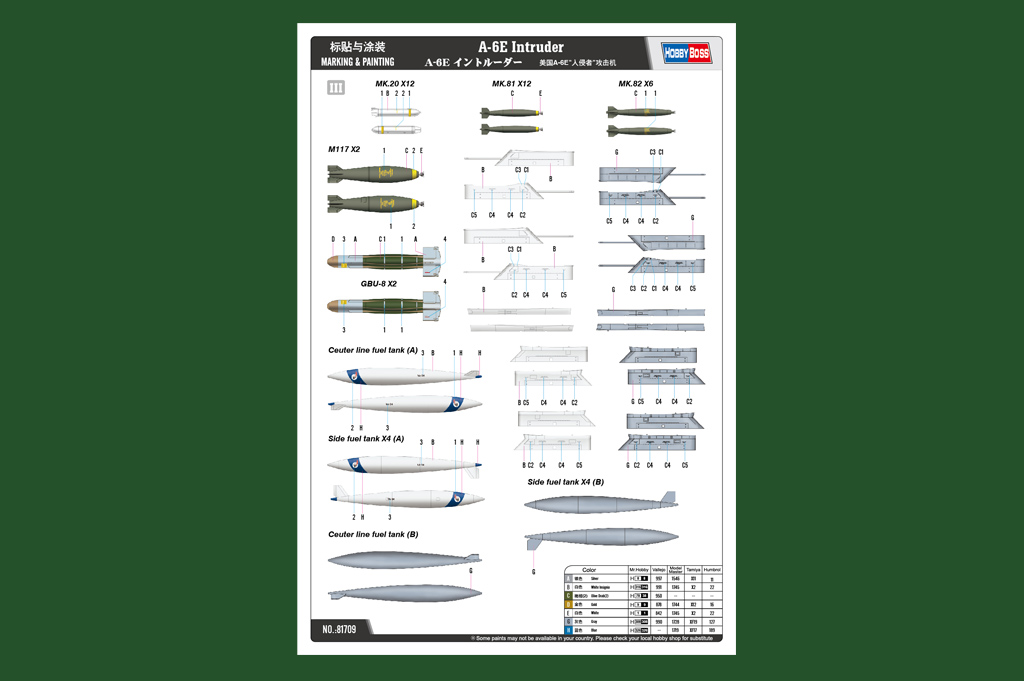
- Ample external stores (centerline fuel tank (A) and (B)
- Side fuel tank (A) and (B) (x4)
- Mk.20 (x12)
- Mk.81 (x12)
- Mk.82 (x6)
- M117 (x2)
- GBU-8 (x2)
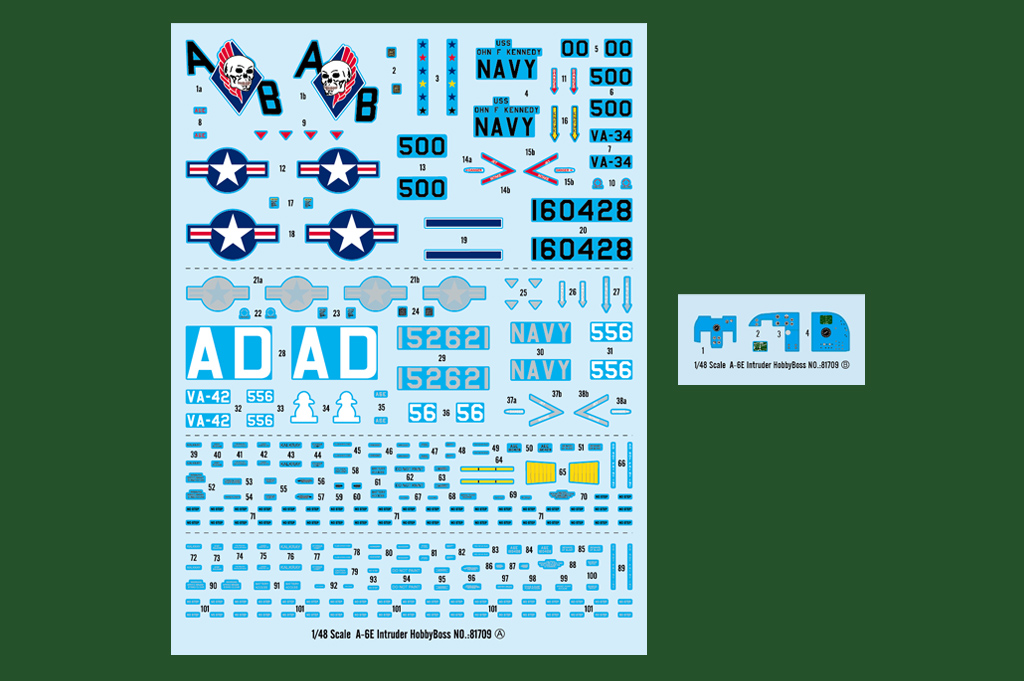
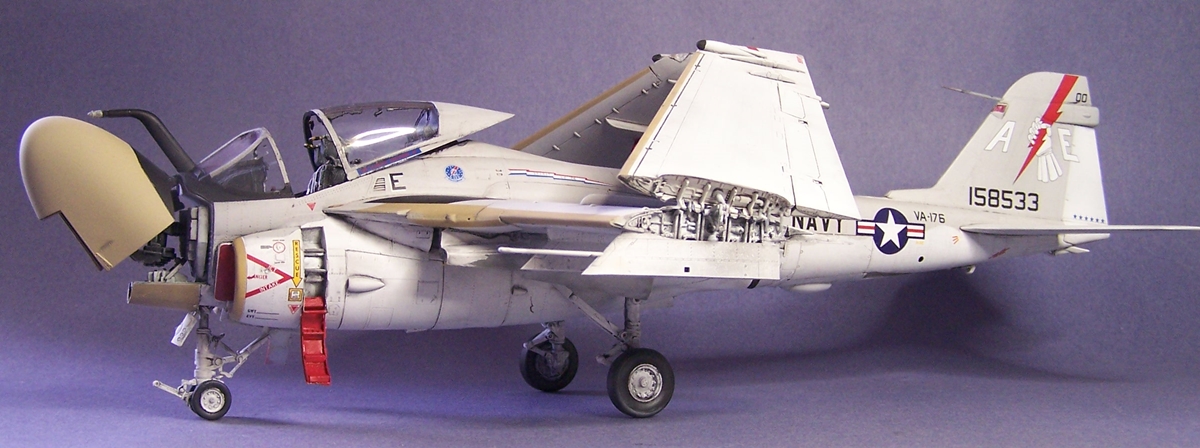
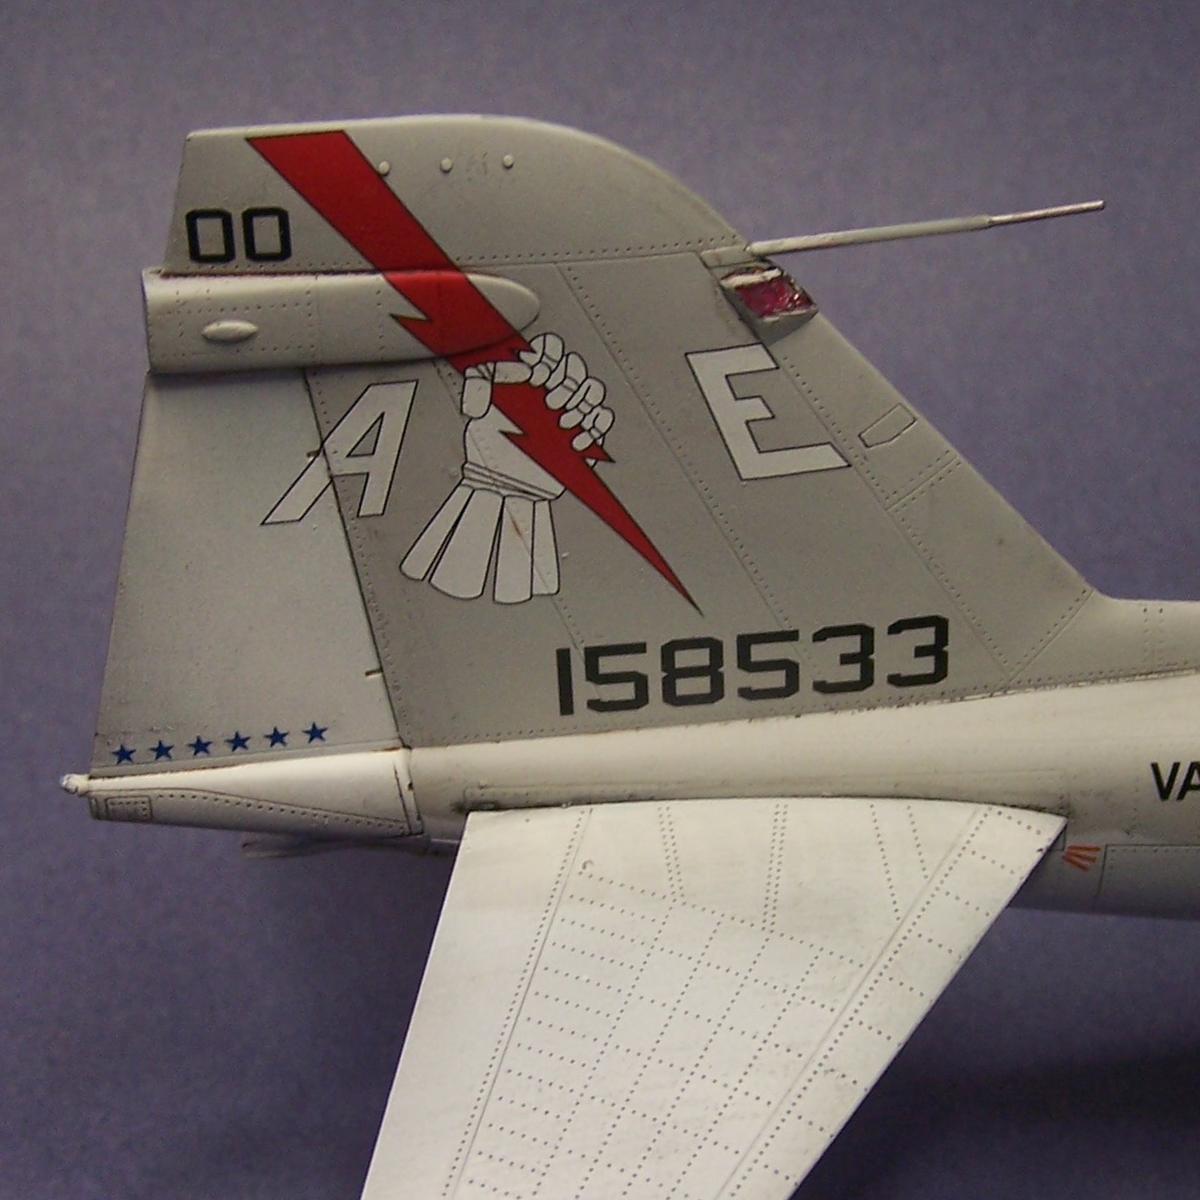
Decals and color painting guide for (2) US navy aircraft:
- VA-34 'Blue Blasters', USS John F. Kennedy, A-6E,00/AB (BuNo.160428)
- VA-42 'Green Pawns', A-6E,56/AD (BuNo.152621)
The kit decals includes stencil data, instrument faces and weapons markings. The total count of plastic parts is 510 contained on 16 sprues.
The Build
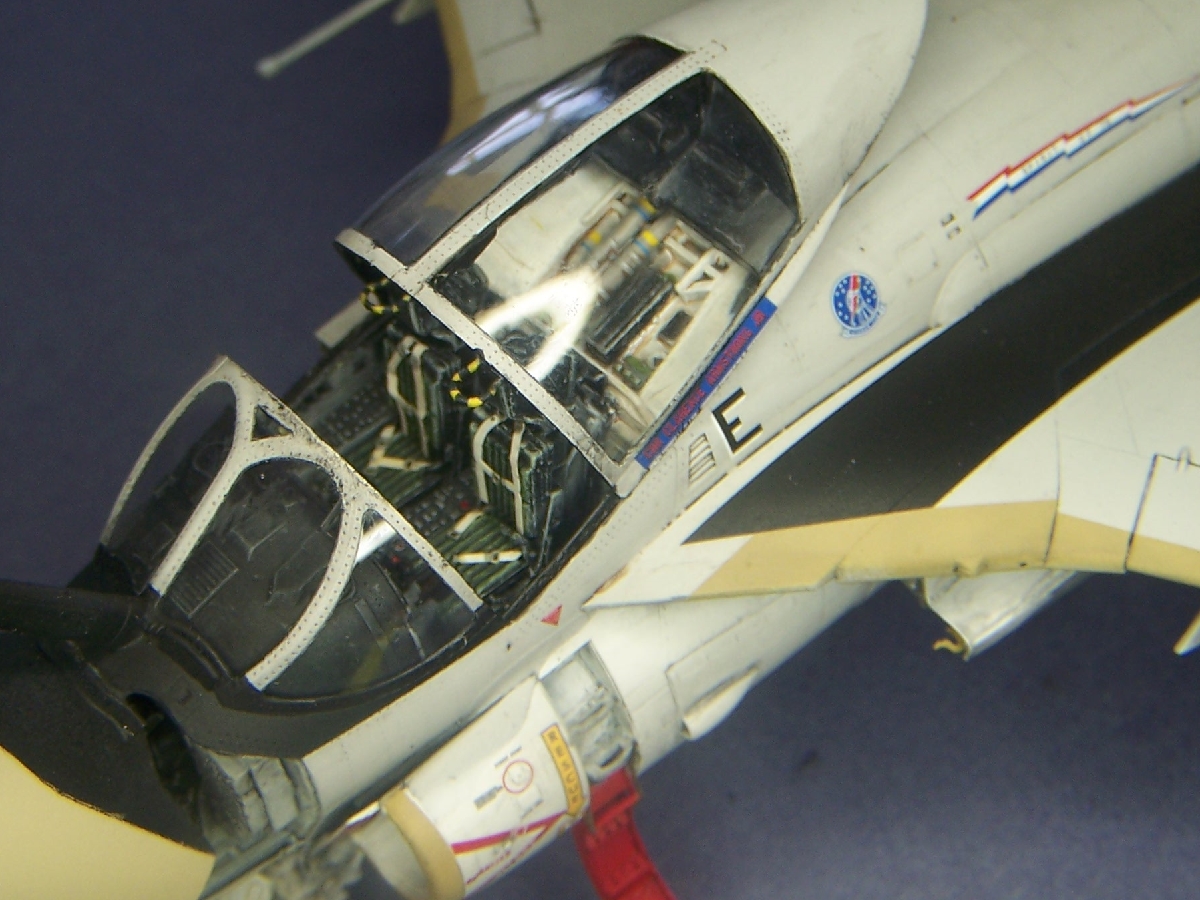
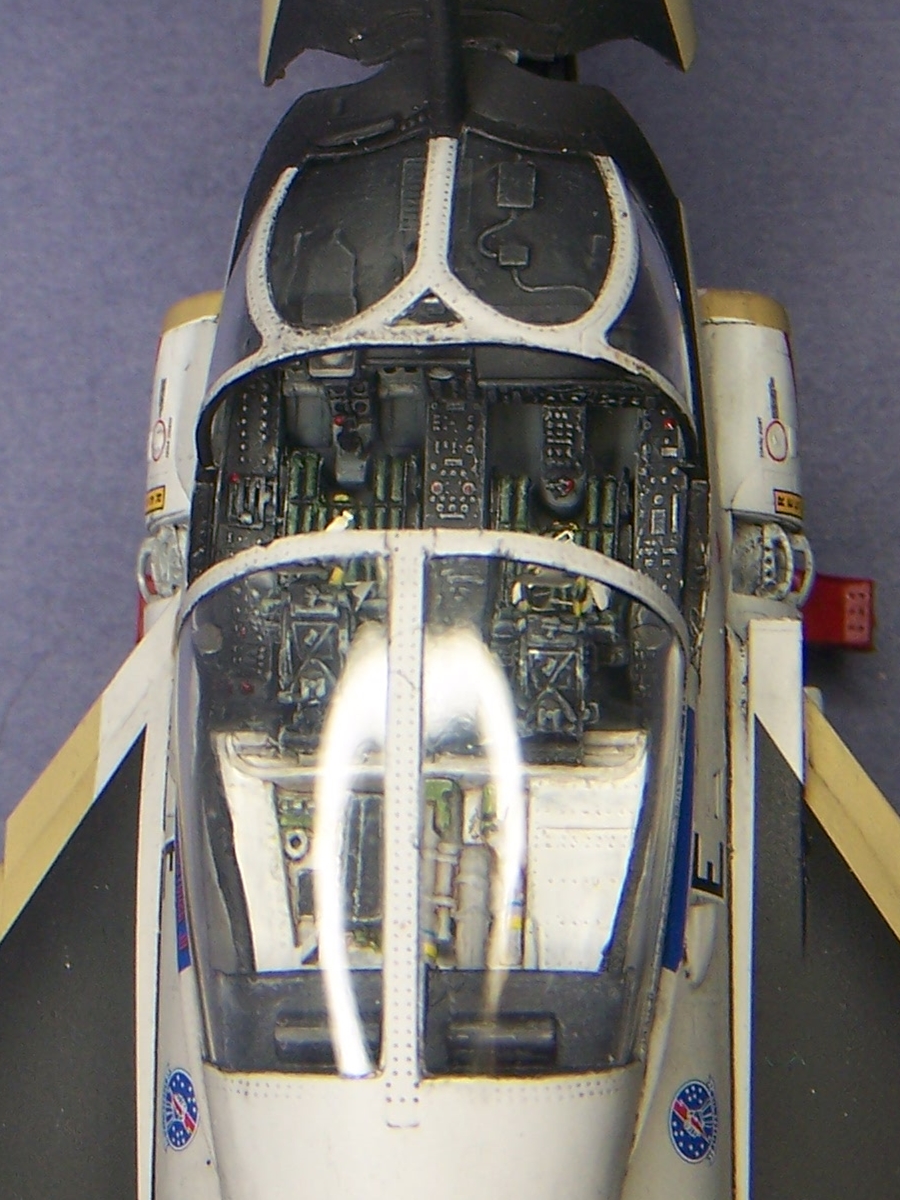
Beginning with the ejection seats and cockpit, the seats are simple to build and they are finished out with photo-etch harness belts. They have pretty decent details and look very convincing when completed. The cockpit came together pretty quick. I encountered no problems to mention, only noting the excellent detail. I did take a few liberties and added ID bands to a few of the lines located on the aft deck.
Next I built up the landing gear. These are unique because they have a metal inner core that is sandwiched by outer plastic shells. The fit is surprisingly good but they do require a bit of clean up to make them presentable.
Following the instructions I then tackled the intakes. I confess that I spent way too much time here to make them appear seamless inside and out. Here’s why: The forward exterior portion proved difficult because a nasty seam runs through several details. The interior wasn’t as bad but proved to be challenging because of accessibility. I then installed each into the appropriate fuselage halves and added the speed brake covers per the instructions.
Setting that aside I commenced building the radar assembly. It was only 15 pieces that went together well and looks pretty good when completed. I’m sure someone suffering from AMS (Advanced Modeler Syndrome) will go crazy in here.
Next I built up the tail-gear and rudder completing all sub-assemblies needed to mate the fuselage halves. I encountered no real problems other than it was pretty tricky at first but then it all just popped into place. The fuselage seam from the canopy to the vertical fin was the worst part of the build and proved impervious to almost all of my tricks. Once the seam disappeared I used a ponce wheel to replace lost rivet detail and re-scribed the other lost lines.
The inboard wing assemblies were next along with the flaps and burner cans. This all went very smoothly. I did not encounter any noteworthy problems and I soon had the wings attached to the fuselage. The outboard wings went together pretty much the same way. Now I cannot attest to the other options such as open slats, flaps, spoilers and unfolded wings but they all look great in the box. Another option I omitted is the RAT (Ram Air Turbine) and I just closed the door. The next parts to be added were the windscreen, and IFR (In Flight Refueling) probe. This allowed me to finish up the bottom side of the fuselage adding the belly panels and ram air scoops along with the other usual suspect bits and pieces. The model was prepped along with adding the rest of the small parts like the gear doors, boarding ladders and canopy for painting. The boarding ladders look pretty intimidating and have lots of photo-etch bits but they are neophyte friendly and look great when completed.
Once painted and decals applied I set about the completion, or so I thought. First I would like to expand a little on the decals. The kit supplied decal are very nice and are of good quality however they are inaccurate as I explained in this earlier review of this aftermarket decal set from Furball Aero-Design. I used the featured aftermarket decals and was very happy except I had to use ‘NAVY’ x2 (located on the fuselage sides) from the kit decals as they were absent from the aftermarket set.
Now back on track and on to the finish I was able to add the landing gear, gear doors, radome, and all the remaining little parts. All of which consumed a lot of time and effort. Sadly my luck ran out years ago and I dropped it. The wing broke off plus other little bits as I was setting up for photographs.
Bottom Line
This a great kit and I give it a 8 out of 10 on the Greg-O-Meter. It’s not for the beginner but if you have a few similar subjects under your belt go for it. I would like to thank Squadron MMD, HobbyBoss and IPMS USA for the opportunity to present such a fine model to my fellow IPMS members.


Comments
Add new comment
This site is protected by reCAPTCHA and the Google Privacy Policy and Terms of Service apply.
Similar Reviews