
SH-60F and HH-60H (1+1)
The US Navy had a winner in the SH-3 Sea King. But like all good things, the Sea King became obsolete, and the Navy had to find a replacement. The answer was that the US Army was looking for a replacement for their UH-1 Iroquois (Huey). Robert McNamara would have been so proud, as the Army and Navy chose the same basic helicopter, Sikorski’s S-70, which became the Army’s UH-60 Blackhawk and, because the Navy’s just, well, different, the SH-60, HH-60 and MH-60 for the elder service.
The Navy version has the tail wheel moved forward, and doubled. This allows the tail on the ship-based helos to be folded, saving deck space. Navy missions include surface warfare, undersea warfare, anti-submarine warfare, SEAL insertion, replenishment, troop landings, search & rescue and Medevac.
The helos in this kit both belong to HS-6, the “Indians”. The Sh-60F is the ASW version. The HH-60H is the SAR/Medevac version. These photos are from HS-6’s web page from a WESTPAC cruise on the Nimitz. As you can see, there’s photographic proof that Dragon’s markings are correct.
The Kit
Although there are two very similar helicopters in this kit, you need to decide pretty early which one you’re going to do, as there are some differences externally between them. The nicely done interior is the same for both, so procrastinators have some leeway, but by the end of step 1B, you’ve decided which color scheme and decals you’re going to use. The main differences are the right side door and left side window setup. There’s a small piece of PE for the door slide.
You also get a number of parts for the Army version. (Feeds the spares box.)
Construction
This is a very nicely designed and molded kit. Everything fits together with a minimum of hassle. There’s no flash anywhere. There were a couple of places where I needed to put in a little putty or apply the sanding stick, but that’s mostly the fault of my assembly method. I was particularly happy with the way the clear front of the cockpit just slides into place with no hassle. The rotor blades come in 2 parts, and I was more than happy at how well they fit. The only real work on the construction part was cleaning up the gates were the parts connected to the sprue. I’m also happy with Dragon that the big connections to the fuselage halves come into the bottom, making it easier to work with.
One perplexing item is part C51. It shows up prominently on the drawings for the color scheme for aircraft #6, but I couldn’t find anywhere in the assembly instructions where it told you to install this part. Well, it’s there now.
Paint
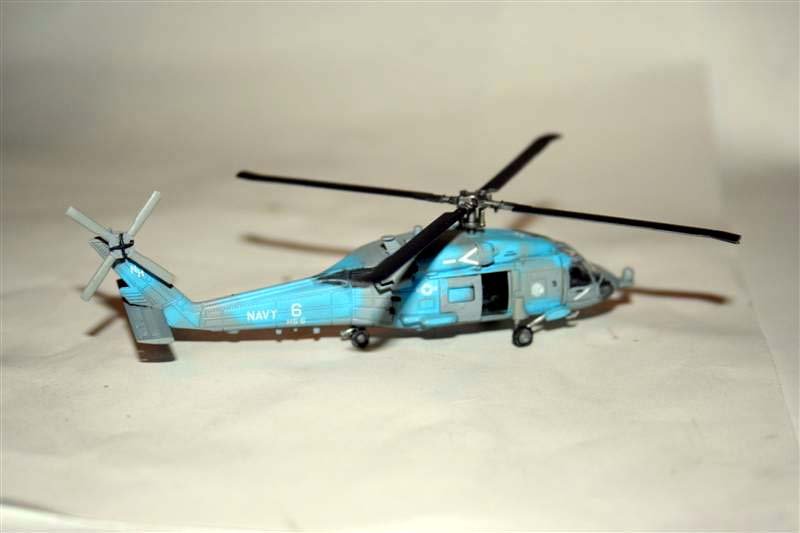
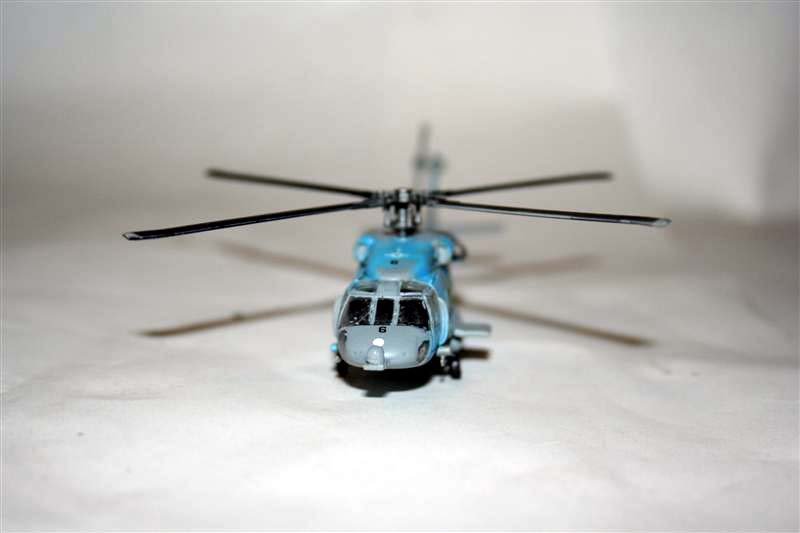
Painting was fairly east at first. I painted the entire fuselage 36320, Dark Ghost Gray, as the instructions say. I masked the windows in the cockpit, and didn’t install the side windows until after decals.
So far, really easy, but when I went to paint the blue, the instructions weren’t on the same page as the Navy. The instructions call for FS 15044. Dark Sea Blue, as used on late WW2 Hellcats and Corsairs was 15042, and 15044 would be very close to this. This was way too dark and I finally settled on Testors’ #1162, Sky Blue. I then freehanded the blue, using the finest tip on my airbrush. It looks pretty good. For some reason the flash on my camera makes this blue really stand out. Just so the “color police” don’t think I’m using a really wrong blue, here are pics with and without the flash.
A coat of Future (Yes, I still have a bottle of Future.) and I’m ready for markings.
Decals
The decals are really good quality, printed by Cartograf of Italy. They are very nicely printed, in register, the colors are right on, and they come off the backing paper cleanly. The problem I had with these decals is that the entire decal sheet is about 1.5 inches by 1.75 inches, and everything is so SMALL! With magnifiers I was able to put the markings in place. The problem with the diminutive size comes when trying to cut the decal from the paper without slicing up the neighboring marking, especially a gray “star and bar” on a light blue background. There’s no contrast there. I have some really fine surgical scissors which I use for decals, but this sheet pushed the limits of being able to see and cut. I refuse to admit that my eyes are getting too dim for this fine work.
Finishing
And the last stuff. I always leave off anything which is breakable until after decals, as I have to really concentrate to get them in place and fairly straight. I usually break something. Add the wheels, the windows, the tail and main rotor, and it’s done.
Overall Evaluation
Recommended. It’s pretty tiny, only 4 inches long, but the parts fit amazingly well, and it’s certainly an interesting subject. This is about as close to a “box shaker” kit as you’ll find with a rotor on top. The fineness of the interior parts looks tough, but they fit SO nicely. The same goes for the wheels, rotor and the antennas, sensors, etc.
Thanks to Dragon USA for an excellent model of an interesting air vehicle. And thanks to John Noack for allowing me to build it.


Comments
Add new comment
This site is protected by reCAPTCHA and the Google Privacy Policy and Terms of Service apply.
Similar Reviews