

Dave Morrissette
Reviews By Author
|
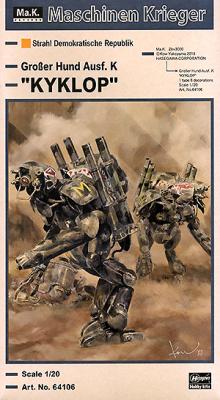
Großer Hund Ausf. K KYKLOP Humanoid Unmanned InterceptorPublished:
As a bit of background, and from Wikipedia, the Maschinen Krieger universe is a science fiction universe created by Japanese artist and sculptor Kow Yokoyama in the 1980s. The franchise originally began as the science fiction series SF3D which ran as monthly installments in the Japanese hobby magazine Hobby Japan from 1982 to 1985. To develop the storyline, Kow Yokoyama collaborated with Hiroshi Ichimura as story editor and Kunitaka Imai as graphic designer. The three creators drew visual inspiration from their combined interest in World War I and World War II armor and aircraft, the American space program, and films such as Star Wars, Blade Runner, and The Road Warrior. Inspired by the ILM model builders who worked on Star Wars, Yokoyama built the… more |

|
Focke Wulf Ta-152C-11Published:
The Ta-152 was the last upgrade to the Fw-190 series designed by Kurt Tank. The H versions were designed for high altitude interceptors while the C versions were designed for lower altitude jobs. None were produced or employed operationally in sufficient numbers, so this is a Luftwaffe ‘46 project. Hobby Boss continues their Fw-190/Ta-152 releases with this C-11 version. This kit consists of seven gray sprues, a clear sprue, a small PE fret, and decals for one plane, Yellow 11. The sprues are excellent – no flash, great panel lines, and the clear parts are very thin and clear. Construction is straightforward and starts with the cockpit. The PE fret replaces the rudder pedals, and there is also the needed seatbelts already included. Decals are included for the instrument… more |
|
S2F Tracker Wheels and MasksPublished:
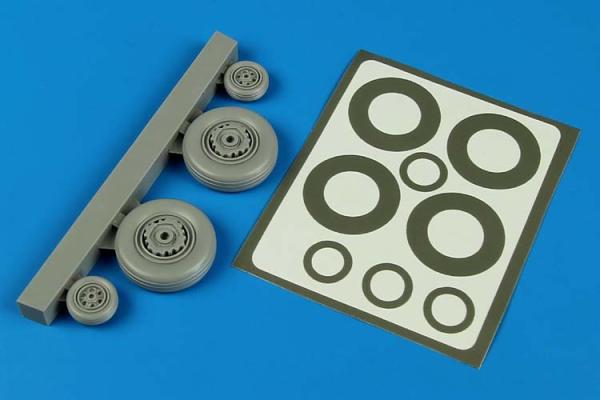
Aires continues its rich tradition of detailed aftermarket parts with a wheel set for the Kinetic S-2 Tracker. This set contains two front wheels and two main wheels as well as a masking set for the wheels to help painting. The set is cast in Aires’ usual gray resin and has no defects or issues. The set is simple to use. The wheels can be trimmed from the pour stubs. One thing you will need to do is to sand the mold seam off and rescribe the wheel treads. Total prep time is maybe 5-10 minutes. You will also need to drill the hole slightly deeper to allow the axle to slide fully into the wheel. The kit wheel has a separate hub and a two-part wheel. To build it, you paint the hub and glue the two wheel parts over it. This leaves a seam that needs sanded down and then… more |
|
S-2F Tracker Wing PylonsPublished:
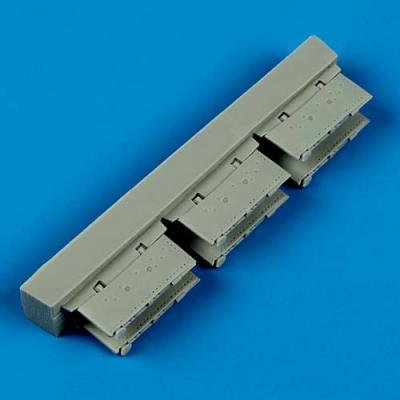
The last S-2F set I have for review from Quickboost is a replacement set of wing pylons for the plane. There were six underwing hard points for rocket pods and conventional depth charges, or up to four additional torpedoes. This set is six direct replacement pylons. Trim them from their well-molded sprue and glue to the plane. I test-fitted three and they snap into place. The molded detail is somewhat finer than the kit parts. The kit includes three rocket pods for each wings. There is some improvement in accuracy and detail, as the Quickboost parts have better rivet definition and detail. This is especially true on the bottom of the pylons if they are left empty. Kinetic completely missed the prominent pad on the front of the pylons. This is a very simple replacement. It… more |
|
EA-6B Prowler Air ScoopsPublished:
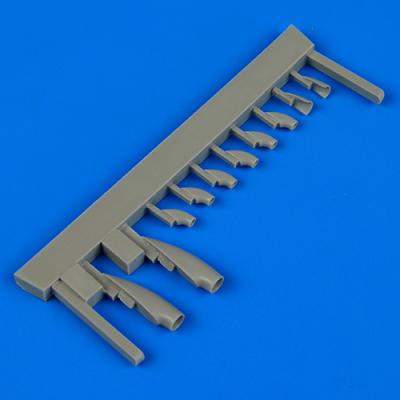
Quickboost makes another addition to its sets for the Kinetic 1/48th EA-6B Prowler with a replacement set of air scoops. There are 10 different scoops cast perfectly in the expected gray resin. There are three different varieties of scoops:
Using the set is simple – cut from the casting block, make sure the bottom edge is good, and glue in place and paint. The Quickboost parts have good depth to the openings, which is not the case with all the kit parts. Also, the kit’s two large scoops have to be glued together and sanded, which is not done with the Quickboost set. Overall, a good… more |

|
SAAB J-35 Draken Pitot Tubes and AOA SensorPublished:
Master Model of Poland continues their great run of products with a set of two pitot tubes and an AOA sensor for the Hasegawa 1/48 Draken. If you have never used one of Master's products, you are in for treat. They make machined metal parts for ships and planes. Ship parts are mostly gun barrels, while the planes’ parts are gun barrels, pitot tubes, and various sensors, all of which are in metal, either brass or aluminum. This set includes three parts – the long nose pitot tube, a second short pitot tube which was on the top of the tail on some planes, and lastly, a replacement AOA sensor for the nose. I included a picture of the kit nose pitot compared to Master’s and it is not even close. Master's pitot is a drop-in replacement and is much finer and more accurate than the kit… more |
|
S-2F Tracker Tail Wheel (skid)Published:
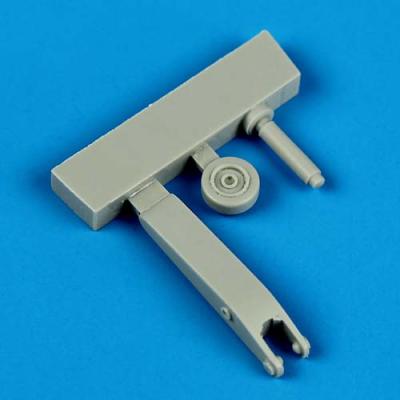
Quickboost has issued a replacement "tail wheel" for the Kinetic S-2 tracker. It really isn't a tail wheel, but rather a tail skid. The parts are three – a tail wheel, the skid, and the piston. It is well cast in Quickboost’s gray resin. You separate the parts from the casting blocks, sand the minimal attachment points, and assemble the wheel by adding the separate tire. One thing to note in the comparison photos is how blob-like the kit parts are – almost no detail whatsoever. The kit part is molded as one piece, lacks any wheel hub detail, and will also need filling as there are definitely some sunken-in areas. If you are building this kit, this part is a must-have! It is recommended, especially due to the low cost and improved detail. My thanks to Quickboost and IPMS/… more |
|
S-2F Tracker Radar (MAD Boom)Published:
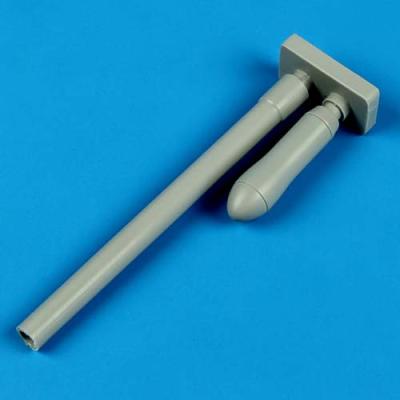
Quickboost continues its aftermarket parts for the 1/48 Kinetic S-2F Tracker family with a part labeled as the Tracker’s radar. First and foremost, this isn't part of the radar. It is really the MAD (Magnetic Anomaly Detector) boom which extends from the back of the plane as it looks for submarines. A good picture of the boom extended is: https://commons.wikimedia.org/wiki/File:S-3A_VS-32_1982.JPEG#/media/Fil…. In looking through internet pics, it looks like the boom was always retracted while on the ground. The parts for this set are a two-part boom – the extension boom and the detector end. You trim off the two parts and glue them together, then add to the back… more |
|
S-2F Tracker EnginesPublished:
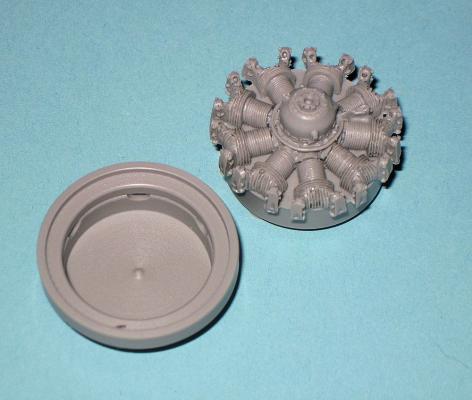
Another addition to the Quickboost line for the Kinetic S-2F Tracker is a replacement set of engines. The set comes with four parts – two engines and two holders. They are cast in familiar gray resin and are perfectly molded. The installation is simple. Assemble the nacelle as per kit instructions. Sand down the backing ring so it slides into the opening, paint it up and glue the engine in place, and then the cowling, and you're done. One thing noticeable in the comparison pictures is that the Quickboost engines are missing the rods connecting the valve covers and engines. They are easily made, and if you add ignition wires you have a superb upgrade. In summary, this is a more detailed simple upgrade which is cast perfectly and fits very well and is very visible on… more |
|
F-8 Crusader Ejection SeatPublished:
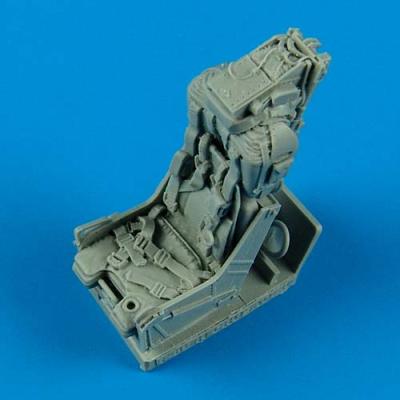
Adding to the Quickboost line of 1/32nd scale ejection seats is this latest offering for the Trumpeter F-8 Crusader. The seat, cast in their normal gray resin, comes in two pieces. The main body and the pull ring are both perfectly cast, and the pull ring has a resin protector cast in front of it. To assemble, cut the bottom plug off the seat, trim the pull ring and attach it, and paint it up. As with all Quickboost seats, the belts are molded in and have a nice draping effect to them. I included several shots of the seat plus a shot of the kit seat and the Aires seat. The kit seat is styrene and does have a set of PE belts, and for a kit seat is pretty nice. The Aires seat is, not surprisingly, very similar to Quickboost's, but the belts are multiple PE parts, as well as some seat… more |
