
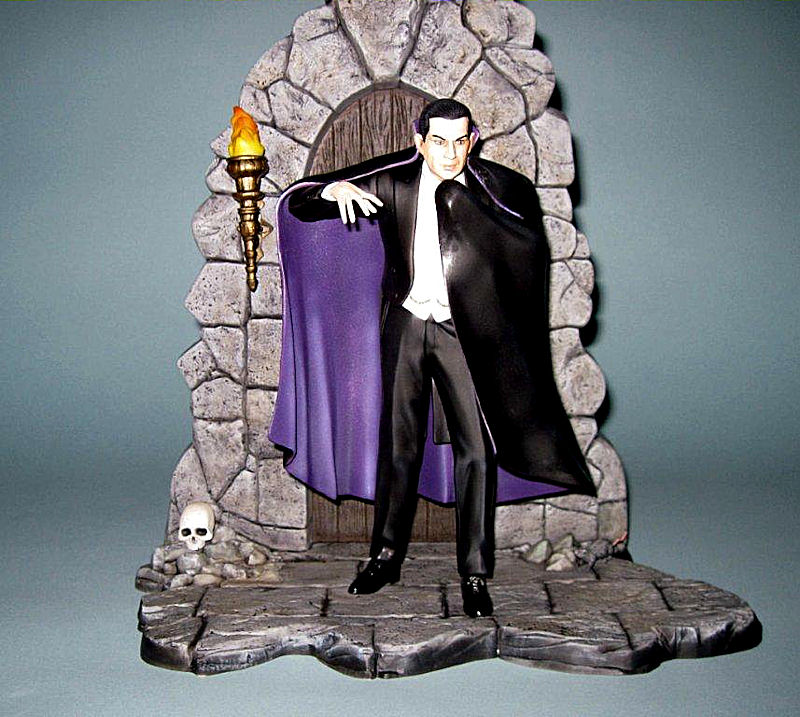
Bela Lugosi as Dracula on Broadway
This is going to be the easiest review I have done in a while. This is the best styrene figure kit produced...at least to date. Now for the why's. The kit is 1/8 scale and includes Bela Lugosi in the Broadway version of Dracula (it looks like the movie a lot). The kit can be broken down into 4 parts. First is an excellent base with dungeon floor and walls and the door to the dungeon. This includes rock piles, skull, obligatory rodent, lit torch, and an excellent door with its hardware. Second is the figure in a good pose wearing a tuxedo with shoes and gold chains. Third is the cape, which is molded in such a way that it can be added to the painted figure and still drapes naturally. Last, and the most for me, are the head and hands. This is the best likeness of Lugosi around. That includes the expensive resin kits and the collectible toys – this face is every bit their equal. Also included in the kit is a superb write-up by David Fisher of Amazing Figure Modeler with his excellent tips on building the kit – a mini-AFM!
The way the kit is designed is a builder’s dream. I started with the base and assembled it quickly. There are minor seam lines on the kit and some gaps I filled with Aves Apoxie sculpt. I primed the base and used the gray primer as the base for the stone work. I brush-painted the door with dark walnut from Reaper Miniatures. I airbrushed the grout lines for the stones with grimy black for effect. This was then sealed with clear coat, and a dark gray and brown wash was done over the entire base. While this was wet (it was an oil wash), I added washes of black, dark green and several brown tones to the wall to break up the colors. This was left to sit for several days and then clear-coated again. I dry-brushed the stone with three different gray colors and then dry-brushed the door with several tans to lighten it. Sealed again, and off to pastels and detailing. I painted the skull and rat and added them and one last flat coat and the base was done.
The pants were assembled, as well as the shoes and sleeves. These took a little filler and sanding, but minimal. The way the kit is designed, I sprayed the shirt and vest light gray, then highlighted with white. This was sealed. I sprayed the back of the tux, the pants, the tux sides and the sleeves black. These were highlighted with grimy black Floquil and sealed. I added the white shirt to the back of the tux, added the tux sides, and glued in the arms. All that was needed was a touch of filler where the sides and sleeves met, which was sanded and then sprayed black, and the kit was sealed. I added a bit of medium gray pastels to highlight the pants. I used Testors brass for the gold chains and used Gunze Lacquers for the really shiny shoe look. These were then added to the base.
The cape was next and it is molded in five parts. They fit well but it did require several putty/sand/prime iterations to make it good to go. I sprayed the inside of the cape first with Vallejo purple. This was highlighted with lighter shades of purple and intentionally not sealed. The outside of the cape is sprayed the same way as the tuxedo. This was sealed with several coats of flat. I wanted the inside to have a shimmer so I used Alclad clear and added a half tablespoon of mica from a previous job. This was beat in with a mixer and then sprayed, giving a nice satiny effect which, of course, you can't see in pictures. This was draped over the suit already added to the base.
Last were the superb head and hands. The hands are a single piece each and just require sanding of any seam lines and then priming. The head is a two-piece assembly with the break running behind the ears and across the hair. This was puttied and smoothed with small files and hair replaced with a scribing tool. I base-coated the head Garage Kit flesh from Garage Kit.US. I then highlighted with pale flesh and highlighted some areas with a darker flesh version. Looking at it, it looked too "alive" so I added a small drop of blue to the pale flesh and misted over the entire face and hands. I sealed and painted the hair and eyes to get a feel for it. I used pastels to shade the face creases, lips, and temples, then added reddish to under the eyes. I added some wash in the eyes and sealed. I used Glosskote on the eyes and mouth and installed the head to the kit.
The kit is superb in every way - great likeness, excellent engineering and assembly and loads of fun – go buy one. My thanks to Frank Winspur and Moebius for the chance to review this kit – it is a true winner in every respect – and to IPMS/USA for the opportunity. And if you look further into this year, they have even more excellent kits coming!


Comments
Add new comment
This site is protected by reCAPTCHA and the Google Privacy Policy and Terms of Service apply.
Similar Reviews