
F4U-1 Corsair, Part 3 – The Finale
After the last segment, the kit was ready for paint. There are three marking options included in the kit. I chose a tri-color screen from VF-17 aboard the USS Bunker Hill in 1943. To start painting, I wanted the bottom white to be hard and take some weathering. For this, I used decanted Tamiya lacquer from a spray can. This is just one of the many tricks I learned from Ed Kinney. I masked off the exhausts with Silly Putty and used a little red brown (just a couple drops) to tint the white away from pure white. This was sprayed in three coats and left to dry. The lacquer dried very quickly and very hard. At this time, the landing gear and the gear doors, the main flaps, and a bunch of miscellaneous parts were sprayed.
Intermediate Blue was next, and Model Master was used with no problems. I masked the bottoms of the wings at the wing folds. Pay special attention to the instructions, as Tamiya has shown in detail which areas are left bottom color, intermediate color, and top color. I left the demarcations lines feathered, using a Badger Velocity air brush. And the two windows areas behind the cockpit were painted Intermediate Blue also. The tail was also painted. Once this dried, the back windows were masked with the kit masks and glued in place. I also painted the bottom of the outer wing panels.
Last was Navy Blue from the Gunze Mr. Color range, and this was also feathered in to leave soft demarcation lines. The Intermediate Blue wing folds were masked prior to shooting the wings and outer wing panels.
Once everything was dry, several coats of Testors GlossCote were applied and left to dry for two days in preparation for decaling. The decals are good but took a little work to reduce silvering. There large ones were, well, large, and took some effort. I ruined one of the wing walks, so I masked and painted instead...it looks better that way. There are a full set of specials also, so decaling took a couple days, but it really pops out against the colors. Another round of GlossCote and it was ready for a wash.
I used a couple methods here. For the white bottom, I used medium brown oil washed over the entire surface. For the intermediate blue areas, I used the same material and process, but heavier, and for the Navy Blue I used a watercolor composed of medium gray which was left to dry and then wiped off. Don't forget all the wing folds, wheel wells, canopies, and small parts. After this was done, I gave the parts three rounds of Testors DullCote and let them dry once more. After a day, I broke out the pastels and used gray to streak off various panel lines. I used brown and black for exhausts. I then used a silver colored pencil and worked my way around, chipping panels and openings, plus the wing leading edges and the prop. Another round of DullCote and it was time for final assembly.
I attached the gear doors, tail wheel doors, and small doors around the wing fold. Things went perfectly. And now for the big screw-up. When I went to slide the wings on over the posts, they were very tight. Looking over the instructions, it clearly says NOT to glue the parts on – guess I missed that part. I had to work with it and eventually they slid right over the spars. The wing supports were added and fit perfectly. I did paint these red just for some color. I added the flaps and got them settled. The flap actuating rods were connected and a quick DullCote added to the glued areas. The masks were pulled off, and all the clear lights and canopy were added. Done.
Having built Tamiya’s Zero and seen the P-51 and Spitfire built, I think this is even better. No metal parts for wing hinges. Perfect fit and a great subject. Anyone with any interest in Corsairs needs to build this kit. I know that I will be buying the next ones coming out. It is as near perfect as any kit I have ever built or seen built.
Again, my thanks to Tamiya and Tamiya USA for such a superb kit. It is simply a must-have for plastic modelers. And my gratitude goes to IPMS/USA for allowing me the opportunity to build this one.


Outer wing panels, intermediate and navy blue
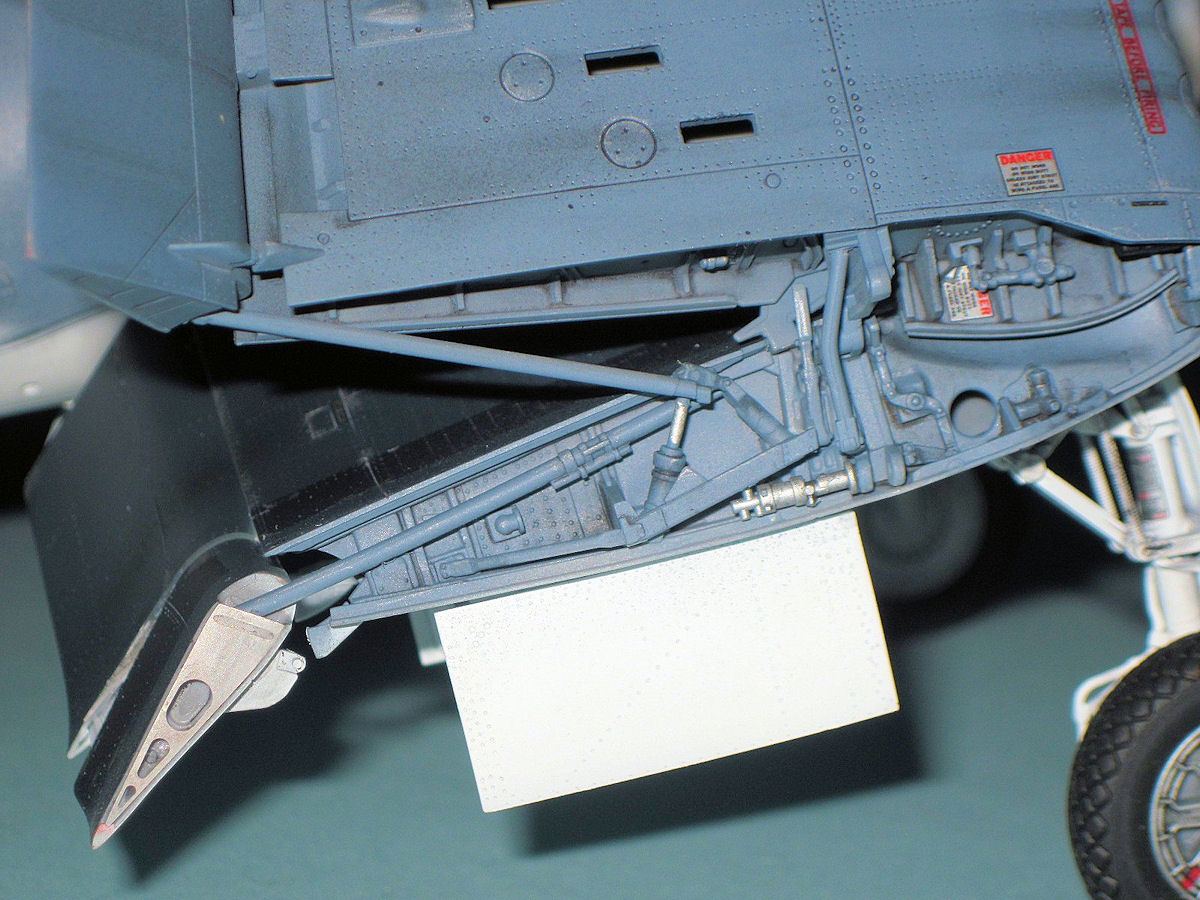
Right wing fold mechanism

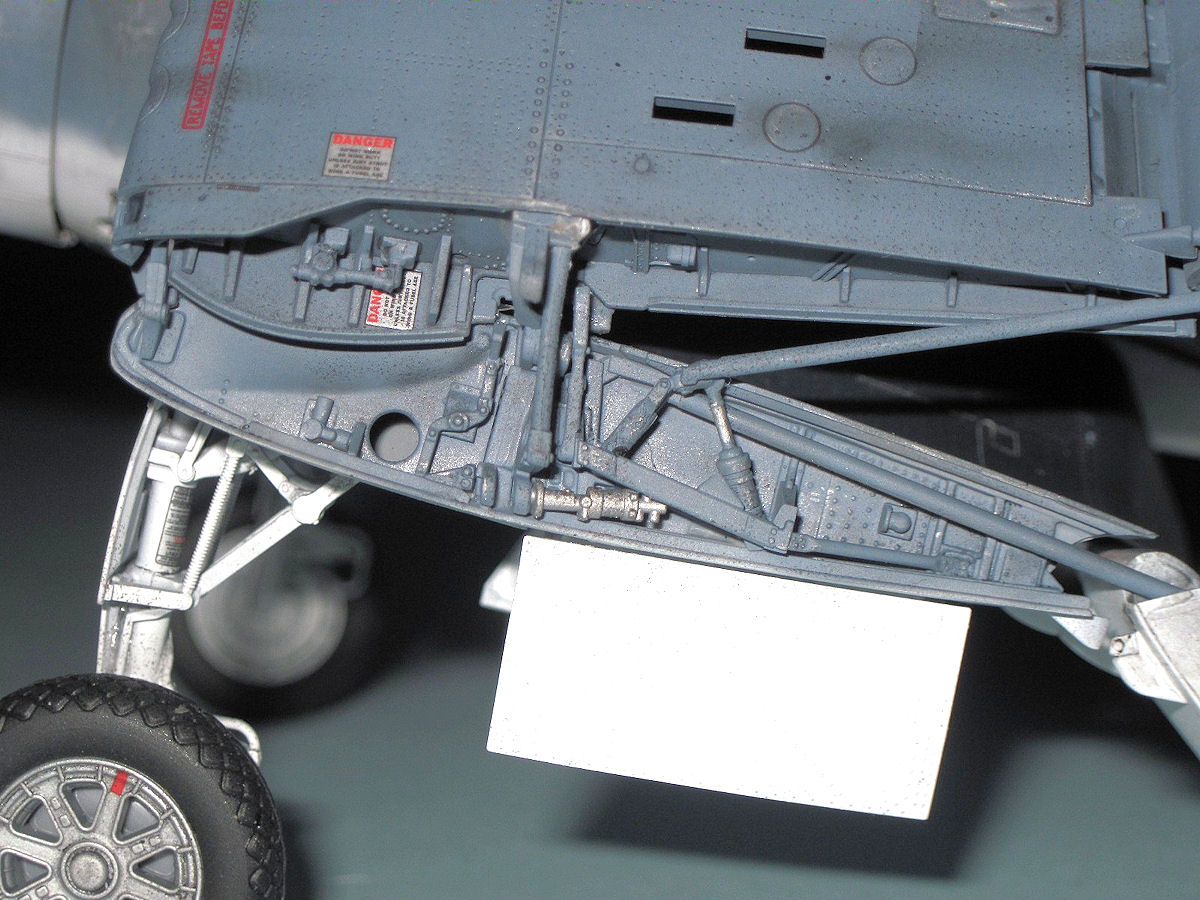
Right main gear strut

Right inner wing leading edge

Engine and prop detail

Folded right outer wing

Both wings folded

Landing light
Left wing fold mechanism
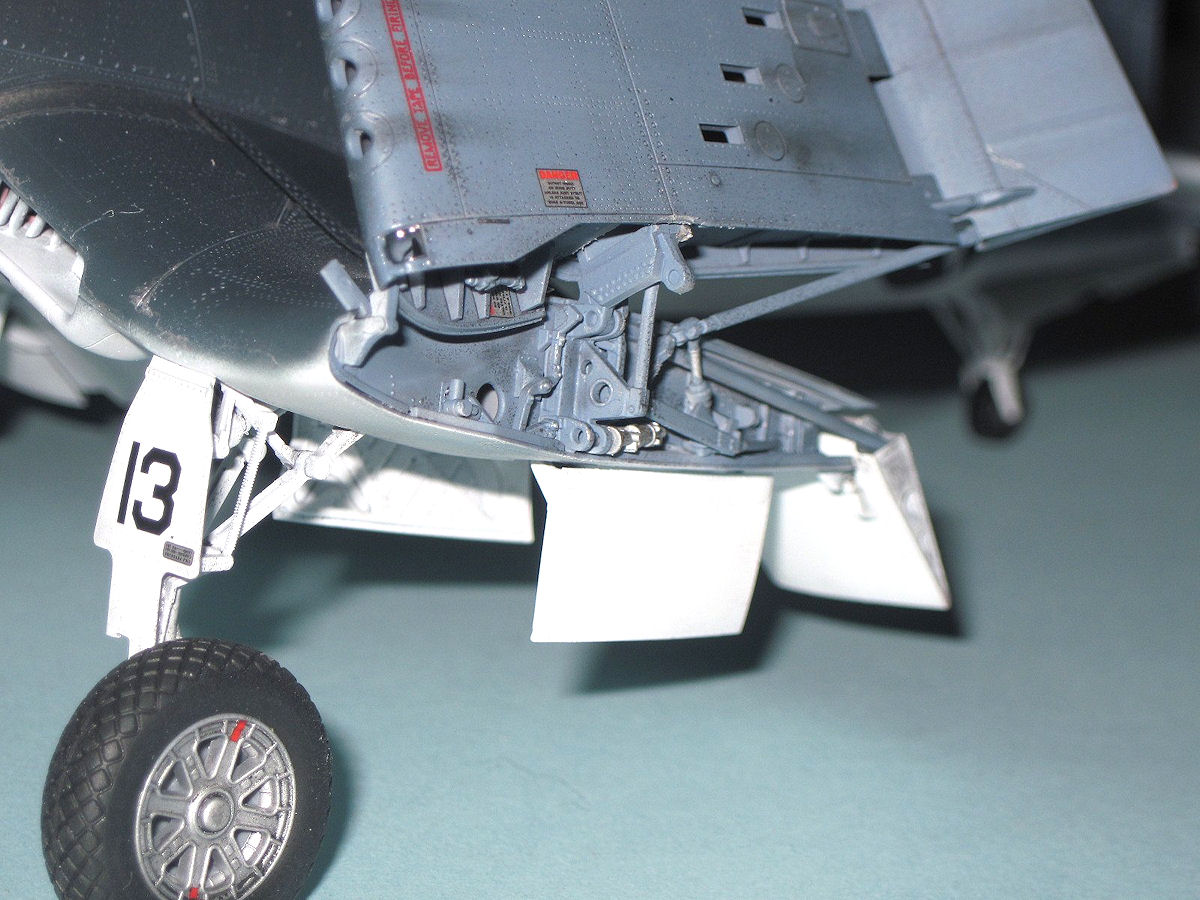
Left wing gear, fold, flaps

Underside

Tail gear and well

Main gear and well - note door actuators

Main gear well

Belly sighting window

Exhaust staining

Underside mid-fuselage

Cockpit 1

Cockpit 2

Cockpit 3

Canopy framing 1

Canopy framing 2

Completed 1

Completed 2

Completed 3

Completed 4

Completed 5

Completed 6

Comments
Add new comment
This site is protected by reCAPTCHA and the Google Privacy Policy and Terms of Service apply.
Similar Reviews