

Bill O'Malley
Reviews By Author

|
Sd.Kfz.234/3 mit 7.5cm KwKPublished:
Dragon’s Sd.Kfz.234/3 is an excellent kit with crisp molding, full interior detail and while complicated, it goes together very well. This new Premium Edition is a reissue of Dragon’s 2007 kit #6257 including new fenders with photoetch storage bin covers & locks, and movable suspension that allows the wheels to be angled for turns. Vehicle BackgroundThe SdKfz 234/3 was the third in a series of heavy armored reconnaissance vehicles produced by Germany during WWII. It had an open-topped superstructure in which a short-barreled 7.5cm L/24 gun was installed. This gun, surplus from the upgrade of older Panzer IV tanks, was intended for use against "soft" targets. Eighty-eight of the 234/3s were produced by Buessing-Nag between June & December of 1944. The… more |

|
Renault FT-17 TSFPublished:
Renault FT-17 TSF BackgroundThis Hauler conversion kit for MENG's 1/35 scale French FT-17 Light Tank (Cast Turret) kit, #TS-008, modifies it into a Renault FT-17 TSF Command Radio version. The Renault Char signal, or TSF (télégraphie sans fil - wireless, in English), is a command tank with a radio. The FT-17 turret was replaced by a box-like superstructure, giving room for a crew of three: driver, radio operator and observer. The vehicle was equipped with a code-only wireless radio, and featured a wire antenna hung between a mast mounted on the superstructure and the vehicle’s tail. They were unarmed, used for coordinating assaults, and keeping contact with high command while deep behind enemy lines. During WWI, 188 TSFs were produced. Kit Contents… more |

|
Von Franco’s Stoned Hoods & CrooksPublished:
BackgroundThis is the second Moebius Models kit based on the monster art of Von Franco, a self-taught American artist associated with the Lowbrow art movement and Kustom Kulture. Von Franco’s skill at drawing hot rod and monster art follows in the art style of Ed “Big Daddy” Roth and Von Dutch. The inspiration for this kit is Von Franco’s caricature monster painting Stoned Hoods & Crooks. The challenge of this kit is not in the build, but in painting the model in the cartoonish style of the box art. If you ever wanted to paint a fluorescent orange model piloted by a lime green monster driver with bloodshot eyes, then this is your kit! Kit ContentsThis kit was released in 2013, and follows a previous Moebius Models artwork-turned-kit version of… more |

|
AEC Mk.II Armoured Car, Part 3 – Turret & Final CompletionPublished:
Part 3 Review – Turret & Final CompletionThis is the third, and final, section in a series of reviews covering the MiniArt AEC Mk. II Armoured Car kit. Previously, Part 1 reviewed the kit contents and assembly of the driver’s compartment and Part 2 reviewed the chassis, engine, and exterior. This review covers construction of the turret and final completion of the model. Thanks to Model Rectifier Corporation (MRC) for their generosity in providing the review sample of this kit and for their continued support of the IPMS review program. IntroductionThis is an excellent, highly detailed kit. The molding is very crisp with great detail, and the fit is excellent. There are a few difficult areas that will make the kit challenging for less experienced… more |

|
Diorama with Brick WallPublished:
This kit is one of MiniArt’s Diorama Series and includes a damaged brick wall section cobblestone street, and streetlight. The kit comes boxed with parts in a plastic bag. Kit contains three vacuum formed pieces for the wall sections, wall cap and base. The kit also includes one molded plastic sprue for the streetlight fixture. The base section has cobblestone pavers, piles of rubble, and rubble behind the wall. The cobblestone base has a worn vehicle track at an angle across the front. The wall is set at a slight angle and the base appears to have enough space for one 1/35 scale vehicle plus a few accessories. All of the vacuformed pieces have small dimples from the forming process that will need to be scraped off. A MicroMark chisel or a chisel-pointed X-Acto blade works well… more |

|
IL-2 Shturmovik Gun Barrels & Pitot TubePublished:
This is another fine set of replacement details form Quickboost, this set for the Tamiya 1/72 Ilyshin IL-2 Shturmovik. The details include replacement gun barrels and pitot tube. The Tamiya kit details are nice, but the Quickboost details are more refined and have no flash. The gun barrels and pitot tube are thinner than the Tamiya parts and don’t require any cleanup other than removal from the casting block. The Quickboost details will add nicely refined detail to the Tamiya kit and are a great value for a low price. Thanks to Quickboost for their continued support of the IPMS review program and for providing the review sample. Thanks also to the great IPMS review staff for letting me review the details. |

|
BMW R69 Motorcycle year 1956Published:
This is a resin kit of a 1956 vintage BMW motorcycle in 1/87 scale (HO train scale). Kit comes in 22 gray resin pieces and two photoetch pieces. The frame pieces E & F are cast within a casting ring completely surrounded by flash. Hauler suggests an interesting method to remove the flash by placing the parts on a piece of sandpaper and sanding off the flash. It worked pretty well and left the very delicate parts fairly clean without breakage. Some of the flashing around the parts is fairly thick considering how small the parts are. The front and rear tires use imaginary spokes as the hubs hang in the middle of the wheel. There are two photoetch handlebar pieces supplied so I assume they needed to be glued together and that’s what I did. The kit goes together… more |
|
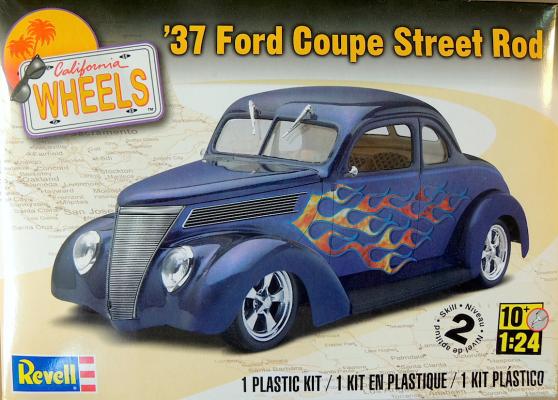
’37 Ford Coupe Street RodPublished:
IntroductionThis is one of the all time great car designs with smooth lines and the free-flowing curves of the fenders. This classic has always been popular with hot rodders. The Revell kit of the ’37 coupe has been issued and re-issued many times, and this is the latest version. This version seems to be mostly a repackaging, as most of the parts and options were available in previous releases. The kit is showing it’s age with soft detailing, some fit issues, and a completely confusing front suspension. In spite of the shortcomings the kit still builds into a nice hot rod model. The kit would be frustrating for an inexperienced modeler and would be better suited to an avid car modeler. Kit ContentsRevell’s description:
|
|
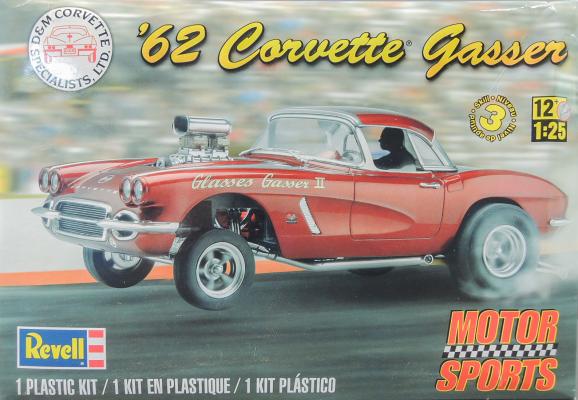
’62 Corvette GasserPublished:
This is a nice kit and a fun build. This kit is the second version of the ’62 Corvette released by Revell, following the 2012 release of the ’62 Corvette Roadster 2’n1 kit. The ’62 Gasser kit is for skill level III and ages 12+. The kit did not seem that difficult, and I think it would be fun for even advanced beginners. BackgroundThe Gasser kit recreates the ’62 Corvette converted by D&M Corvette Specialists into a street gasser with a blown small block Chevy engine. The original car’s body is nearly stock, and is replicated in the kit by the same stock body used in the Revell ’62 Roadster. The instructions and decals have a 2013 copyright. The underside of the floor pan/interior has a 2012 copyright and is likely the same as the earlier ’62 Roadster kit… more |

|
42 CM "Big Bertha" and German Siege Artillery of World War IPublished:
IntroductionFrom Osprey’s website:
|