
AEC Mk.II Armoured Car – Contents & Interior - Part 1
Part 1 Review – Kit Contents & Interior Assembly
This is the first of a series of reviews of the MiniArt AEC Mk. II Armoured Car kit. Model Rectifier Corporation (MRC) has generously provided the review sample to IPMS. This part reviews the kit contents and assembly of the driver’s compartment. Subsequent parts will include the engine, chassis, exterior, and turret.
Background
The AEC Armoured Cars are a series of heavy armored cars built by the Associated Equipment Company (AEC) during the Second World War. The first example, Mk. I, was demonstrated in early 1941 and an order was placed in June of that year.
The Mk. I version carried a Valentine Mk II turret with 2-pounder gun. Vehicles of later variant designs carried heavier armament. The Mk II version has a heavier turret with a 6-pounder gun, redesigned front hull, and 158 h.p. diesel engine. The weight of the Mk II is 12.0 tons.
Mk II and Mk III armored cars were used on continental Europe. Production of all the AEC Armoured Car marks ceased after 629 had been produced. The Mk II / Mk III took part in the fighting in Europe with British and British Indian Army units. In 1944 a batch of AEC Armoured Cars was send into Yugoslavia for use by partisans. After WWII, AECs were in use by some countries up to the 1970s.
MiniArt also makes a kit of the Mk. I Armoured Car, kit #35152, and a Mk. III version, kit #35159.
Kit Contents
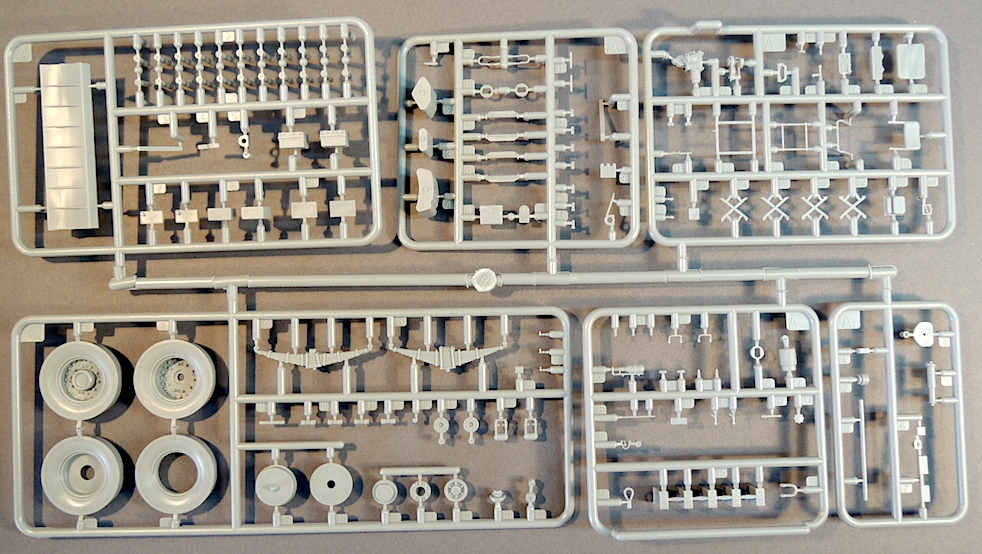
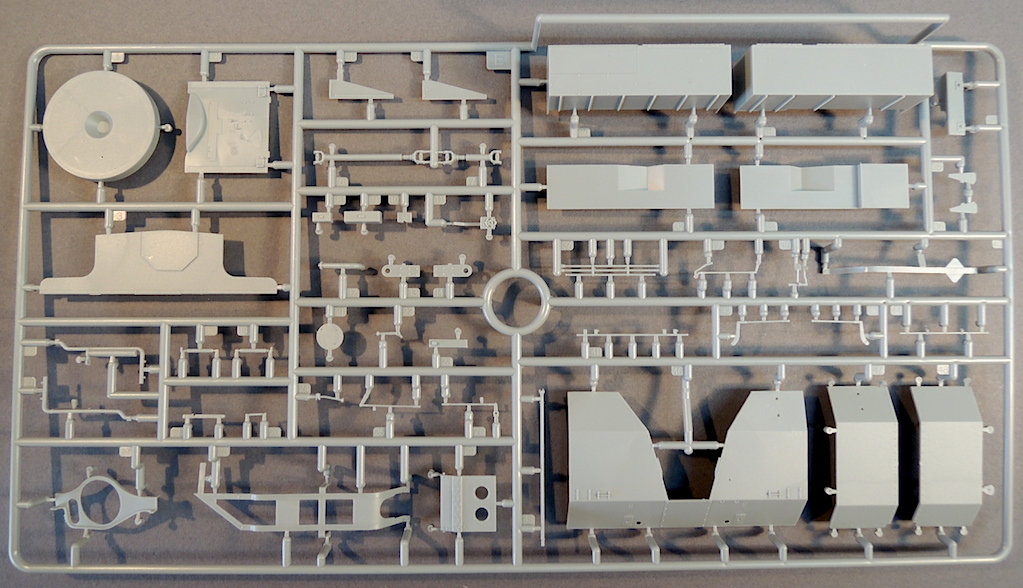
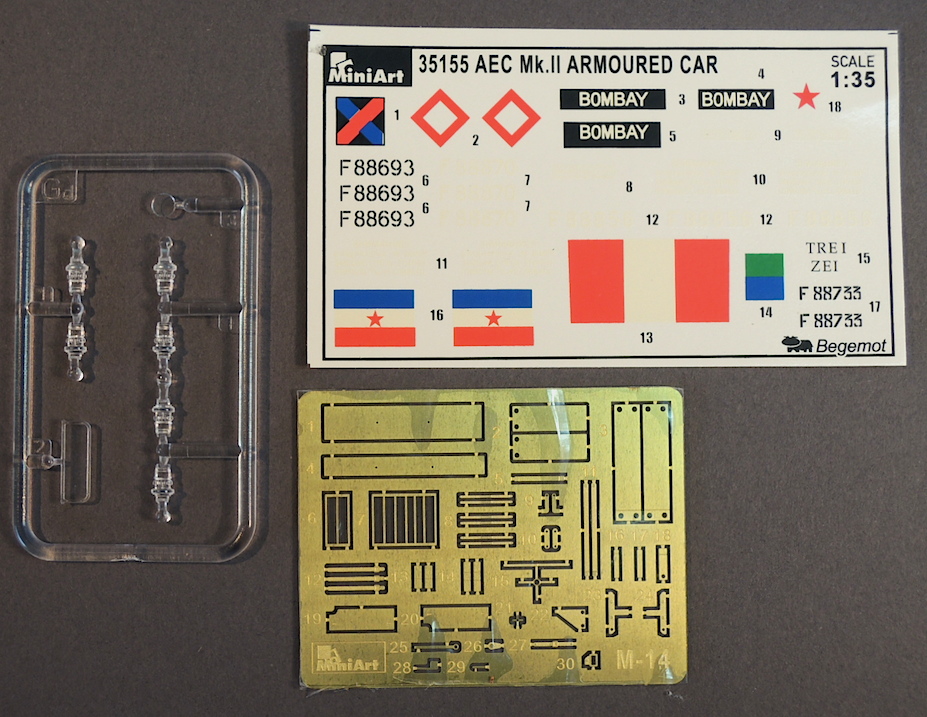
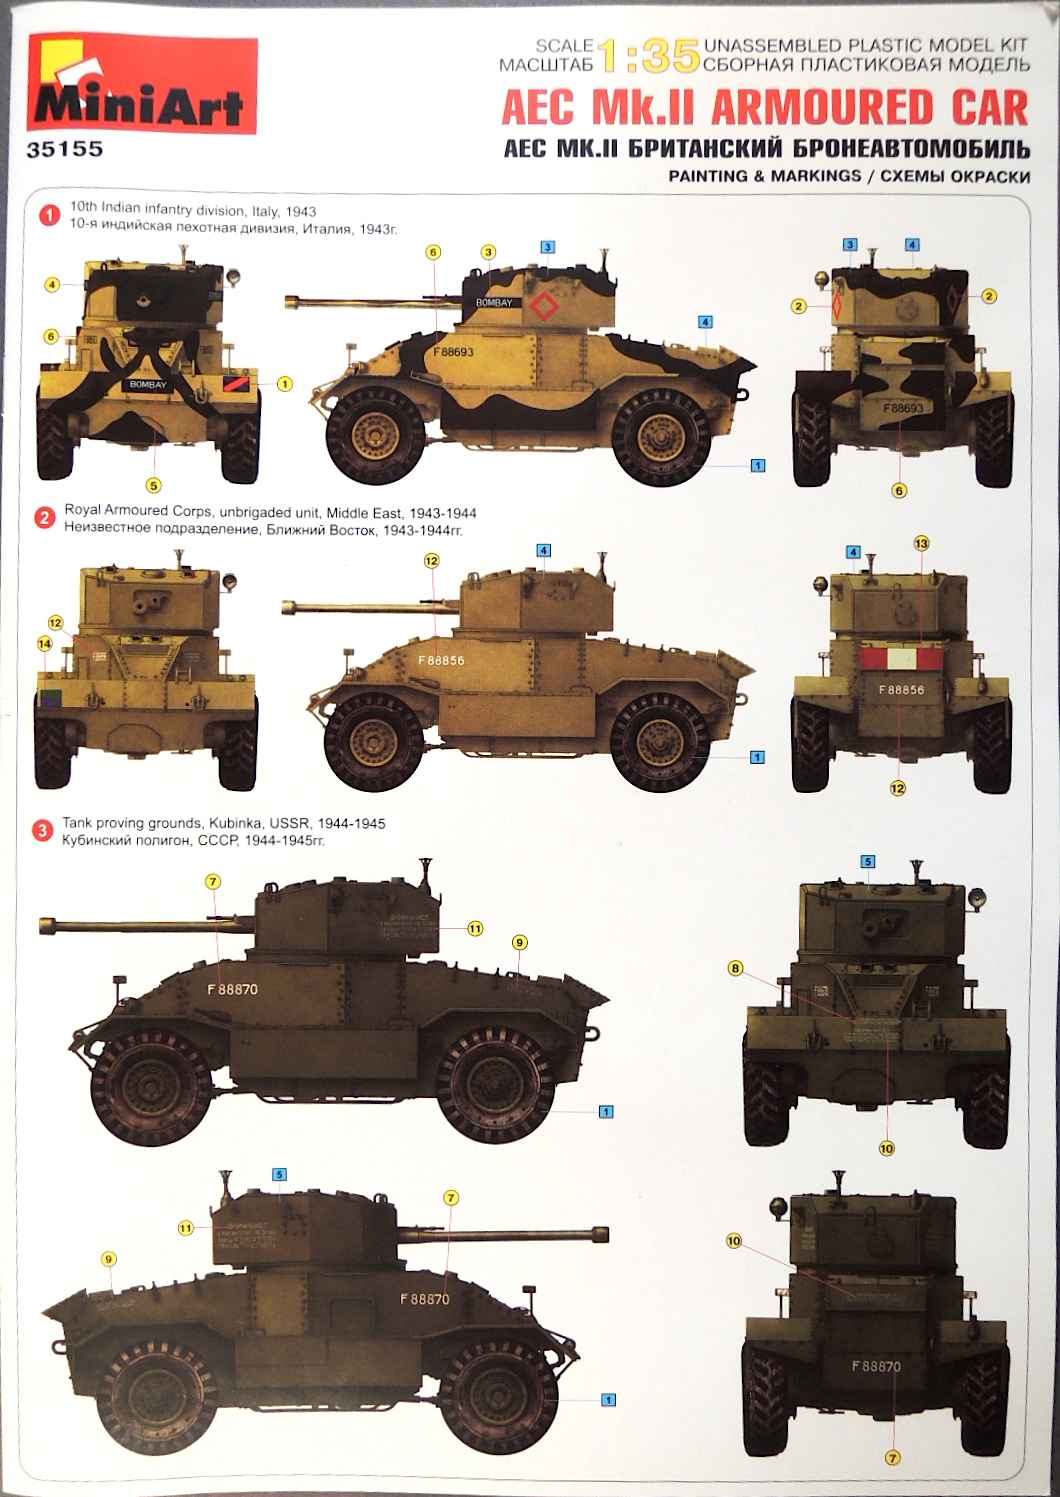
The MiniArt Mk. II kit comes on six large gray plastic sprues, one sprue of clear parts, one sheet of photoetch details, decal sheet, four tires, and illustration booklet. The illustration booklet is 15 pages and 78 steps, plus four paint and marking schemes.
Description from MiniArt’s website:
- 487 plastic parts
- 44 PE parts
- Decals are included
- Full-color instruction
- All New Tooling
- Fully detailed interior
- Highly detailed engine compartment
- Engine is accurately represented
- Fighting compartment is truly reproduced
- Crews vision periscopes with clear plastic parts
- Driving compartment interior is fully detailed and correctly done
- All doors and hatches can be assembled open or closed
- Slide-molded tires made in one plastic part
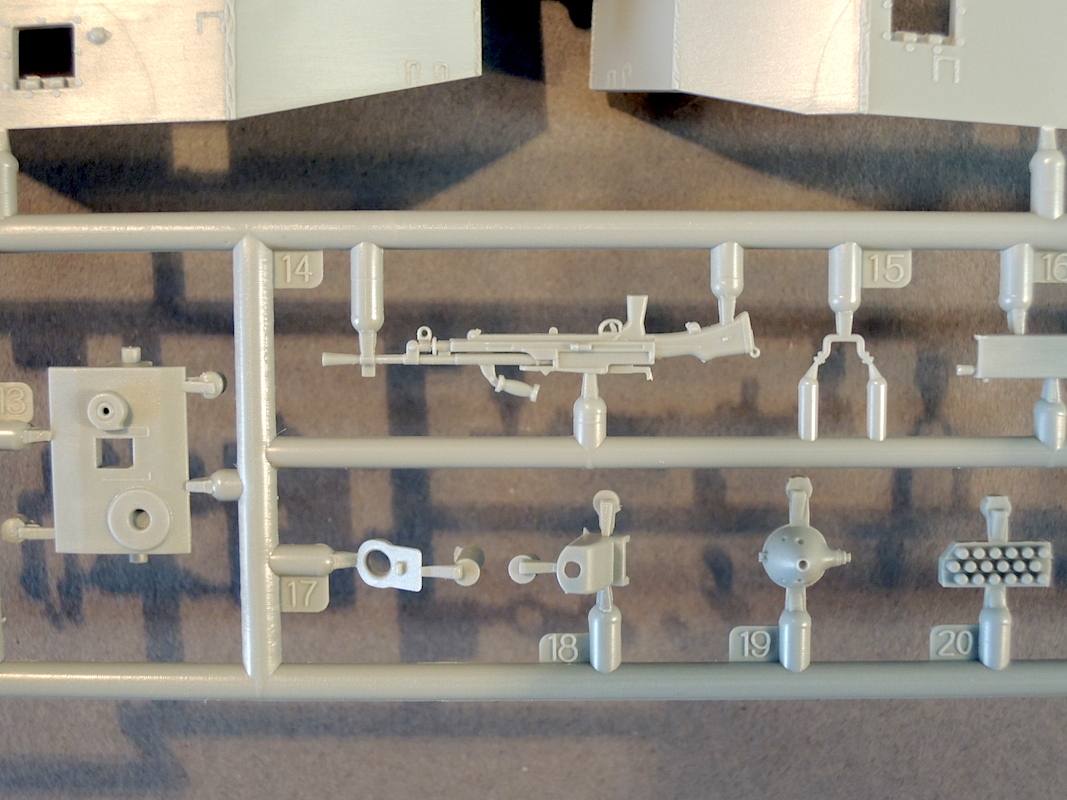
The plastic parts are molded in a gray plastic that’s fairly hard. Examining the sprues indicates lots of small parts, very fine detail, very little flash, and few ejection pins. The hard plastic resulted in breakage of many small parts while removing them from the sprues. The photoetch is wrapped in a clingy vinyl, which helps prevent the parts from disappearing as they are cut off.
The instructions appear quite clear on first look and the color schemes are nicely rendered. The instructions show the kit to have fine detail including a highly detailed interior.
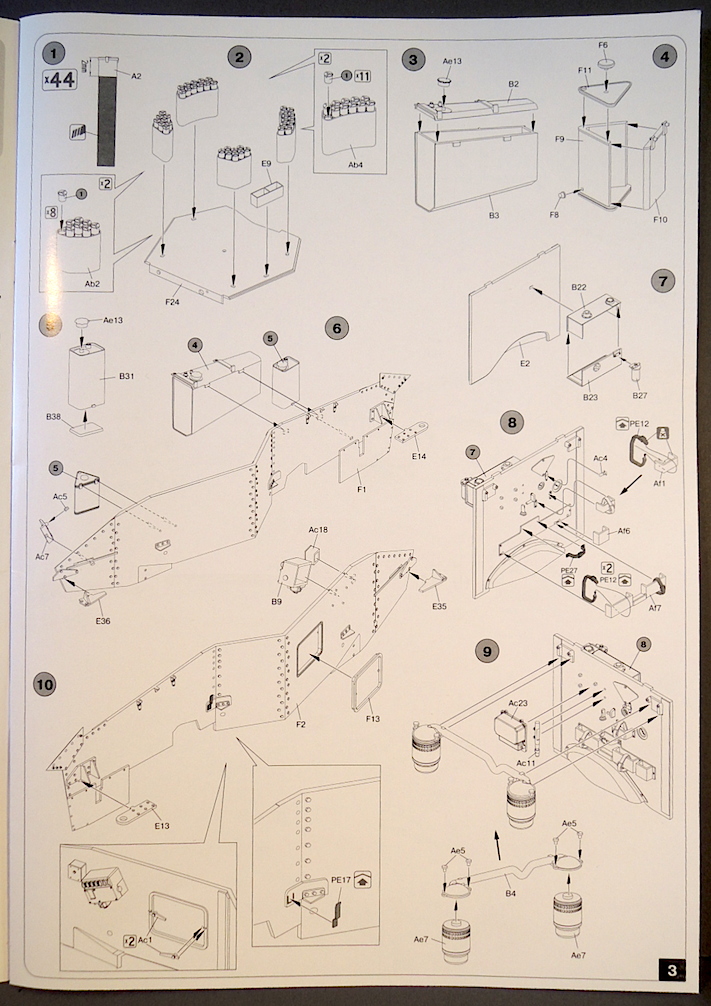
Assembly begins with the interior of the driver’s compartment, then to the engine & chassis, exterior of the car, and finally the turret.
Interior Assembly
Step number one requires cutting 44 gun shells to 2 millimeters long. It would've been easier if MiniArt molded the sections to 2 mm, saving the work cutting them off. Another alternative would be to have deeper holes in the holders so that the shells can slip in. This would simplify the alignment of the shells so they are vertical. Using a razor blade chopper simplified the cutting of the shells. The assembly of the shells and holders add nice detail to the interior of the gun compartment.
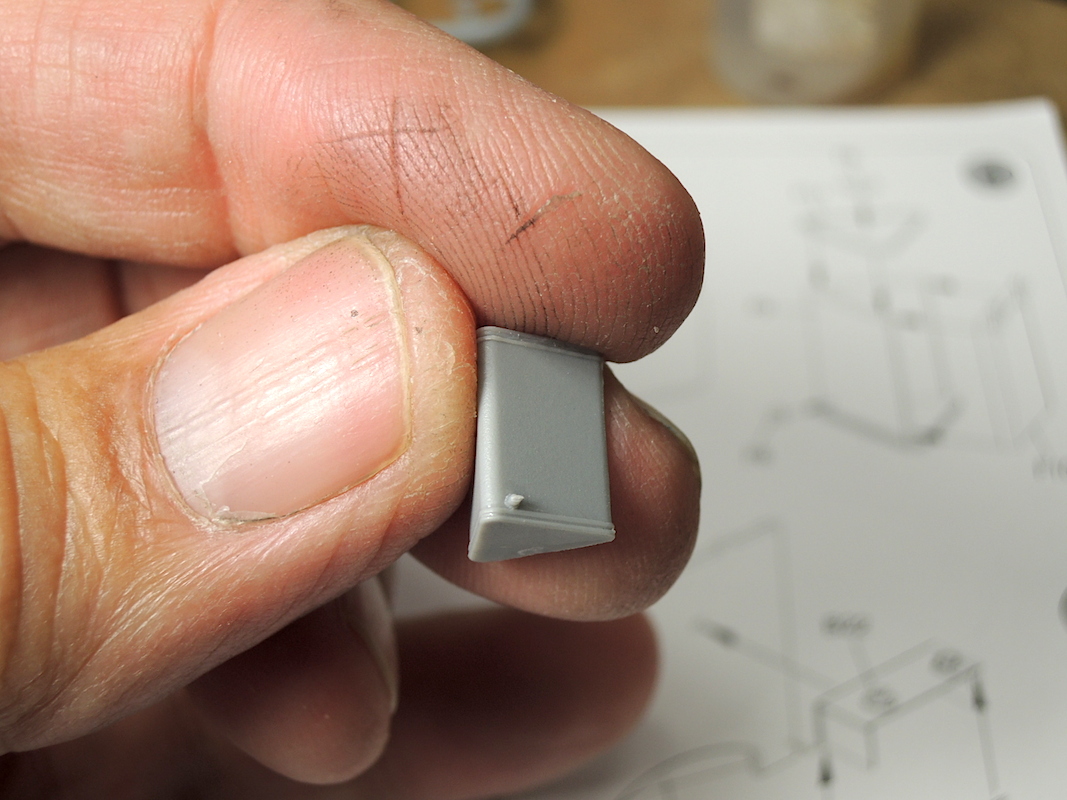
In step four, part F8 is so small I thought it had broken off the sprue. Looking at the sprue under a magnifying glass revealed the tiny part at the end of the sprue attachment. I clipped off some of the sprue attachment with the part so there was something to hold onto, glued the whole thing to part F9, then cut off the remaining sprue from part F8. It seems like this part could have been molded as part of the larger tank without any loss of detail.
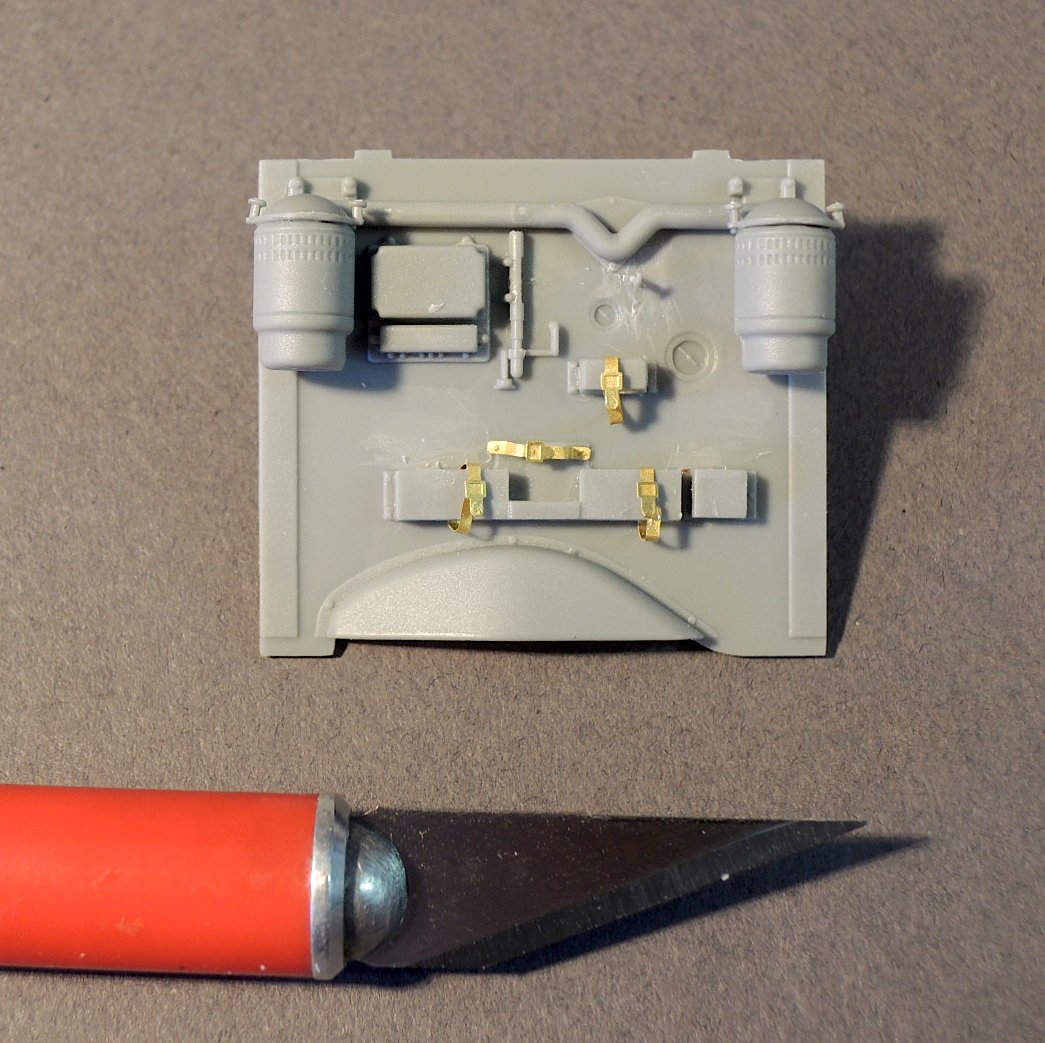
Step 8 includes the installation of photoetch parts for equipment straps. The photoetch is nicely protected with self-adhesive poly film on each side of the photoetch. I found that it was easier to install the plastic bins, parts Af7and Af1, then slip in the photoetch straps.
Step 9
Parts A5 are more tiny bolts to install. Again I left the sprue connection attached until they were glued in place and then snipped off the sprue just above the bolt head.
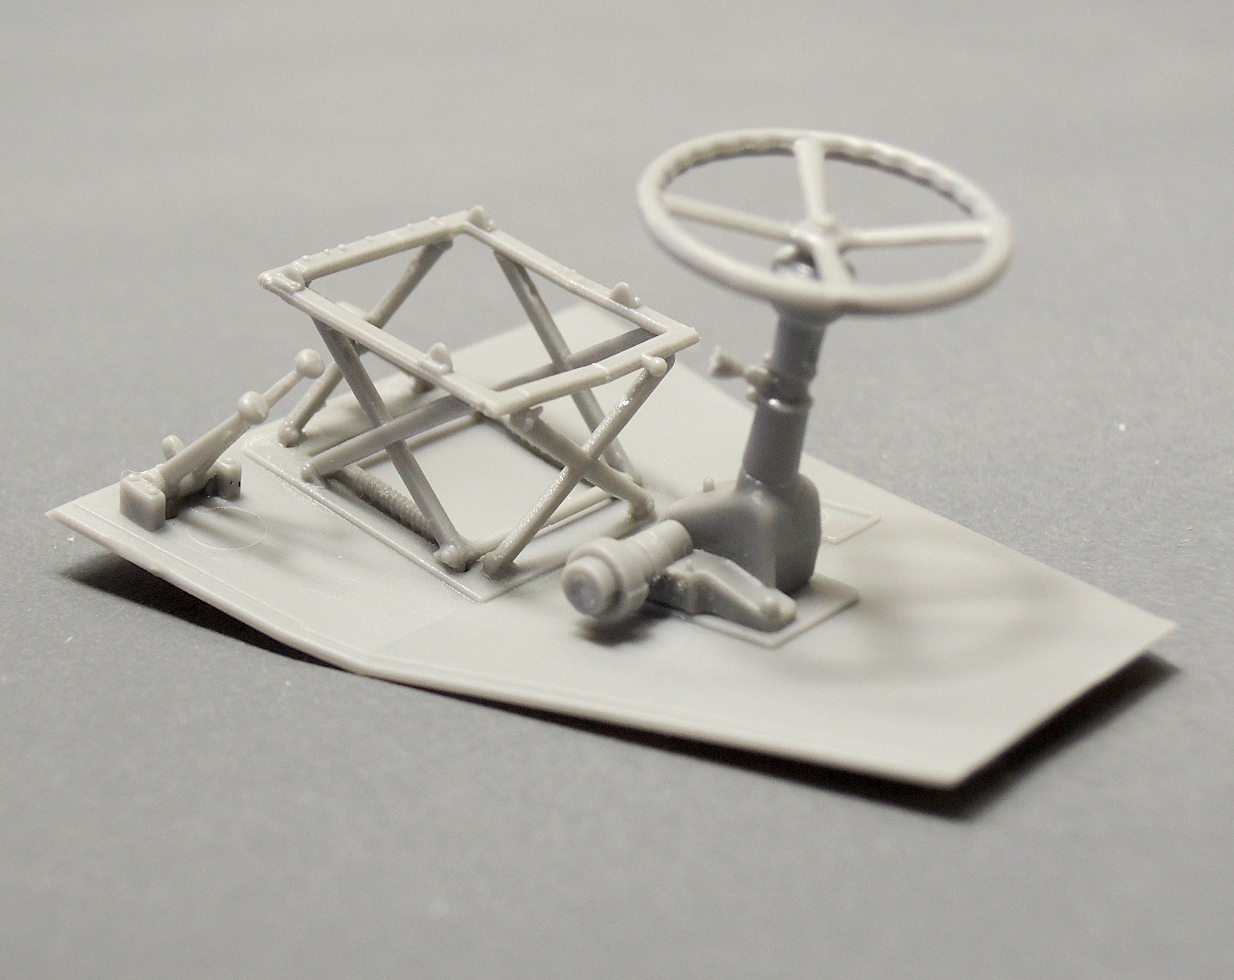
Step 9 thru 12
Assembly of the frame for the driver seat is very difficult. The frame parts are finely cast, but I broke several of them in multiple pieces getting them off the sprue. It's also difficult to get all of the parts aligned properly. It does end up being a nice assembly when complete.
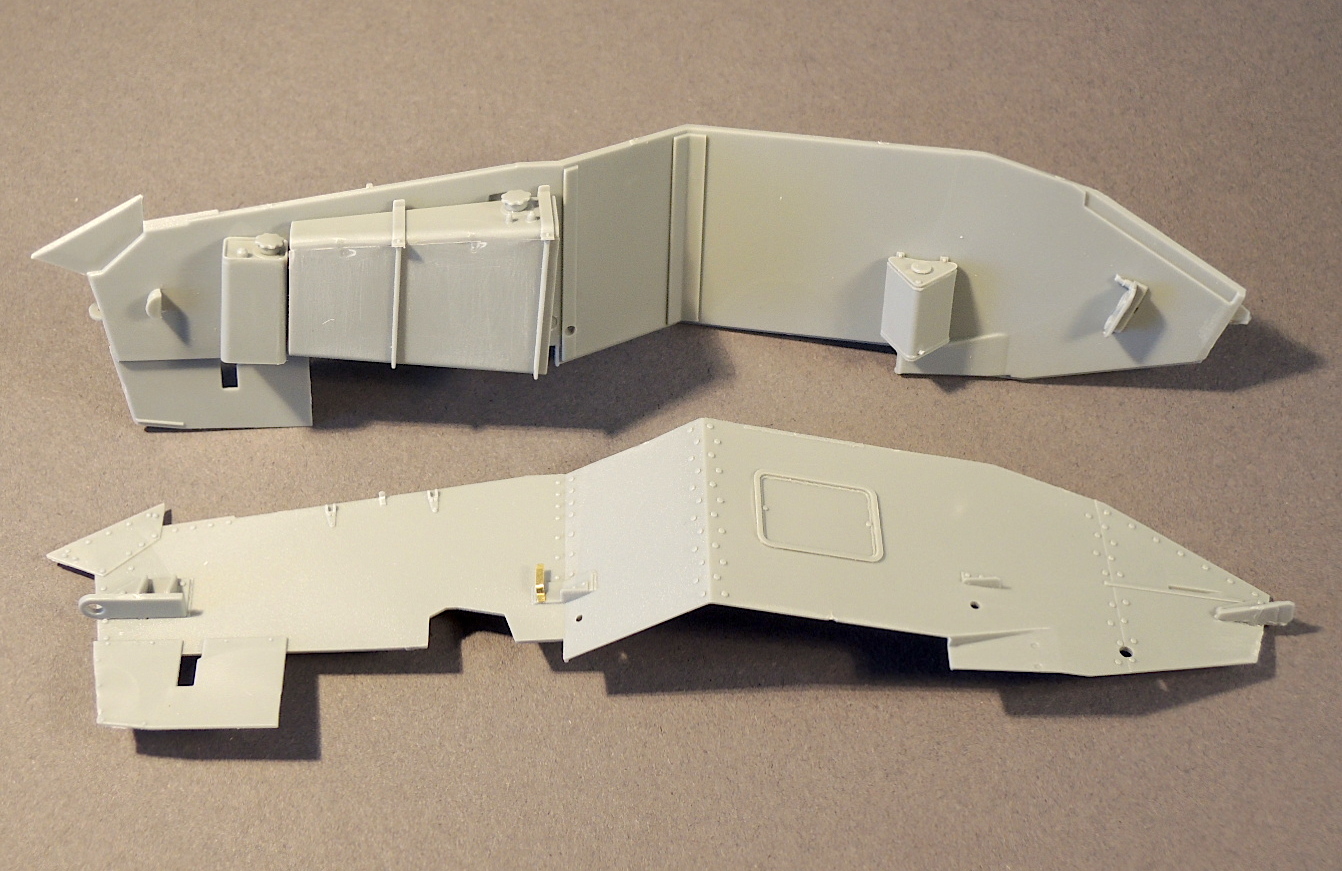
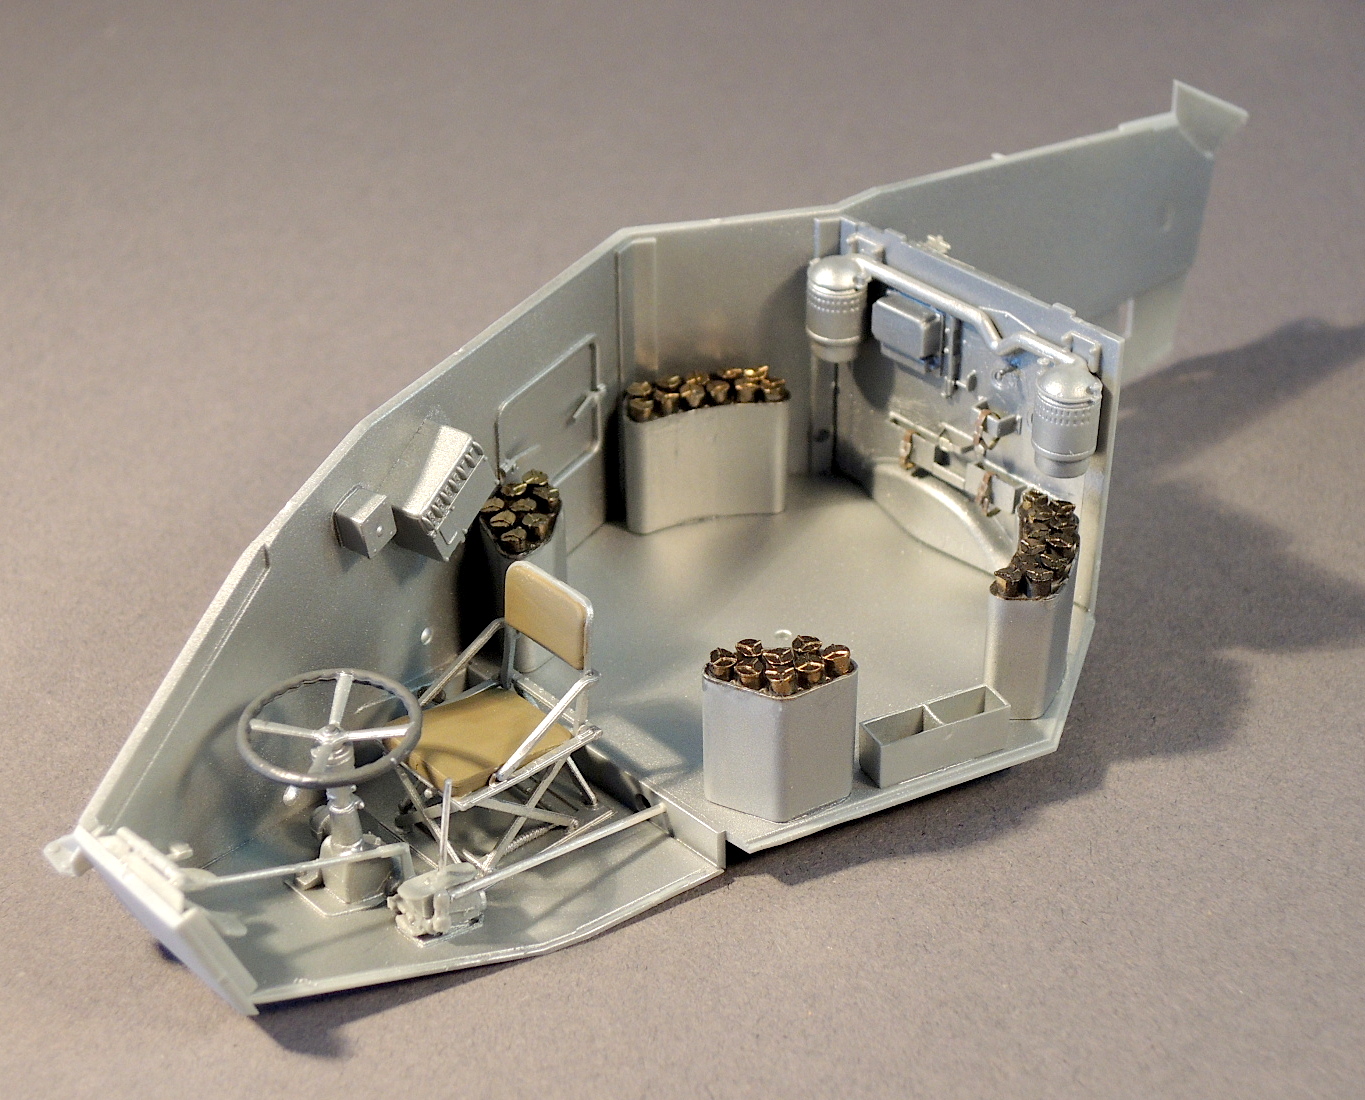
Step 13 is the assembly of the right side of the interior compartment. I pre-painted the shells and holder using Alclad brass for the shells. The instructions call out black for the shells but I thought brass would be more interesting.
I want to display the nicely detailed interior through open hatches so it will be necessary to paint the interior before it’s enclosed by the body. I pre-painted the rear bulkhead of the interior compartment and the leather straps. Step number 14 includes some thin parts. I broke the shift lever B24 getting it off the sprue and had to repair it with plastic rod.
I painted the rest of the interior before installing the left side of the car. References indicate a natural steel finish for the interior of the car so I used ModelMaster stainless steel buffing metalizer.
Step 15 installs the left side of the body and completes assembly of the interior compartment. Part B28, the transmission linkage, ended up being too short. I replaced the link with a piece of plastic rod to reach the step in the floor.
This is a very nice, highly detailed kit. Less experienced modelers might get frustrated with the complex build, but with patience it goes together well. More experienced modelers will enjoy the great detail in this kit and also appreciate the nicely engineered assembly.
So far the kit is highly recommended for those wanting to assemble a highly detailed model. Thanks to MiniArt for a great kit and to MRC for providing the review sample.
The next part is the engine and chassis.


Comments
Interior of AEC MK11
Hello there, I Boughton a few wks ago to build, it will be a while before I build it though,, they said it was a good starter kit for interior builds, let's hope so, do you have any pictures of the vehicle interior finished and painted, if pos
Thanks
Stephen
Add new comment
This site is protected by reCAPTCHA and the Google Privacy Policy and Terms of Service apply.
Similar Reviews