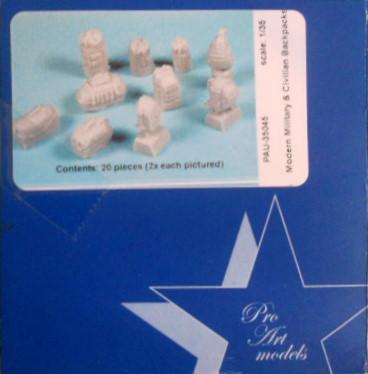
Pro Art Models has come up with another idea for filling a simple niche with respect for modelers who build dioramas or need items to use as stowage on military and/or civilian models. This time Pro Art Models have put together 1/35 scale resin backpacks for military and civilian use. The detail is so precise that you almost can’t wait to paint them just to see how real they’re going to look. There are 10 different white resin pieces, of which there are two each (total of twenty pieces), with half being military and the other half being civilian. Even in close inspection, I could not find any apparent bubbles or flaws. Pro Art has positioned them on their resin stubs so as not to cut off any major details which would affect the detail of each piece. The handles, belts, buckles, and zippers can be seen so vividly that it seems to be almost real.
Reviews
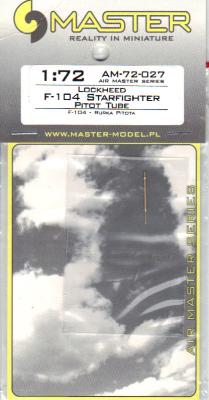
Master Model out of Poland has released a number of pitot tubes turned from brass. This 1/72nd F-104 pitot tube is similar to other Master Models pitot tubes in that it is turned brass and is a simple replacement for the kit part. For this review, I compared the Master Model’s pitot tube with the pitot tube from the Hasegawa F-104G. The Master Model pitot tube has a lot more finesse than the kit part, and it also looks a lot better than what the kit provides. That being said, the fit is a little loose. You can either use a little CA to solve this issue, or you can fill in the kit nose and drill out a new locating hole.
This brass pitot tube is a welcomed addition to any 1/72nd F-104 kit. It is a simple replacement to the kit part but provides a huge improvement in detail over the kit part. If you are planning on building an F-104, I highly recommend you pick up one of the Master Model pitot tubes; you won’t be disappointed.
I’ve always liked to let the pictures tell the story, but in this case, they can’t show you what a spectacular fit everything is in this kit. I must give them an A+ for pre-planning and engineering here. Every piece just click fits into where it was supposed to without issue, with only one exception.
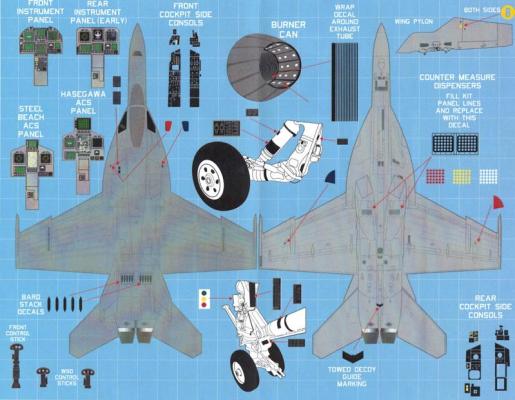
This set of “upgrade” decals is another product by Afterburner in a long line of high-quality decal sets. Designed for the Hasegawa F-18 Super Hornet, this Upgrade Set provides well over 100 markings, stencils, instrument panel faces, restraint harnesses, and even red landing gear door edge markings for the awesome Hasegawa Super Hornet.
This set of decals easily achieves all of the standards for high quality decals. The decals do not allow for underlying colors to bleed through after application. Registry is dead on, and the decal proportions are correct and proper. There is very little carrier film that will need to be trimmed away. The sample taken from the sheet indicated that the decals are strong enough to withstand some handling during the application process, and yet thin enough to adhere to any raised or engraved detail upon which the decal is placed. The sample was treated with SolvaSet and did not show any sign of a negative reaction.
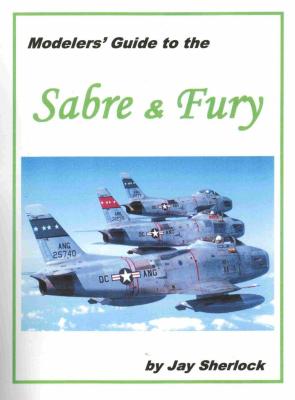
New from Aero Research comes another in the “Modelers Guide” Series, and this time it’s the Sabre and Fury that undergo Jay Sherlock’s microscope. Soft cover (spiral bound) with 152 pages of tech data, kit reviews in all scales, model changes and options that include explanations on the various wing changes to Sabres and Furies. There are also numerous photographs, both in color and black and white, included. This is followed by a breakdown on the various aircraft themselves, beginning with the XP-86 and plowing through the 29 Sabre models and 7 of the Furies. With each aircraft, there is an explanation as to what the differences are for each one. The final chapters deal with serial # lists, operating units, surviving aircraft and finally references.
The Squadron
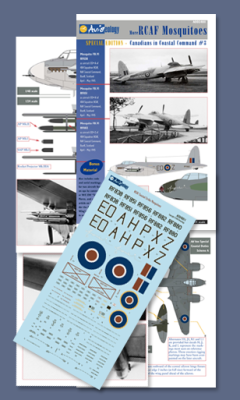
The Mosquito was flown by 100 RAF, four RAAF, two USAAF and one RCAF squadrons, plus 45 other units. The RCAF unit was the 418 "City of Edmonton" Squadron
This squadron was formed at Debden on 15 November 1941 in the night intruder role, equipped with Bostons. However, work up was slow and it was early spring 1942 before the squadron was fully operational, flying its first mission on March 26th.
As well as flying the standard Boston, it also used examples armed with a solid nose mounting 20mm cannons which proved to be quite effective in the night fighter role. In May 1943, the squadron converted to Mosquito VIs and, on 15 September, 1943, performed in the escort fighter role to a force of Lancasters from No 617 Squadron attacking the Dortmund-Elms Canal.
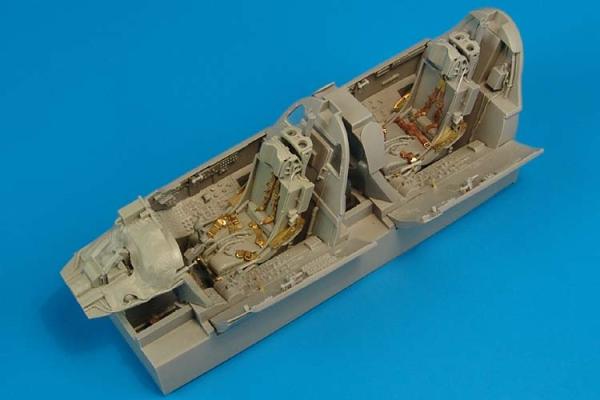
Designed for the Trumpeter/Hobbycraft 1/32 F-105G is Aires’ new cockpit set, which is comprised of 33 gray resin, one clear resin and almost 100 photoetch parts. Casting is flawless, which is normal for Aires. The photoetch has nice relief.
I sanded the cockpit and sidewalls down and test fit them in the Trumpeter kit. The fit is good and not much thinning will be needed. You will need to sand the pour area off of the bottom of the cockpit. The test fit did show that the back of the cockpit interferes with the bomb bay in the kit. This was easily remedied by cutting the back bottom portion off of the kit at an angle and the fit tightened right up. The sidewalls required a slight trimming but fit tight and looked great.
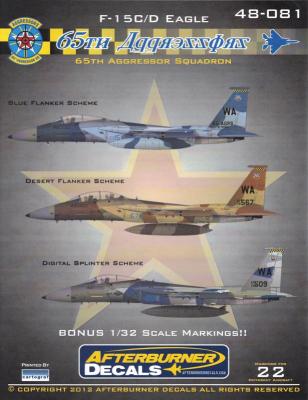
In a single word, “Wow”! This set of decals is recommended for the Hasegawa F-15C/D in 1/48th scale and can be used on the Academy kits as well. Afterburner also points out that the package includes markings that can be used on the Tamiya 32nd scale F-15.
The product package includes three sheets of decals, one sheet being rather small and including three decals of the 57th Fighter Wing logo. The remaining sheets contain markings, stenciling, and other markings that one may choose from.
Markings are provided for the very unique Digital Splinter Scheme, the Blue Flanker Scheme and the Desert Flanker Scheme. Additionally, included within the Desert Flanker Scheme, there are markings for aircraft flown in 2006, 2007, 2008, 2009, and 2012. Blue Flanker markings include aircraft flown in 2006, 2007, 2008, 2009, and 2012.
Decals, in order to be of “high quality,” must possess certain characteristics.
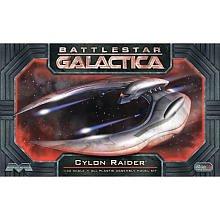
If you are as old as I, you remember the original Battlestar Gallactica series with Lorne Green and Dirk Benedict. Well, when the Sci-Fi Channel reimagined the Battlestar Gallactica series, there were some changes that upset some potential fans, myself included. One was that Starbuck, Benedict’s character, was now a woman and that was just the beginning. I didn’t watch the series when it first came out and now I regret it. I’ve since bought the series on DVD and have taken a liking to it. If you can just forget the old series, and it is easy to do, then you will absolutely love the new series.
Big Cutlass… Part Deux
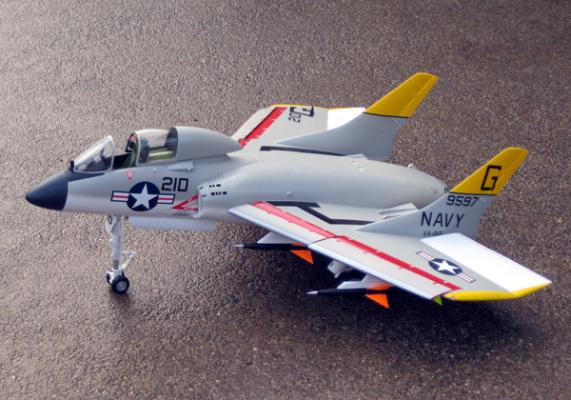
Well, shiver my swashes and buckle my timbers…at last. The finishing touches have been applied to this magnificent beastie! The stance of the aircraft can be referred to as a cross between a praying mantis and a Great Dane passing a peachpit. In any case, this has to be one of the most unique carrier aircraft ever produced. Although not the most popular among pilots, I recall reading a pilot report in Tail Hook magazine where comments ranged from concern over a hard landing which would drive the nose gear up through the cockpit floor “doing horrible things to the pilot” to attempts to keep the fuel load in trim being much akin to “sitting on a basketball.” Oh, well, I digress, so on to the build.

