
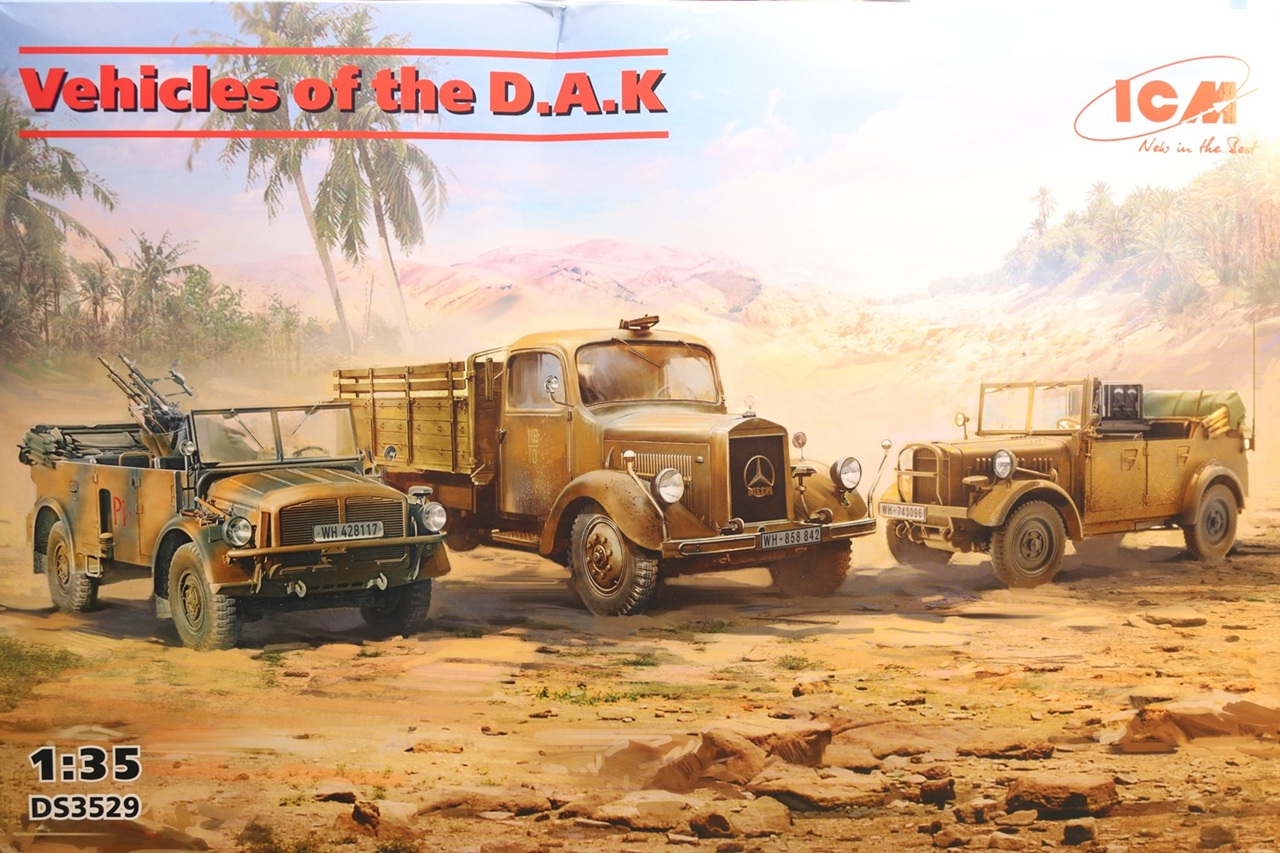
Vehicles of the D.A.K.
ICM’s “Vehicles of the D.A.K.” kit includes three 1/35th scale German truck kits:
- S.E.Pkw. Kfz.70 with Zwillingssockel 36 (anti-aircraft truck)
- Le.gl.Einheits-Pkw (Kfz.2) (radio car)
- Typ L3000S (cargo truck)
All three kits have been issued previously in various boxings. The Kfz.70 was first released in 2015 and a version including the AA guns was released in 2023. The Kfz.2 was first issued in 2018, a version with the radio parts was released in 2019. The cargo truck was first issued in 2017.
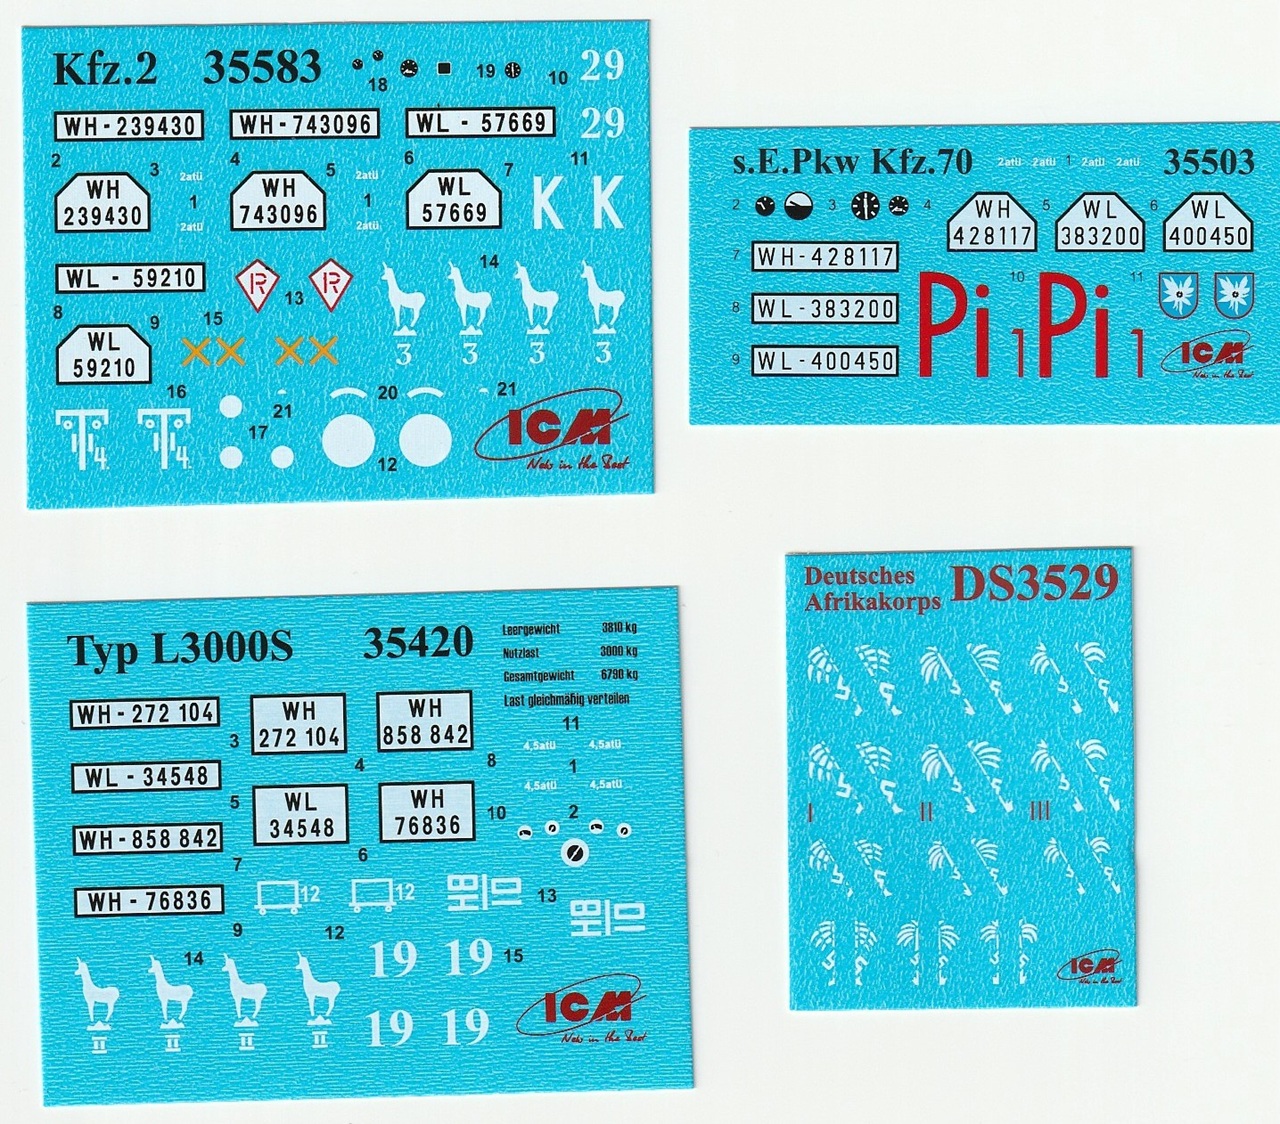
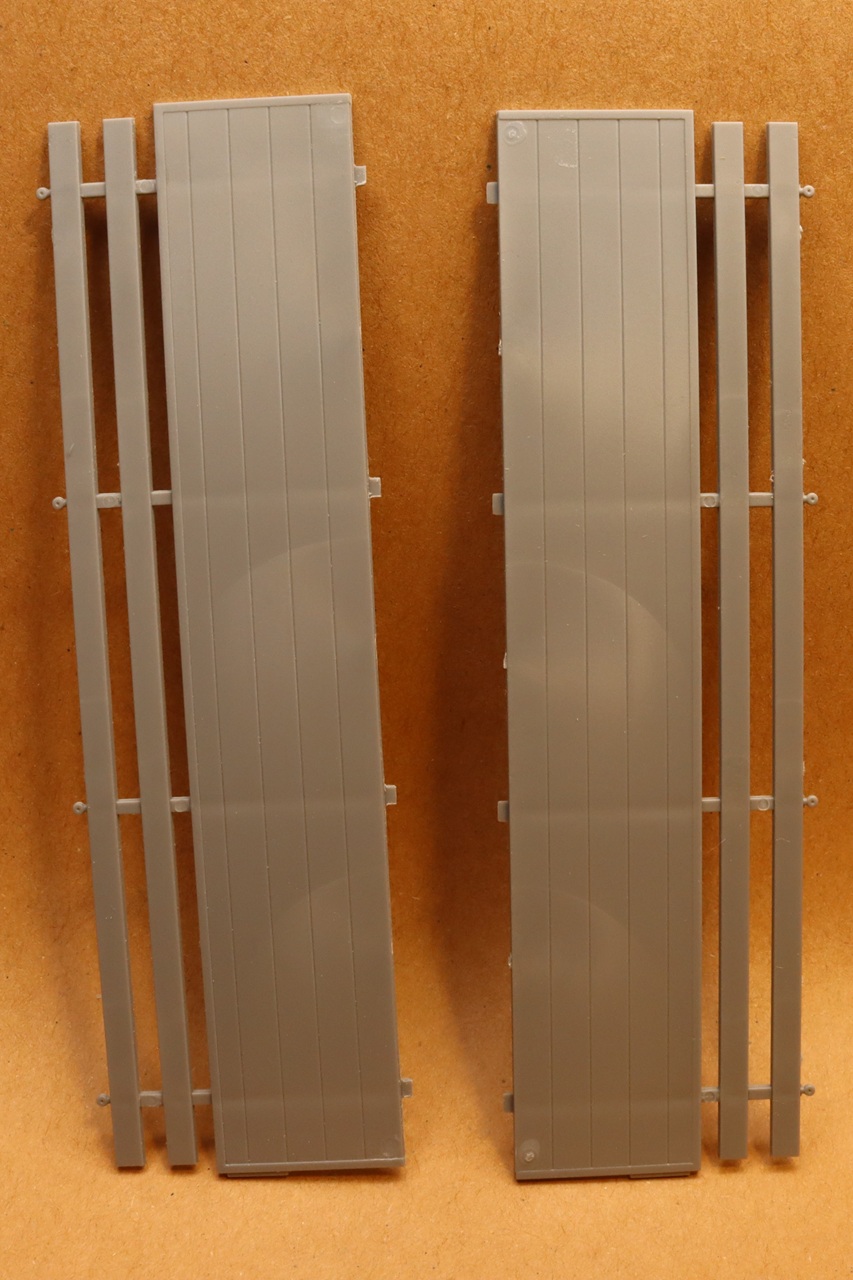
Depending on where you buy your kits, getting this boxing will get you three kits for about the same cost as any two of them separately. The three kits come packed together in a sturdy plain cardboard box with the box-art printed on a thin cardboard lid. Each kit’s parts are individually bagged. Clear parts are included in smaller bags to protect them from scratches. Each kit has it’s own instruction book and decal sheet. The instruction books are clearly illustrated and easy to follow. Color callouts are keyed to Revell and Tamiya paints for the cargo truck and radio car and to ICM’s brand of paints for the anti-aircraft truck. The painting and decal placement guides are printed in color. There are decals provided for the Afrika Corps emblems of swastikas on palm trees. These decals are split in half so that the swastikas are not intact. These decals are not mentioned in the instructions so you will need to research references to place them. With three kits packed together there is not much extra room in the box. My box was a little squashed when I received it and some of the parts were bent during shipment.
Although the kit is labeled “Vehicles of the D.A.K.” painting and marking options are also provided for other theaters.
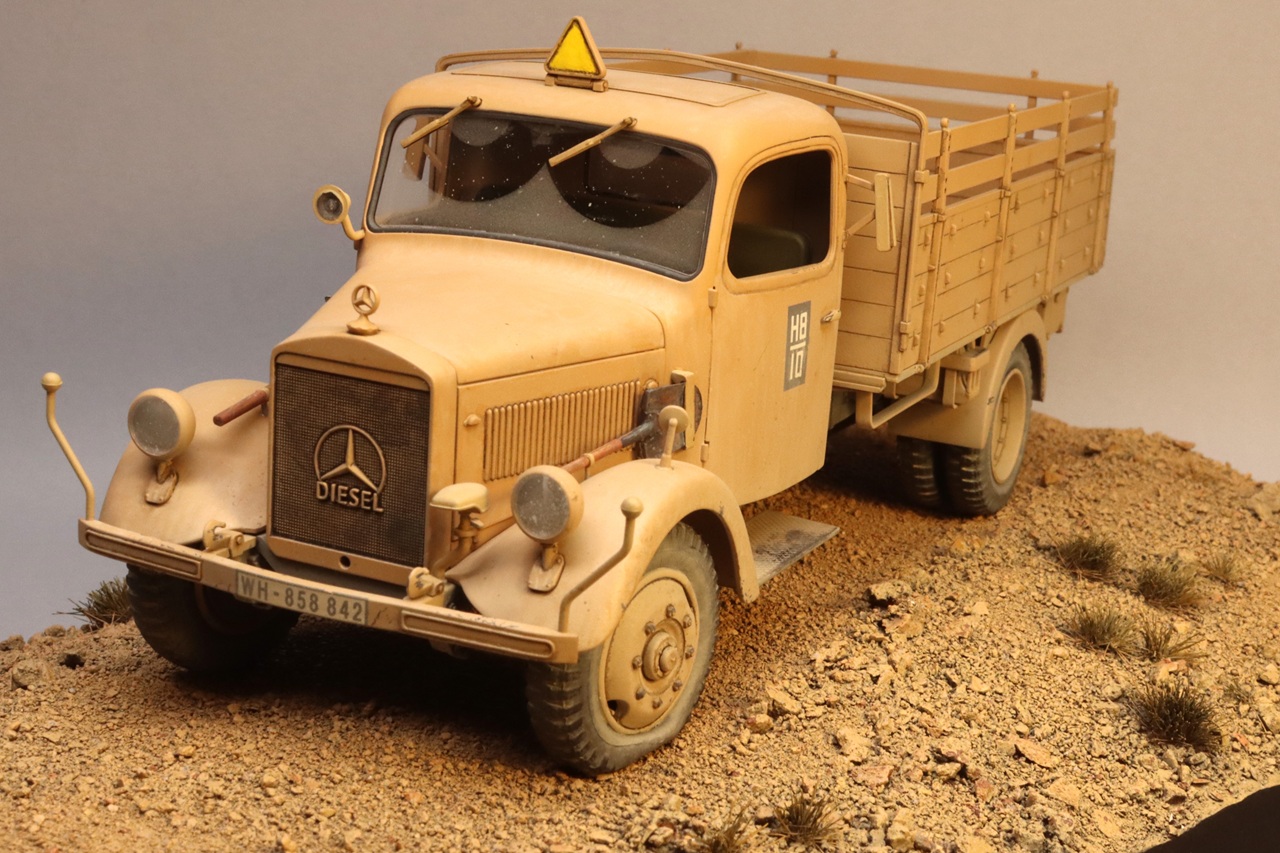
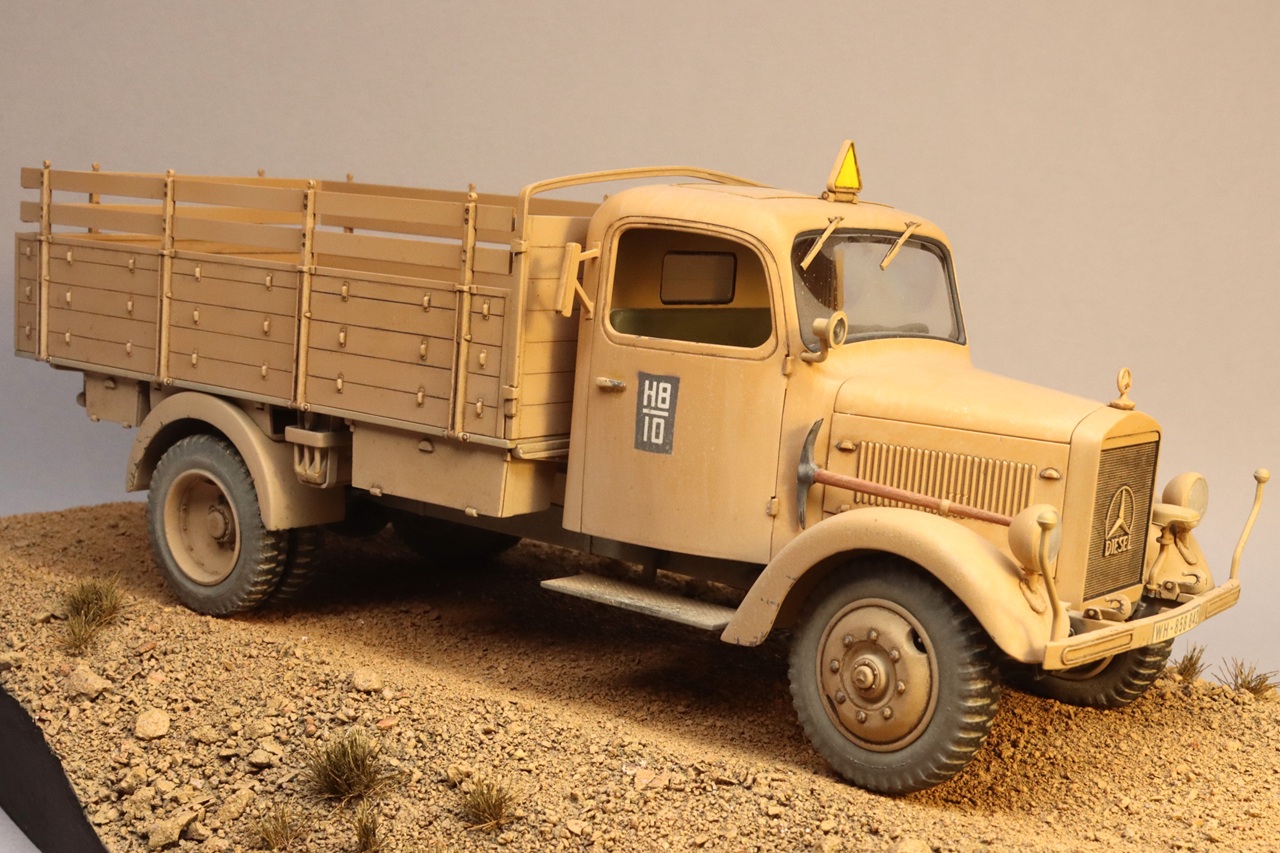
Typ L3000S (Mercedes) Cargo Truck
I started with the cargo truck. The truck parts are well molded and usually didn’t need more cleanup than removing mold parting lines. There are ejector-pin marks on some parts, but they are usually in inconspicuous places. An exception to this is the inner surfaces of the bed sides. The insides of the bed sides have visible ejector-pin marks and shallow sink-marks where there is bracing molded on the outer surfaces. There are a few very thin fragile pieces in this kit that are difficult to remove from the runners. You may want to consider leaving fragile parts off until near the end of the build. It’s a good idea to have various gauges of wire handy for replacing broken parts.
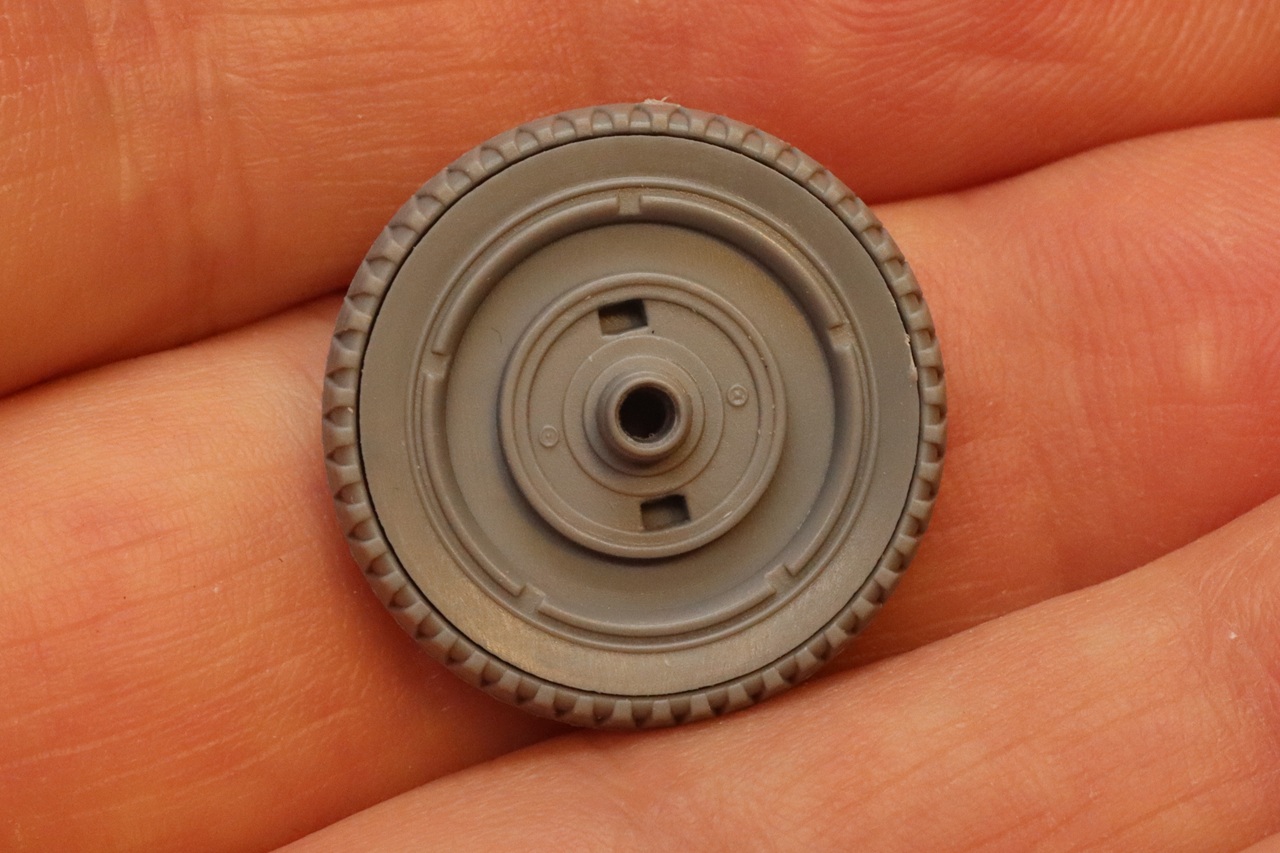
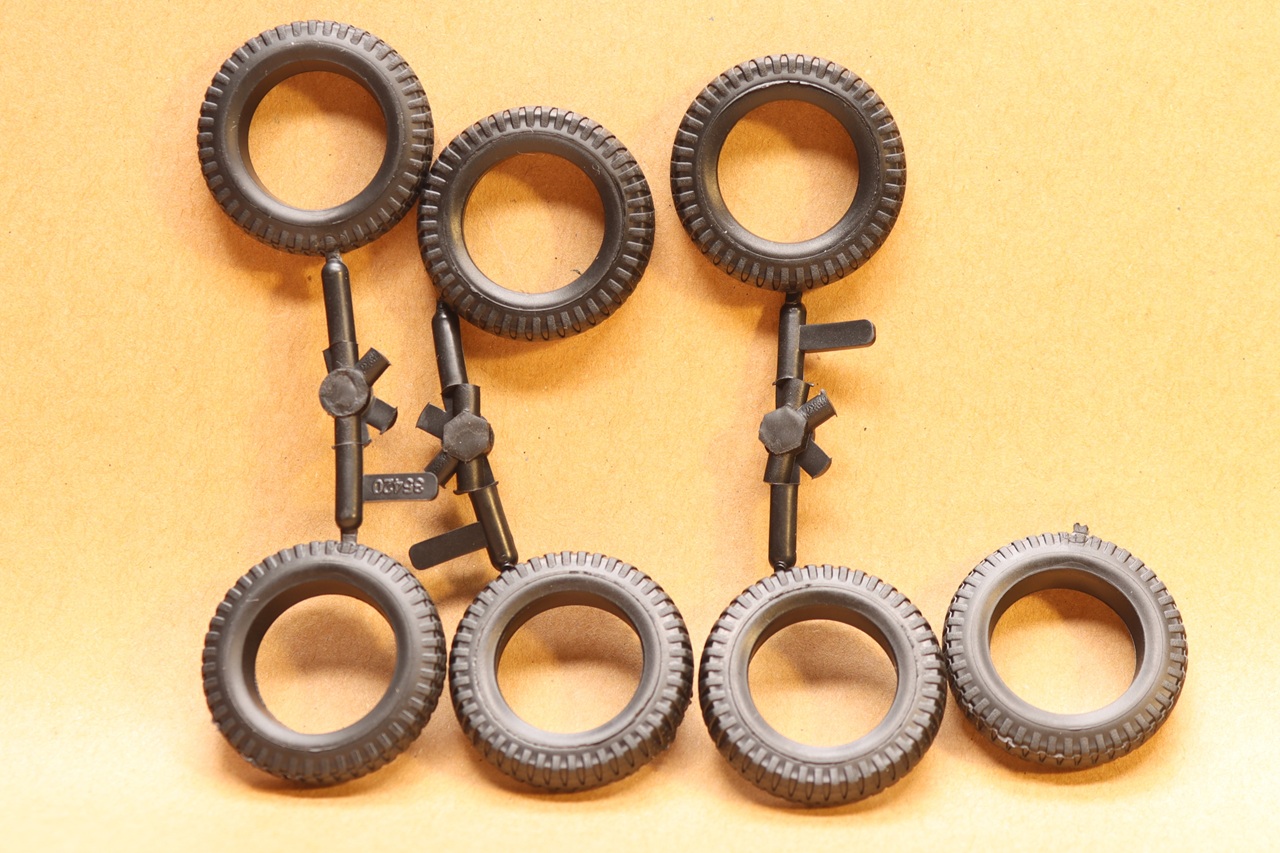
The tires are molded in soft black rubbery plastic. The soft material allows for good tread detail to be molded into a single-piece tire but makes it difficult to clean up mold parting lines. I didn’t succeed in getting all the parting lines removed. If I wasn’t building tis kit for review I would have searched for aftermarket resin tires.
Construction starts with the motor. The motor is reasonably well detailed for the scale but there is no provision for displaying the hood open. The valve cover (A19) has sprue gates in a spot that makes removing them difficult (this won’t matter if you glue the hood on).
The frame sides a molded as “C” channels that have ejector pin marks on the inner surfaces. These marks aren’t easily seen on the finished build. The locating pins for the running board brackets (A44) are too long for the holes in the running boards (B32 and B33), trim the pins by half before gluing. I recommend leaving off the front tow hooks (A41 and A42) until after the frame halves are glued together so that you can set the frame on a flat surface as the glue sets up. The front wheels don’t seat all the way on the front axles. I tapered the axle stubs for a better fit. The drive shaft (A37) was a little too long to fit without bowing. I removed a little material from the front of the differential housing (A28) and enlarged the hole until the driveshaft fit without bending.
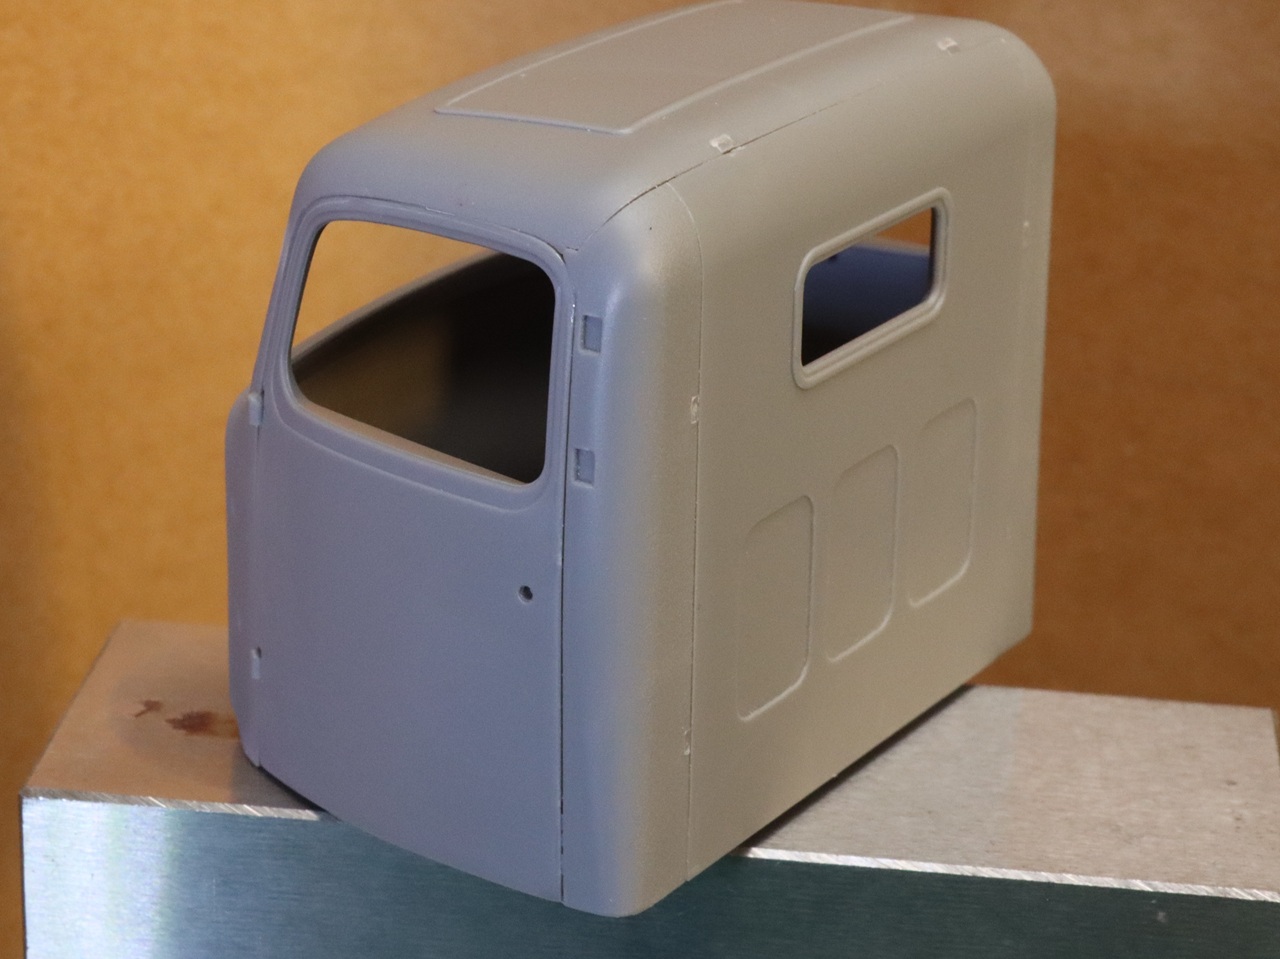
The steering column is part B1 not B3. The cab roof and cowl are molded as a single piece (B17). This avoids having a seam on the front of the cab but makes the part vulnerable to damage in shipping. I deviated from the suggested construction sequence so that I could use the doors to restore B17 to the correct shape. After assembling the cab there is a seam at the top of the rear surface that isn’t visible in pictures of the real truck. There is a rough texture on the rear surfaces of the rear cab corners (B8 and B9) that needs to be sanded smooth. The cab has no detail for representing the rain gutters that should be over the doors. These could be added with stretched sprue, but I didn’t notice this until after I finished painting. I had trouble locating the spotlight bracket, it turned out to be part A46 not B46.
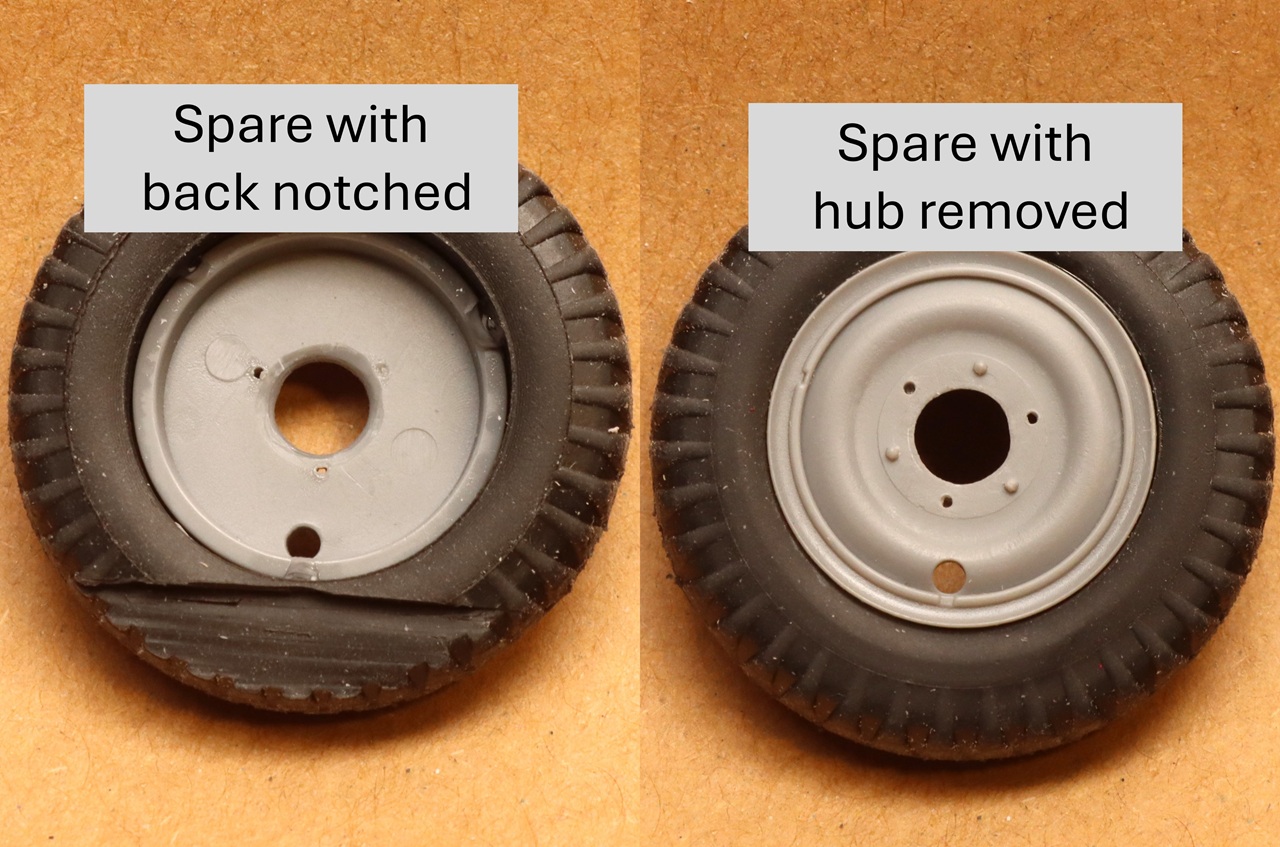
The wheel for the spare tire is represented by the same part (A26) as is used for the front wheels. It doesn’t seem likely to me that the spare tire would include the hub and all the lug nuts, so I left this part off. The missing spare tire inspired me to flatten one of the tires for a diorama opportunity. I carved away some material from the inside of one tire and used superglue to secure it in a mashed condition. I didn’t glue the rear axle to the springs so that I could tilt it to keep all six tires touching the ground. I used an old Dragon figure from my stash; no figures are included in the kit. The tailgate doesn’t have any details to show how it is held closed. You may want to scratch-build some latches.
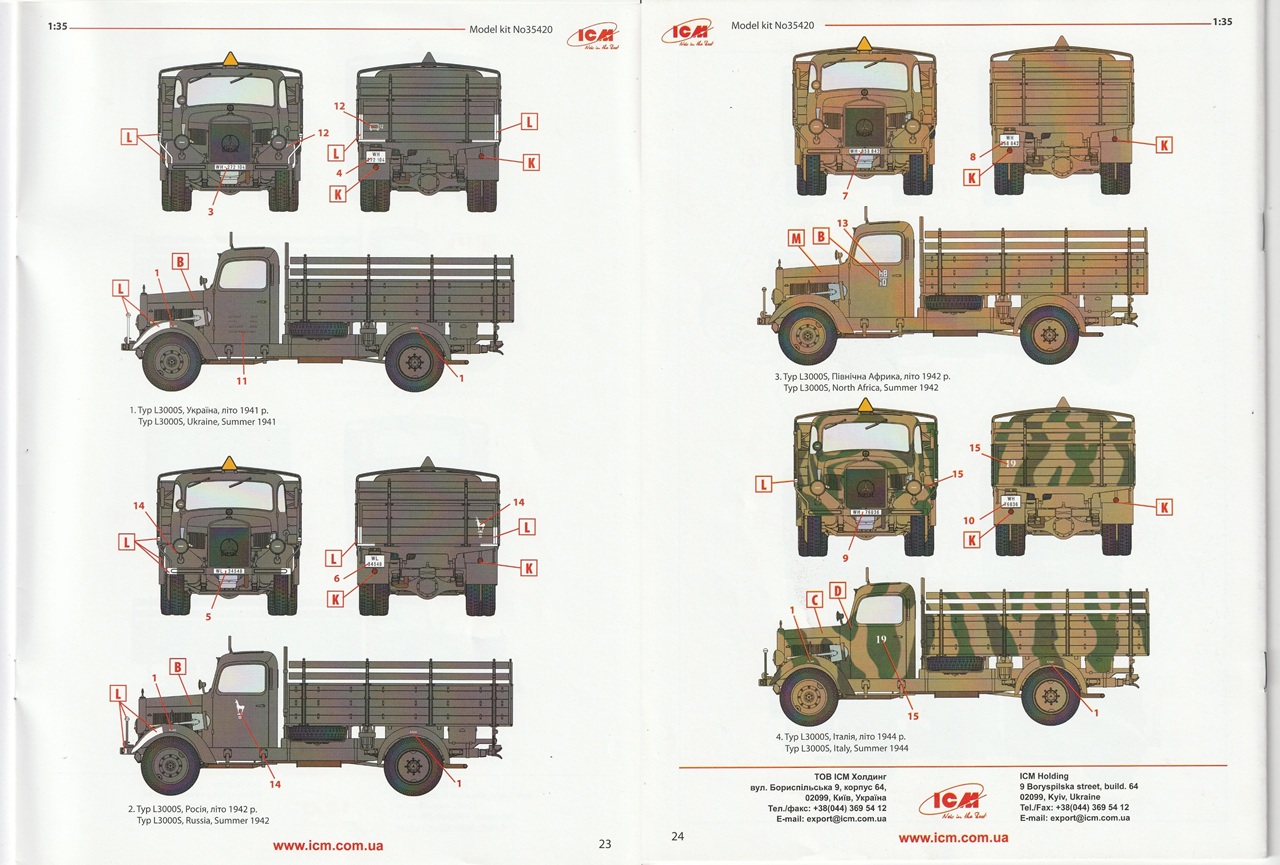
Decals are provided for the dashboard gauges. Although the gauge decals are designated with a single number, they are individual decals, so don’t soak them all at once. The gauge on the far right of the dashboard has pronounced raised detail and is easier to paint it than use the decal. Markings are provided for a panzer-gray truck in Ukraine in 1941, a gray truck in Russia in 1942, a sand-colored truck in North Africa in 1942, and a dark-yellow and green truck in Italy in 1944. The painting guide shows the headlights with blackout covers but only clear headlight lenses are provided.
Other than the issues I’ve mentioned, this kit goes together well and makes a good-looking model with relatively simple construction.
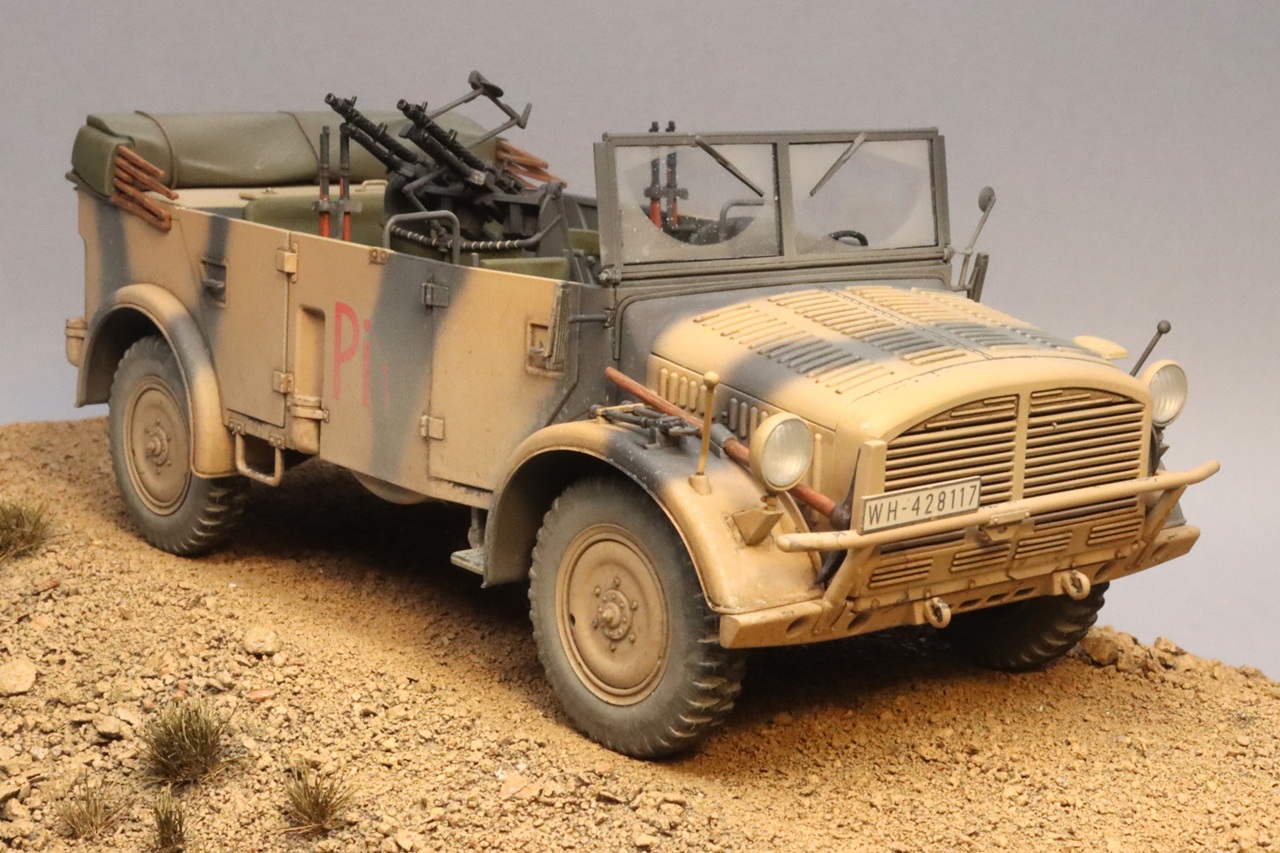
S.E.Pkw. Kfz.70 with Zwillingssockel 36 (Horch 108 type 40 anti-aircraft truck)
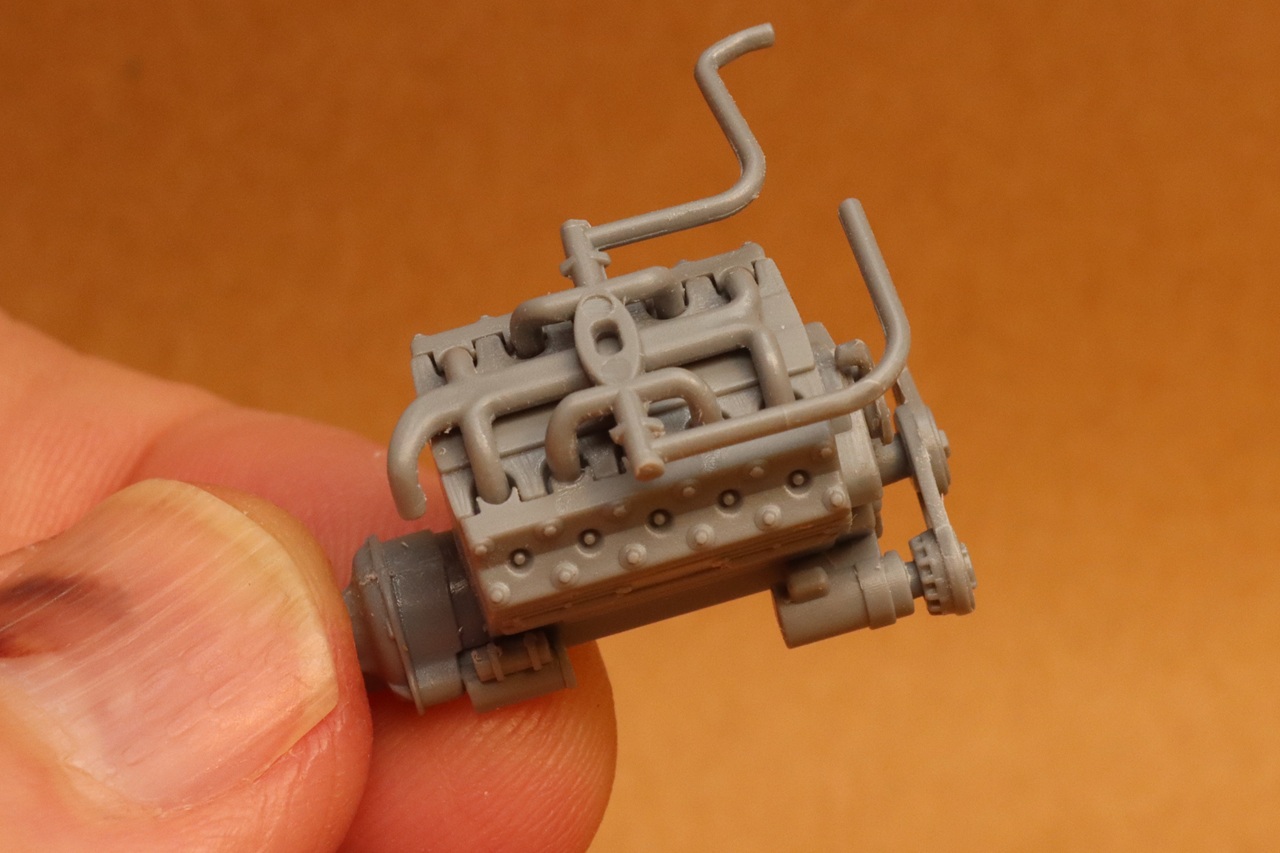
Construction of the flack truck starts with the motor. The motor is well detailed and looks good when assembled but seems to be an odd design. Make sure the locating pin in the engine block is not too long to keep the halves from coming together all the way. There are ejector pin stubs on the inner surface of the cylinder heads that need to be removed for good fit. The air cleaners (A18 and A19) have ejector pin marks and no locating aids to install at the correct angle. I eyeballed the location based on the illustration. The real trucks were built with V8s, but the model’s motor looks like it has ten spark plugs, six exhaust ports, and four intake ports? I don’t have any references that show the motor so I can’t be certain what it is supposed to look like. Since the model doesn’t have any parts for displaying with the hood open, I decided not to worry about it.
The frame and major crossmembers are molded as a single piece. The mold parting line runs along the side of the frame instead of at an edge, so it is a little more difficult to clean up than usual. There are some ejector pin marks visible on the bottom of the frame. The lightening holes on the inner surface of the frame are simulated using perforated inserts (A21 and A28). These inserts have ejector pin marks on the sides that will be exposed. They are not exact mirrors of each other, so you can’t swap sides to hide the marks.
The suspension of this vehicle is complex. Each wheel has upper and lower a-arms, two shock absorbers, and two coil springs. Each coil spring is made up of two halves that then slide onto square pegs molded in the frame. The spring halves are small and awkward to glue together. Be careful that you don’t get glue squeeze-out inside the springs or they won’t fit on the pegs. I beveled the edges of the pegs to make installing the springs easier. The suspension has a lot of parts, and each has a little bit of play. I was worried about errors adding up and the truck not sitting level when finished. I left the attachment of the lower A-arms to the wheels unglued until I had all the wheels on and all touching the ground.
Parts D1 and D26 (brake lines?) are very delicate and hard to clean up without breaking. You may want to replace them with wire. The fuel tank is installed in step 22, and it is not clear which way it should be oriented. If you skip ahead to step 28, the illustration shows the drain plugs toward the rear.
The tires are molded in soft black rubbery plastic. The soft material allows for good tread detail to be molded into a single-piece tire but makes it difficult to clean up mold parting lines. The tires in this kit were much more cleanly molded than the tires for the cargo truck.
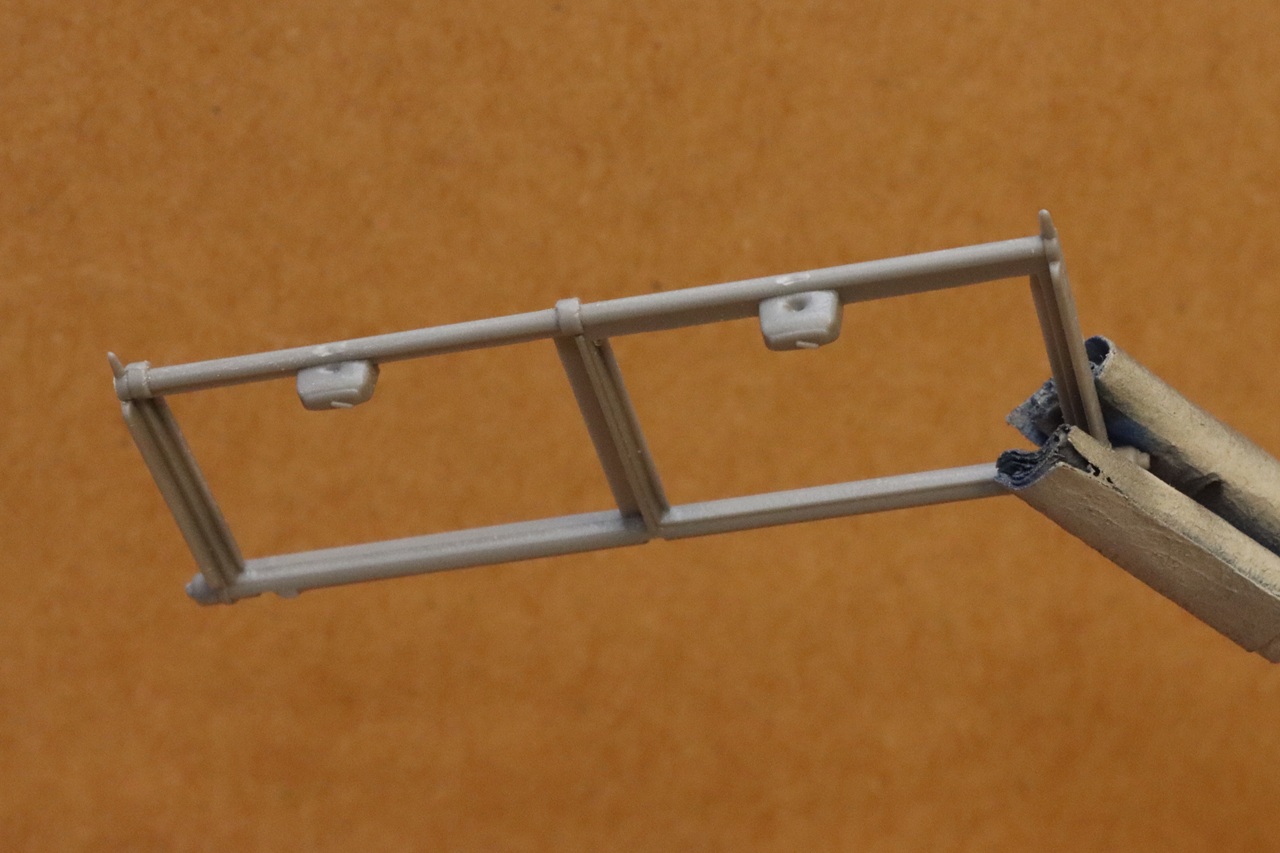
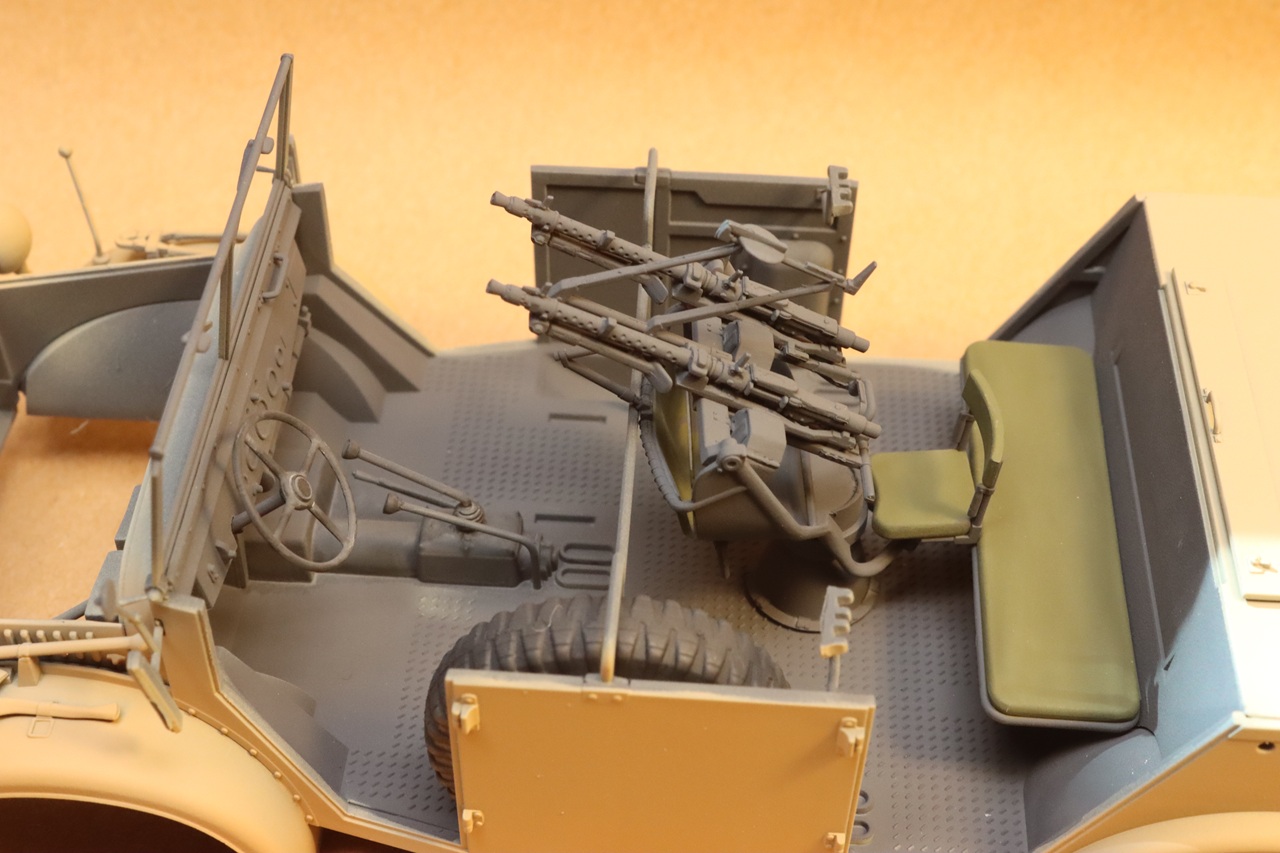
The firewall-dashboard (B7) as ejector pin marks on the visible side, it would have been better if they were on the motor side. The hood (B9) sat too high at the back until I thinned the underside of the back edge. The wheel for the spare tire has no detail on one side and has hub and lug nut detail on the other side. I drilled out the hub and half the lug nuts for a better appearance. The spare tire was a little too thick to fit into the locating recess in the floor. I notched the back side of the tire so it would drop down into the recess. In step 40 the instructions call for filling in the locating holes for the center row of seating. This is much easier to do in step 29 before any other parts are in the way. The parts for the center seat are included in the kit, so you could build a troop carrier version of tis vehicle. The frame for the rear seat A87 is very thin and the vertical supports are molded at a right angle to the horizontal frame. The frame is very easily damaged even before removing it from the runner. The rifle-brackets (D29 and D30) are fragile and stick up above the sides of the vehicle. It is better to leave them off until the end of the build.
The gun mount has a lot of thin delicate parts that require careful clean-up and assembly. The pistol-grips of the machine guns were too thick to fit through the openings in the mounting frame, I enlarged the holes slightly. There are optional gunsight parts for displaying the guns in a horizontal or elevated position. There are no locating aids to show exactly where the gun mount should be attached to the floor. If installed where the painting guide shows it, it looks like center portion of part A3 would prevent it from rotating. I cut out the center of A3 to make room for the mount.
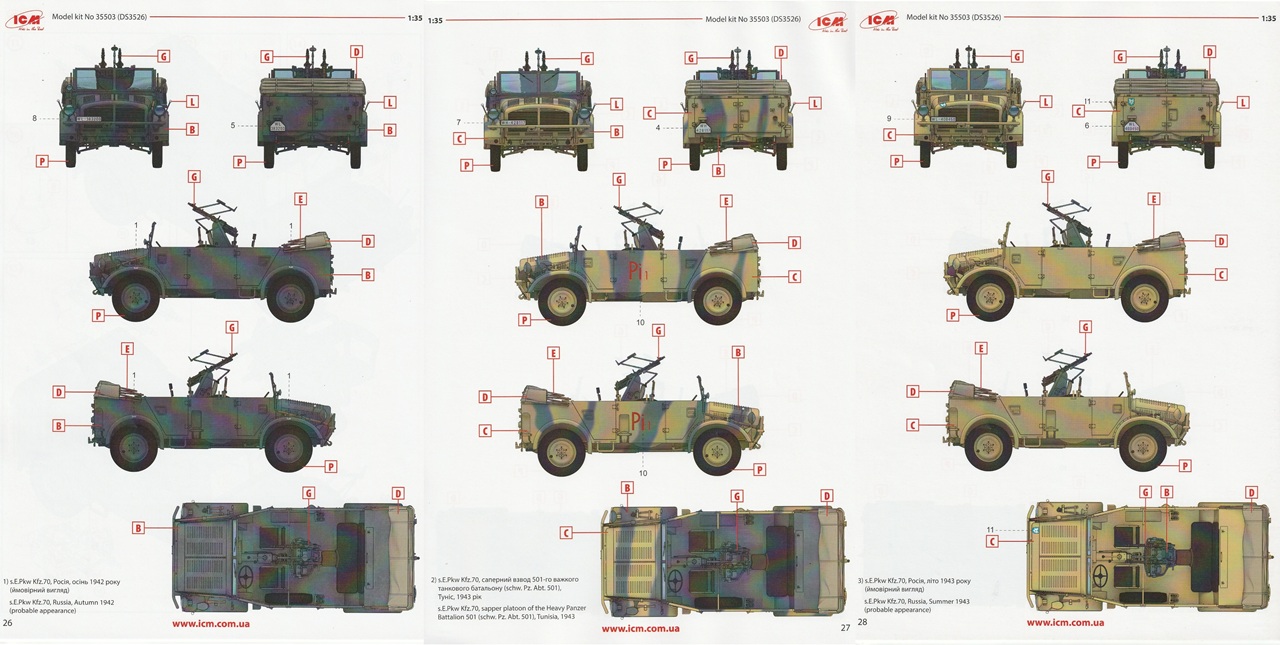
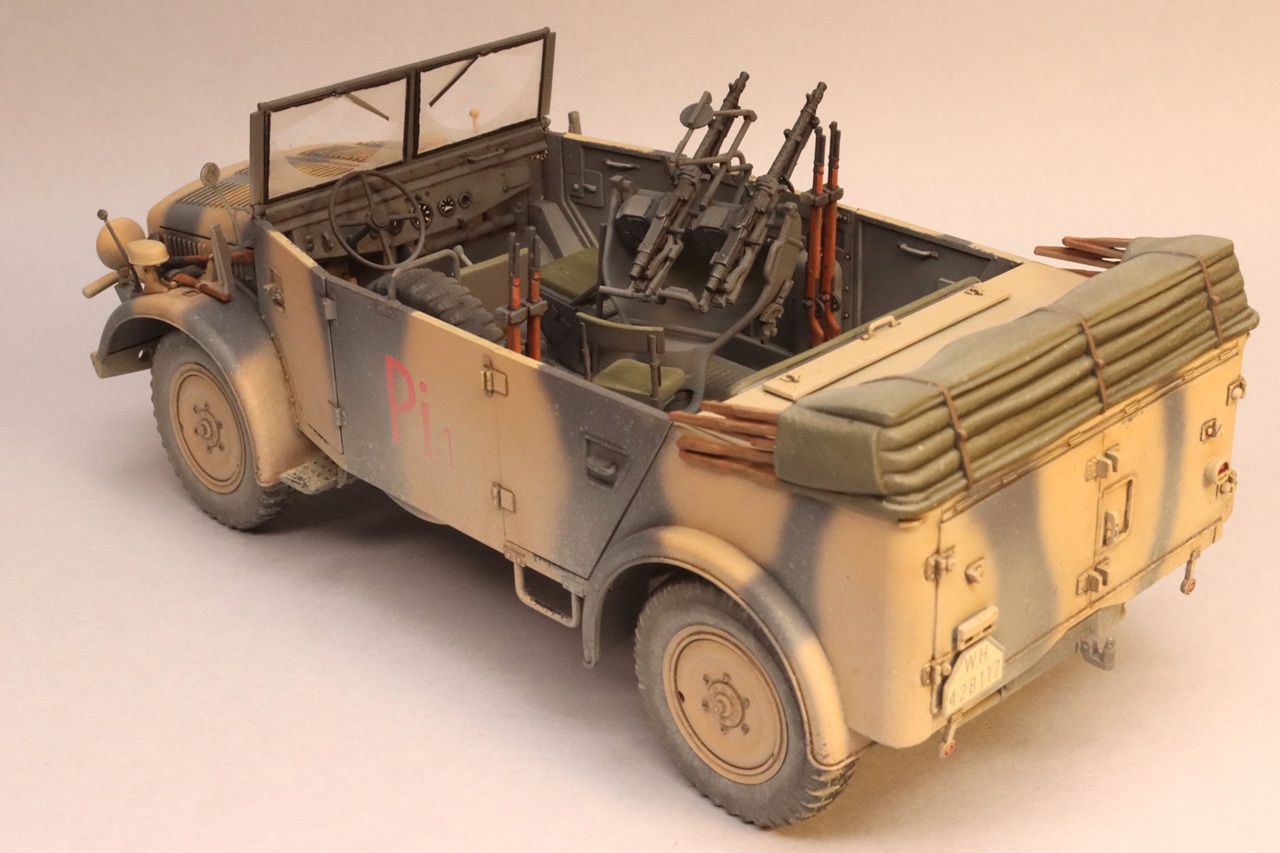
Four decals are provided for the dashboard gauges but there are five gauges on the dashboard. The decals are too large to fit where the instructions indicate they should go. I painted the smallest gauges and applied the other decals where they seemed to fit, leaving one large decal leftover. Marking options are provided for an overall panzer-gray truck in Russia in 1942, a gray and sand colored truck in Tunisia in 1943, and a dark-yellow truck in Russia in 1943.
This makes a good-looking and interesting model when finished but with it’s complex assembly and many delicate parts it is not a kit for a beginner.
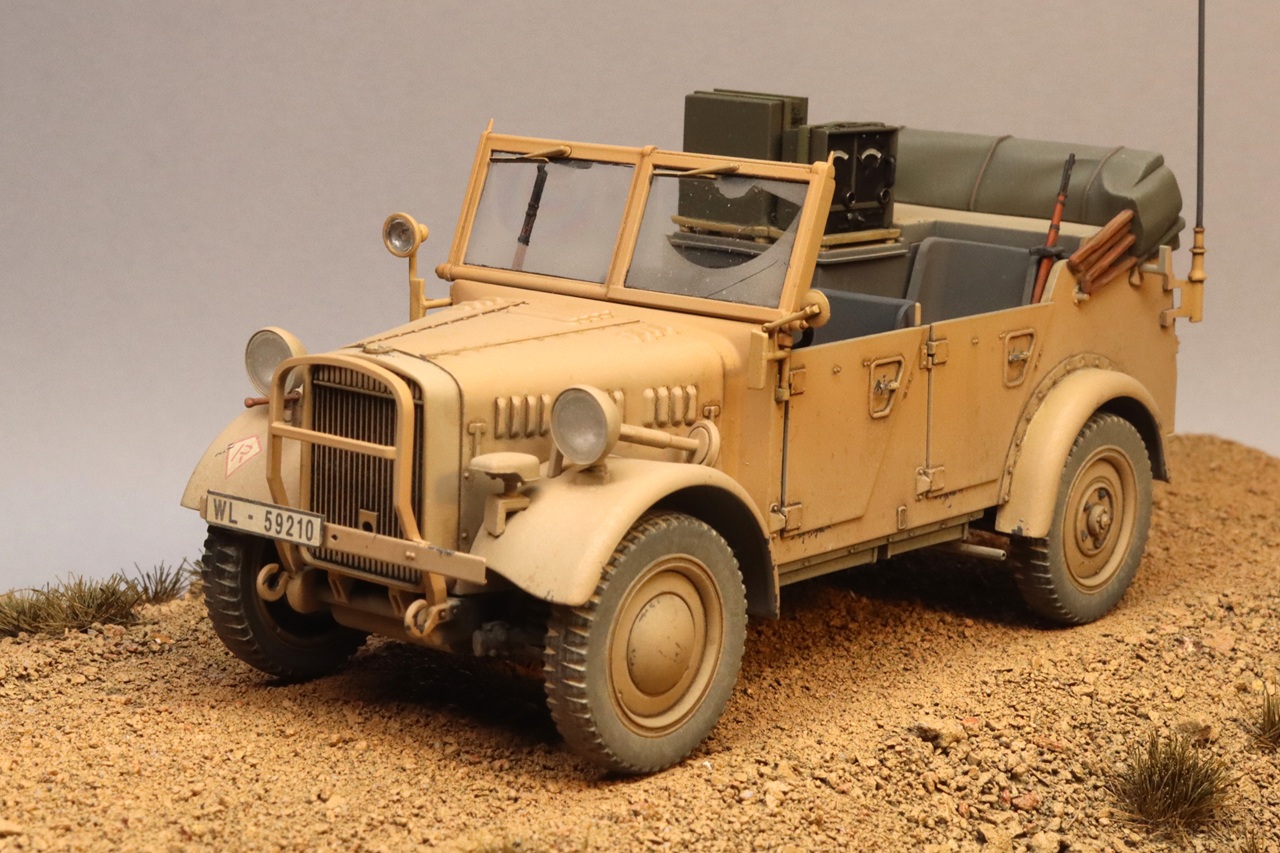
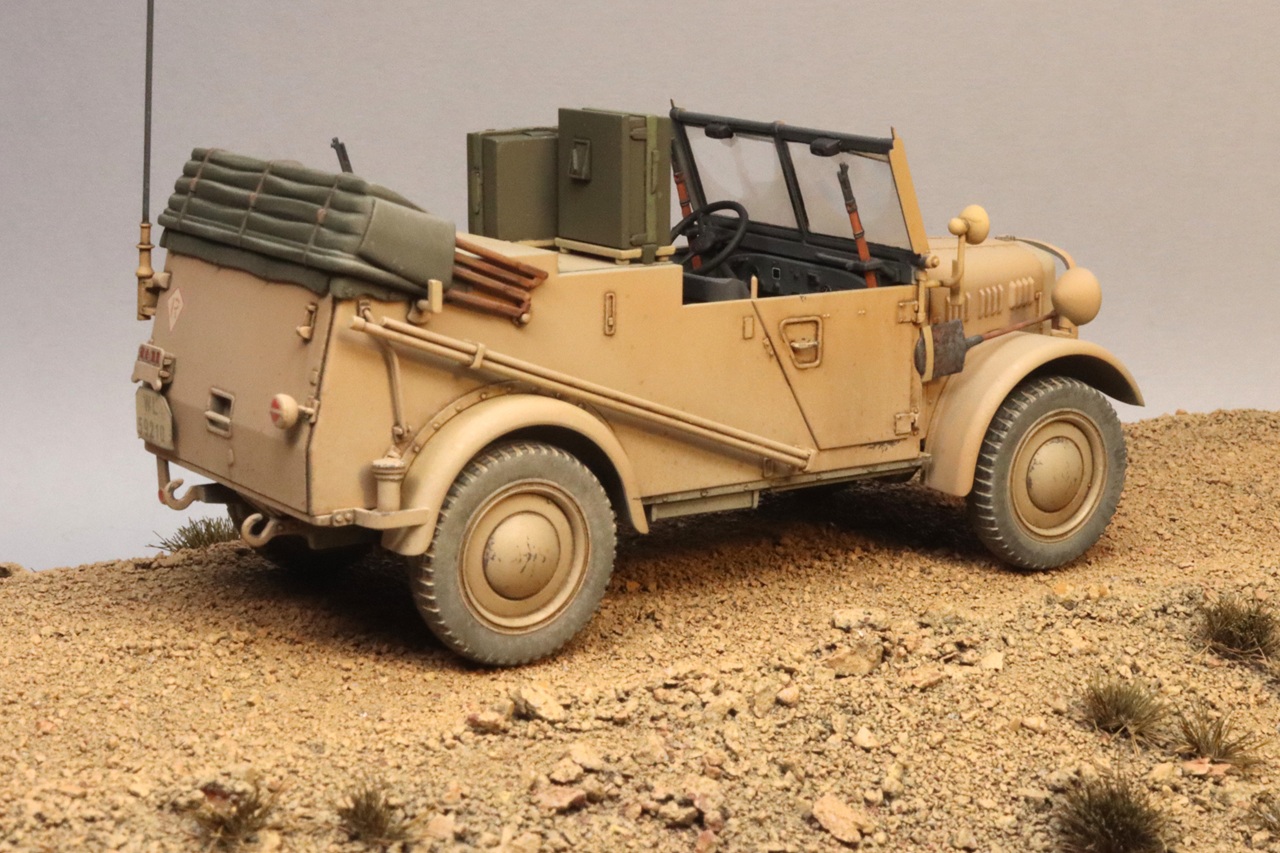
Le.gl.Einheits-Pkw (Kfz.2) (radio car)
The radio car’s construction starts with the frame and suspension. The frame and most of its cross members are molded as a single piece. The frame has some ejector pin marks on the lower surface. Although this vehicle’s suspension is as complex as the flack truck’s, it is made up of fewer parts and is a lot easier to get together. The pins on the inner end of the axle shafts (C5) are too thick to seat all the way into the sockets on the differential housings. I thinned the pins a little for a better fit. The instructions show pins on the exhaust pipe fitting into notches on the frame but there are no notches in the illustrated locations. I glued the front of the exhaust pipe to the top of the muffler (A19) and attached the pins to the frame where they happened to fall. The linkages for the shock absorbers (C28 and C29) are added in steps 11 and 12. From the illustrations in these steps it is hard to tell how they attach to the A-arms. The illustration in step 13 shows them in place. In step 13 the instructions show B6 attaching to the steering linkage in the middle. This won’t work. B6 attaches to the linkage in the hole closest to the exhaust pipe.
The motor is well detailed and goes together easily but the kit does not include any parts for displaying the hood open. The starter (B12) fits better if you cut off the locating pin.
In this kit the tires are molded in the same hard plastic as the rest of the kit. This makes it a lot easier to clean up mold parting lines but sacrifices some tread detail. On my kit the wheel backs (C16) had flash in the holes where the axles attach. It’s a lot easier to clean out these holes before gluing the wheel halves together. The wheel backs are slightly undersized, leaving a gap around the wheel on the inner surface. When installing the motor, it’s difficult to get the locating pins of the front and rear drive shafts in place. I cut the locating pin off the front drive shaft and made a butt-joint to the front differential case.
The instructions would have you install the radiator shroud in step 35 and the hood in step 49. It may be easier to get a good fit if you glue the hood and radiator shroud to each other first and then add both to the chassis. You can omit the upper radiator hose to make this easier, it won’t be visible anyway. The dashboard has some uneven areas in the center as if the tooling was reworked. After painting the dashboard, this unevenness is very difficult to see. The gear shift lever (B5) is very fragile. I broke it and had to replace it with wire. The wiper motors are molded into the windshield frame and have some big sink marks on top. The fit of the windshield parts under the wiper motors is very tight. I had to scrape away some material from the wiper motors to get the windshields to fit without bending the frame. The mounting bracket (B43) for the NOTEK light (B18) was missing the hole to accept the pin on the bottom of the light. The part number of the spotlight body is not indicated on the instructions. It is B26.
Decals are provided for the dashboard gauges. Although the gauge decals are designated with a single number, they are individual decals, so don’t soak them all at once. The decals for the rear license plate are too large to fit on the plastic part. I applied the decal to a piece of foil and then glued that over the plastic license plate.
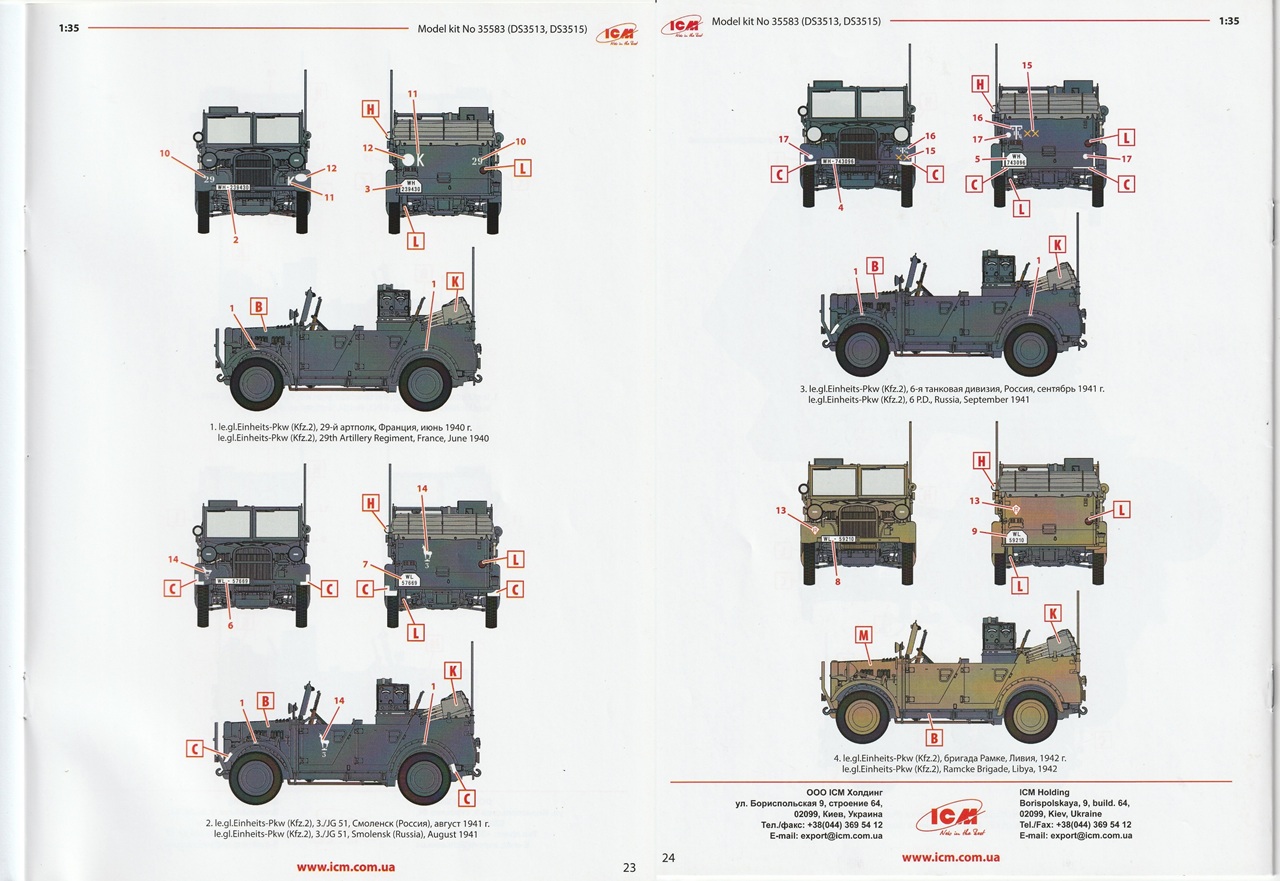
Marking options include a panzer-gray vehicle in France in June 1940, a gray vehicle in Russia August 1941, a gray vehicle in Russia September 1941, and a sand-colored vehicle in Libya 1942. The painting guide shows the headlights with blackout covers but only clear headlight lenses are provided.
This little radio car was a fun build and goes together reasonably well. Other than the delicate work to get the windshields to fit it is a pretty easy build.
I’d like to thank ICM for providing these kits for review. I am impressed with the variety of options they continue to provide to modelers despite what must be difficult circumstances for them. And thanks to IPMS/USA for providing me the opportunity to participate in the Reviewer’s Corps.

Comments
Add new comment
This site is protected by reCAPTCHA and the Google Privacy Policy and Terms of Service apply.
Similar Reviews