
U.S. F-105 Pilot
Dateline: February 11:
Review package from IPMS/USA (Dick Montgomery) arrives. After looking at the items, I realized there was an item in the box that I had not wanted. I immediately fired off an email to the Review Delivery Man…
"Dick,
I got my package today and I think there may be an upset reviewer out there! Inside my KODAK carousel box were the three Plusmodel items and an AERO line 1/48 F-105 pilot. Send me an address and I will mail it tomorrow to the rightful owner."
His quick and concise reply…
"Mark,
Well now....I was under the impression that you said you'd review those items assuming that no one else asked for them. There is no one awaiting them...they were meant for you."
DOH!!!!!! I have learned a VERY valuable lesson today! I need to be more SPECIFIC when volunteering to review items!!!! I have learned my lesson, OBI-WAN!
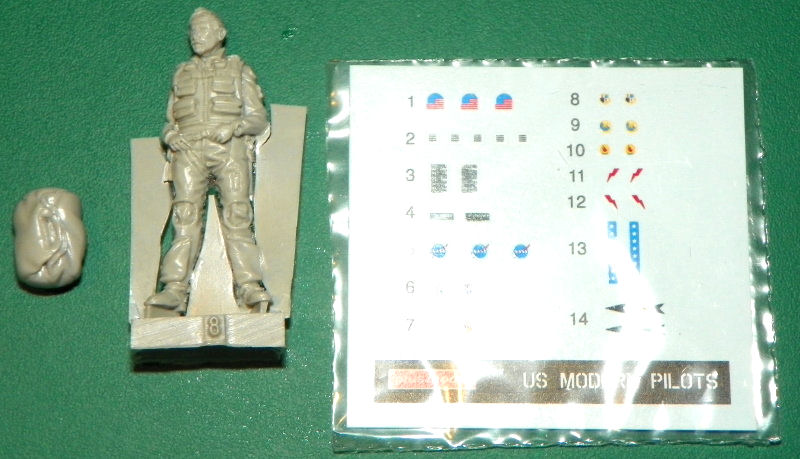
This F-105 fighter pilot figure is a really nicely molded figure. Along with a nice casual flight line pose, the set comes with a flight bag and decals. There is no painting guide, so you had better know how to paint an F-105 pilot figure. I am not an aircraft guy but I am sure I can come up with a general idea of what colors to use. There is one ugly downside to my sample. There is a large air bubble in the casting on the figure’s left wrist, right at the cuff. I am hoping the baking soda and super glue filler will work here, as it is quite noticeable.
Like all resin, it is best to give the parts a good soap and brush cleansing to ensure all mold release agents are removed. Then, there is the required removal of the pour lug and sanding to finish. Remember that resin particles are hazardous and you should always complete these tasks using water to keep the dust down and wear a cheap doctor’s mask to keep the particulates out of your lungs. The lug attached to the flight bag was removed and the bottom sanded flat. The figure lug was left, as in this case it will serve as the painting base. The bubble was easily filled and sanded and I can’t tell it was ever there.
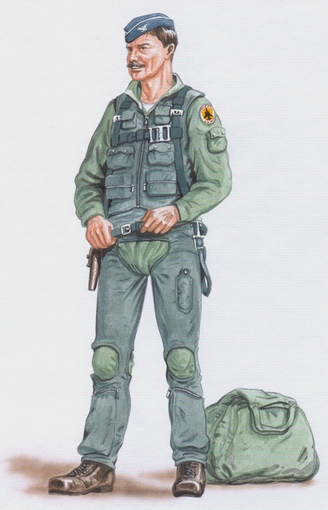
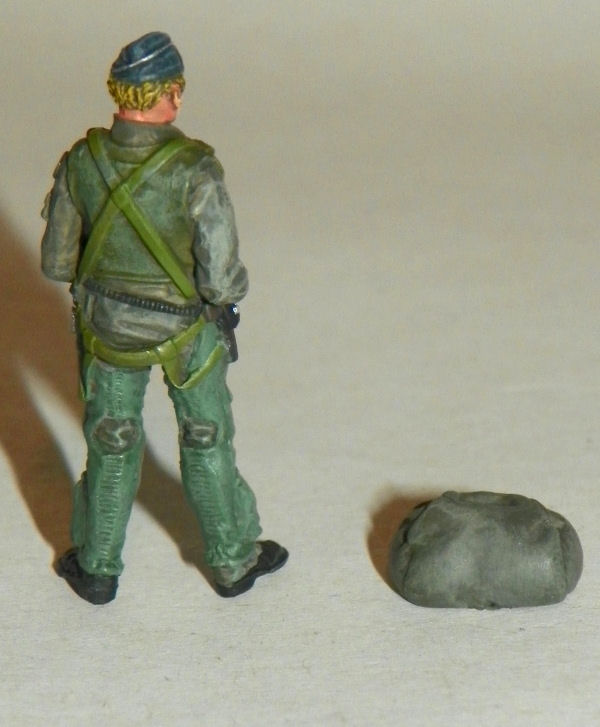
The figure and bag were given brush coats of Model Master Olive Drab. The cover picture shows what appears to be three different shades of green, and that is what I am going to attempt to replicate. No bright oranges or yellows here. The face was applied next. I used the Shepard Paine guide to attempt to paint the face and hands. I use enamels as opposed to oils and they still blend well, as long as you are patient. After I was satisfied with the result, I moved onto the rest of the figure. I still need more eyebrow practice, as that seems to still be my downfall.
All paints that were used were of the Model Master variety. I applied a dry brush of lightened Olive Drab to the flight suit and bag. The next color was the chaps, and these were done in Dark Green and then also dry brushed. The final items were the vest and hat. These were done in Italian Dark Green and Dark Flat Blue. After letting them dry for a day, I moved on to the detail items. The hat was piped in Aluminum and the eagle in Chrome Silver. Aluminum was also used in the buckles and holster button.
The decal was applied to a raised portion of the right shoulder. In hindsight, it might have been better if I’d sanded it down before applying the decal.
I would like to thank Plusmodel for making, releasing, and donating this set for review, and IPMS/USA for encouraging me to review it. This is a great little item and for all you wingy-thingy builders, and would greatly accessorize ANY aircraft where the figure’s gear will fit the scenario. Get this figure and make your aircraft diorama stand out.


Comments
Add new comment
This site is protected by reCAPTCHA and the Google Privacy Policy and Terms of Service apply.
Similar Reviews