
Tupolev Tu-141 Strizh
Background
Hauler-Brengun was founded in 1999 and produces scale plastic kits, resin kits and accessories, photo-etched details for kits and other accessories. This kit of the Tupolev Tu-141 Strizh is offered in only 1/144 scale.
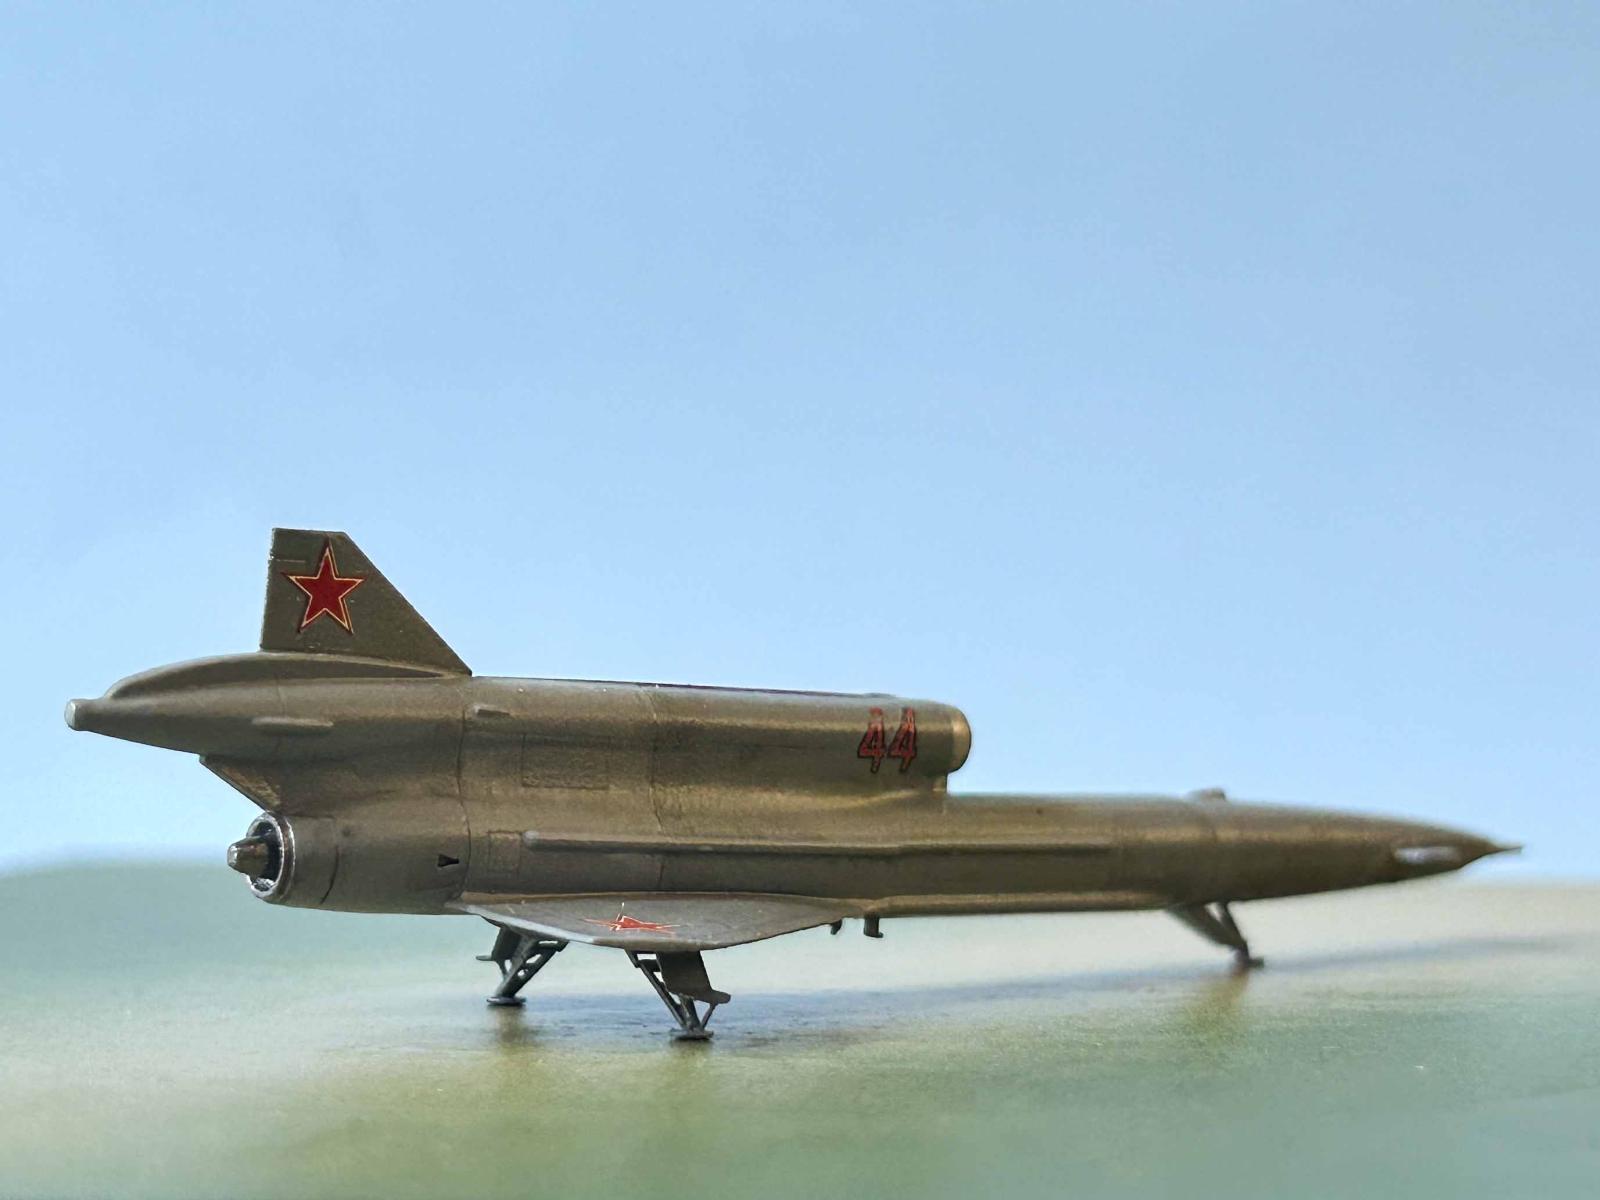
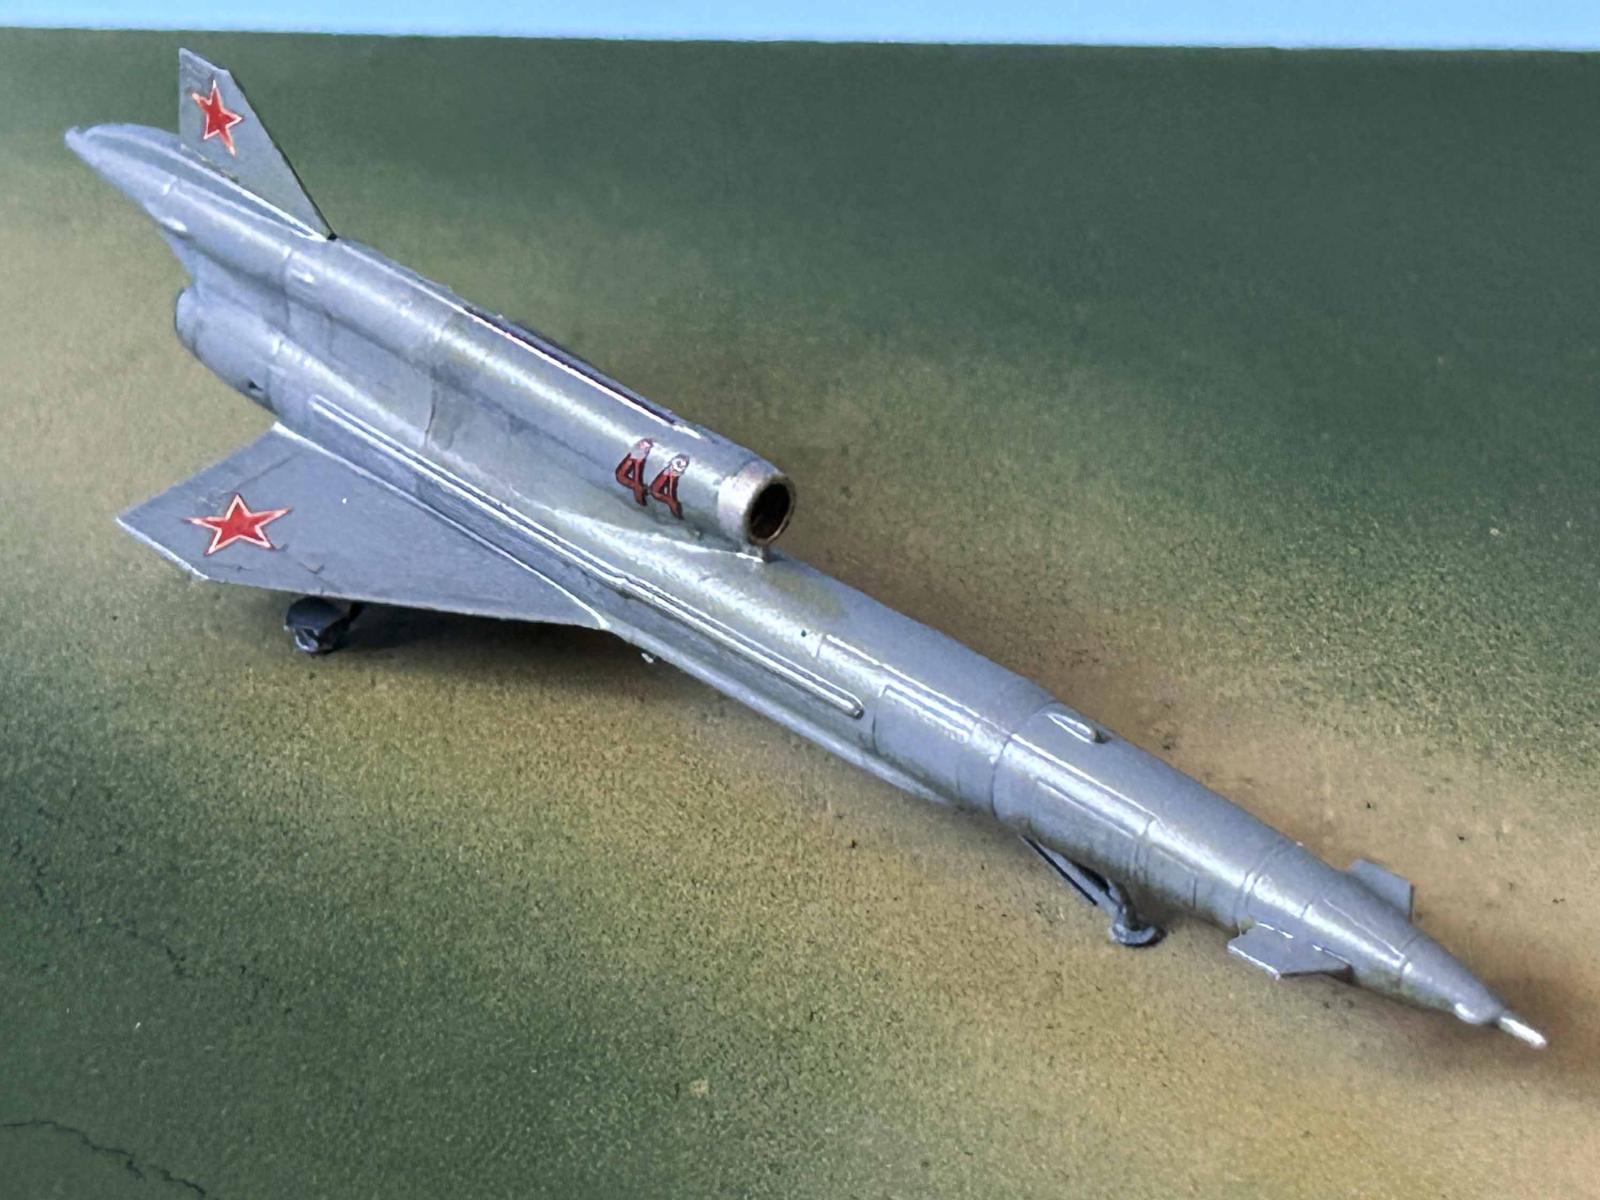
The Tupolev Tu-141 Strizh ("Swift"; Russian: Туполев Ту-141 Стриж) is a Soviet reconnaissance drone that served with the Soviet Army during the late 1970s and 1980s, as well as the Ukrainian Armed Forces since 2014. As with previous Tupolev designs, it has a dart-like rear-mounted delta wing, forward-mounted canards, and a KR-17A turbojet engine, 4,409 lbs of thrust, mounted above the tail. It is launched from a trailer using a solid-propellant booster and lands with the aid of a tail-mounted parachute. The Tu-141 was in Soviet service from 1979 to 1989, mostly on the western borders of the Soviet Union.
The Soviets manufactured 152 of them, largely basing the drones near its western borders. The collapse of the Soviet Union saw huge stockpiles of Soviet military equipment ending up in independent Ukraine. The Tu-141 has a PA-4 panoramic camera and an A-86-P forward-looking camera. These are comparable to the KA- and KS-series high-altitude reconnaissance cameras the United States used during the Cold War. These cameras use old-school film but are optically powerful. There are allegations from Russia that the Ukraine has re-purposed some of the Tu-141 drones into missiles that have damaged some Soviet aircraft.
The Kit
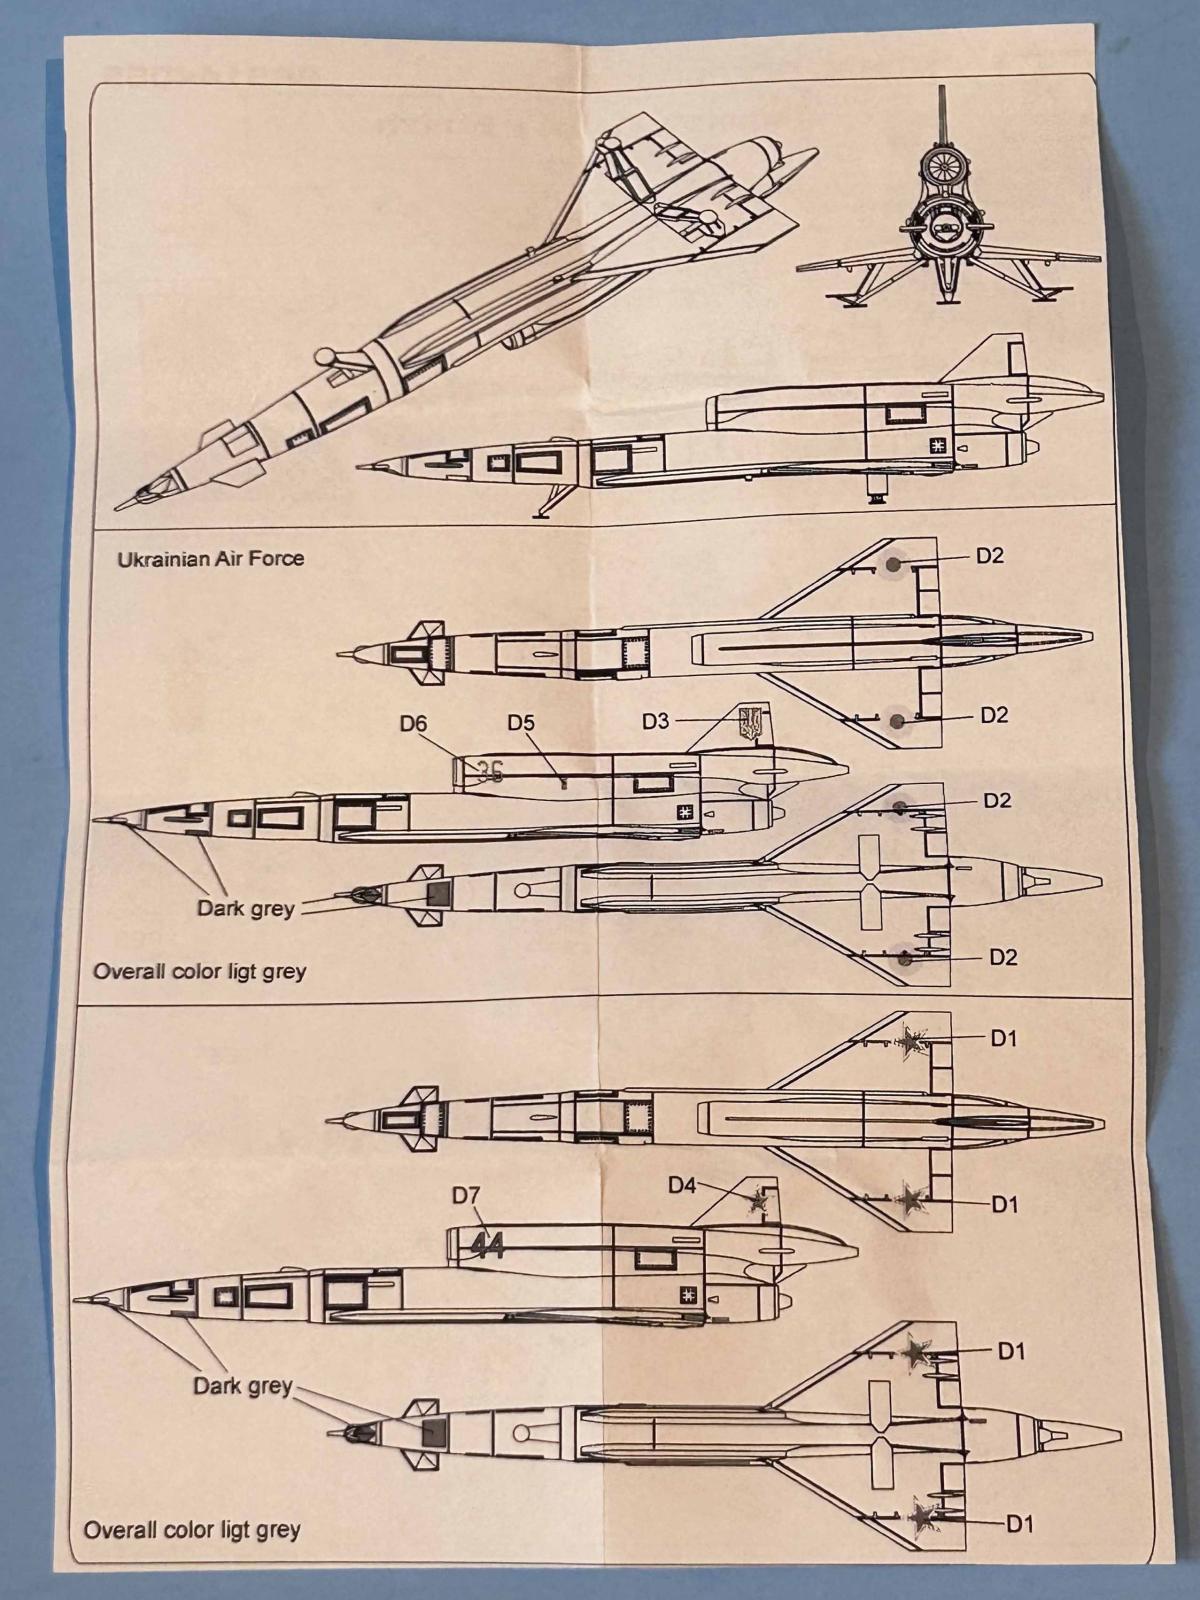
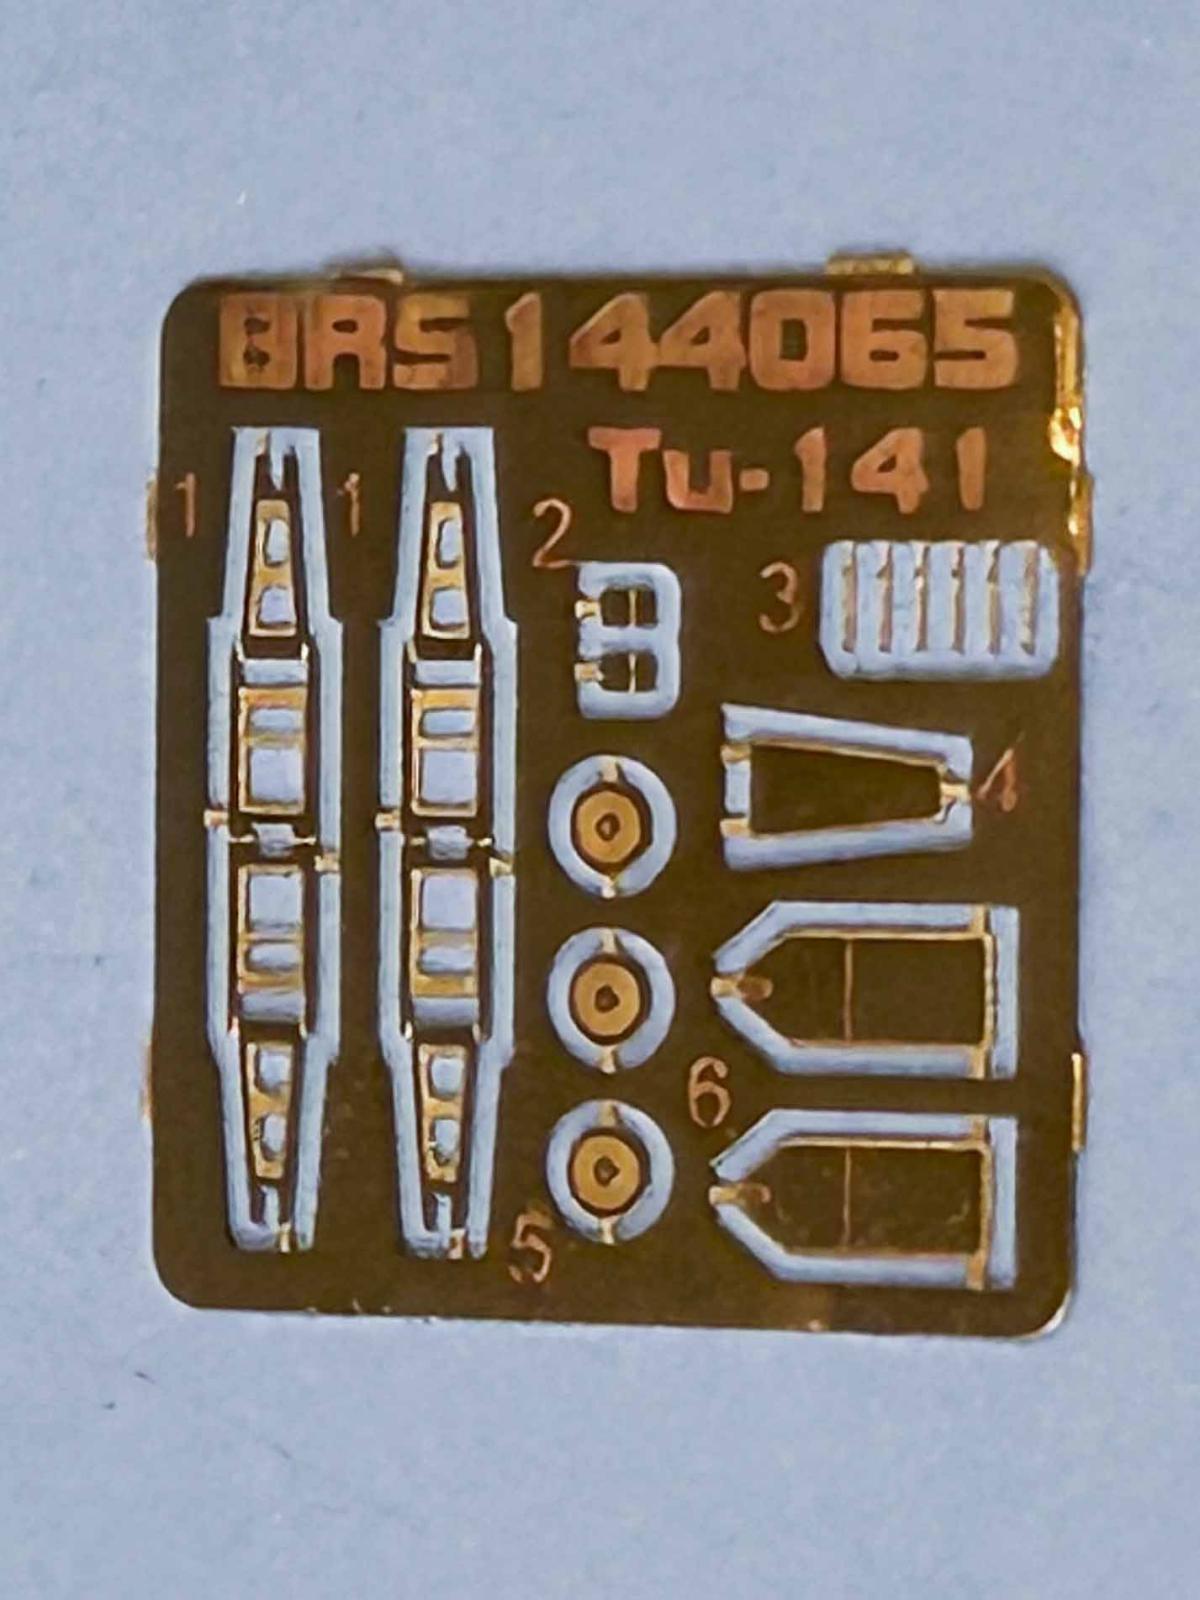
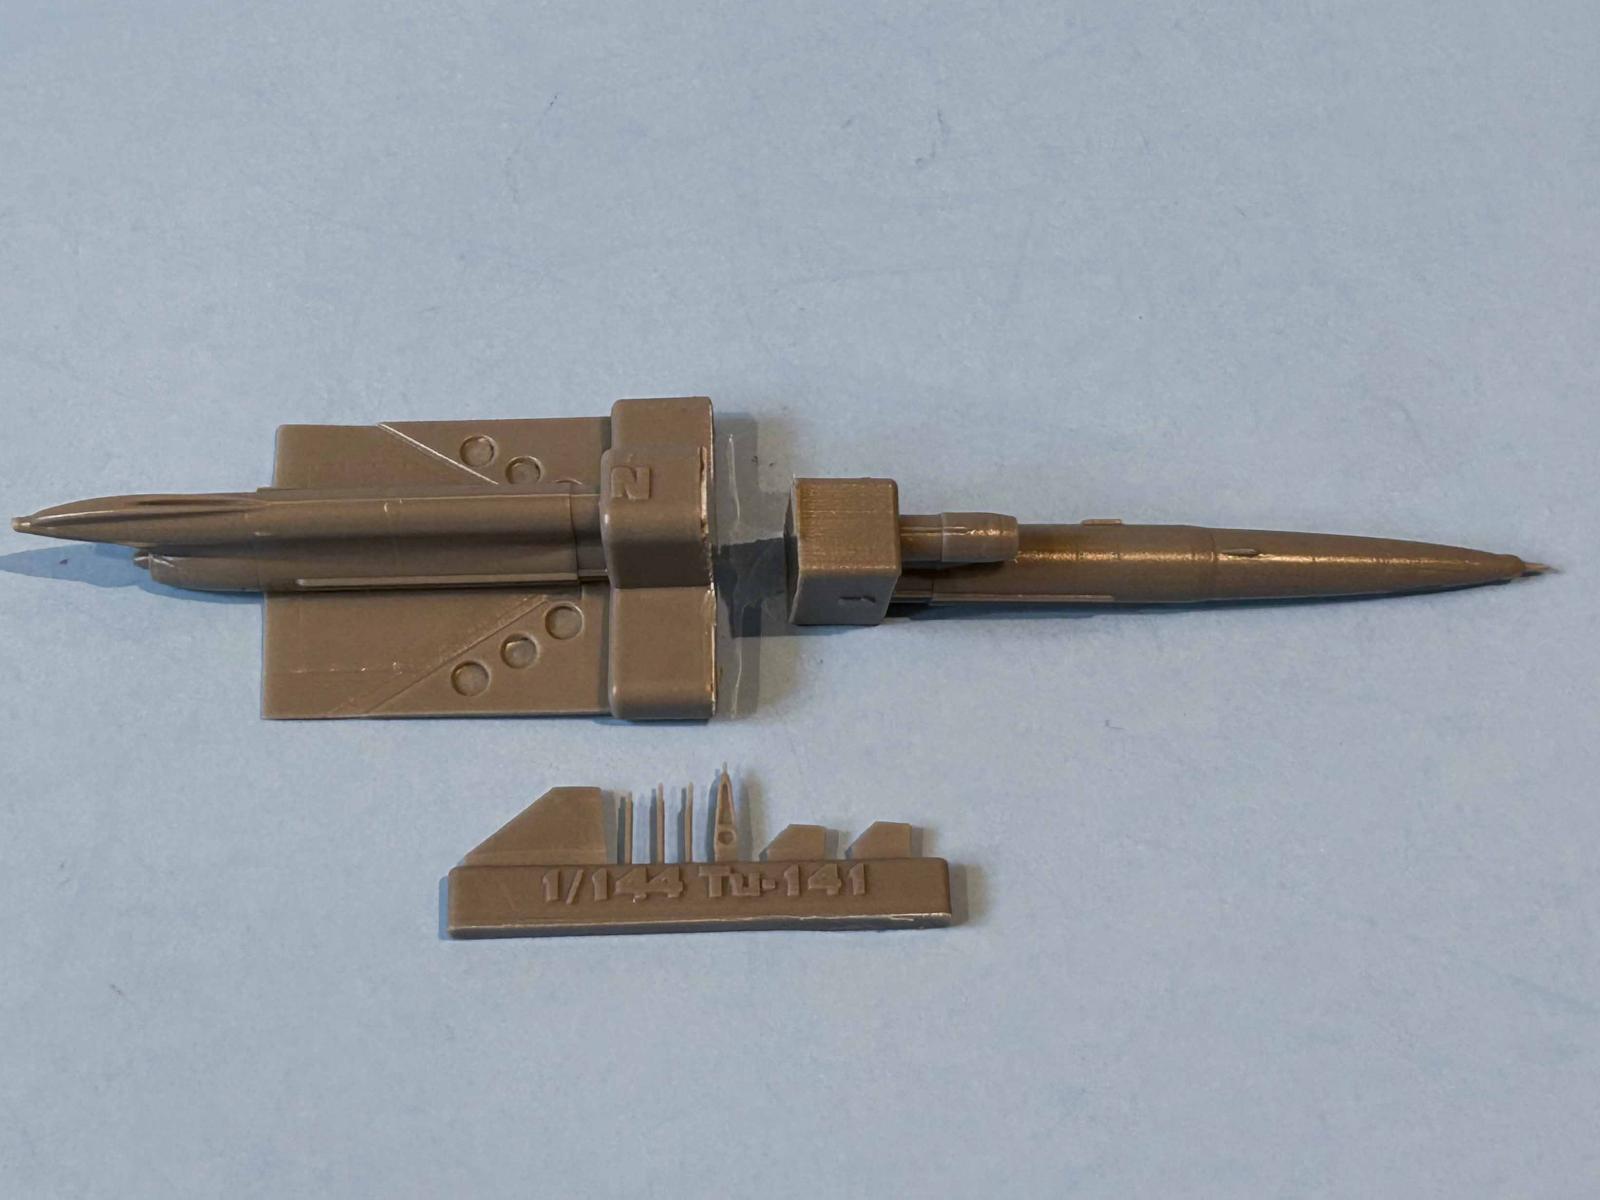
The Brengun 1/144 Tupolev Tu-141 Strizh consists of 9 pieces of gray resin and a photoetch fret with 16 pieces. At first glance the resin looks well done and displays very nice detail, with only a few tiny bubbles on the exhaust cone. Your first task will be to identify what machine you wish to build. The kit provides decals for Ukrainian Air Force and Russian Air Force drones. I ended up using the Russian scheme. Make sure that you bathe the resin parts in soap and water for at least 20 seconds to meet CDC standards. This effort will be important to make sure the resin is free of any mold-release (ask me how I know). I normally recommend carefully using some painter’s poly-fiber scouring pads to clean up the photo-etch, but in this kit, I passed this step as the photoetch parts were quite small.
Construction
I used a fine-tooth razor saw to separate the front and rear fuselage from their pour blocks. I then carefully sanded to obtain an optimum fit. Since the front and rear must be perfectly squared up, I also used a Dremel router to remove much of the internal fuselage material at the join. I followed this up by inserting a brass rod to provide strength to the joint and then secured it with black super glue [Hobby Town IC-2000 Tire Glue]. This super glue provides some additional flexibility over standard super glue in set-up [20-45 seconds] and sanding [dries softer than standard super glue]. I did use a metal ruler to assure that the front and rear fuselage were straight.
The next step was installing the dorsal fin and rudder [RP9] along with the nose canards [RP3 and RP4]. The installation of the landing gear is the fun part. Folding the main landing gear retraction arms [PE1] went well and I was pleased with the detail. I wasn’t quite sure on the installation of the main gear struts and doors as it looked like I was going to need six additional hands. After folding the main gear doors [PE6], I placed gel super glue in the main gear wells and proceeded to add the main gear struts [RP7 and RP8], main gear doors, and the main gear retractions arms. I used a sharpened wooden toothpick to assist in alignment of all three parts. It went much better than I had expected. I repeated the process for the main gear well on the other side but somehow the resin gear strut went airborne and apparently vaporized. I ended up using 0.20 plastic rod to replace it. It’s perhaps a bit thicker, but it ended up working fine. The next part was adding the outer main landing gear door retraction rods [PE3]. It appears that six of these tiny retraction photoetch parts are provided, but only four are required. That being said, I managed to lose two fairly quickly trying to install them as well as two more while painting. I still have one on each side attached. After finally installing the main gear struts, the nose gear installation was relaxing. Here I super-glued the nose gear door [PE4] to the nose gear retraction strut [RP5].I then superglued this assembly and the nose gear strut [RP6] into the nose gear well.
I added the landing gear skids [PE5] next, one at a time. This was to ensure the proper angle of the skids. The final step was to add the two launch rail guide brackets [PE2] in front of the wing leading edge. These tiny parts have to be bent to a right angle which turned out not to be too difficult. The fun part was supergluing them to the bottom fuselage at the correct angle. I used a sharpened wooden toothpick to help guide them into the right place and angle.
Painting & Decals
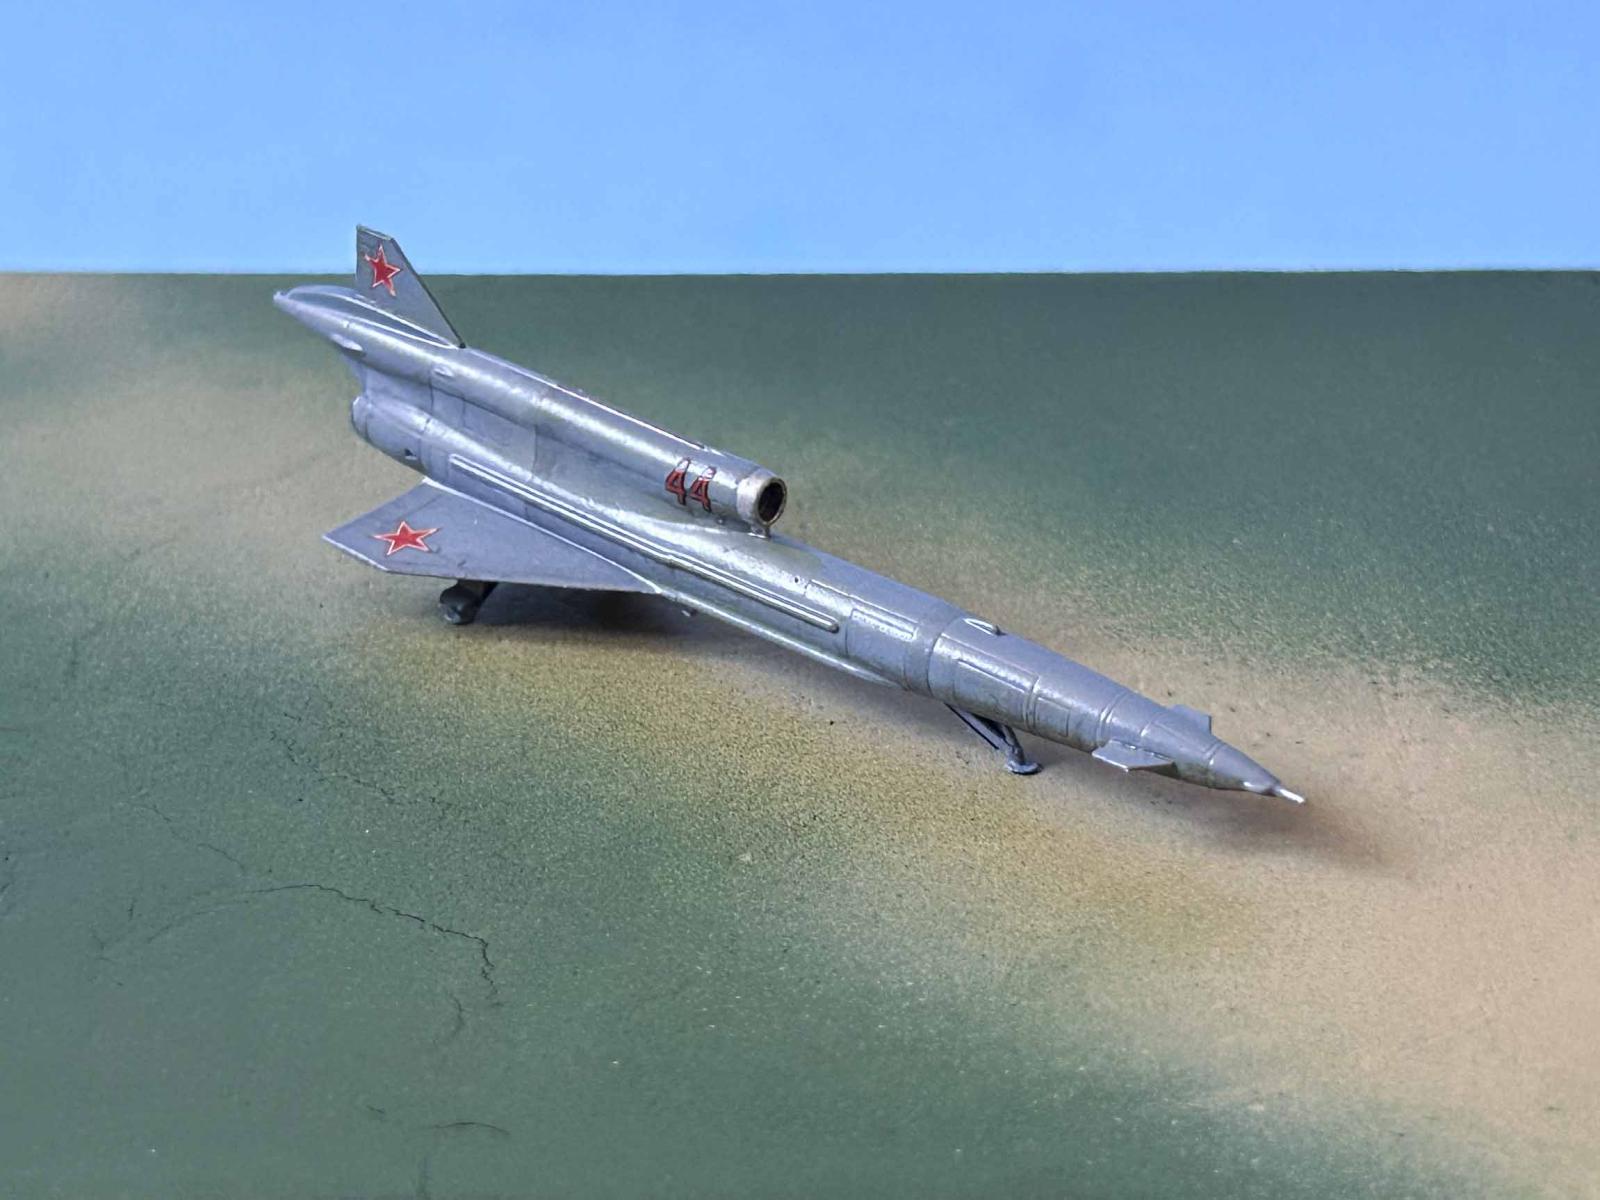
Once I had assembled the basic airframe, I primed the model with Tamiya Surfacer Primer (light grey). Satisfied, I painted the entire airframe Vallejo Air 71-343, Russian Air Force Grey Number 8. The pitot tube was painted Vallejo Metal Color 77.701 Aluminum. The engine intake ring was painted Vallejo Metal Color 77.712.The engine exhaust was painted Vallejo Metal Color 77.703 Dark Aluminum and then highlighted with Vallejo Metal Color 77.713 Jet Exhaust. I used Tamiya masking tape to mask off the camera windows and painted them Vallejo Air 71.056 Panzer Grey. I then airbrushed on Future and let the airframe sit for two days under a plastic bowl to keep dust away.
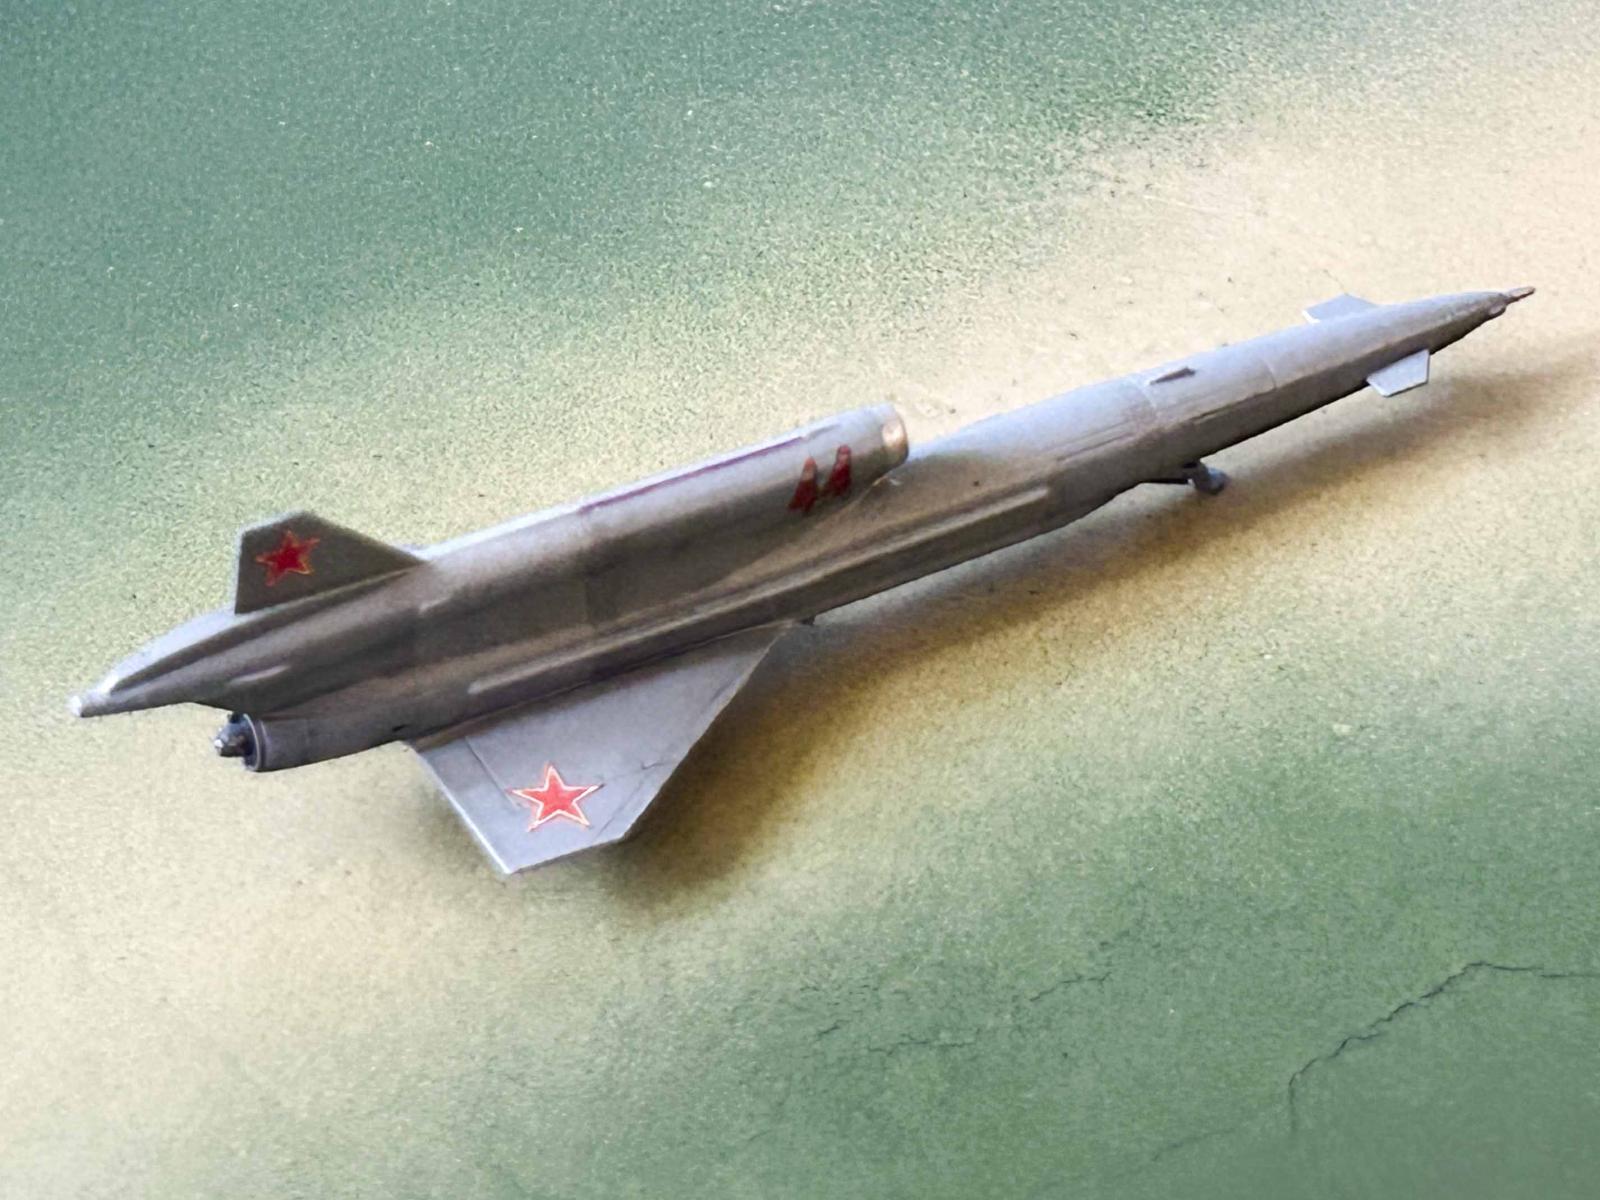
The decals need to be cut individually from the decal sheet, and ideally as close as you can get to the artwork as possible to minimize the carrier film. I brushed Future before laying down each decal and positioned with a wood toothpick until satisfied. You will want to be very careful with the decals as I lost one “44” code when it folded up on me removing it from the water. I used Gunze Sanyo Mr. Mark Softer on the decals and then let dry. After two days, I sprayed the model again with Future and let dry under a bowl for another two days.
Next up, I applied Tamiya Panel Line Accent Colors in Gray and Dark Gray to the panels. I applied Vallejo 70.938 Transparent Red to the dorsal ridge and Vallejo 71.344 Russian Air Force Grey Protective Coat to the fuselage panel just forward of the dorsal fin.
Overall Evaluation
Even at a hair over 4" in length, this is a nice multi-media kit. I would recommend that one be sure to have the appropriate tools on hand including a razor saw and tweezers capable of grabbing and placing very small photoetch parts. While this may not be a kit for the novice due to the small photoetch parts, it would be fine for those with any multimedia kit experience under the belt. I would love to see Brengun bring this kit out in 1/72 as they have included some really nice detail in 1/144.
My thanks to Hauler-Brengun and IPMS/USA for the chance to review this great kit.
Highly Recommended !


Reviewer Bio
Frank Landrus

Frank retired from the Ophthalmic industry with over thirty-six years of Research and Development experience. Frank's first model kit was a 1959 Hawk 1/72 US Marines Vought AU-1 Corsair and has been building models for over sixty years. Frank's first encounter with IPMS was attending a North Central Texas ScaleFest show in 1984. Frank soon became more involved in Make-N-Take activities and became the IPMS Western Coordinator for Make-N-Takes [West of the Mississippi River]. Make-N-Takes quickly became a local model contest and airshow staple reaching a high of reaching over 1,300 children before the COVID shutdown. Frank has volunteered to assist in contest judging since 1985 and is currently the Nationals Head Figure Judge until he is dead or they find someone better.
Comments
Add new comment
This site is protected by reCAPTCHA and the Google Privacy Policy and Terms of Service apply.
Similar Reviews