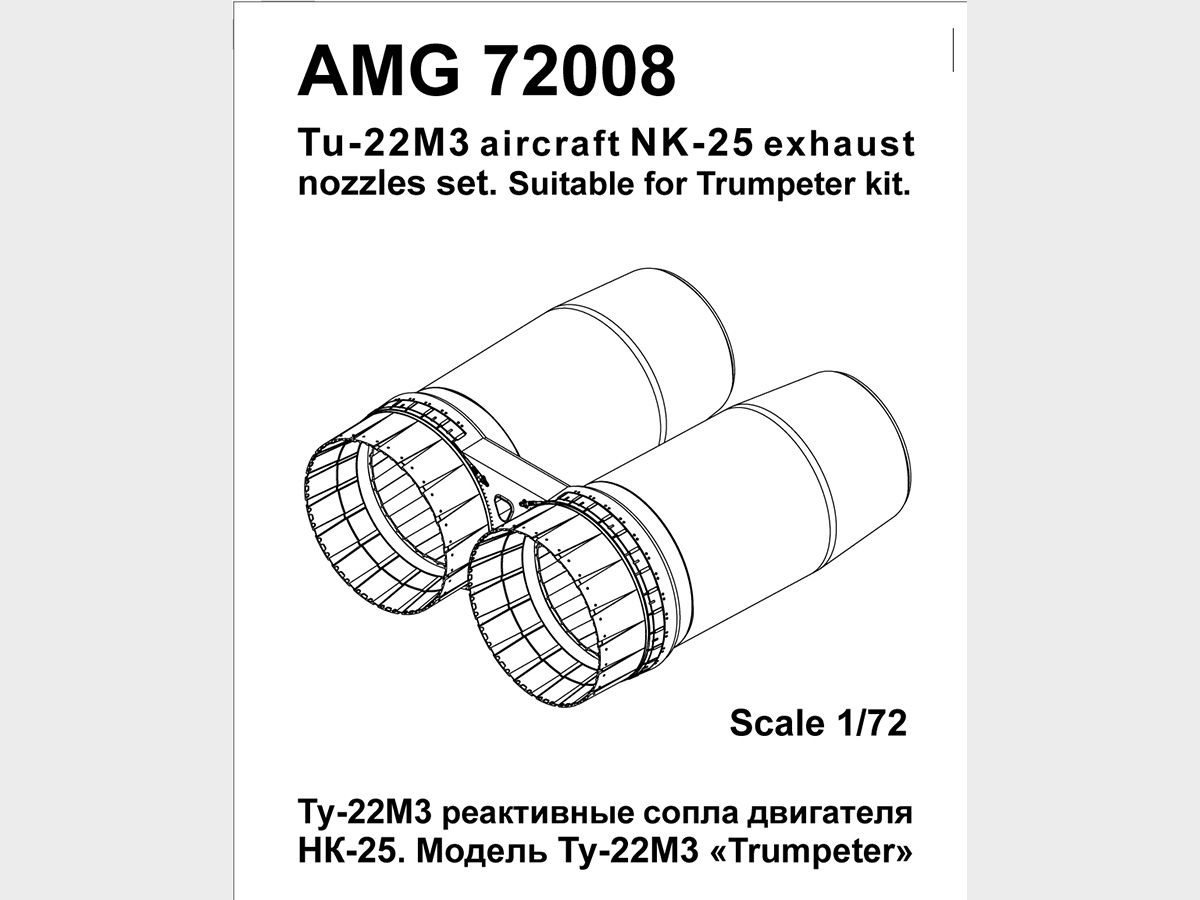
Tu-22M3 NK-25 Exhaust
IPMS/USA gladly welcomes the return of the Advanced Modeling/Amigo team for sending us this new-technology set; their lineup continues to grow! And thanks to Phil and John for obtaining the sets for the team…
Advanced Modeling/AMIGO (Hereafter referred to as AM for simplicity) is a Russian company specializing in modern Soviet and Russian aircraft accessories; their first items released a few years ago were weapons, and they have recently branched out into other items, in this case, an upgrade to Trumpeter’s 1/72 Tu-26M3 NK-25 Bomber kit exhaust, augmentor tubes, and afterburner nozzles.
AM’s accessory shows the extent 3-D printing has improved the appearance of our available aftermarket… included are 11 resin parts: Exhaust augmentor tubes with excellent cooling liner details, along with variable nozzle apertures and a new, correctly-sized tail fairing to attach all to the back of the kit. The star, however, is the 3-D printed Flameholder frame/grid. Fine, multiple layered details abound, just waiting for the impatient builder to make a muck of it by being in a hurry or using a knife. This is a DISASTER RECIPE if you are not careful and use the right tools. Read on…
The pictures tell the story, particularly the final one with the Trumpeter augmentor parts placed in the AM resin upgrade for the afterburner fairing bulkhead. Each exhaust as molded by Trumpeter has three parts, and no interior variable nozzles, only the outside burner petals and a turbine wheel. Compare that to the AM upgrade with the Printed flameholder over the turbine exhaust area, and there is virtually decades of difference in technology and final look. How to remove the flameholder from its backing frames and legs is the hard part, but the secret weapons to successfully attack the beast follow: Use a variable-speed rotary tool, like the Dremel, spun up to medium speed, very little pressure, and a bullet-shaped Emery stone grinder.
Everything just needs to be removed from casting blocks, including the aforementioned flameholder grid. Carefully, patiently, and not under the influence of alcohol, apply the grinder stone to patiently (there’s that word again for a reason) take off the back flashing of each and every part of the grid. Start from the center to the outermost area, and experience success. This way the strength of the part itself preempts bits from blasting off due to vibration. The fact all are still in place on my example shows the success of this technique. If it works for me, it can work for you.
The medium speed prevents killer vibration and harmonics from snapping off the tiny stuff. Really.
Sand down the flashing on the tail nozzle fairing in the traditional flat-table way, and insert the nozzles from BOTH sides like the instructions state. It will make difficult work if you need to putty and sand to get the fairing to “Fair in”, but the final product is night and day from the kit item.
Assemble, painting along the way, and weathering as well as appropriate. When finished, I shot all the exterior parts with Testors rattle can “Titanium”. Looks good to me.
This is an impressive, high-quality upgrade, making the Trumpeter Tu-26 that much better. Full marks to Advanced Modeling for providing what we old Cold-war dinosaurs desire out here amongst the unwashed while finding yet more ways to make our spouses mad at us and our cohorts ooh and ahh over minuscule details! Your sets fill the gaps on Eastern weapons and accessories, something we have only dreamt of in the past. …And thanks once more to Phil and John for approving my working the latest products!


Comments
Add new comment
This site is protected by reCAPTCHA and the Google Privacy Policy and Terms of Service apply.
Similar Reviews