
Tomahawk IIb - (P-40C African Ace)
History
The Curtis Company manufactured 13,700 P-40’s before and during World War II, with production ending on November 30, 1944. The P-40 flew with the air forces of the United States, the RAF, Australia, New Zealand, Canada, South Africa, France, Brazil, China, Turkey, and Russia and by some resources Finland.
The P-40 lineage may be traced back to the radial engine-powered P-36 and H-75. The P-36 was intended to replace the P-26 Peashooter in an effort to match the high performance European fighters (the Bf-109, Spitfire and to an extent the MS-406). The Wright XR-1670 radial engine rated at 900 bhp powered the first prototype which first flew in April 1935. Soon it was evident that the radial engine-powered aircraft would be outclassed, and therefore the Air Corps requested that a fighter be equipped with the Allison V-1710 inline engine. Eventually the design morphed into the P-40C powered by the Allison V-1710-33 rated at 1040 bhp.
In October 1939 the French ordered 230 Curtis H-81As, the export version of the P-40, which were then scheduled to be shipped in March of 1940. These aircraft were to be fitted with four Browning FN 38 7.5 mm machine guns in the wings and would be equipped with French equipment. Events of May-June 1940 were cause for this order not to be filled. Instead, the first batch of 140 of these aircraft was shipped to Britain. The British immediately noted deficiencies with the design such as lack of cockpit armor, no self-sealing fuel tanks and weak armament. These aircraft were relegated to training and ground support in North Africa.
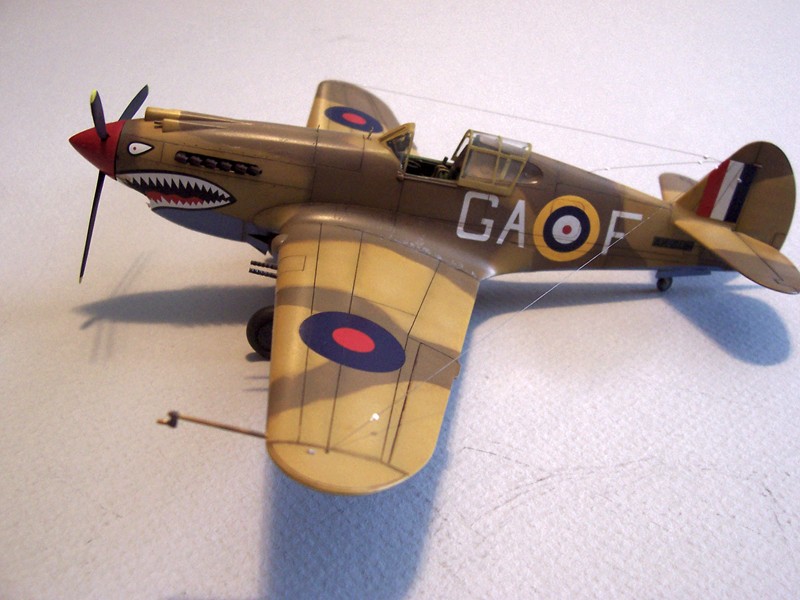
Somehow my earliest memories of World war II aircraft always include the P-40’s of the American Volunteer Group. There is something neat and wicked about the shark mouths. The engine cowling of all the P-40 series aircraft seem to be the perfect pallet for nose art: shark mouths, skulls, parrots and the occasional nude damsel adorned these aircraft.
Box Contents
This model kit was previously issued by Hobby Craft as “P-40 Pearl Harbor Defender“, and later by Academy as P-40C Tomahawk. The current issue contains three sprues molded in grey plastic, plus a small sprue of clear parts. Despite the age of the kit there was no flash present on any of the parts. Panel lines are finely engraved with limited recessed rivet detail around the wings and horizontal stabilizer fillets. Overall the parts look quite nice. There are a few spare parts to be used in the Academy P-36 kit, and there are no alternative parts to the P-40 build. All very basic, but still nice.
Instructions
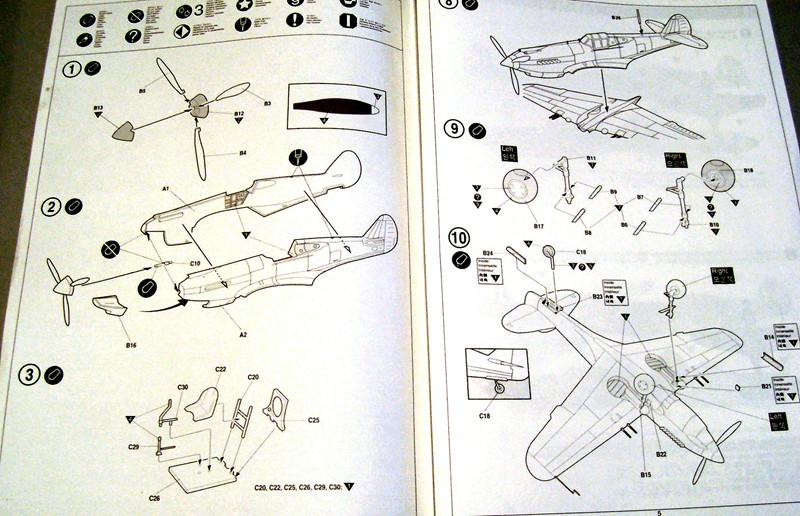
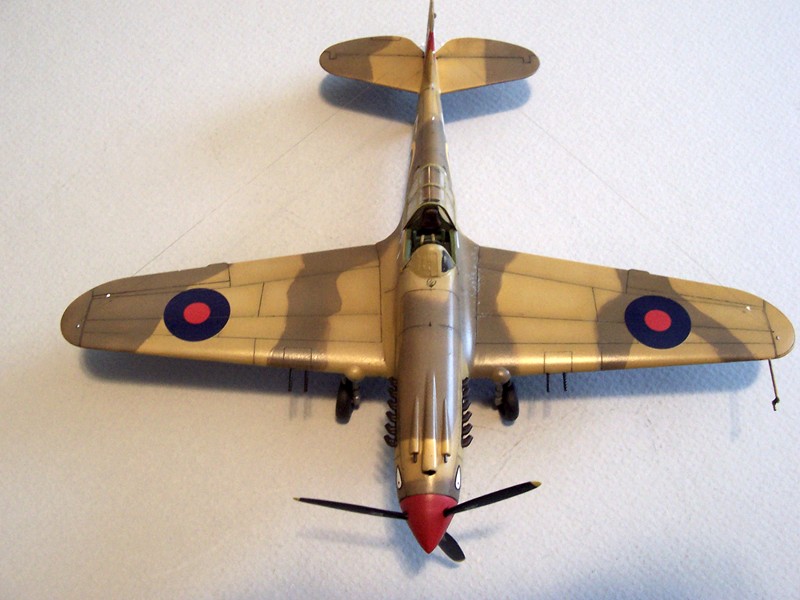
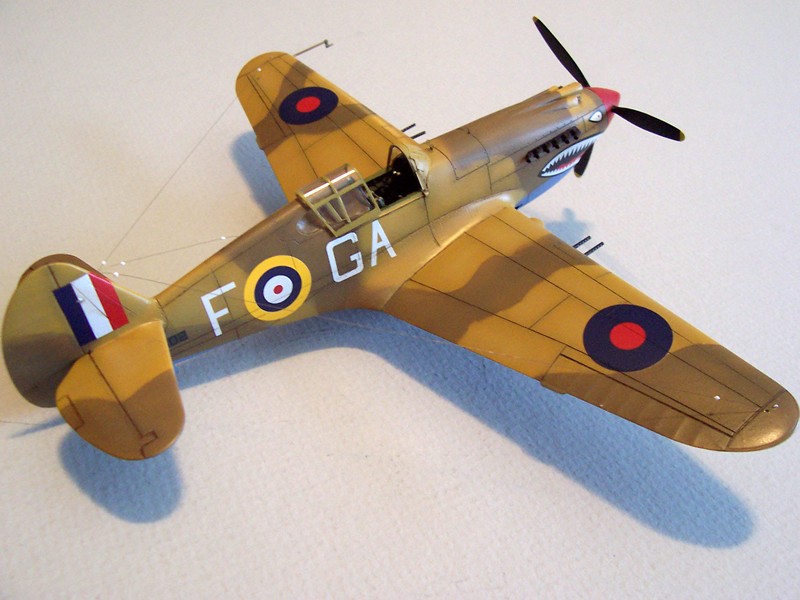
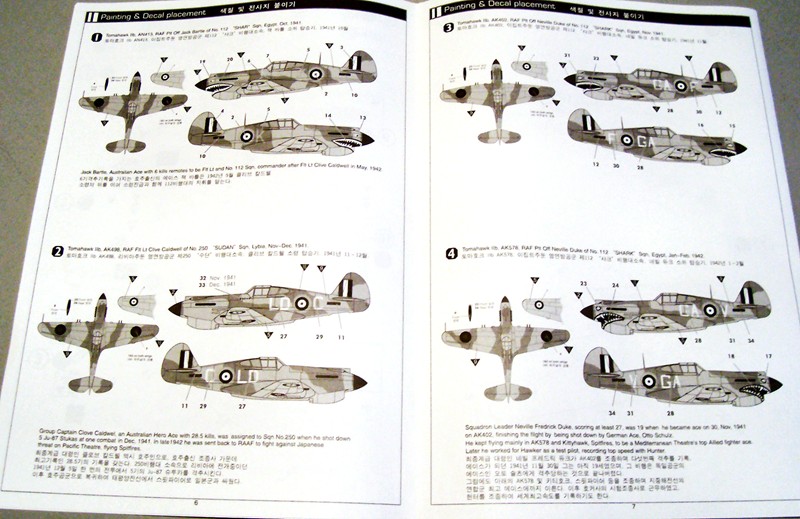
The instructions are the eight-page fold-out variety. There are ten uncomplicated steps to the work, with exploded views locating the various components. Suggested paint colors and manufacturers are noted by numbered triangles. There are two pages of aircraft profiles for four different aircraft, three of which bear the famous shark mouth. All aircraft are painted with azure blue undersides, and dark earth and middle stone upper surfaces. The last page shows the sprue layouts and identifies parts not required in the build.
Construction
Cockpit/Fuselage
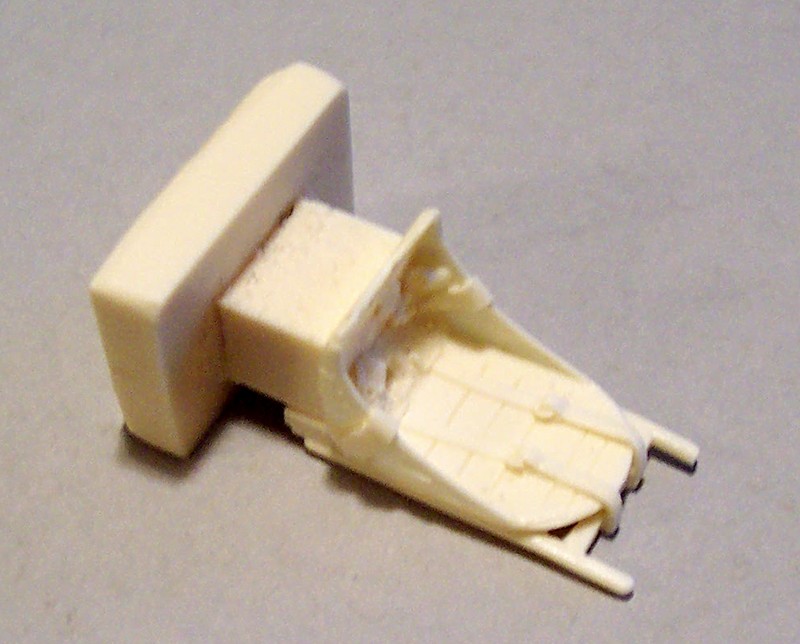
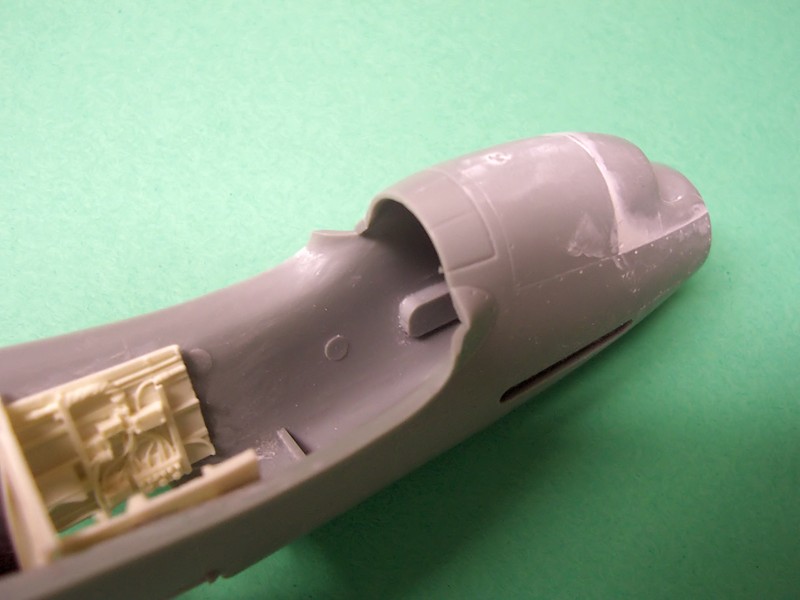
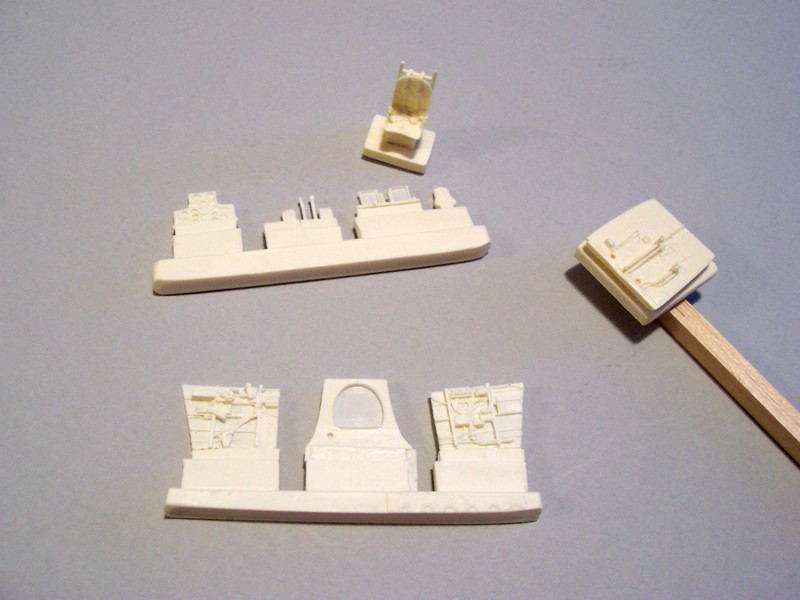
The kit cockpit consists of molded-on detail on the fuselage sides, plus the floor, seat, rear bulkhead, instrument panel and gun breaches. The control stick and seat adjustment levers are molded separately. Good basic detail, but rather sparse and plain. True Details offers a resin replacement (48003) specifically for this kit that raises the level of detail. That is what I planned to use in this build. In addition Eduard photo etch set FE137 was used to compliment the True Details resin. While the kit cockpit floor is flat, the True Details resin floor has a slight curve matching the top of the wing profile. Purists take note!!
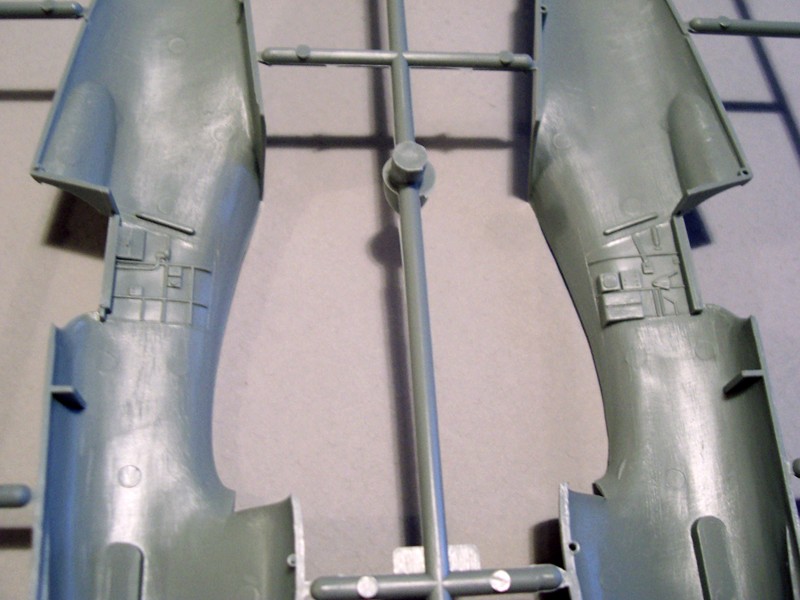
Some care is required when fixing the fuselage halves together to assure proper alignment. The engine lower cowling is a separate piece and will also require some care with alignment. I ended up with a minor step on one side of the cowling/fuselage joint and used filler to eliminate the difference. The Eduard PE set provide three small discs with raised detail to fit over the radiator intakes. The kit part represents the three intakes as raised, flat surfaces.
The True Details side walls were fixed in place with Gorilla super glue after the kit details were sanded off. I also removed the inside cantilever of the side rails. The seam in the rear spine panel of the cockpit was filled with putty and sanded smooth. The rear cockpit bulkhead is inserted from below and fixed with super glue. I checked the fit of the True Details seat and found that it would not fit from the top, but would need to be fixed to the TD floor and inserted from below. This step is a tight fit, and the end result, while not perfect, is OK. Again super glue fixed the resin parts in place. Looking down into the cockpit reveals a very busy area, which is a vast improvement over the rather Spartan kit cockpit.
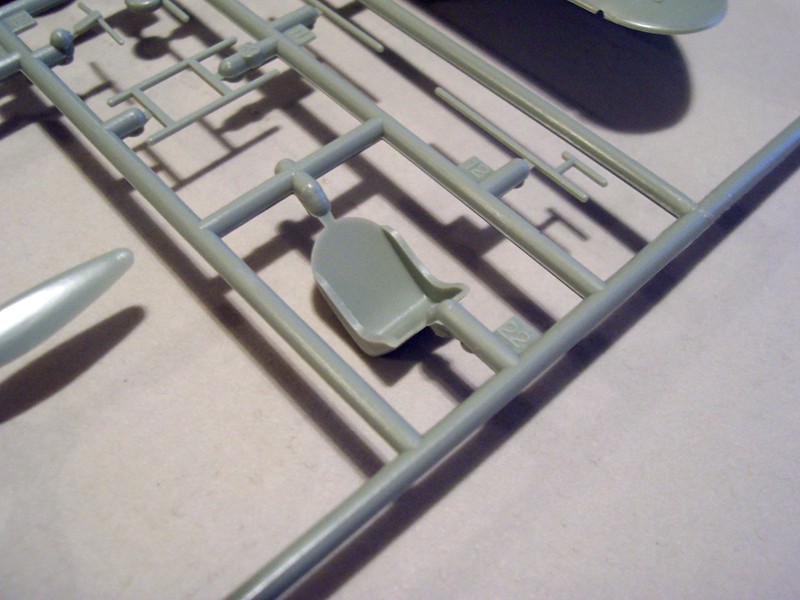
The kit seat is quite simple, but could be used with some thinning of the sides. The TD resin replacement parts include a well detailed seat with molded on seat belts. This part was used to replace the kit part.
The ring gun sight is provided in a molded part, and is a bit too thick. The Eduard PE included a more-to-scale part that was used to replace the kit part.The P-40C was fitted with round exhausts. The kit parts are a bit bulky and require careful cleanup to remove the molding seam, and should be drilled out for added realism. I substituted the very nice Ultracast set for this project. The exhausts fit into slotted recesses on either side of the engine. The resin exhaust base plate require careful trimming of each end to fit within the recess.
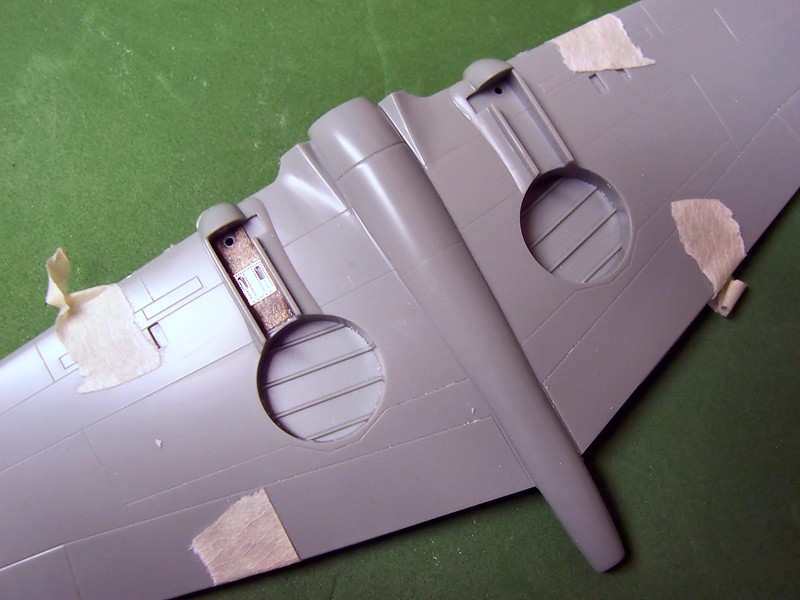
Most reference images of P-40’s show the engine cooling vents in an open configuration. I used a fine razor saw to remove the molded-on vents. Using a thin strip of styrene the opening was closed off. The vent flaps were made from individual pieces of sheet styrene. While not perfect, this work does offer a bit of interest to the appearance to the model.
Wings
The wheel wells are molded as part of the wing underside and contain limited detail. The Eduard PE set provides a few pieces to dress up this area. The kit’s plastic pitot tube was replaced with brass tube and surplus photo etch before I could break the installed kit part. The brass tube extended well into the wing leading edge and offers a very secure installation. The fit of the wing subassembly to the fuselage is tight, but with care and patience the parts fitted together with only a minor step at the left wing root.
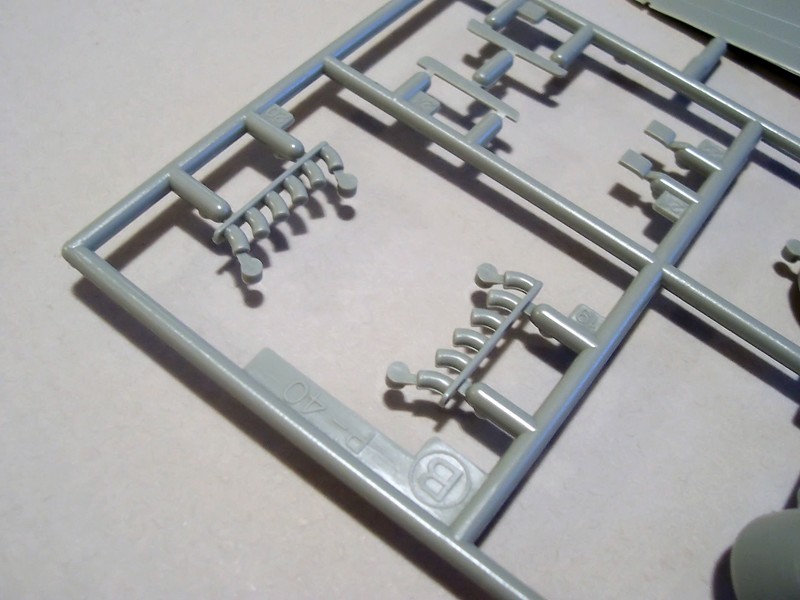
The mounting holes for with wing-mounted gun barrels are represented by half round openings. These holes should be drilled out as full circular openings for a better fit of the four gun barrels. Each gun barrel is nicely represented with cooling holes along the length. The barrels were too small a diameter for me to drill out the ends and therefore I needed to use some 3-D black paint to represent open ends.
Landing Gear and Wheels
he main gear are quite simple and could use so I added detail such as brake lines. Again, the Eduard PE comes to the rescue with replacement parts for the struts. The kit wheels are nice, but I decided to use the True Details (TD 48020) flattened resin wheels in their place. The True Details wheels are showing their age, but still work nicely in the build. The Eduard PE inner wheel covers are installed once the axle mounting hole is drilled out.
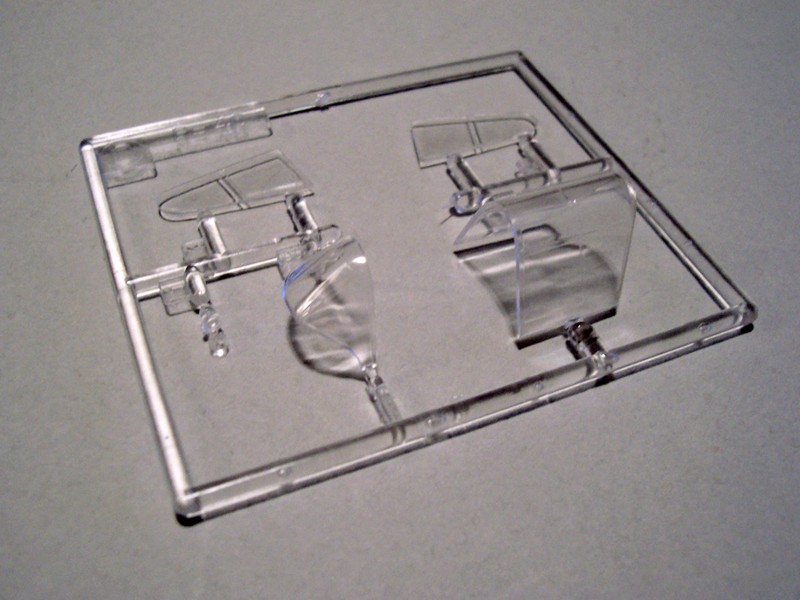
Canopy and Windscreen
The clear parts are a bit thick and not too clear, but are crisply molded. A dip in Future floor wax really improved the appearance of the clear parts. I had some concern that the sliding portion of the canopy when placed in the open position would set too high. A test fit revealed the part fit looked quite natural.
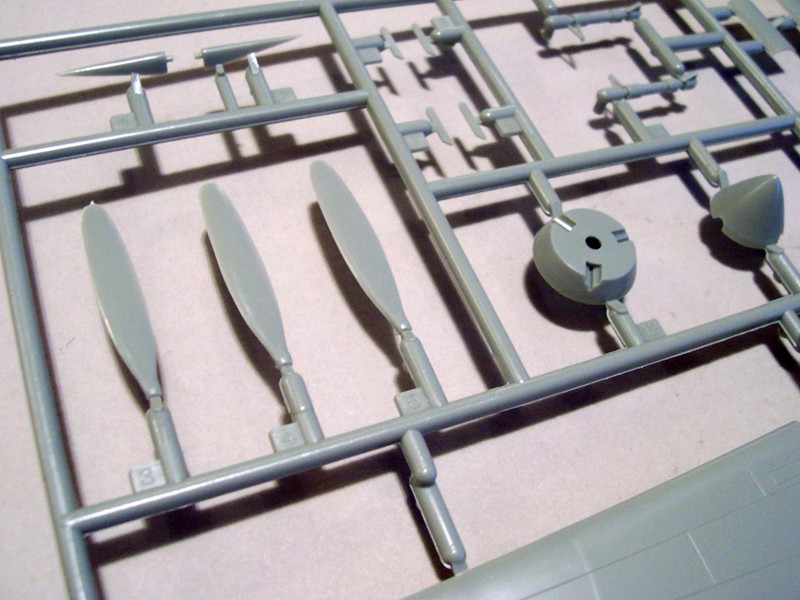
Propeller and Spinner
The spinner is comprised of two parts and the propeller blades are individual parts. I glued to spinner part together and used d some filler to eliminate some unevenness between the two parts. I first primed the parts with white paint, and next painted the spinner parts red as shown on the instructions, and painted the blades separately. Care is required to fix the blades at the rear part of the spinner to assure proper alignment. I used Gator glue to fit the blades into the spinner.
Painting and Finishing
The model was first primed with Rustoleum’s painter’s Choice, flat white. Imperfections were corrected followed by a pre-shading of all panel lines with a mix of Tamiya flat black and red/brown. PolyScale acrylic paints were used for the exterior camouflage colors. Three airbrush applications of Future floor wax preceded the decals.
Decals
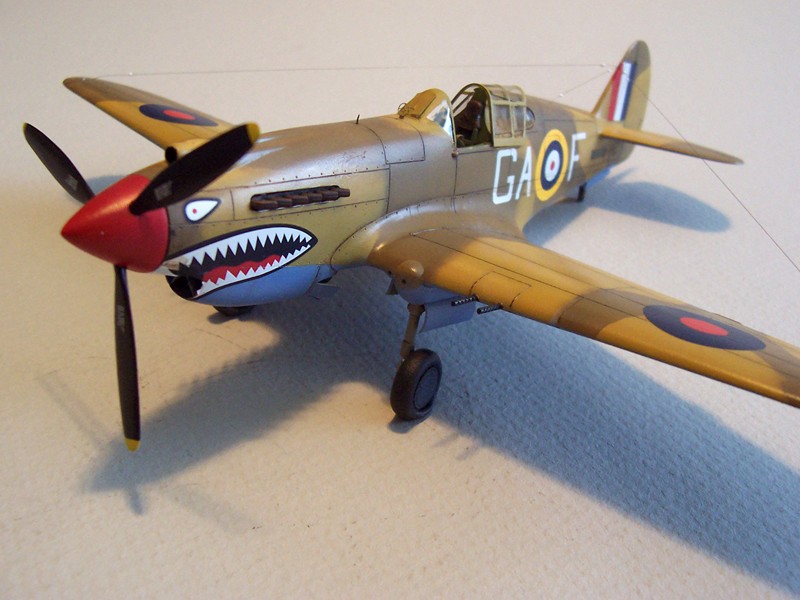
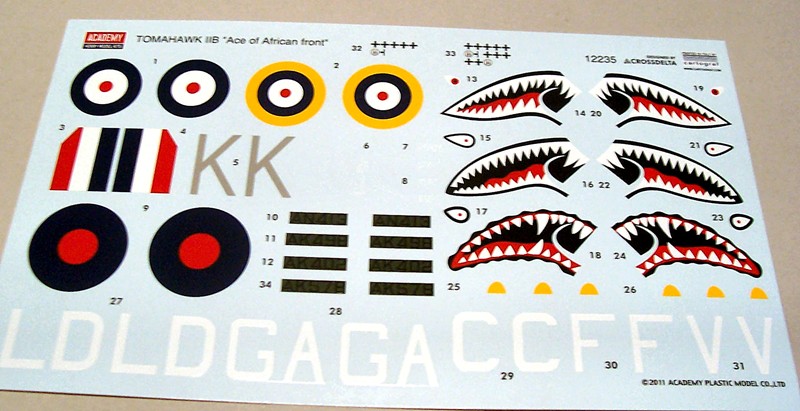
The decals are printed by Cartograf and appear to be a bit too glossy and just a bit thick. I was immediately concerned about how well they would work. I found that I had nothing to be concerned about. The decals worked just fine with the application of Microset and MicroSol. The decals did bridge the fine panel lines and were cut with a sharp hobby knife. The markings that I used were for the aircraft flown by Neville Duke, No 112 “Shark” squadron. The shark mouth did not quite fit and some gaps were evident. I used bits and pieces from the remaining shark mouths to fill the gaps. One last application of Future was used to blend the decals’ edges, and after a day to harden a final application of ModelMaster acryl flat was used to finish the model.
Conclusion
This offering from Academy remains a great kit for the beginning modeler to build right out of the box, and the price is almost just right. The fit of the parts is good considering the old molding technology. The advanced modeler may wish to replace various components with better detailed aftermarket accessories. Either way this kit will build up to a fine model that captures all the sleekness and appeal of the early Curtis fighters.
I experienced no fit problems with the parts, and the mold seams were pretty insignificant.
I enjoyed the build and recommend this kit for all modelers no matter their skill level. Lots of potential within the confines of the box. While researching the P-40 I found several articles addressing the inaccuracies in the Hobby Craft/Academy kit. I elected not to undertake this additional work as most of the “inaccuracies” are found on the fuselage undersides, I felt the model looks like a P-40C and I should leave well enough alone. I have two other Hobby Craft/Academy kits in my un-built collection. Perhaps one of those will receive the accuracy corrective treatment.
Thanks to IPMS/USA, Academy Hobby Model Kits and MRC - Model Rectifier Corp. for the opportunity to build and review this kit.
And, yes. That is masking tape on the windscreen. Amazing what one doesn’t see when one is not looking. The tape was removed after submitting this review.


Comments
Add new comment
This site is protected by reCAPTCHA and the Google Privacy Policy and Terms of Service apply.
Similar Reviews