
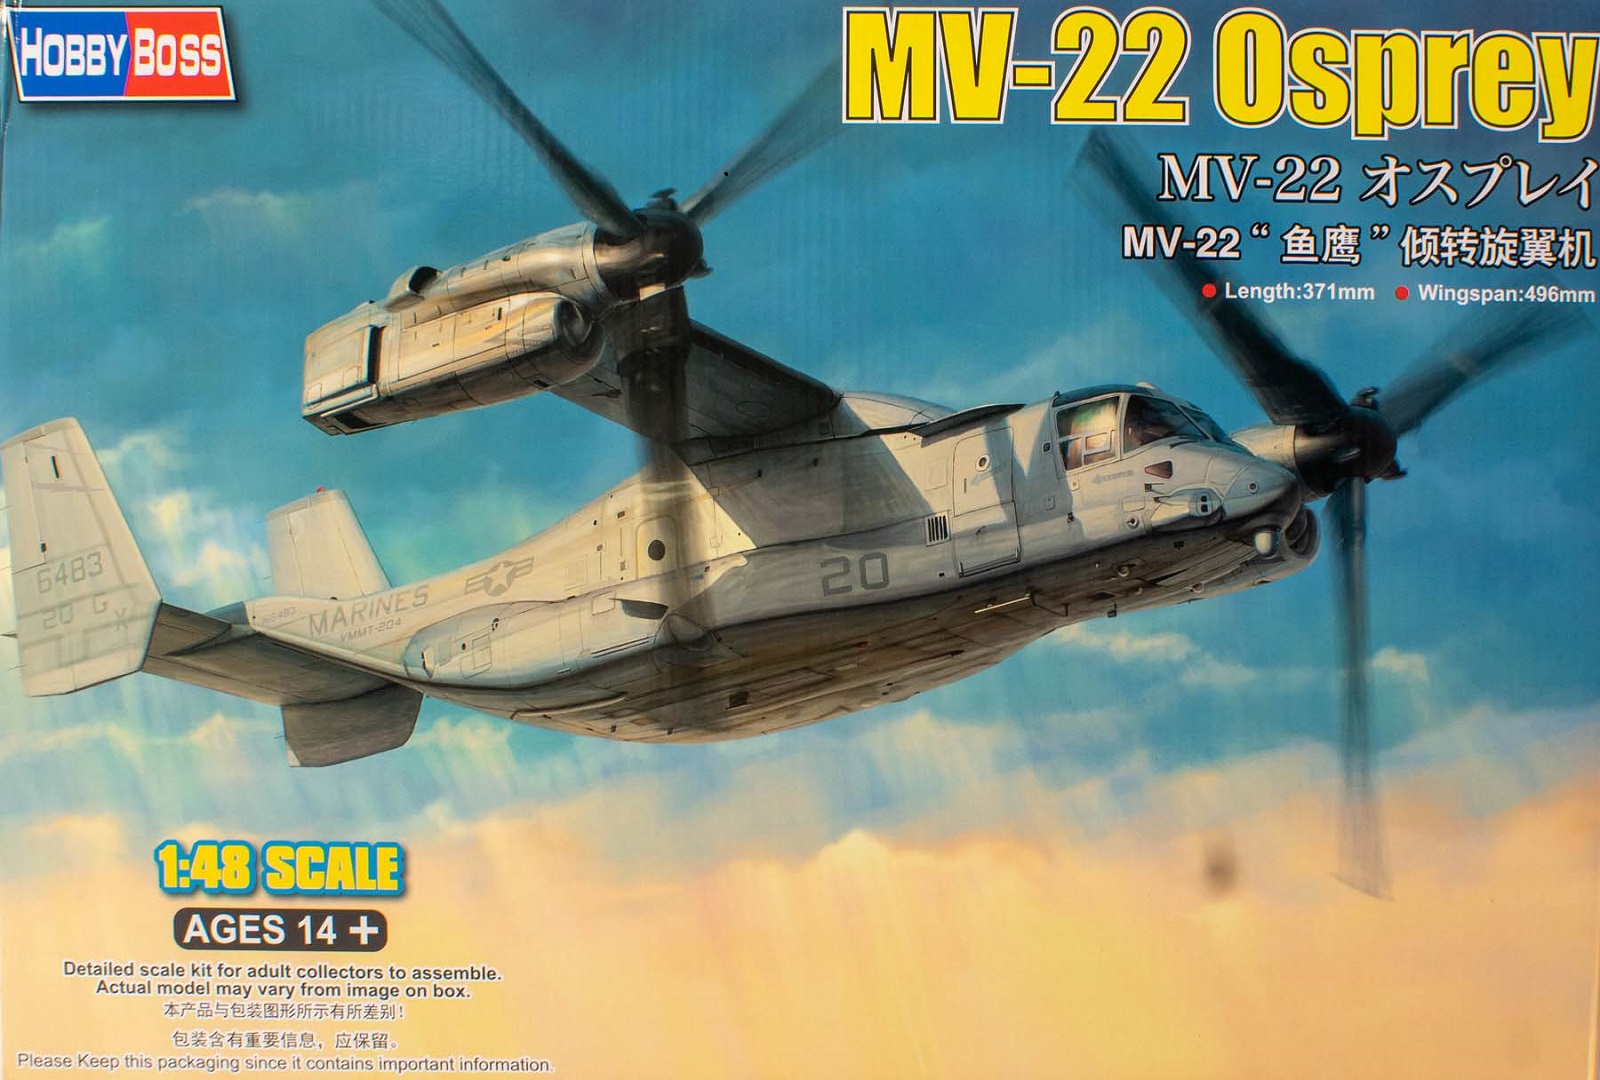
MV-22B Osprey
The Bell Boeing V-22 Osprey had a checkered development history and near cancellation of the project. However, persistence paid off and this unique and versatile hybrid aircraft has seen great success in the US Marine Corp (MV-22B) and US Airforce (CV-22). It is also being integrated into the US Navy (CMV-22B) to replace the aging Grumman C-2 Greyhound’s, as well as a Presidential (Marine MV-22B – VIP) transport. The only export customer so far is the Japanese Ground Self-Defense Force (MV-22B). There are several other countries who have or are considering the Osprey.
The 1/48 Hobby Boss Osprey arrived in a large (a little too large for the contents), strong box, with a nice painting of the Marine version of the Tilt Rotor aircraft featured inside. Each sprue was contained in its own plastic bag, except for sprue “D” which was duplicated. The clear sprue was wrapped for extra protection and the “glass” was crystal clear. A small photo etch (PE) fret and decal sheet were protected within their own bags. Rounding out the contents were the black and white instruction book and a color painting/decal guide. Hobby Boss also included a color sheet showing their other latest releases.
While inspecting the parts, it showed that most ejector pin marks were located in places that would not be seen (except for two in the cockpit side walls and two inside the main wheel wells). There was very little flash as well. There were mold lines along the upper and lower fuselage sides and sponsons. These were all tiny and easy to eliminate. It looked like those parts may have been slide molded due to the compound curves. For most parts, the sprues stubs attached on the mating surface.
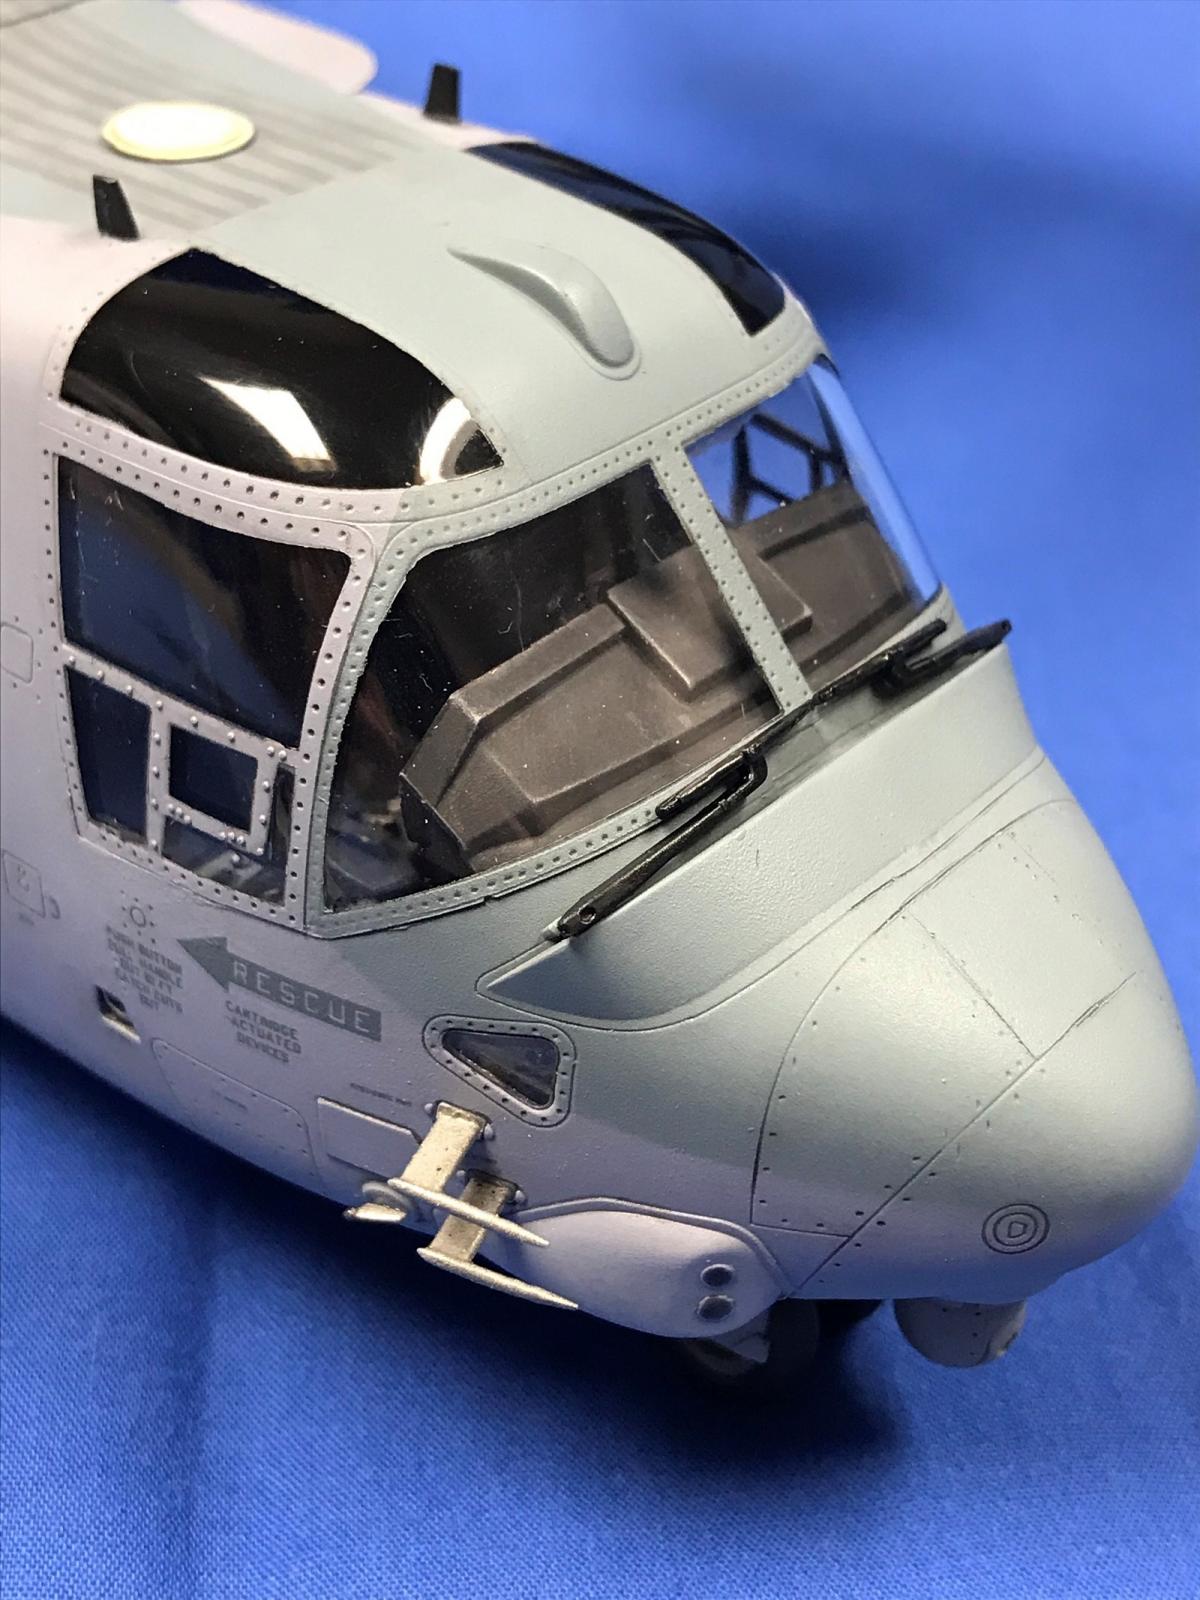
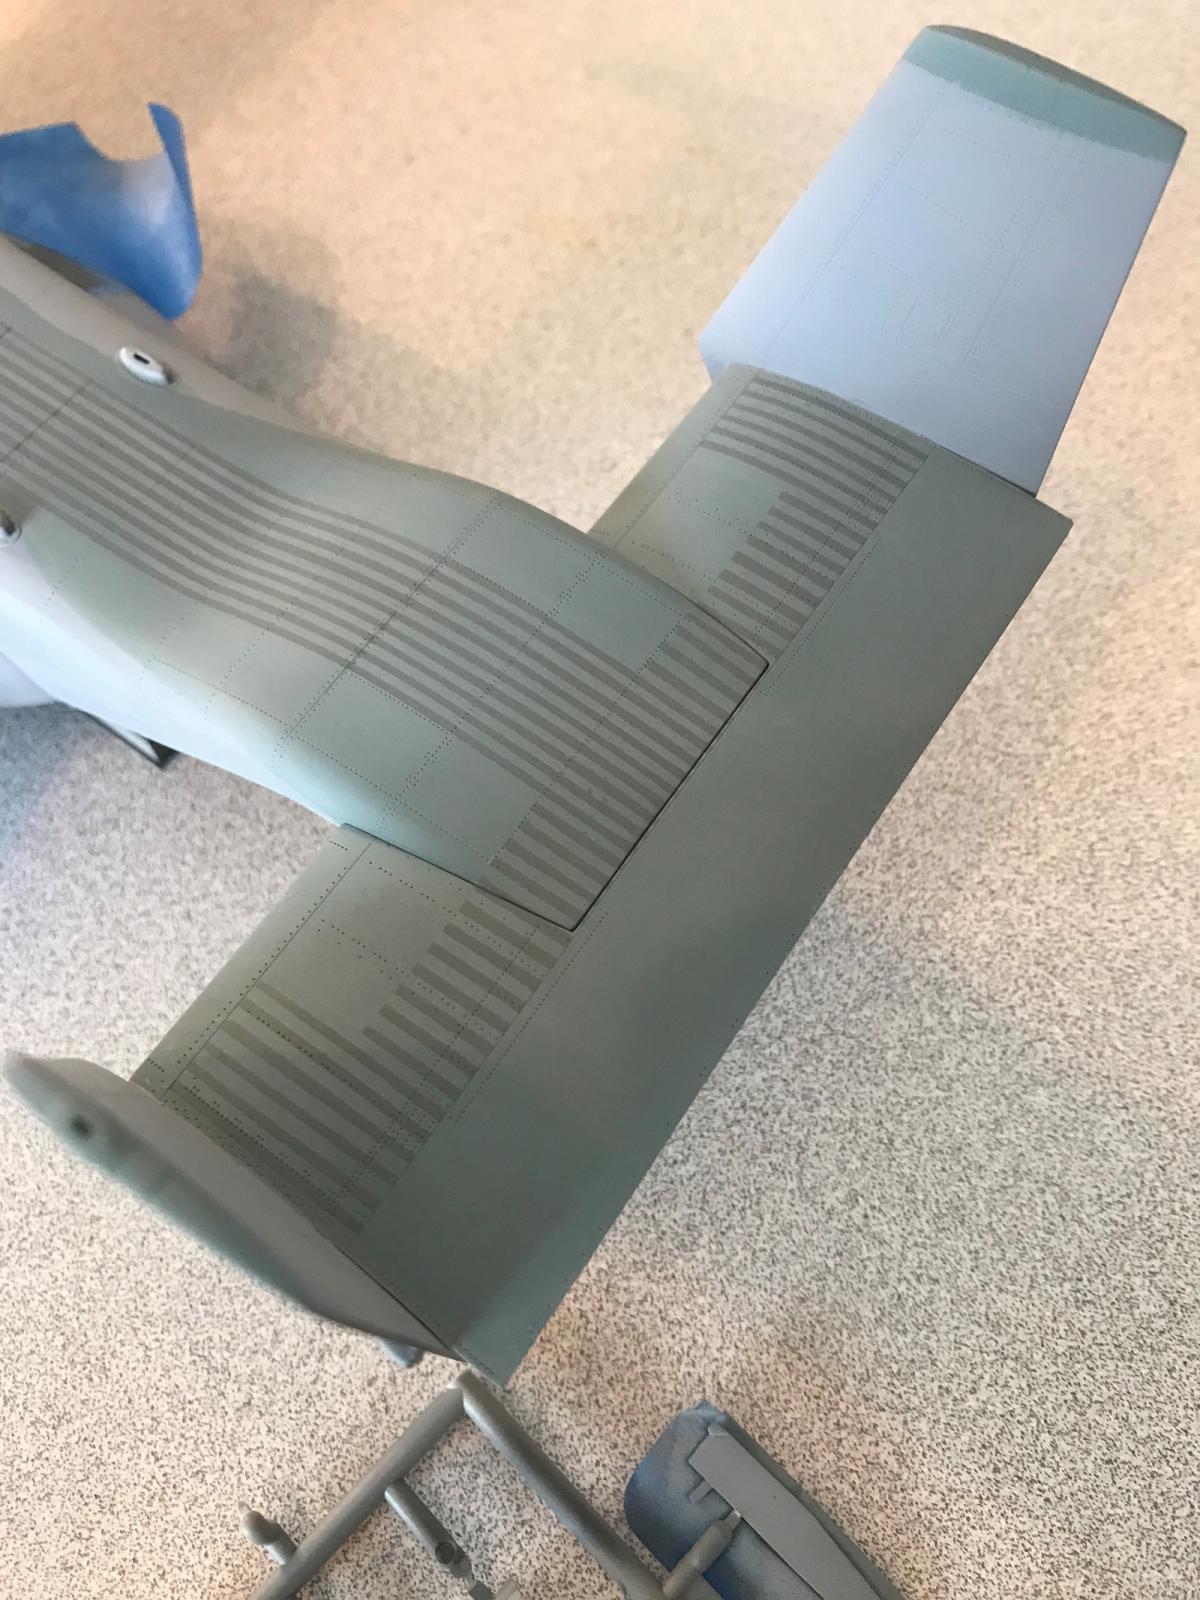
The surface detail was simply beautiful with fine recessed panel lines and rivets. As much of the real aircraft is made of composite materials the level of surface detail appeared restrained and appropriate. Only on the nose and nacelle tops did some panel lines become less pronounced.
The instruction booklet was easy to follow with clear steps and diagrams. The decals looked well printed and glossy. Markings were provided for one aircraft belonging to the Marine Medium Tiltrotor Training Squadron 204, based at MCAS New River, North Carolina. Hobby Boss made no reference to this. There are some great pictures of this Osprey at: https://www.seaforces.org/usmcair/VMMT/VMMT-204.htm.
The small, brass photo etch fret contained shoulder harnesses for the two pilot’s seats, screens and fire extinguisher mounting brackets. The metal was pliable enough to easily bend to shape and strong enough to be workable.
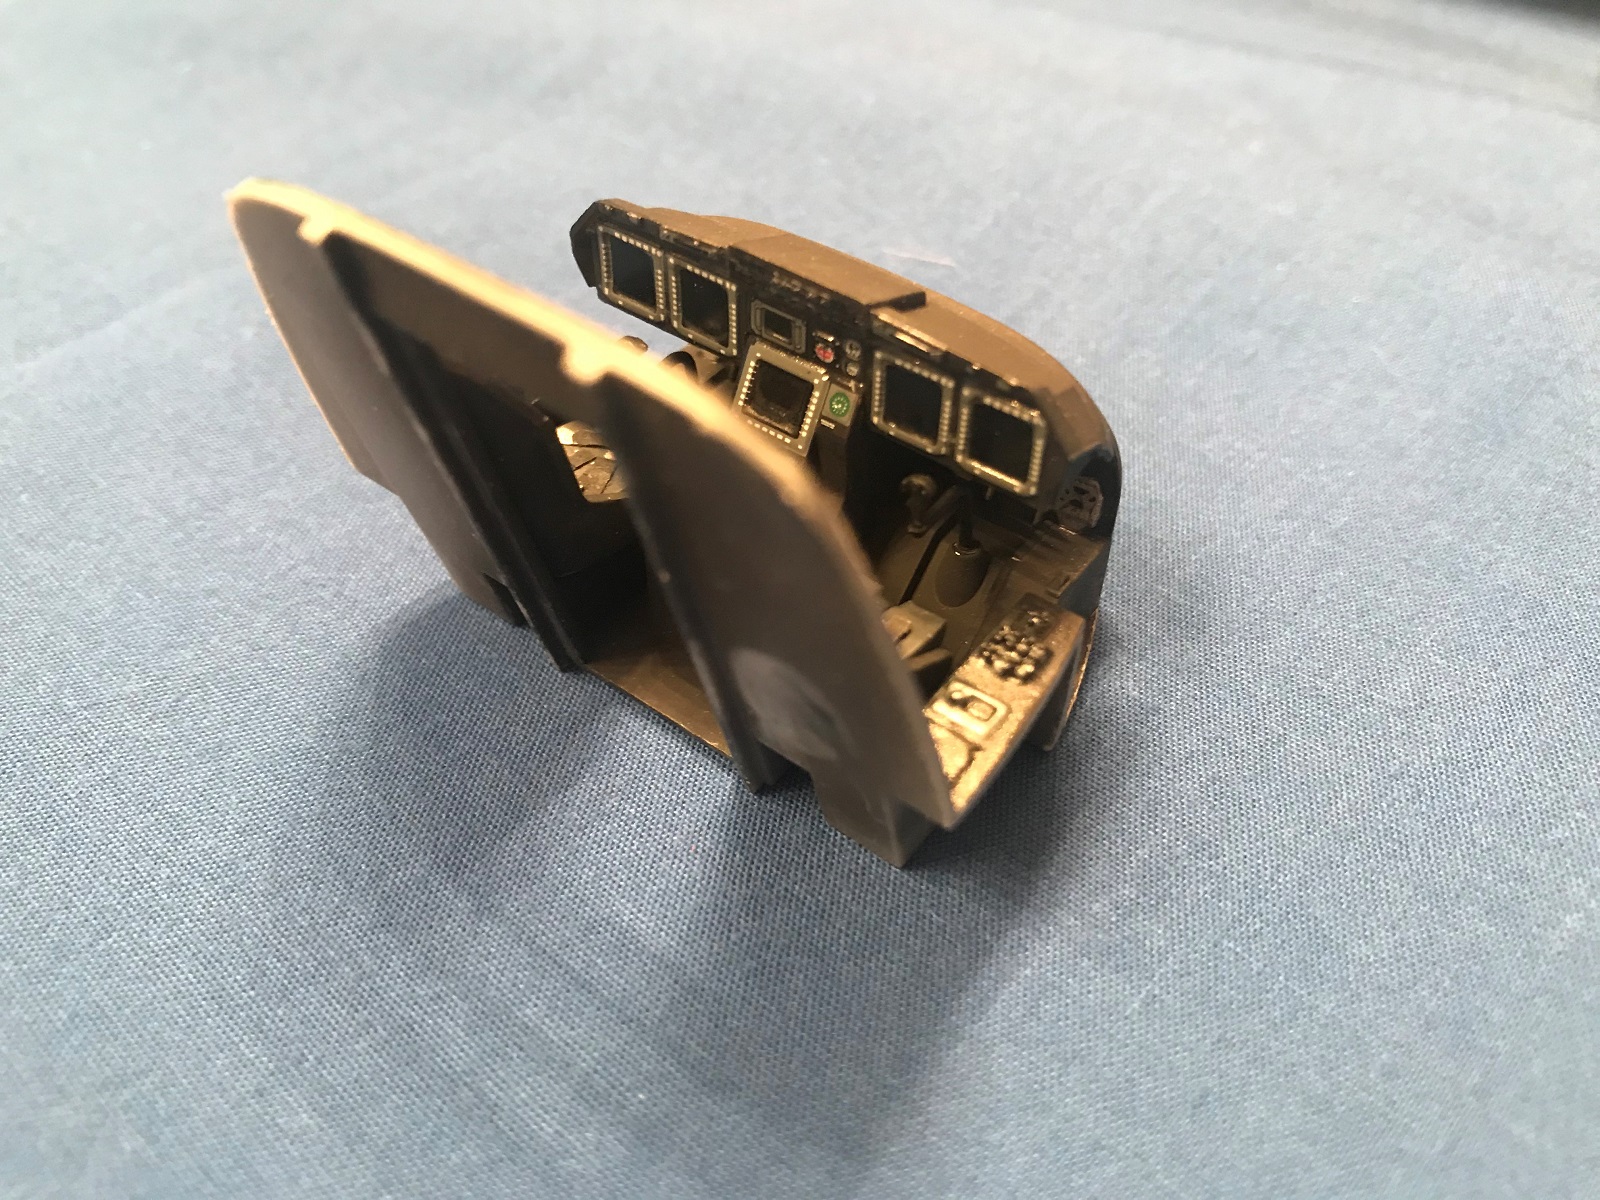
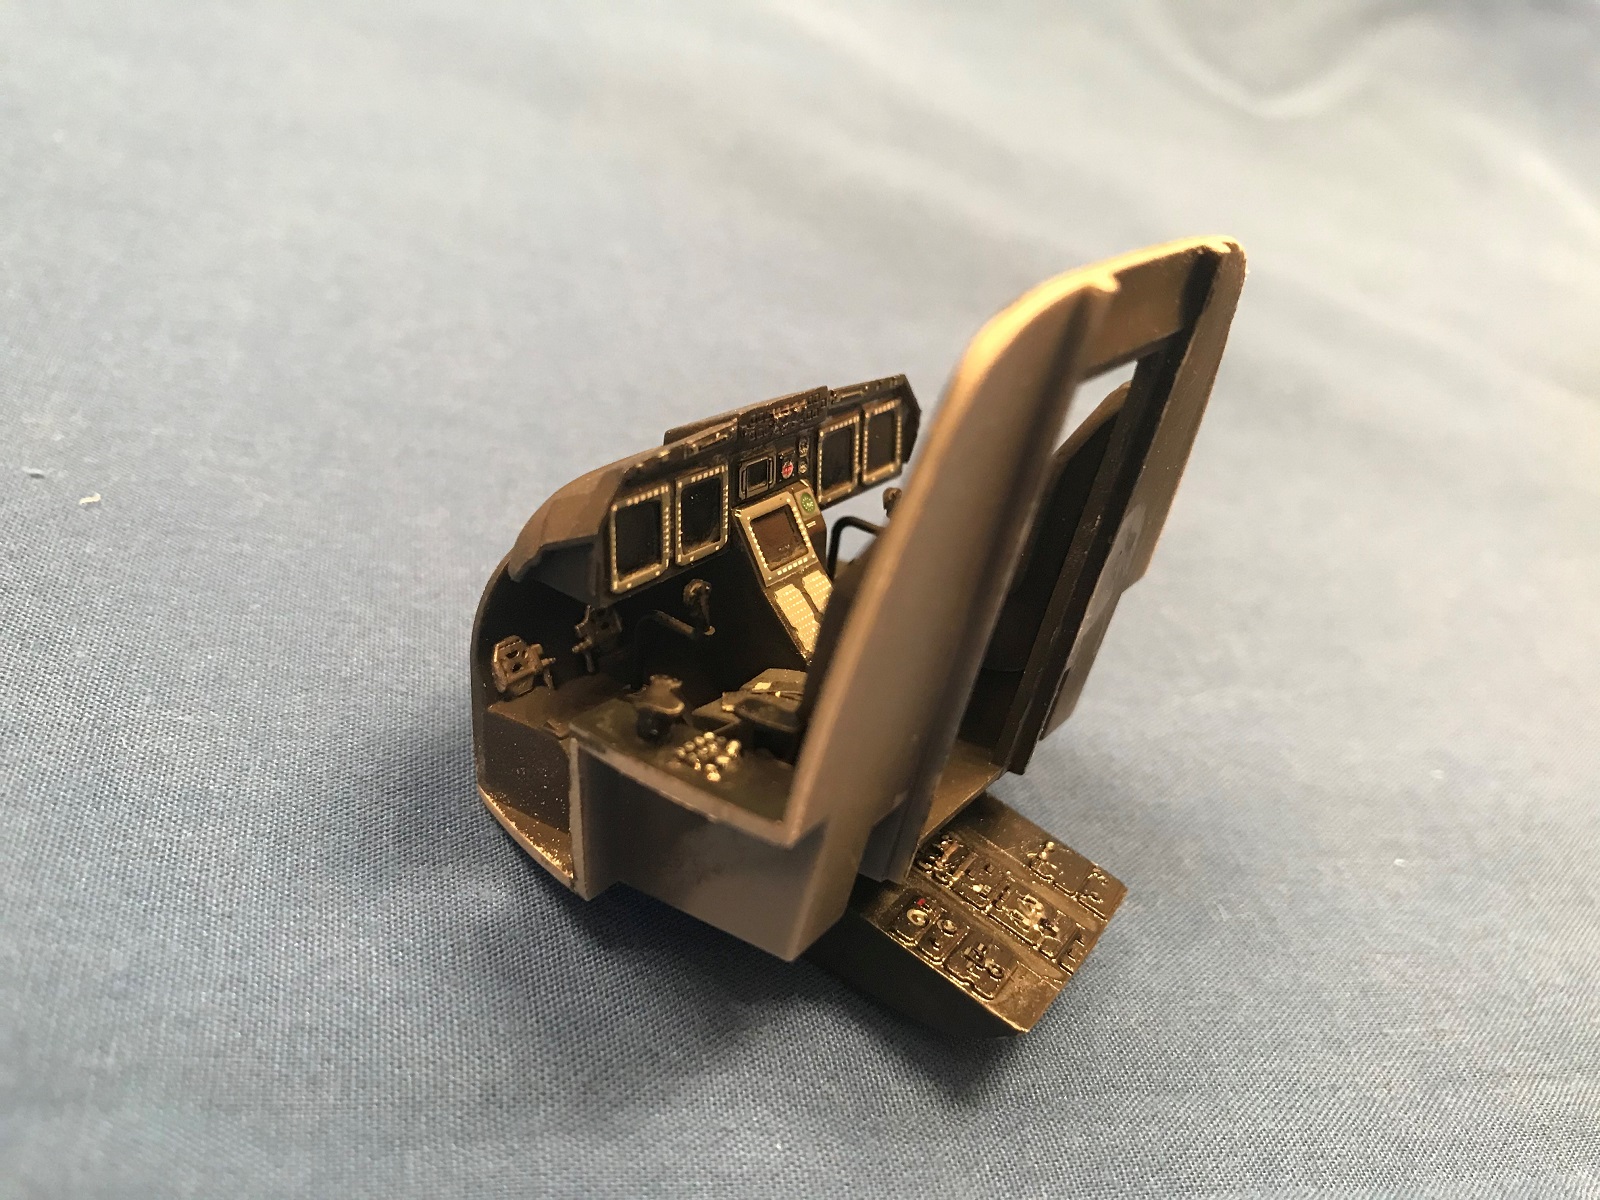
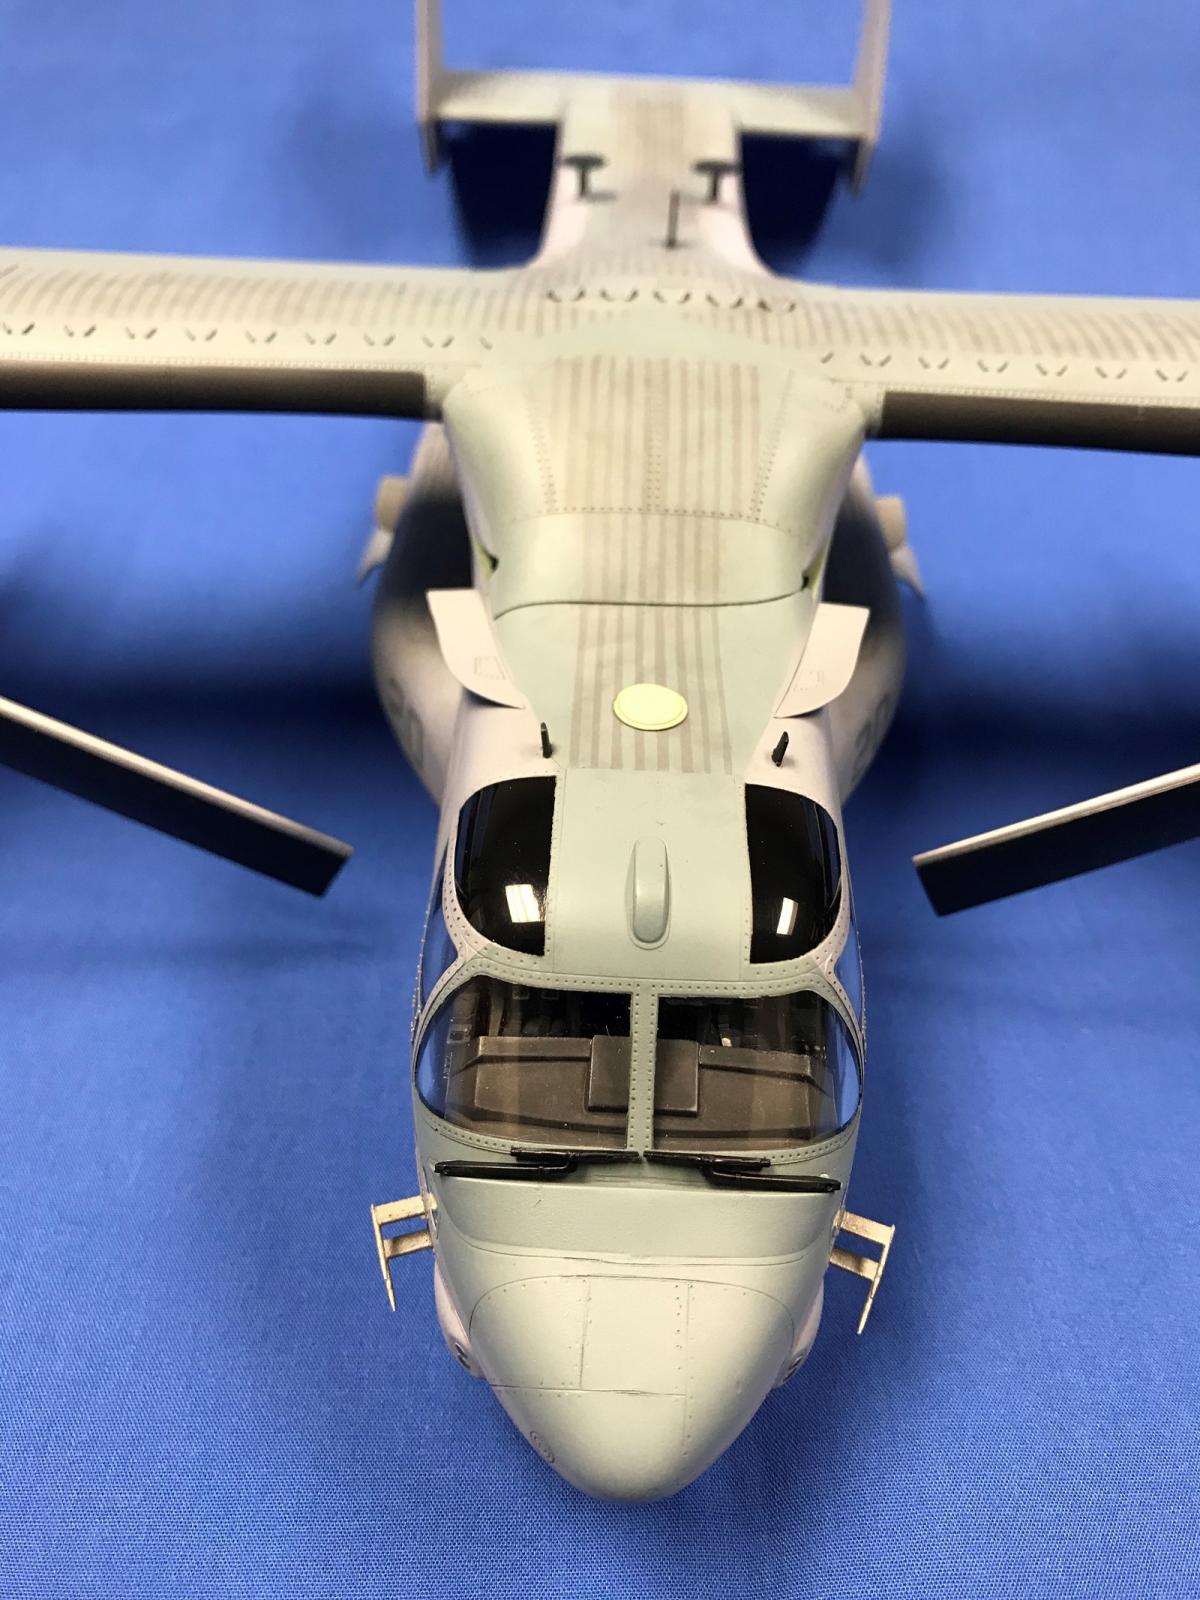
Before starting construction of the cockpit and cabin areas, all internal parts were painted. The cockpit is essentially all black, with black seats and PE belts. Only the shoulder harnesses were supplied. I made the lap straps from tape. Decals were provided for the instrument panel, side consoles and overhead panels. They were glossy, applied well to raised and recessed surfaces, and looked more than adequate behind the cockpit windows.
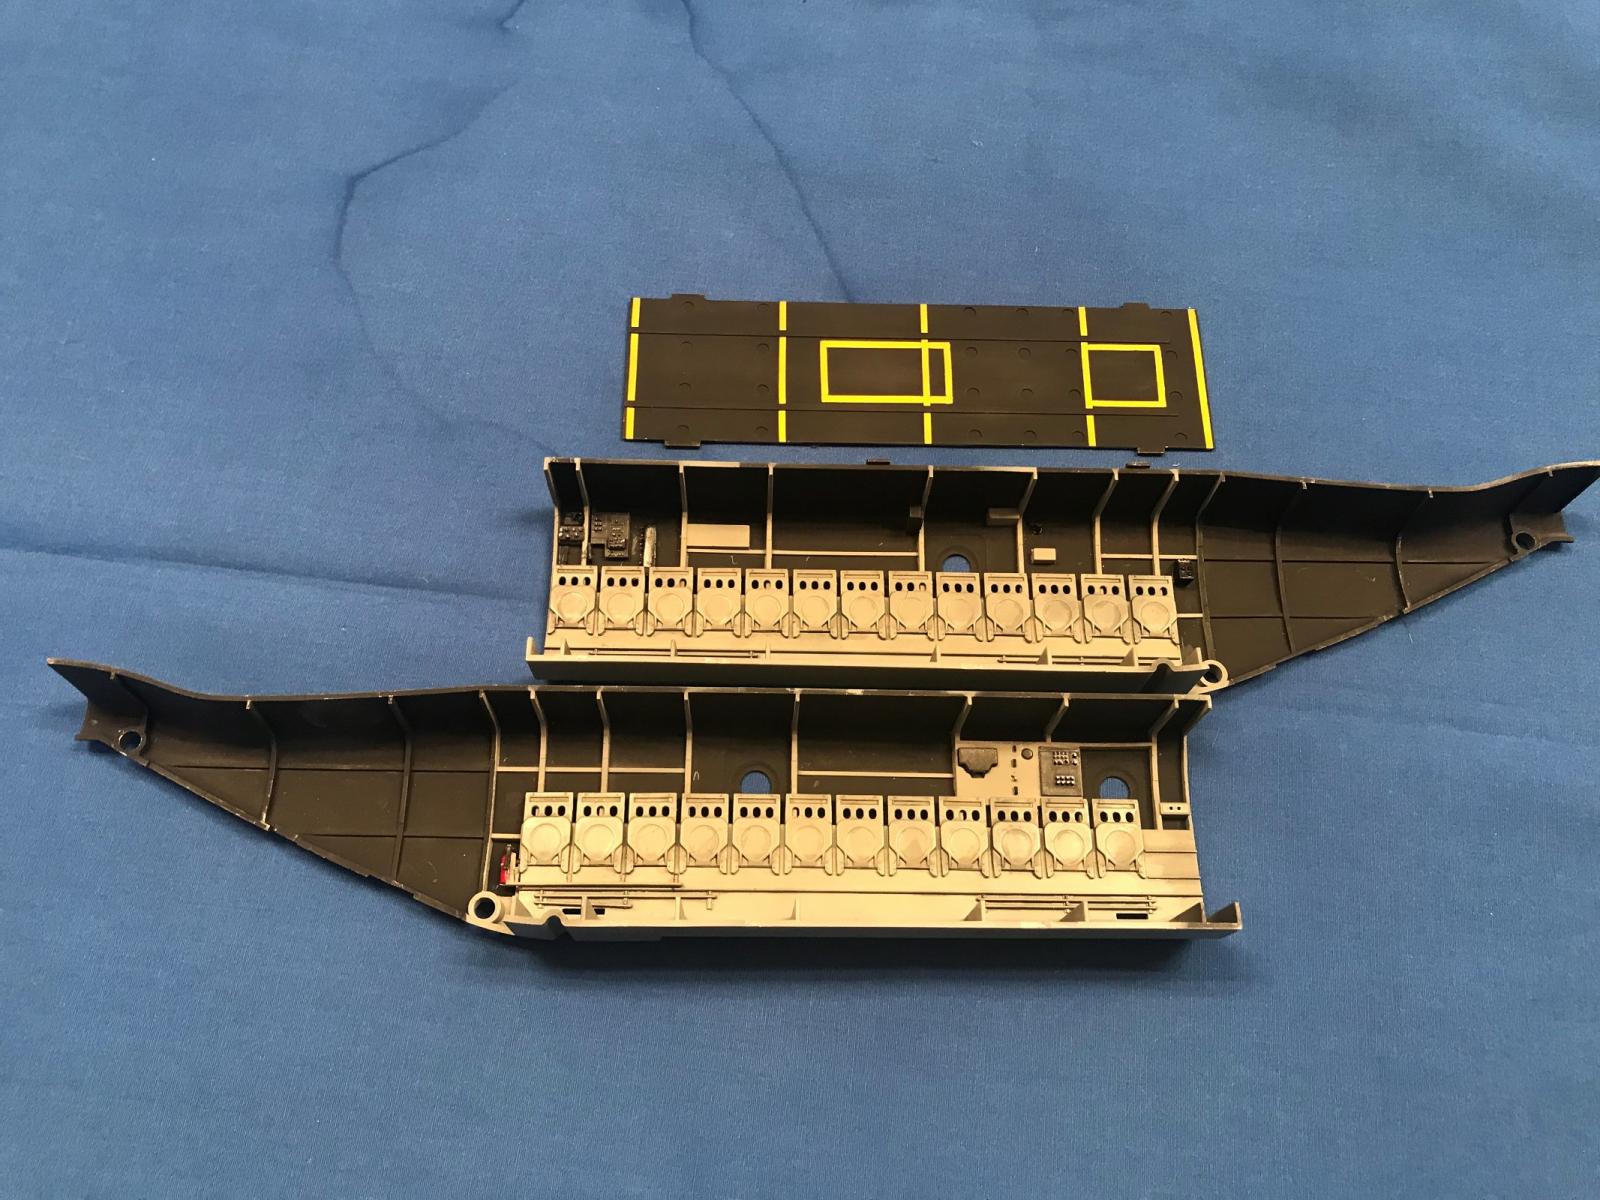
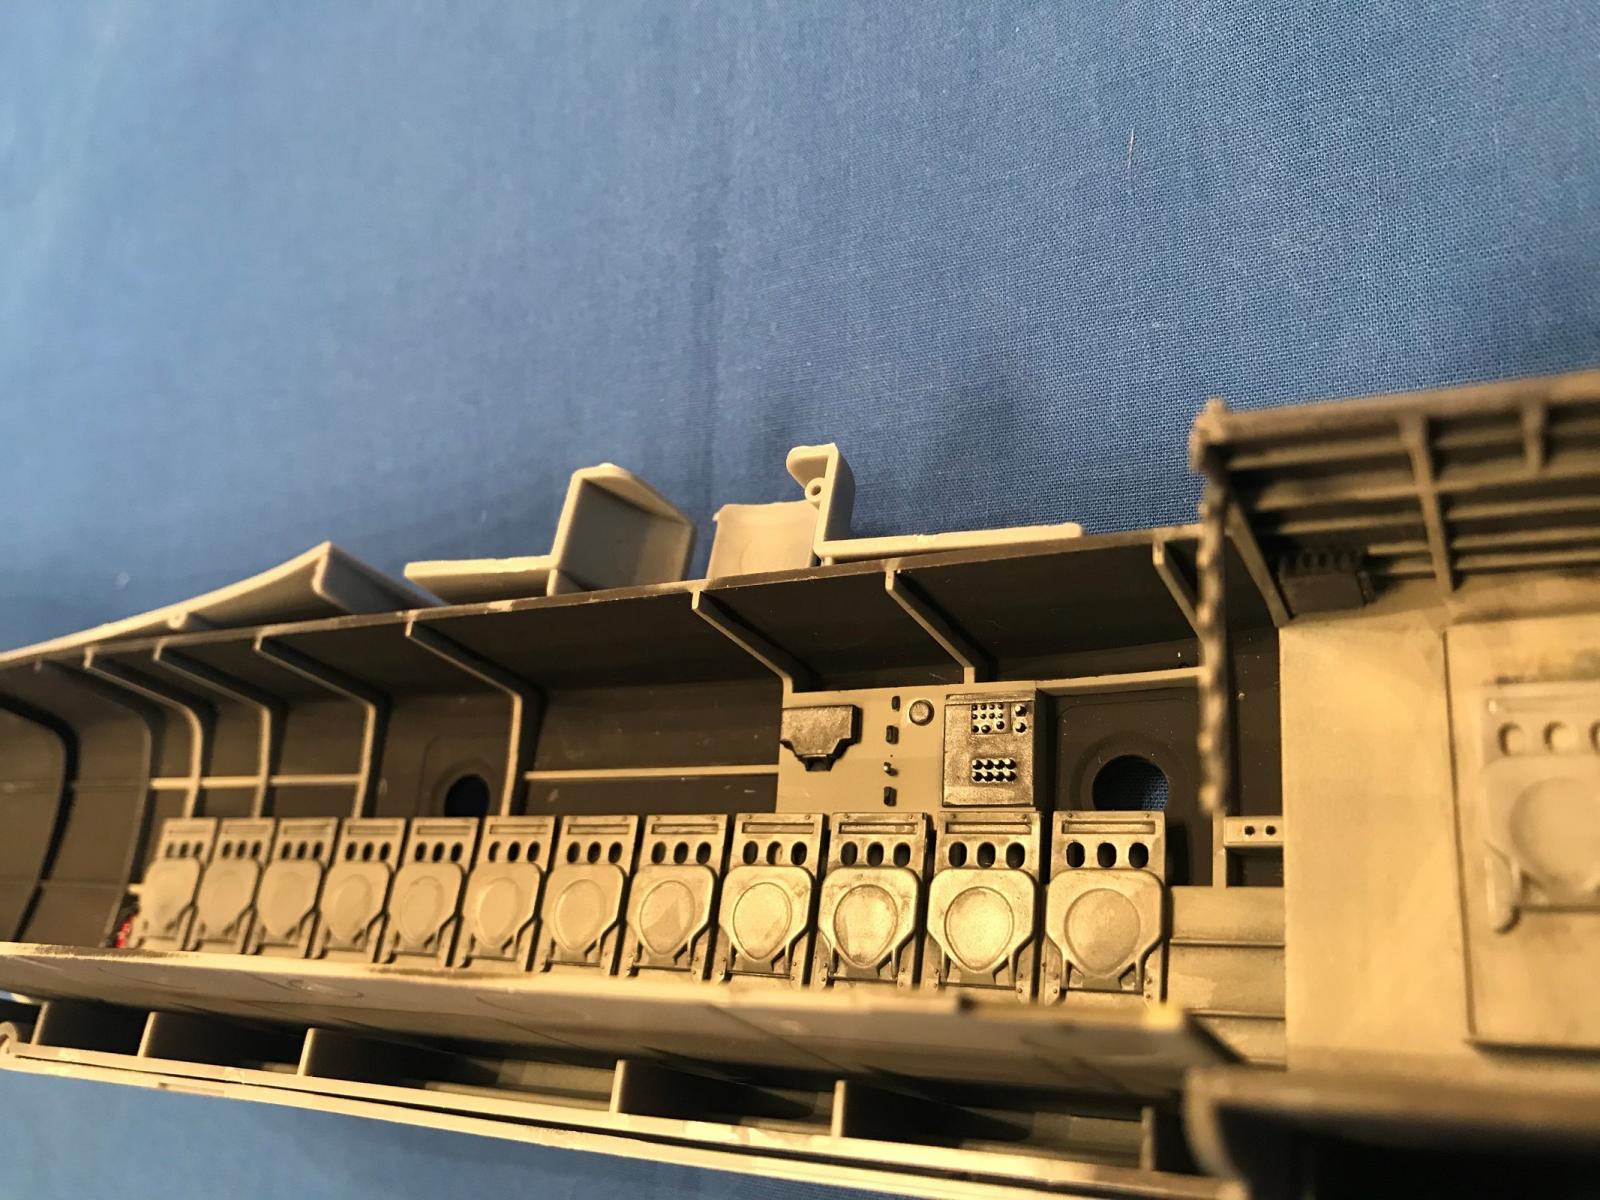
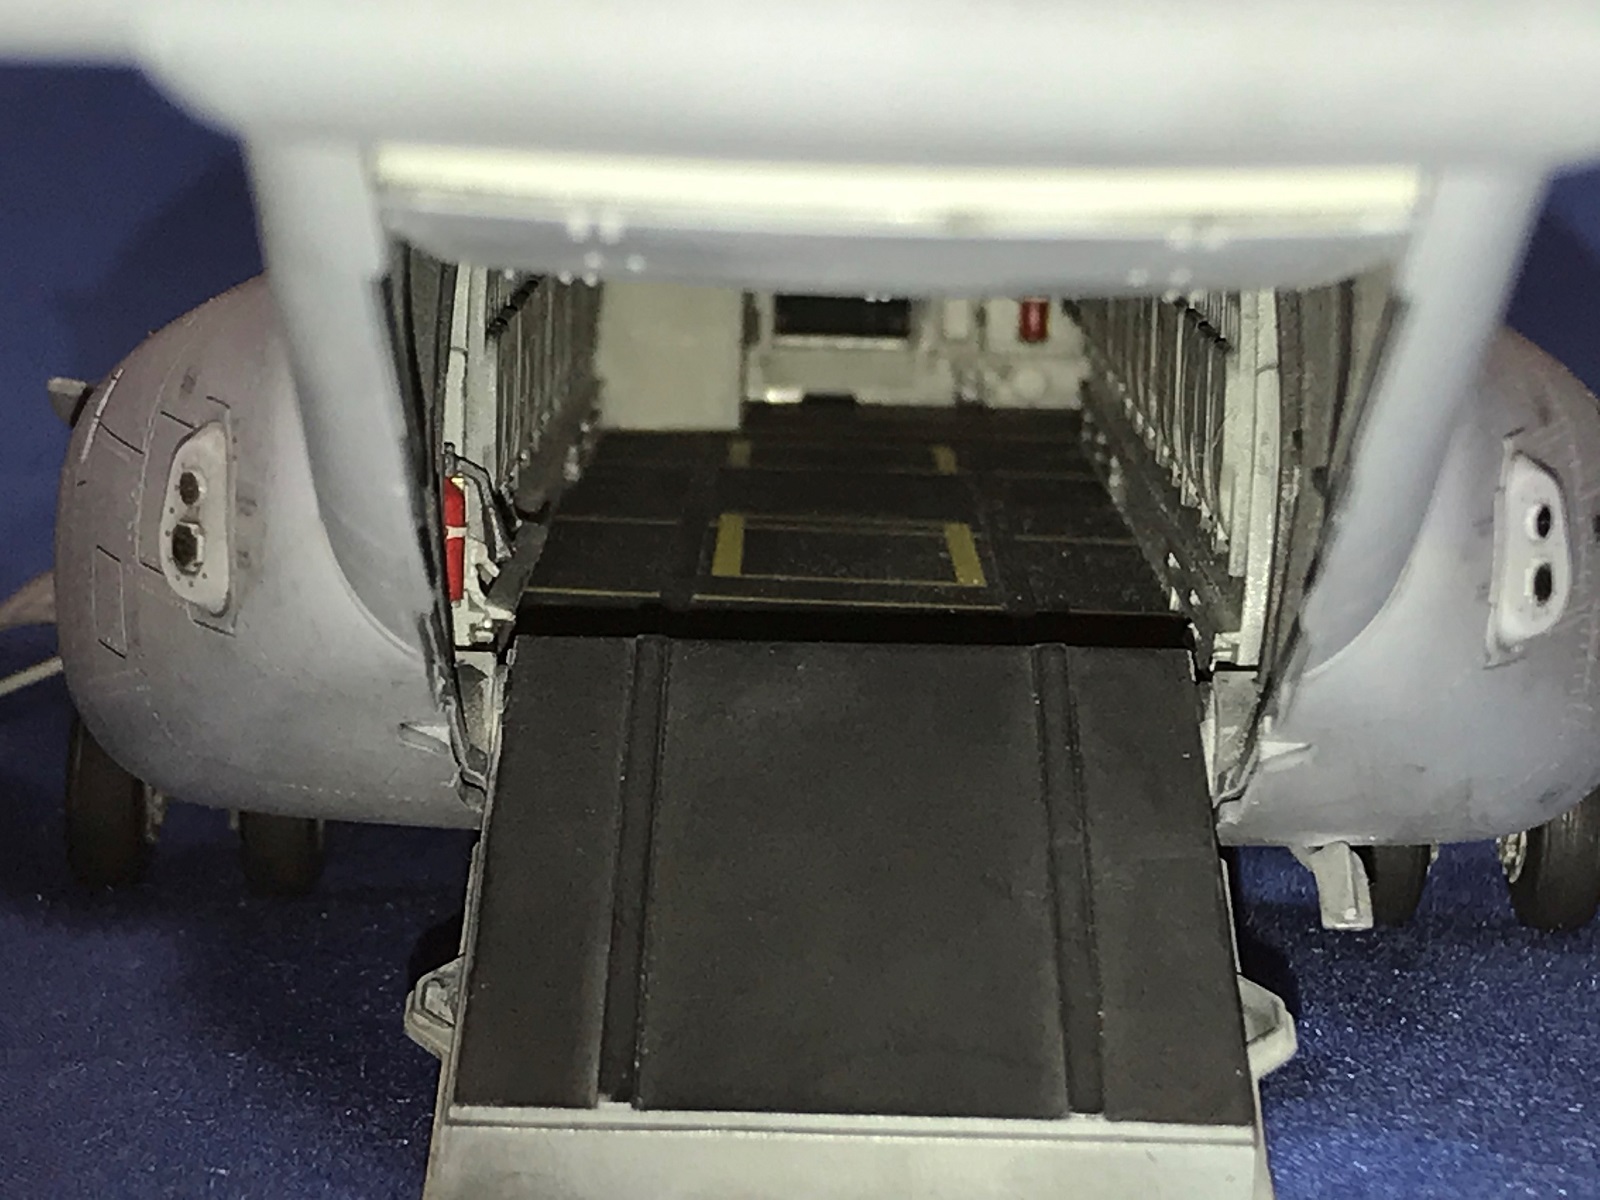
The cabin was supplied as left and right halves that sandwiches inside the fuselage halves. I initially painted the entire cabin interior black, and then masked between the framework and painted the rest gray. The floor was painted black with yellow stripes and inspection/winch hatch outlines. The yellow stripes were prominent in online pictures, but not mentioned by Hobby Boss. Both sides of the cabin were lined with separate retractable seats and other equipment. Everything fit very well and looked great. One major part missing from the interior was the massive amount of wiring and plumbing that cover the ceiling and walls of the cabin. This detail would be difficult to portray effectively in plastic and would be an extensive project for anyone who wanted to add it to their model. For what could be seen inside (it is pretty dark in there), an aftermarket resin or scratch-built interior would certainly be spectacular!
Another aspect worth mentioning was that the forward cabin door was molded shut. I would have liked to have had the option of posing the door open. However, a recessed outline on the inside of the fuselage facilitates the door being cut out. If it was cut out, the steps and other door detail would have to be scratch built. There is a resin set that includes the door designed for the Italeri kit. Eduard will be releasing PE sets that may also include the door. I have not seen what the Eduard sets include yet. Neither the closed door or lack of wiring/plumbing detail was a deal breaker and certainly did not detract from what was becoming a fantastic model.
Two fire extinguishers were painted and mounted on PE brackets before being glued in their positions. Prior to the cabin halves being glued together, I painted and assembled the rear upper and lower loading hatches. These fit nicely together and are designed to operate. The hydraulic jacks were not supplied for the lower hatch. These could be made from brass tube and wire.
The nose and main wheel wells were built, and the fit was good. The stubby undercarriage legs were attached via a substantial semi-circular mounting tab but, I left the wheels off until later.
The main wheel wells were glued inside their respective sponsons. I deviated from the instructions and attached the sponsons to each fuselage half before closing it up. The fit of the sponsons was tight, and I trimmed one end and the forward landing gear bay wall a fraction for a good fit.
With the internal parts finished and side windows inserted, I closed the fuselage halves. No nose weight was needed, as the wing, when mounted, moved the center of gravity forward enough. The fuselage halves fit very tightly. I sanded the mating edges of the cockpit and forward cabin and test fitted the fuselage halves several time to achieve a decent fit. I had glued the main, interior cabin halves together first and sanded the outside seams on the roof that would be visible when rotating the wings to and from a stowed position. I made sure all the remnants of sprue on the mating surfaces were removed so the parts would come together with a flush joint.
There were lots of bits and pieces to add to the outside of the fuselage, but these were left off until later. Two hatches along the belly for the winches were scribed after cleaning up the seam. PE vent grills were glued to each fuselage side and one on top of the wing. Each fit precisely.
I glued the twin tails and tailplane halves together and mounted them on the fuselage rear. Everything fit great with no gaps.
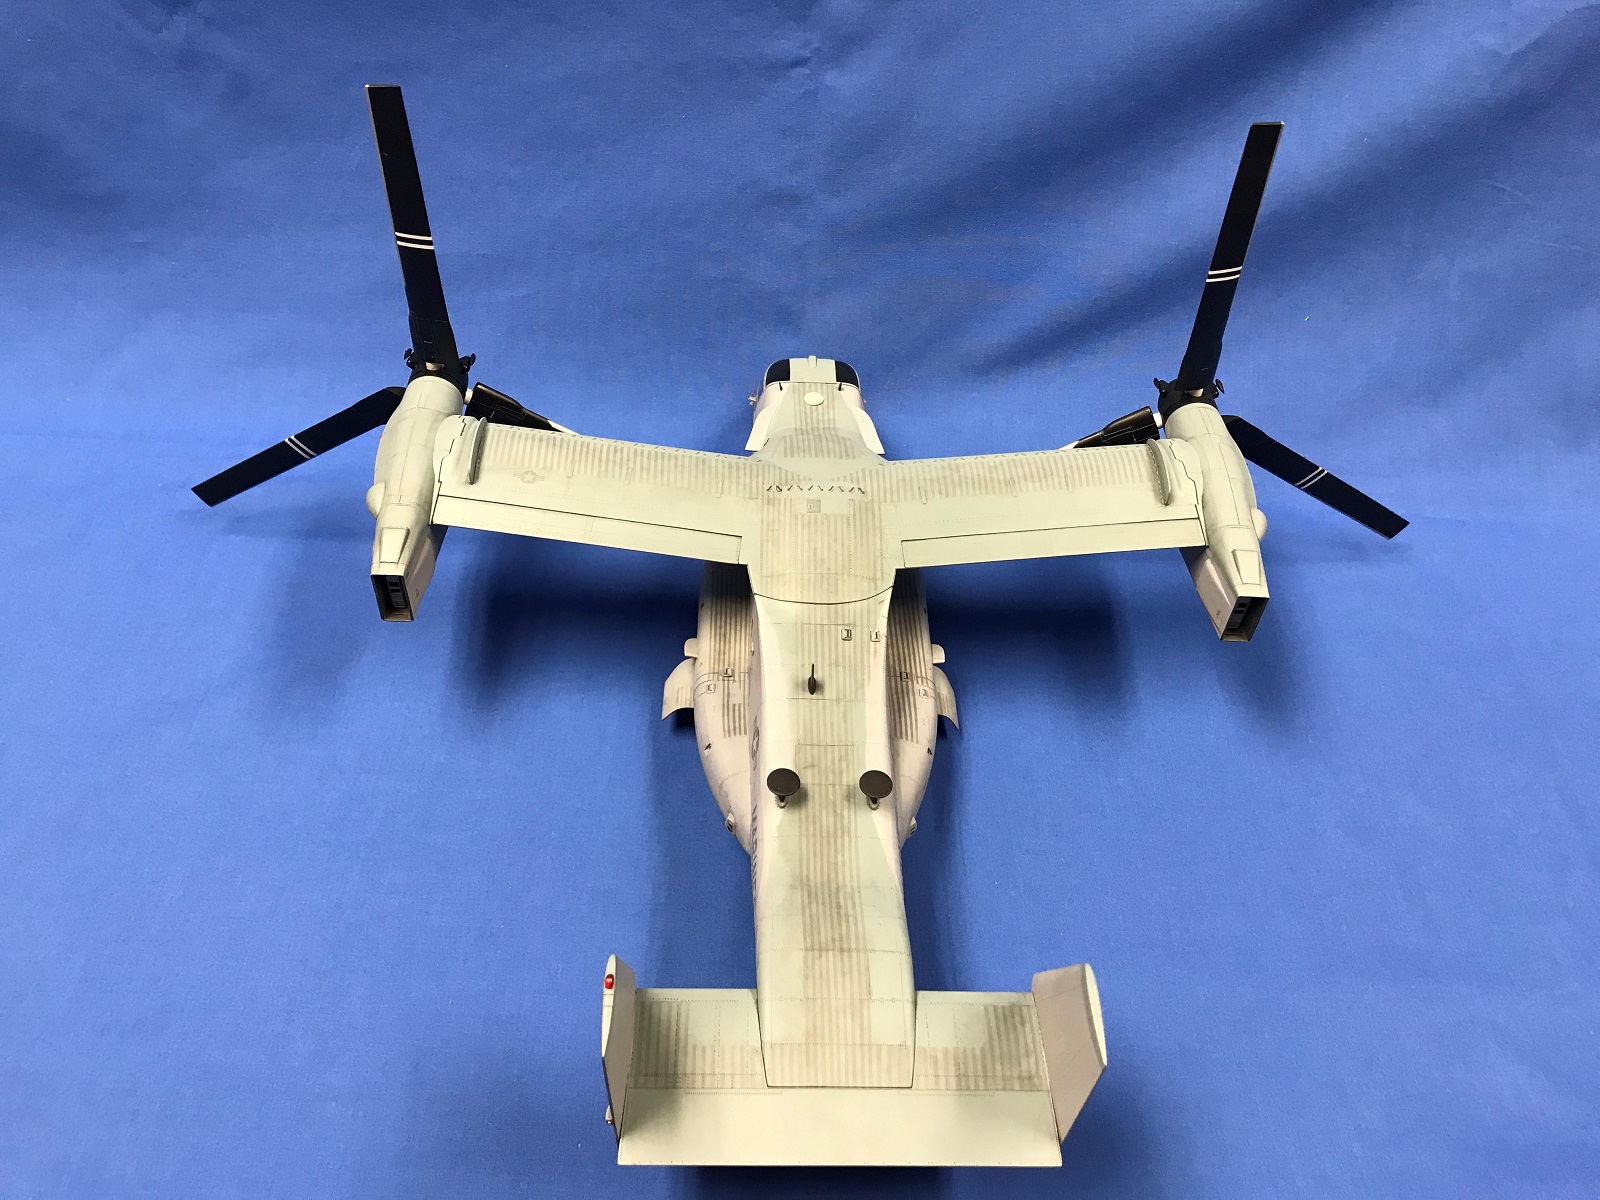
The wings were simply upper and lower halves that fit very nicely together. Substantial “T” slots were provided to mount the trailing edge flaps in the “up” position. The “T” part of the mount could be cut off and modified to display the flaps “down”, but to be completely accurate, part of the trailing edge of the wing would also have to be cut and lowered.
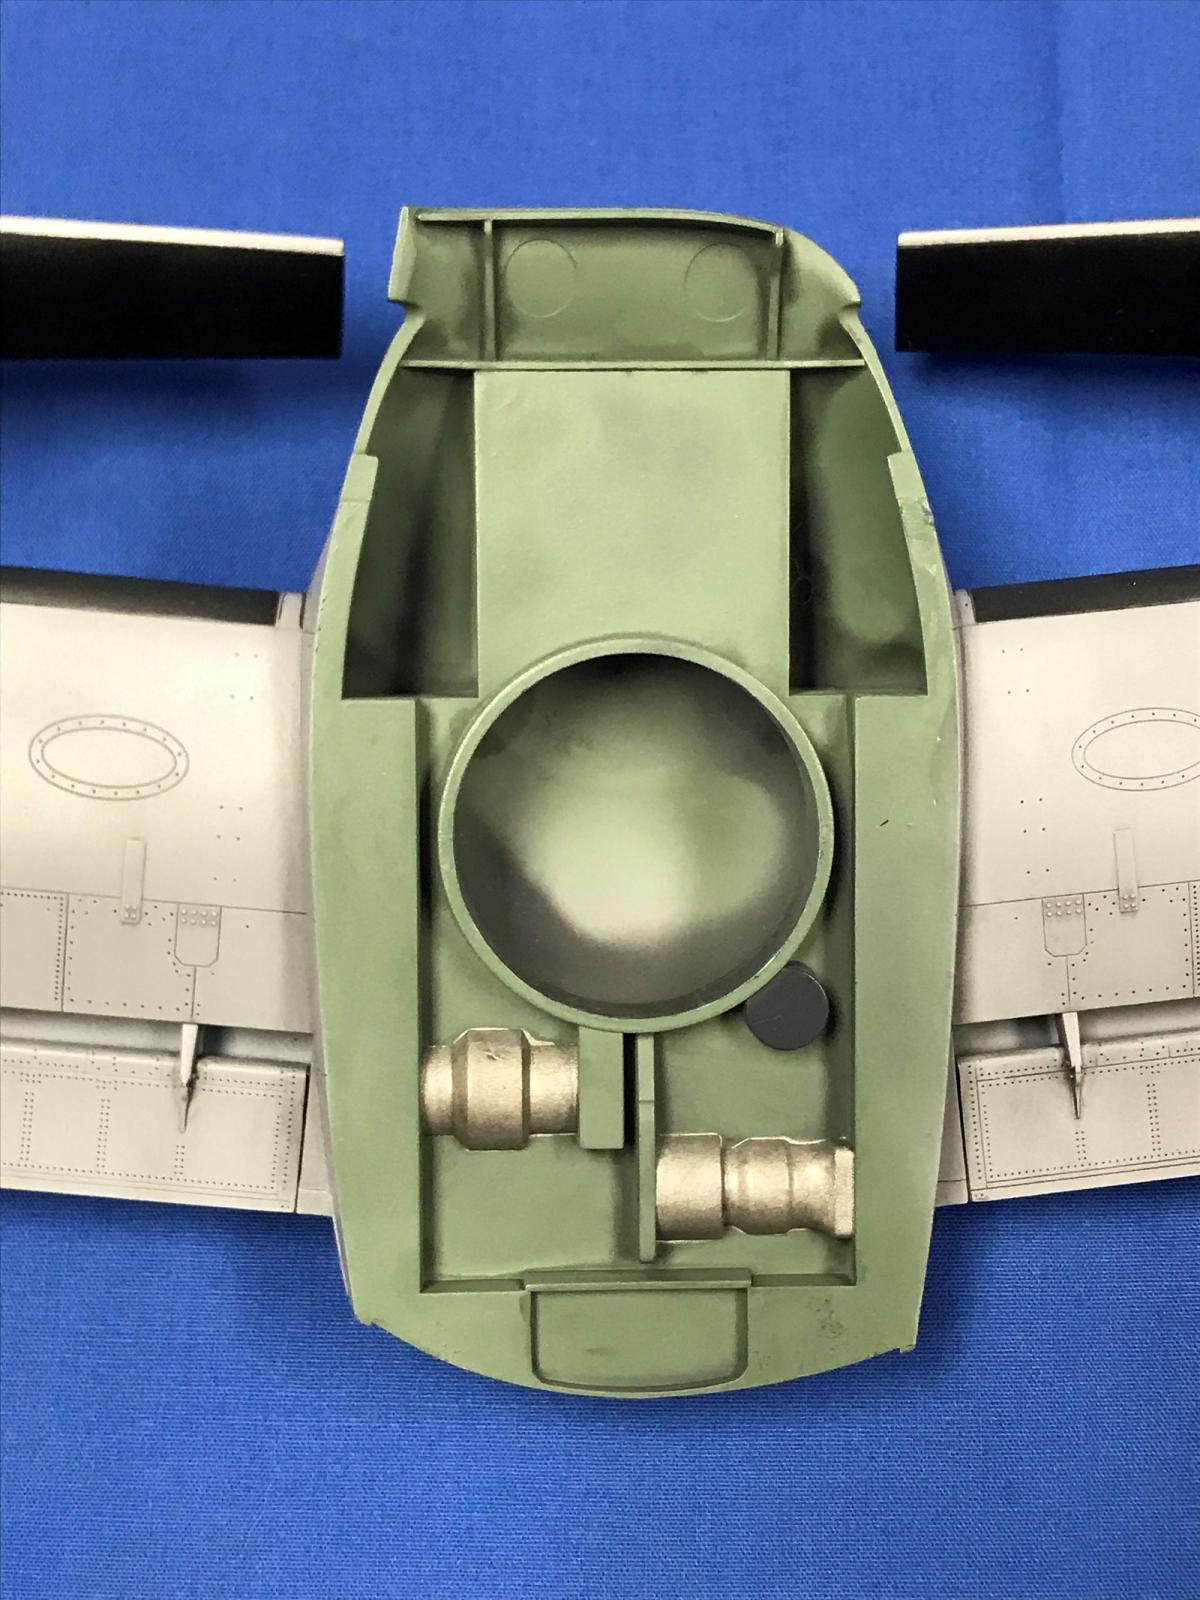
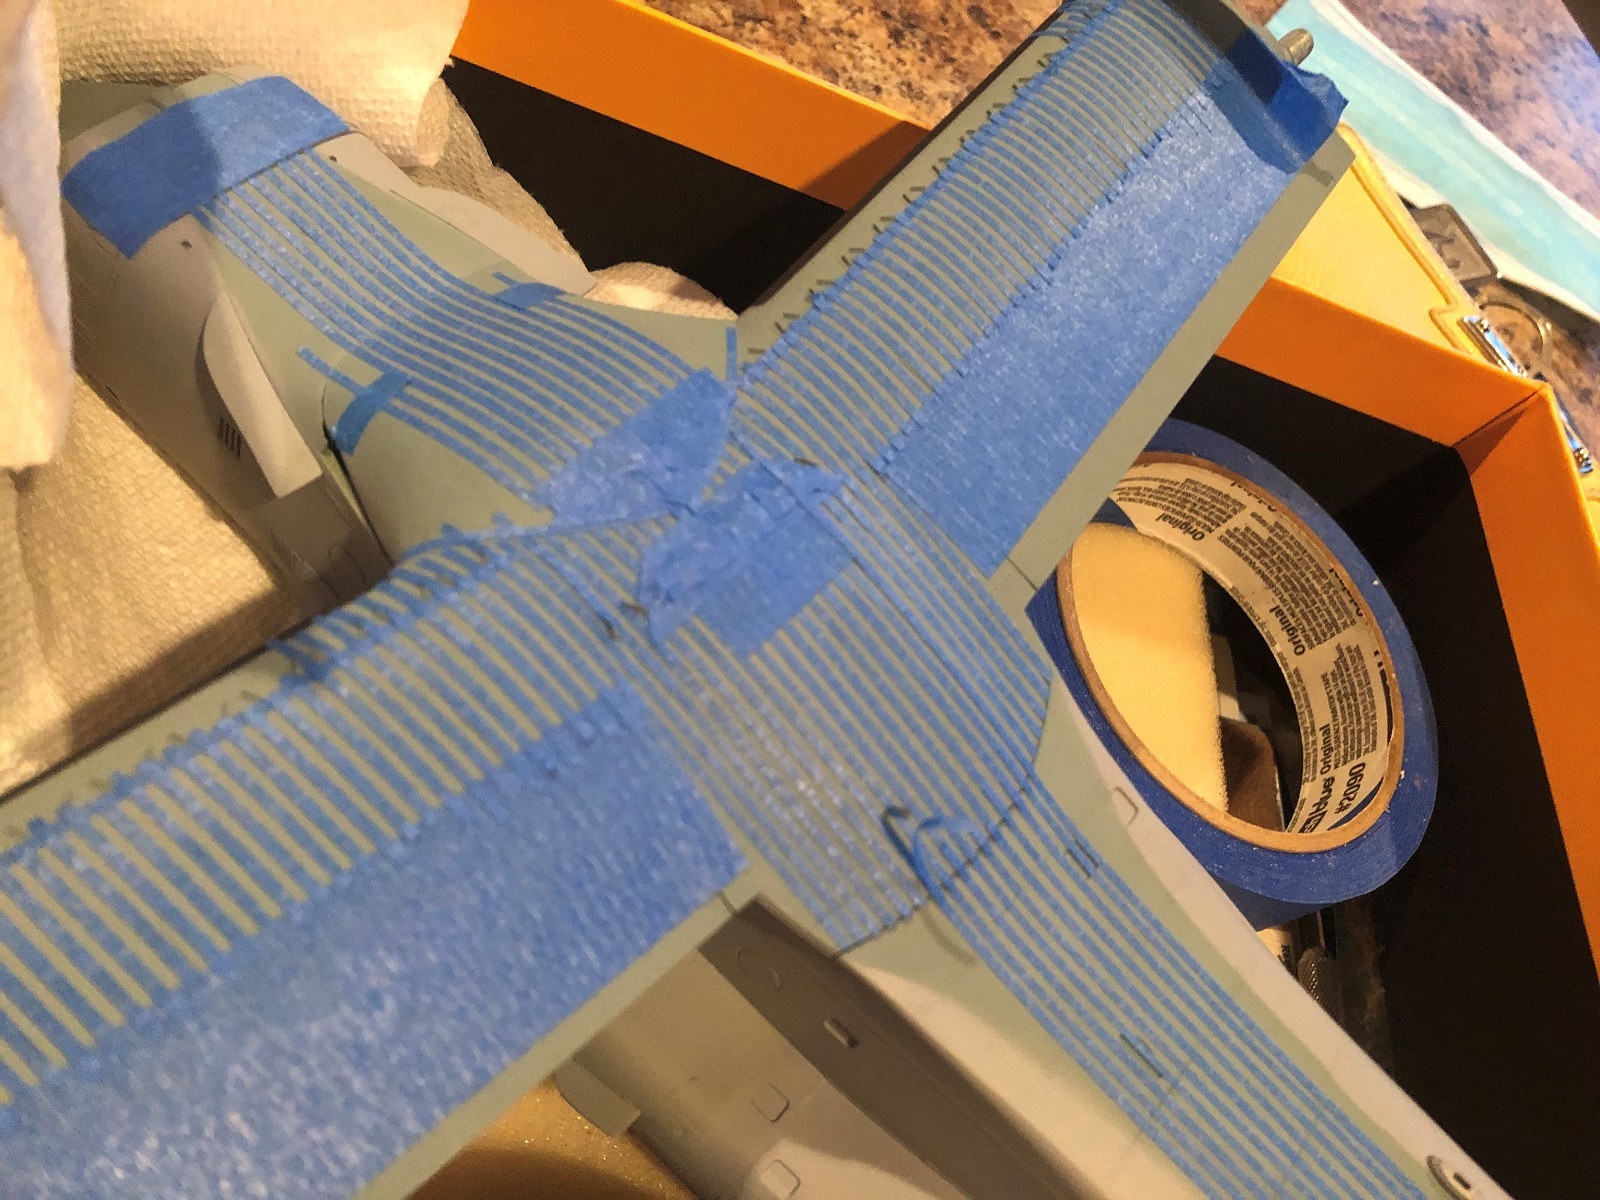
The wing is designed to swivel to a stowed position on top of the fuselage. I left the wing and fuselage assemblies separate until later in the build. I snipped off the left side ring tab that locks the wing onto the fuselage roof. This made it easy to mount the wing and remove it at will. I would end up mounting the wing for application of the walkway stripes and removing it for painting numerous times.
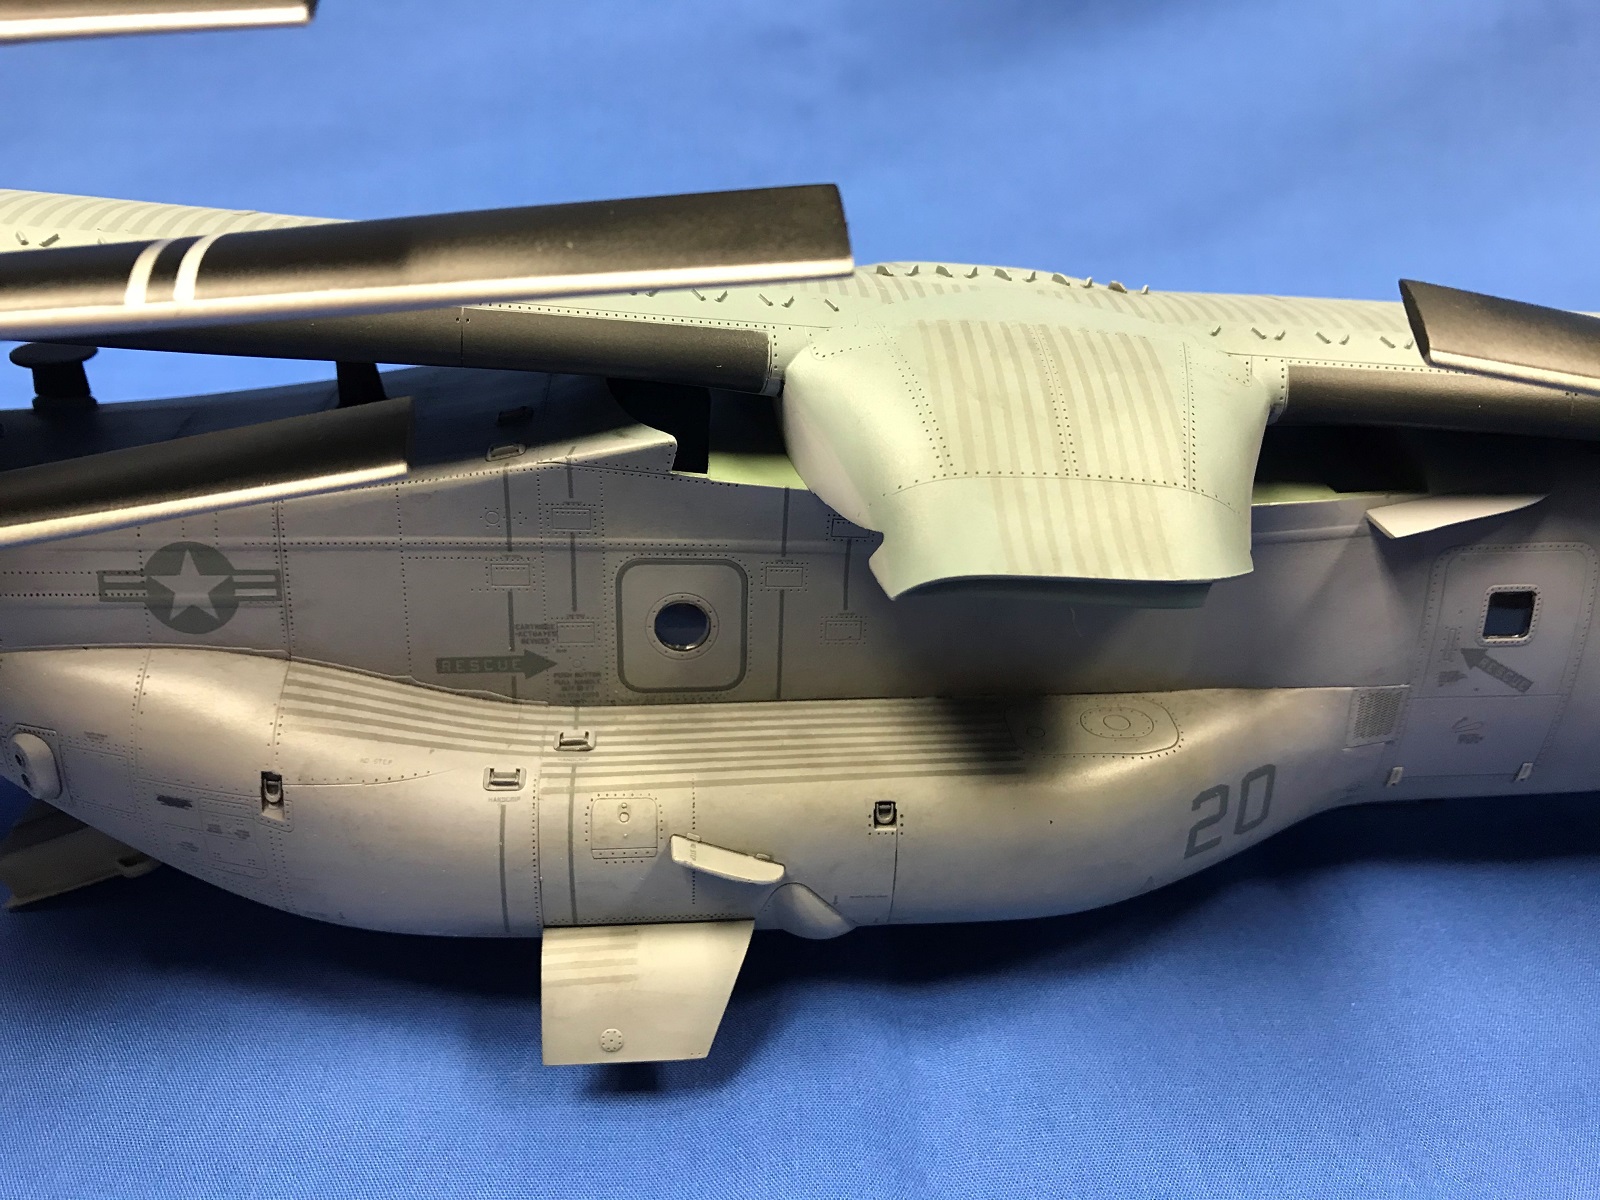
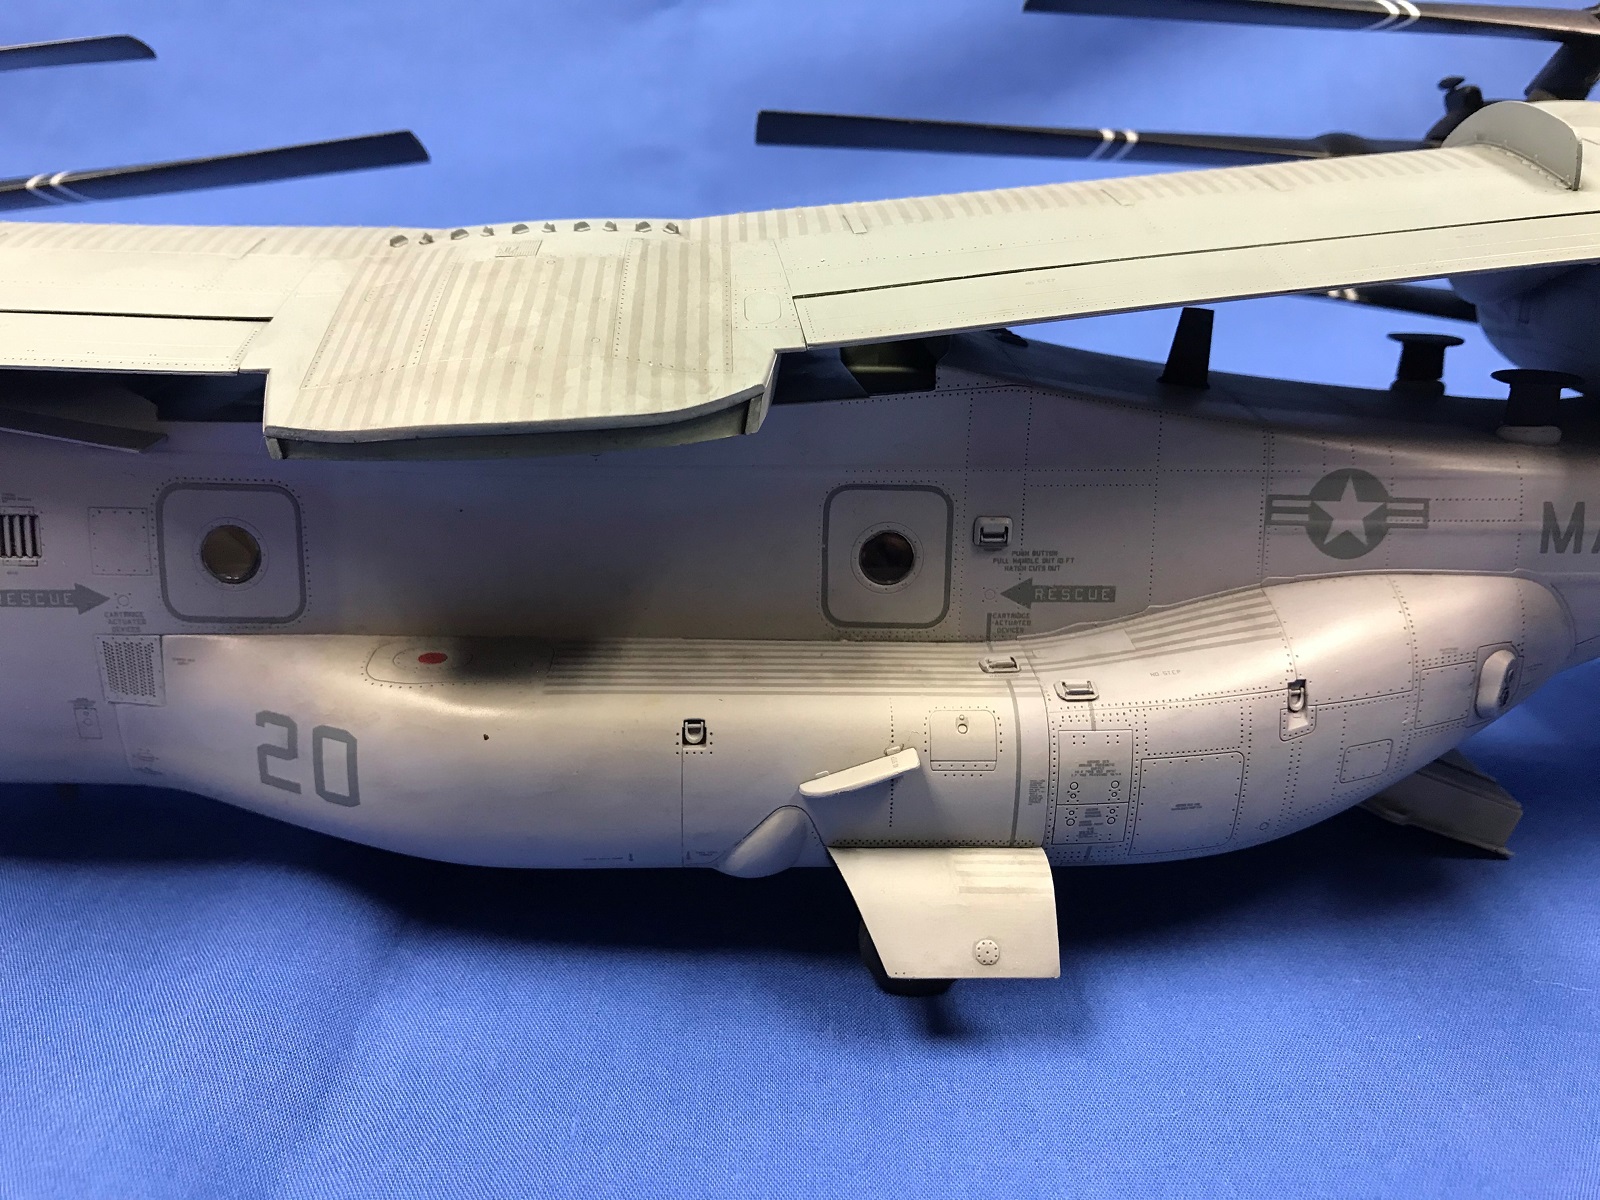
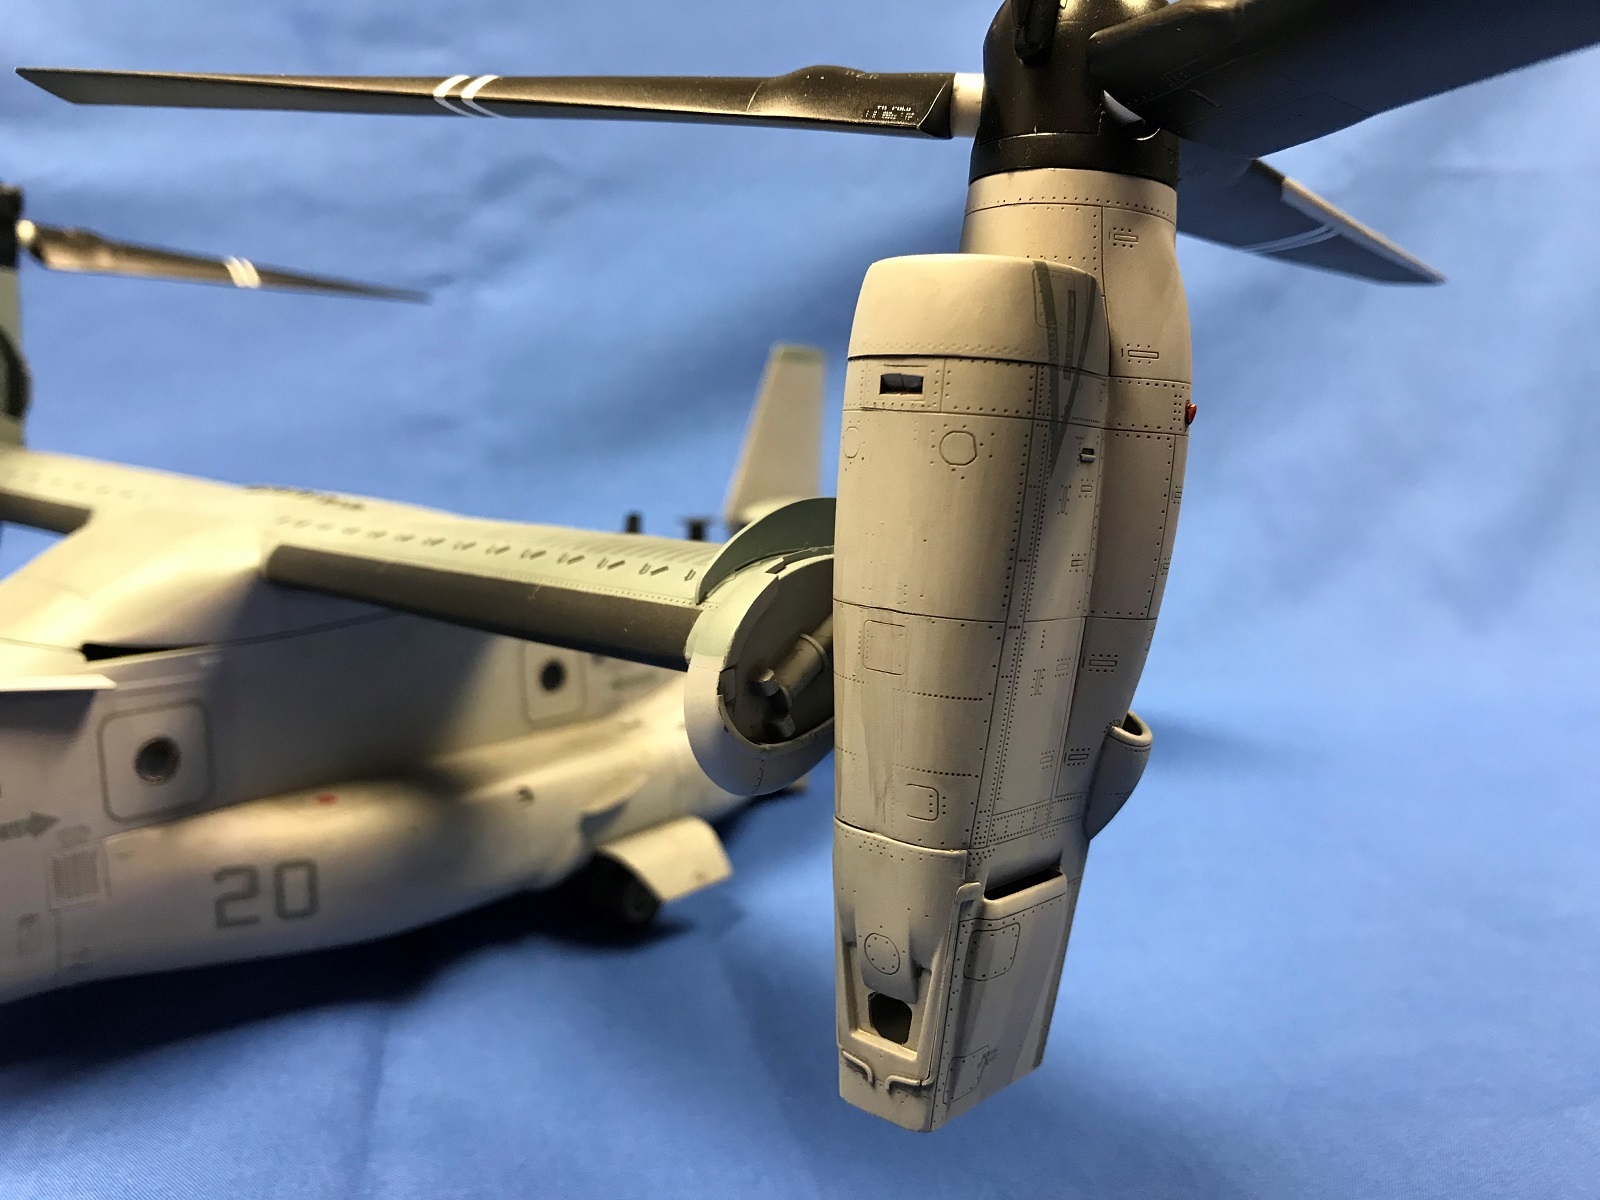
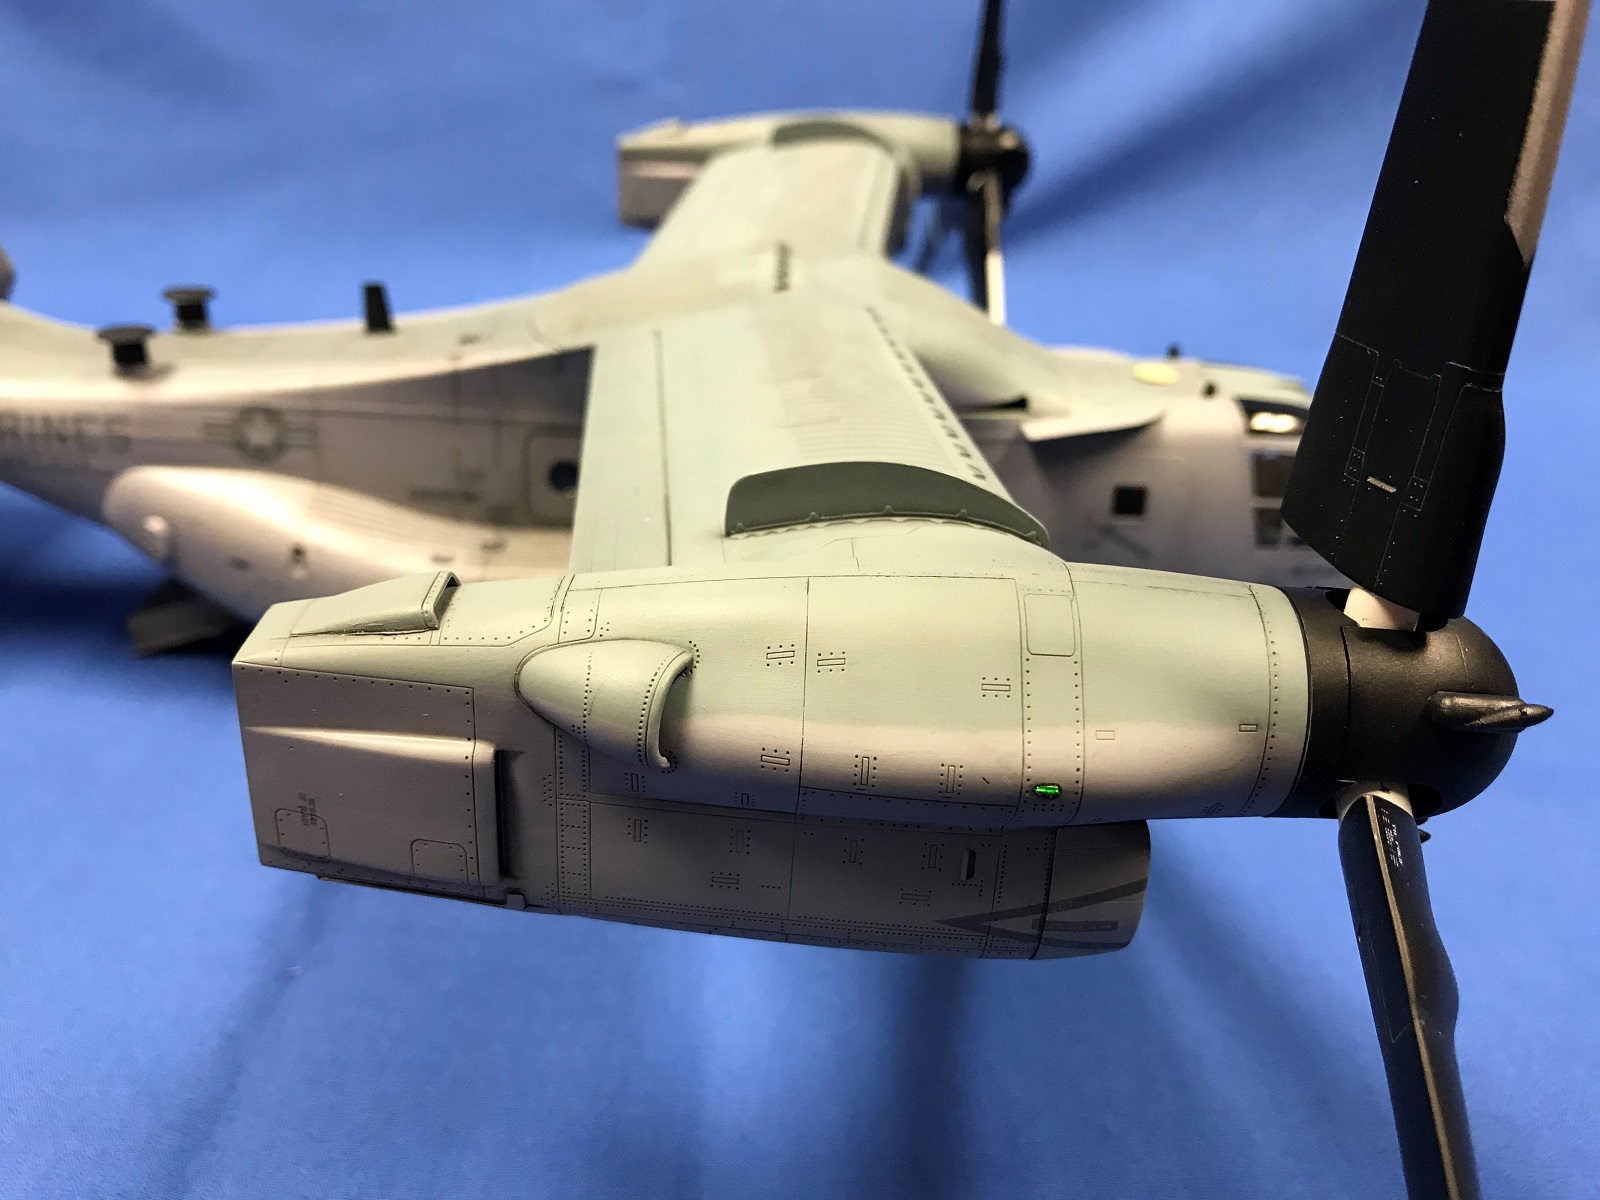
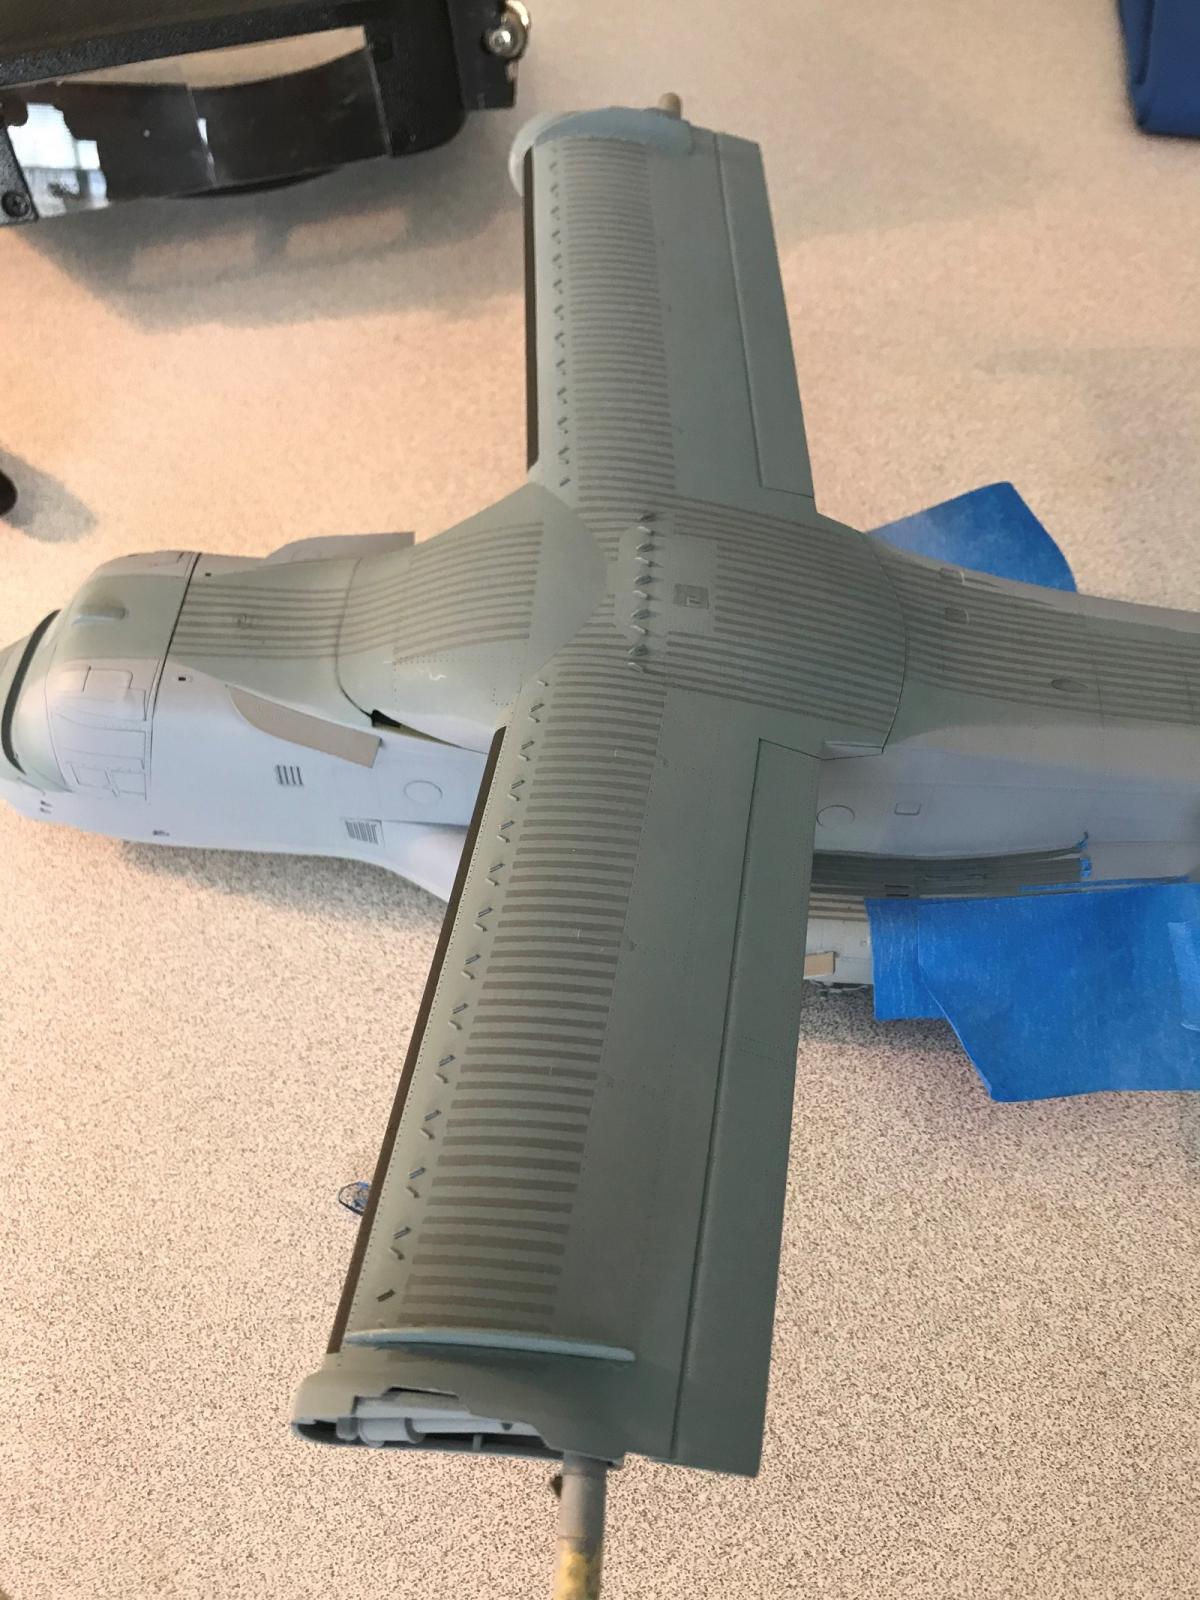
The engine nacelles are beautifully detailed, but the large pistons (located on the wing tips) that raise and lower the nacelles and the surrounding area were quite simple looking. The engine intakes are also simplified. I drilled out the intake to add more depth. This also made it easier to paint the white part of the intake.
All engine parts came together nicely, including the exhaust and noise suppressors. Make sure a good clean fit is achieved with each nacelle side, especially on the top as there is a lot of rivet and panel line detail very close to the seam. I was able to get a fairly nice join which minimized the amount of sanding and loss of detail, which was subsequently reinstated using my razor saw and ponce wheels.
The nacelles attach to the wings via large round pegs. The fit was very loose. I wrapped Tamiya tape around the pegs which firmed up the fit. I think Hobby Boss could have followed Hasegawa’s approach of using poly caps on their 1/72 Osprey kit for a firm, movable fit in this area.
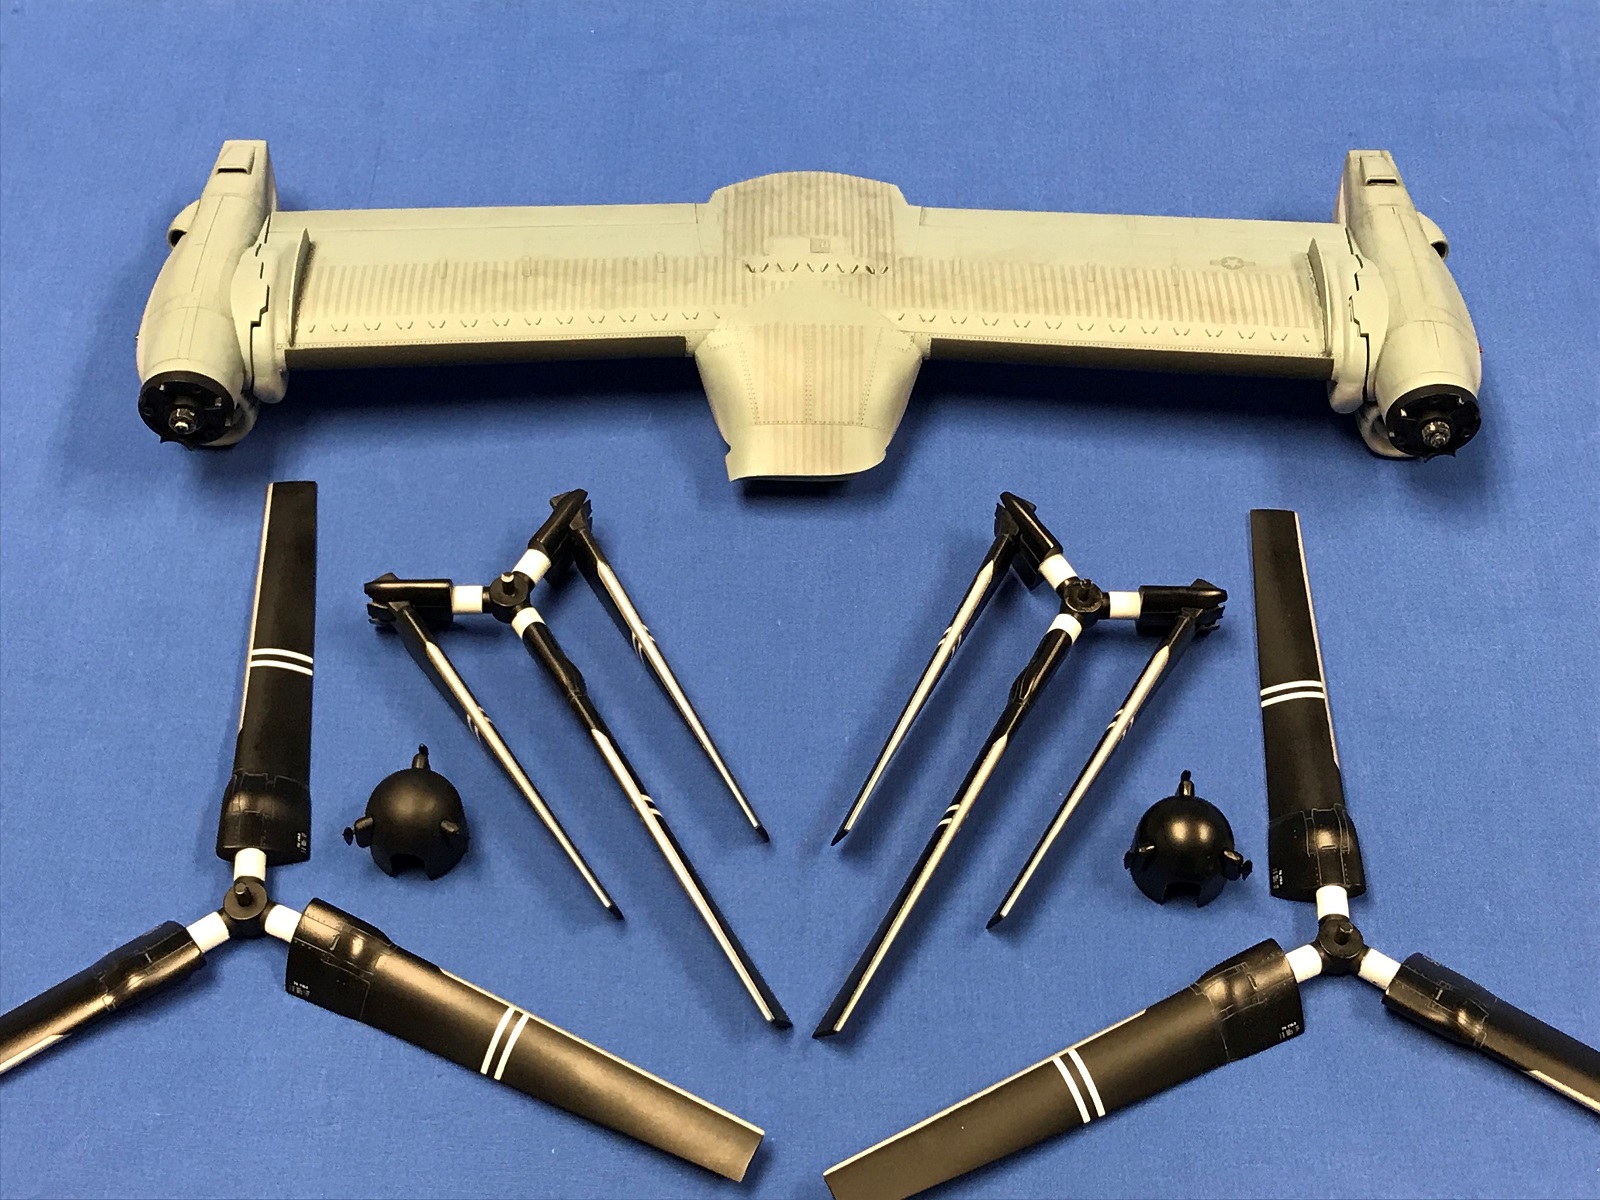
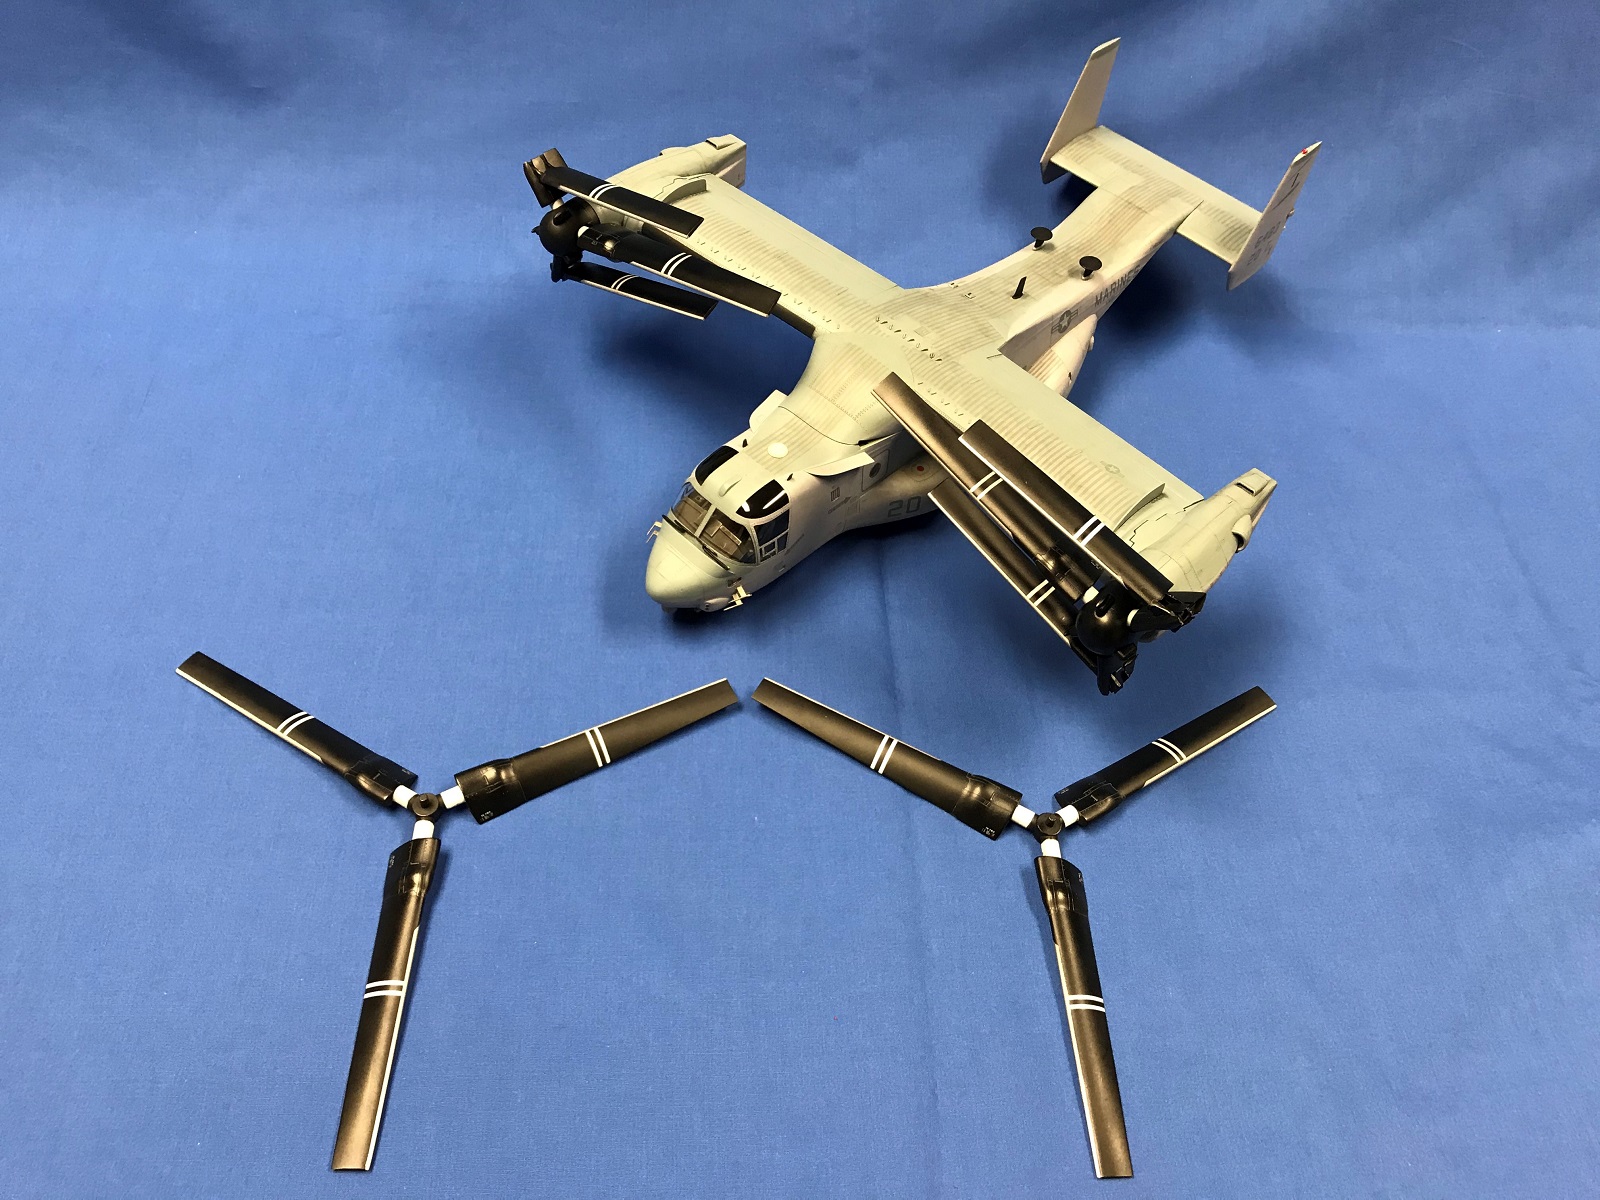
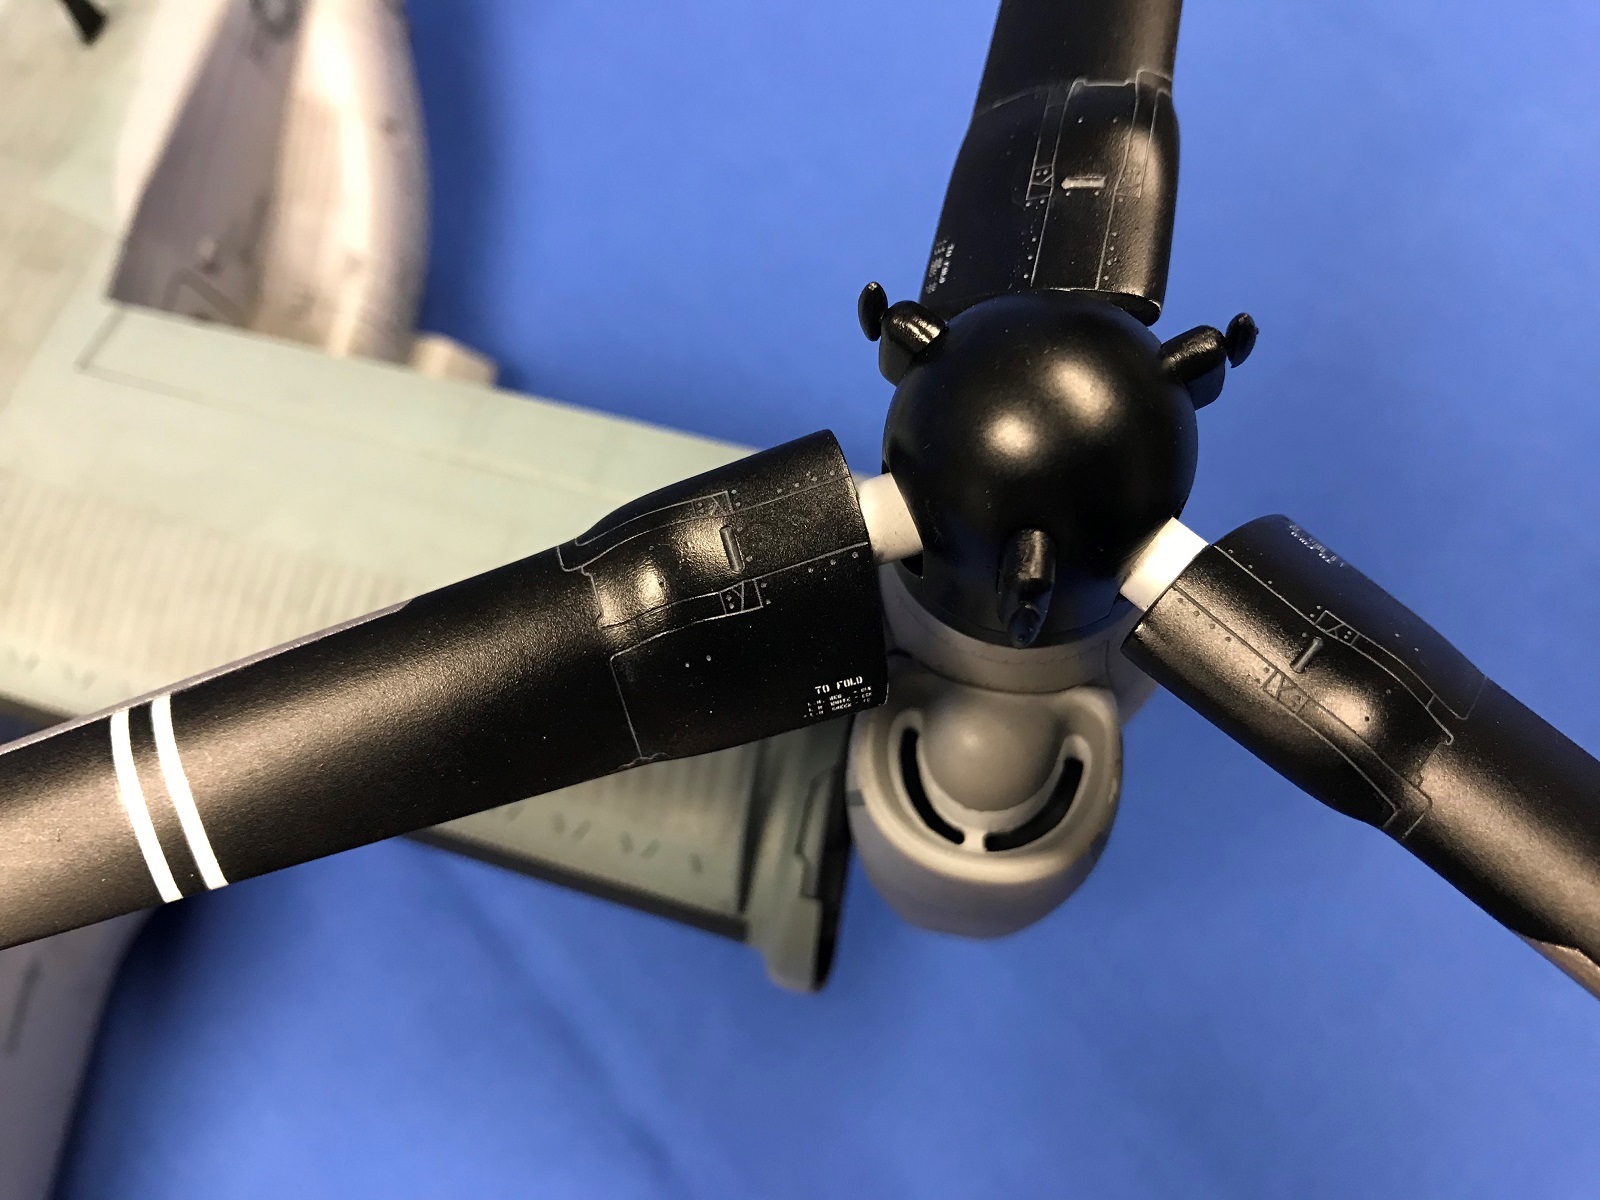
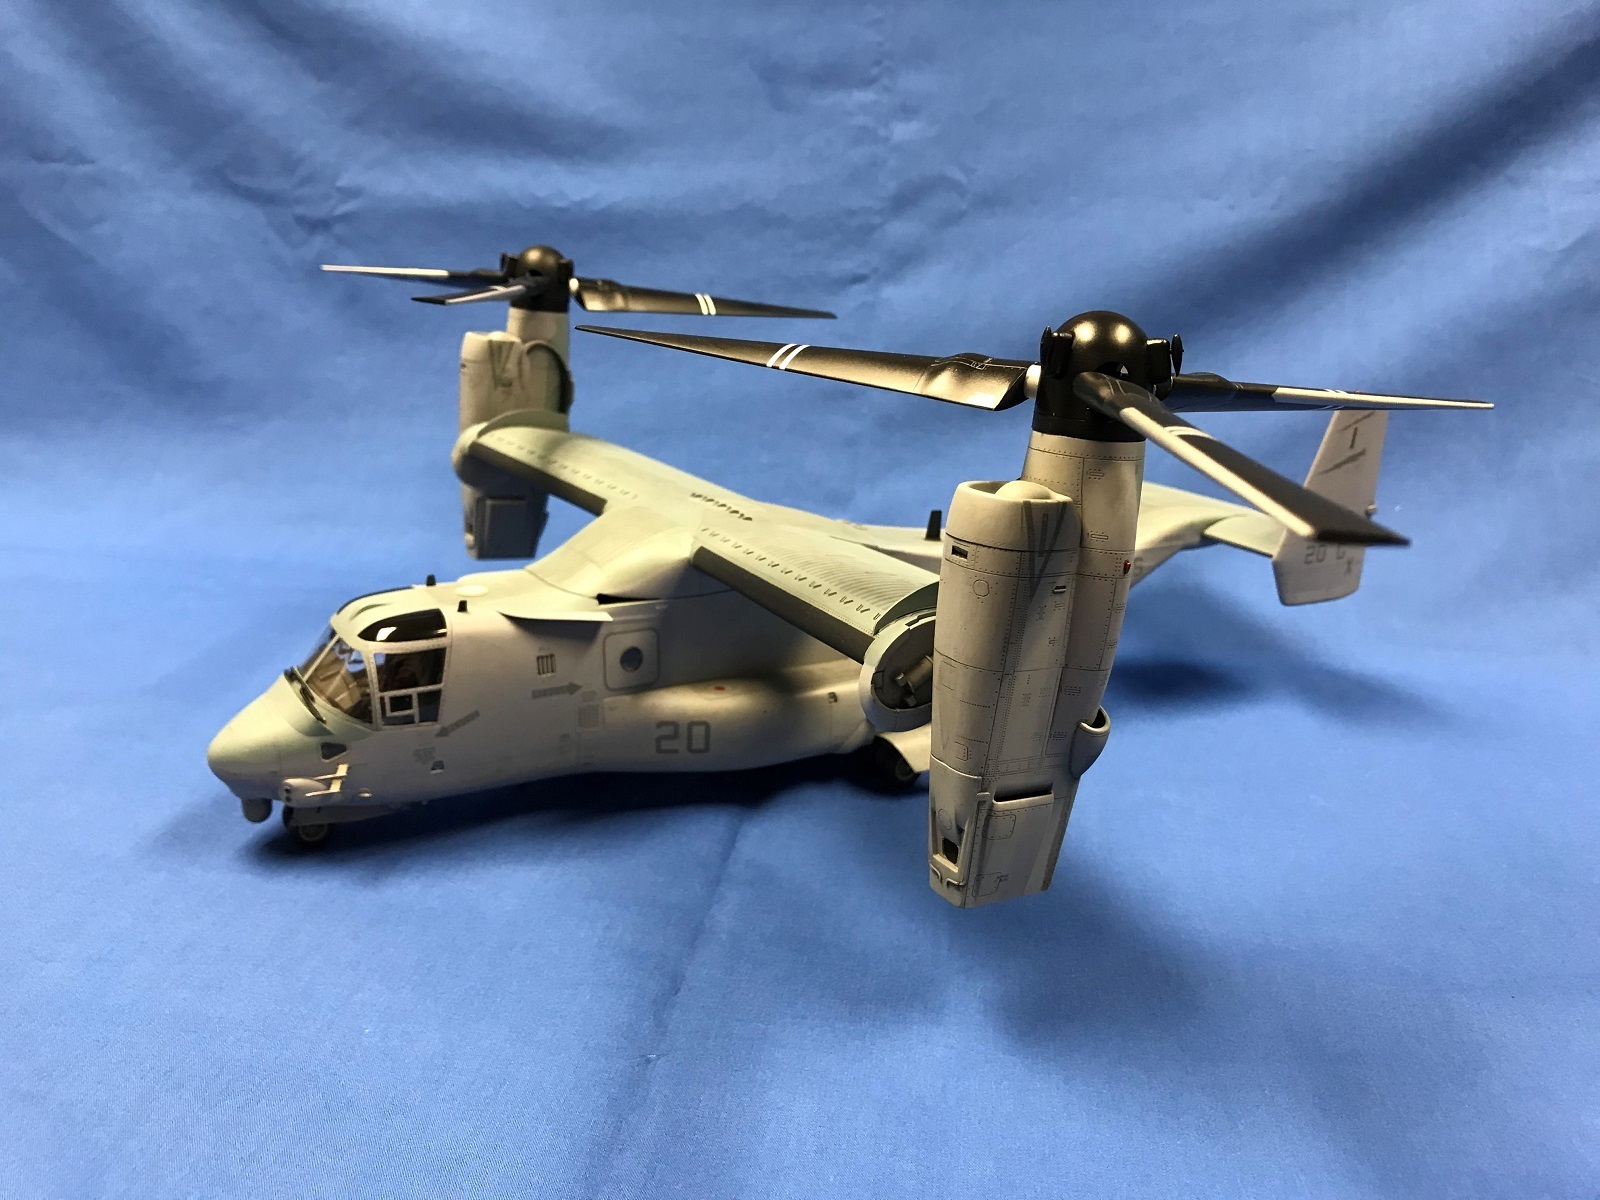
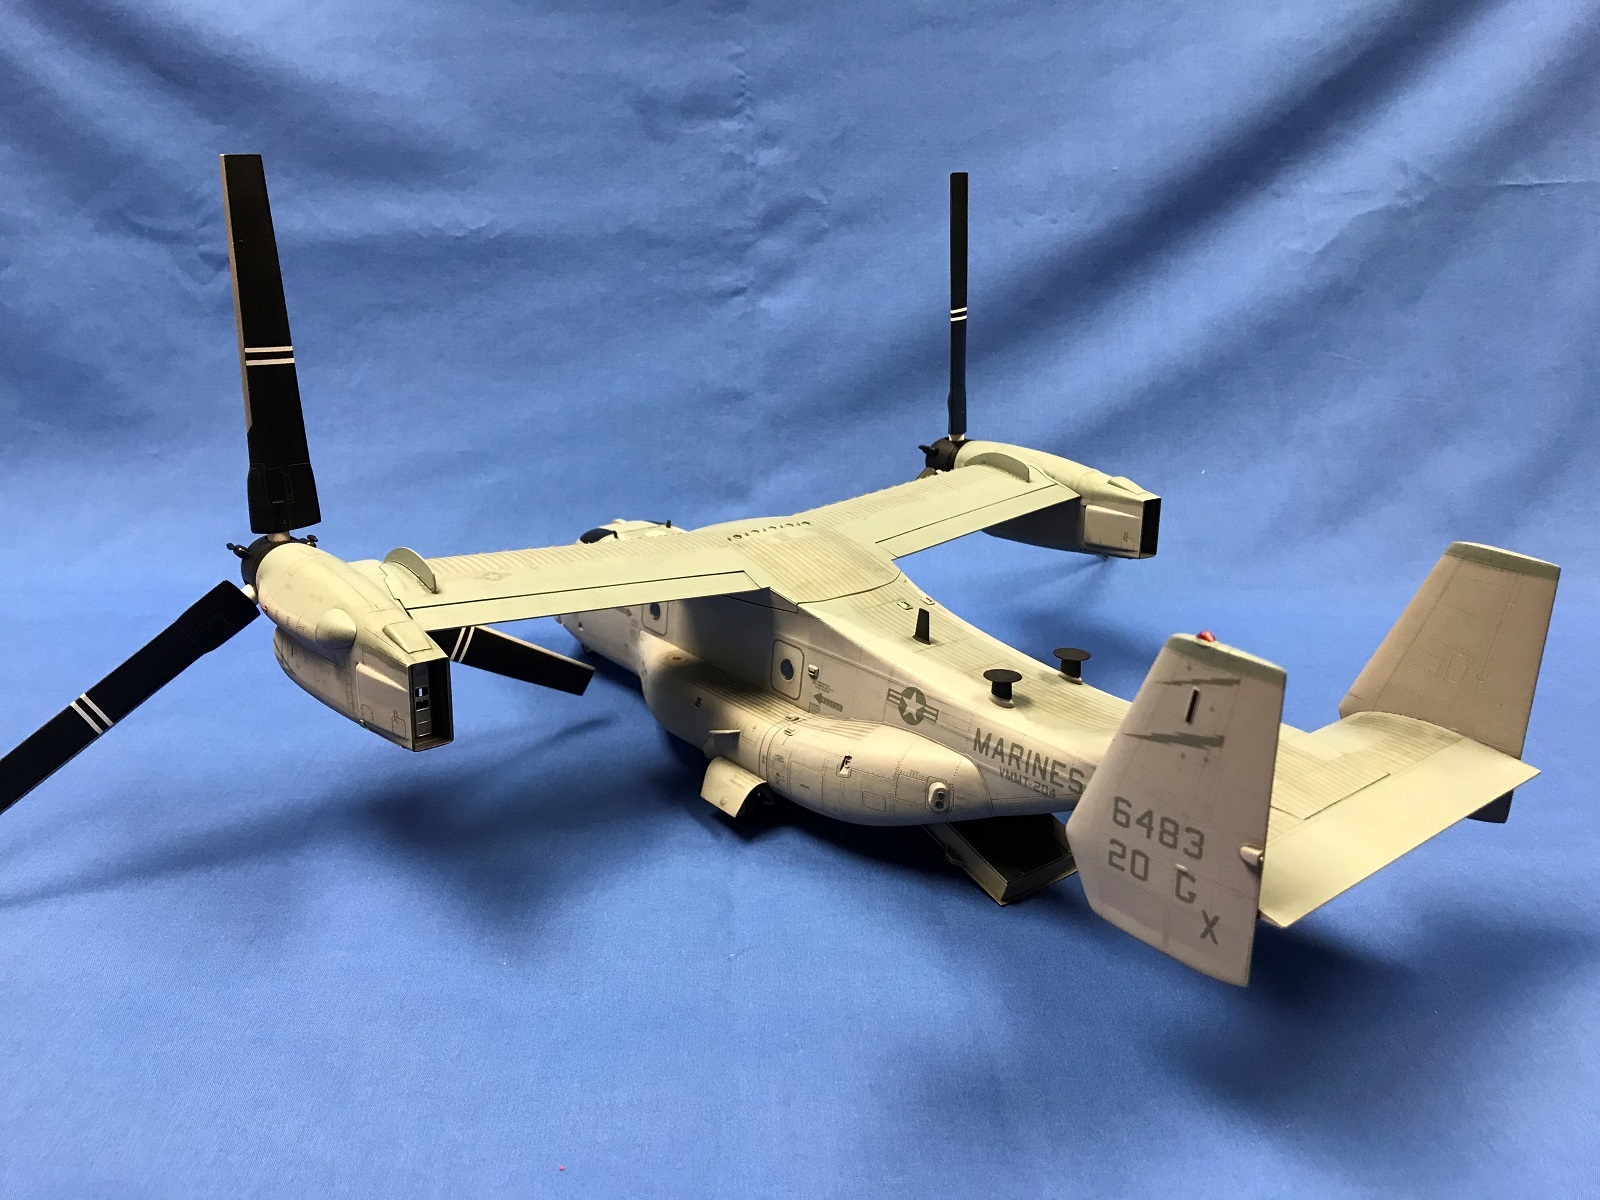
The two giant, three blade prop-rotors (a hybrid between aircraft propellors and helicopter rotors) define the real V-22 Osprey and were the jewel in this model. There were two complete sets of blades (twelve in all) and hubs provided for each. One set to be assembled folded and stowed and the other extended. In the stowed position, one blade is left extended and two are folded. I built all the blades and painted the white stripes instead of using the decal stripes which only accommodated one set. When building all the blades, following the instructions carefully and making sure you have the correct parts is recommended. I noted that assembling the blades the wrong way could be quite easy. There were left and right specific hubs that each specific blade fits. The diagrams in the instructions were very helpful. I still managed to attach two blades in the wrong position and had to fix the resultant problem I created!
Each blade attaches to the prop hub through substantial mounting pegs. Since only one set of spinner back plates and spinners were provided, one could change between the extended and folded sets using the single spinner for each side. The back plate attached permanently to an axel mounted on the front of the engine, and the prop/hub and separate spinner “press fit” tightly onto the back plate. I found this to be a somewhat clumsy way to be able to interchange the extended or folded prop rotors. A better way would have been to supply two complete sets of blades, spinners and back plates that press fit onto poly caps on the engine axel. Still, it was fantastic to have these options included in this kit!
In step 17, the instructions indicated the addition of a refueling probe (E40) and a radar housing (E41) on either side of the nose. For the actual aircraft modeled in this kit, neither were needed. The box top artwork correctly depicted this. I cut off the mounting tabs on these two parts and inserted them into their slots but left them sitting a little proud of the surface, which helped sand and eliminate the gaps. The good news is that other variants of the V-22 could be made that would use them.
The painting guide indicated the overhead cockpit canopy windows be painting flat black. They should be a tinted smoke color. I used Tamiya smoke.
I ordered a set of canopy and wheel masks from Flying Leathernecks Decals, designed for the new Hobby Boss Osprey.
With the “glass” masked, I wheeled my Osprey down to “Booth’s Painting Shop” (the basement) and got busy with paint.
The painting guide referenced several different paint brands, including Tamiya, which is usually my paint of choice. I liked this approach, but I did find several errors: Tamiya XF-58 is olive drab, XF-24 is medium gunship grey. The Tamiya grey recommendations are not quite right. XF-19 is close to light ghost grey, but XF-20 is not close at all to dark ghost grey. Except for the tail tops that they suggested to be painted gunship grey, Hobby Boss did not reference the third color, medium grey, that starts at the nose and runs over the upper surfaces. I used Model Master light ghost grey, dark ghost grey and medium grey. The medium grey really needed to be toned down, but I didn’t notice until too late.
Underneath the pivoting center wing section and fuselage innards were painted Model Master RAF interior green which appeared close to pictures I saw online.
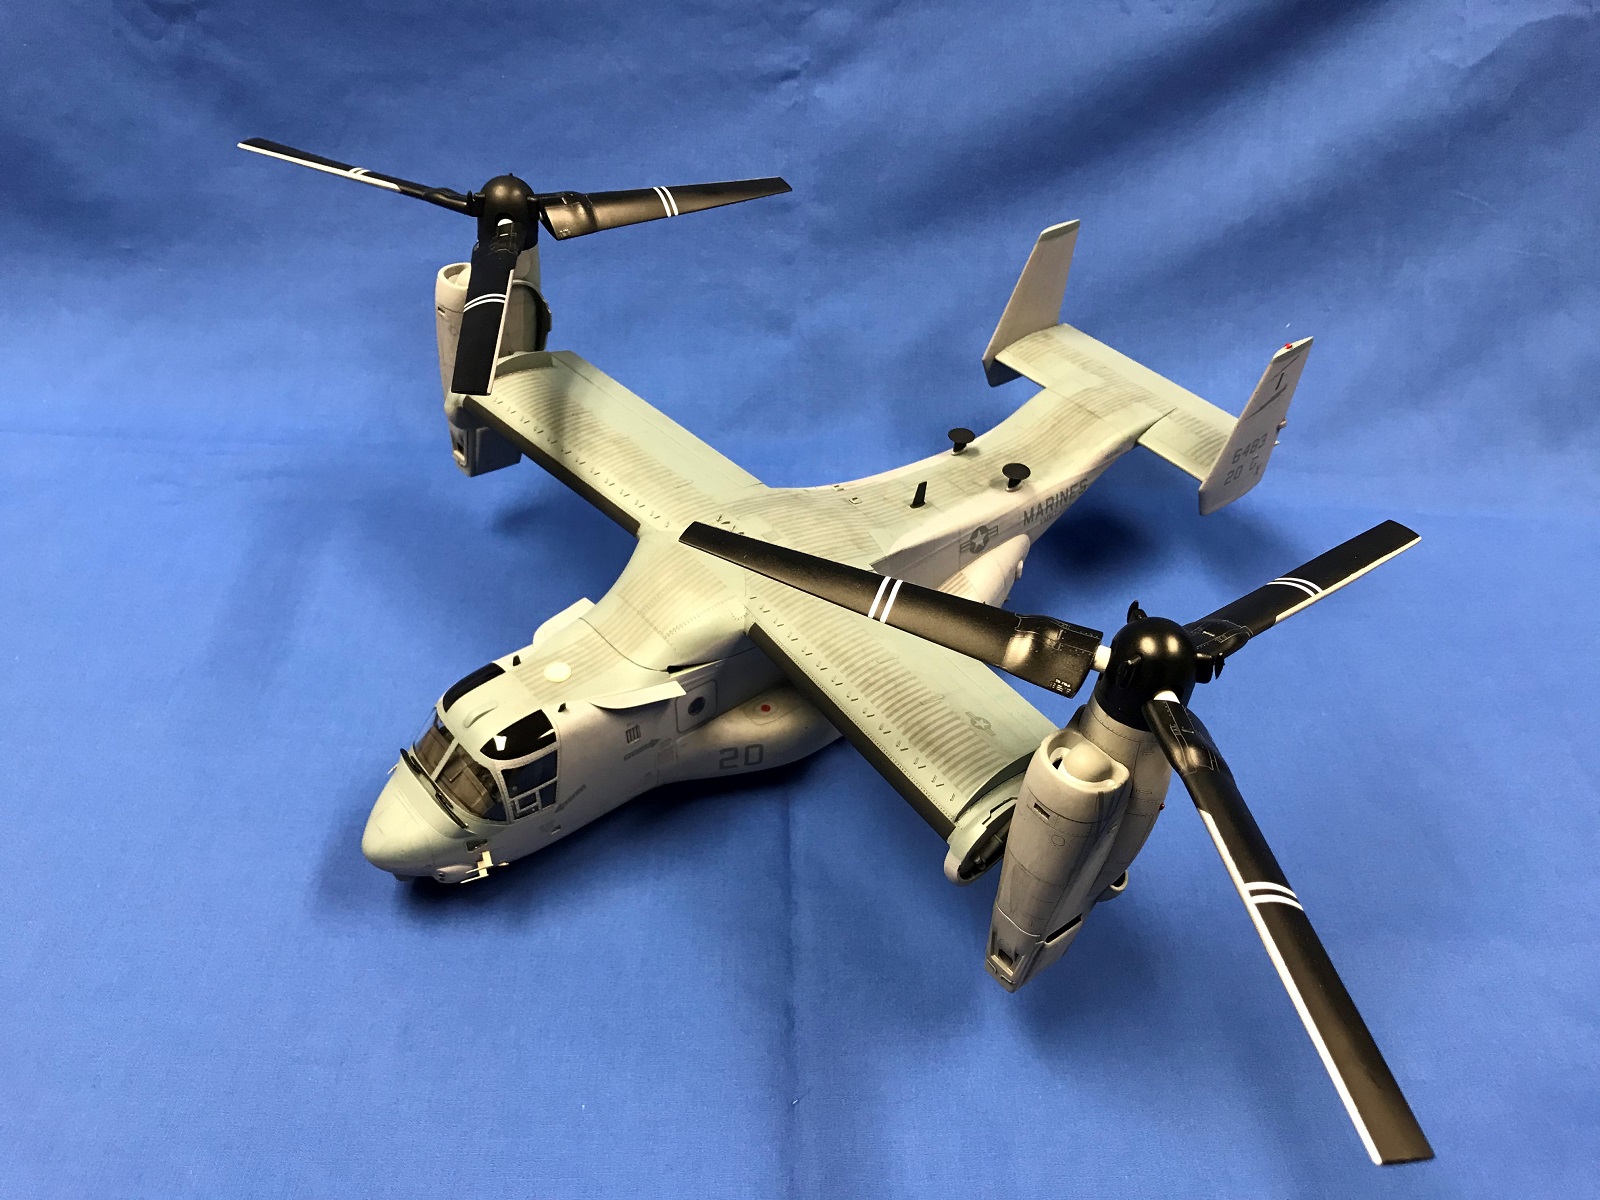
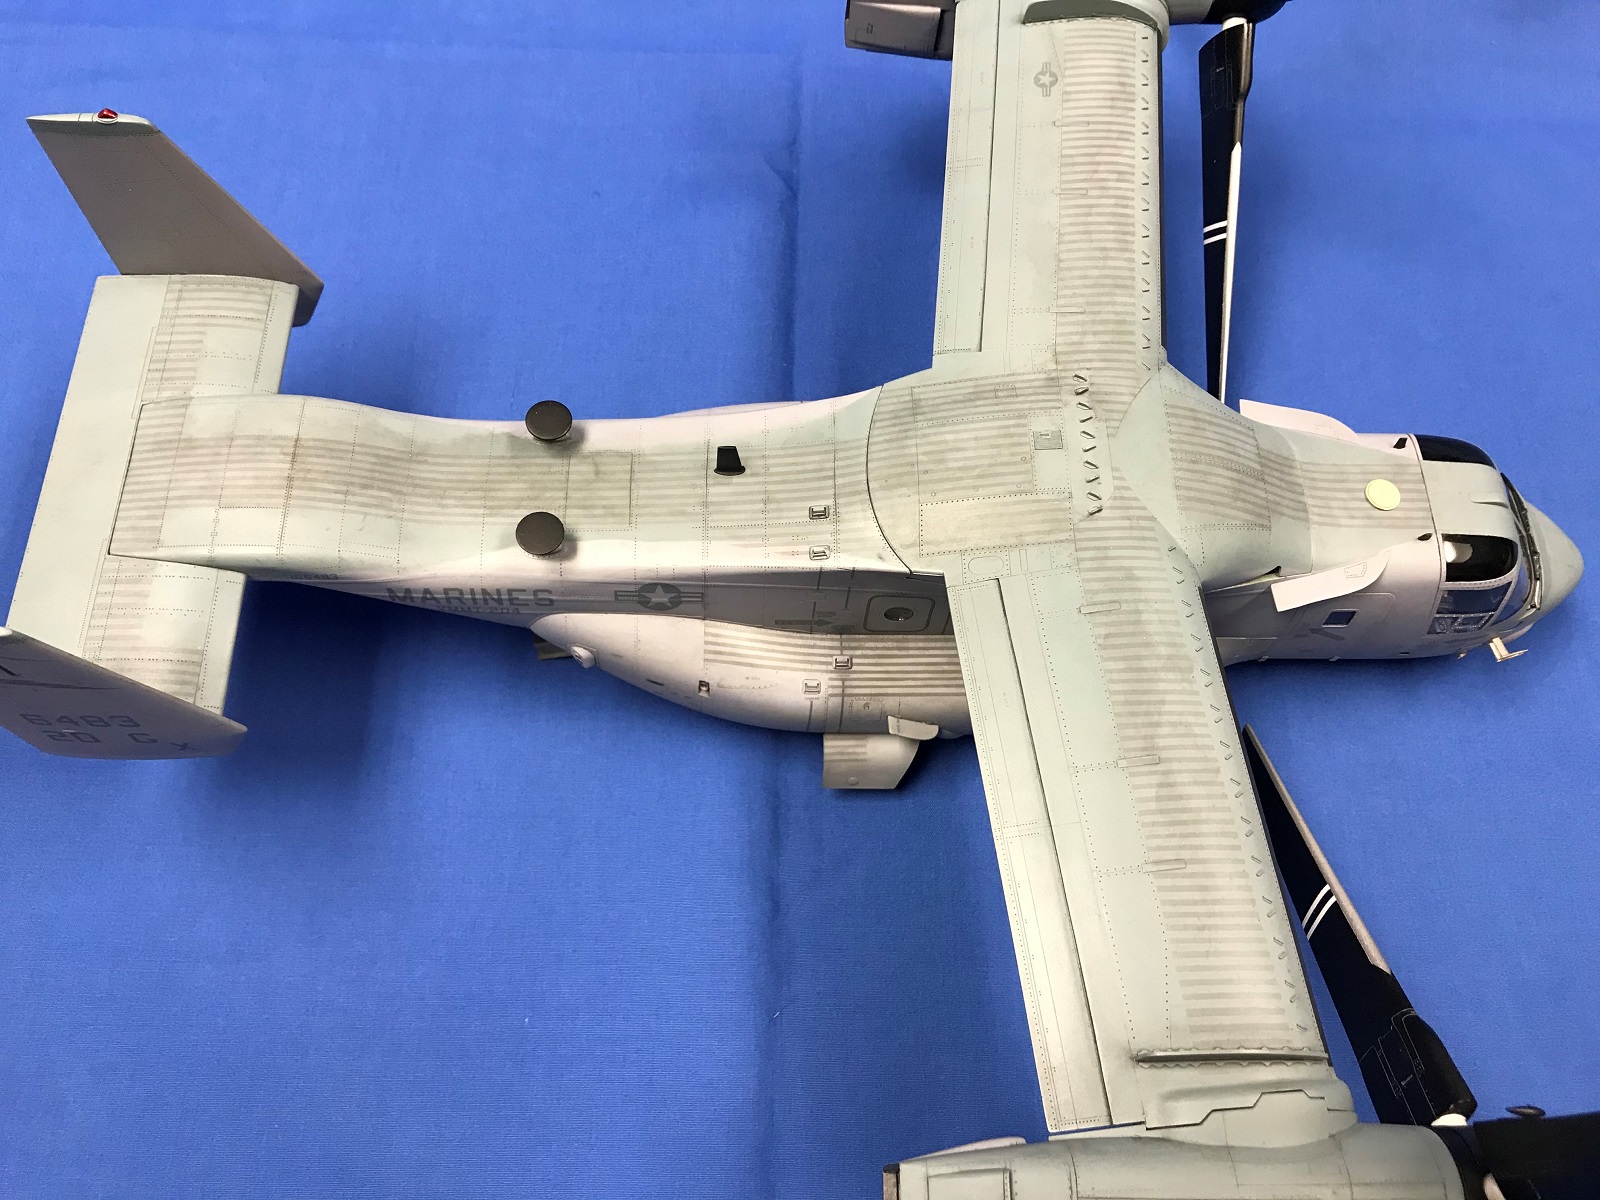
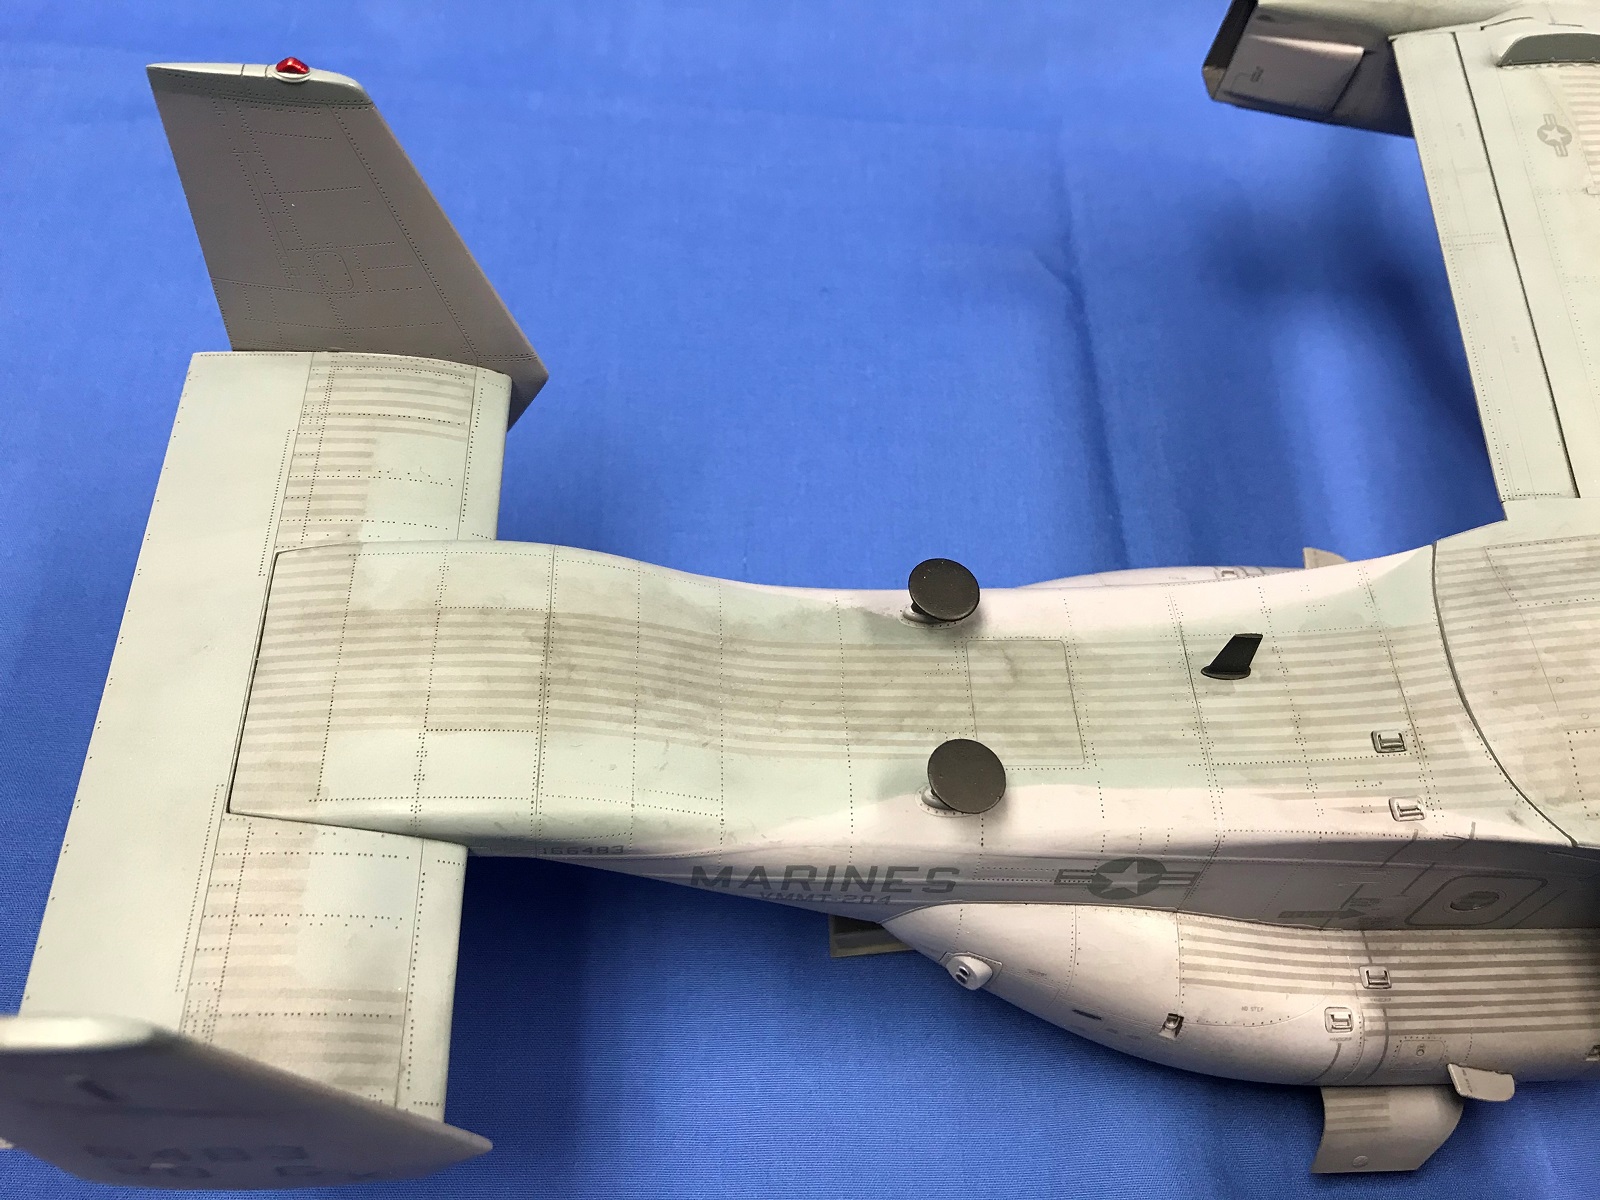
Most, if not all Ospreys appear to have walkway/non-slip stripes applied over the fuselage roof, wings, tailplane, sponsons, and main landing gear doors. These were not supplied as decals nor shown in the painting guide. I cut thin strips of tape to form the stripes and then sprayed them on using Tamiya dark sea grey. It took a long time to cut and mask, but the result was well worth the effort. As I had the 1/72 Hasegawa Osprey kit, I used their instruction sheet and decal sheet as a guide.
The decals were then applied over a Tamiya gloss coat. Most laid down very nicely, snuggling into panel lines with a little help from Micro-Sol. They were thin but strong and most ended up looking like they were painted on. These were some of the nicest decals I have worked with! After taking care of some silvering, mainly under recessed rivets, another gloss coat sealed the decals. A panel line wash and dirtying up the airframe followed. I painted the left refueling cap red from reference photos of this aircraft.
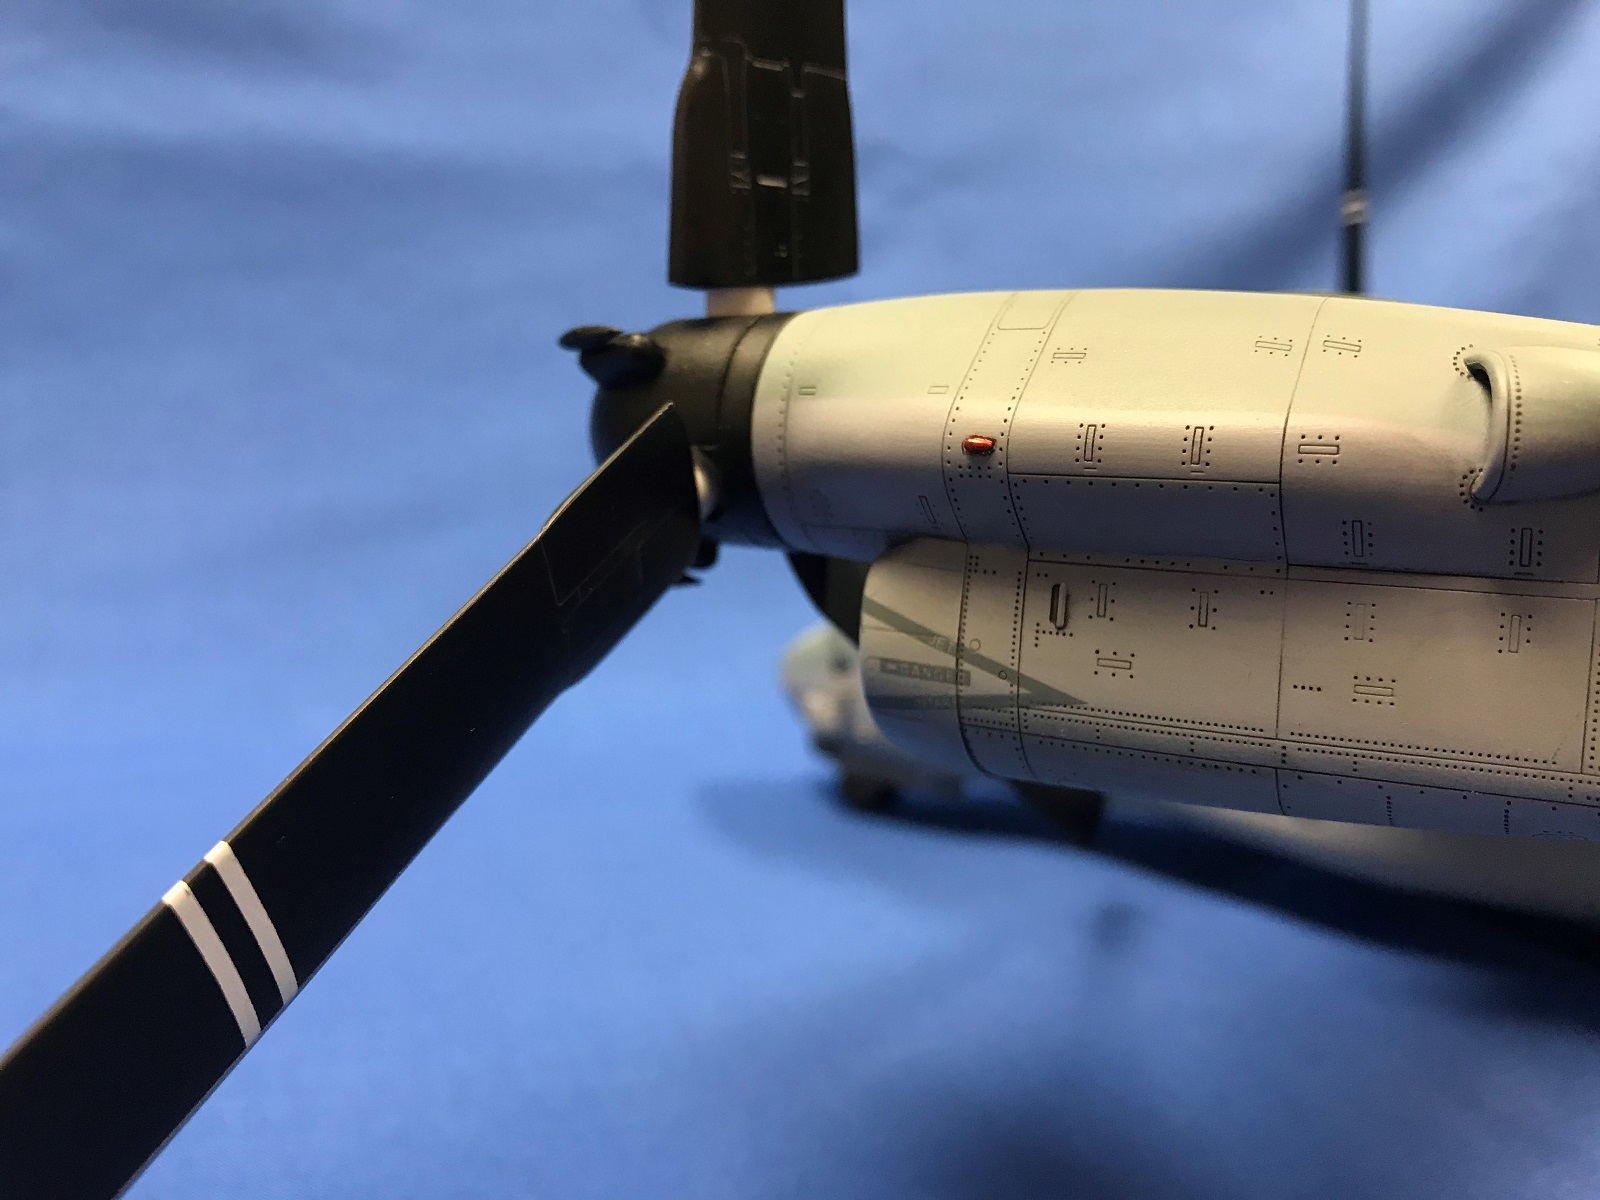
Curiously, none of the navigation lights were supplied on the clear sprue. There were lights located on the outside edge of each nacelle, one on the left tail top and trailing edge and three under the belly. I painted all of them chrome silver then overcoated each one with their appropriate color whether it was clear red, clear green, or simply clear. Most of the lights could be scratch built from clear sprue quite easily, if desired.
My last assembly steps were attaching all the antennas, pitot tubes, wheels, and windscreen wipers to the fuselage. All these fit fine, but I had to remove paint from mounting surfaces to facilitate a better fit.
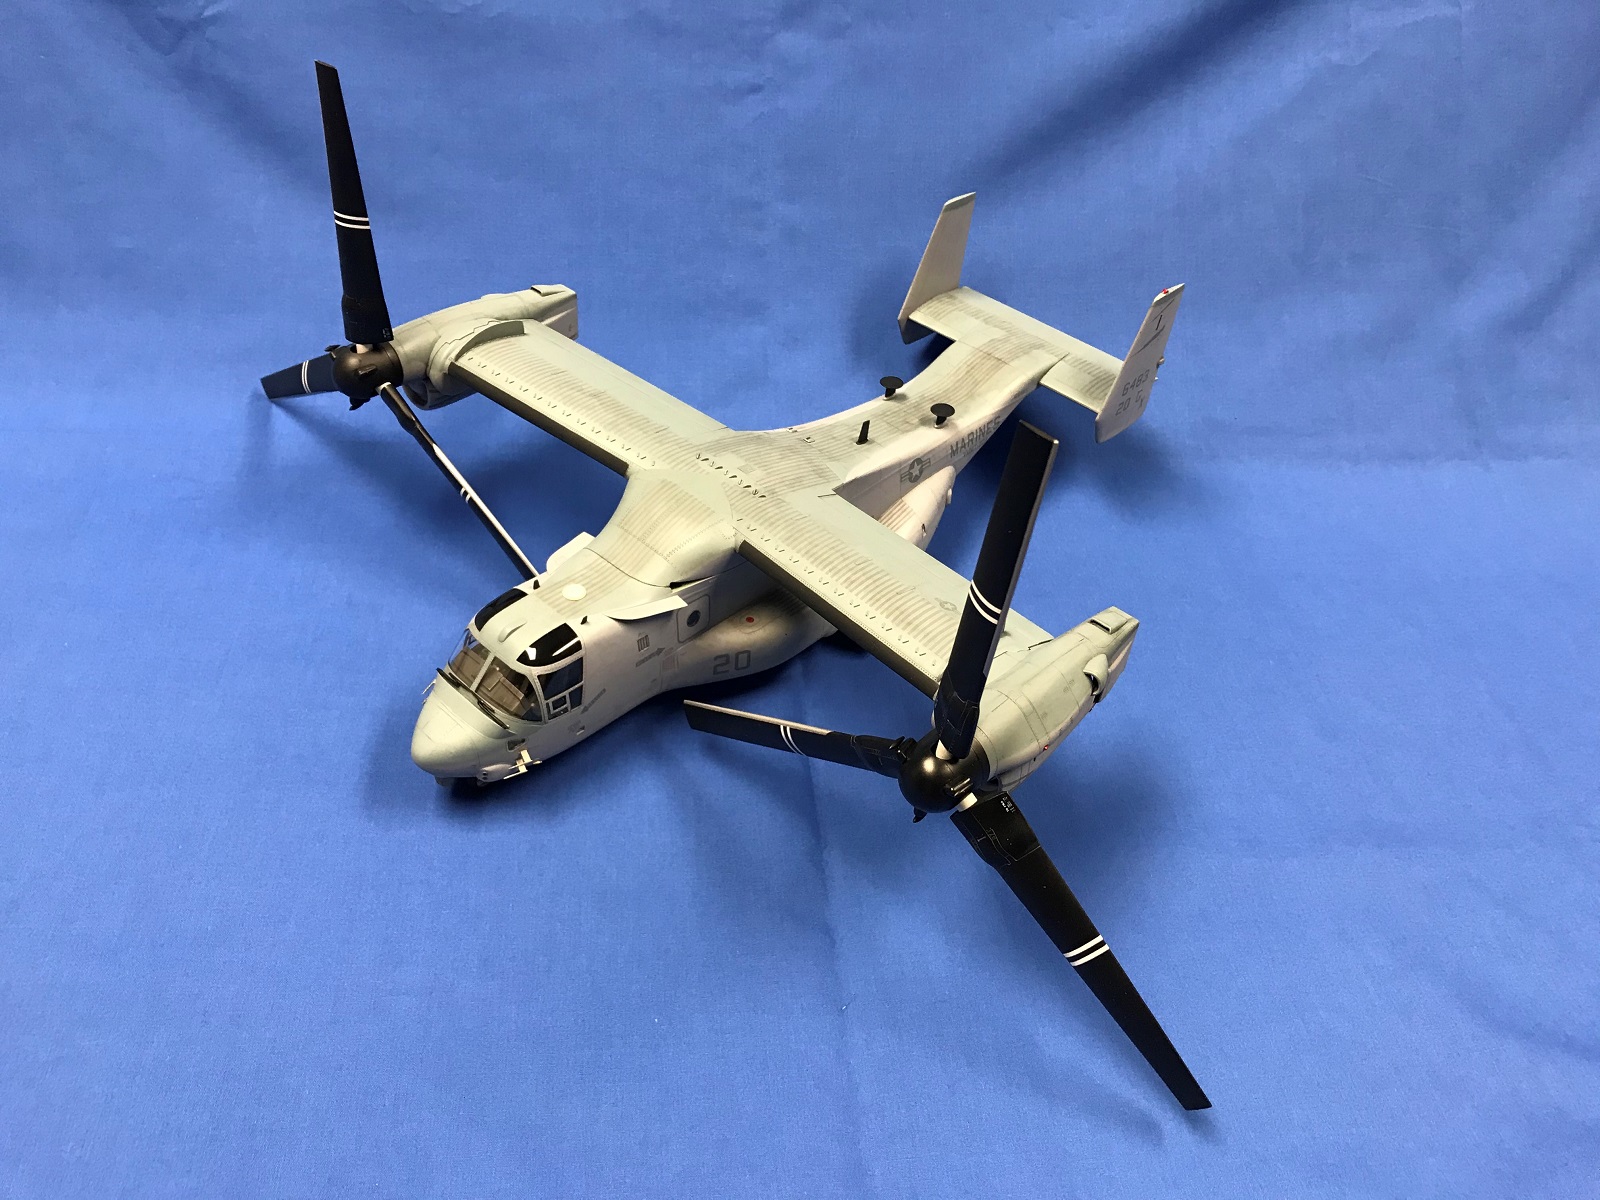
The wing was “snapped” onto its swivel and the engine nacelles were pushed onto the ends of the wings. The real fun began when I was finally able to press each set of prop/rotors into position and admire the Osprey with folded blades and stowed wing and then extended blades and wing ready for “start-up”. In 1/48 scale, she is a large, uniquely attractive aircraft, especially with the extended prop/rotors.
While various online stores are selling this model for less than the MSRP, I do think $160.00 is a little steep. However, price aside, the fact that two complete sets of blades are supplied, the ability to tilt the engines and fold the wing to a stowed position are certainly a huge plus! I believe this Hobby Boss kit relegates all others, in any scale, to second place. A modeler with a few kits under their belt should not have any problems producing a really nice rendition of this important aircraft.
Our cats, Tucker (in the box) and Avatar fully approved of this model and its quality as well!
My sincere thanks to MRC, Hobby Boss and IPMS USA for the privilege of building the MV-22B Osprey.

Box Top

Cabin and cockpit installed
Cabin and floor

Cabin close up
Cockpit 1

Cockpit 2
Cockpit 3
Forward Cabin 1

Forward cabin
Osprey Prop Rotor Folded, Wing Stowed Side 3
Osprey Prop Rotor Folded, Wing Stowed Side Left

Osprey Prop Rotor Folded, Wing Stowed Side
Osprey Prop Rotor Options 1

Osprey Prop Rotor Options 3
Osprey Prop Rotor Options
Osprey Prop Rotors Up
Osprey 1
Osprey Above and behind
Osprey Above
Osprey Engine and Piston
Osprey Engine Intake
Osprey Left Nacelle
Osprey Left Side Prop Rotors Up
Osprey Left Side Rear
Osprey Narcelle Close Up
Osprey Nose 1
Osprey Nose Close Up
Osprey Ramp and Floor

Osprey Rear Sponson

Osprey Sponson Stripes
Osprey Tail and Spine

Osprey Wing Swivel Mount
Osprey Wing Underside
stripes 3
Stripes Tail-clean
Comments
Add new comment
This site is protected by reCAPTCHA and the Google Privacy Policy and Terms of Service apply.
Similar Reviews