
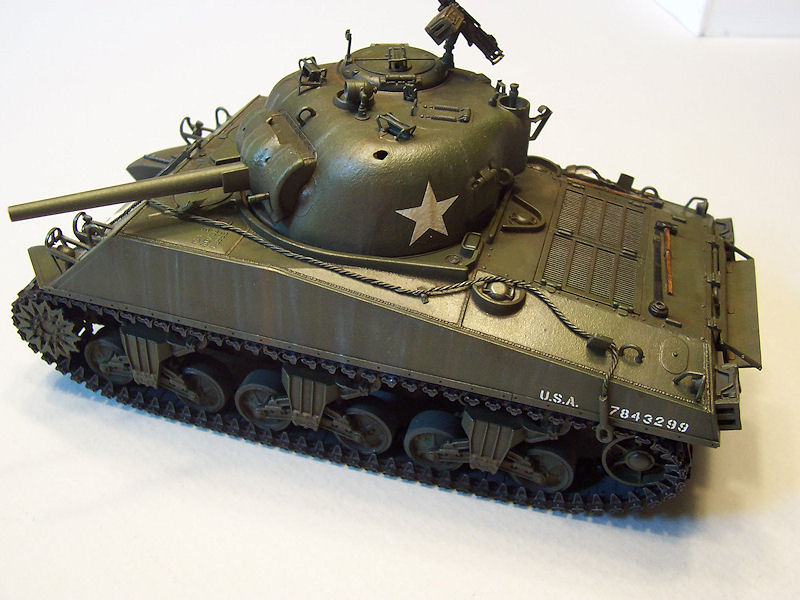
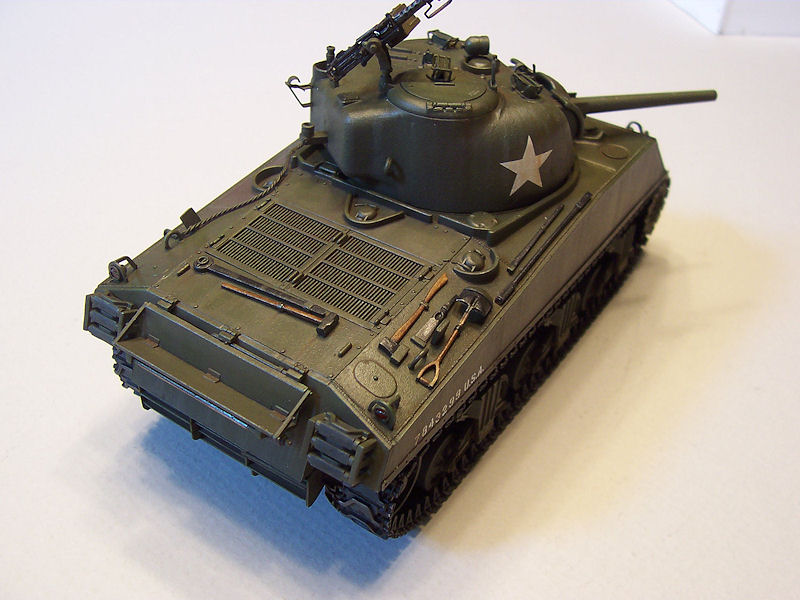
Sherman M4A3(75)W ETO
History and Performance
I have never been a big follower of the Sherman (and I certainly do not mean to offend anyone), and therefore cannot offer anything new on the history or performance of this medium tank, as it has been addressed many times before. My references were limited to the Internet and the Squadron Signals publication Sherman in Action.
The M4A3 was the major service variant, and was the model chosen for postwar production, and was the most produced of all Sherman variants.
Kit Review
Instructions
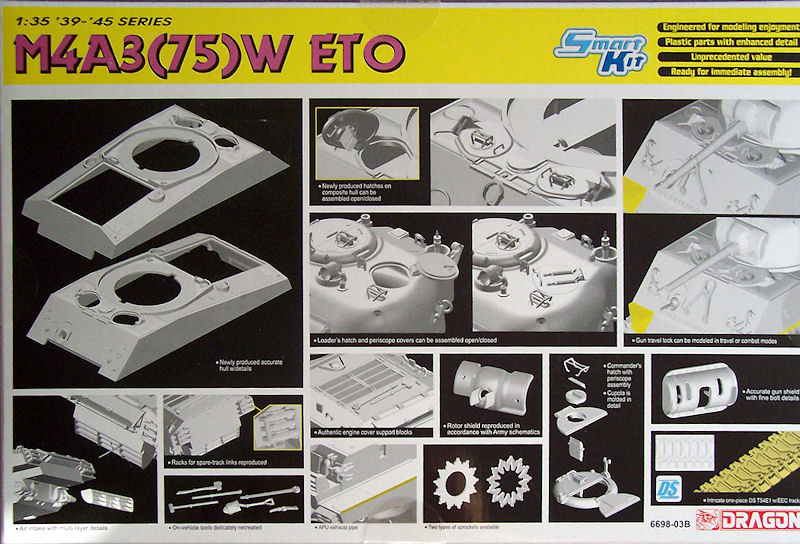
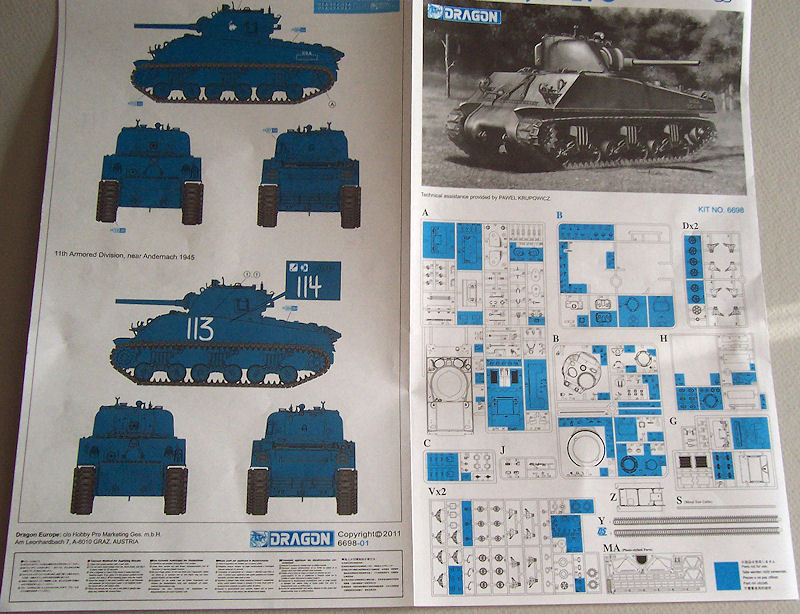
The instructions are typical Dragon in their foldout scheme. There are six pages, with the first showing the many parts not being used in this build, four pages on the twelve major steps in the effort, and the last depicting the two vehicles than can be built with the box contents. Gee Whiz! With all these surplus parts I just might become a Sherman fan! As is their norm, Dragon also offers information on paints and colors from various model paint manufacturers. It should also be noted the images on the box bottom and side often assist in parts placement location sometime omitted or vague on the foldout instructions.
Sprues and Packaging
There are ten grey sprues for the main kit assembly, one sprue of clear parts, the hull bottom, plus a fret of photo etch. The grey plastic molding is, for the most part, crisp with most attachment points being rather small. The turret and mantel exhibit an excellent representation of casting as would be found on the real vehicle. The hull top has very nice weld beads and casting numbers represented. Overall, nicely done.
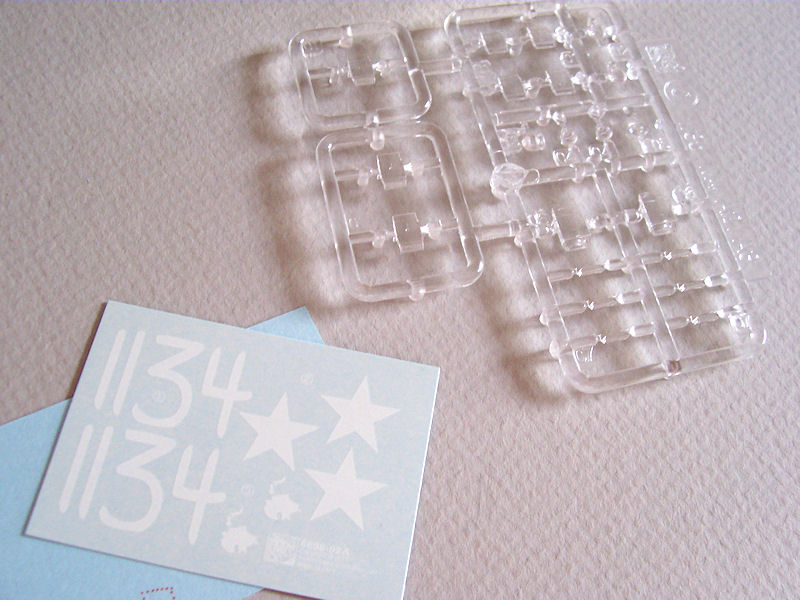
Clear Parts
The clear parts include periscopes and head lights, plus several parts not being used.
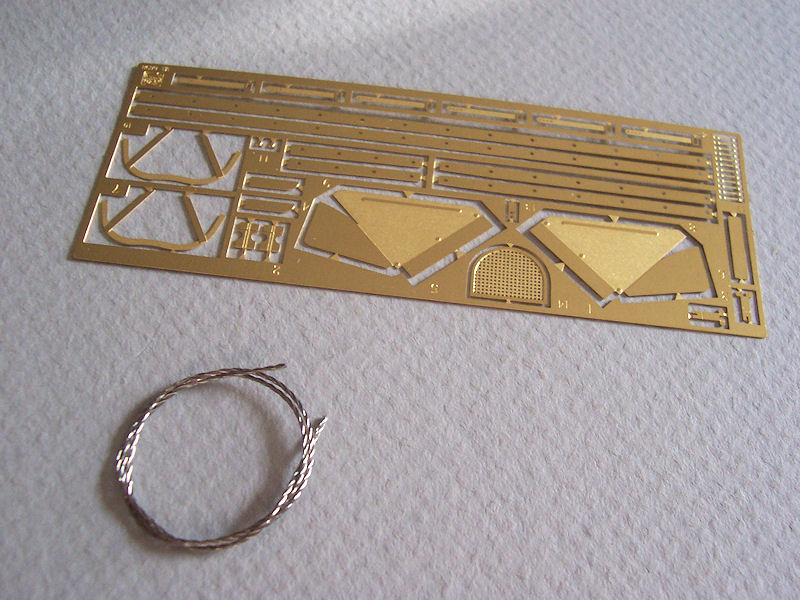
Photo Etch
The photo etch includes tool hold-downs, fender fronts and rears, and a longitudinal flange. Also included are guards for the headlights.
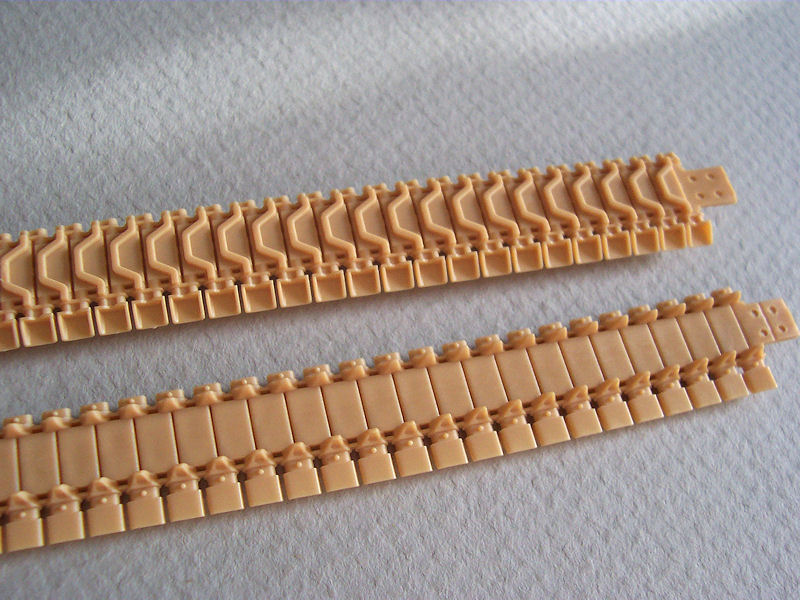
Running Gear and Tracks
The tracks are the DS variety and include some very nice details.
Decals/Markings
Markings for two vehicles are included, one from the 10th Armored Division and the other from the 11th Armored Division.
Figures
There are no figures included.
Miscellaneous
A short length of twisted wire cable is included.
Construction
Running Gear and Tracks
The first steps of the construction are dedicated to the drive sprockets and bogies. There is a good deal of mold seam cleanup required before the various parts are fitted together. There are a few alternate parts where the modeler needs to decide which version is required. True Sherman fans will have adequate references to assist in the choice. Although I could not discern a great deal of difference between the alternate parts, I flipped a coin to make the decision. With some care the assemblies will be made to work, and this will be important later in the build.
Each road wheel is comprised of two parts, front and rear. There are small alignment lugs on the inside of the front part that will mate with depression on the rear part. The rear part slips into the front part, and the alignment is a bit tricky to achieve.
The DS tracks are very nicely detailed and went together with just a drop of solvent.
Lower Hull
Parts G12 and G13 are fitted to the lower hull with a simple butt connection. I set the hull on a flat surface, adjusted the two parts in place, then carefully applied solvent with a Touch-N-Flow solvent applicator. I then allowed the joint to harden over night. I thought the fit of part B62 was quite vague. Checking out the next step helped a bit with the fit of the part.
The headlight guards are furnished as plastic or PE parts. I used the plastic parts as there are only two PE parts and there are three front headlights and two tail lights requiring guards.
The lower hull assembly was relatively simple and posed no problems. Fitting part G4 to the hull rear did result in noticeable gaps on both sides that were partially covered with the installation of parts A55. Vallejo filler was used to fill the remaining gaps.
Upper Hull
As with the lower hull, the upper hull construction went together without problems. There are several locations requiring opening for later fitting of the tools. Step 7 shows two surface details that need to be removed, but the same detail appears in place in the following steps. My references show the detail, so I left it in place. The fit of the rear deck and grilles does allow for a minor gap between the parts. This was carefully filled and sanded, with a narrower gap being retained.
The PE fenders are shown being installed in this step. I deferred this step until the hull top and bottom were fitted together. Other than that, the assembly of the upper hull was also without problems. I did find significant gaps on the sponson undersides that were filled with strip styrene. In addition, I found that the PE fret was numbered incorrectly when compared to the plans. The kit-furnished tow cable was replaced with a short length of hand-twisted fine lead wire. The cable furnished with the kit is just too stiff and I can never get it to lie down naturally. The lead cable can be teased into position.
Turret and Armament
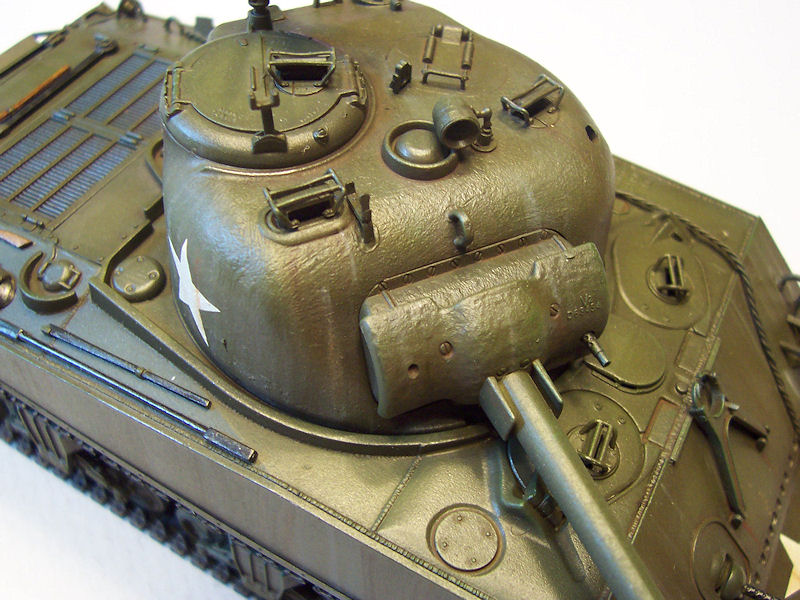
The turret has very nice texture representing a casting. There is a mold seam line around the pistol port that was apparently added to the turret from an early kit issue. Also, when part B31 is fitted in place below the rear bustle, a seam is apparent. These seams were scraped and sanded, and the surface texture was reapplied using Mr. Surfacer 500 and an old brush.
The main gun assembly consists of five parts that require a bit of care in alignment and a judicious application of solvent to fit the parts together. When fitting this subassembly to the turret front, I found that it appeared to be set back too far. I checked my meager references and it was wrong. I then realized the instructions failed to note the installation of part B20 or B34 (both are shown as not being used, but fit the opening perfectly). Once the missing part was in place the main gun assembly fit perfectly.
The placement of some of the smaller parts is rather vague on the instructions, but the box images helped clear up any confusion.
Painting and Finishing
First, the assembled model was washed with warm water and Dawn detergent, rinsed in warm water, and allowed to air dry for several days. Next, white primer was applied and allowed to dry thoroughly. The model was the airbrushed with Tamiya NATO black as an undercoat, with mixtures of other Tamiya acrylic paints creating the olive drab and weathering. A glossy surface was applied for further pin washes and decal application.
Decals
The kit comes with decals for three vehicles and offer minimal markings for either version. Decals are printed by Cartograf and went on well, as usual. There was no discernable carrier film on the decals. Once dry, the model was given a flat finish and it was done.
Conclusion
Compared to some of the Dragon kits of German World War II vehicles, this model was an easy build without too many small parts or complex construction. Most everything fit as shown.
As noted above, I was not a big follower of the Sherman tank, but I did enjoy this build and plan to build another. Is this how it starts? Being of average building skills, intelligence, and height, I found this was not a challenging build for me, so other modelers with similar attributes should also enjoy this kit. It builds into an impressive representation of this very famous and popular vehicle. Highly recommended to Sherman fans and those who will soon be fans.
I wish to thank Dragon USA and IPMS/USA for the opportunity to build and review this kit.


Comments
Add new comment
This site is protected by reCAPTCHA and the Google Privacy Policy and Terms of Service apply.
Similar Reviews