
WW1 US Pioneer Skeleton Tank
Introduction
Late in WW1 the US determined that there was a problem with current tanks. The British designed rhomboid tanks were good at crossing the enemy trenches but were so heavy that most got stuck or broke down in no-mans-land. The French FT17 light tank usually made it across no-mans-land but couldn't always cross the enemy trenches. The US looked for a tank that could do both.
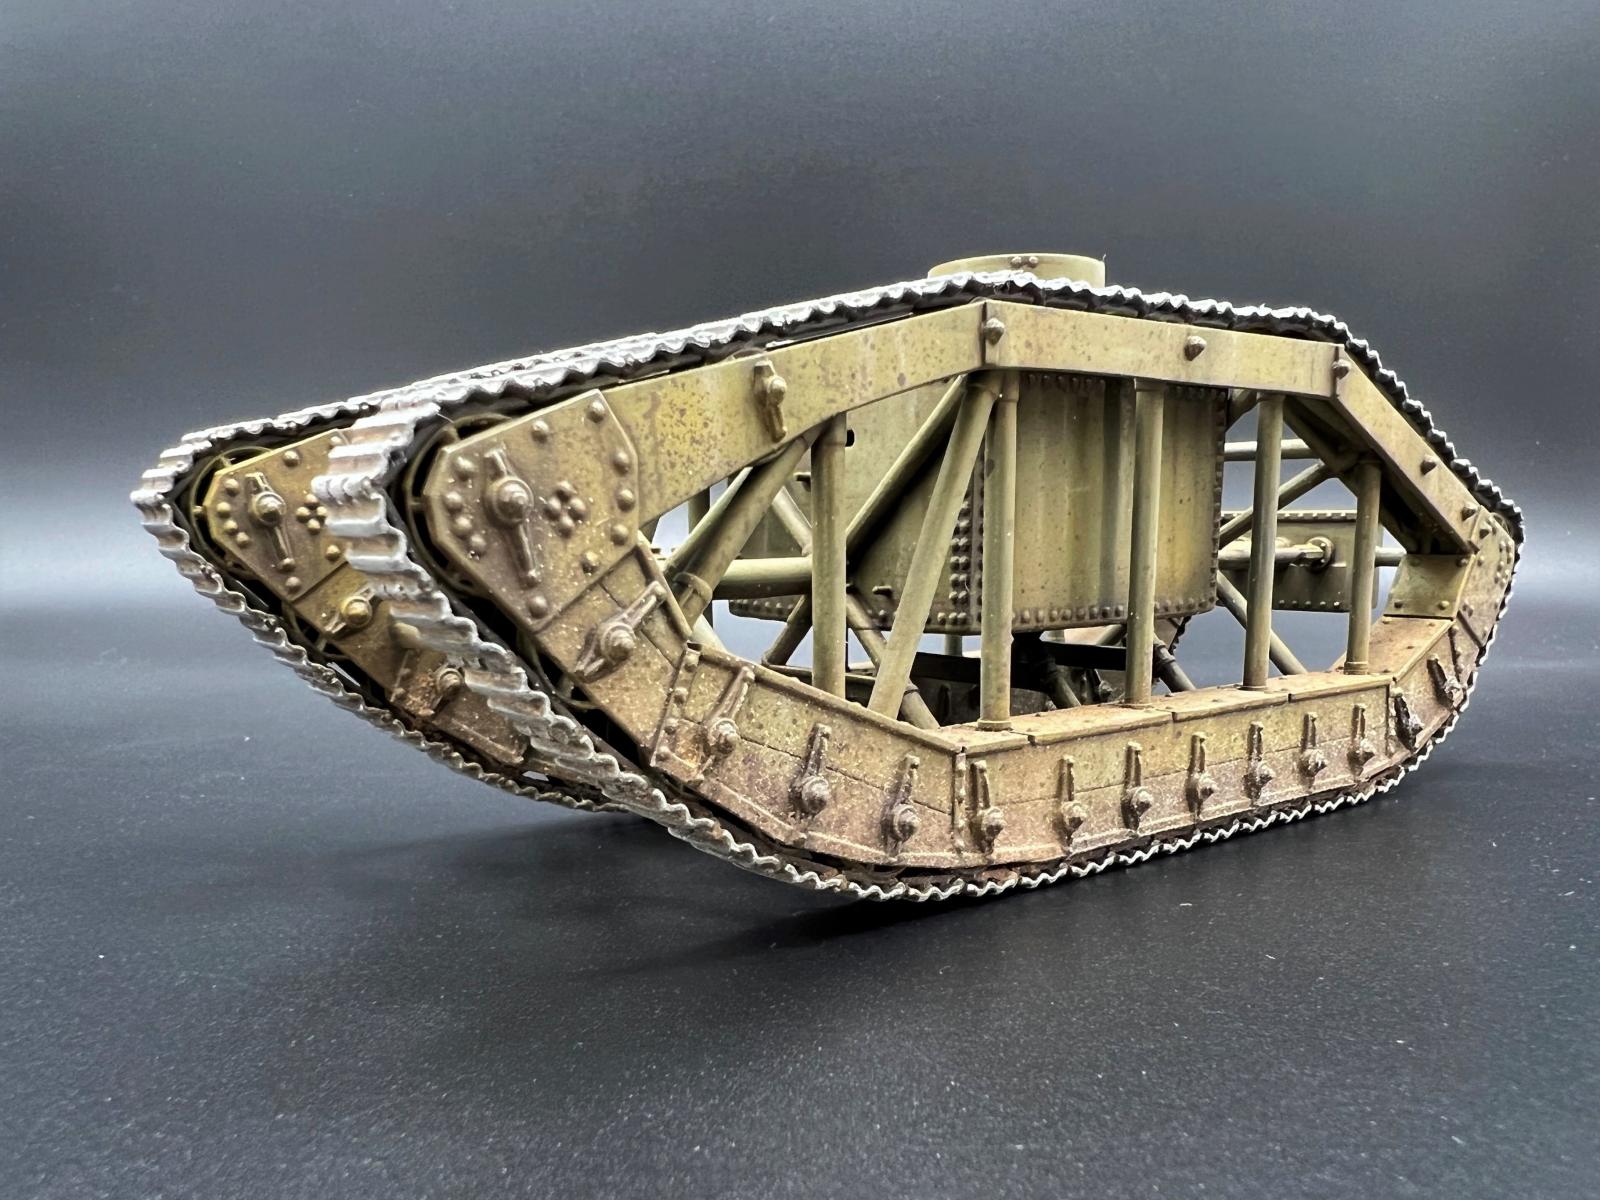
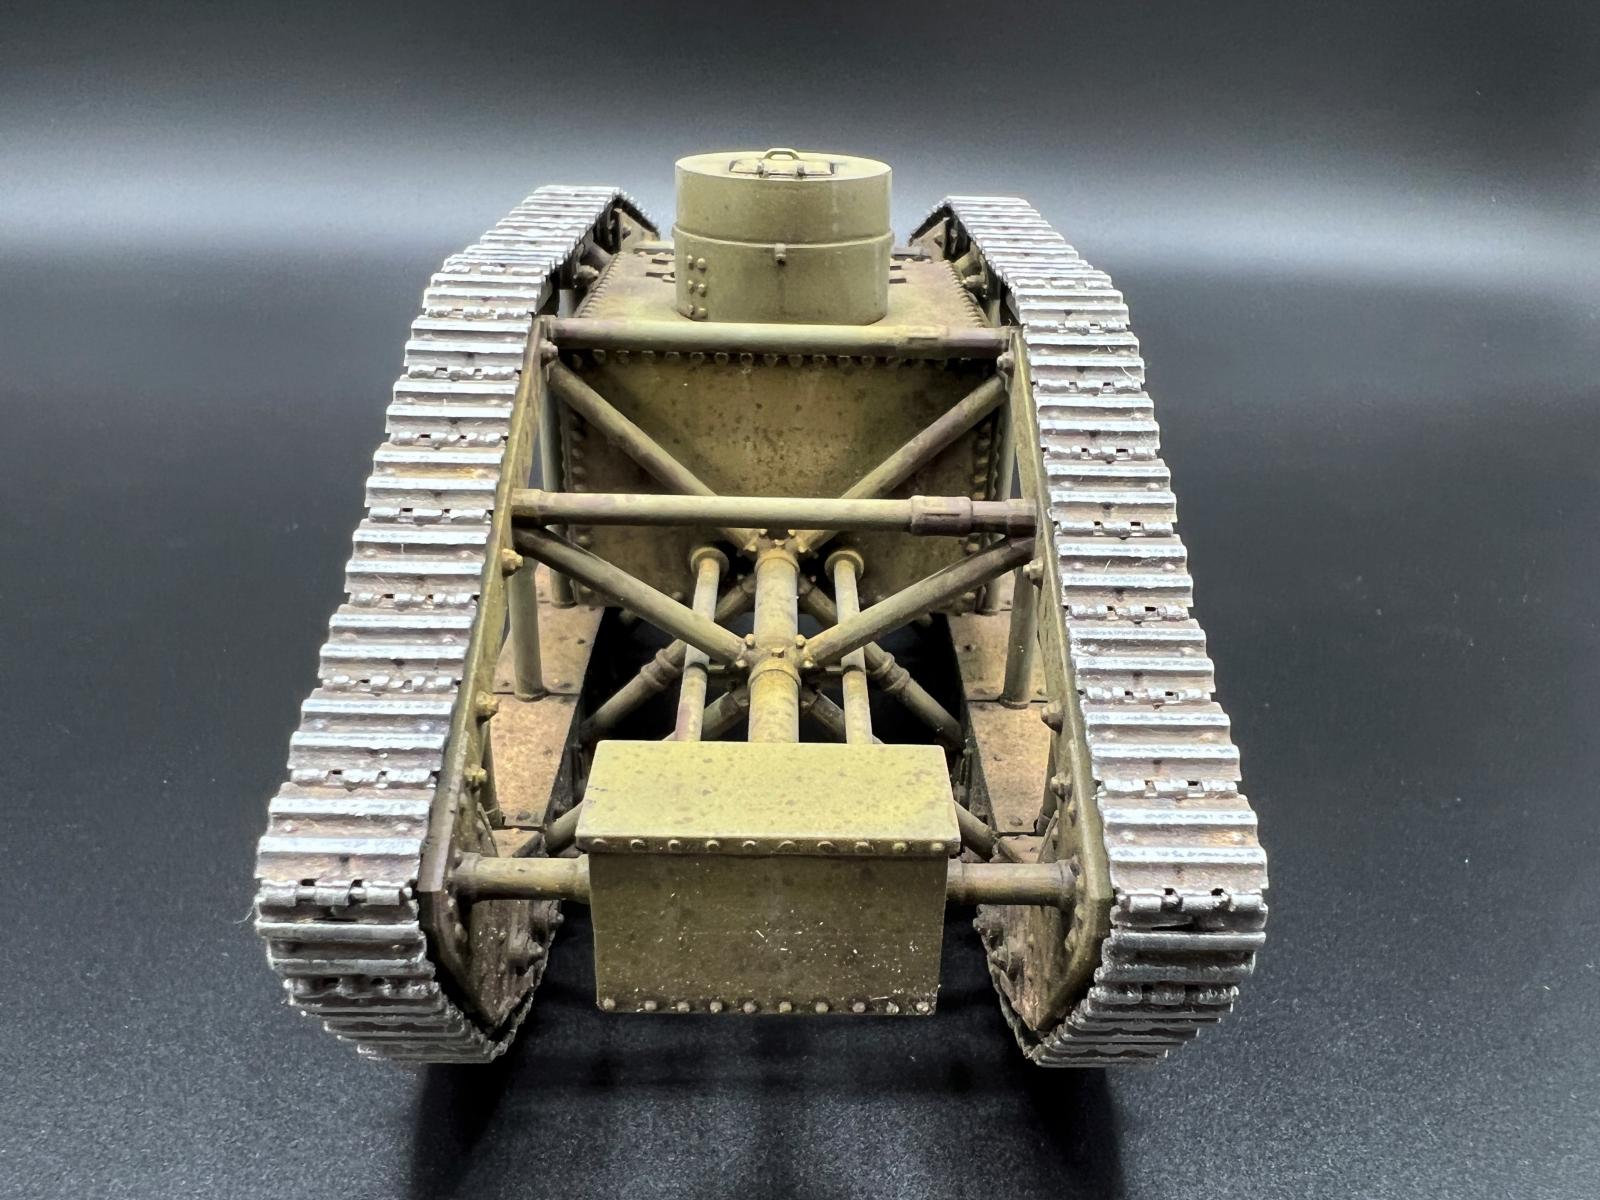
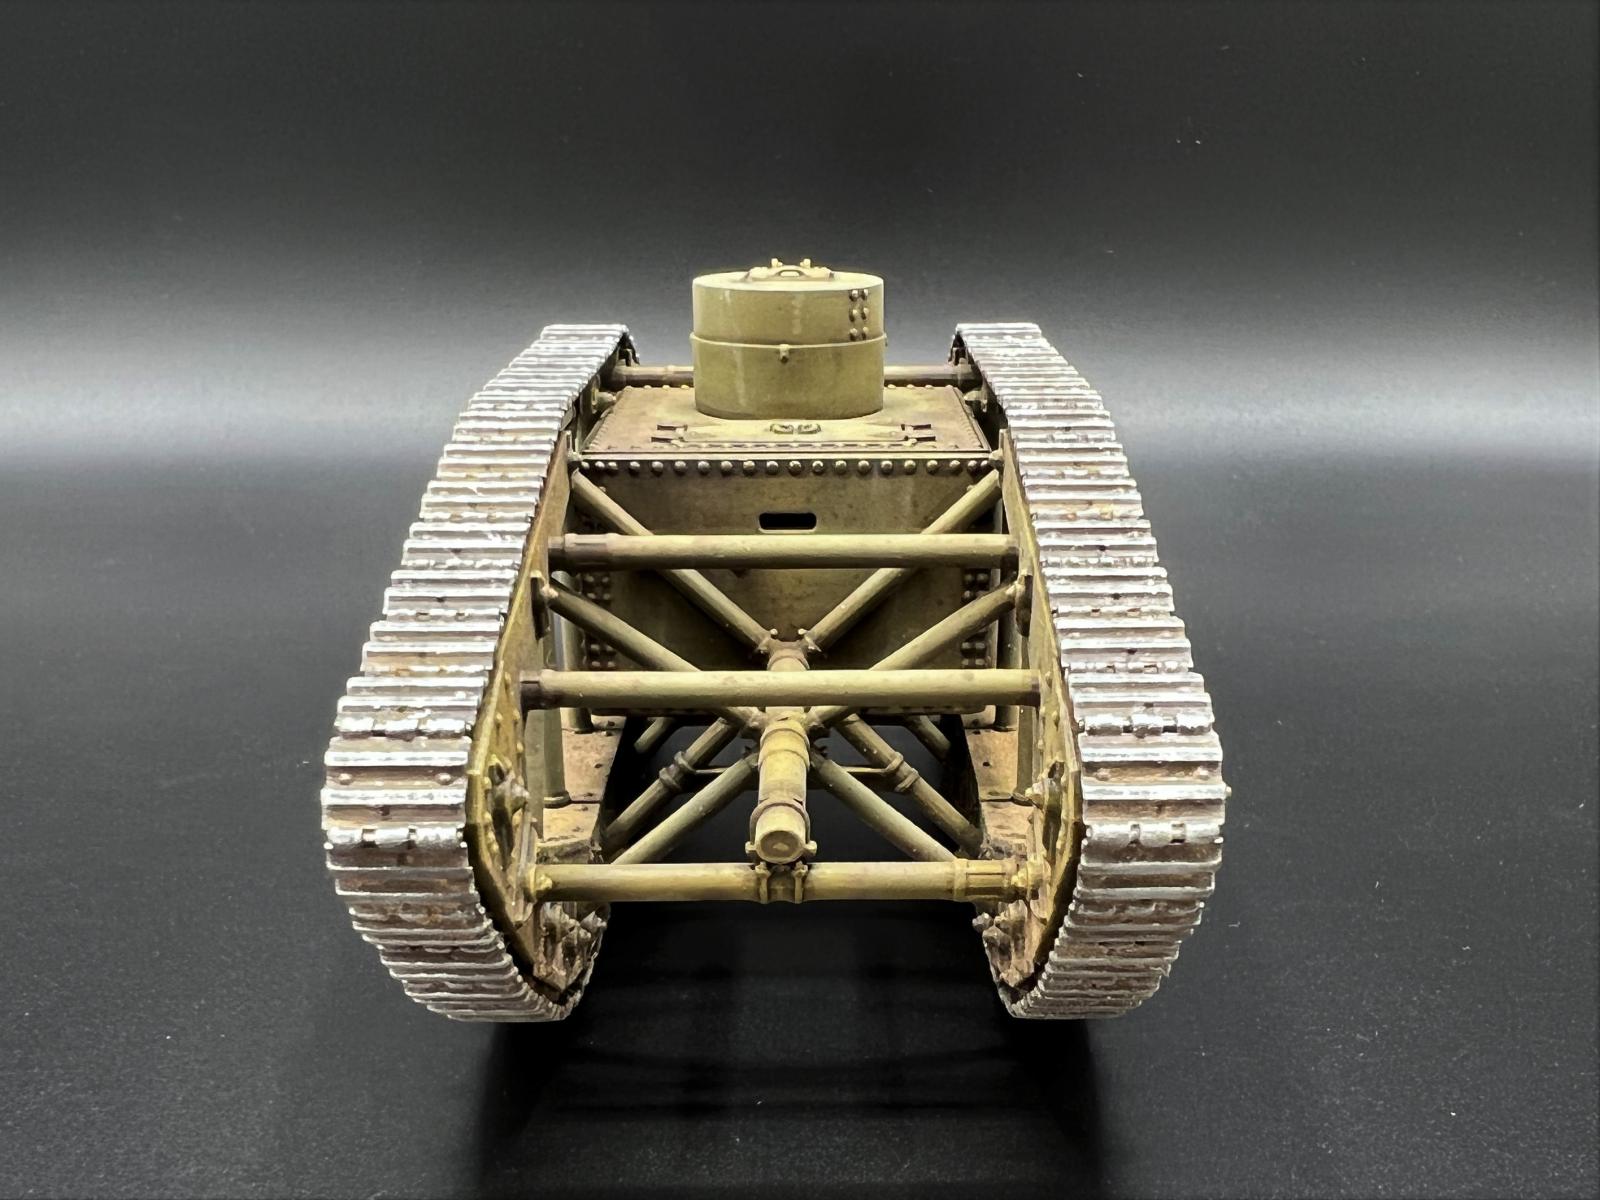
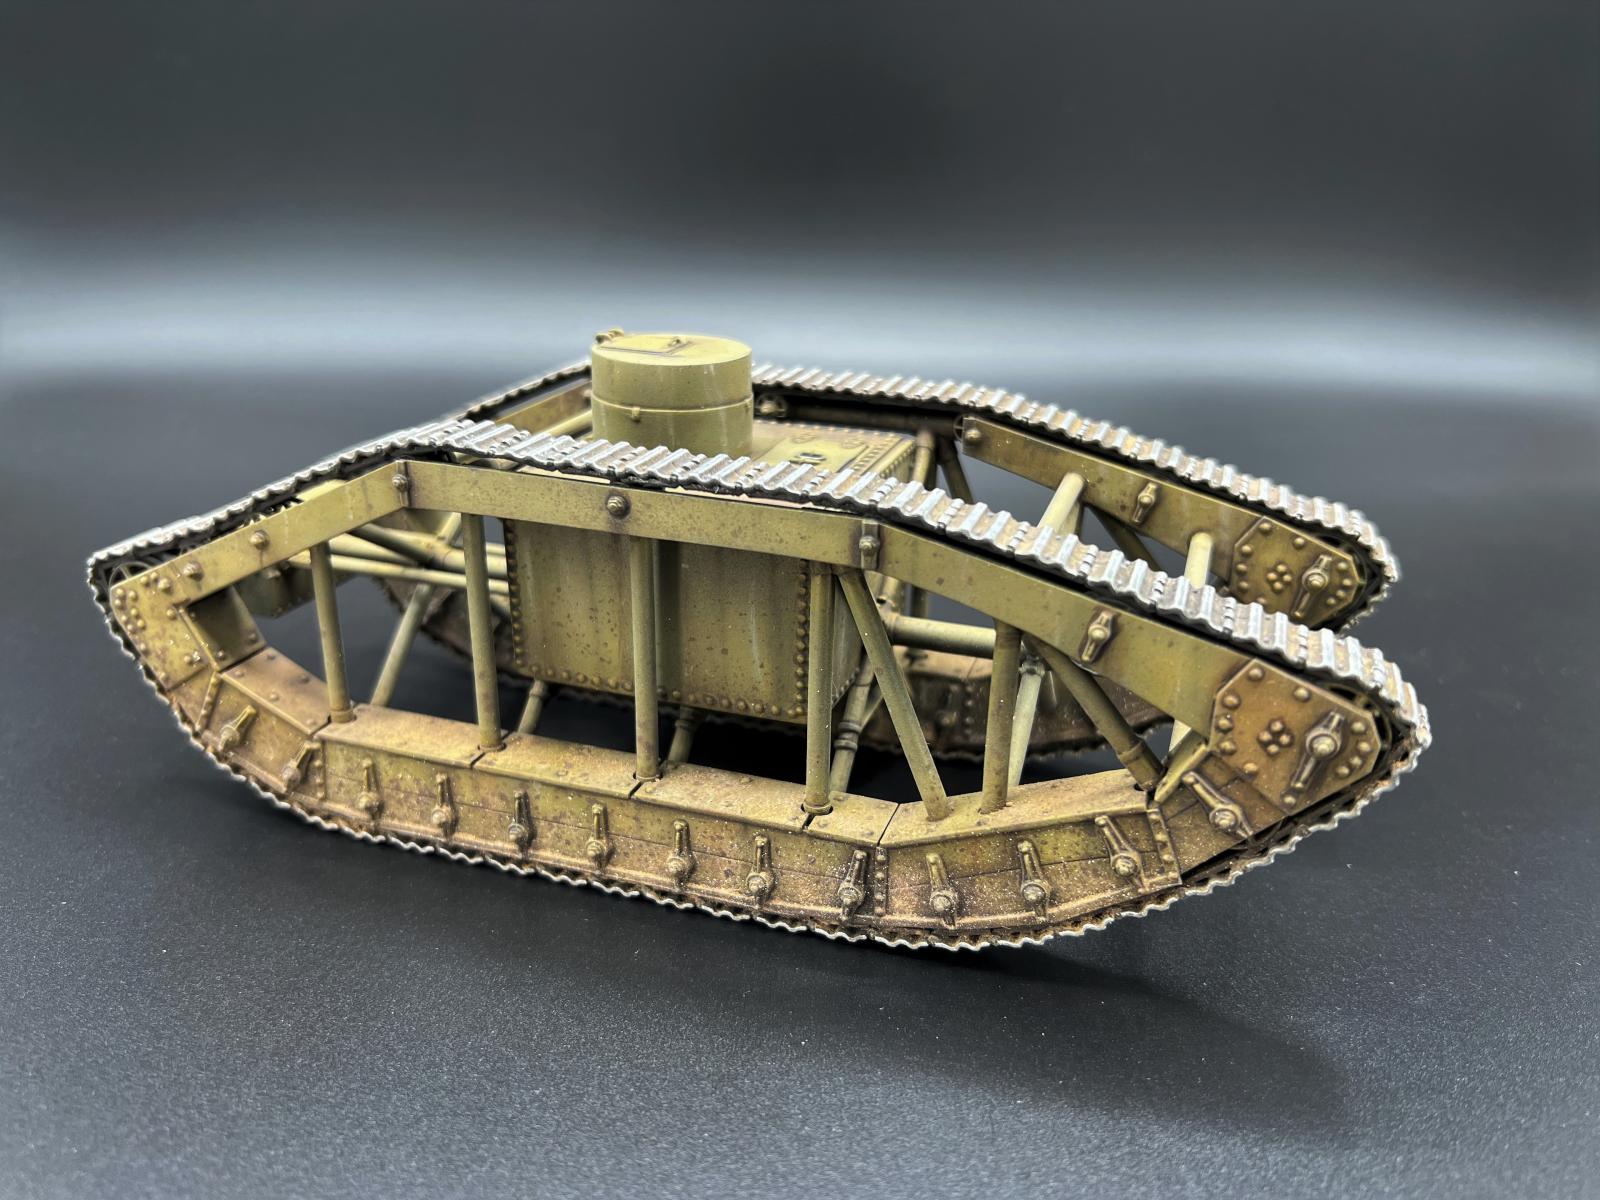
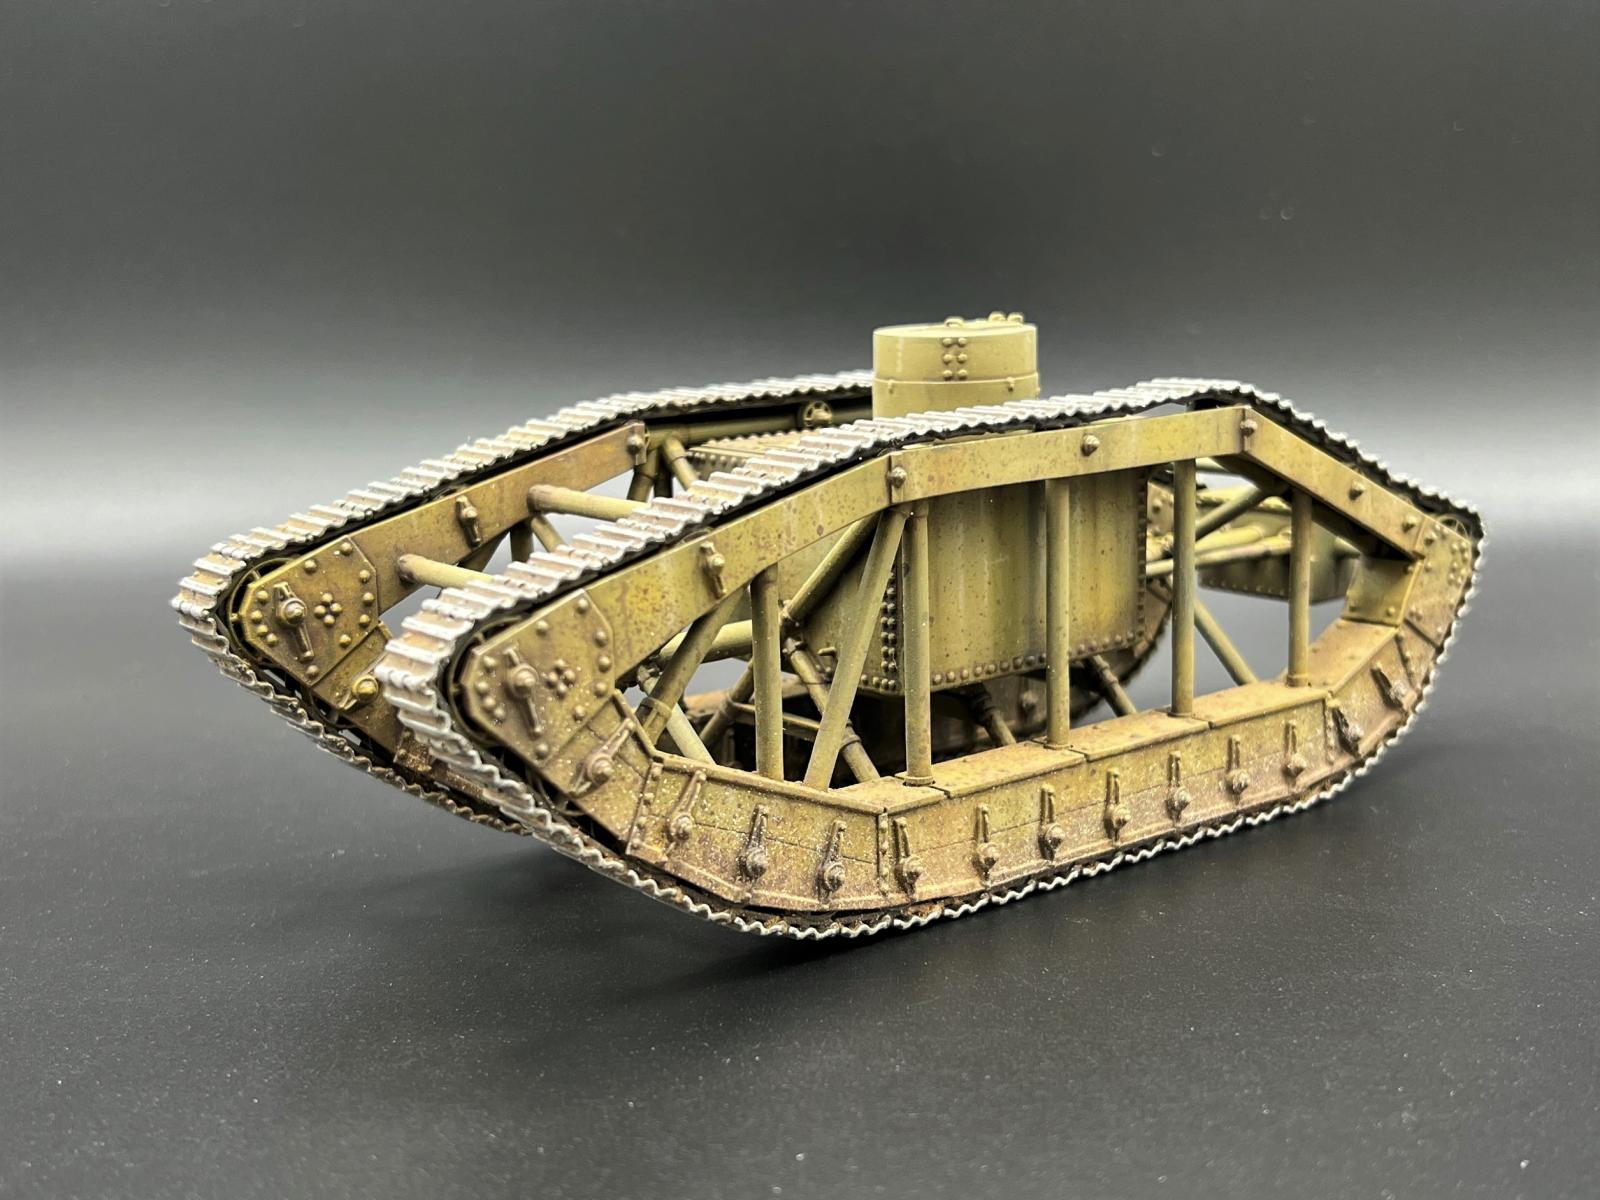
Pioneer Tractor Company tried to solve the problem by hollowing out the rhomboid. The tank used standard iron pipe and plumbing connectors as a frame with an armored engine/fighting compartment suspended in the frame. Pioneer completed a prototype in October 1918 and submitted it for testing. It was fast by WW1 standards and crossed the trenches well. However, its limited ability to carry armament doomed the project. The single prototype is preserved at Ft. Lee.
Review
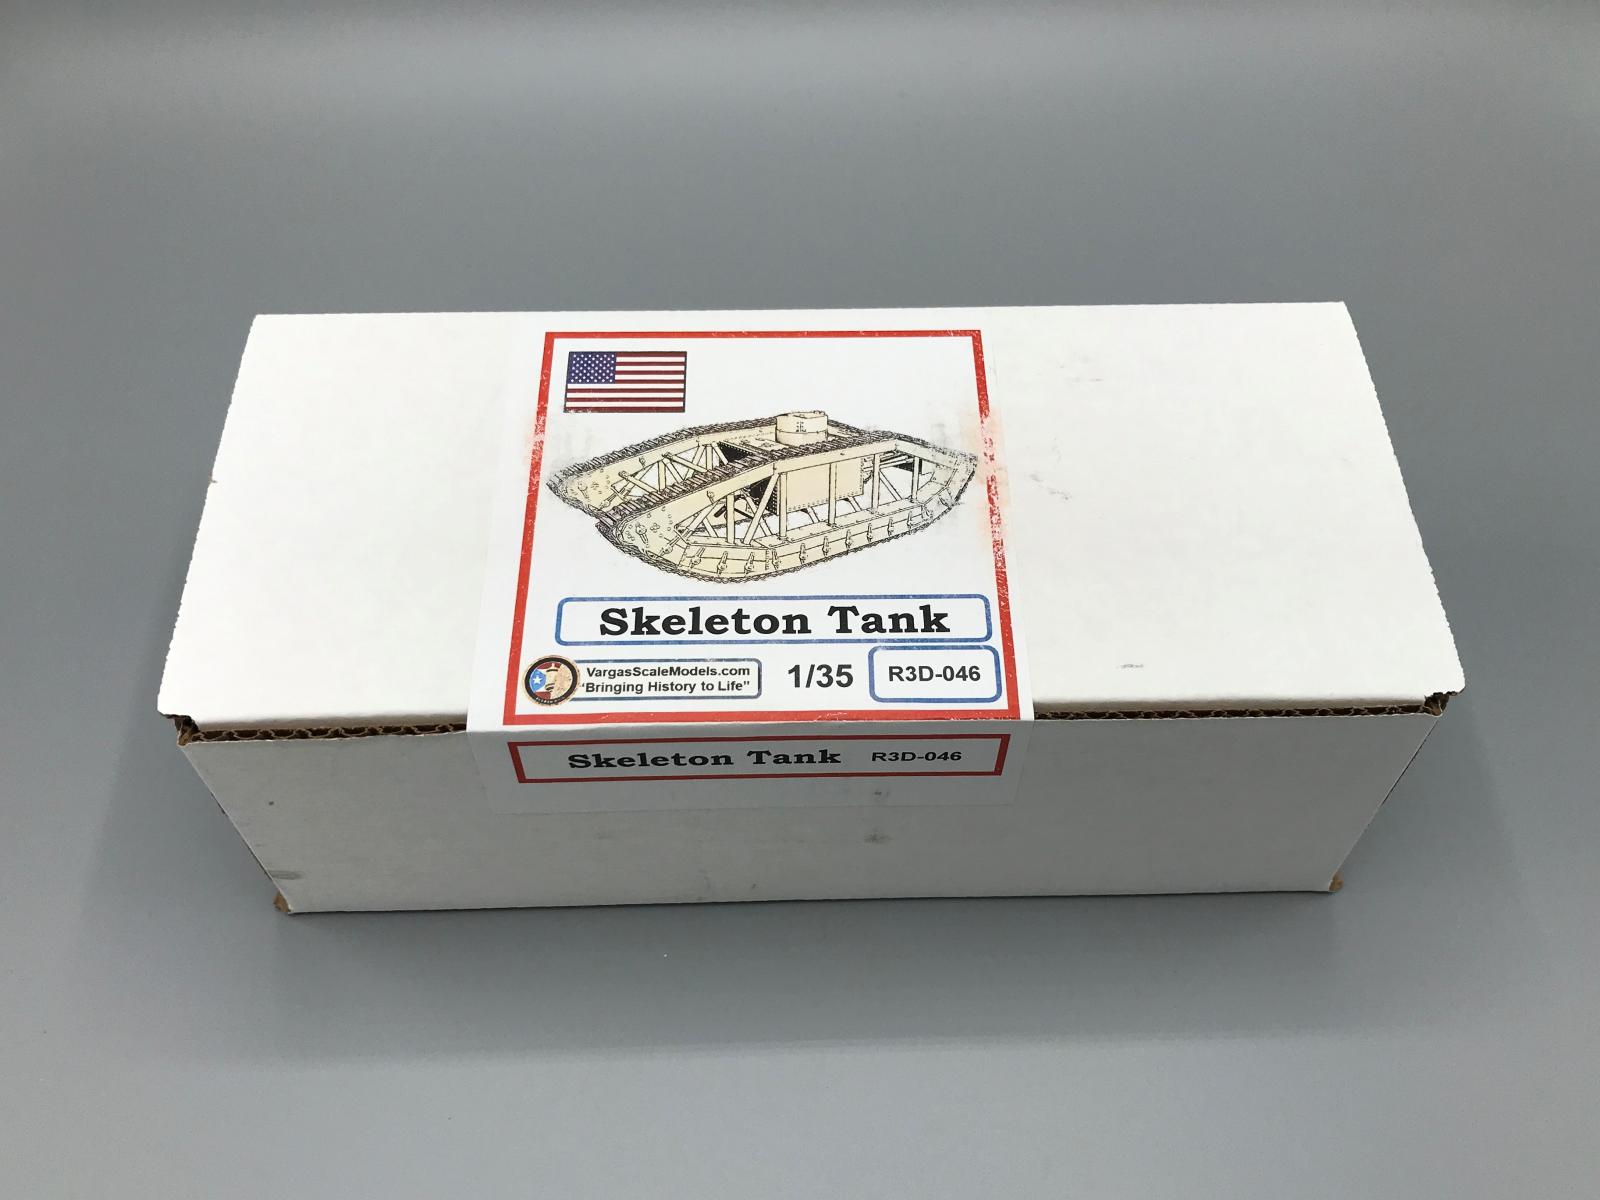
Vargas Scale Models from California USA specializes in interesting and unique subjects from World War One and the Interwar periods in 1:35th scale. All are CAD designed and 3D printed in resin. Sales are direct to the modeler.
The kit is packaged in a sturdy corrugated cardboard flip top box. Inside are the instructions and six 3D printed resin parts cushioned in bubble wrap. The instructions are a single double-sided page printed in color. They consist of CAD renderings to highlight the assembly. There is no parts list nor painting instructions. No photo-etch or decals are included or needed.
The parts are printed in gray resin. The kit includes the tank itself printed as a single piece complete with running gear and tracks. Rendering this in any traditional cast resin or molded styrene would result in a high parts count and a lot of assembly time. The turret, the incredibly thin driver’s hatch and three options for armament round out the kit. The detail is good. Unlike cast resin, there are no pour plugs or mold parting seams to remove. Nor are there any pin holes or air bubbles to fill. Instead of pour plugs or sprues, 3D printed kits use support structures. On this kit they are very delicate and easily removed. Striations are the bane of 3D printed kits. On this kit, they are minor, and most are addressed with the right primer.
Build
The build started by removing the support structures with a sprue cutter and sanding off the attachment points. The parts required a thorough cleaning with a toothbrush in warm soapy water followed by rinsing in warm water and blow drying with an air blower. There were a couple of sticky spots on the hull indicating that the resin in some spots had not fully cured. To complete the cure, I laid out the parts in direct sunlight for a minute or two per side. Too long in the sunlight will cause the resin to get very brittle. The parts exhibit minor 3D print striations. I have found that these striations are best handled by priming the unassembled parts with an inexpensive rattle-can sandable, automotive primer or a good self-leveling hobby primer. On this kit, I primed the parts with Mr. Surfacer 1000 in a rattle-can. This filled most of these striations. The remaining striations were sanded out. There was one deep striation that required filling with Mr. Surfacer applied with a fine brush.
Once the parts were cleaned up, the assembly was trivial. The driver’s hatch was slightly warped. I fixed this by clamping it to a metal ruler and dipping it in hot water for a few seconds. Medium viscosity cyanoacrylate (CA) glue was used for the joints.
Painting and Weathering
After assembly, the tank was primed with Mr. Surfacer 1500 Black rattle-can primer. I airbrushed Tamiya XF1 white on the high spots that would be in direct sun. The model was painted with AK Real Colors RC024 Faded Olive Drab thinned with Mr. Color Leveling Thinner. I gave it a dot filter using Winsor & Newton oils. After sealing things in with a coat of Future, I gave it a pin wash of AK Streaking Grime and dry brushed the details with oils. I weathered it with various AK Streaking products and pigments and splashed it with AK Earth Effects. The tracks were painted with Tamiya XF84 Dark Iron followed by a coat of AK Track Wash. AK pigments were applied to the tracks and fixed with AK Fixer. After a flat coat of my precious Model Master clear flat, I dry brushed the cleats of the tracks Model Master Steel and rubbed wear points with a pencil.
Conclusion
This kit highlights how the CAD and 3D printing technologies can give us kits of very obscure subjects at an acceptable price point. I believe that this is the only kit of this subject in 1:35 scale. The kit builds into an excellent replica out of the box. Due to the need for CA glue, it is more appropriate for experienced modelers. I recommend the kit and hope to see more new Great War and Interwar kits from Vargas. Vargas Scale Models kits are available directly at https://vargas-lg.myshopify.com/. Thanks to Vargas or providing the review kit.


Comments
Add new comment
This site is protected by reCAPTCHA and the Google Privacy Policy and Terms of Service apply.
Similar Reviews