
Polish Land Forces K2GF
The South Korean K2 Black Panther MBT (Main Battle Tank), produced by Hyundai Rotem, was designed to meet the Republic of Korea’s Army requirement for a three-dimensional, high speed maneuver, based on network-centric warfare. The first tanks were available in 2014. While this at first looks like a shrunken down M1 Abrams, it is a new tank design unto itself. This state-of-the-art tank features an autoloader with a sophisticated 120mm main gun system (to include smart top-attack munitions), Automatic Target Detection and Tracking System (ATDTS), network-centric warfare capabilities and operability, and both active and passive protection systems.
What makes the tank unique is South Korea’s ability to rapidly produce the K2 for domestic and export use. Turkey was the first nation to order the K2, beating out the French LeClerc and German Leopard 2. Poland reached an agreement with Hyundai Rotem for license production of the K2 Panther in January 2020. 180 K2 Panthers were delivered to Poland in 2022 and the remaining 820 K2PL Panthers will be built under license in Poland. The K2 Panthers in Polish service will allow Poland’s older arsenals of T-72 and Leopard 2 tanks to be delivered to Ukraine. Compare the acquisition speed of the South Korean K2 Panthers to Germany’s Leopards and the US’ M1 Abrams, and you can see why South Korea has a definite advantage, as it does with its export markets for its K9 (155mm) self-propelled artillery system.
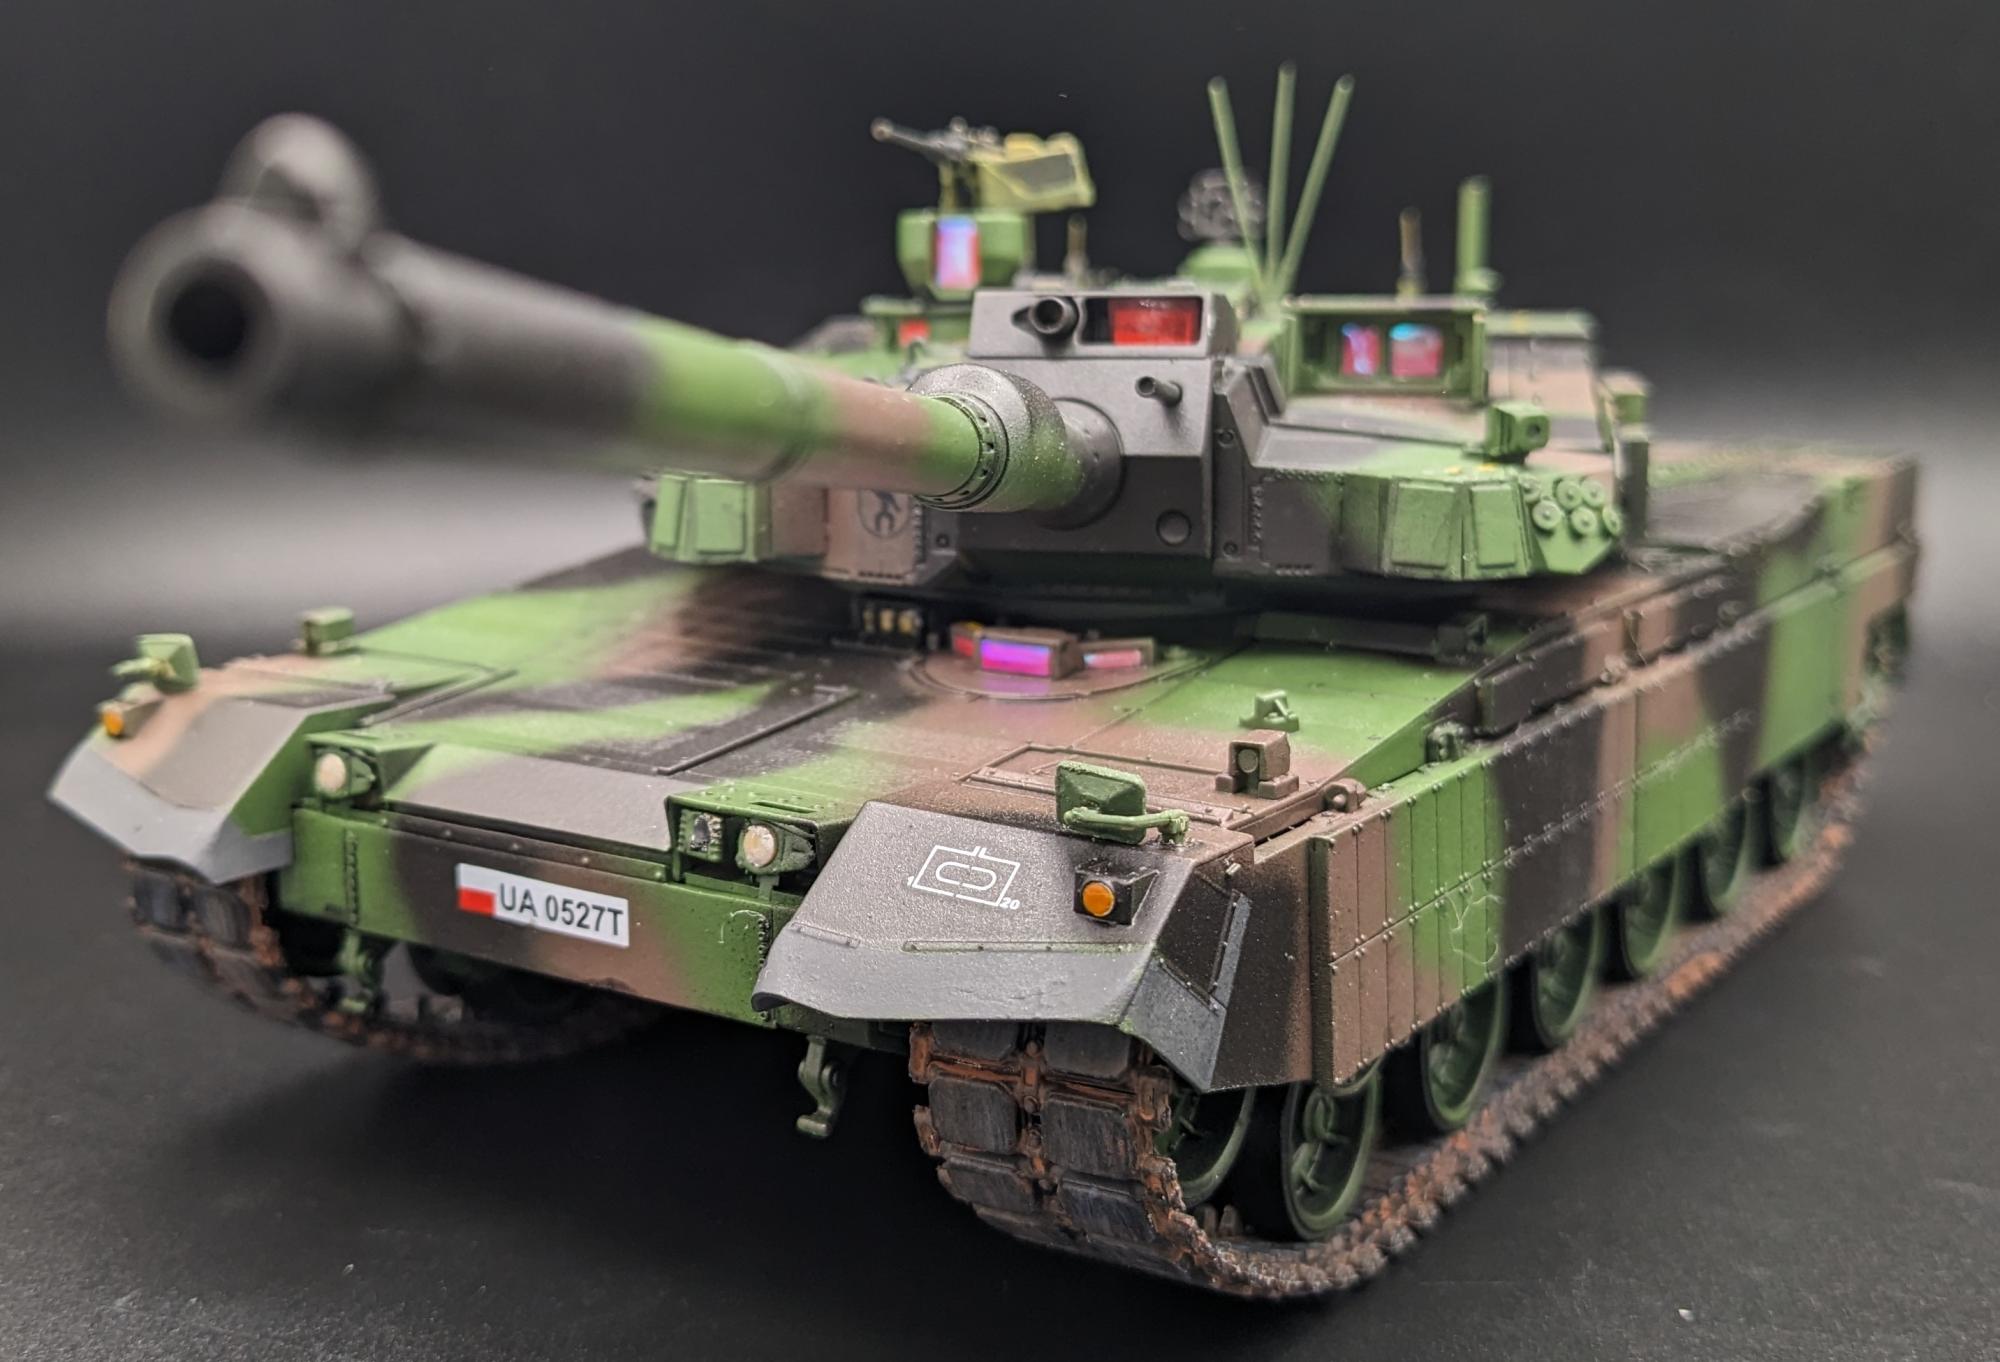
I am an unabashed fan of Academy armor model kits, participated in live fire exercises with the K2 in South Korea and enjoy building Polish armor, so when a kit comes along that puts a K2 in NATO three tone camouflage, I’m in! This is a great kit, and it is fun to build.
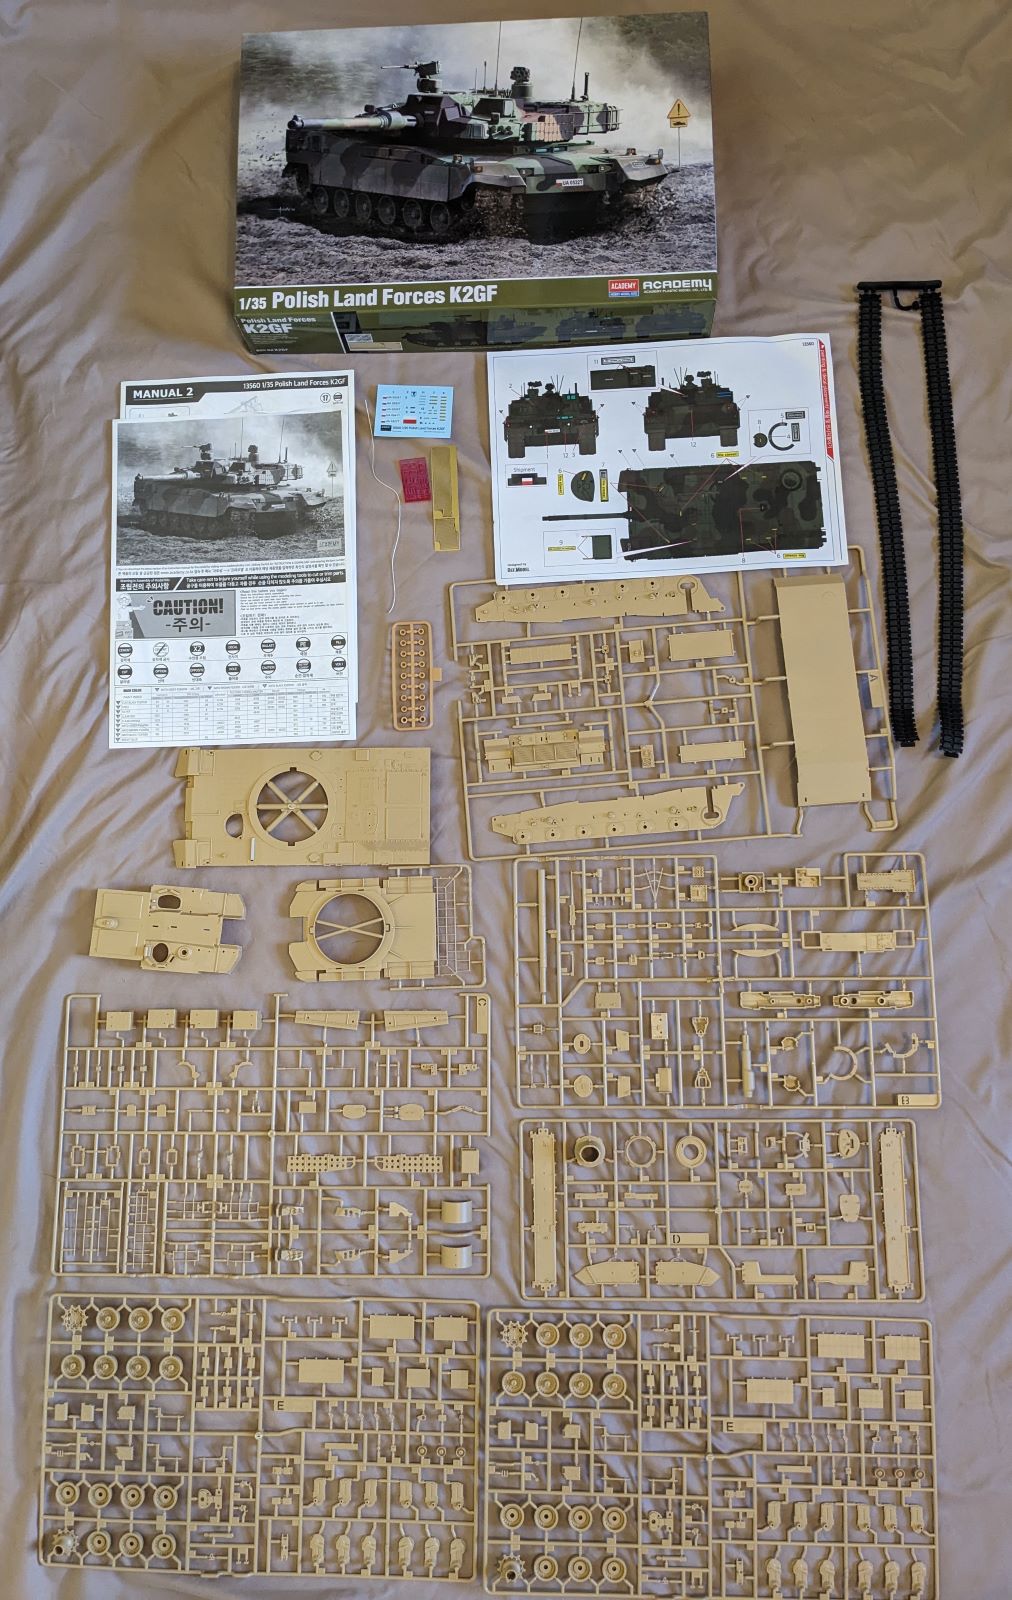
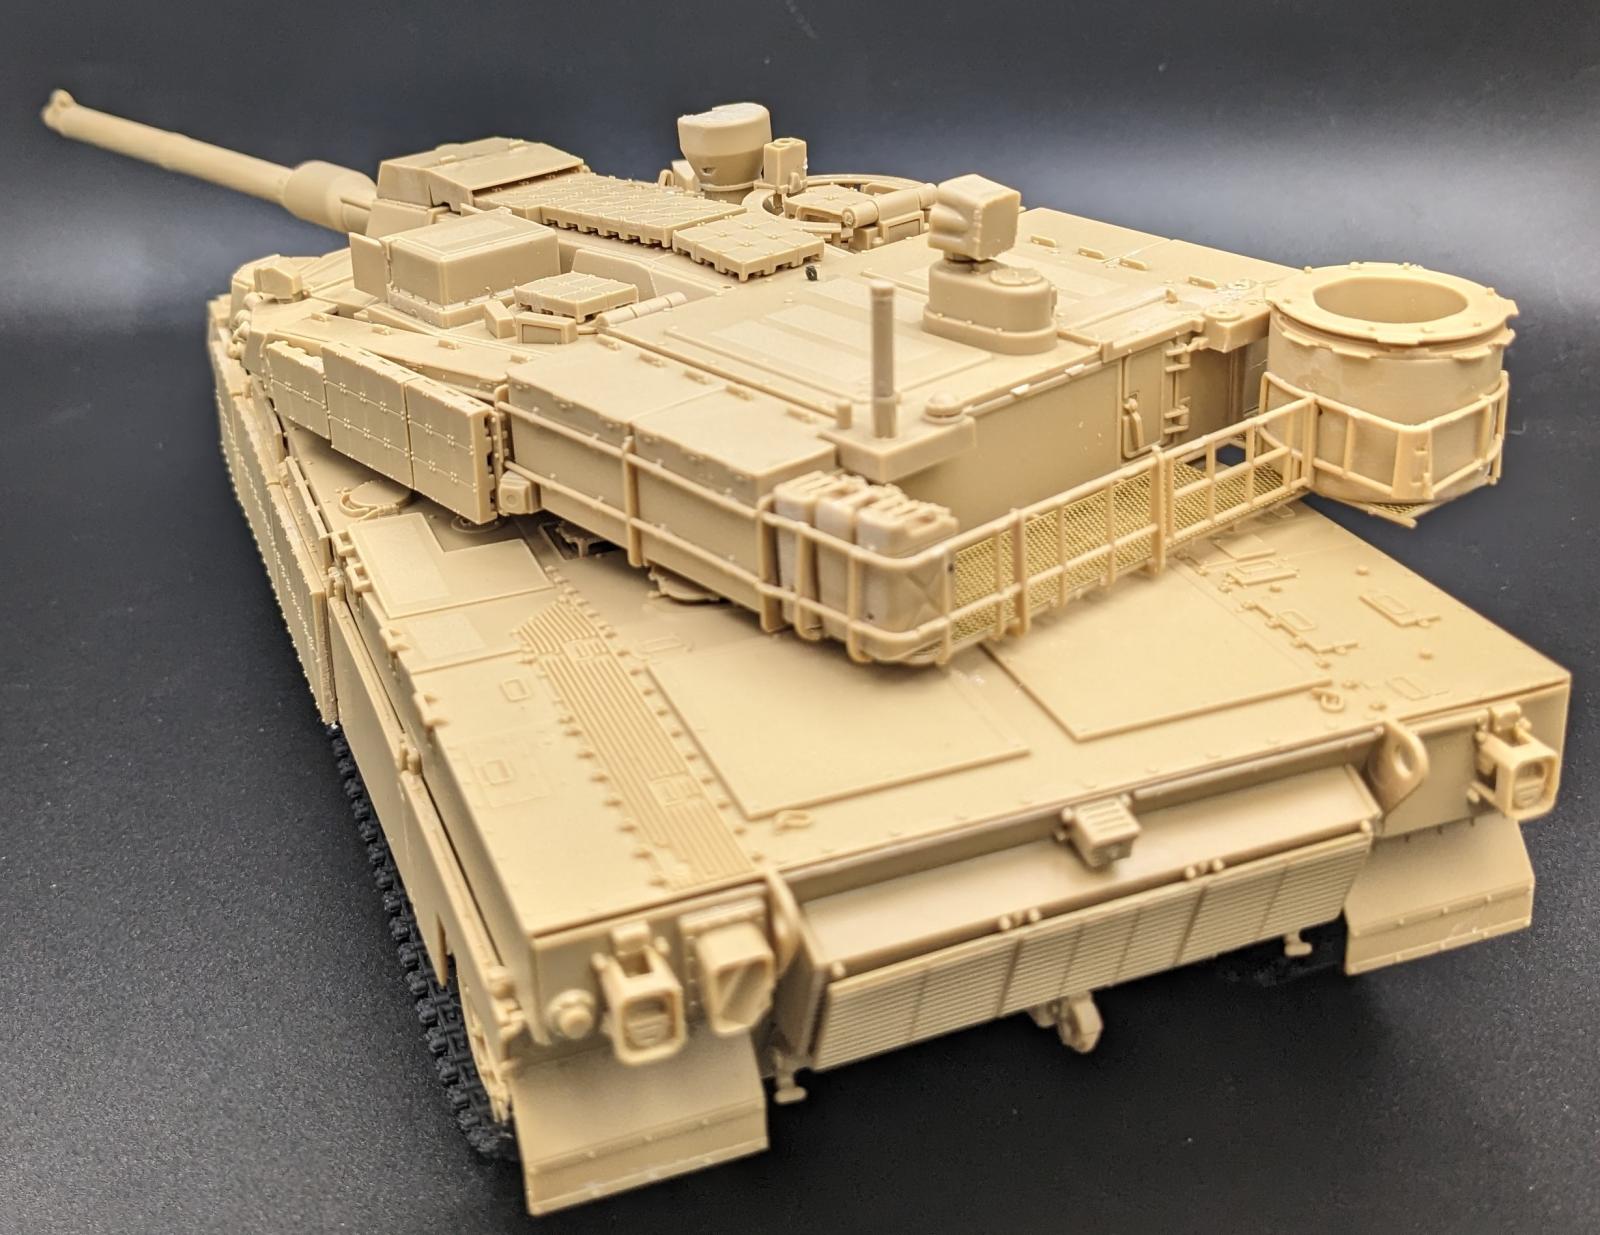
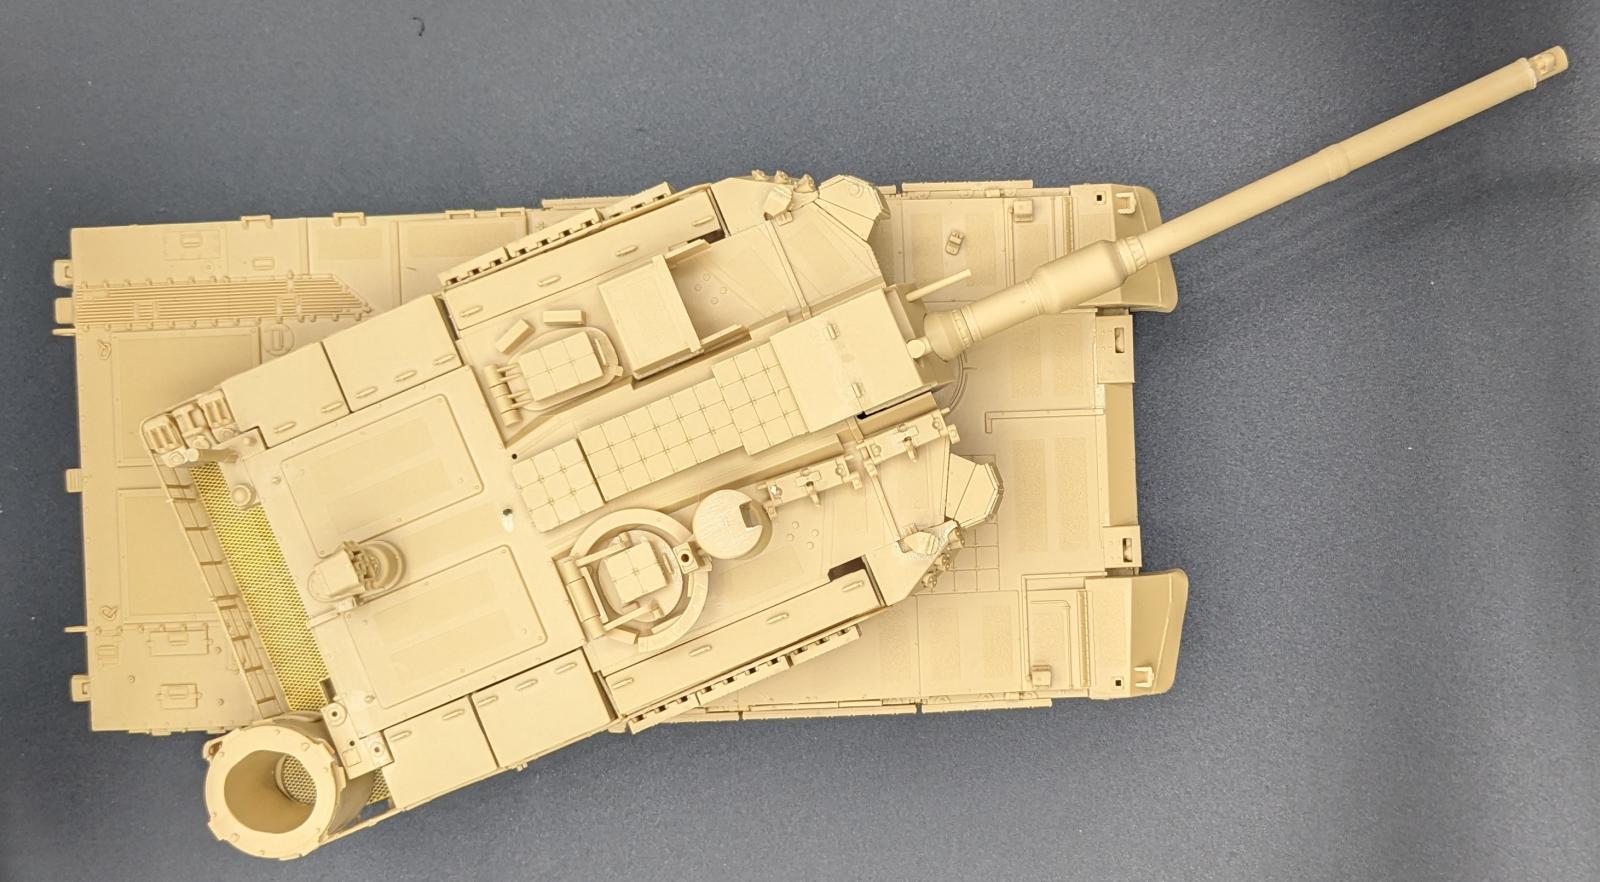
Upon opening the rigid box top opener cover, there is a sturdy box that does a good job of protecting the kit’s six plastic sprues, upper hull, lower turret, upper turret, two rubber tracks with a unique attachment system (more on that later), rubber poly caps, small PE fret, twine for cables, chassis tub, turret, decals, and “Polaroid” stickers that replicate modern optics.
There are two construction manuals covering 29 steps. Construction starts with the turret and progresses to the hull. There are minor notes that are identified here by their instruction step:
Step 1: Recommend keeping the “Polaroid” stickers off until after painting. The stickers, replicating modern optics very well, have a protective clear plastic that can be removed after painting, but that can be problematic finding it after painting in the tight confines where optics are located. Also, a silver paint undercoat does well before placing the stickers. For any stickers that don’t adhere well, a small drop of Pledge/Future or white glue works well.
Step 4: The tub (Part D10) does not have tabs to ensure the proper orientation inside the ring (Part D11), and the illustration is not clear. After some research, it appears that the flat part of the circle faces to the rear of the turret.
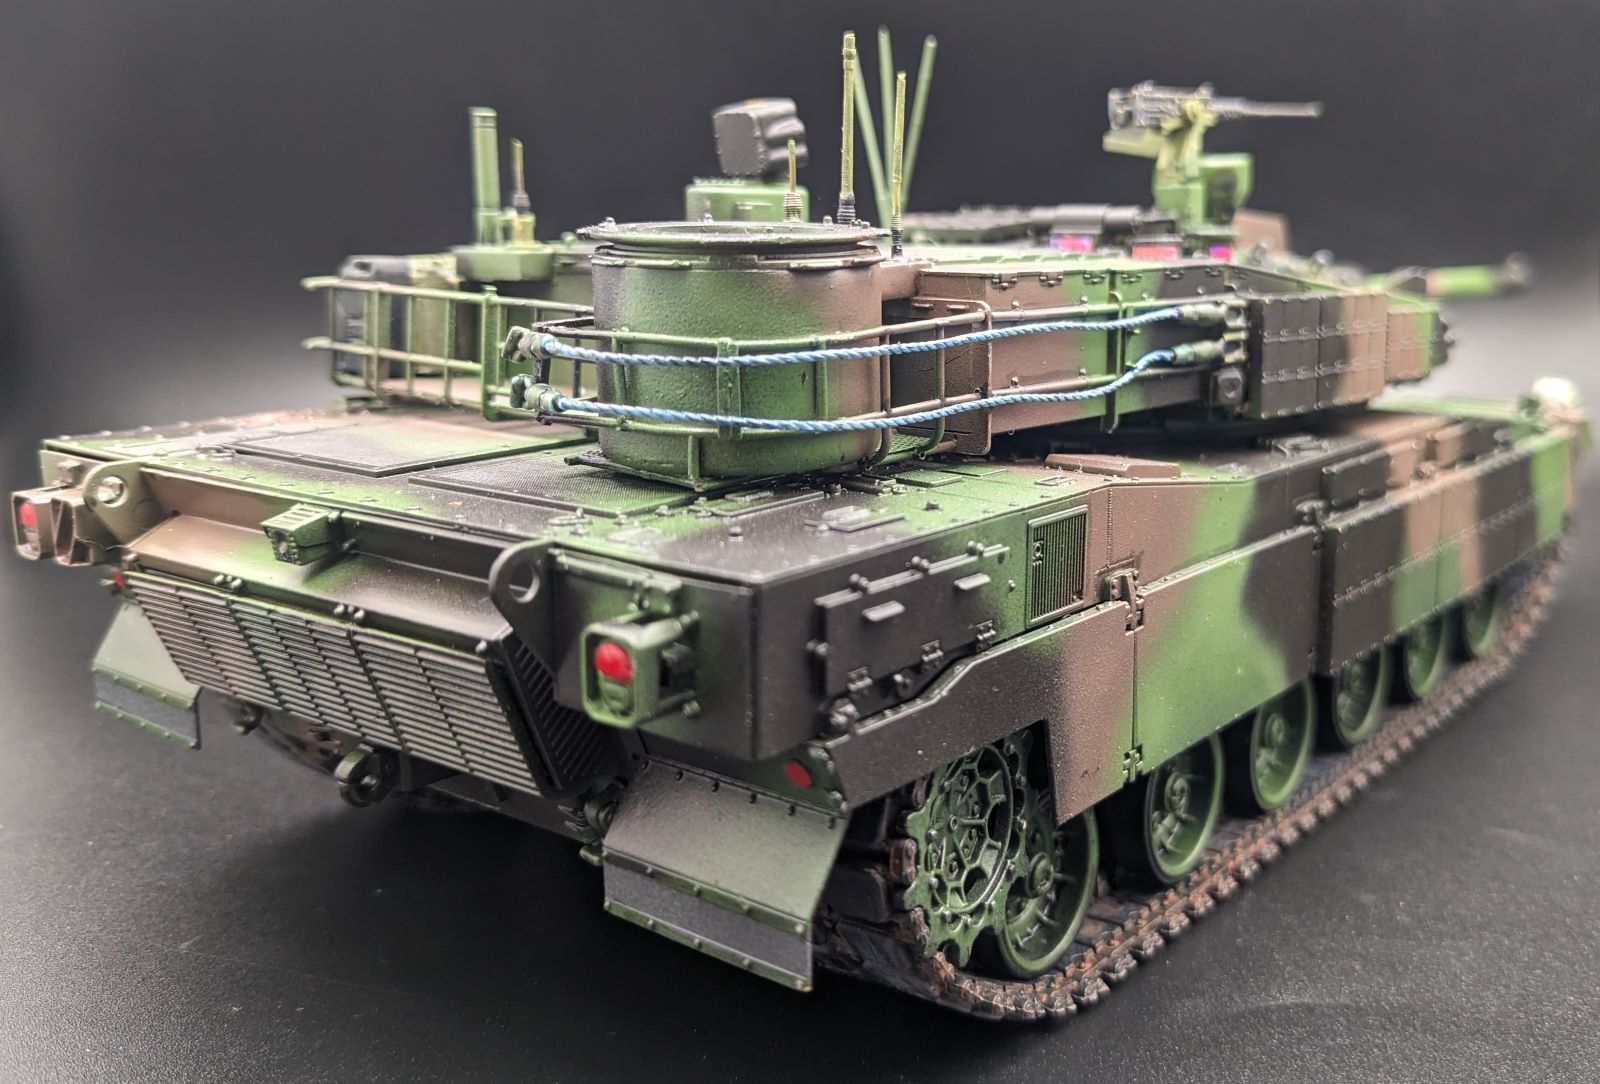
Step 5: The tow cables are thread with a real size template with measurements. These were painted blue in accordance with the instructions, and photos of Korean K2 Panthers show them as well. I couldn’t find Polish K2s with the blue with the limited information available, but that doesn’t mean the first batch wasn’t shipped with blue tow cables; besides, they look great on the finished tank.
Step 10: There are two options for the six sensors (three on each side of the main gun) that I believe to be millimeter band radar system. The instructions don’t give any indication on the difference, so I chose the version from online photos of Polish K2s.
Steps 10-11: Take care installing the antennae and sensors as they are quite small and delicate. I left mine off until completion so they wouldn’t break off.
Step 11: The door on the commander sensor can be open or closed, but the instructions don’t show where the door is stowed when the sensor face is exposed.
Step 12: Take care and note the position of Parts E25 (drive sprocket mount) as they can fit on either the outside or inside face of the chassis (Parts A2 and A3). There is no key to ensure they go in the correct position, and the incorrect way leaves an unintentional gap (ask me how I know).
Step 13: There is a gap above Parts E25 and A2/A3; a small piece of plastic card stock takes care of that. Also, Sub Step 4 has an optional grill cover, but doesn’t reference which variants have this option and online photos weren’t of much assistance. The kit comes with it, so it was used.
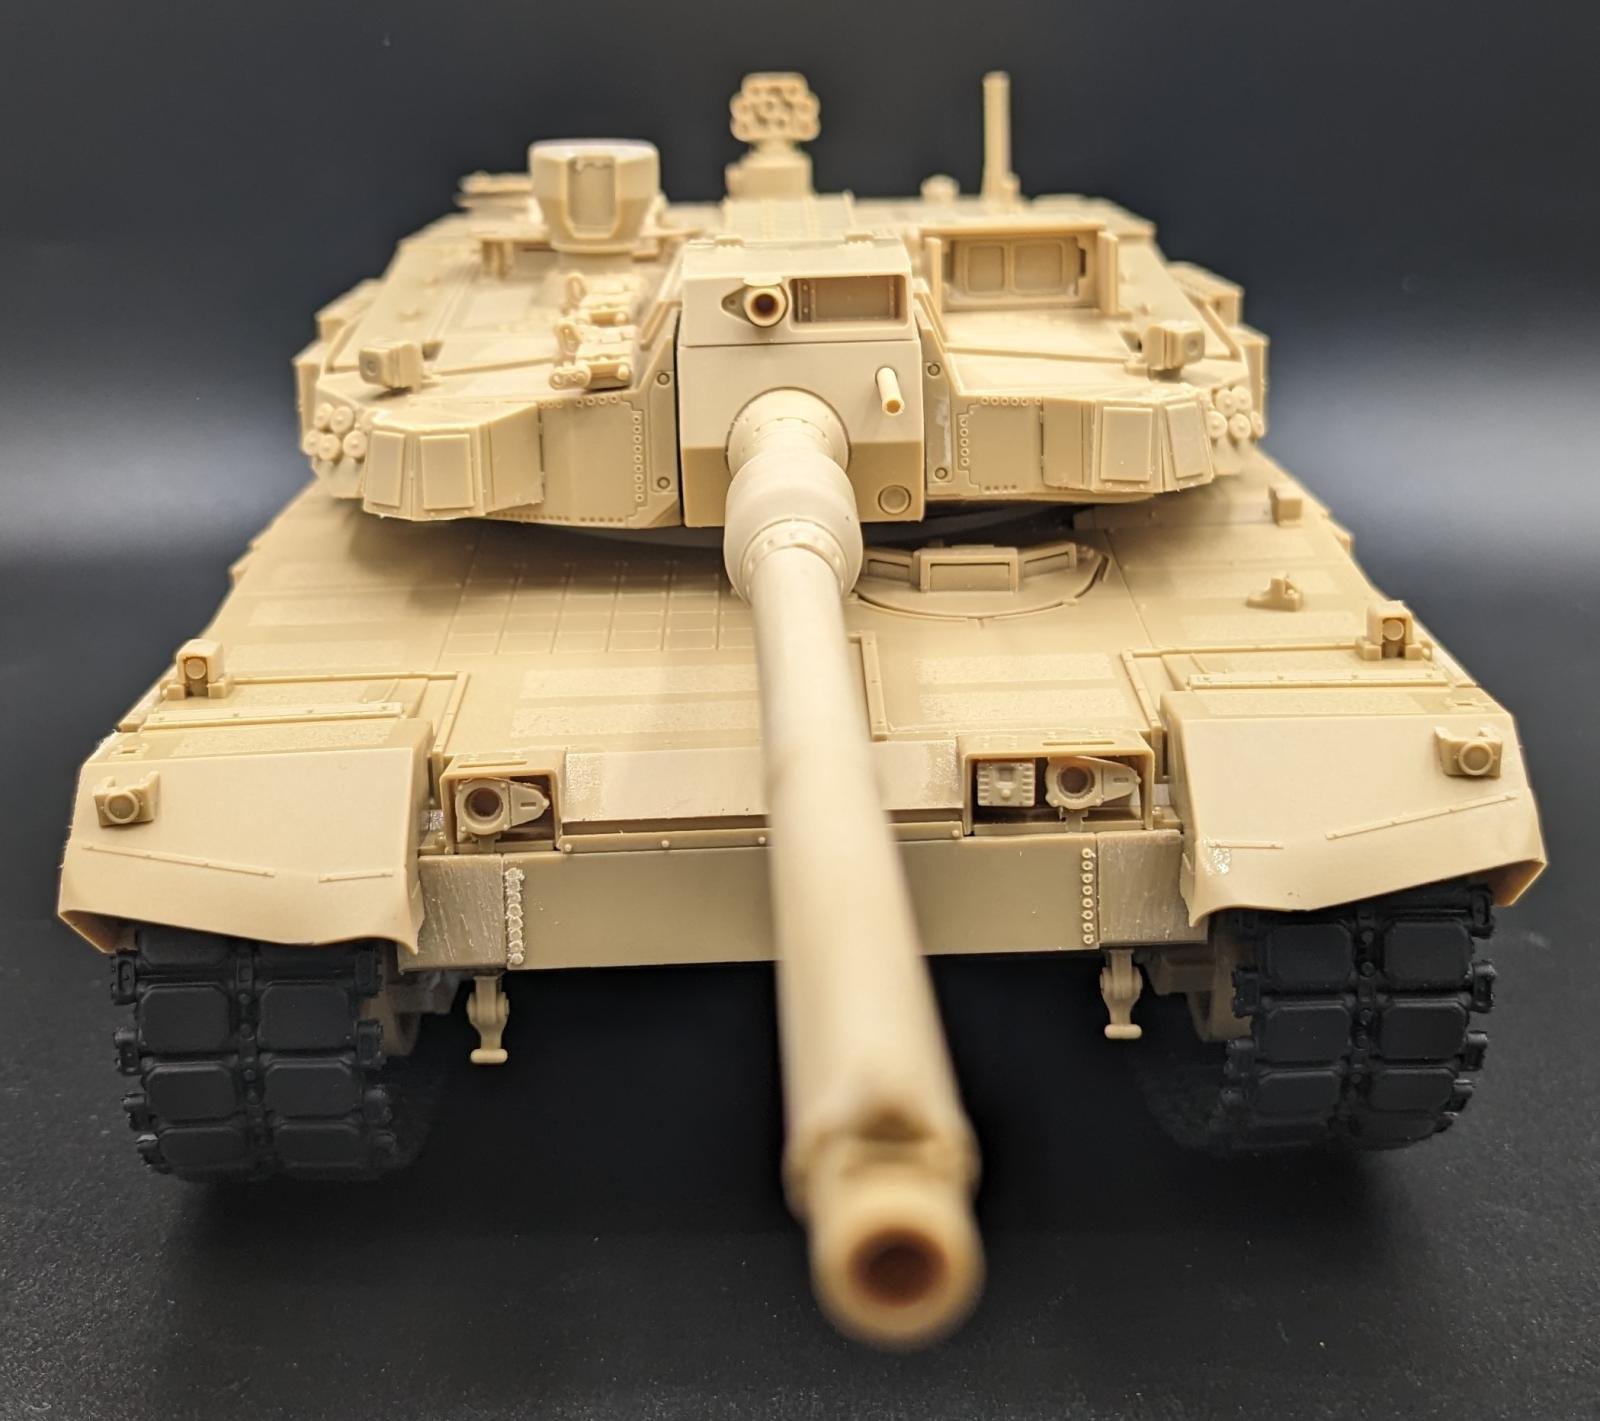
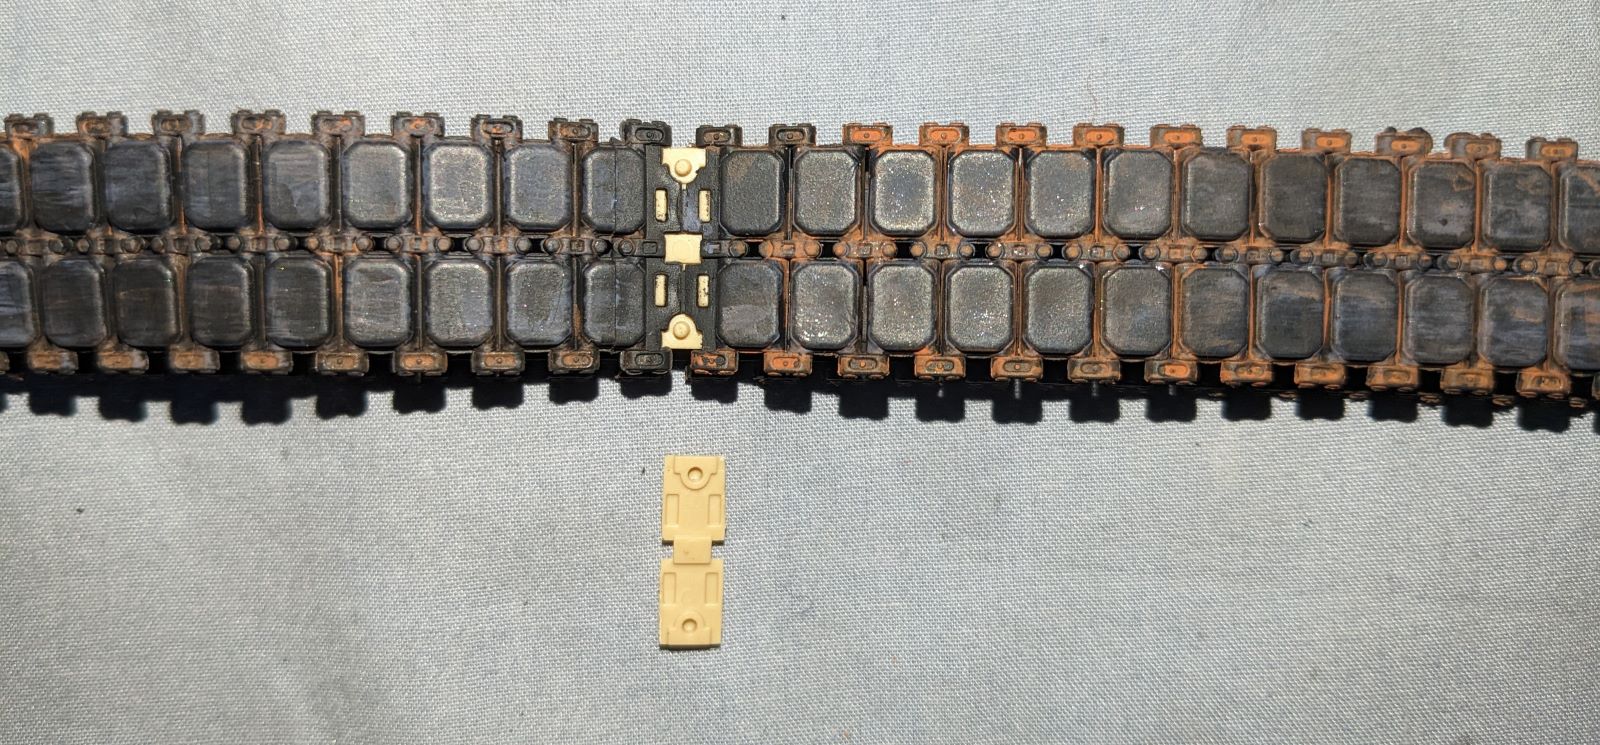
Step 25: The flexible rubber track has a genius feature – a two-piece plastic track that joins the two ends of the rubber track. No more gluing, heated nail, stapler, swear-word-inducing sequence of joining the track together. It was easy to join!
I followed the instructions, and it was easy to build with the notes outlined above. Attention and care must be used as there are a lot of fiddly bits, primarily in the form of antennae and exposed sensors.
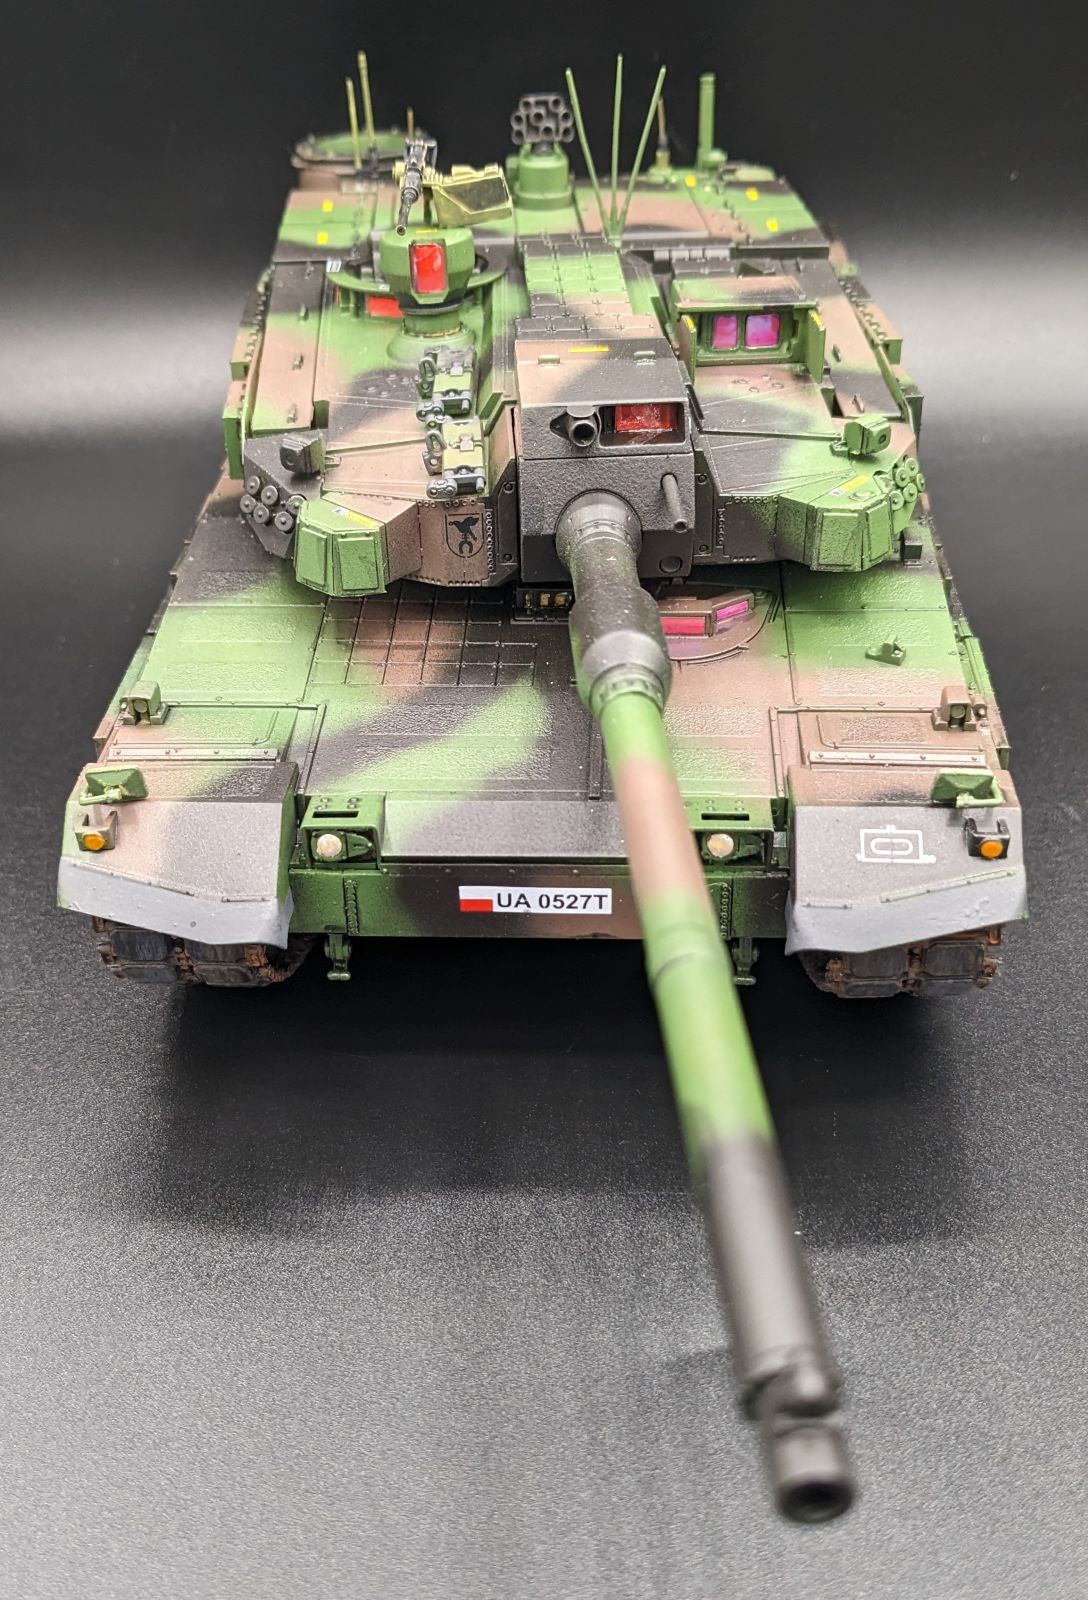
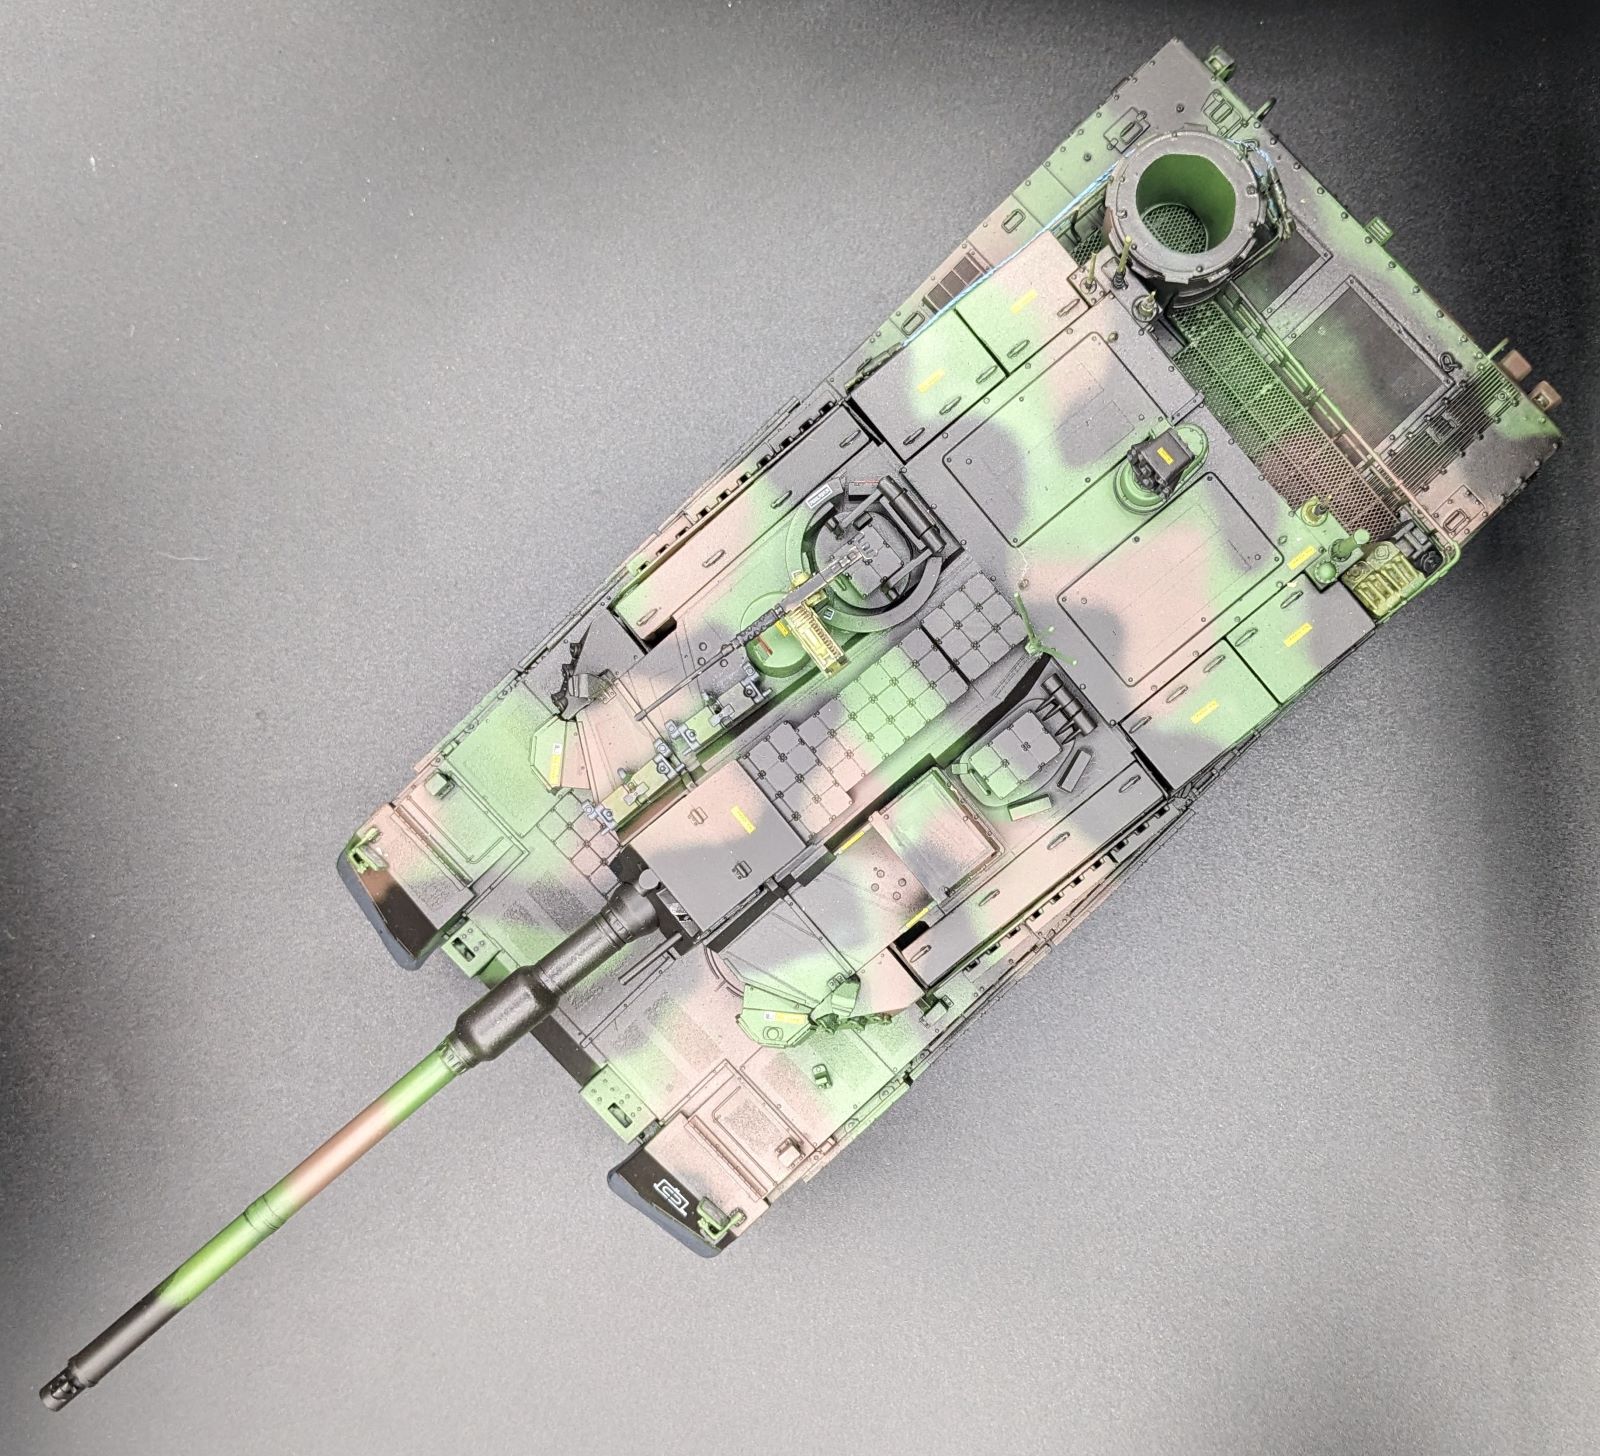
There is two-sided color painting guide for the NATO three-tone camouflage, along with warning decals in Polish. Options are available for tank upon delivery from South Korea, along with bumper numbers for five Polish K2 tanks. The decals are thin, lay down well and mine did not silver.
This model was a lot of fun to build and paint. The track assembly process is a joy and changes the process. My only complaints, minor niggles really, are the lack of callouts on the various parts of the tank, particularly the numerous and highly technical sensors (some of which are also very fiddly and delicate). There are no clear parts provided, but the polarized stickers negate that requirement and look fantastic when installed. This kit can be for beginners with a kit under their belt, primarily for fragile pieces. It builds into a beautiful and impressive model. I look forward to seeing what more talented modelers can do with this kit.
Profuse thanks to Model Rectifier Corporation (https://www.modelrectifier.com/) and IPMS/USA for providing the review sample.
Comments
Add new comment
This site is protected by reCAPTCHA and the Google Privacy Policy and Terms of Service apply.
Similar Reviews