
Panzerspähwagen (Funk) P204(f)
Background
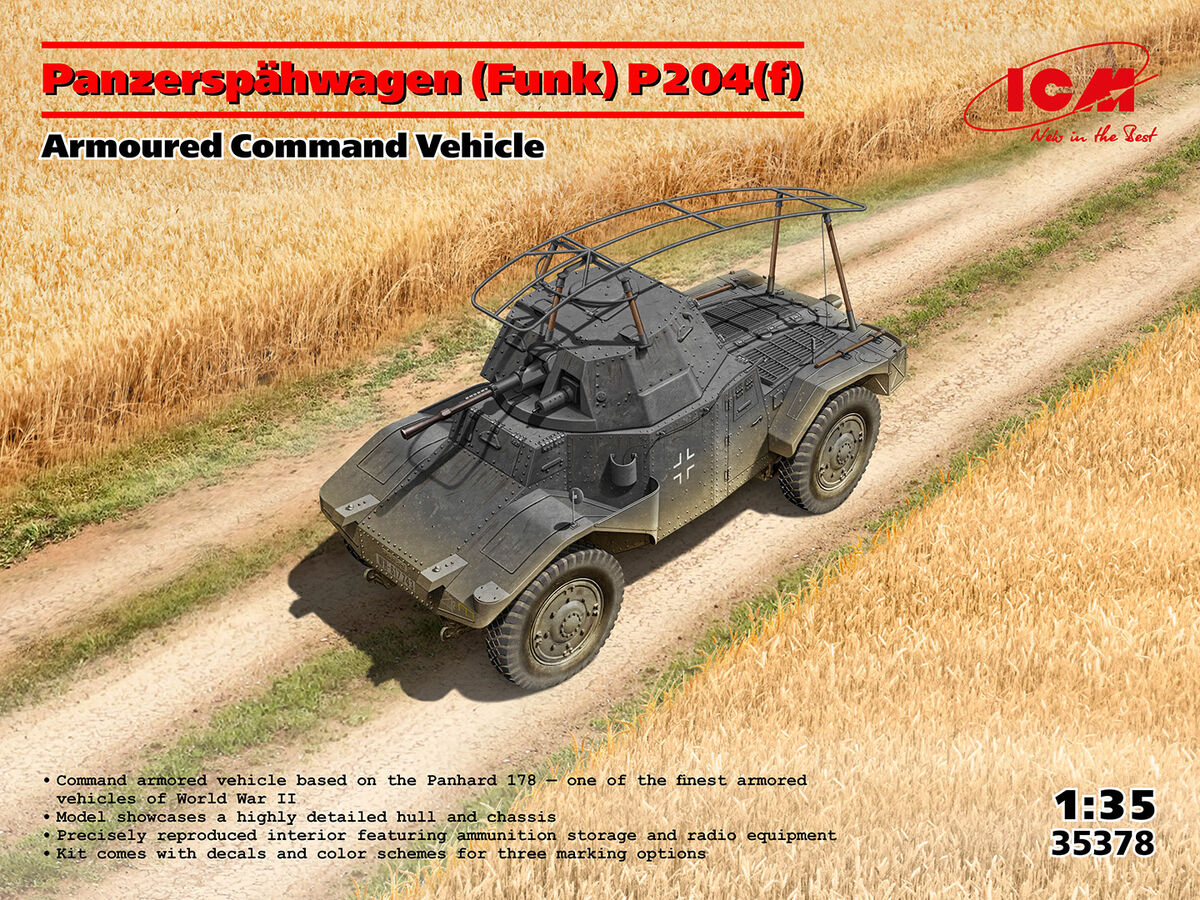
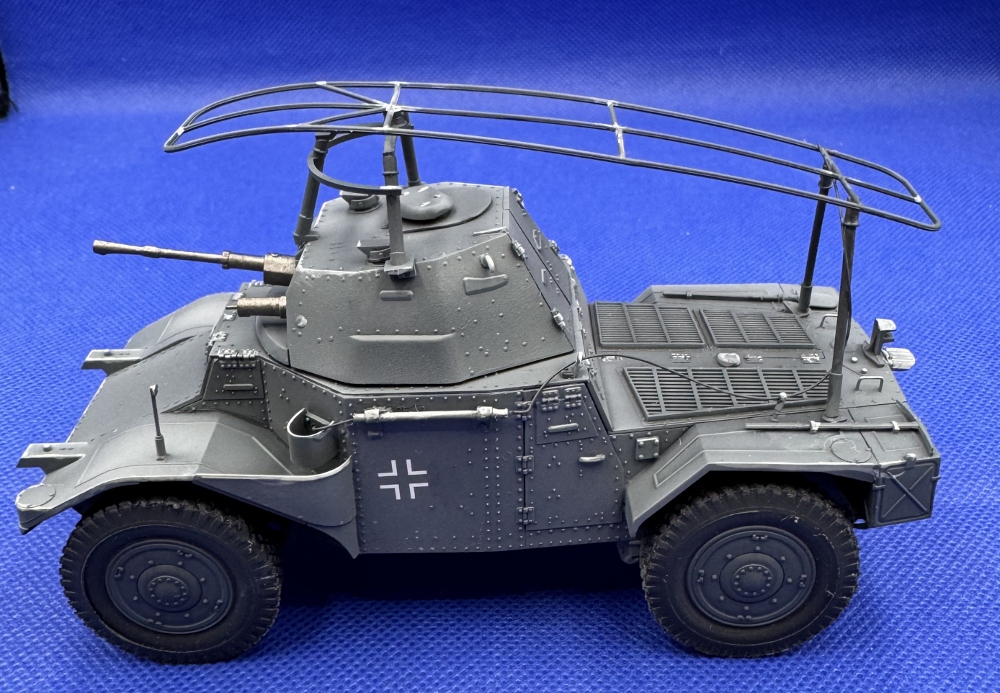
The Panzerspähwagen (Funk) P204(f) was a German command radio-equipped armored car based on the captured French Panhard 178. Command variants of the P204(f) used FuG 10 or FuG 11 radios, and the large Hochantenne (elevated) frame antenna, with some vehicles also fitted with a right-side telescopic mast. The Germans converted the P204(f) into a Funk vehicle by removing the APX3 turret and installing a fixed or open-topped armored box.
Panhard was a major French designer of armored cars, known for reliable and fast vehicles like the AMD 35 and later AML series. The 178 was one of the most advanced pre-war designs, so when Germany captured over 400 of them in 1940, they quickly put them to work in reconnaissance and security roles. The Germans redesignated it as the P204(f) and found its roomy hull ideal for converting into a communications and command vehicle.
I found it interesting that the vehicle was dual-drive, with a rear driver doubling as a radio operator.
Box
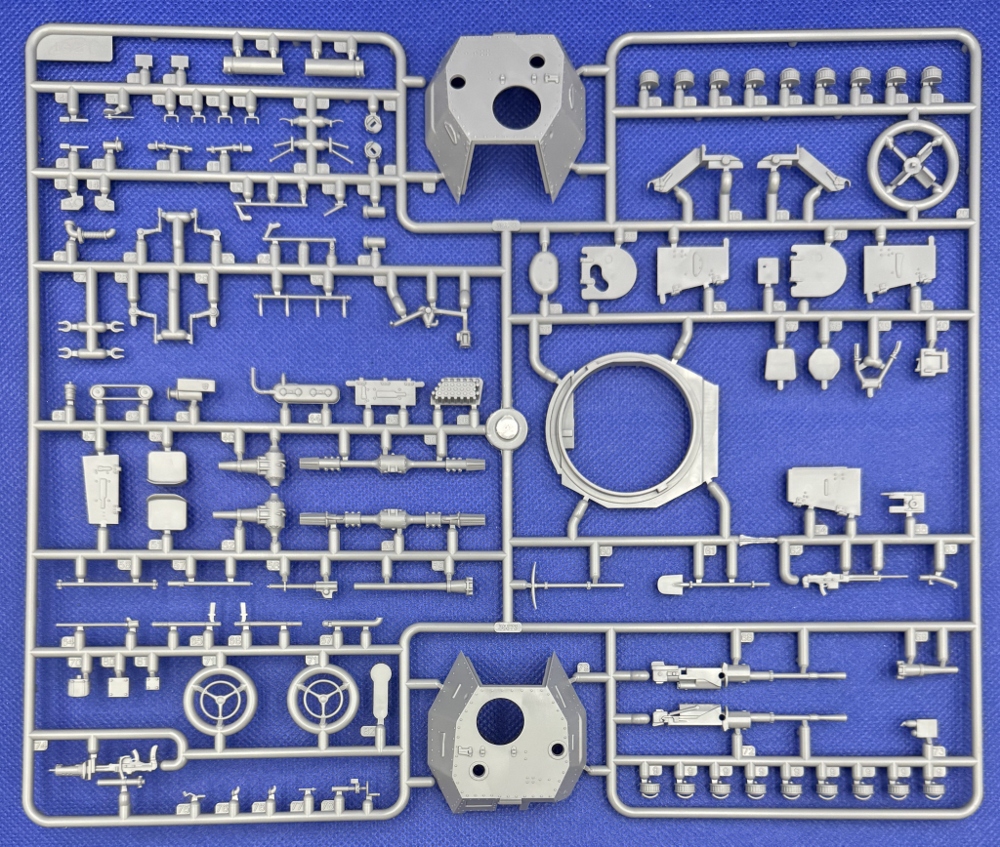
Measuring 11.5” x 9” x 2.5”, the box features a German Panzer Grey image of the Panzerspähwagen (Funk) P204(f) viewed from above on a country dirt road. Typical ICM graphics, showcasing three painting options of the vehicle, are included on the box sides. Inside are six grey sprues:
- Sprue A x 1 (From Kit # 35373 – Panhard 178 AMD 35, 2015)
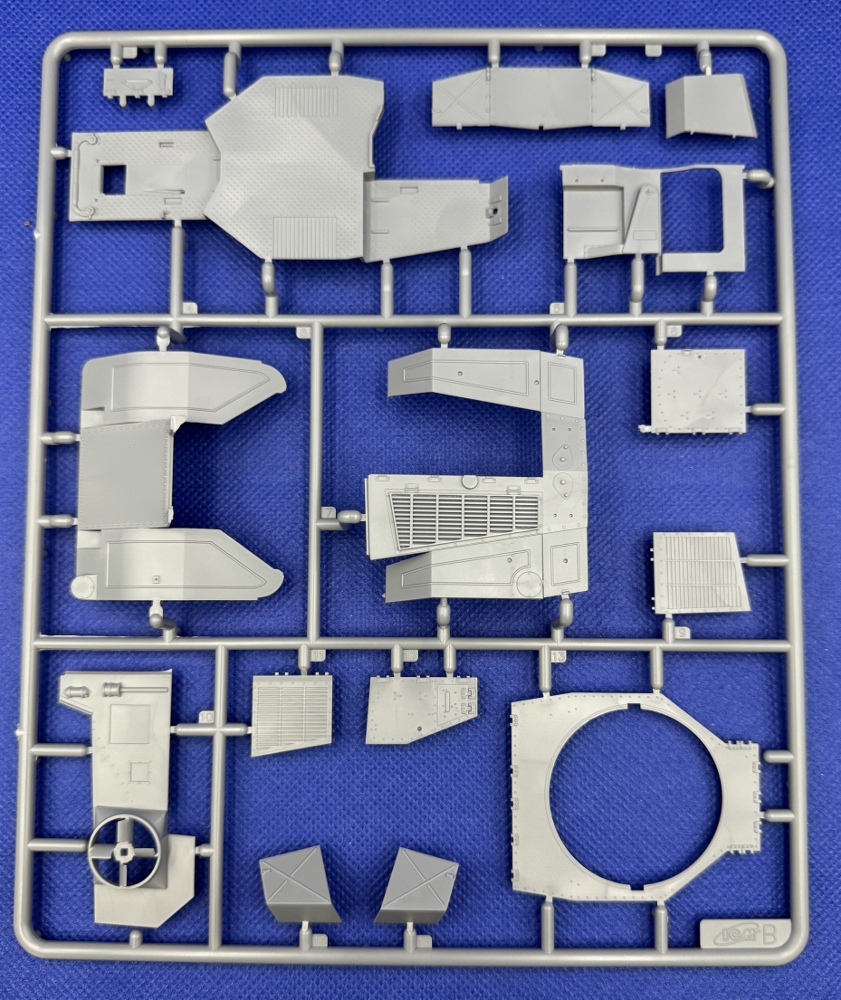
- Sprue B x 1 (From Kit # 35373) 2015
- Sprue C x 1 (From Kit # 35373) 2015
- Sprue E x 1 (From Kit # 35373) 2015
- Sprue F x 1 (From Kit # 35375 – Panhard 178 AMD-35 Command, 2016)
- Sprue F1 x 1 (From Kit # 35376 – Panzerspähwagen P 204(f) Railway, 2017)
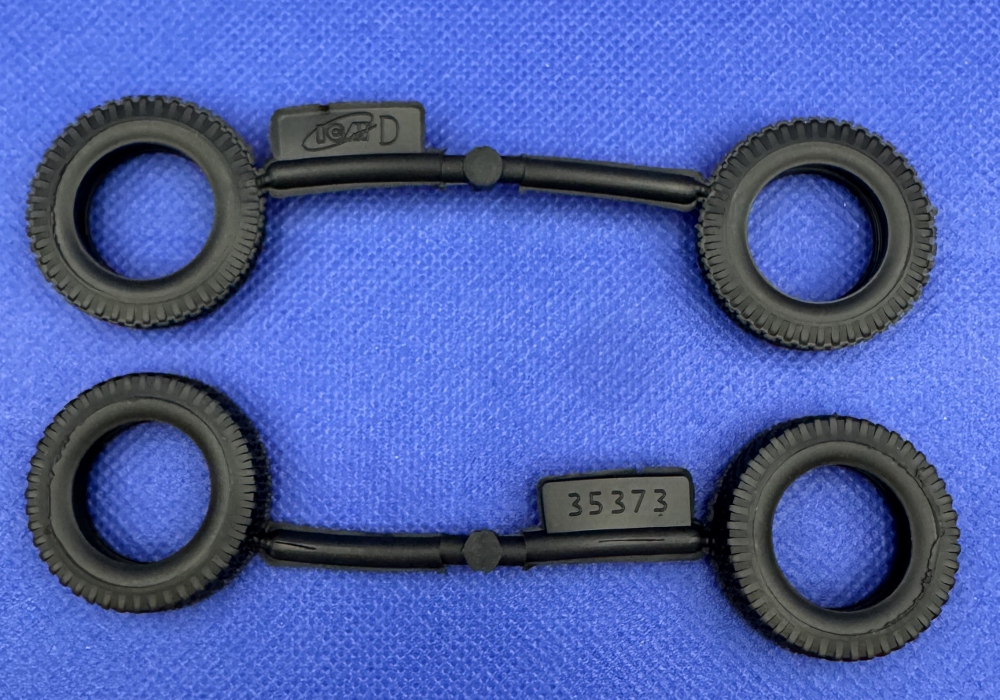
- 1 baggie containing the four flexible tires.
- 1 small decal sheet.
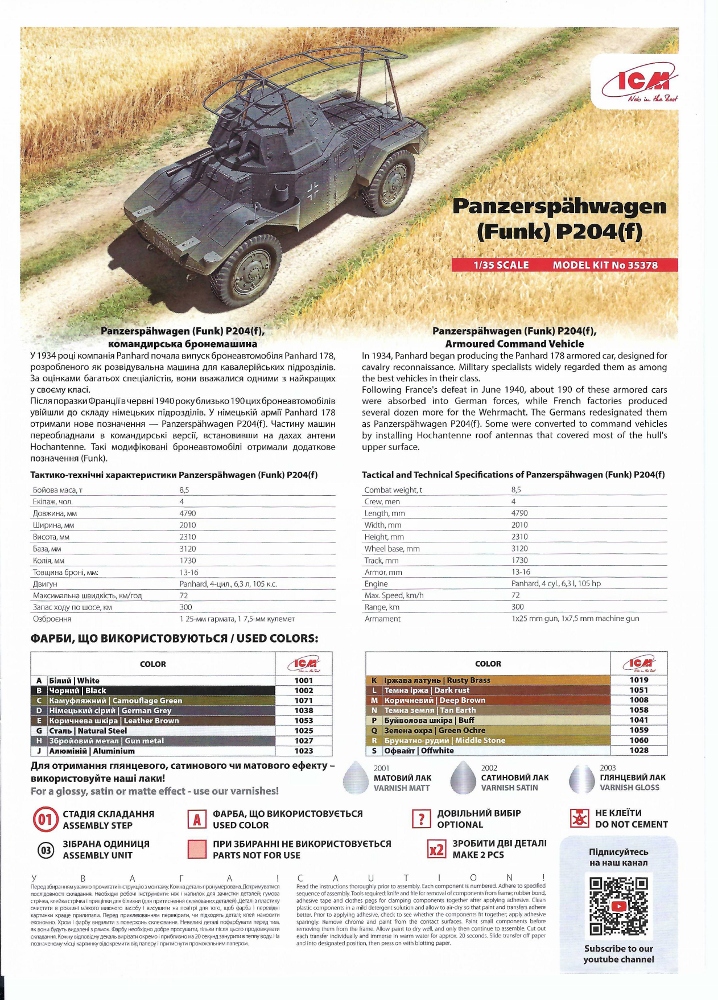
- 1 ICM Paint reference sheet.
- 1 16-page portrait-style instruction booklet.
- Parts count 151
My first step with any kit is to check the basics: mold taper, flashing, ejector pin marks, sprue gate locations, mold shift, and seam lines that might need work. The parts here are clean and well-detailed, with minimal cleanup required.
Instruction Manual
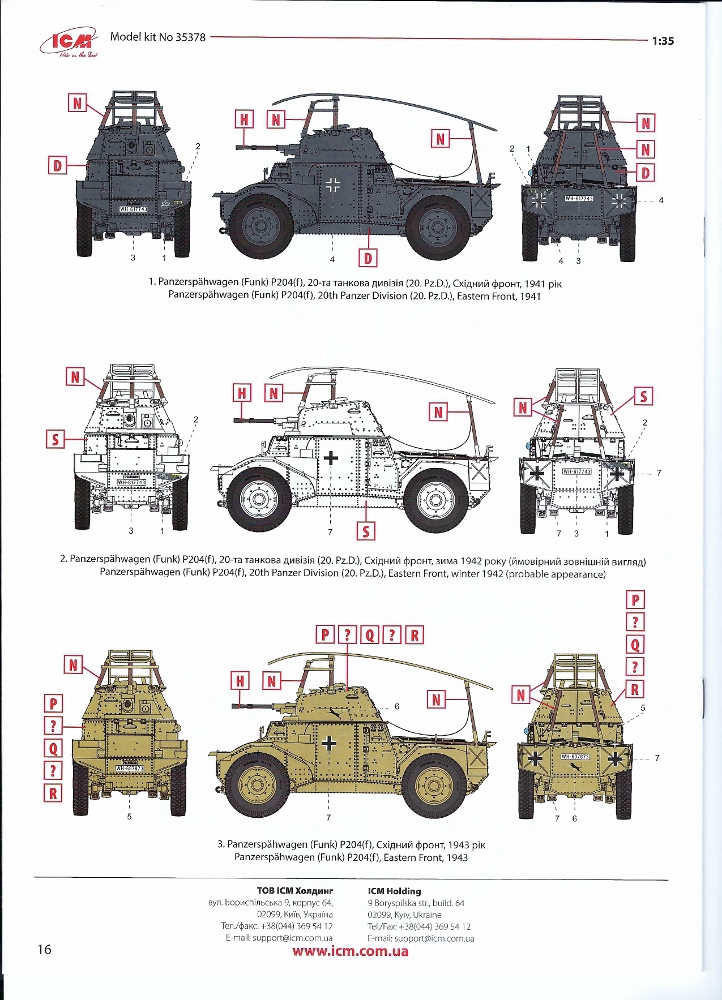
The instruction manual is printed in portrait orientation on 16 pages with 65 steps; steps 61-64 are not included in the instructions. Paint call-outs for ICM’s acrylic paints. Three paint versions are depicted:
- 20th Panzer Division (20. PzD), Eastern Front 1941. (German Grey)
- 20th Panzer Division (20.PzD.), Eastern Front, winter 1942. (Winter White)
- Eastern Front, 1943. (Dunkelgelb)
The Build
Steps 1-18
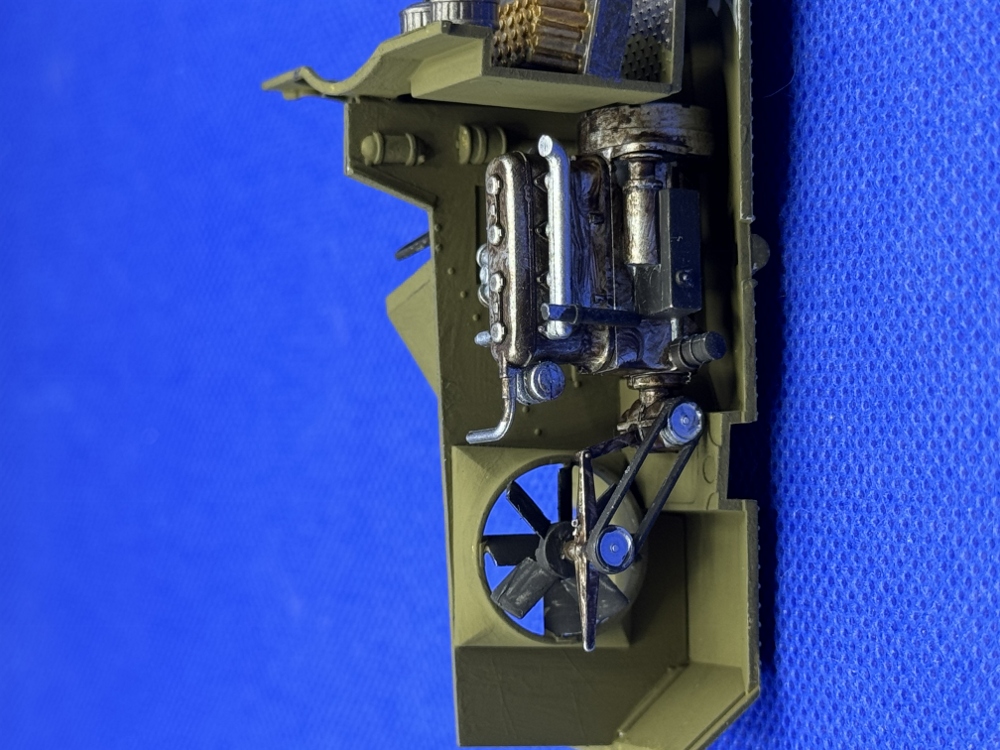
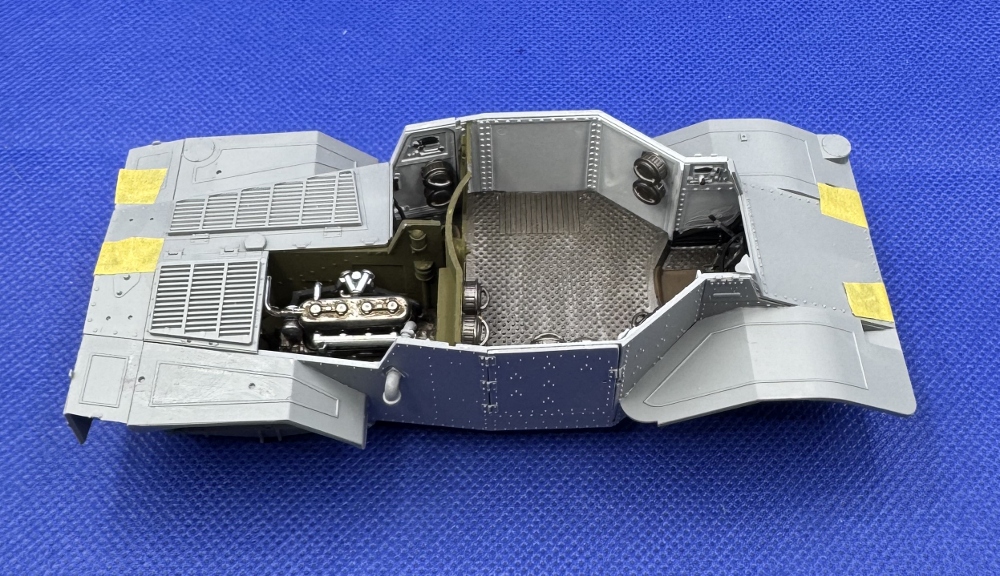
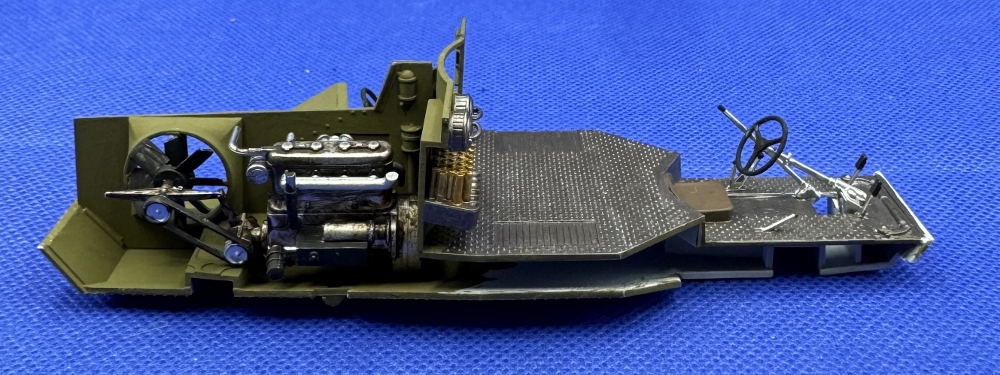
These steps cover the main floor assembly of the vehicle, including the two seats, the driver’s steering columns and steering wheels, the shifters, the bulkhead between the front and rear sections, and the foot pedals. Steps 5–8 focus on building the two-piece, four-cylinder 105 hp engine, with installation in step 9.
At this stage, I went ahead and painted the engine first. I primed it with A. Mig One Shot Black Primer, followed by ICM Aluminum 1023, then picked out the details with ICM Black 1002 and ICM Natural Steel 1025. To enhance the finish, I added a light wash coat of Mr. Color Weathering Brown and dabbed away the excess. I held off on installing the engine until the basic frame was painted.
For the floor assembly, I used A. Mig One Shot White Primer, and then painted the individual parts. The seats were done in Vallejo Model Color Leather Brown 70.871, the floor in A. Mig Gun Metal 45, and the smaller details in ICM Black 1002 and ICM Camo Green 1071. The next steps focus on assembling the left and right hull sides, each featuring side doors that can be posed open if desired. Additional interior details are installed here, including the gauges and the drum magazines. I primed the hull sides with Ammo Mig One Shot White Primer before picking out the individual components to paint. The ammunition rounds were finished with Vallejo Model Color 70.801 Brass, while the drum magazines received A. Mig Gun Metal 045. Once all the painting was wrapped up, the completed side assemblies were attached to the hull floor.
These steps went together without any problems. A few mold-release marks are present, but they will not be visible once everything is assembled. Since I had the floor and side painted, the engine was then added.
Step 19 - 26
In these steps, the front and rear hull plates and the side exhaust are installed, the latter aligning impressively well as it passes through the hull side and connects to the engine. Once these components are in place, the engine-compartment glacis with its louvered access panels can be positioned open or closed, showing the detailed engine. ICM’s molding of the louvers and hinge details is crisp and well executed.
The French ER 26/27 radio and its mounting rack are provided on Sprue F from the ICM kit 35375, but their installation is not referenced anywhere in the assembly instructions. After further research, I located the proper positioning in the instructions for ICM kit 35376, Panzerspähwagen P204(f) Railway WWII German Armoured Vehicle, shown on page 8.
At this stage, the side-skirt fenders and external compartment doors are added. Fit is excellent throughout, eliminating the need for any filler.
Steps 27 - 37
Next, the suspension assemblies are installed along with the wheels and tires. The assembly consists of two axles for the dual-drive layout, each built from a two-part construction that attaches to the underside of the hull and aligns with the suspension leaf springs. This is where I encountered a fit issue: while the front axle was seated correctly, the rear axle would not fit between the leaf springs. In hindsight, the lower half of axle part C-53 should be installed first, followed by the upper half from Step 29. I was able to correct the issue.
During steps 35–37, which involve several small, fragile suspension parts, all of which require careful handling to prevent breakage.
Steps 38 - 39
Ths involves adding the upper-hull details, including the grab handles, shovel, pick, and the armored headlight covers. I noted an error in the instructions for Steps 38–39 regarding the grab handles, part C-6. The directions repeat the same installation step twice, but the illustration immediately below Step 39 clearly shows that only two C-6 grab handles are fitted to the rear upper hull as seen from reference photographs.
Steps 40 - 57
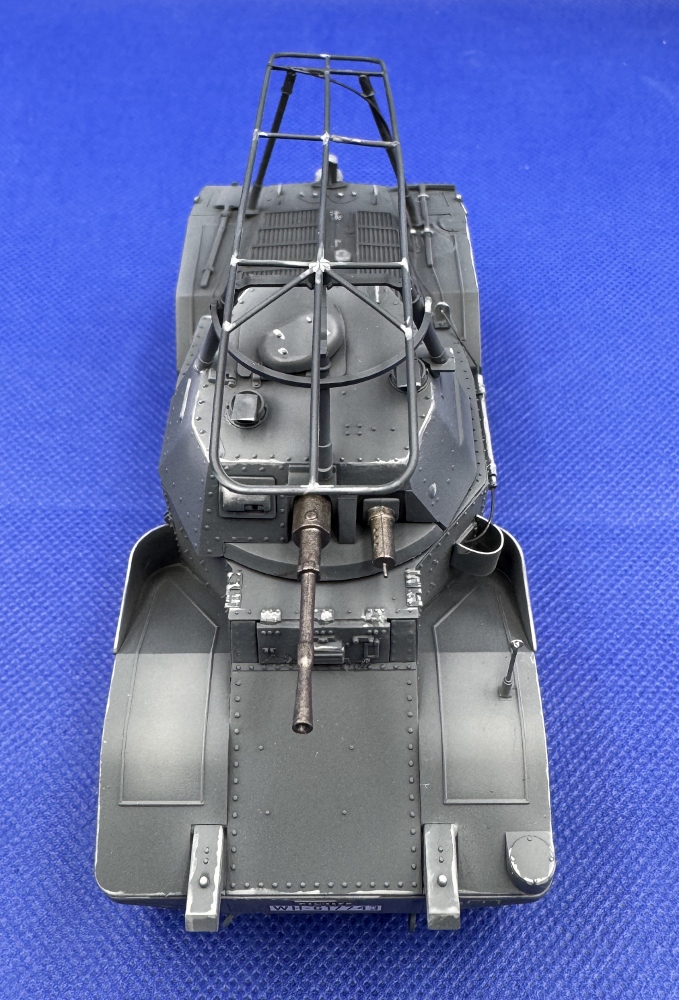
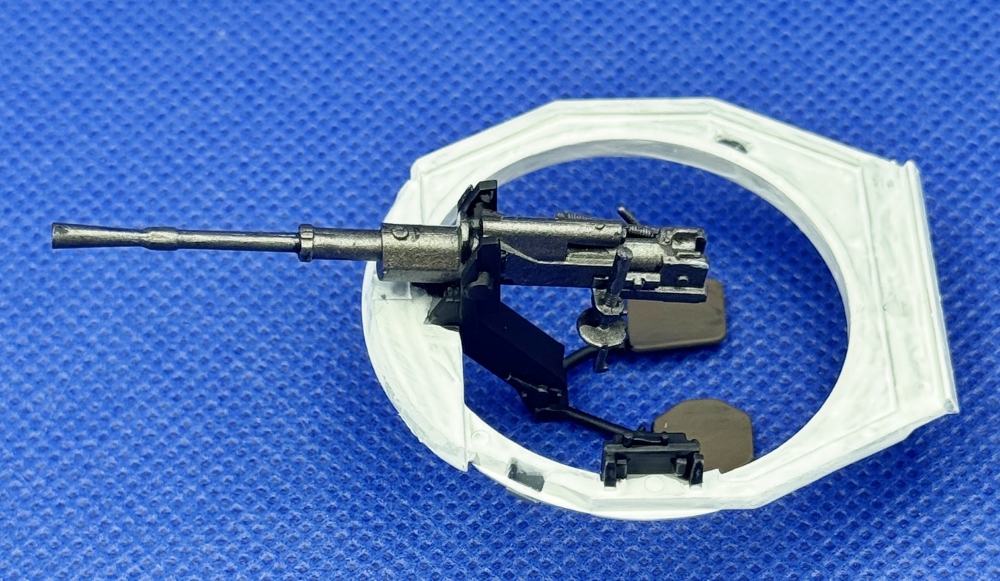
Consists of adding the 7.5 mm Reibel coaxial machine gun and the 25 mm SA 35 main gun are assembled and mounted within the turret. The 7.5mm machine gun is built up, consisting of two parts plus an ammunition drum. The 25mm main gun consists of four parts plus two supporting arms. The two crew seats are also installed during this phase onto the main gun supporting arms. In step 50, the turret hatch and rear access doors are installed. These can be left open or closed. Additionally, in step 54, the front turret window is installed, which can also be positioned open or closed. I chose to close all of them. The guns were painted before installation using A. Mig One Shot Black Primer followed by A.Mig Gun Metal 045, then washed with Mr. Color Weathering Brown. The crew seats were brushed using Vallejo Model Color Leather Brown 70.871.
Steps 58, 59, 60, and 65
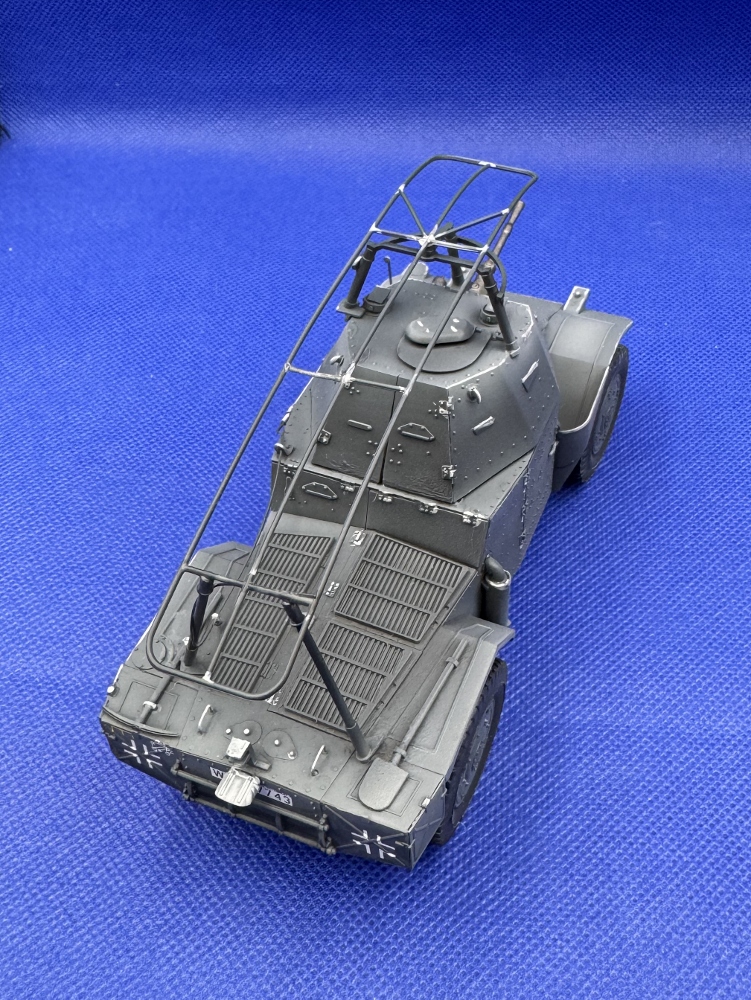
Consists of building the frame antenna structure. Then, in step 65, we see the placement onto the turret and rear hull.
However, steps 61-64 are not included in the instructions. Refer to ICM’s kit # 35376 Panzerspähwagen P 204 (f) Railway for instructions for parts F1-8, F1-9, and F1-11 placement.
Step 58
This begins construction of the Hochantenne (elevated) frame antenna using parts F1-7 and F1-13. Part F1-7 has two ejector-pin marks that need to be filled. The antenna-wire support (F1-9) was drilled out to accept the wire after painting. I also added the wire-anchoring bracket on the hull top, as shown in the painting guide on page 16 and confirmed by reference photos.
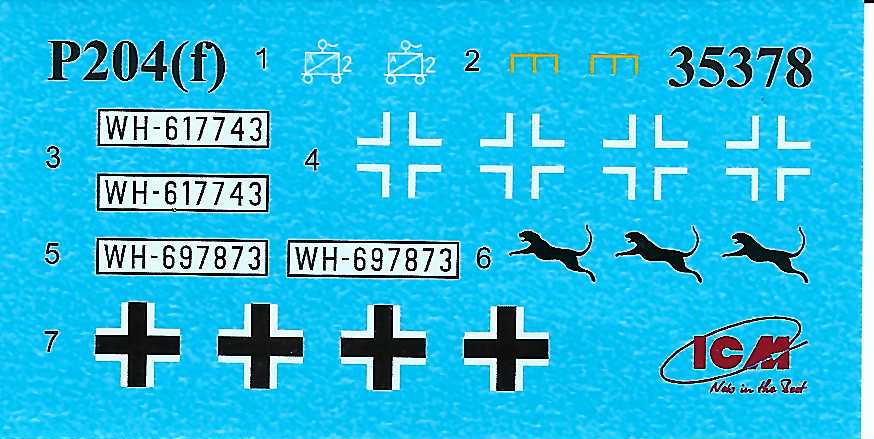
Painting and Decals
For this build, I chose the 20th Panzer Division (20. PzD), Eastern Front 1941 paint scheme associated with Operation Barbarossa, rendered in German Grey. Painting was performed concurrently with each construction step using ICM, Ammo Mig, and Vallejo acrylic paints. The final assembly received a coat of Ammo Mig One Shot Black Primer followed by AK’s German Panzer Grey Modulation Set. To prepare for the decal application, I airbrushed Testor’s Gloss Acrylic 4638 in the areas where the decals are to be applied.
Micro Set followed by Micro Sol was used for decal application, and the results showed no noticeable silvering. As expected, ICM’s decals performed well and were easy to apply.
After the decals were applied, a flat coat of Testor’s Flat Clear 4636 was applied.
In Conclusion
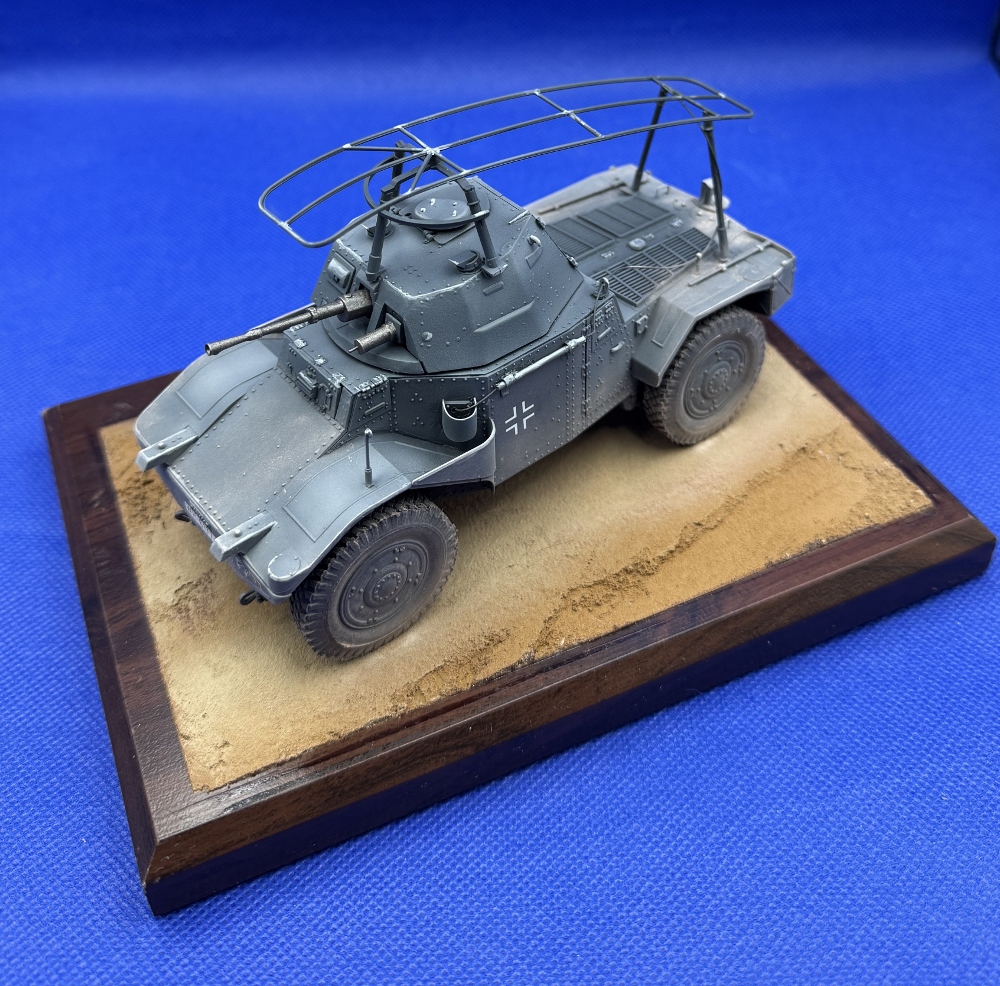
ICM delivers an impressive kit at a very reasonable price, with an exceptional level of detail throughout. To highlight the kit’s fine molding and functionality, I chose to present the finished model in a countryside setting similar to the box art. Modelers familiar with ICM will immediately recognize the high-quality engineering and crisp molding. Cleanup was minimal, with little flash present. I would recommend this kit to modelers of any skill level.
Thanks to IPMS/USA and ICM for allowing me to review this kit.
Reviewer Bio
Phillip Cavender

Phil Cavender, IPMS/USA #50085, is a retired pharmacist from the Veterans Administration, having retired in 2011. While he explored model car building as a child, it wasn’t until 2015 that he rediscovered plastic scale modeling. His renewed interest emerged while researching his father’s military history, which led him to a local hobby shop. There, he met a former UK military tanker who reignited his passion for the hobby. After relocating to Myrtle Beach, Phil teamed up with six skilled modelers to co-found the Grand Strand Scale Modelers chapter of IPMS/USA. He now focuses on building armor models in scales from 1/35th to 1/16th.
Comments
Add new comment
This site is protected by reCAPTCHA and the Google Privacy Policy and Terms of Service apply.
Similar Reviews