
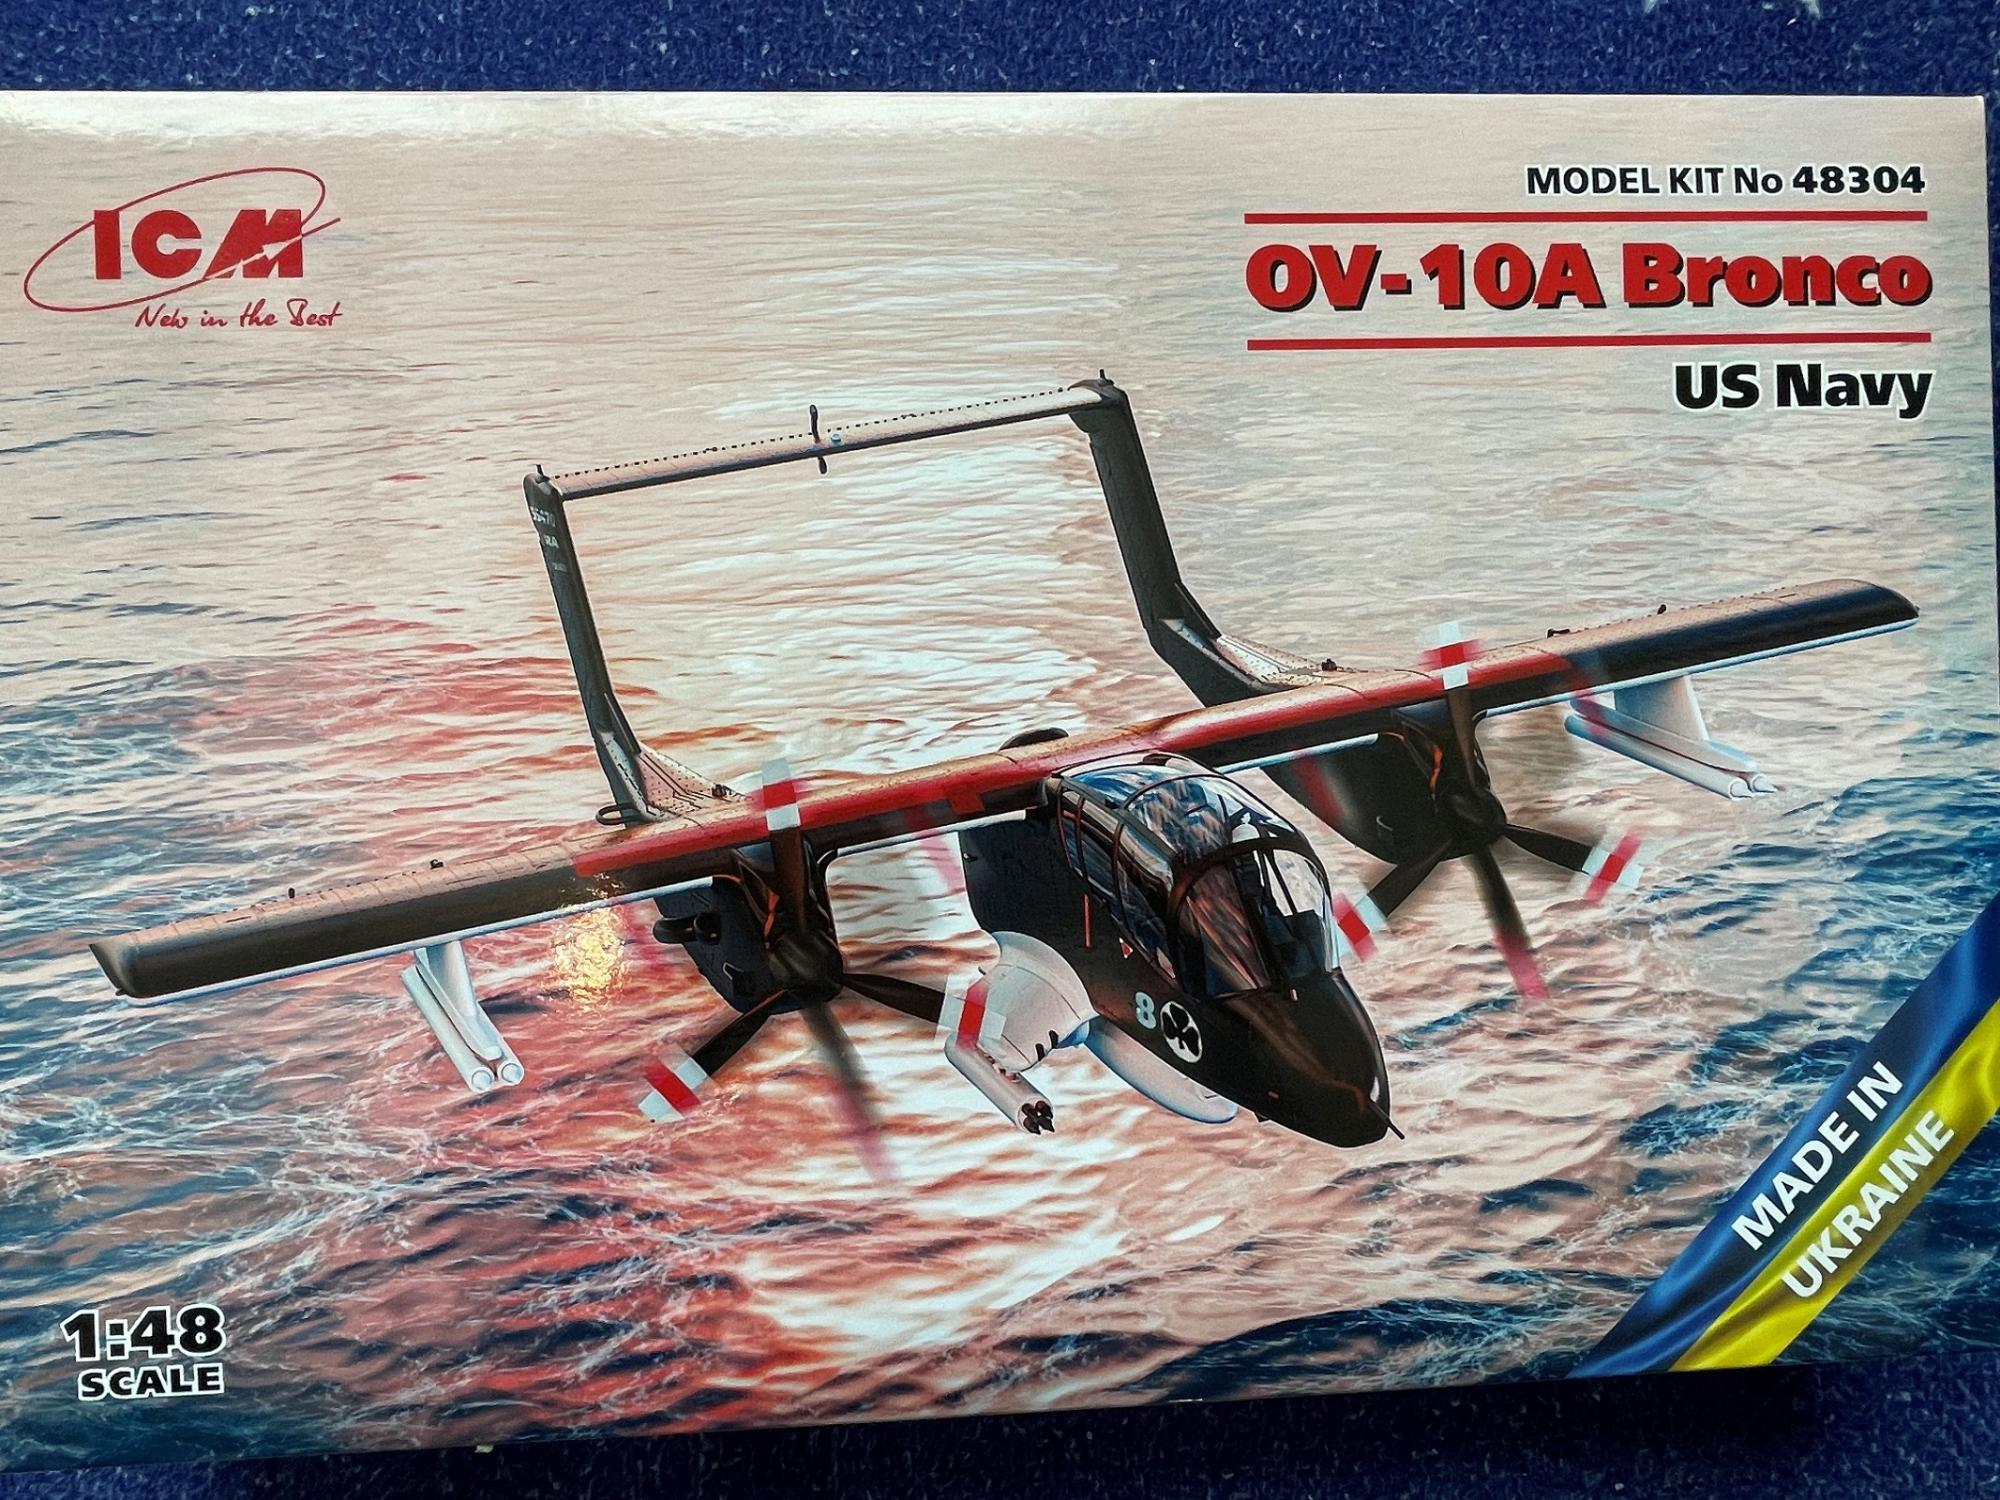
OV-10A Bronco US Navy
The OV-10A Bronco was a highly versatile aircraft and proved itself during the Vietnam War. Some aircraft operated by the US Navy were used in an anti-submarine training squadron, VS-41, Shamrocks. Some of these Bronco’s were painted in black or a very dark blue over white camouflage scheme. Interestingly, I could not find any pictures of OV-10A’s in this color. A number of Bronco’s were also returned to service during Desert Storm.
ICM seemingly defies all logic and continues to excite the modeling community with excellent model kits from the Ukraine. Keep them coming!! They have proudly added “Made in Ukraine” on their box tops.
The OV-10 arrived packaged in ICM’s typical superb box. All the plastic contents were protected in bags, along with a glossy instruction manual and two decal sheets.
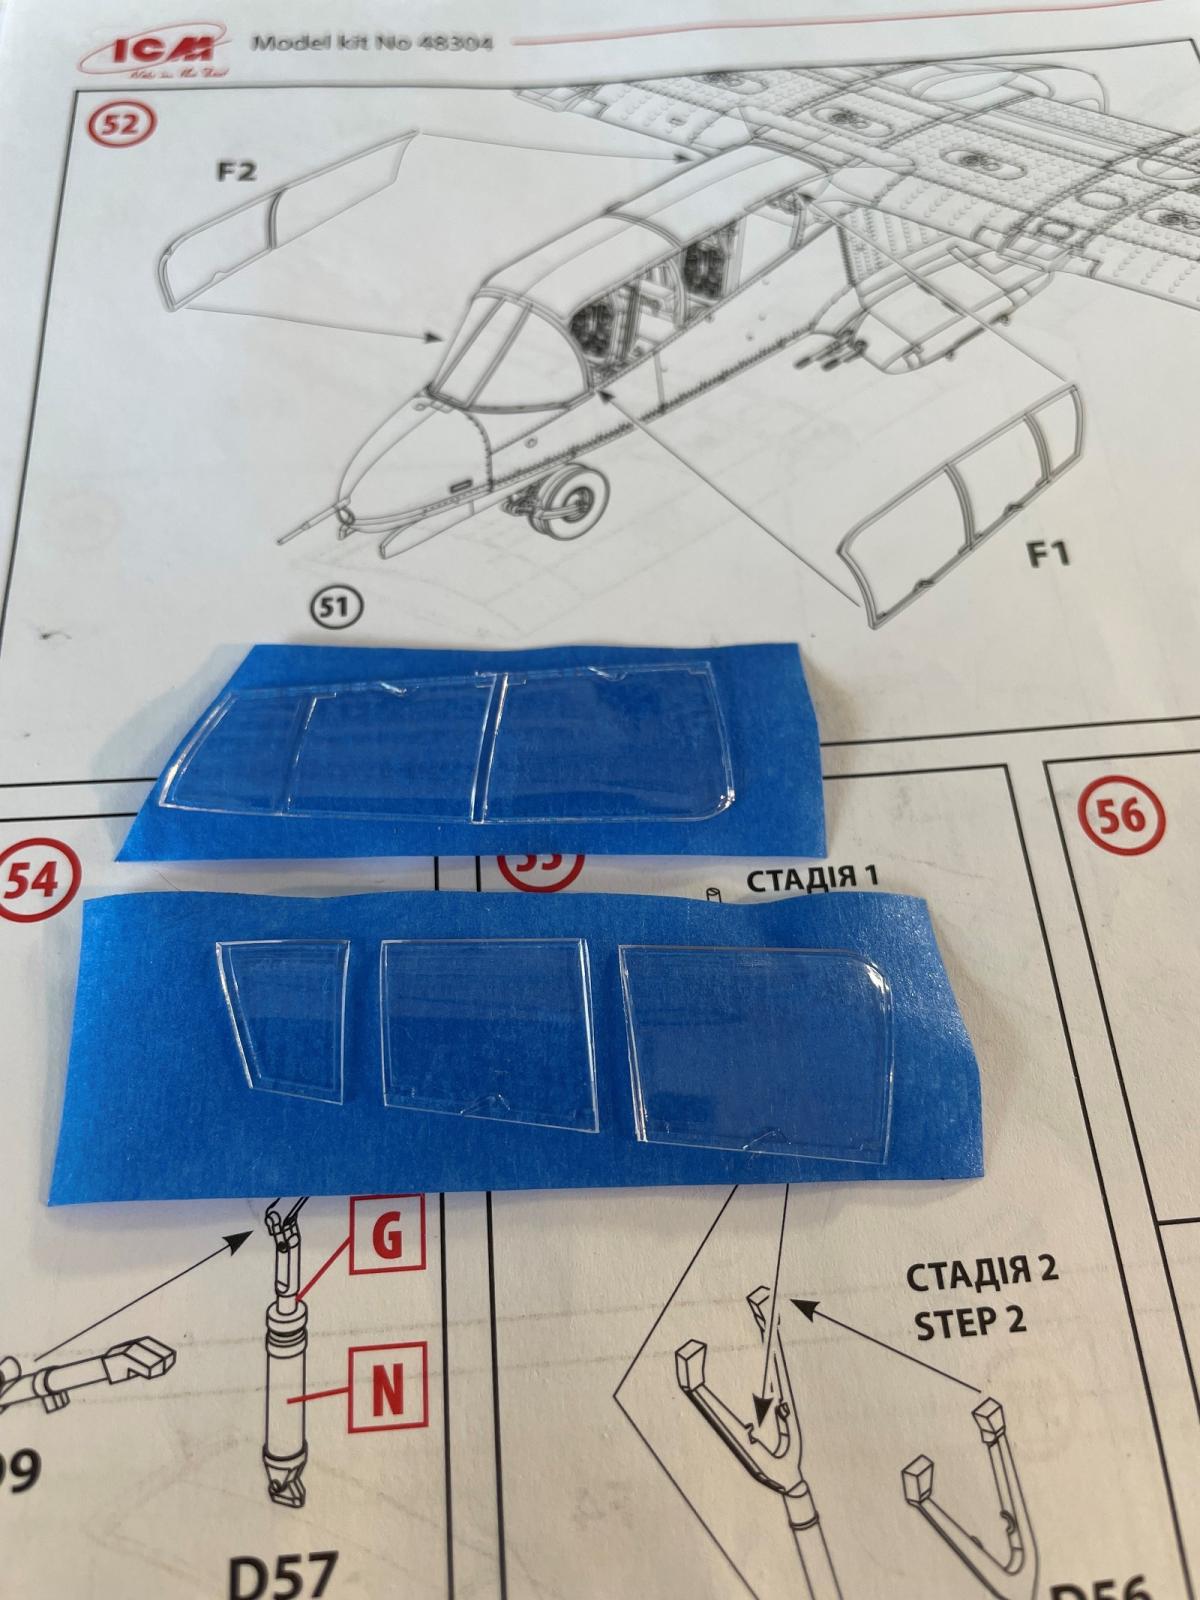
The manual included a parts layout and canopy mask templates (page 24). While I already had a set of Eduard masks, I was confident the templates would work just fine after my experience using the templates supplied for the ICM B-26K Counter Invader I recently built.
Construction started with the cockpit and ejection seats. The cockpit detail is acceptable in this scale. The instrument panels decals were suppled, but the side consoles included raised details and needed painting. No seat belts were included, but I used the Eduard photo etch seat belts that came with their Space, 3D cockpit set. The cockpit went together easily and all parts fit nicely. Everything could be seen clearly through the large canopy windows. I painted the main grey color followed by other detail parts in black, using the kit paint recommendations.
The nose undercarriage bay roof and rear bulkhead was part of the cockpit assembly and everything fit fine.
The fuselage sides were glued around the cockpit floor and it was here that I discovered a rather large twist longitudinally through the cockpit floor. I am not sure if this was something I did, but I used heat from a hairdryer to help straighten the soft plastic out as best I could. Carefully gluing the fuselage and cockpit floor together helped, but I think I still ended up with a slight twist through the completed fuselage as I has some minor fit issues with attaching the fuselage belly. I used super glue along the belly seam, sanded it flush and re-scribed any lost details back into the plastic.
The fuselage side weapons sponsons were assemblies. The fit was ok and I filled a few gaps with super glue. I thinned the inside walls of the sponsons to try and get a flush fit to the fuselage, but it was still not as good a fit as I would have liked.
The main landing gear bay walls were all separate, with the ceiling mounting on top. Everything fit very nicely, but make sure the outside edges are clear of excess glue to get a good fit when being sandwiched between the engine narcelle walls/tail booms. The gear doors were part of the side bay walls. Gear door retraction struts were added, but their position was a little ambiguous until I saw the angle of the mounting stubs.
The undercarriage legs were nicely detailed and slotted together well. Being made from ICM’s typical soft plastic, I was tempted to replace these with stronger metal undercarriage legs. I could see the wheel wanting to splay out due to the weight of the Bronco. I managed to break the right main leg twice, albeit through rough handling once and then dropping the model. It is now quite strong with two metal rods down through the center of the leg. I would suggest leaving the legs off until later in the build.
ICM provided each tire in halves and separate wheel hubs, which made for painless painting. Each main tire showed a somewhat faint tread pattern which all but disappeared under a coat of paint. The nose wheel was also built the same with no issues. I did, however, appreciate the inclusion of the tread pattern.
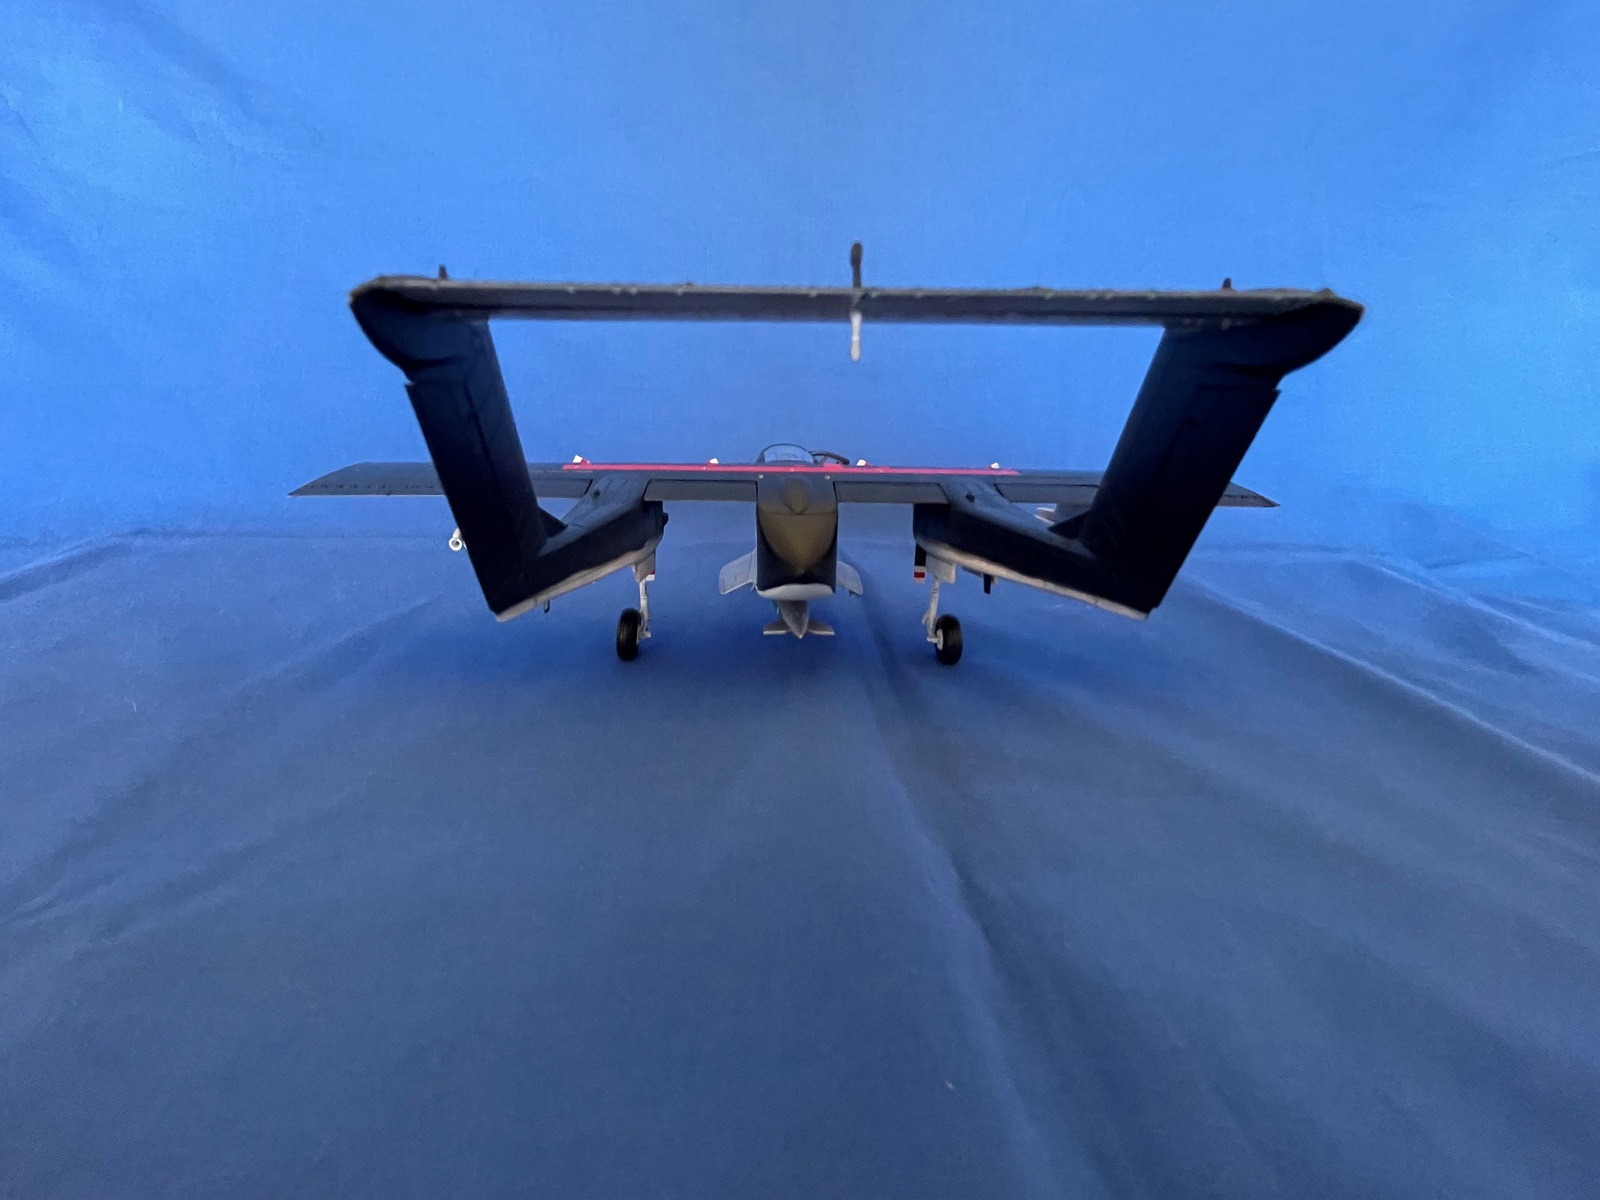
I really liked how the tail booms were designed! The fit of the plastic parts was fantastic. A separate bottom panel slotted between the side boom panel and then this assembly was mated with the top that was already an extension of the top wing. I worked slowly to ensure a tight fit and a swipe of Tamiya liquid cement was all that was needed. There was a slight overlap of the side boom right behind the flaps. This was eliminated using a line of super glue and sanded smooth.
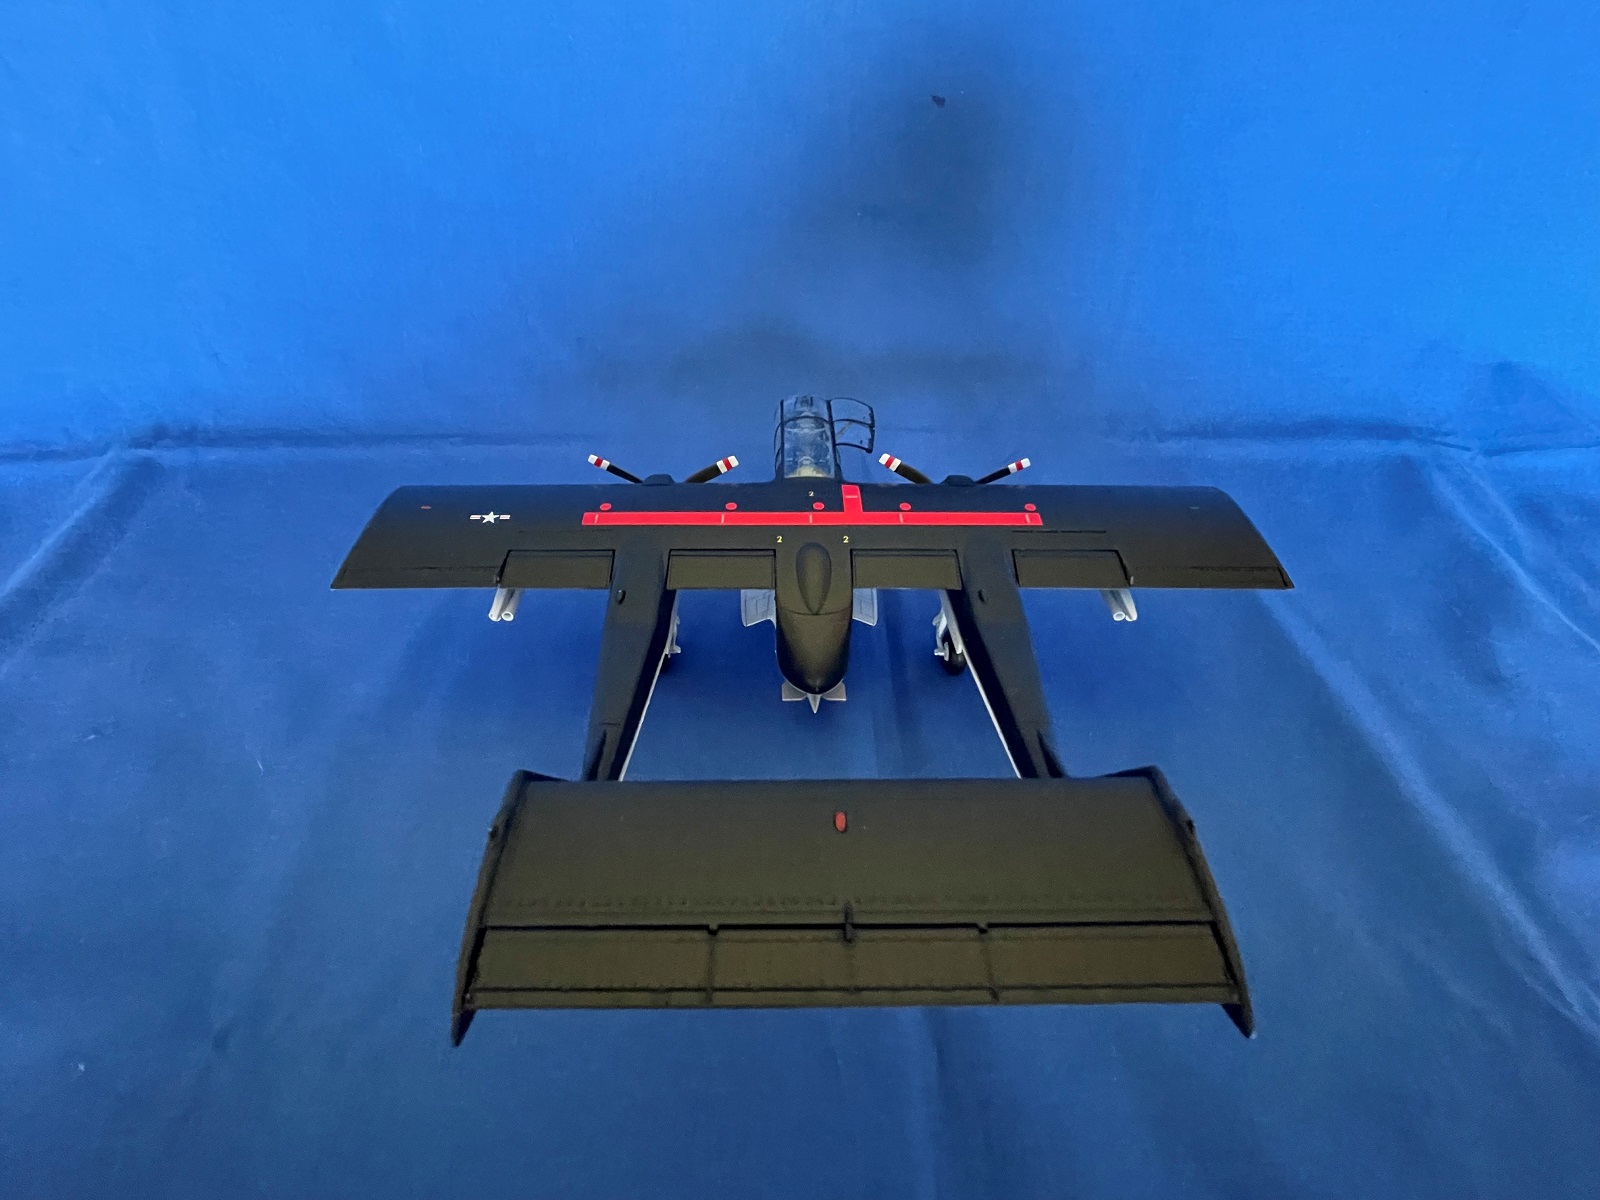
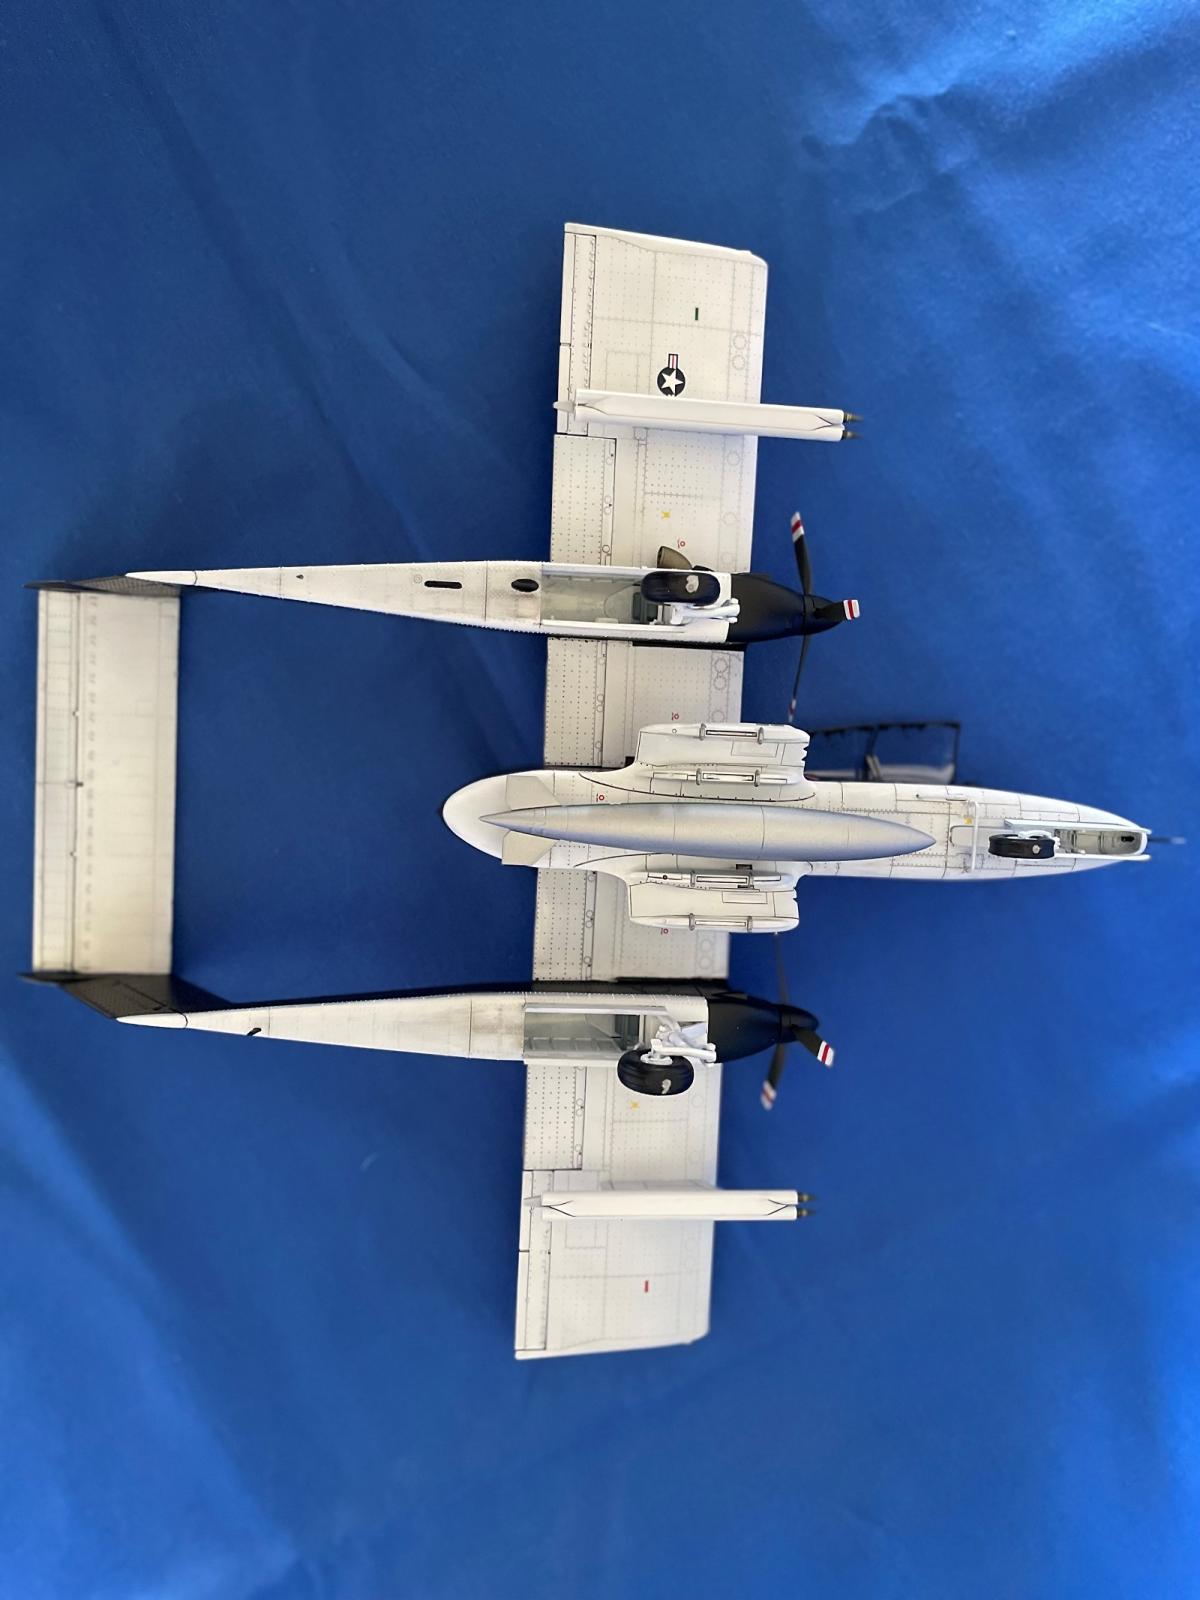
The upper wing was one piece and, as stated, included the top part of the booms. Four panels made up the underside of the wing to complete this assembly. There were some slight gaps where the underneath of the wing root met the fuselage and tail brooms. The rest of the wing to fuselage fit was very nice and just required some careful sanding of the wing leading edge where it blended with the fuselage side.
If I were to build this aircraft again, I would add some Evergreen plastic sheet to breach the gaps. This may also have helped keep the whole wing at the correct zero-degree dihedral. I think mine had an ever so slight anhedral. Don’t forget to open holes for the wing mounted pylons for painting options 1, 2 and 3.
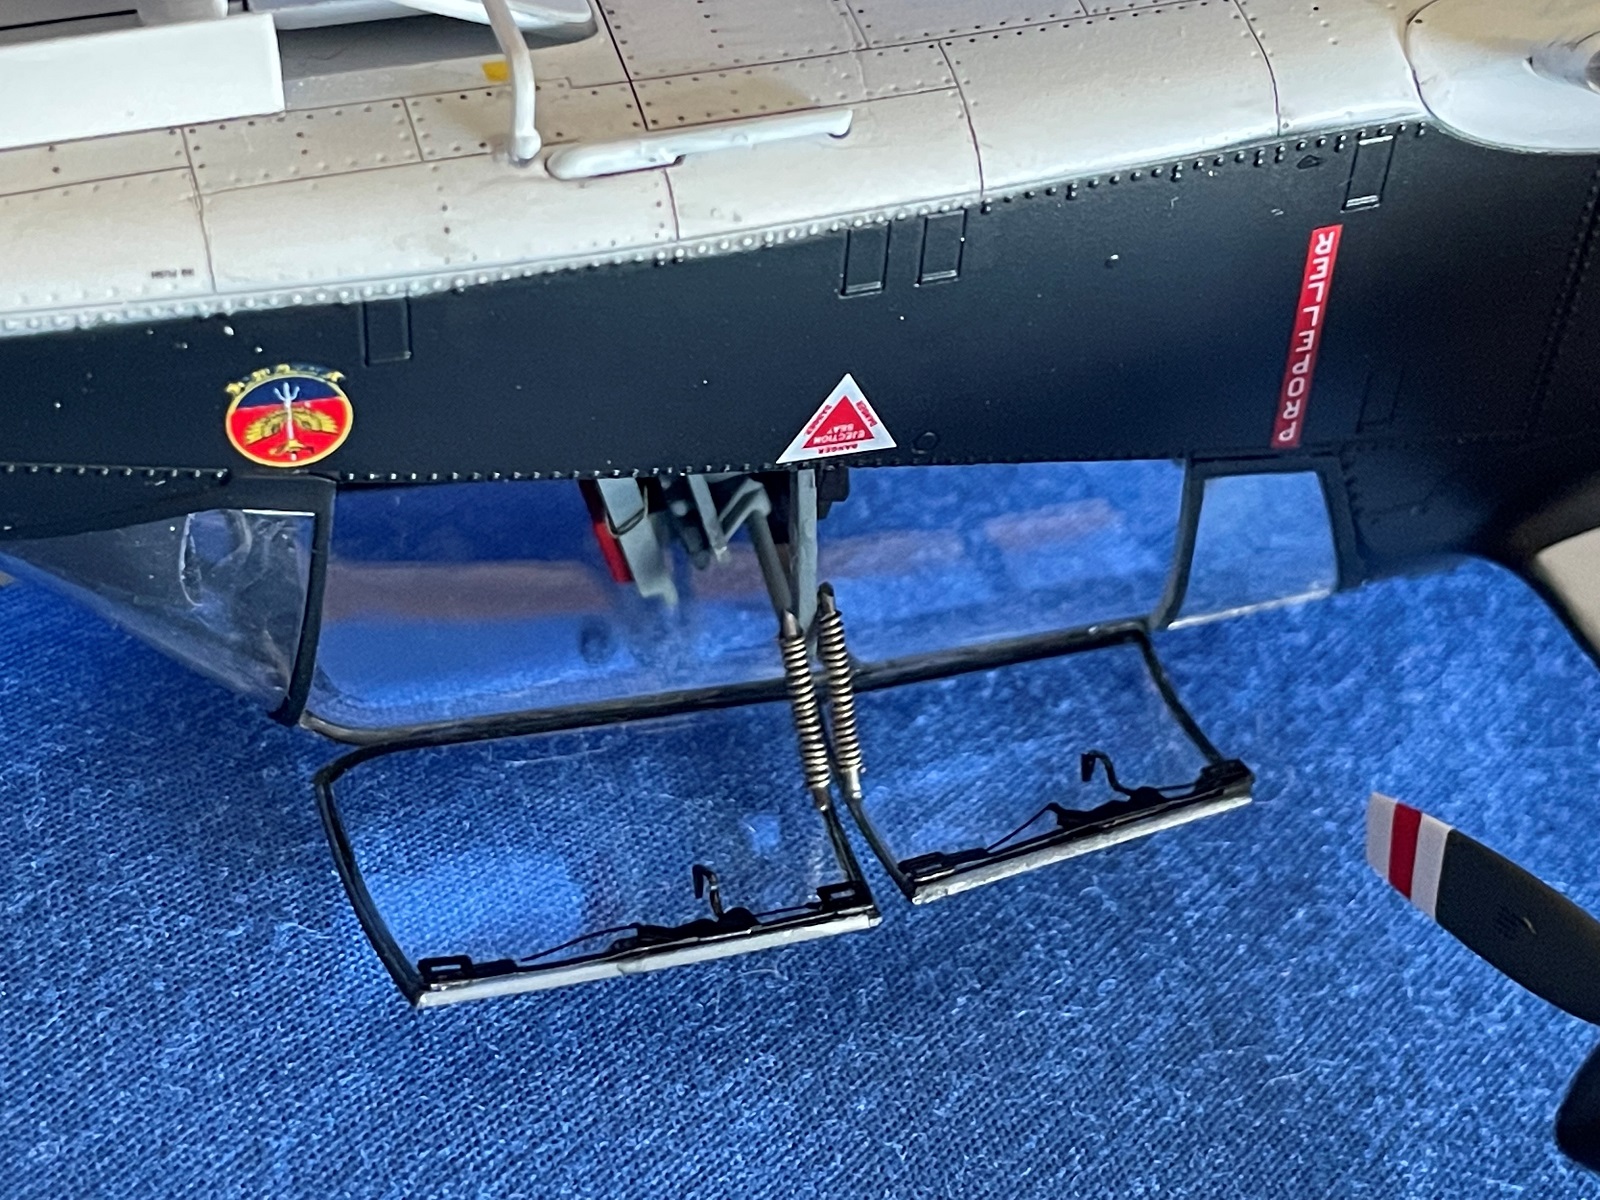
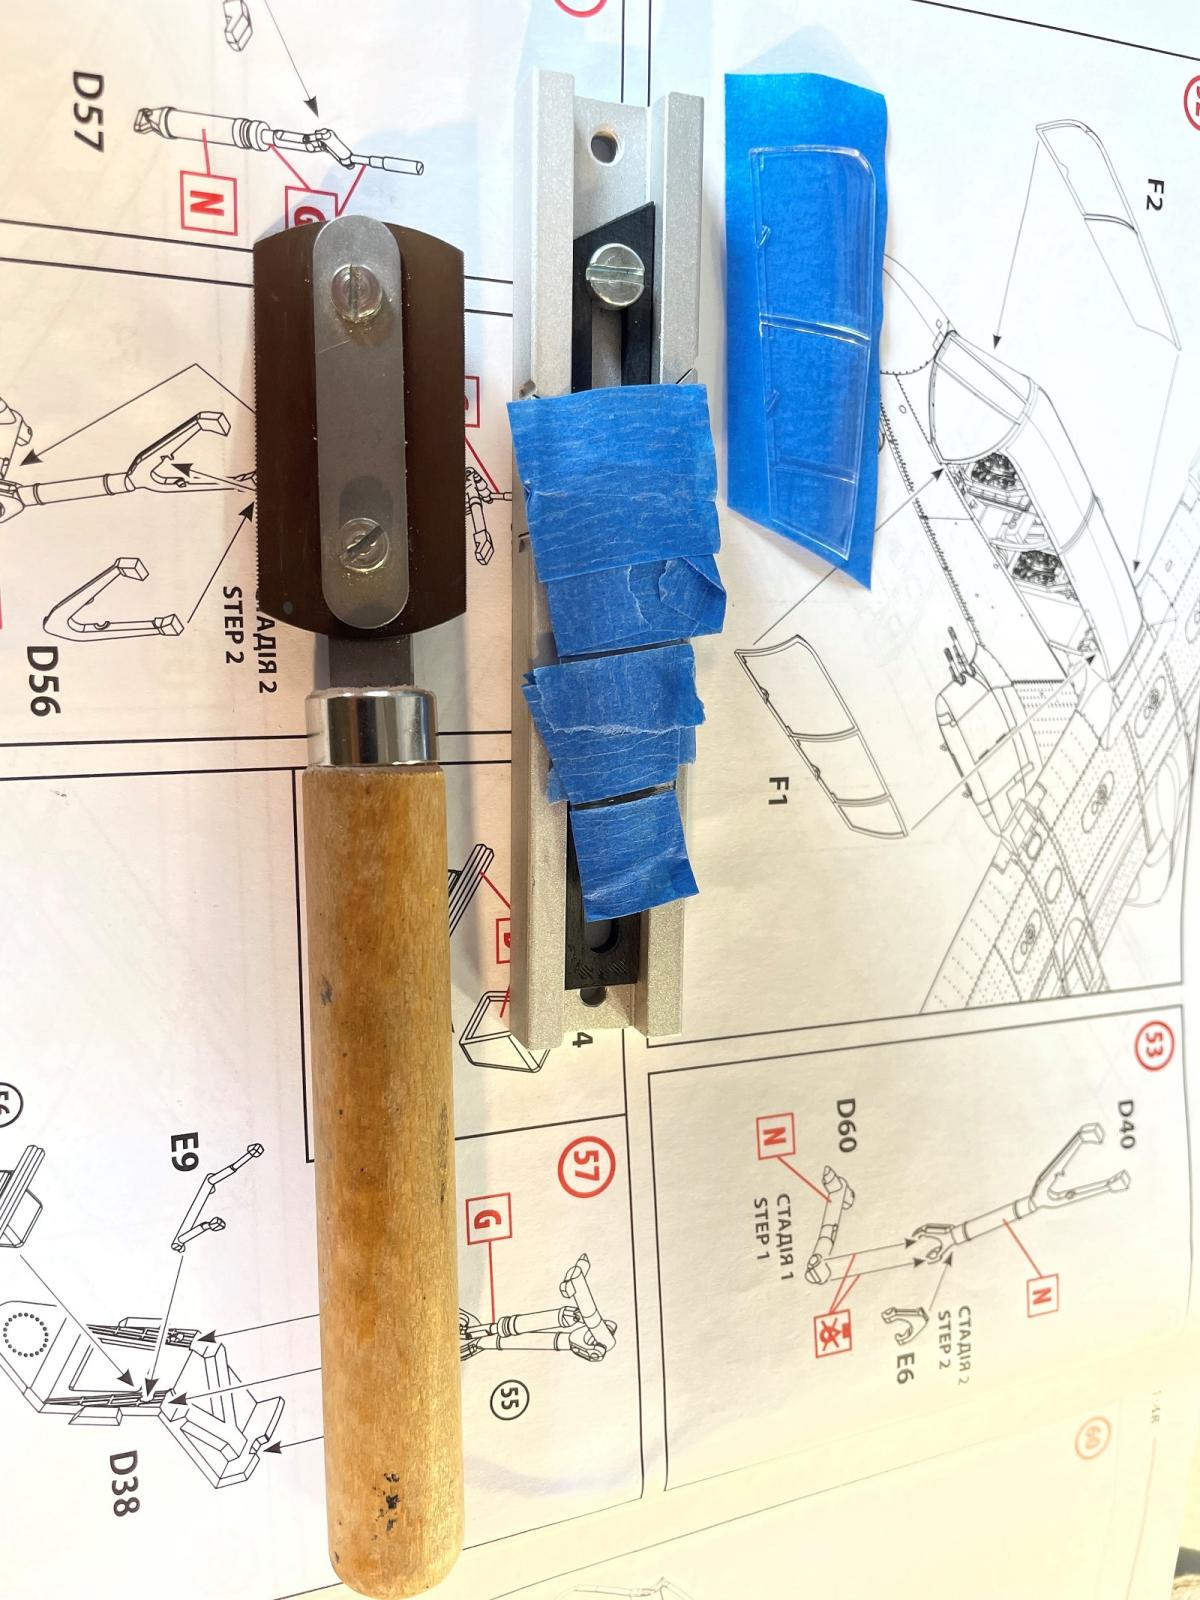
All of the clear parts were extremely clear, but I dipped them in Future, as I normally do, to help protect them further. The kit supplied side canopy hatches were molded closed. The two pilots typically enter the cockpit on the right side and I decided to display these side hatches open. I masked off the “glass” and using my trusty razor saw, and carefully cut out each hatch. The canopy roof, windscreen and left side panels all fit precisely. I glued in the rear, right window, but left the cut front and rear cockpit hatches until later.
By now the Bronco was ready for painting with the canopy masked, and the open spaces left from removing the side hatches were filled with soft foam I cut to shape to protect the cockpit from paint.
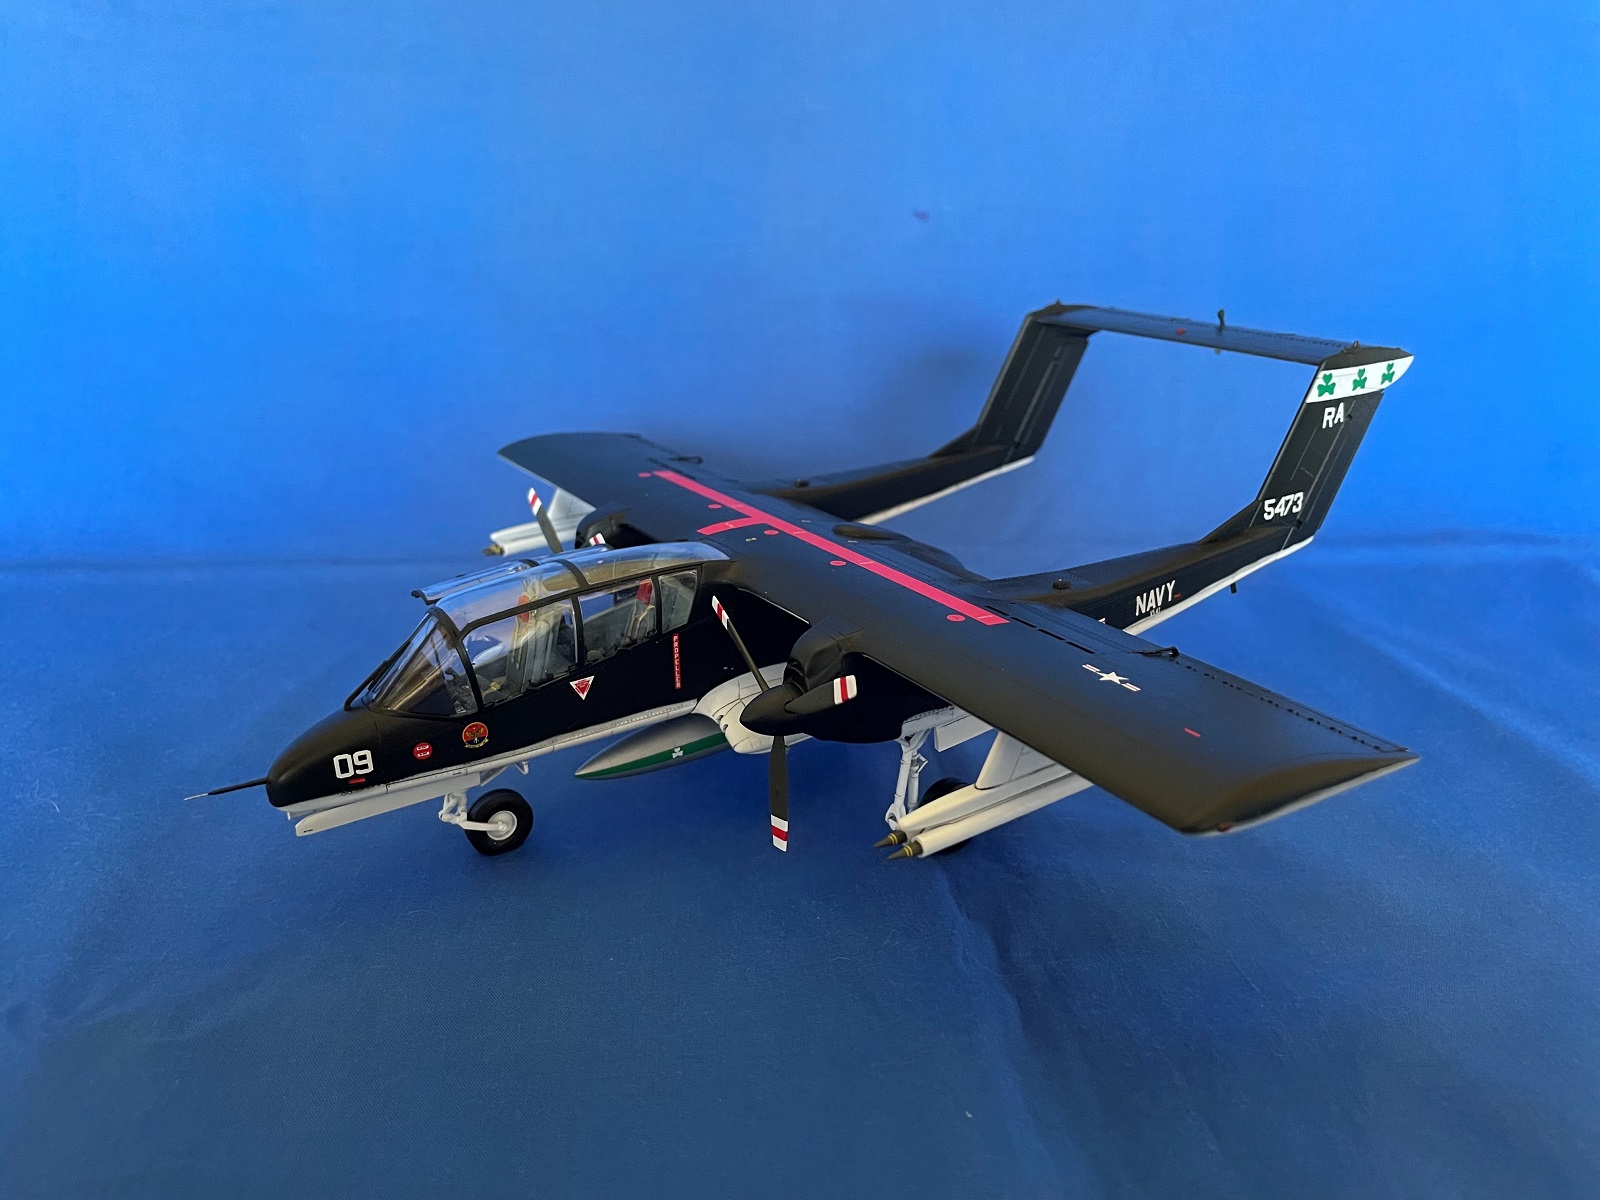
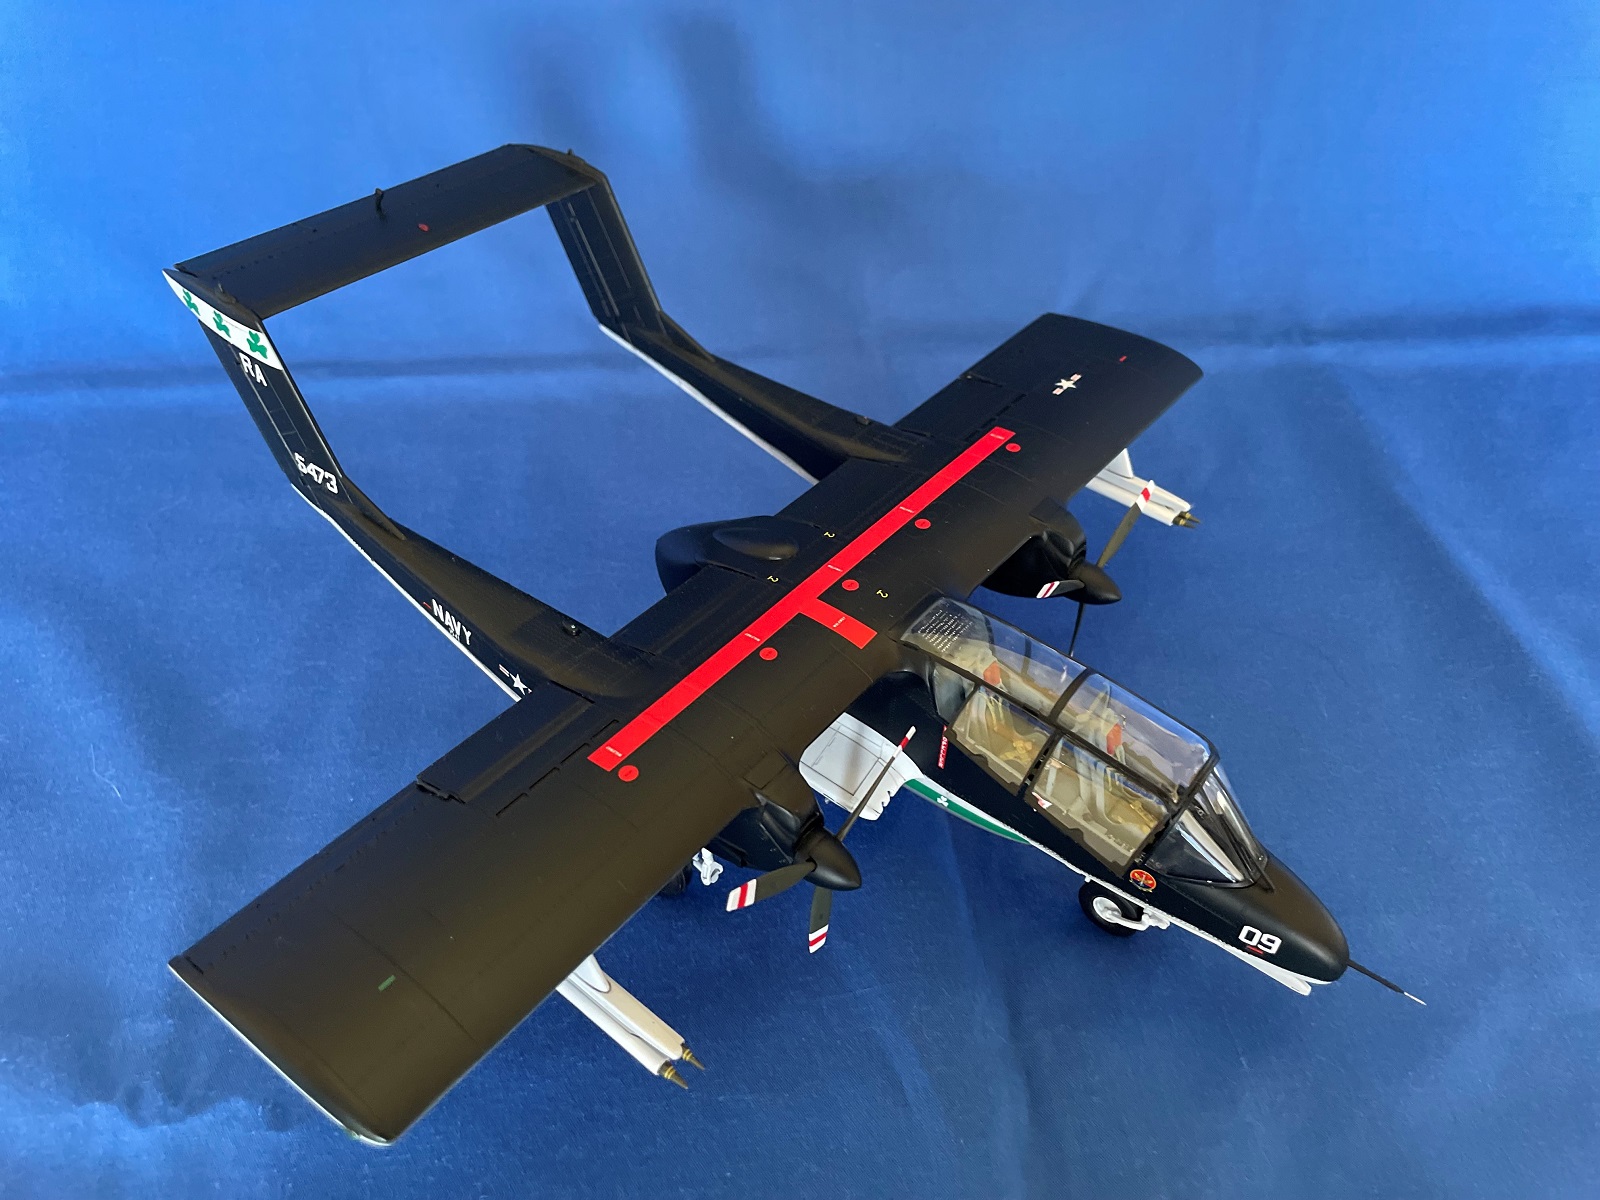
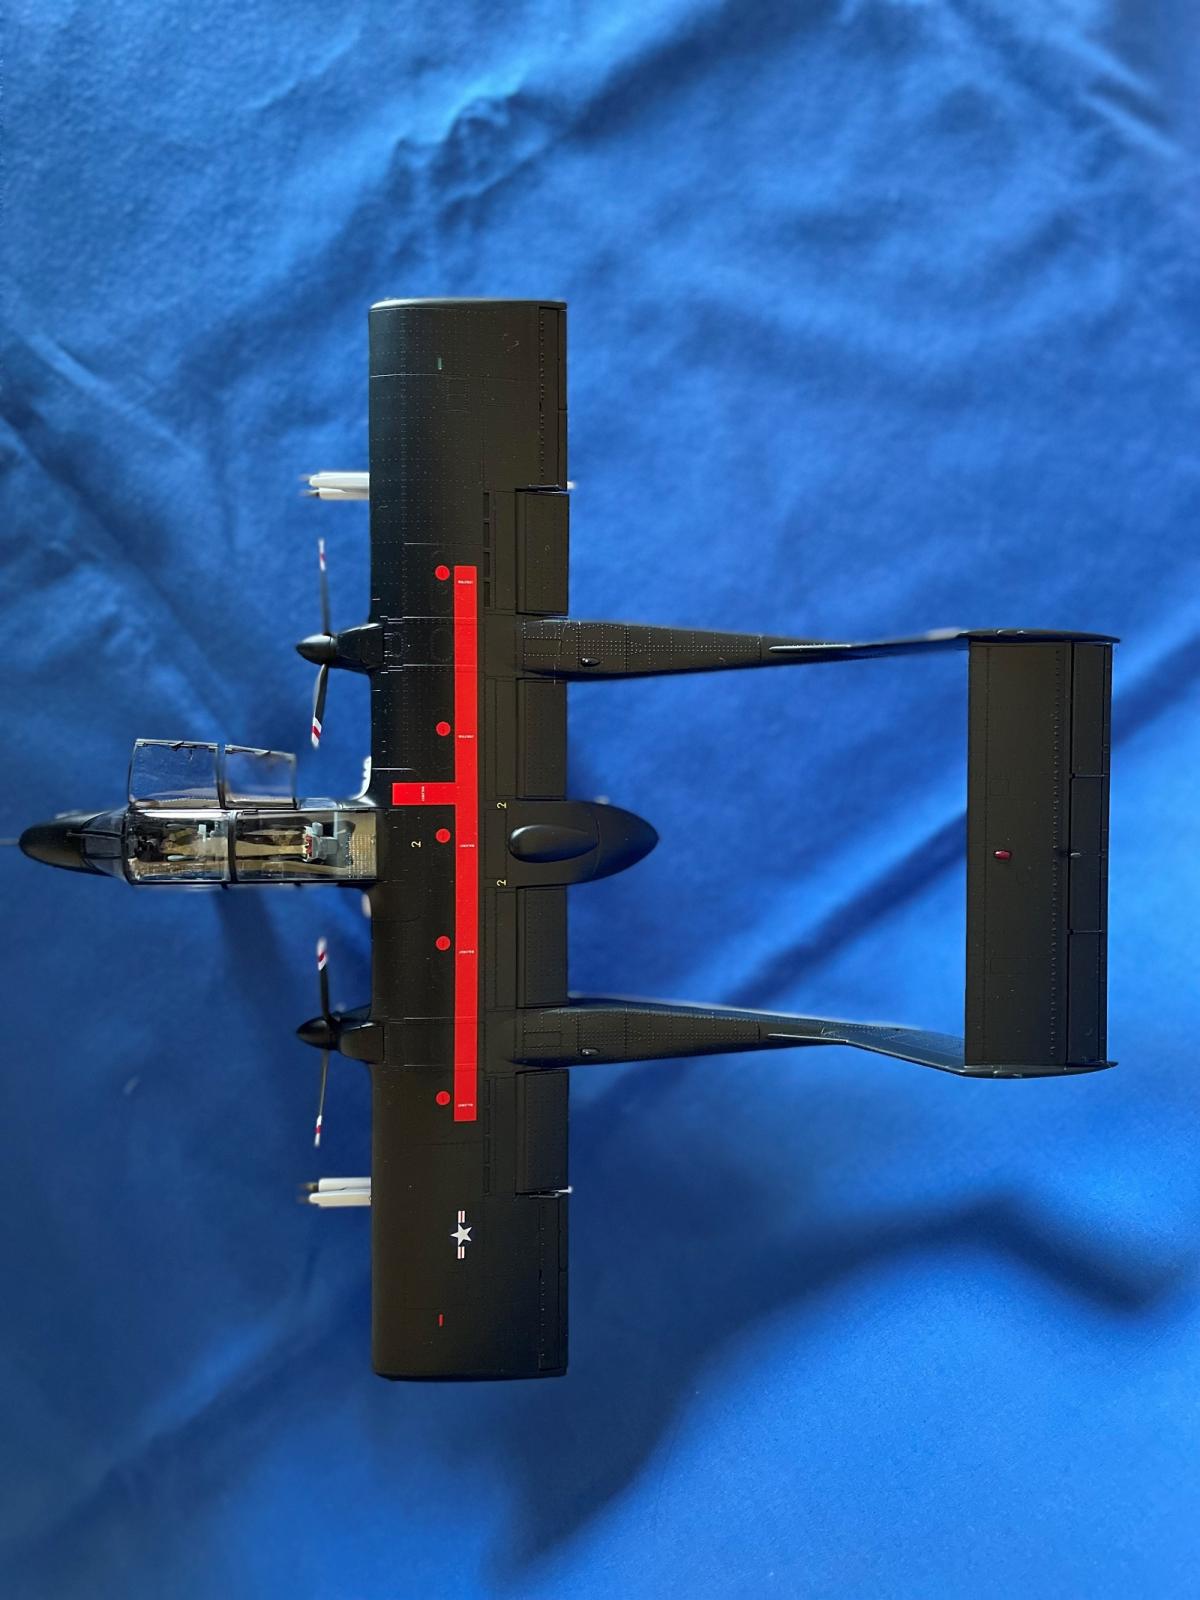
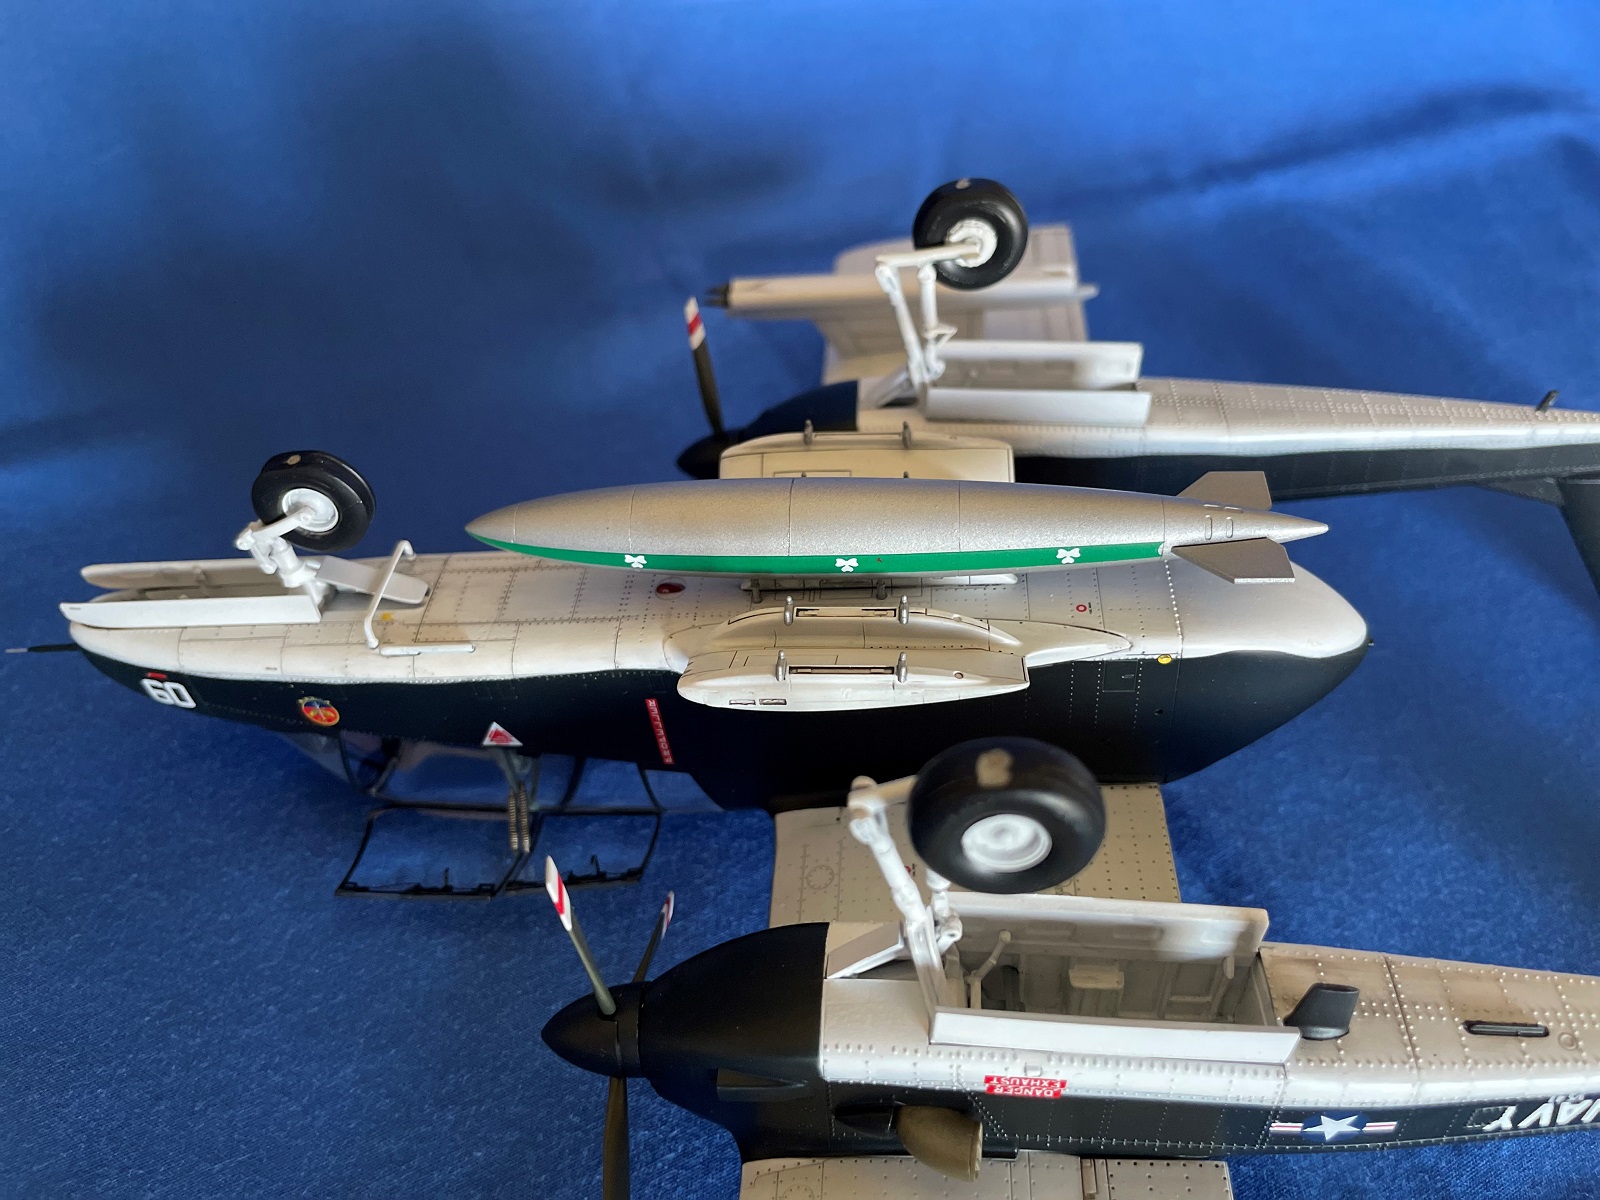
I decided to paint the third option: OV-10A 155473/RA-09, VS-41 Shamrocks, NAS North Island, 1971. As mentioned earlier, I had no luck finding any pictures of the actual or similar aircraft in this livery online, and I assume ICM must had had the same issue, or the pictures they had were black and white. ICM recommended either a dark blue (showing a percentage mixture of two ICM colors) or a black paint job over off white. I contemplated between Tamiya Tire Black or some sort of dark blue color and finally decided on Tamiya XF-17 Sea Blue. It looked essentially black with a very slight blue hue. I sprayed the underside of the aircraft and tail tops white, masked off a soft edge using Blue Tac rolled into long thin snakes and applied the Sea Blue to the upper surfaces. A Mr. Color gloss coat followed. I painted the centerline fuel tank aluminium. The propellors were painted Tamiya XF-81 green with white tips that I measured to match the length of the white and red prop tip decals.
The ICM decals and their application were nearly faultless and a joy to work with. About the only issue I ran into were with decals that had more clear carrier film, like the shamrock leaves on the tail, and some of the stencils. The clear film was extremely thin and wanted to fold over on itself and wrinkle as I maneuvered it onto the model. However, once on the aircraft, I was able to drag the whole decal into position and the carrier film formed itself around raised rivets and recessed panel lines beautifully!
The large red wing walk decal and the long green stripes alone the belly fuel tank were strong and enabled me to maneuver them until I was happy with their positions. I applied the white and red striped prop tip decals. I was glad I sprayed the tips white, as the white part of the decals were a little translucent and the green on the rest of the blade would have shown through.
After positioning each decal, I used Micro-Sol decal solution, resulting in most looking like they had been painted on. I experienced very little silvering that was taken care of with more Micro-Sol and a sharp blade or pin.
I sealed the decals with another gloss coat and applied a wash to the white areas. I kept the aircraft fairly clean as it belonged to a specialized training unit, and I assumed that they would take care or their OV-10’s.
For the Bronco I was building, I used the wing pylons and built the LAU-33 rocket launchers. Each was in two parts with separate war heads. The fit was good. These were painted white, while the rocket heads were painted green and adorned with two tiny yellow decal stripes on each. A weapons load sheet for each of the four aircraft represented in this kit was shown on page 23 of the instruction manual.
Interestingly the LAU-33 warhead stripes were included on the main decal sheet and the LAU-33’s and their pylons were found on Sprue “A”. For decal options one and two, there was a complete selection of weapons (two sprues) and a dedicated decal sheet. Superb!! As I did not use these, I added both to my spare parts allotment.
A satin coat finished the painting stage and I continued with final assembly. I glued the prop spinners and hubs to the props. Note that the props rotate counterclockwise to each other.
Various antennas were glued into their recesses around the Bronco’s belly and tail booms. A clear lens covering the nose landing light was added, as well as other position lights. During the build, I accidentally broke the pitot tube off the nose and subsequently lost it. I replaced it with a Master Models brass pitot tube, which was much stronger than the soft plastic.
The remaining gear doors were attached to the main and nose wheel retraction struts and the main wheels were glued onto their pegs. The nose wheel fork had tiny attachment stubs that I could see coming loose easily. I drilled through the fork and wheel and inserted a brass rod axel cut to the appropriate length. I now had a much stronger nose wheel assembly.
The two open canopy hatches were left until last, and I glued them in the open position. I fashioned supports from thin brass rod and wound wire around them to replicate a spring mechanism that held the hatch open or closed. I was glad I opened up the canopy. It adds a little more visual interest and realism to the model. Quite often the left side hatches were also open, but I left these closed.
I had a lot of fun building the little Bronc and the Navy paint job and green Shamrocks really looks striking!
I don’t think this would be a model for beginners, but anyone with some experience should achieve a good result building it straight out of the box. The clear decal carrier film and very soft plastic may be the only things that could catch less experienced modelers off guard.
Thank you very much to ICM and the IPMS USA for the opportunity to review and build this excellent model.


Comments
VS-41 Broncos
Hi,
The Broncos assigned to VS-41 at North Island, California were used mainly to train pilots and crew for VAL-4 in Vietnam. There was only one aircraft painted in an experimental scheme of gloss black over lt. gull gray. The ICM colors are wrong. I also believe the red wing walk is incorrect. 41’s other Broncos were the standard USMC green over lt. gull gray. There are a ton of pictures on the internet and at https://blackpony.org/v4-ov10abuno.htm.
(No subject)
Nice job on the model. I'm…
Nice job on the model. I'm wondering how you installed the metal rods in the main gear. The weak main gear is a concern of mine as I contemplate building this kit.
Thanks,
Scott
Add new comment
This site is protected by reCAPTCHA and the Google Privacy Policy and Terms of Service apply.
Similar Reviews