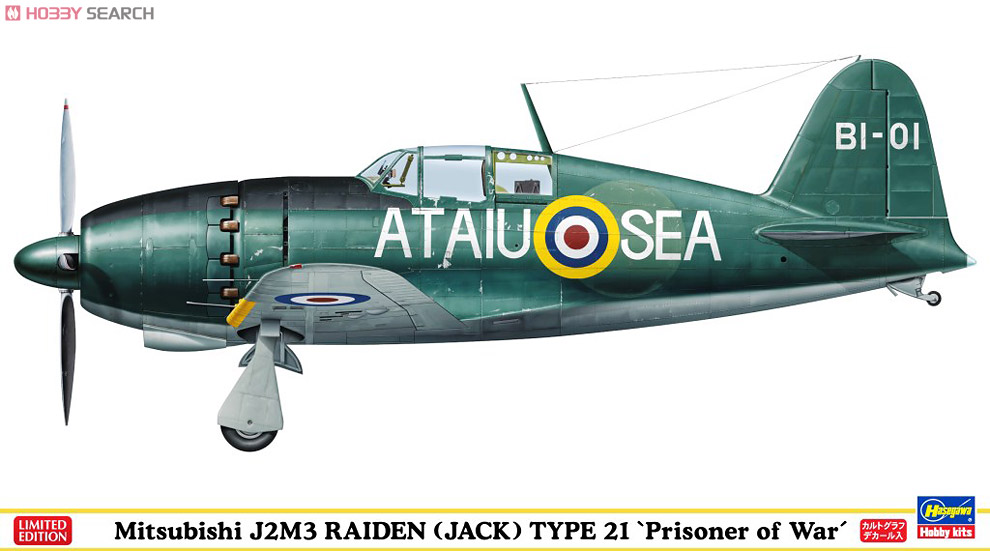
Mitsubishi J2M3 Raiden (Jack) “Prisoner of War”
History
The J2M Raiden (Thunderbolt), codenamed “Jack” by the allies, was designed by Jiro Horikoshi, creator of the vaunted Zero fighter the A6M. Envisioned from the outset as an interceptor, this aircraft was used against the American B-29 Superfortresses that attacked the Japanese mainland in 1944 and 1945. It was armed with four cannon and had a top speed of over 400 miles per hour. It did see some success, but that was tempered by the decision in March of 1945 to move the B-29 raids to night time hours.
After the war, captured examples were tested by the ALLIED TECHNICAL AIR INTELLIGENCE UNIT which under the British examined two examples in December of 1945, while the United States examined a captured “Jack” in US markings and a natural metal finish. All of these aircraft can be built using decals from this kit.
Kit
While some have described this fighter as portly, I have always thought the “Jack” was a sleek fighter. In 48th scale this aircraft has been well represented with the older Tamiya offering and with the Hasegawa kit that first appeared in the 1990’s. But back to the kit at hand….
Upon opening the box, the modeler is greeted by the familiar grey plastic of which there is six sprues, a clear sprue, polycaps and decals are bagged separately, always a nice touch. A word about the decals. Printed by Cartograf, they are all in register, and instrument decals, prop marks and data are provided. Most importantly, the white decals are indeed white! Gone are the days of the off-white Hasegawa decals! Options are provided for two machines of the ATAIU-SEA in Malaya in 1946 in British markings and a single machine of the US TAIU in natural metal US markings from June 1945.
Construction
Construction begins in the cockpit, which is remarkable for is sheer size compared to other aircraft of the period – it seems as if the pilot could have moved freely around the cabin! The pit is well detailed with raised detail on the instrument panel that cries out to be drybrushed, though again, decals are provided for the instruments (I opted for paint). I painted the cockpit in Polly Scale RLM 67, which to my eye is close enough to the interior greens used by Japanese manufacturers. Boxes and details are picked out in various greens and blacks. The assembly is then given a wash and dry brushed in a light grey color. Eduard color photo etch belts were used for the pilot’s seat.
The canopy was masked with bare metal foil and sprayed the interior color and placed onto the fuselage after the halves are assembled. The cowling assembly was not a perfect fit to the fuselage, but a few swipes with a sanding stick helped fair it in.
The fit of the wings to the fuselage was good and the all-important fuselage/wing seam was a great, tight fit. The tail planes were added and were verified to be 90 degrees to the fuselage.
Painting
I decided to do one of the British ATAIU-SEA birds, primarily because liked the idea of beating up the finish a bit and secondly, the great box art by Watanabe. Kids dig box art, right?
I sprayed the wing leading edges Polly Scale Japanese Deep Yellow and masked them off. I also took the opportunity to spray the prop yellow and masked off the warning stripes.
I sprayed the bottom of the plane Polly Scale Imperial Japanese Navy Grey and the top surfaces Polly Scale IJN Green. I added a couple of drops of white to the green and post shaded some of the panels on the wing and fuselage to simulate wear and sun damage.
Looking and the photos I have and thinking the paint scheme through, it seemed natural that the British would have painted over the Japanese Hinamarus. Obvious – right? So that meant I needed to show that too. Using the Eduard Hinamaru mask, I selected sizes that seemed right for the wings and fuselage. For the upper surface, I chose British Dark Green, and for the lower surfaces, British Medium Sea Gray. My reasoning being that they would have used paint stocks they had on hand.
Decaling
After a coat of Future (or whatever it’s called these days), I was ready for decaling. The decals performed well, settling down without struggle for the most part. I did have a little silvering on one of the ATAUI logos, but I believe that was operator error in not having my coat of Future thick enough.
Final Assembly
A sludge wash was applied to the panel lines and cleaned up. A final top coat of 50/50 Testor’s Dullcoat and Metalizer Thinner was sprayed on and left to dry. I then picked out some walkway and panel chipping with a Prismacolor silver pencil, and used Tamiya weathering pastels for the exhaust and oil staining.
Landing gear, gear doors and navigation lights were then added. Blue formation lights were painted on the wings and covered with a tiny drop of Future.
Conclusion
Another great model from Hasegawa, with markings, that to me, really make it pop whether on the contest table, the club stand or your display shelf. If you have the itch to build to build a captured aircraft – this “Prisoner of War” nicely fits the bill.
Thank you IPMS/USA and Hobbico for providing this kit for my review.


Comments
Add new comment
This site is protected by reCAPTCHA and the Google Privacy Policy and Terms of Service apply.
Similar Reviews