
Tupolev Tu-2
History
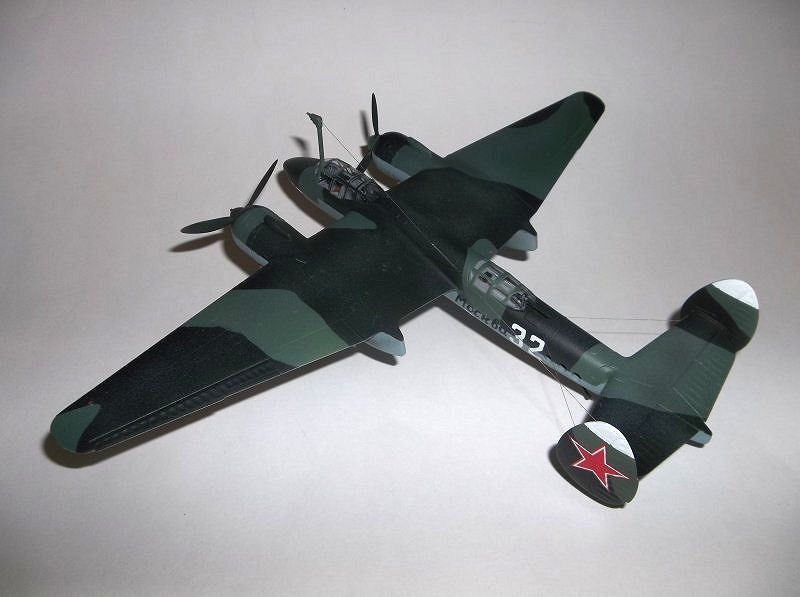
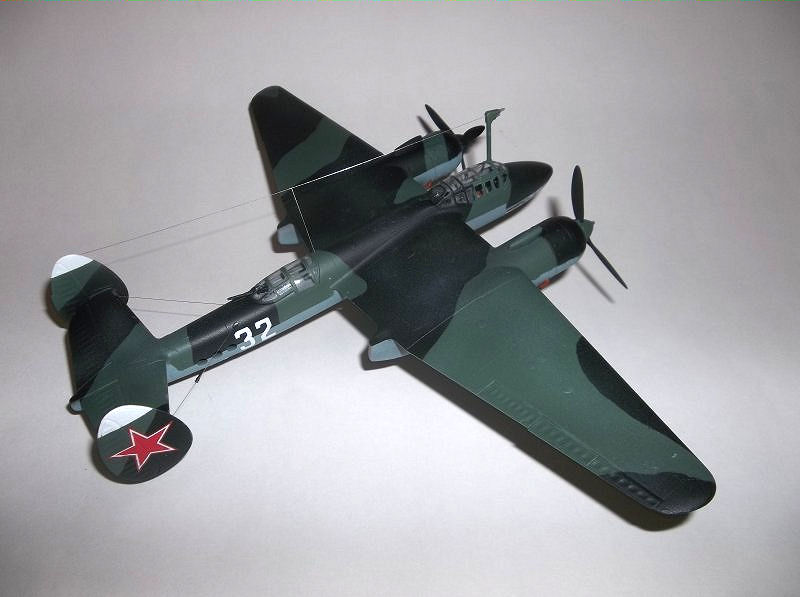
The Tupolev Tu-2 has a rather interesting origin, being designed by a team of engineers who had run afoul of Stalin’s paranoia. They had been placed in a political prison as “enemies of the state,” and the design work for this aircraft began while the designers were incarcerated. The airplane was designed as a high speed bomber, capable of both level and diving attacks. Originally powered by liquid cooled AM-37 engines, these were later required for the Ilyushin Il-2 Sturmovik program, so Shvetsov Ash-82 radials of 1,850 hp. were used, giving the plane a maximum speed of well over 300 mph. A crew of four was carried, including a pilot, navigator gunner, and two additional gunners. The first flight of the aircraft was in January, 1941, and the type entered service in 1942. Many variants of the Tu-2 appeared, and total numbers exceeded 3,000 before production ended in 1950. During the war, the Soviet Air Force was the only user of the Tu-2, but postwar, Tu-2’s were supplied to Bulgaria, China, Hungary, Indonesia, North Korea, Poland, and Romania. Today, a few survive in museums in Russia, Bulgaria, China, Poland, and strangely, the War Eagles Museum in Santa Teresa, New Mexico. Later models of the aircraft had four-bladed props, but this kit only provides the three-bladed ones.
References
Aside from an excellent book by Yefim Gordon and Vladimir Rigmant, OKB Tupolev, a History of the Design Bureau and its Aircraft, I don’t know of any readily available reference books on the Tu-2. Aside from the usual internet sources, one site I found especially helpful was http://massimotessitori.altervista.org/sovietwarplanes/board/index.php?topic=2112.0. This site goes through the entire camouflage history of the Tu-2, 16 pages no less, and includes a lot of color and camouflage pattern material as well as some excellent and useful photos. In fact, there are a couple of photos of one of the aircraft depicted on the kit decal sheet, although in black and white. The colors depicted in the kit instructions may be suspect, as these aircraft may have been camouflaged in brown and green over sky blue, not the black as shown in the drawings. So there is some information available — you just have to know where to look for it.
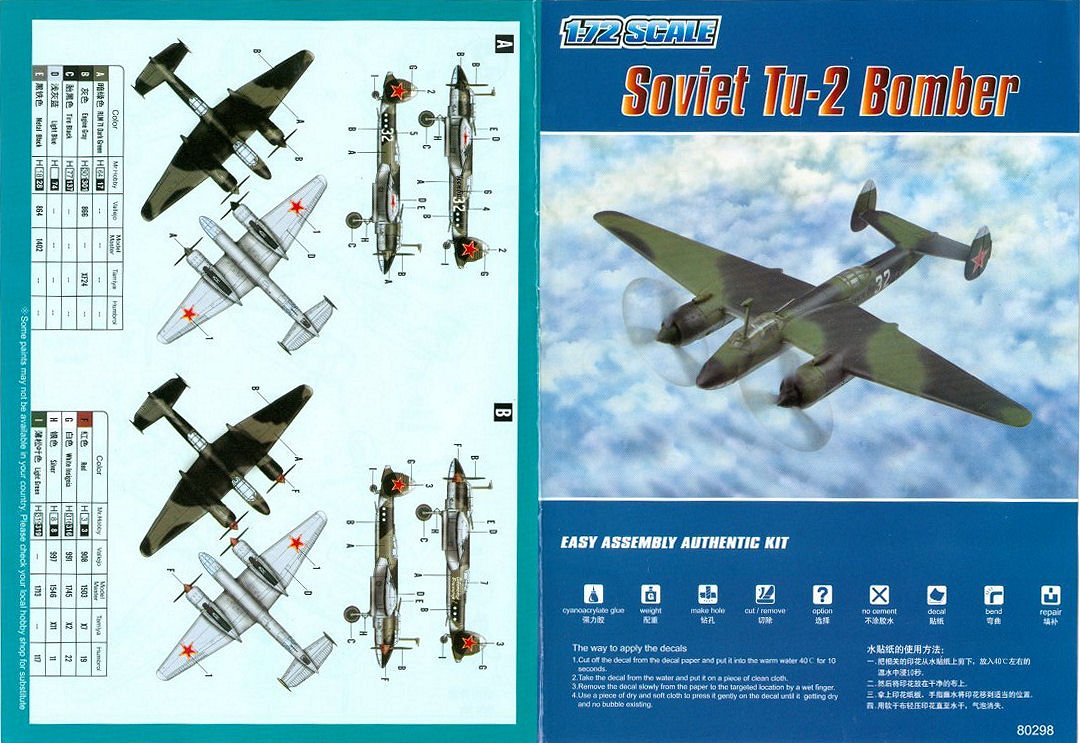
Instructions
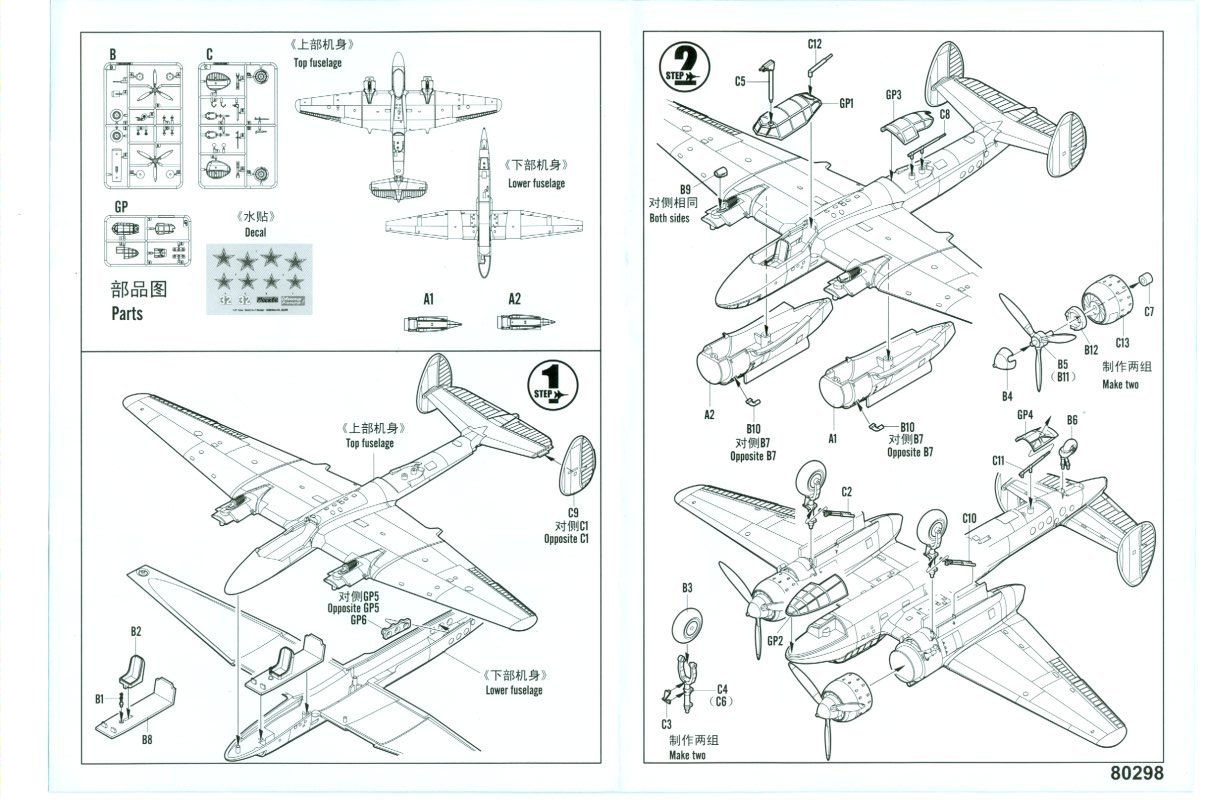
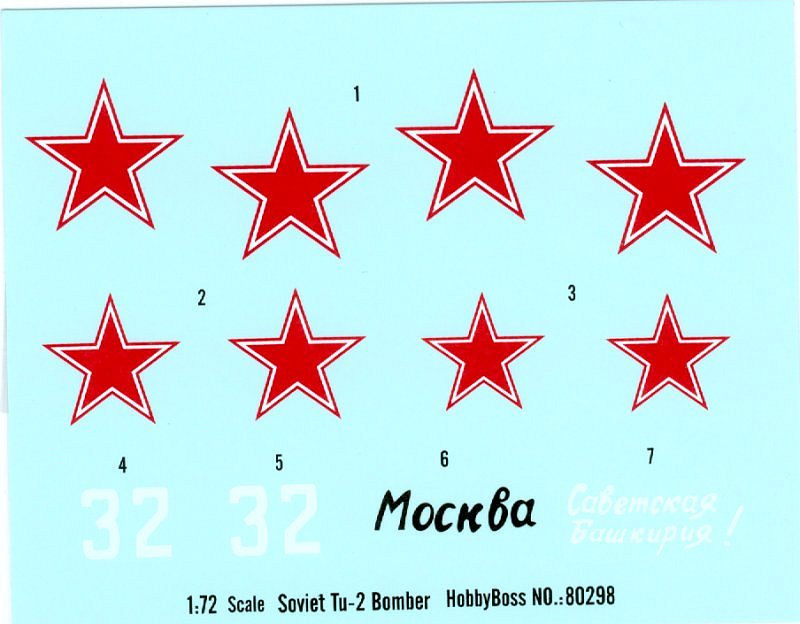
The Hobby Boss kit instructions are typical for this kind of kit. Page 1 has a color photo of the model plus instructions in English and Chinese on how to apply the decals. Page 2 has a sprue and decal diagram, plus the first exploded assembly drawing. Page 3 has the rest of the assembly drawings. No color information is given for such things as the cockpit interior, gear wells, landing gear, props, etc. The last page has two four-view drawings giving two alternate color schemes, although neither drawing identifies a specific aircraft or unit. Camouflage patterns are the same, and there aren’t enough decals for the modeler to become confused as to where they go. A regular three-view general arrangement drawing would have been helpful, as also would a cockpit interior diagram. I went online and found reviews for other kits which showed some cockpit details, as I wanted to put more than a seat and a control stick inside.
The Kit
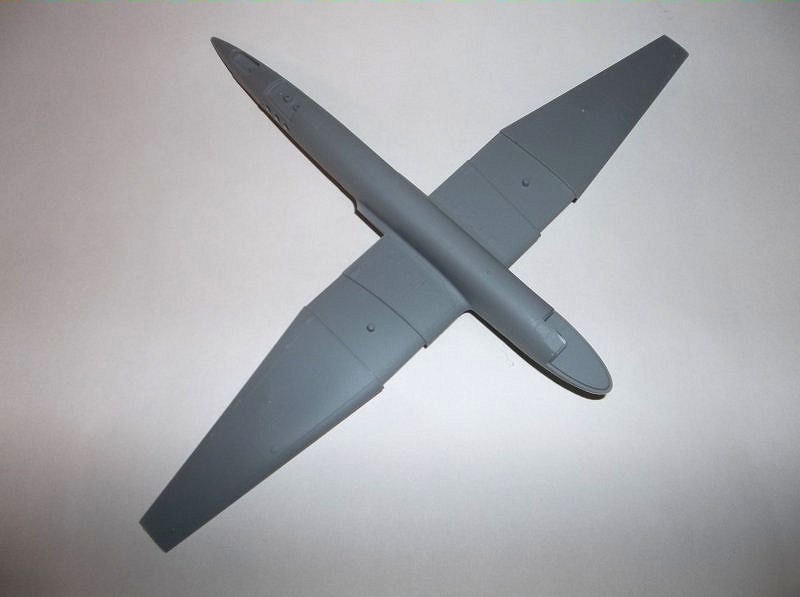
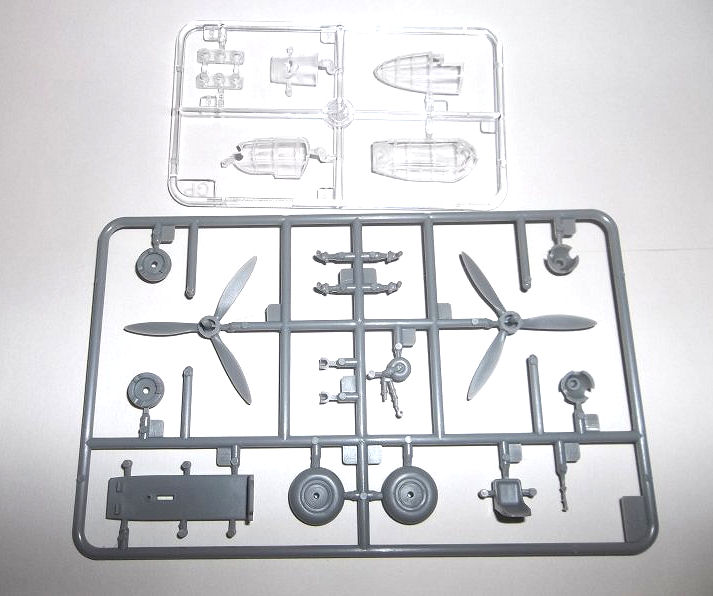
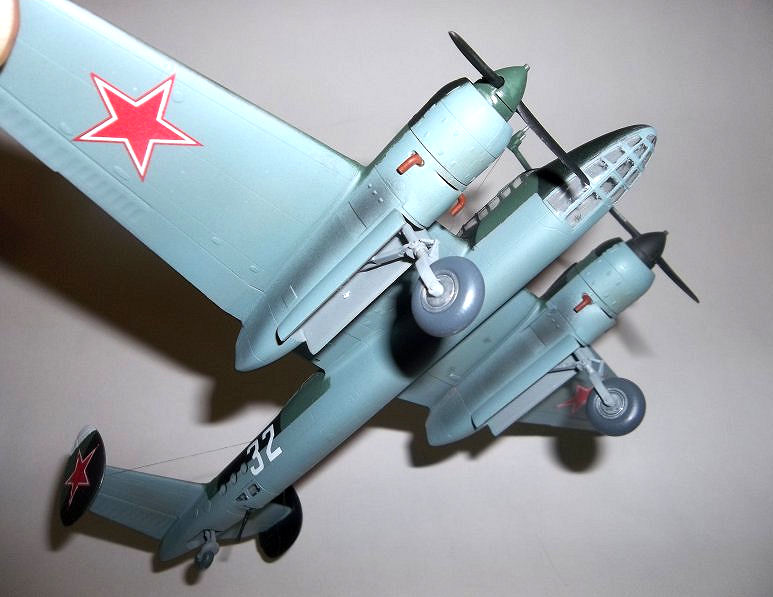
Typical of recent Hobby Boss offerings, this is a kit designed for inexperienced modelers. It consists of about 40 grey plastic parts and six clear ones. The parts are crisply molded with excellent recess panel lines. The kit exudes simplicity with the major wing-with-fuselage assemblies going together like a regular kit to provide built-in dihedral, unlike normal kits. The engine nacelles have the landing gear doors molded in, while the wheel wells have no detail except holes for the landing gear assemblies. The props consist of three major parts – the prop, the spinner, and the rear spinner section. When in place, there are small plastic washers that fit onto the crankshafts, and a spot of glue holds them in place while allowing them to turn. The engines fit onto the nacelles snugly, and four small exhaust stacks can be added later after painting. The rudders fit onto the stabilizers very securely, and the landing gear and tail wheel are easily attached. There are a LOT of sprue-join lines all over the airplane, including inside of the wheel wells. These can be easily trimmed off, but they are sometimes had to spot, so examine the model carefully before you paint it.
The cockpit provides a floor, a control stick, and a seat. The control stick should be replaced by a yoke of some kind. The rudder pedals are about six feet in scale from the seat, which means either they are out of position, or Russian pilots had VERY long legs. I just moved them closer in. There is no instrument panel, and this should be added. Each gun position includes a long “stick” which plugs into two receptacles in each gun position, except for the gunner’s position behind the pilot. I replaced these with small machine gun barrels from the spares box, and this worked out very well. The kit depicts a major production model of the Tu-2, possibly the Tu-2R or the Tu-2S, which had only one window in the rear fuselage instead of three on each side. Check your photos on this one, as it can get confusing, and even the Tupolev book is not clear on this issue. In addition, there is a small slot behind the cockpit gunner’s position. This is hardly noticeable, but should probably be filled in.
Assembly
What can you say about assembling a Hobby Boss kit? You could almost assemble one from across the room. The parts snap together, and although some kind of glue is required, you won’t need much. A serious modeler would trim out the gun positions and detail the interior, but there are other Tu-2 kits (Encore’s, for example) which provide more interior detail and a lot less work. Actually, Flugzeug-Modellbaukasten in East Germany issued a kit of a late model Tu-2 many years ago, and it is not nearly as good as the Hobby Boss kit, although it has the four-bladed props. I just detailed the cockpit somewhat, and left the other glassed-in enclosures pretty much as they were, although the new machine guns did a lot for the kit. The only diversion I made was not using the small three-window clear parts for the rear windows. I just used Crystal Clear, and it worked quite well. Just dab a little in each hole, and presto! – you have a window as soon as it dries. One questionable part is the pitot tube, which mounts on the pilot’s canopy. It looks a little heavy, and should probably be replaced by a more petite unit. Check photo references for this one.
Painting and Finishing
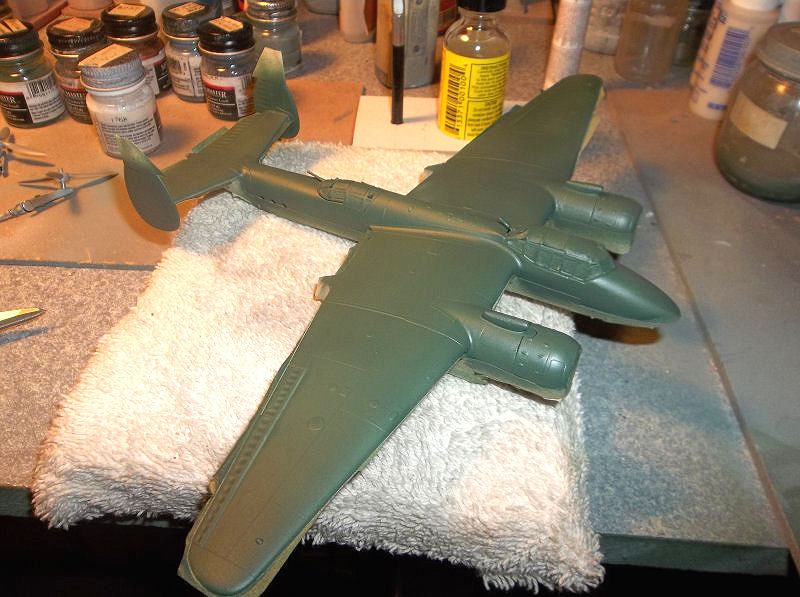
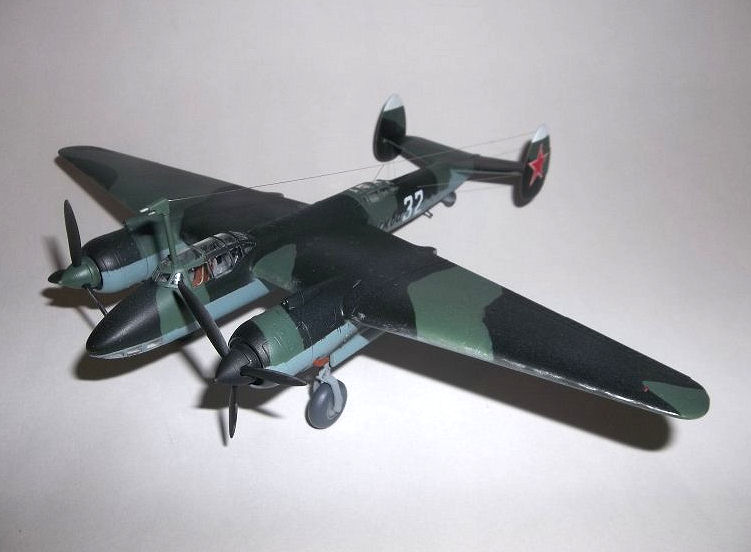
Once it was basically assembled, I masked off the canopies and proceeded to paint the exterior. I used Model Master Russian colors, including the underside blue and topside green. The other color was black, and it was the final coat. I trimmed the decals as closely as I could, and they look pretty good on the model. I did a little bit of weathering and dirtying-up, and added some paint chipping.
Recommendation
The end result is a very acceptable model, although lacking somewhat in interior detail (which is to be expected for this kind of model). A kid could put one of these together in an afternoon and come out with a displayable model, and that’s the idea. Hobby Boss has a good concept in these kits, and I hope they come out with more of them, as the modeling population seems to be getting older and we need more kids involved. Even if you are an experienced modeler, these are fun and a good break from what you usually build. Or you could get this kind of kit for your kids or grandkids and get them started. Try one! They’re a lot of fun.
Thanks to Hobby Boss, Squadron, and Dick Montgomery for the review sample.


Comments
Add new comment
This site is protected by reCAPTCHA and the Google Privacy Policy and Terms of Service apply.
Similar Reviews