
M54A2 5-Ton 6x6 Cargo Truck
Background
Excerpted from Wikipedia:
The M54 5-ton 6×6 truck (G744) was the basic cargo model of the M39 Series truck. It was designed to transport a 10,000 lb., 14-foot long cargo load off-road in all weather. In on-road service, the load weight was doubled. The M54 was the primary heavy cargo truck of the U.S. Army and U.S. Marine forces during the Vietnam War and was also used by the U.S. Navy, U.S. Air Force, and ARVN forces.
The M54 truck was used as the base vehicle for Gun Trucks during the Vietnam War. Field-applied armor added protection to the Gun Trucks, and armament consisted of various combinations of weapons including M60s, .50-calibre machine guns, XM 134 miniguns, and anti-aircraft weapons such as the quad mount .50 cal. machine guns. Early 2 ½ ton trucks proved inadequate leading to their replacement by M54 five-ton cargo trucks.
AFV Club’s M54A2 Kit
AFV’s kit can be the basis for modelers wanting to create a Vietnam era Gun Truck. After the kit is built for this review, I plan to modify the truck into a Gun Truck using a Real Model conversion set.
AFV’s kit has positionable front wheels, canvas top and hard top options for the cabin, and the optional canvas tarp for the truck bed. The cabin doors can be posed open or closed. The kit has a nicely detailed chassis; however, no engine is included. The hood can’t be posed open without modifying the hinges, and the cargo bed benches can be posed up or folded down.
Contents of the kit include 13 plastic sprues, one clear plastic sprue, poly caps for the wheels, cab canvas roof, and cargo bay canvas roof. A small decal sheet and very small photoetch fret is included, as well as a length of black thread and a small brass chain.
The instructions are in a 16-page stapled booklet with 30 assembly steps. Paint colors are listed in Hobby Color, Mr. Color, Mr. Color Spray, Humbrol, Revell, and Lifecolor paint numbers. The instructions include English and Chinese descriptions of the history of the vehicle and include diagrams of many M54 5-ton cargo truck variations. The instructions include a diagram of the sprues, and AFV includes a small poster of the box art. The back page includes marking options for three Vietnam era trucks, numbers 317, 216, and 116, all from the 523 Transportation Company. Each of the options include the yellow hood stripe signifying the 8th Transportation Group.
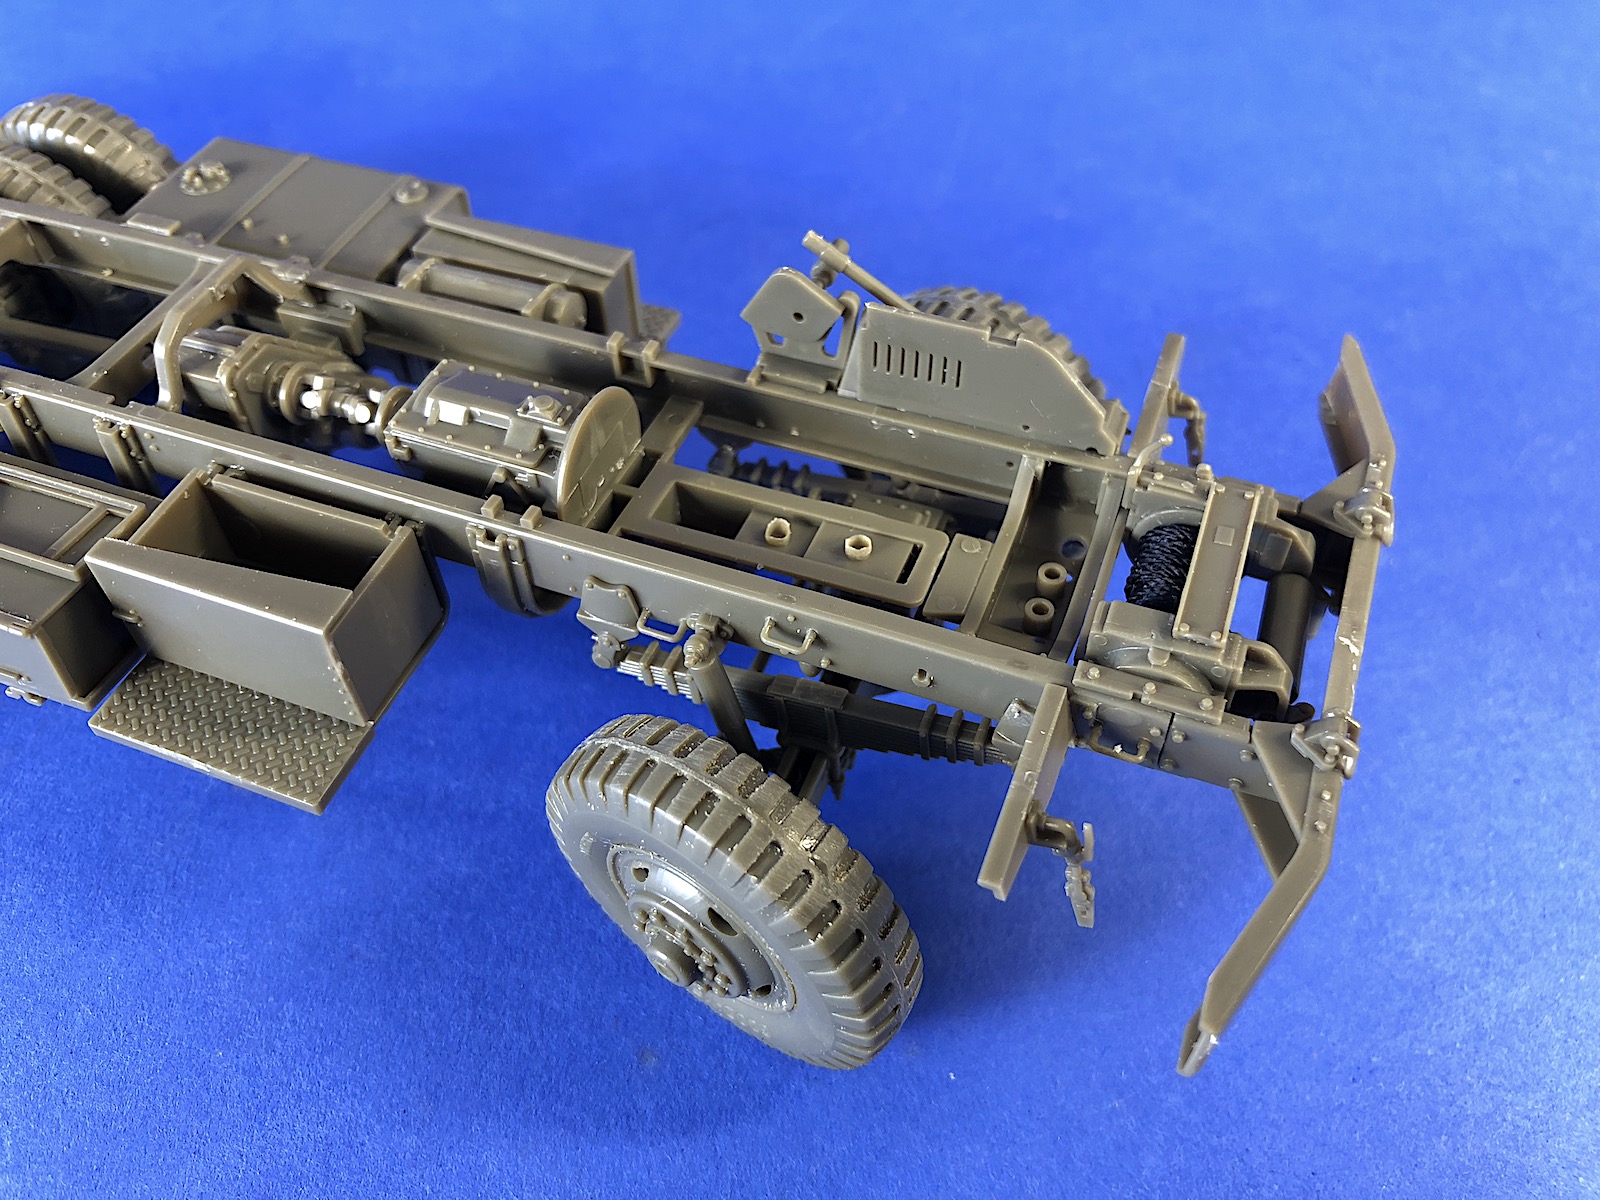
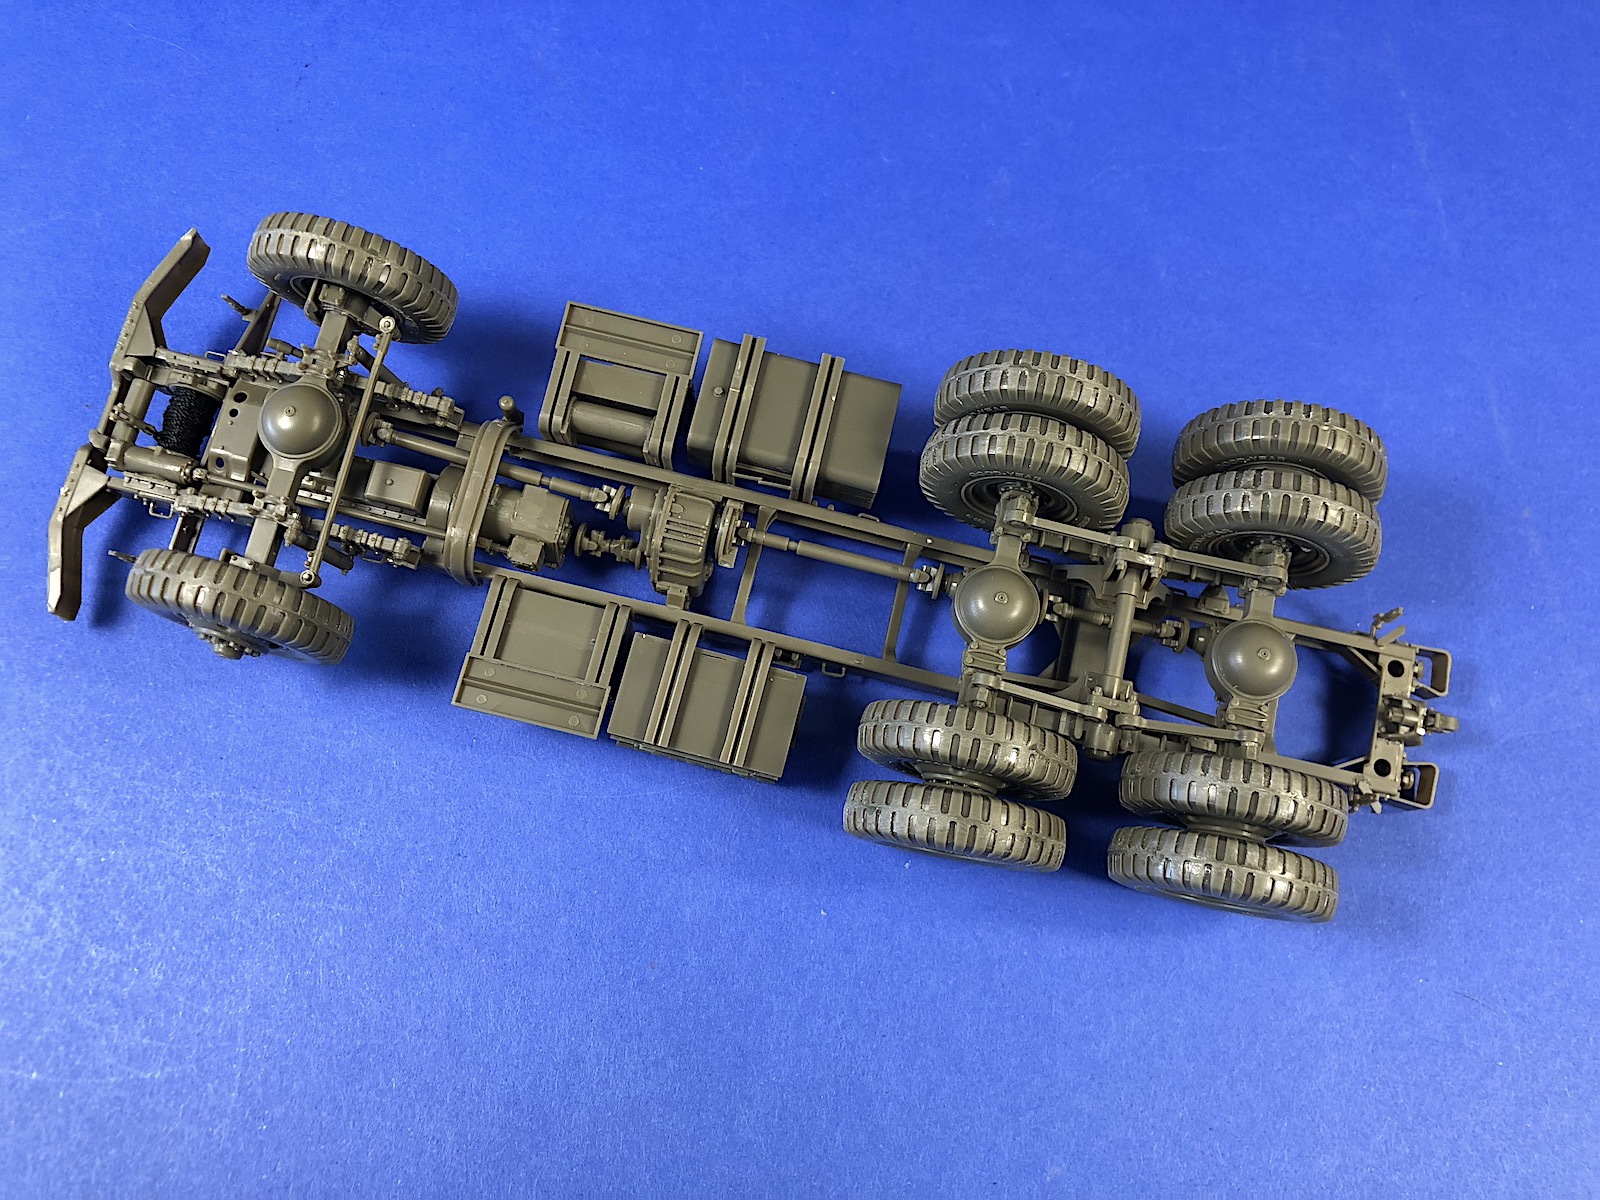
The parts are molded in a light olive drab color and have very nice detail. Most of the parts have a very small mold seam that is easily cleaned up. AFV uses pins, sockets, recesses, etc. to align parts, and they fit extremely well.
Kit Assembly
Assembly begins with the chassis in the first 13 steps of the instructions. The chassis for this vehicle is a very heavy duty, which is reflected in the numerous parts of the kit. The fit of the parts is excellent, which helps to ease the assembly.
Step number 1 assembles the front chassis mounted winch. The winch drum fits very tightly into the side brackets and doesn’t allow rotation. I sanded the rims of the drum and cleaned out the recesses to allow the drum to rotate. This will allow aligning the cable in the best position. AFV provides a link of black thread to be used for the winch cable.
In step 5, AFV provides poly caps for the wheel drums, which allows the wheels to rotate and be removed for painting.
The steering arms snap over pins on the front axle in step 8. This will allow the steering arms to turn. Parts B4 are installed over the steering arms to hold them in place. A tie rod, part C 15, ties the steering arms together so the wheels stay parallel when turning. The tie rod snaps over pins on the steering arms to allow rotation. Do not glue the steering arms or the tie rod to allow positioning of the front wheels.
In step 10 the steering control rods are assembled to the chassis. There is an unnumbered part, C51, that is held in place by part C10. The steering control arms, part C50, connects part C51 to the link on the steering arm. The front end of part C50 snaps into C51 without glue. Do not glue parts C50 and C19 until the position of the wheel is determined, because this will prohibit further movement.
Steps 11, 12 add parts to the front end of the chassis including shock absorbers, outriggers, bumpers, and the front brake drums. In step 13 the wheels are assembled and placed on the chassis. The plastic tires are molded in halves with a center rib in the tread pattern. A touch of liquid cement and a quick sanding conceals the joint between the halves.
Steps 14 and 15 complete assembly of the chassis with pioneer tools, cab steps, storage compartments, and fuel tank. Four jerry cans are provided with the kit.
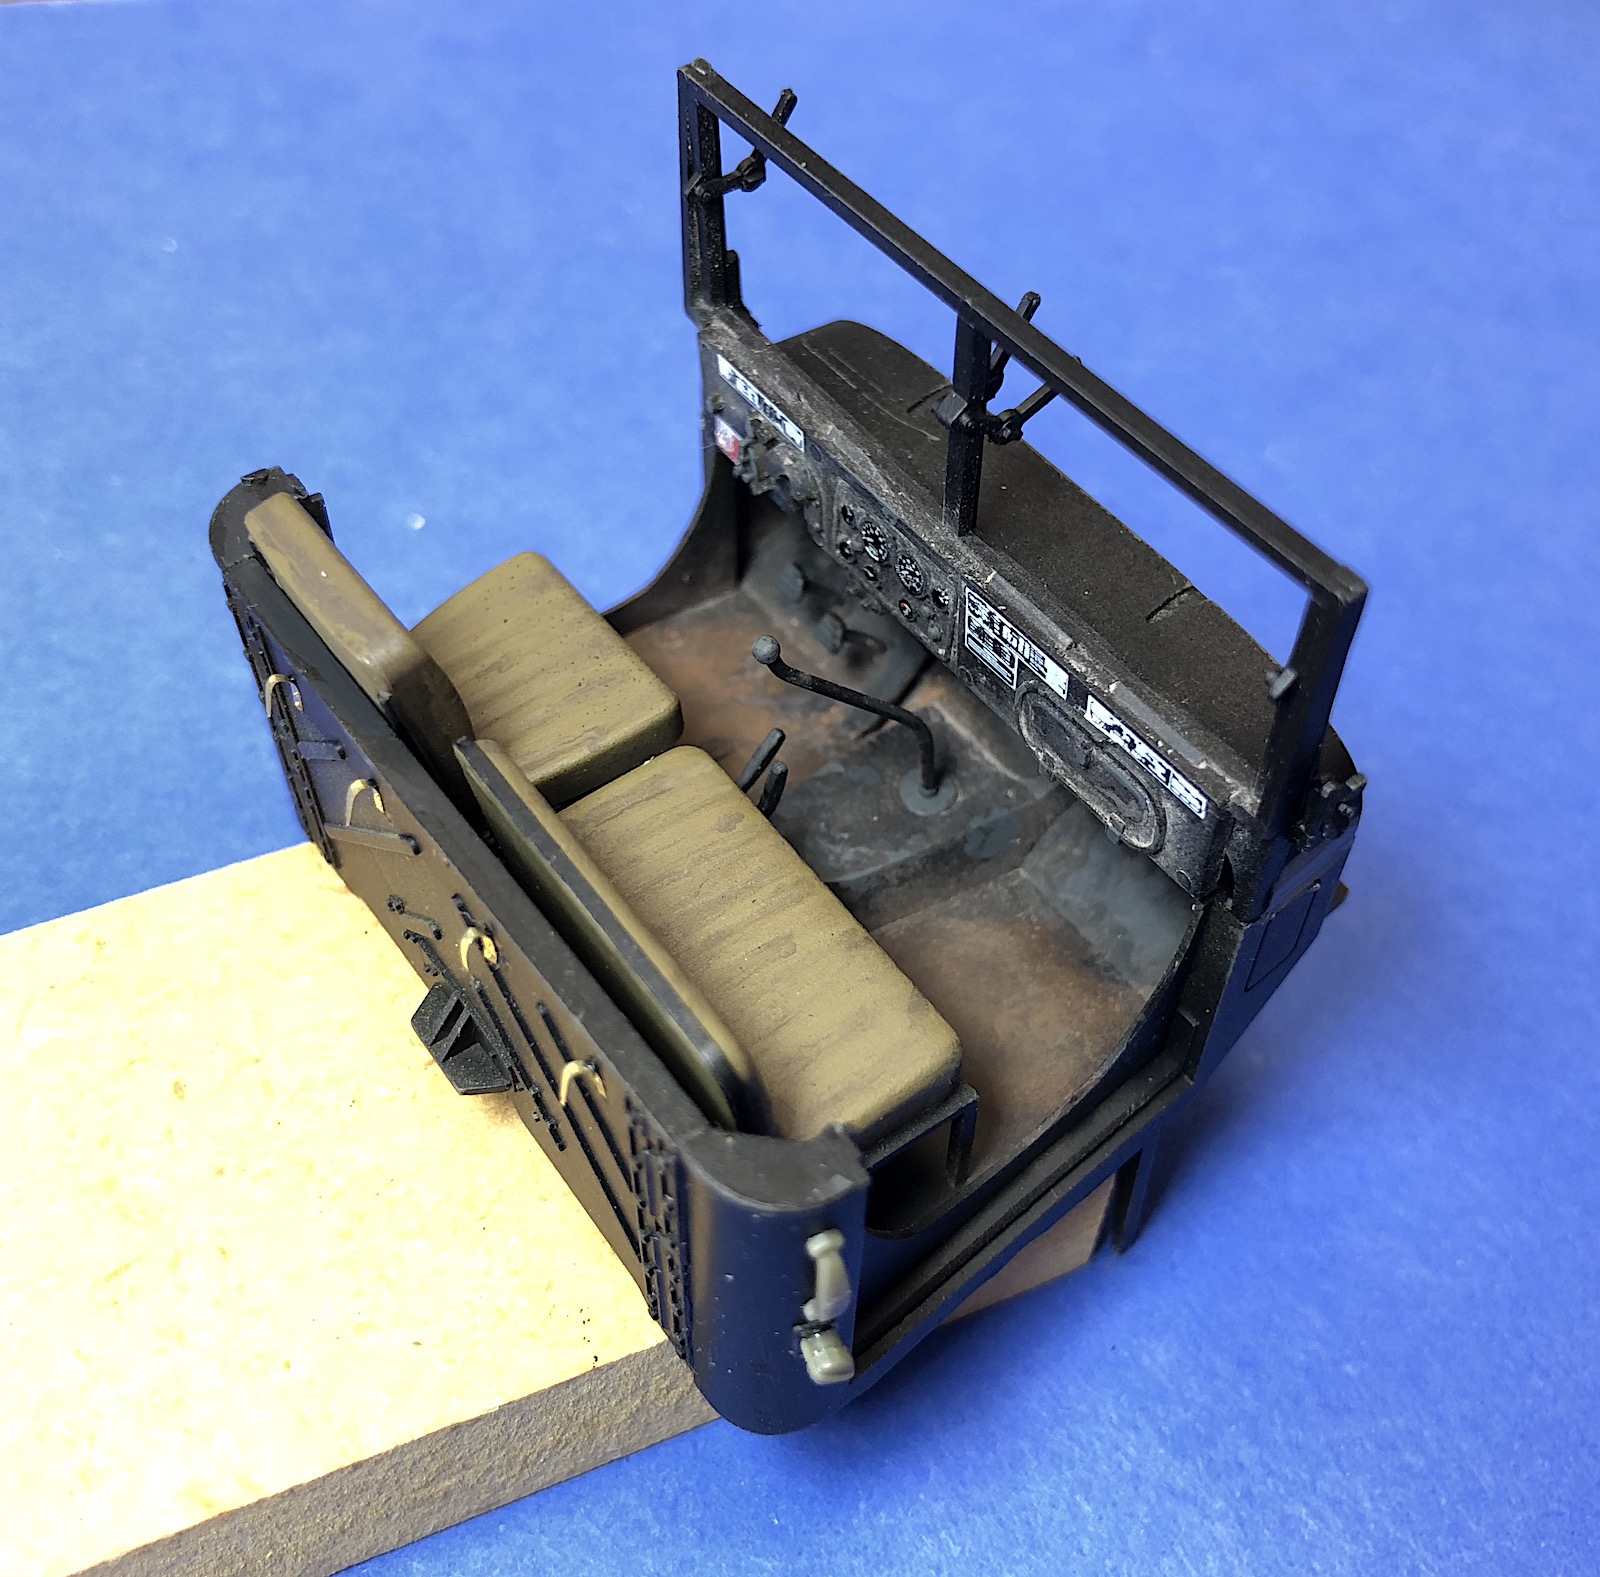
Still 16 assembles the cab interior, which is done without a problem. The front windshields are installed in step 17. The windshields can be posed closed or open, and brackets are provided for both options.
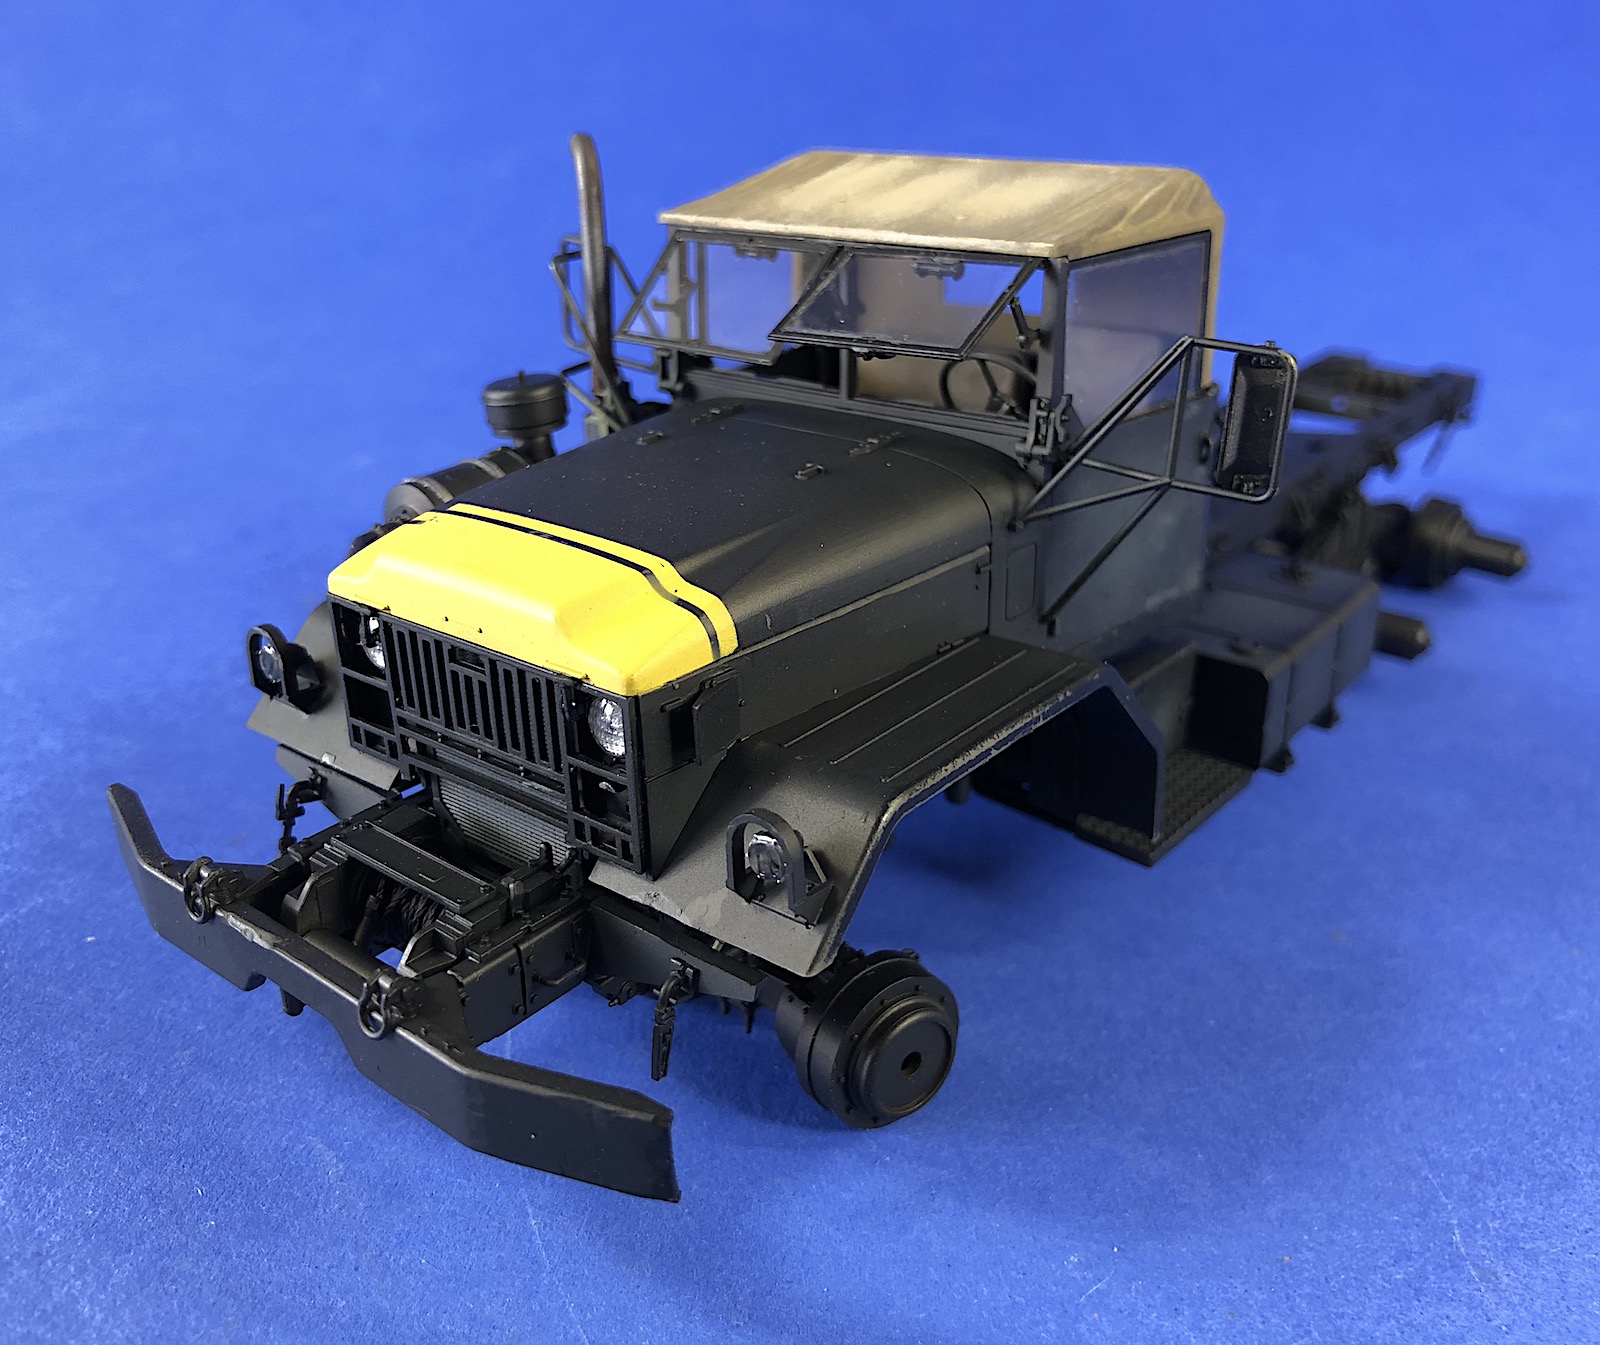
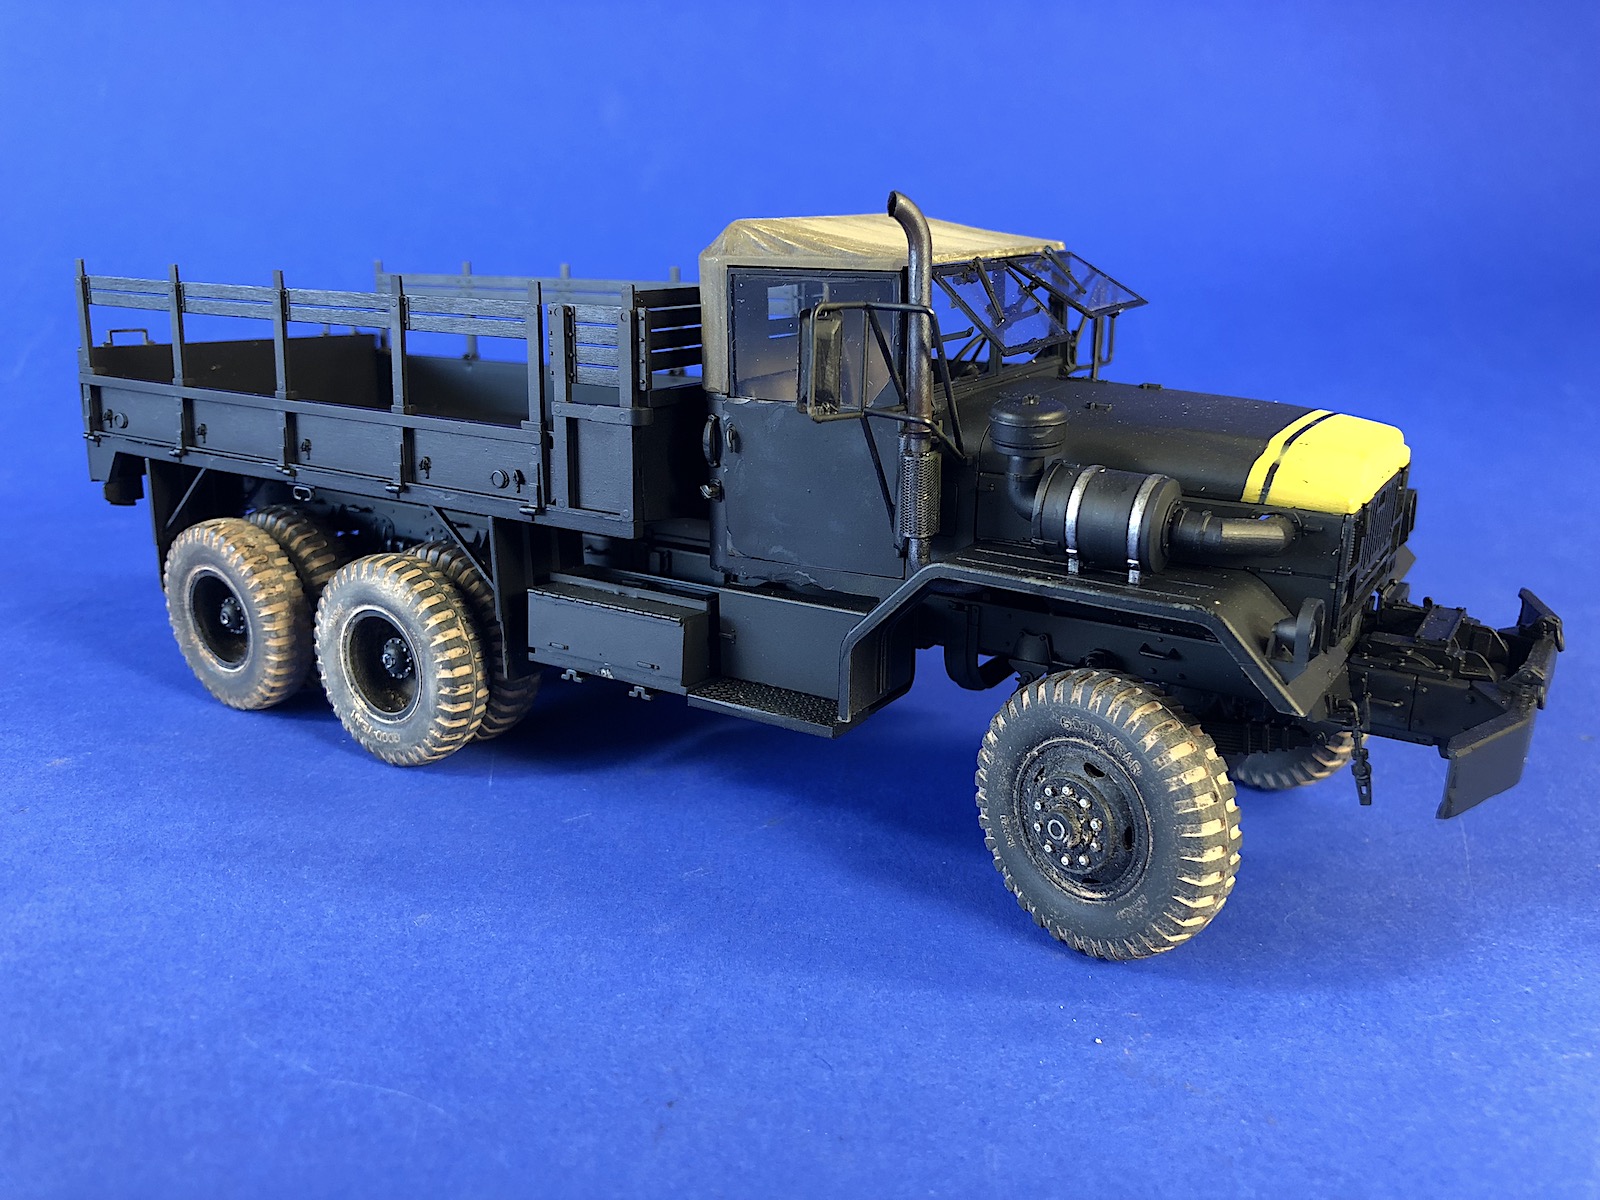
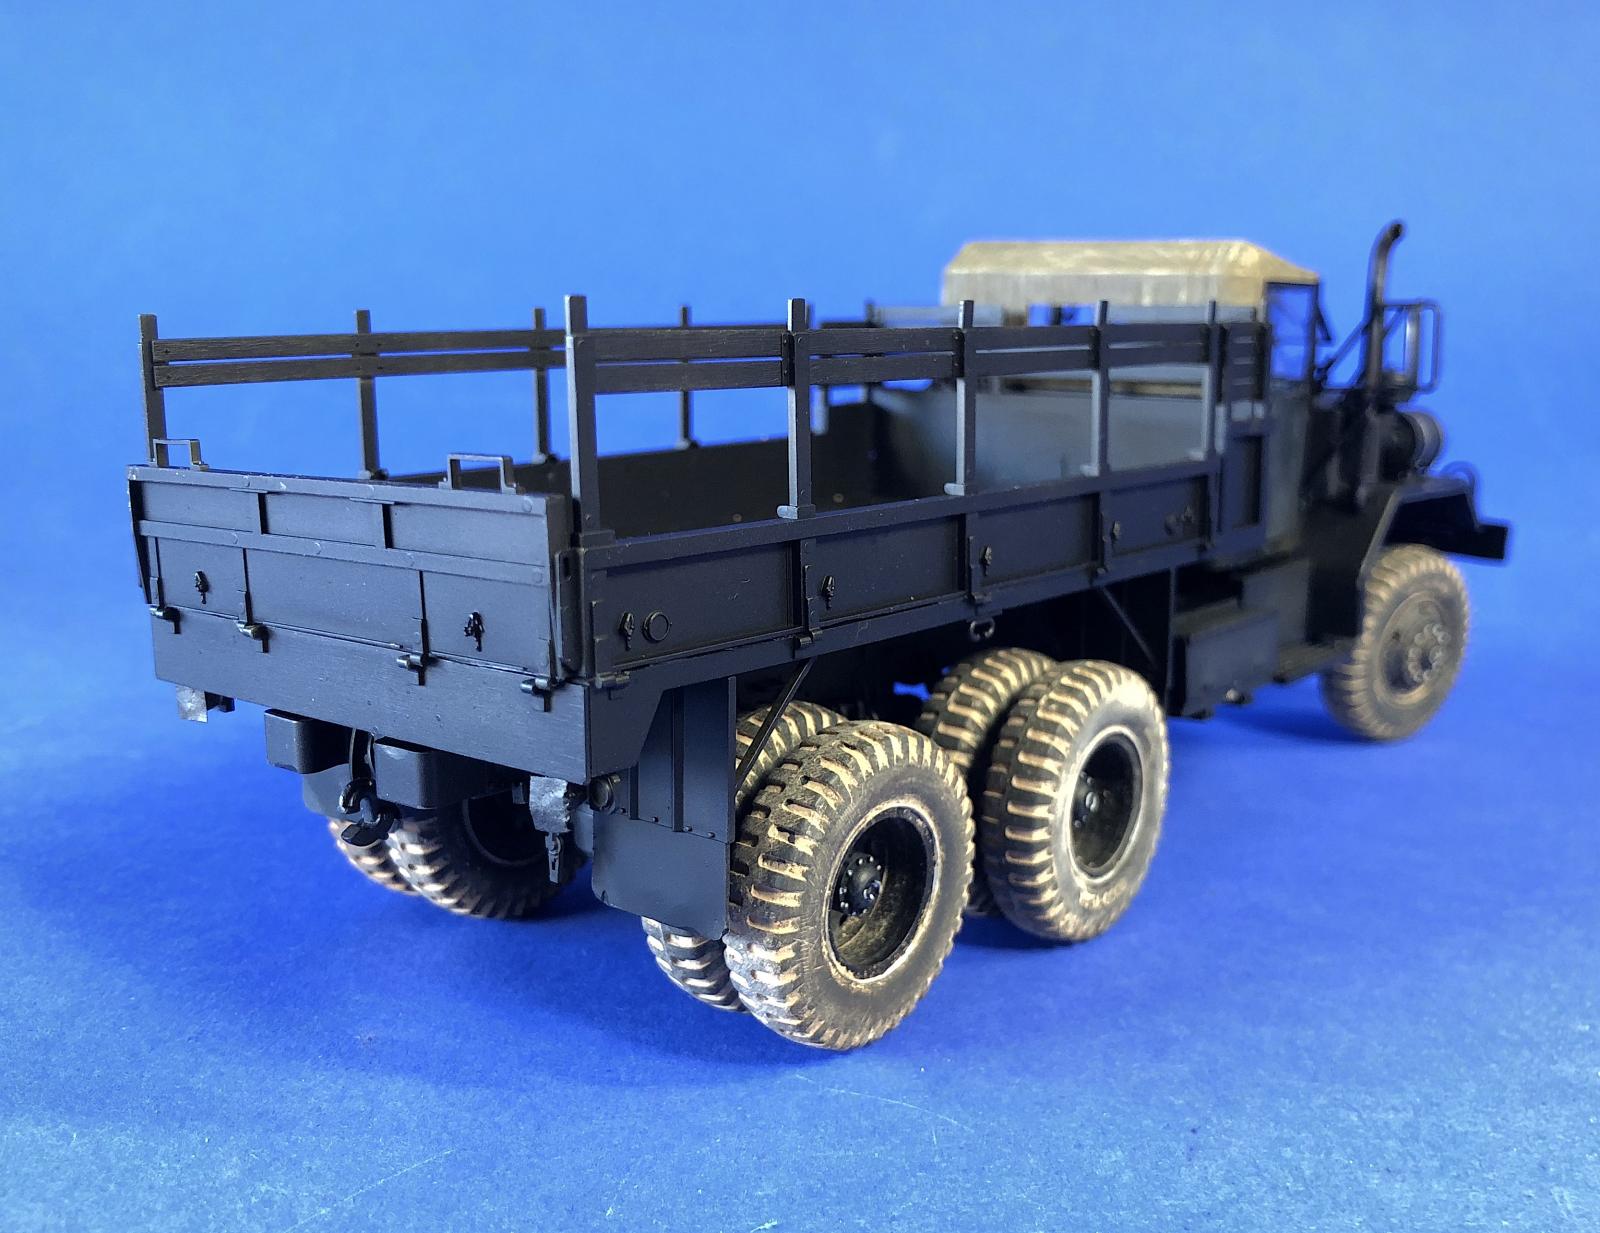
At this point, I painted the interior of the cab parts. After assembling the kit I plan to modify the truck into a Vietnam era gun truck using one of Real Model’s conversion sets. The gun trucks were typically painted black, so I used Mission Models black primer and black paint for the exterior of the vehicle.
Steps 18, 19, and 20 assemble the truck cab. All these parts fit very nicely without any issues. Two options are provided for the cab roof, part M2 is a canvas roof and part D29 is a hardtop.
The radiator and hood are assembled in step 22. There are no provisions for opening the hood as the engine is not provided. The hood fits flush with the side cowls, but reference photos show the hood overlapping slightly.
The exterior of the cab is completed in steps 23 through 25 with the assembly of the air cleaner, exhaust stack, grille, headlights, and side mirrors. The side mirrors are very delicate pieces. There are no mounting holes provided for the mirror frames, so I drilled some holes for the pins.
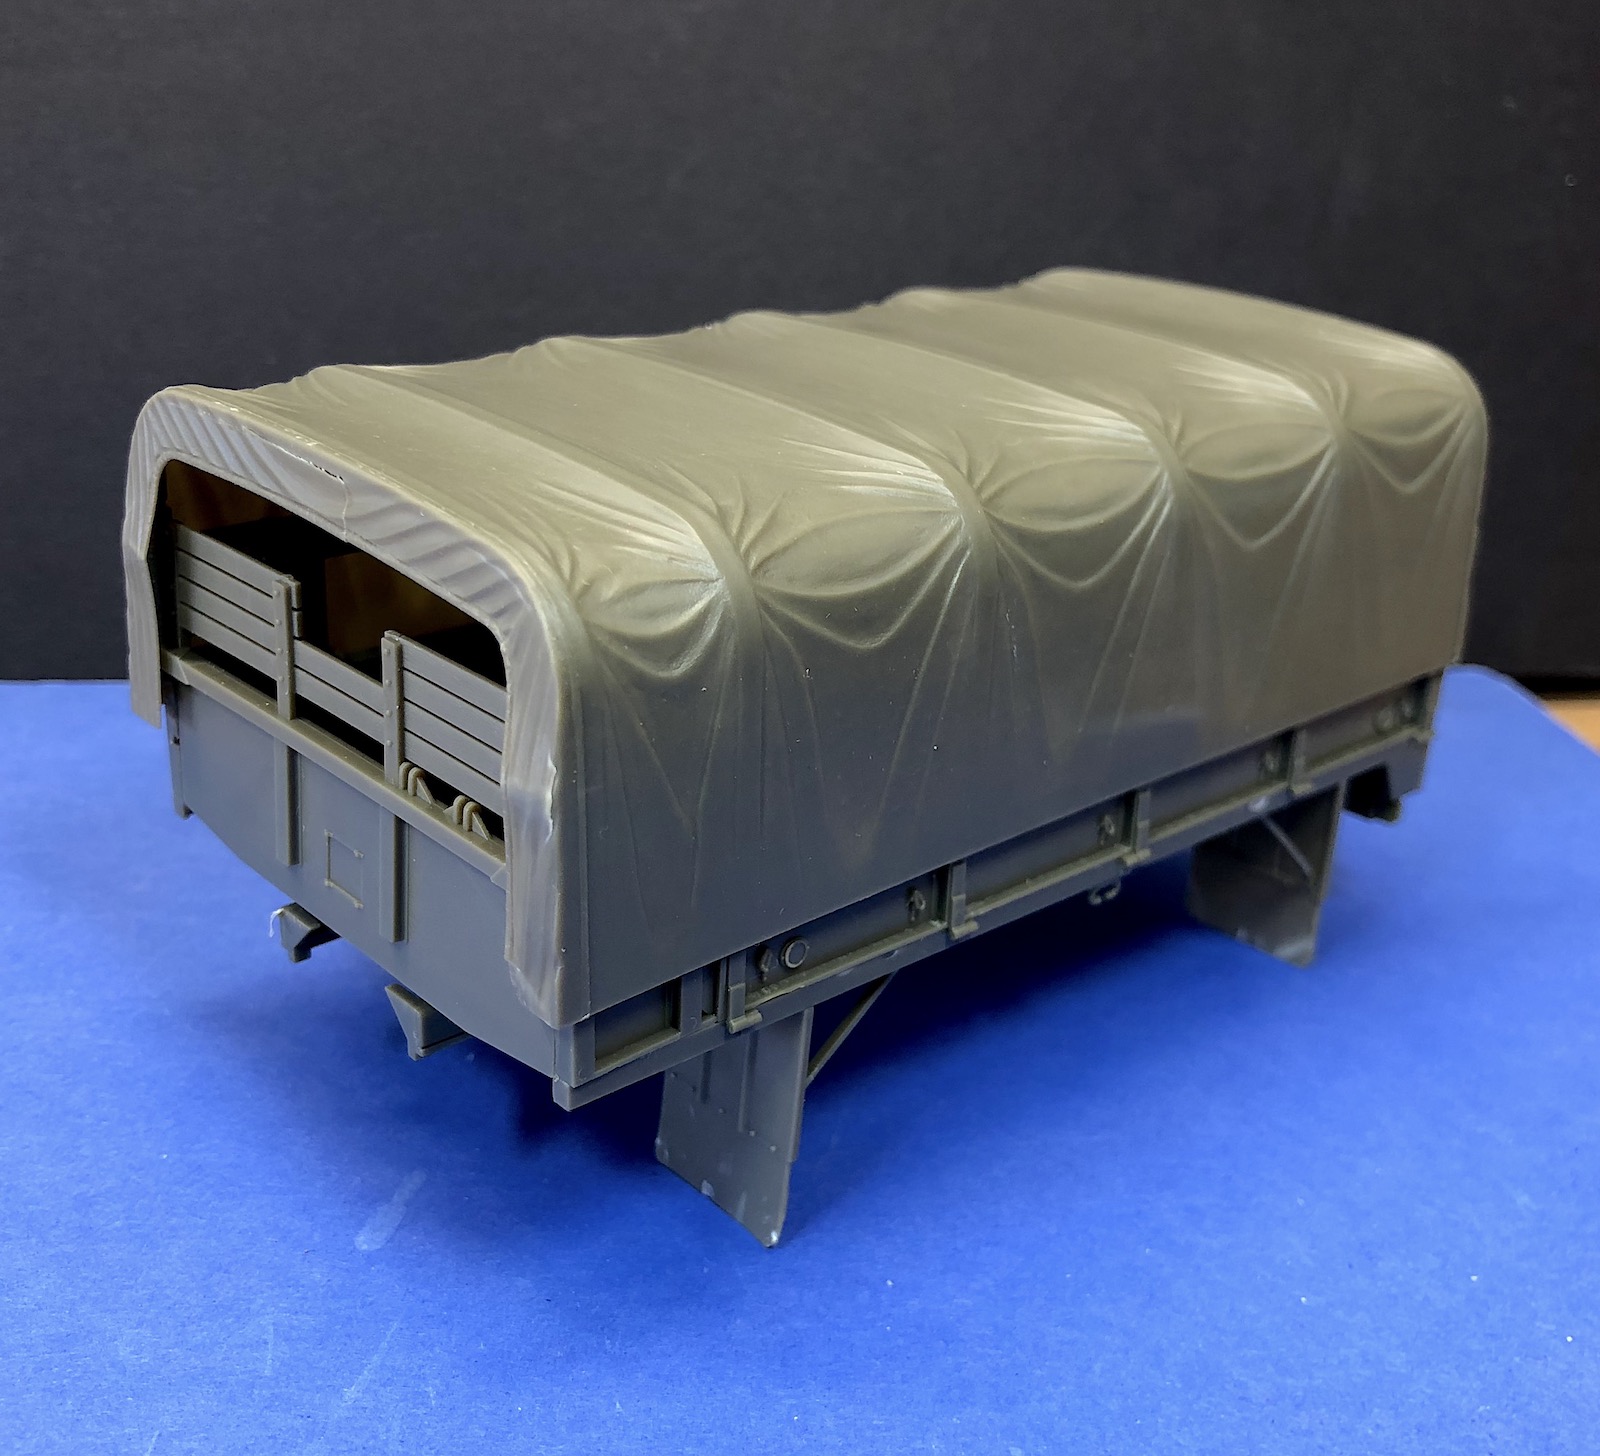
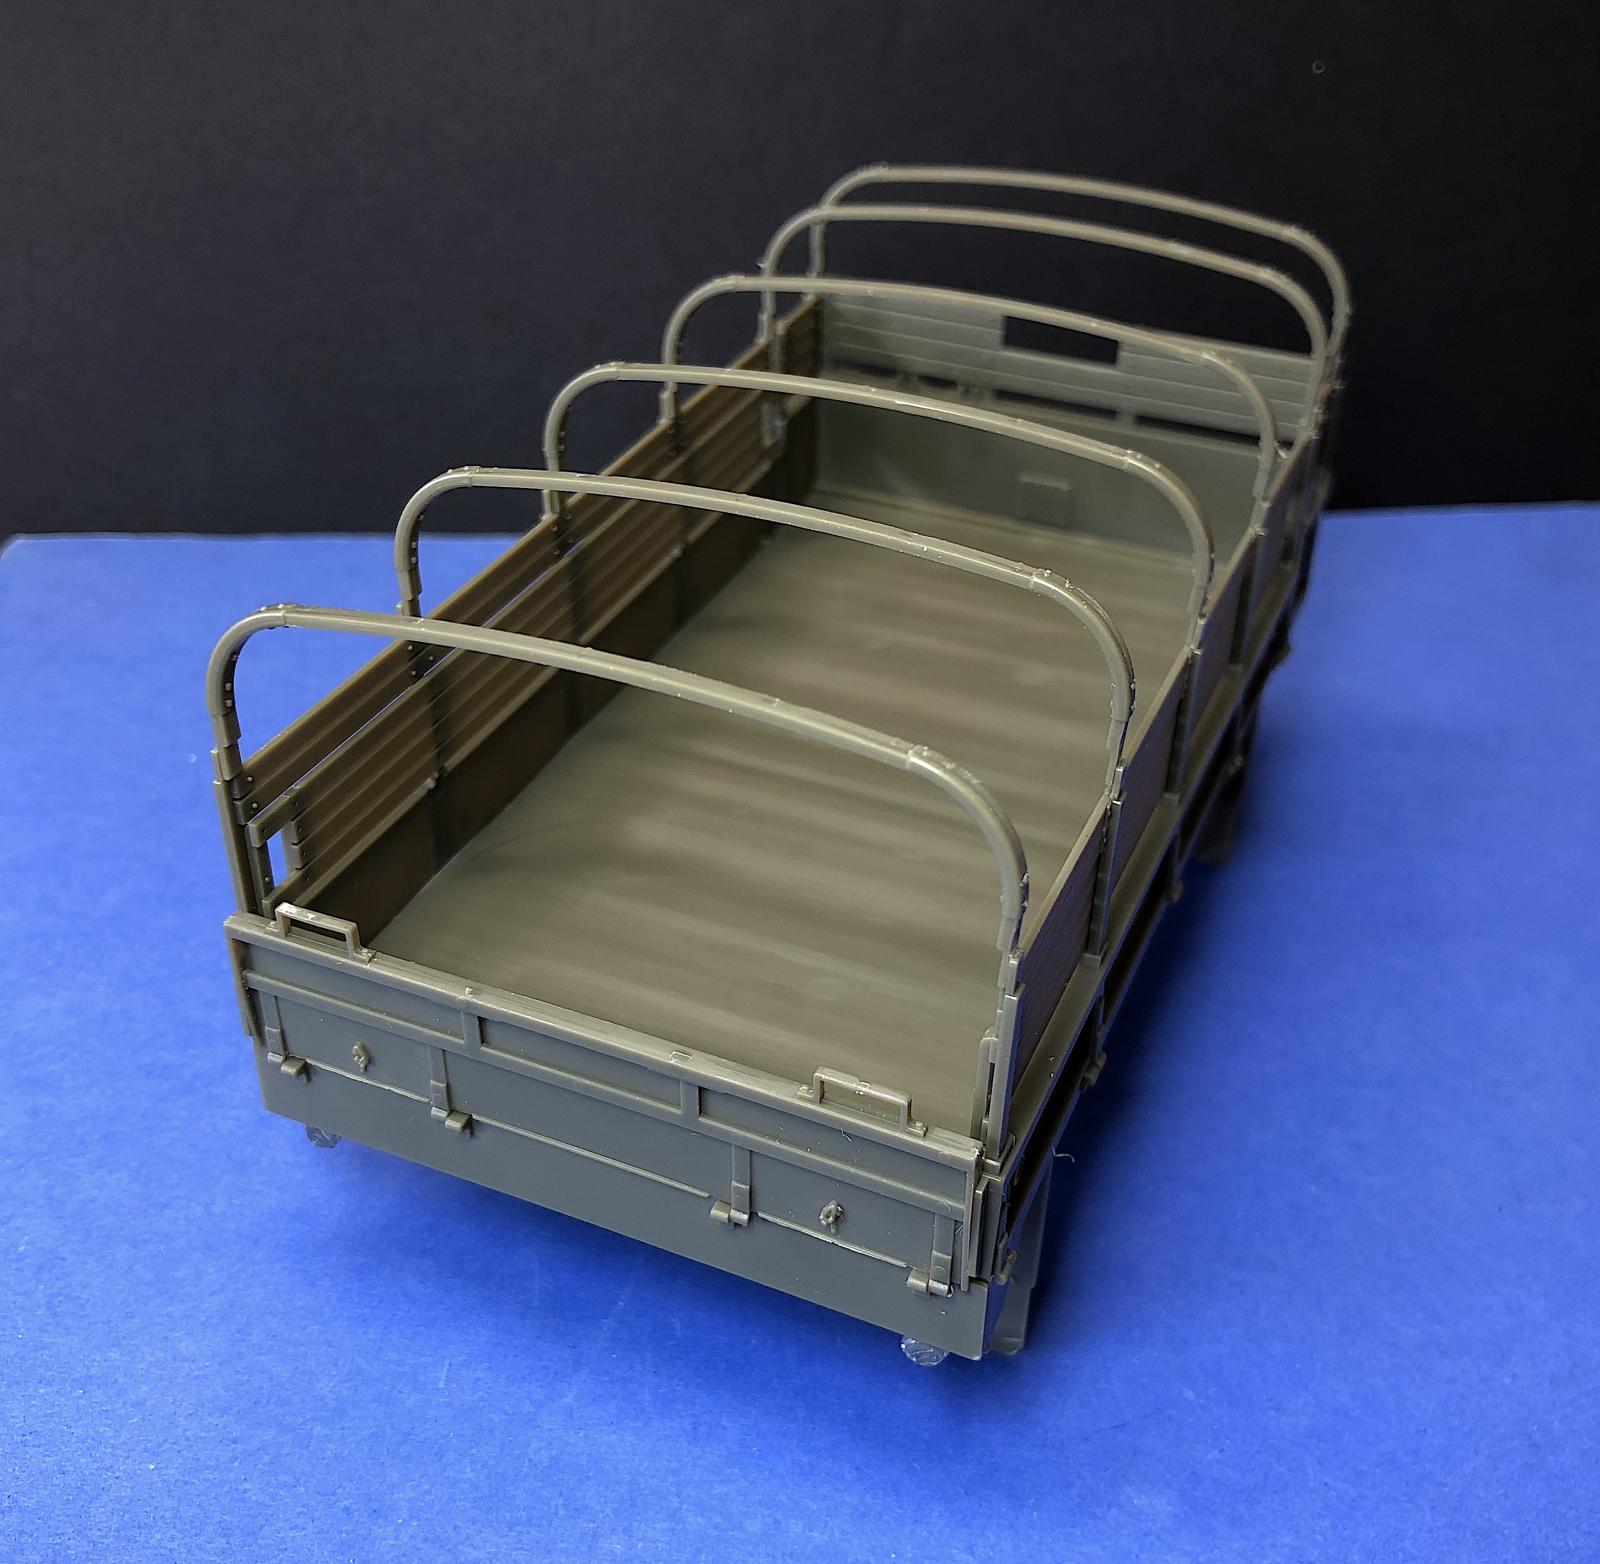
Steps 28 through 28 assemble the truck bed and benches. The truck bed is highly deformed with lateral dents over the supports. This is more realistic than a completely flat floor showing no wear, but this one really has been abused. The rear stakes are molded on to the side panels, and there is no provision to drop the sides. The benches can be posed either up or folded down.
Either the canvas top or the top hoop supports can be installed in step 29, but not both. The folds in the canvas top are unrealistically identical over each of the hoop supports.
The last step, number 30, installs the truck bed and the cab to the chassis. Some pressure was required to get the cab down, but it fit OK. Parts H3 seem to be brackets for the truck bed but I wasn’t sure where they should be placed. They didn’t seem necessary, so I left them off.
Summary
This is a great kit! The fit of the parts is excellent and go together very well. The kit has very nice detail, and the only omission is an engine. The kit may be challenging for less experienced modelers, but the nice fit for the parts will allow most modelers to enjoy this kit. Hopefully, AFV will a produce a gun truck and wrecker versions also!
Thanks to AFV Club for producing this great kit and furnishing the sample for review.


Comments
Add new comment
This site is protected by reCAPTCHA and the Google Privacy Policy and Terms of Service apply.
Similar Reviews