
Ki-84 Special Attack Units
History
The Ki-84 Hayate (Code name Frank) was born in early 1942 as a replacement for the Nakajima Ki-43 Hayabusa (Oscar). The first flight was in March 1943 with the first deliveries were made in April. The Ki-84 was a fast (427 mph), highly maneuverable, heavily armed (Two 20 mm & two 12.7 mm or four 20 mm OR two 20 mm & two 30 mm guns) and armored (armor protecting the pilot and self sealing fuel tanks) fighter. In the hands of a capable pilot it could hold it’s own against any allied fighter. It’s first combat was in the skies over China with it’s first major operational involvement being the Battle of Leyte in 1944. Around 3500 were eventually built and even though it was designed as a fighter it also performed the duties of a fighter bomber and Kamikaze.
The Kit
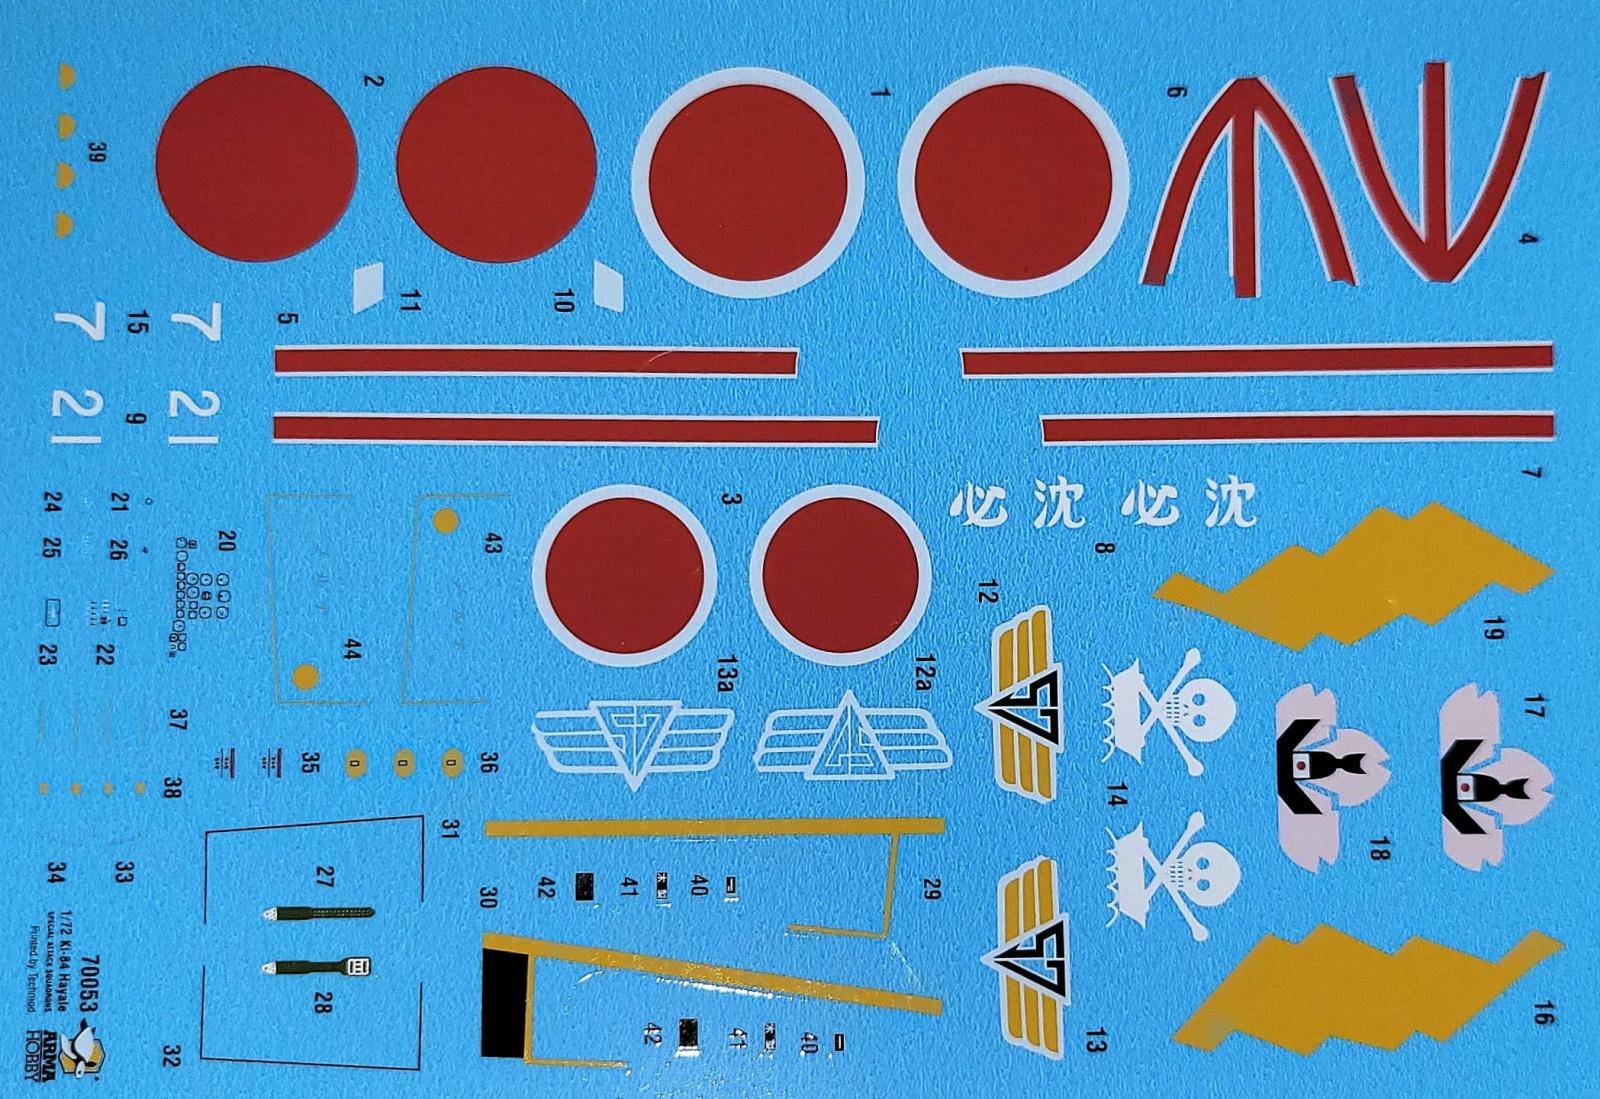
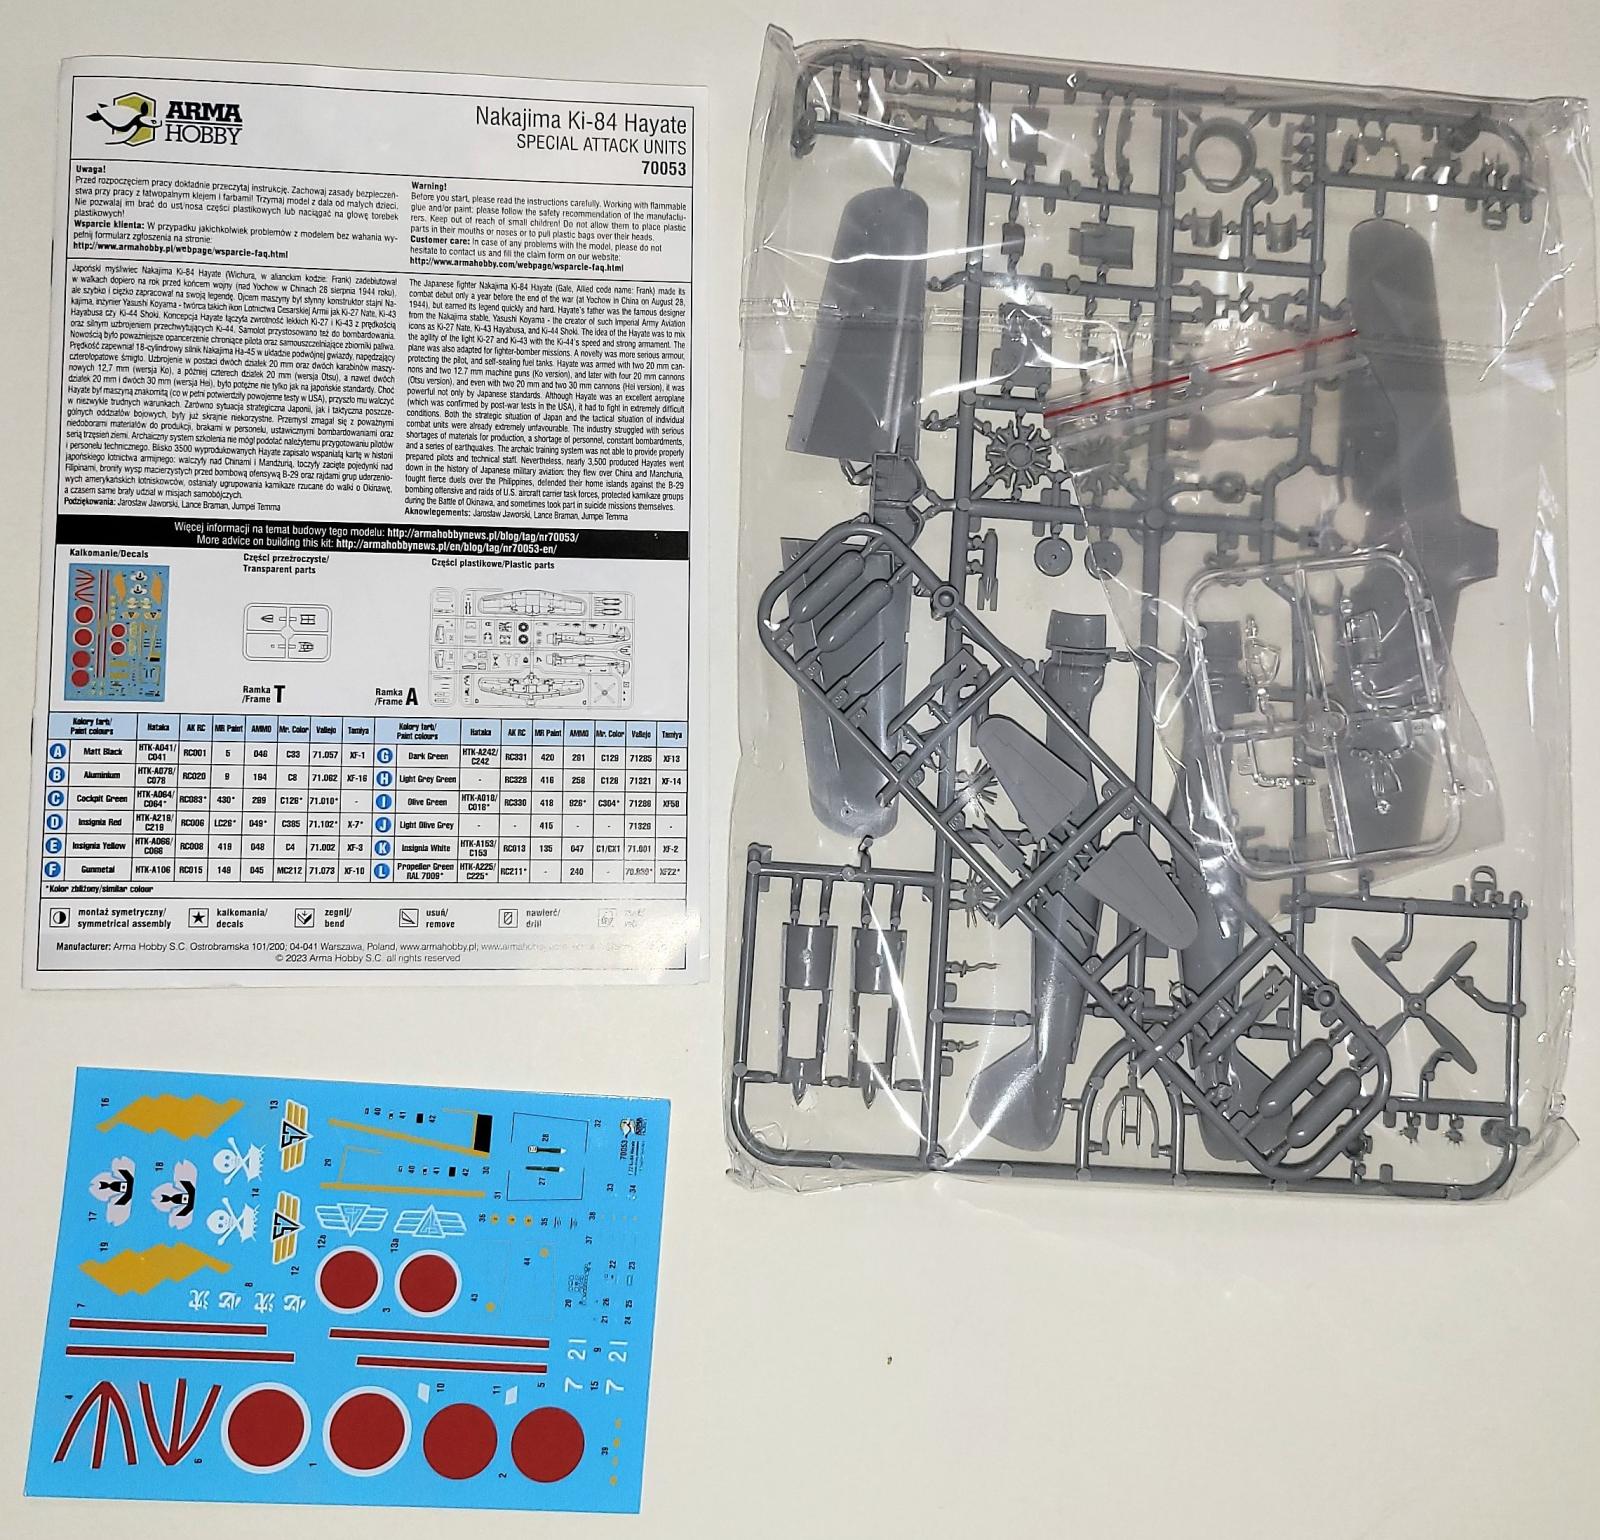
Upon opening the box you are presented with a bag containing one large and one small sprue of gray injected and one small sprue of clear parts. One sheet of decals and an 8 page color instruction book. The parts are finely molded with recessed and raised detail. The clear parts are very clean with no distortions. The decals are printed cleanly and are in register.
Construction
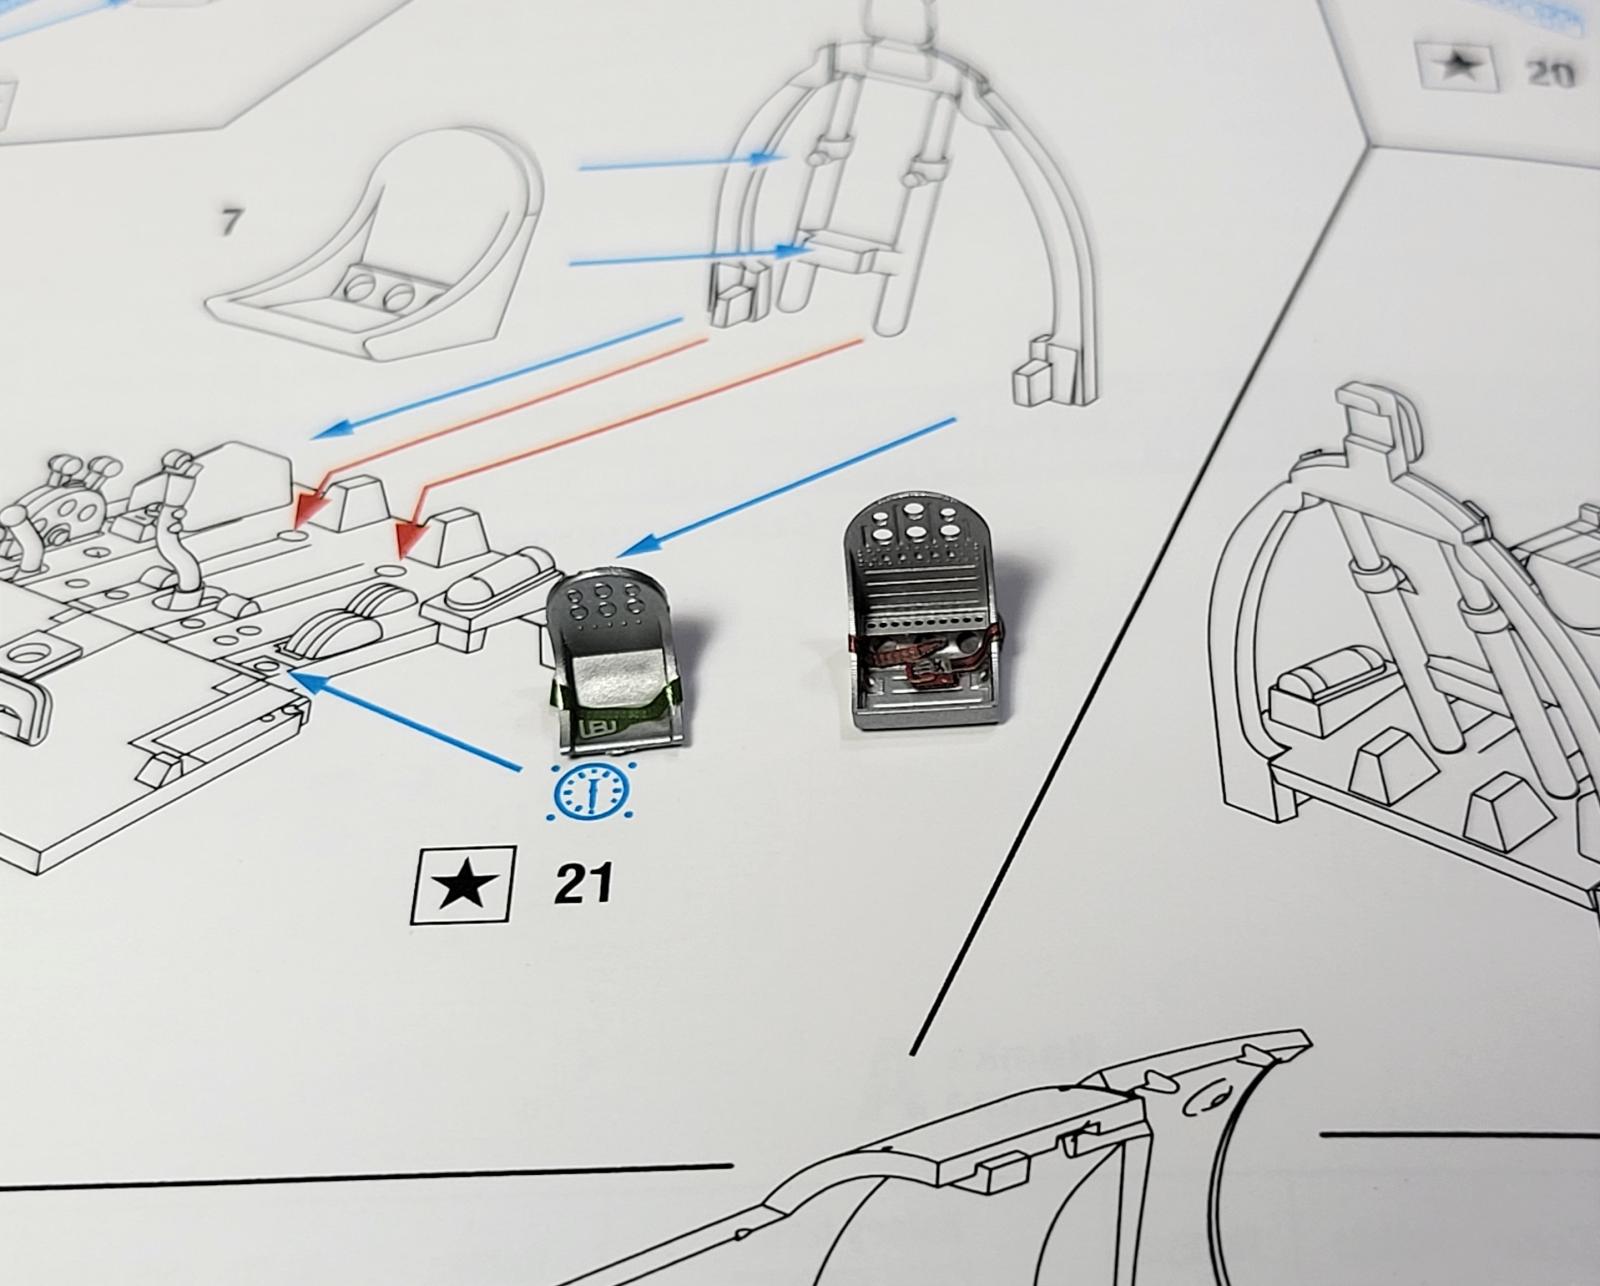
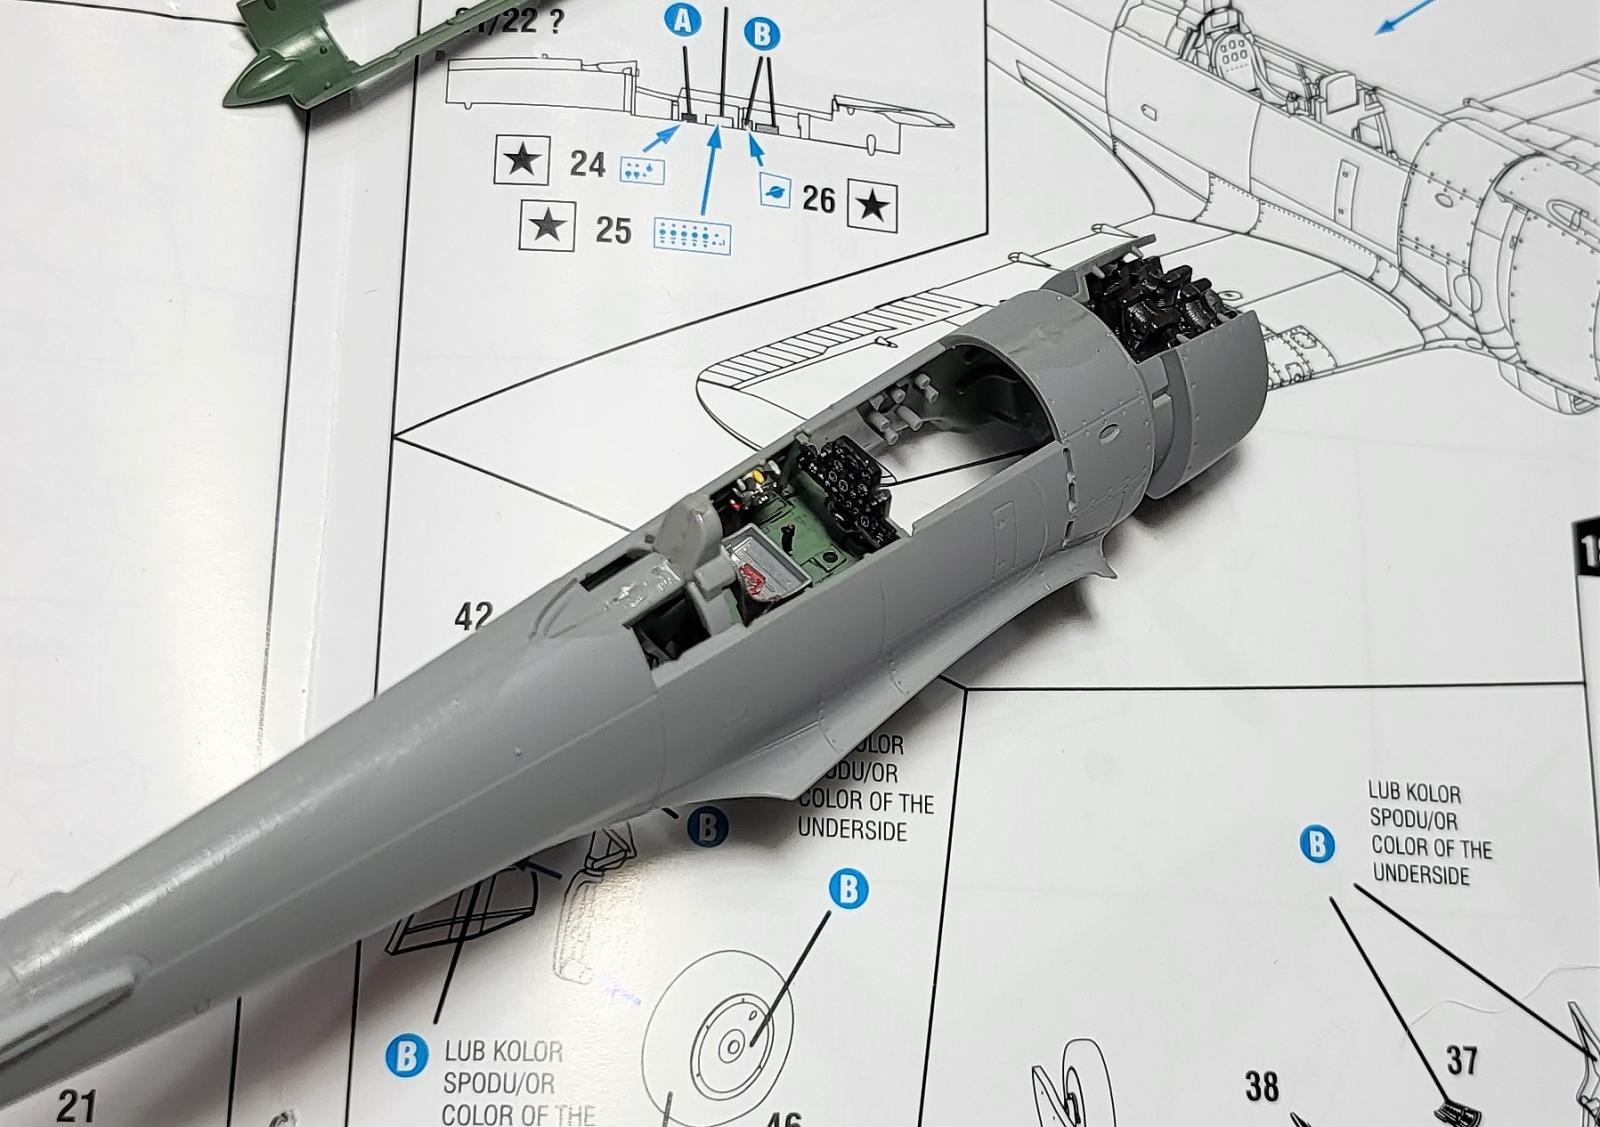
The first 8 of 23 steps needed to build this kit deal with the cockpit. Ten parts and five decals make up the well detailed pit and everything fit together well. Be advised that some of these parts are very small and care must be used when removing them from the sprue. One item I changed was the seat as it seams rather small so I used the Eduard ‘Print’ seat. Step 9 is construction and placement of the well detailed engine and I had just a small issue placing it. It has two tabs that fit into slots on the fire wall and three small tabs that fit into holes on the cowl. I had a less than easy time lining them up!
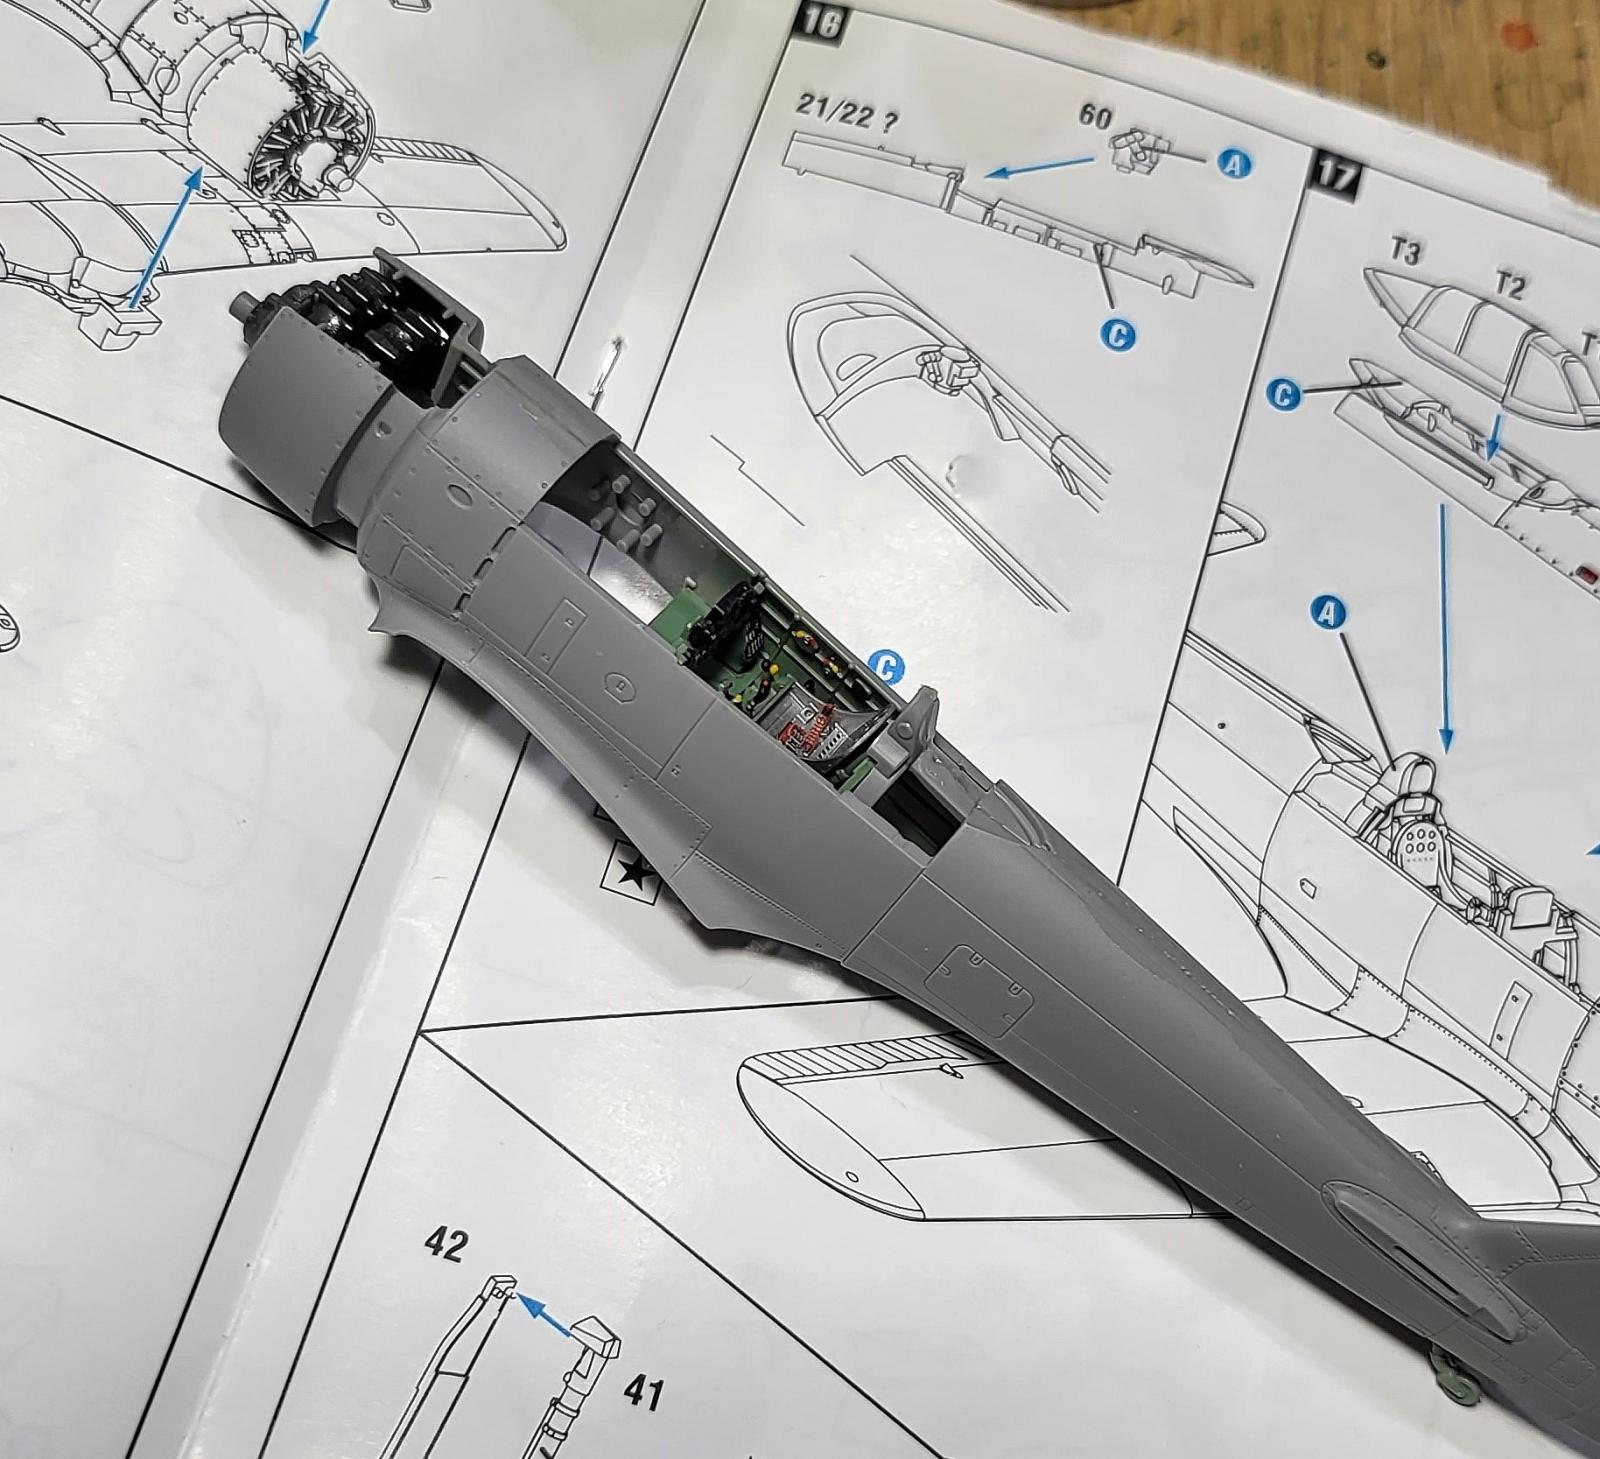
Steps 11-14 deal with building and placing of the wings, adding the horizontal stabilizers and finishing up the fuselage. All very easy with no fit problems. Steps 15-17 are where you have to choose if you want an open or closed canopy. Parts 21 (Closed) or 22 (Open) are the upper portion of the fuselage where the canopy sits and they are made specifically for the different clear parts. Steps 18-20 are the construction and placement of the landing gear and steps 21-23 finish the kit off with the addition of the exhaust ports, cowl flaps, propeller, bomb and drop tank.
Finishing
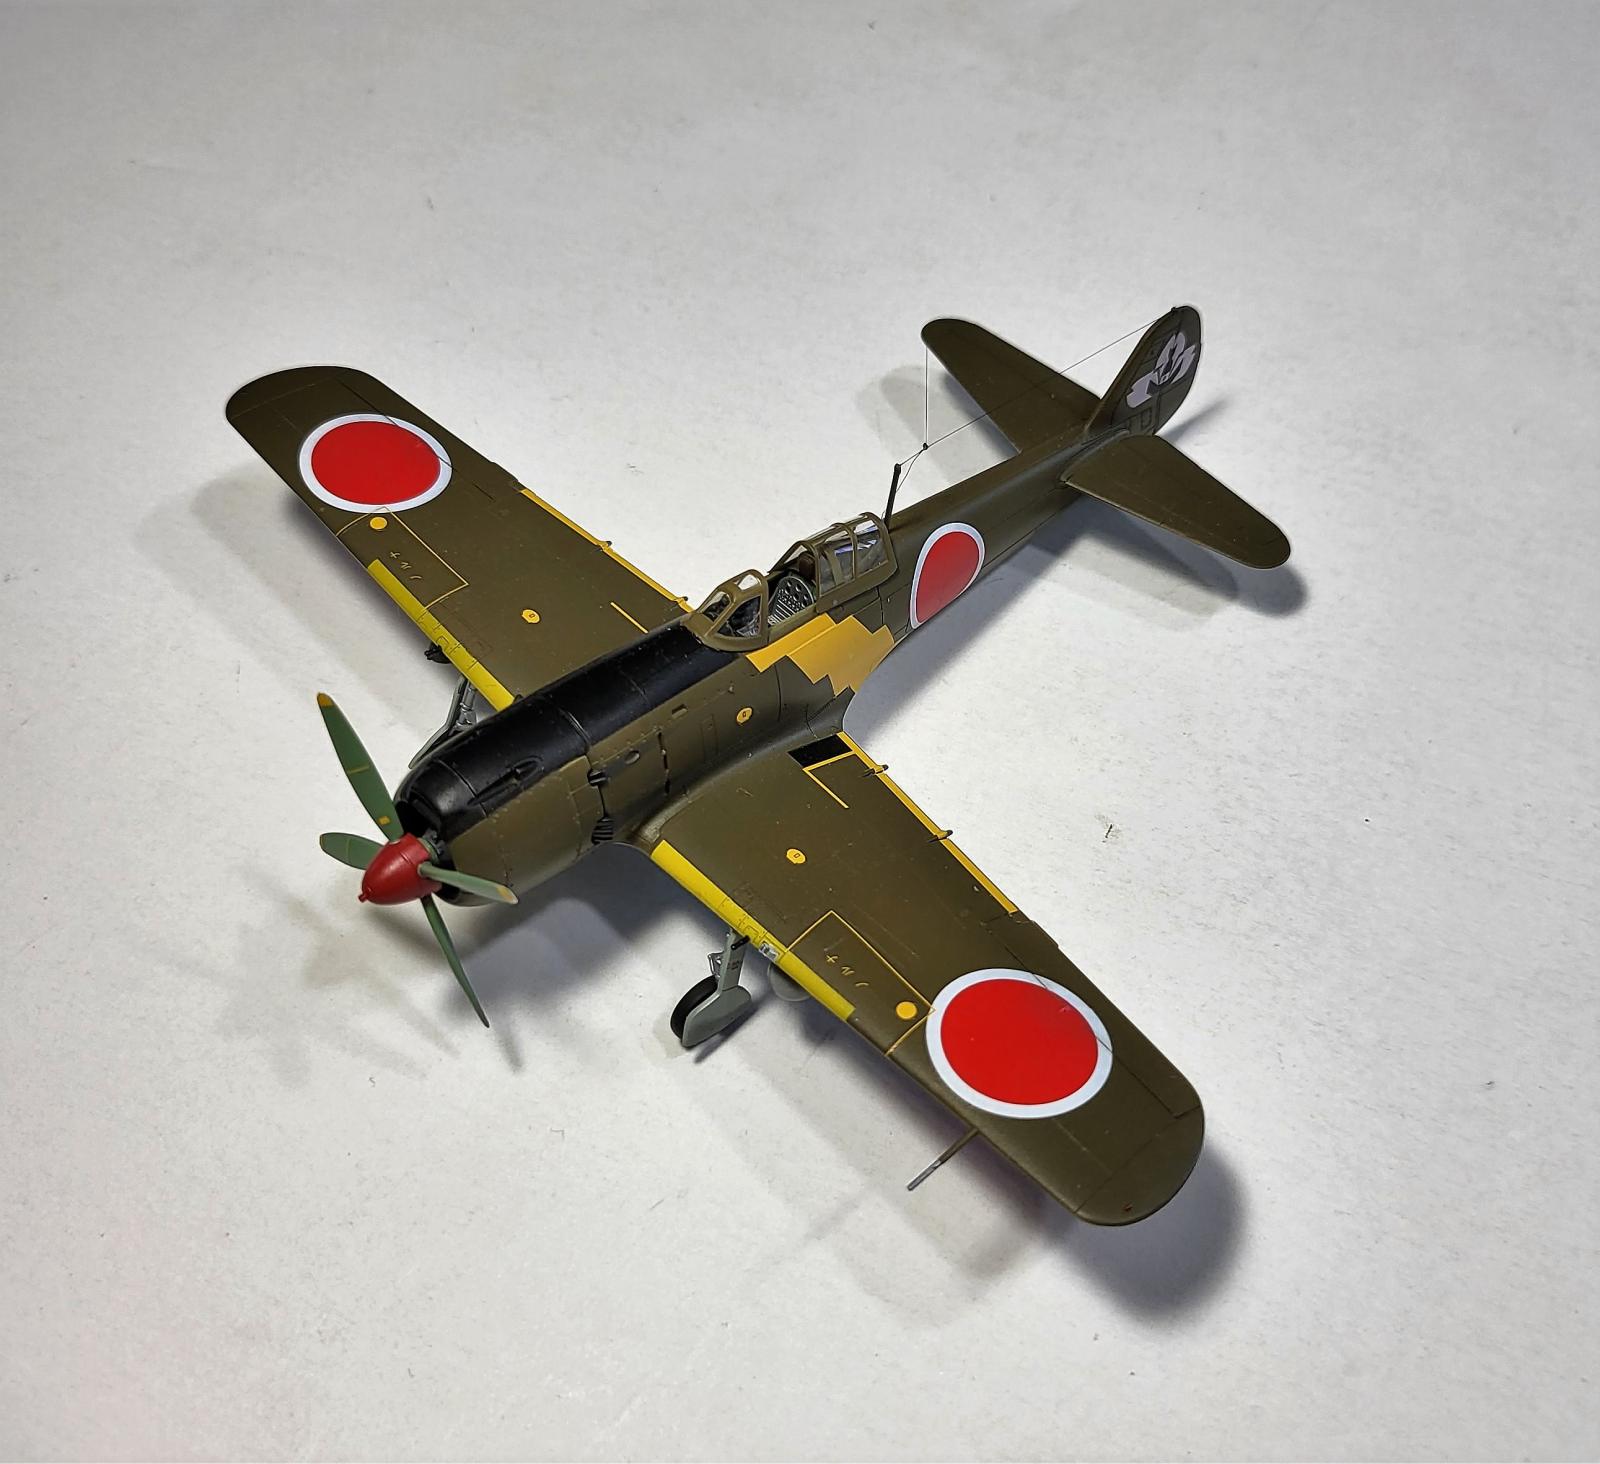
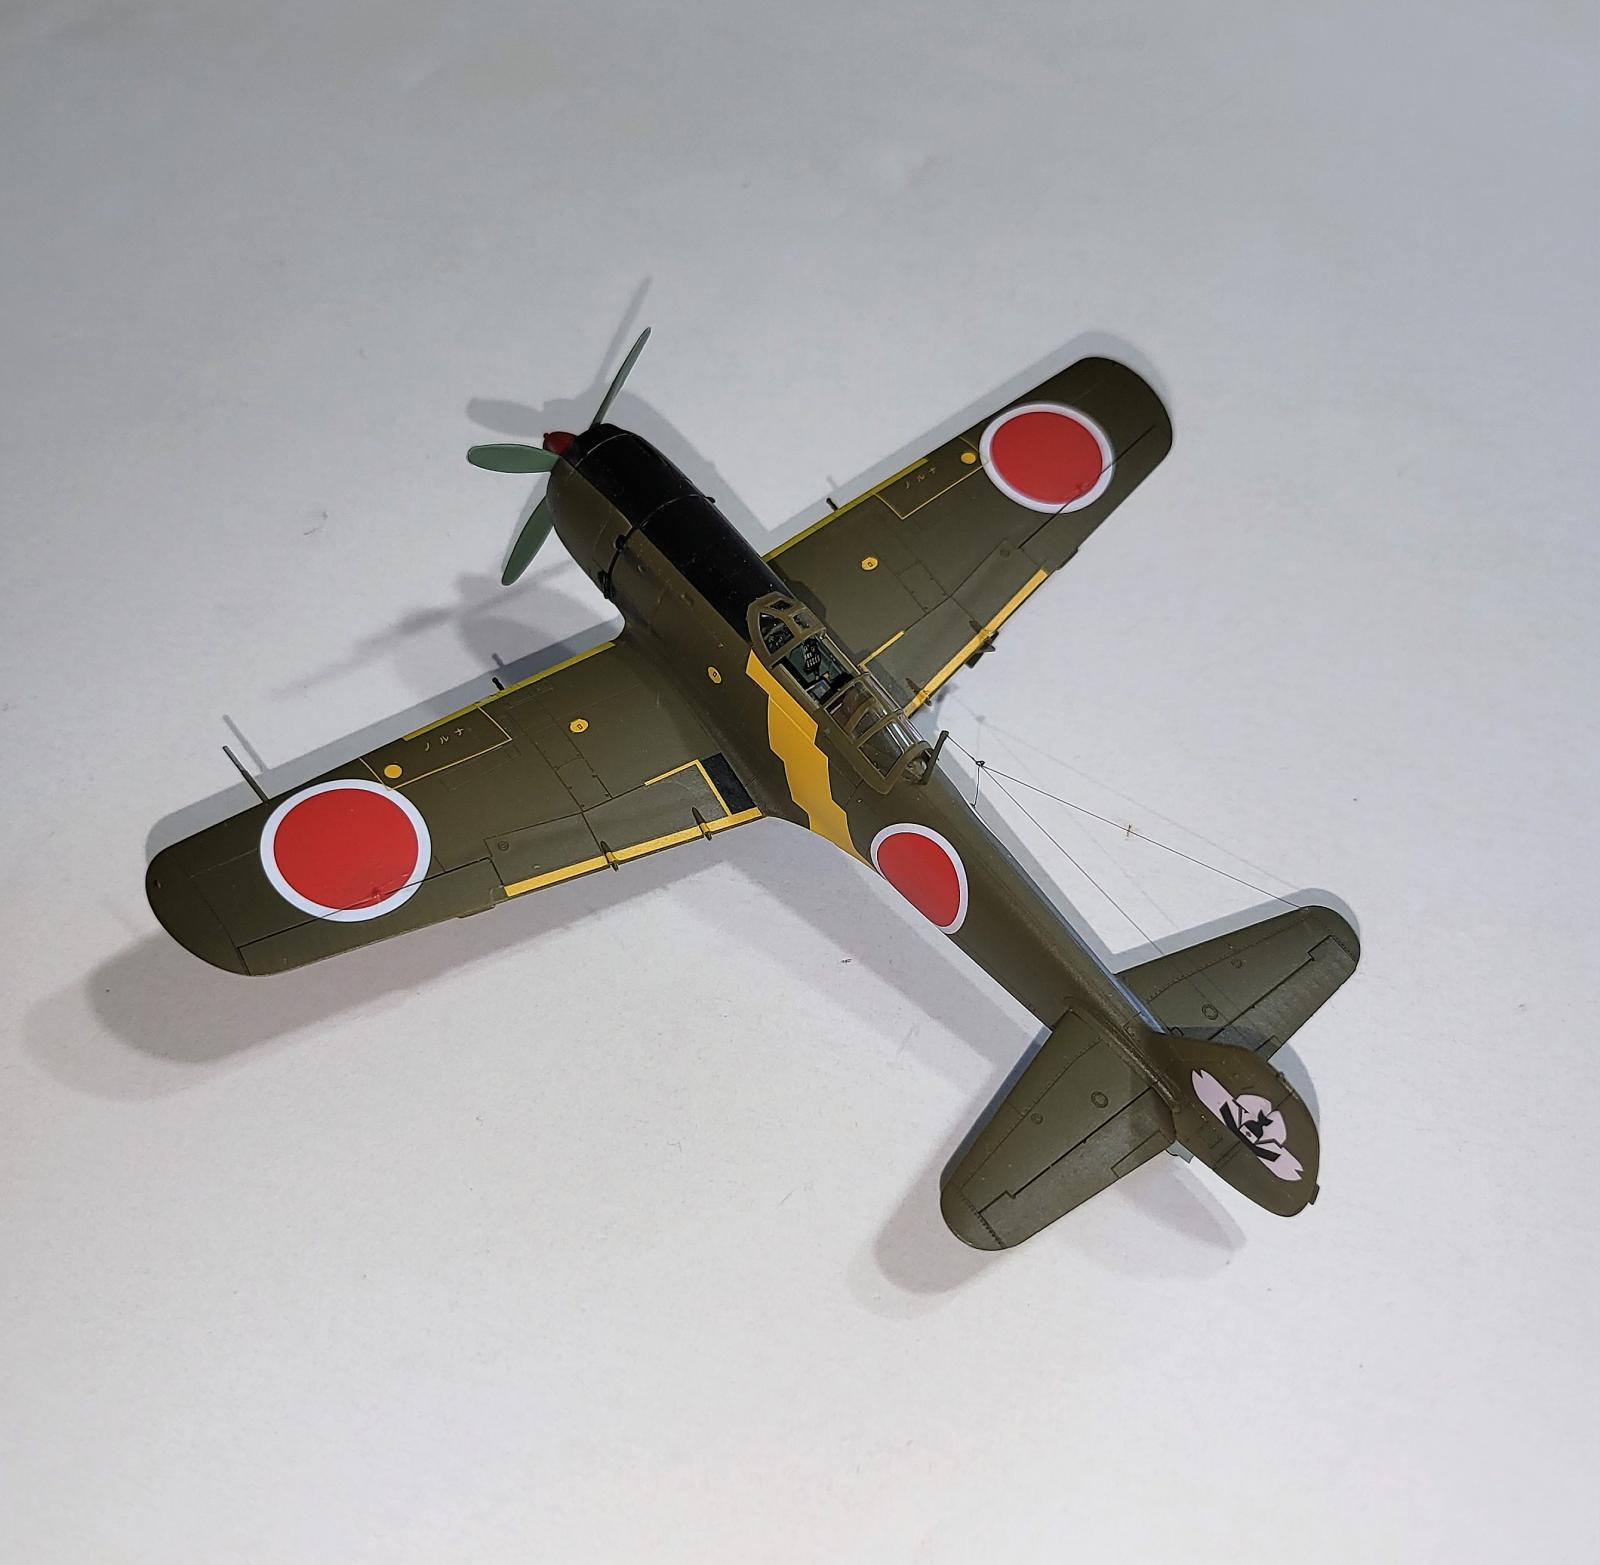
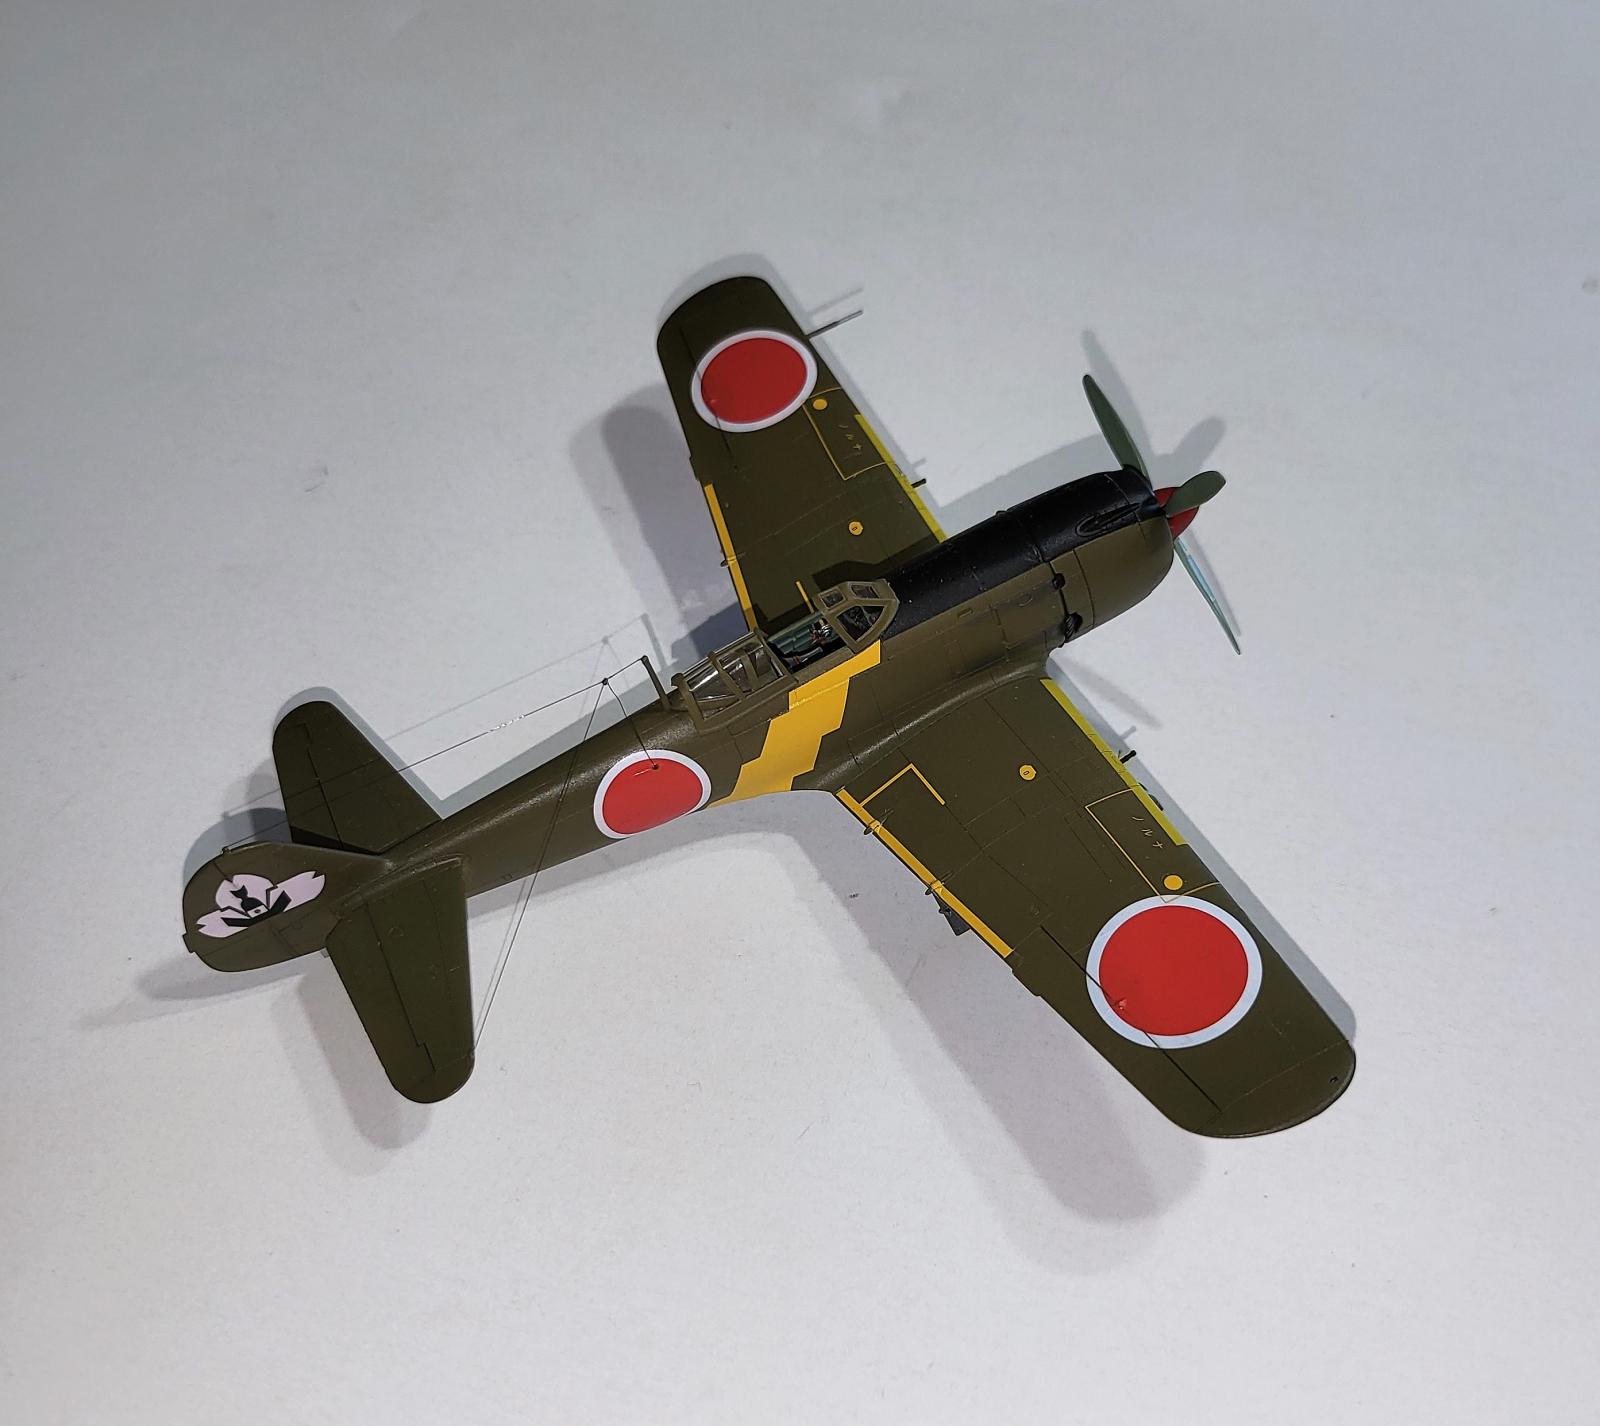
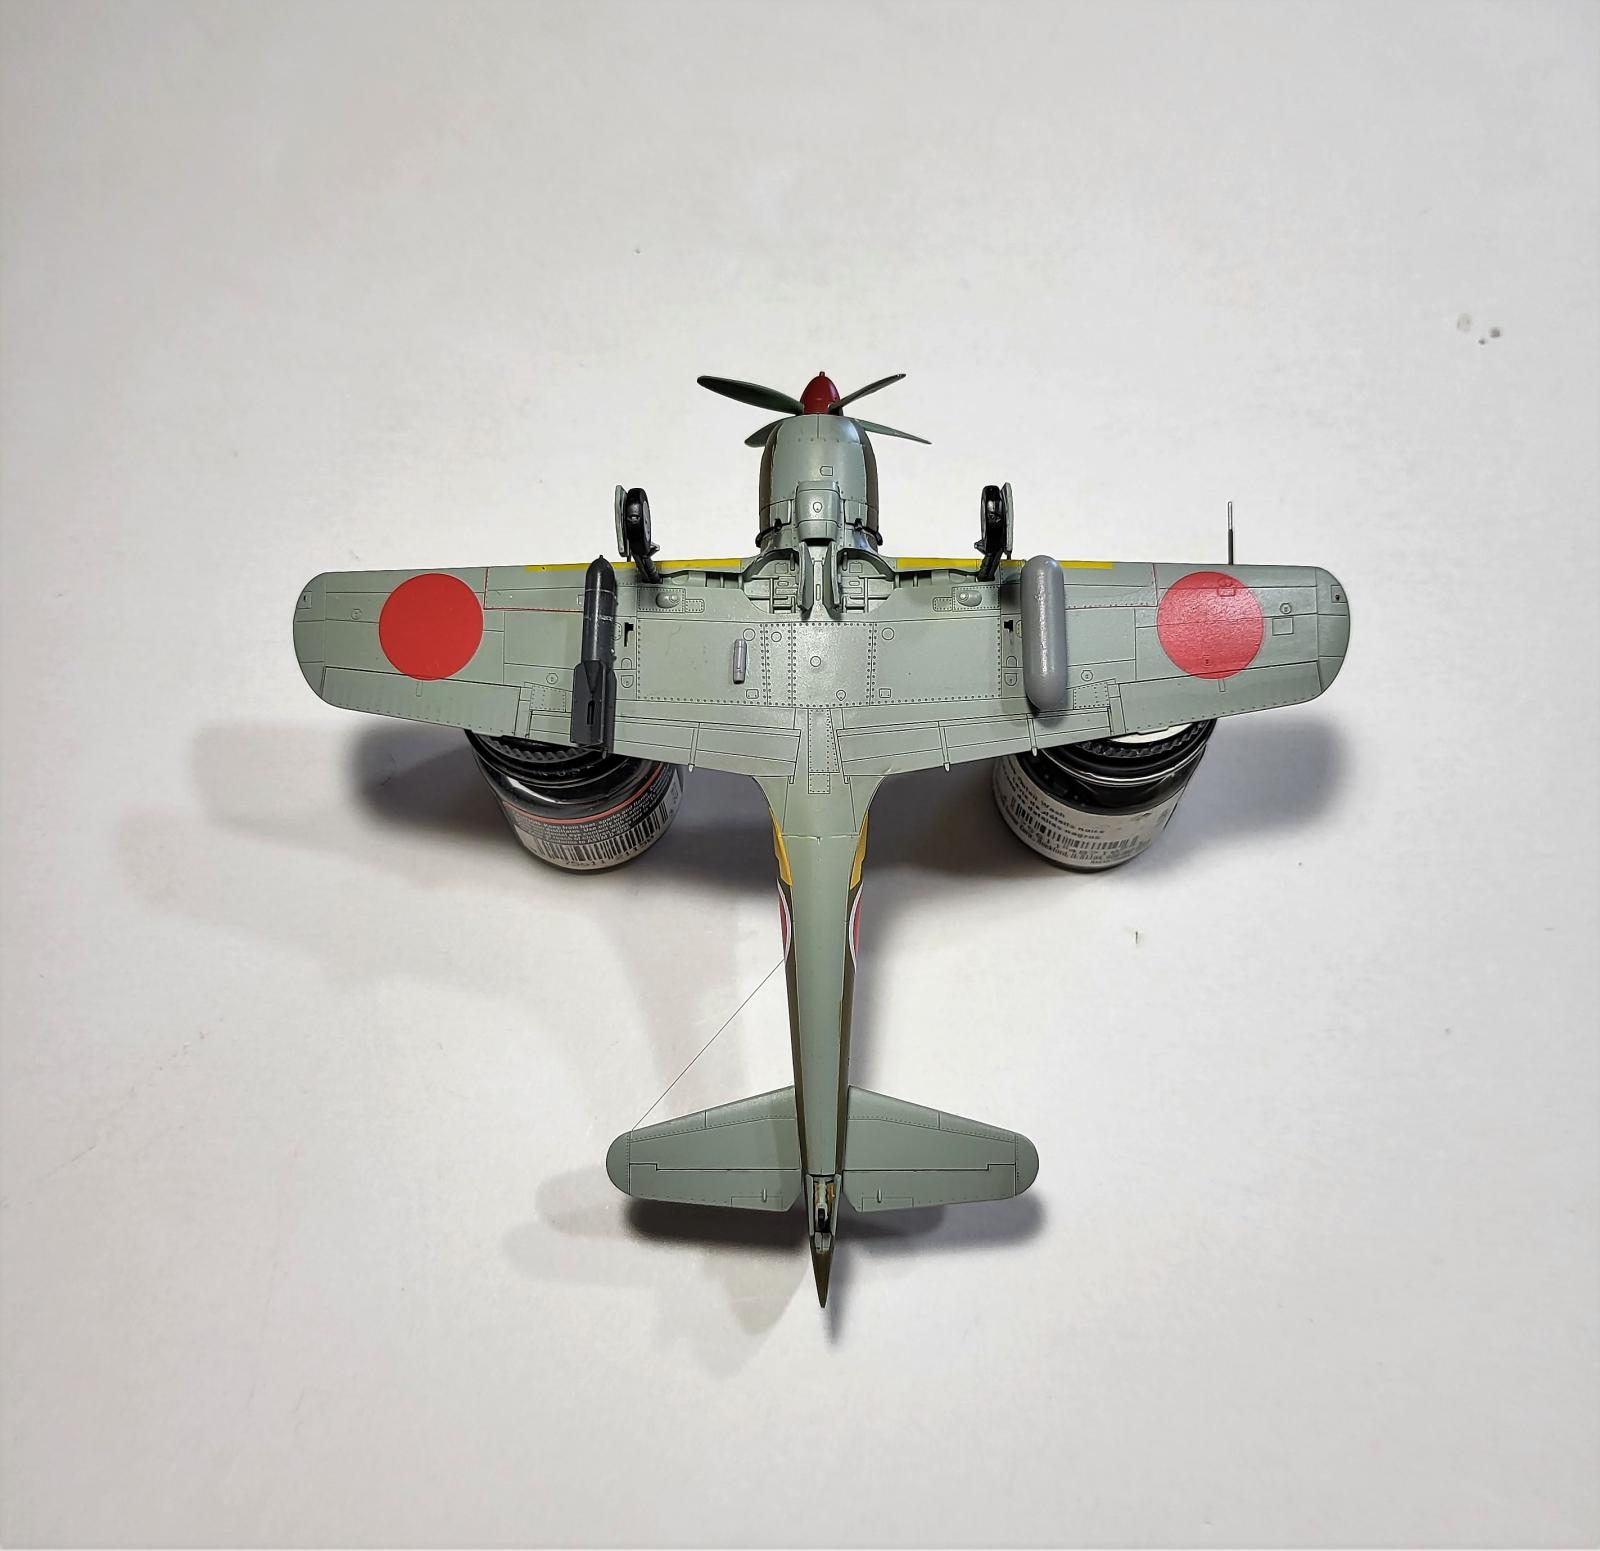
I used Mr. Color c304 Olive Drab for the upper surface and Testors Model Master IJA Light Army Grey for the lower surface. The decals went on easily and settled down with the help of a couple applications of Solva-Set. You are provided 3 marking options in the boxing.
- 57. Shimbu-tai, pilot: Tadashi Kono, Kyushu, Japan 1945.
- 58. Shimbu-tai, pilot: Lt. Toku Ueda, Kyushu, Japan 1945.
- 195. Shimbu-tai, pilot: Lt. Fujiyama Nobuho, Japan, 1945. (My choice)
Conclusions
A new tool Ki-84 has been on many a want list for a while and Arma didn’t let us down. This kit was fun to build and out of box it has very nice detail. I recommend this kit for all modelers with the exception of beginners.
I would like to than Arma Hobby for supplying this kit and the Review Corps for letting me build it.


Comments
Add new comment
This site is protected by reCAPTCHA and the Google Privacy Policy and Terms of Service apply.
Similar Reviews