
Ki-48 Sokei/Lily Photoetch Cockpit Set
Every once in a while something nice happens to you. This little photo-etch set is just the sort of thing I’m referring to. I’ve had the major parts of a Hasegawa Ki 48 Lily kit clipped off the sprues for some time in the hope that eventually I would locate enough reference material to guide me in adding cockpit detail when I continue with the build. The opportunity to review this new Platz photo-etch detail set for the Ki 48 was just what I needed to move me from a state of static inertia to critical mass. The kit box was located among the ‘in-progress’ stack, reopened, contents examined, the workbench was cleared and my Optivisor was back in place.
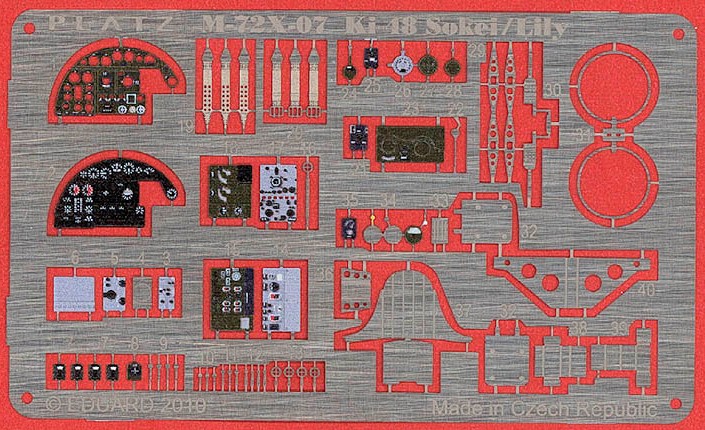
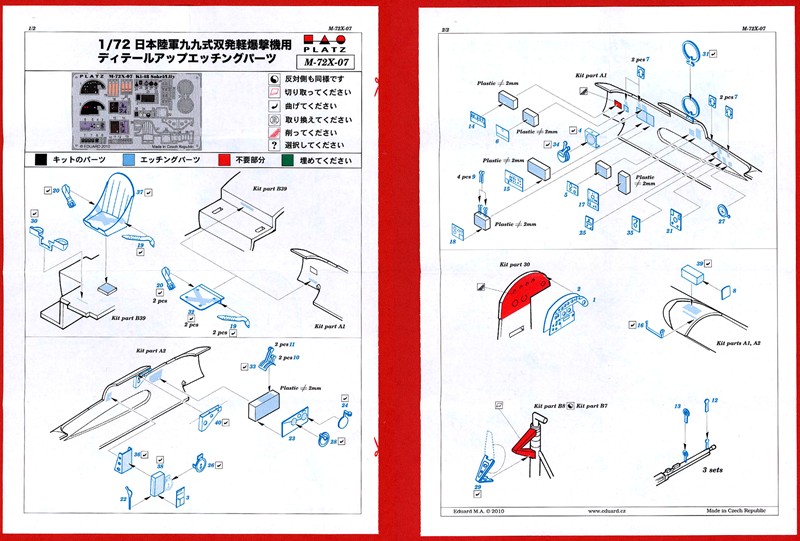
From the information etched on the edge of the fret, it’s obvious that Platz subcontracted the ‘Dean’ of photo-etch manufacturers, Eduard, to produce this pre-painted p/e set for the old Hasegawa (ne Mania) kit. And, the result is a very complete little detail set that should prompt a few more modelers to pull the kit out of their stash and give it a go. As the photo below shows, there are 62 - 63 little metal bits on the fret to clip, bend and install. The set includes a 2-sided Eduard style instruction sheet that provides general guidance for placing the various details correctly. The parts enhance detail in the cockpit with new seats, seat belts, printed instrument panel, radio consul faces, levers, and other bits. The rest of the parts are for detailing the landing gear and machine guns and for replacing the RF loop. Don’t be fooled by the small fret that comes in the package. There are a lot of P/E bits to deal with…and they all are small.
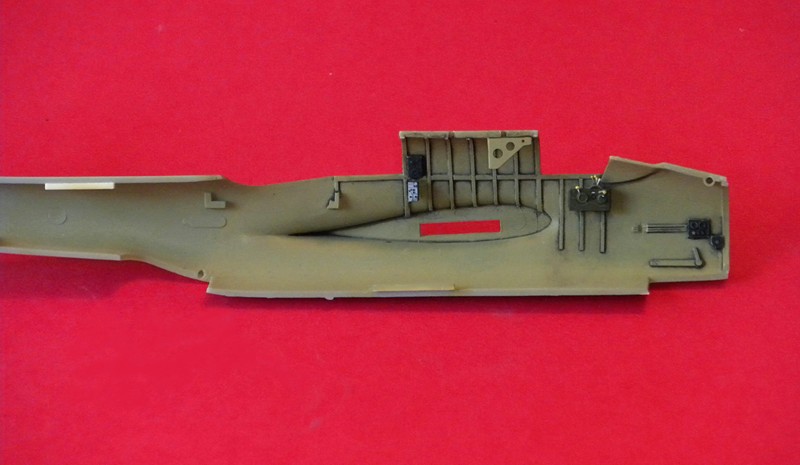
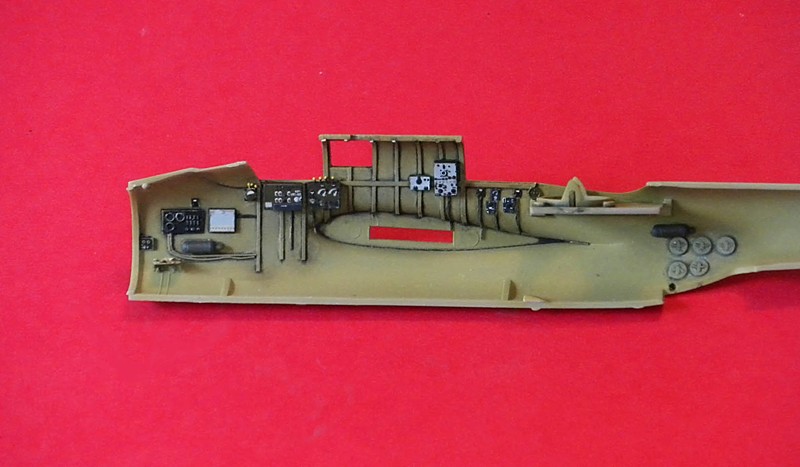
Coincidentally, a fellow model builder loaned me his copy of the Maru Mechanic on the Lily, so I decided to add a little more to the interior sidewalls before clipping and bending the photo-etch parts. Various widths of .010” Evergreen styrene strip stock proved to be the most convenient means of simulating fuselage frame members, so I installed them, sanded them smooth and painted the entire interior before adding the little p/e equipment faces to the specified styrene blocks (I used .060” instead of 2mm called for in the instructions) that make up the rest of the sidewall details. I found it curious that some of the sidewall boxes were provided as fold-up pieces of P/E while others were called out to be fabricated from styrene blocks. Obviously, blocks of styrene are very easy to cut from Evergreen strip stock, so I made them all out of styrene instead of folding up the P/E parts. After painting the sides of the small blocks appropriately, they were installed according the instruction sheets and resulted in a very busy looking cockpit. I added stretched sprue lines to many of the instrument boxes to make it busier. Adding the small levers turned out to be quite a task in this scale and be forewarned that there are only two extra ones on the fret. So, if the carpet monster claims any along the way, you will have to find a substitute somewhere else.
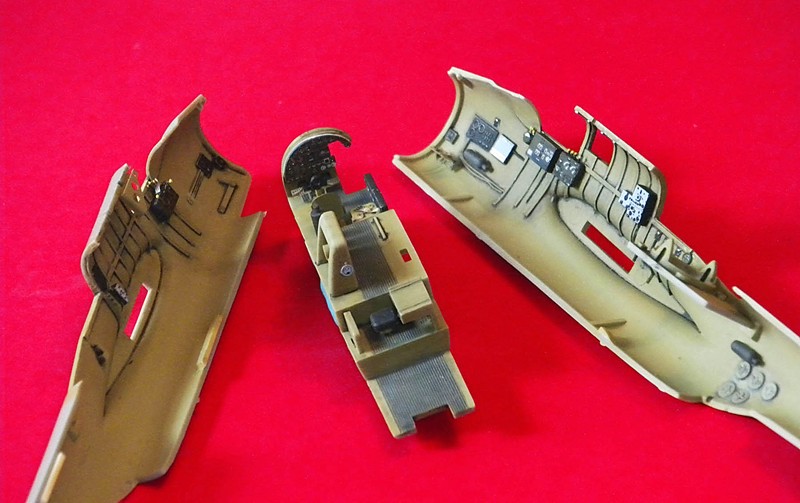
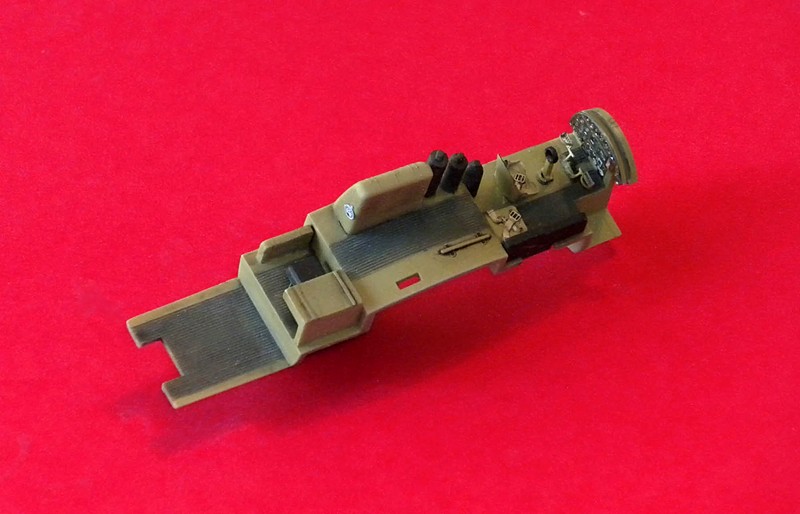
The P/E seats and seatbelts were combined and installed along with the two-part instrument panel. The pilot’s seat looks most convincing, but locating it required fabricating another styrene block (unless you want your pilot sitting on the floor). And, when I positioned the p/e rudder bar assembly at the forward edge of the kit’s floor kick plates, it became obvious that a seated pilot would need to be a six footer to reach the peddles…something that only a few Japanese pilots measured up to.
I was fortunate to have some references to consult as I assembled and placed the photo-etch parts on the sidewalls, because the instruction sheet is vague in a number of areas and there is no guidance as to which kit parts to use and which not to use. Some of the P/E sidewall details were placed close to the positions indicated on the instruction sheet as some of the kit parts were in the spots where the instructions would have you place the P/E parts.
The photos below show how much the Platz parts add to the details inside the cockpit…there are many. I chose to show everything in a semi-completed state because, once everything is buttoned up and the canopy parts are in place, very little of the delicate interior details will be easily seen. It is regrettable that no one offers a vac-formed canopy for this kit because, unless you choose to cut apart the injection-molded kit canopy and fabricate the Ki 48’s unique hinged center section, the cockpit details that required so much care and patience will not be appreciated. On the other hand, if you are one of those who are satisfied knowing that all those details are buried within the finished model, you will be more than happy with this detail set. The landing gear P/E and machine gun ring sights will be added as soon as I get those things ready.
I recommend this P/E detail set to anyone who has an interest adding considerable detail to a 1/72-scale Hasegawa Ki 48, and the patience to do it.
My thanks to Platz and IPMS/USA for the opportunity to review this very nice little photo-etch detail set.

Comments
Add new comment
This site is protected by reCAPTCHA and the Google Privacy Policy and Terms of Service apply.
Similar Reviews