
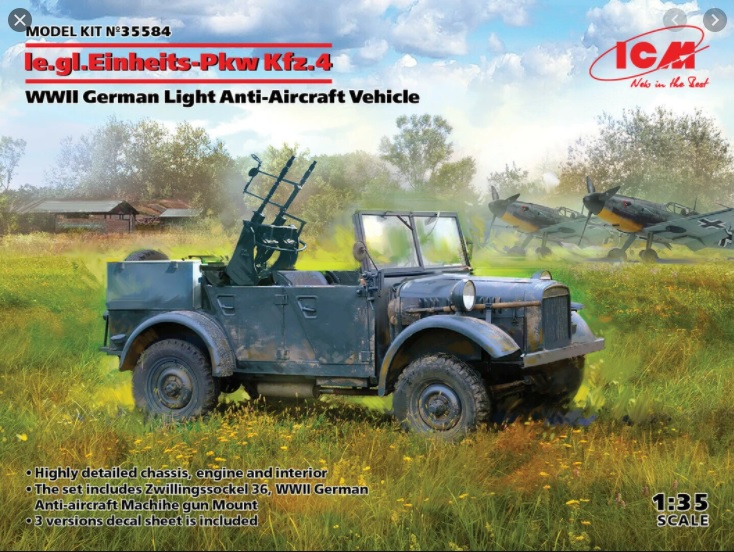
German le.gl.Einheits-Pkw Kfz. 4
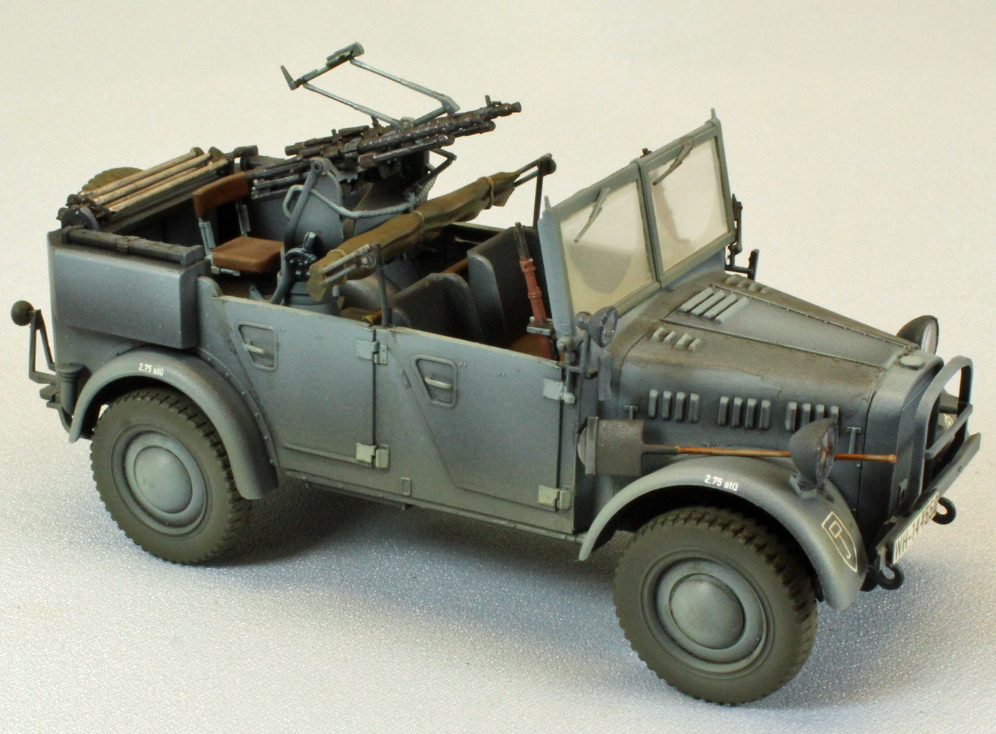
Kiev-based ICM is back again with a new offering in its Einheits-PKW (“Uniform all-terrain passenger car”) line – this time with the light Anti-Aircraft version. This highly detailed and diminutive subject sports twin MG-34 machine guns and crew seat in place of the two rear seats.
History
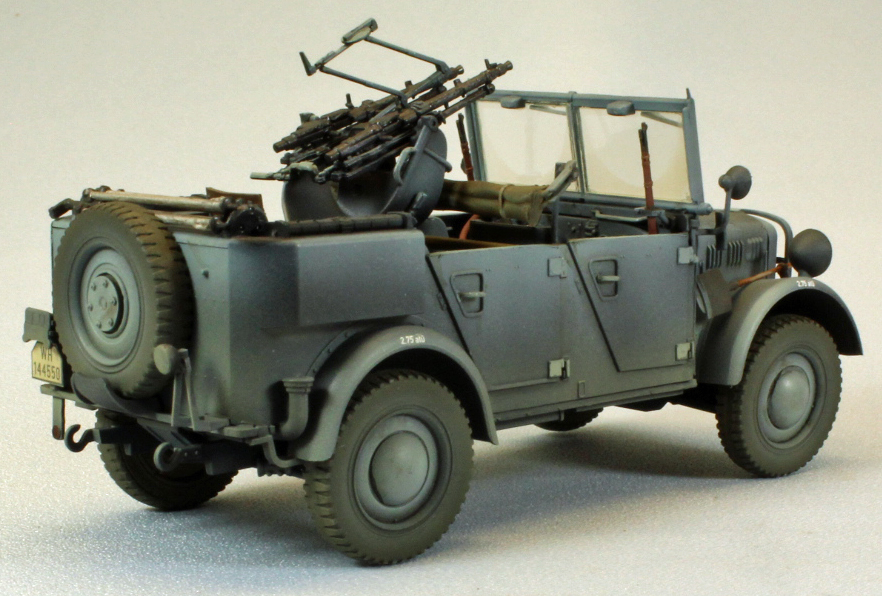
Officially introduced at the end of February 1938, the Truppenluftschutzkraftwagen – “Air Raid Vehicle” - (Kfz. 4) had four doors and a spare wheel mounted at the rear of the car body like the Kfz. 1 & 3.
The units which were allowed to have Kfz 4’s had only one vehicle, each. A light tripod for each gun was stored at the rear. With the tripods, the MG 34’s could be used outside of the vehicle. Even though the guns were able to be fired in any direction from the vehicle, the practical effect of this weapon during combat was questionable.
The Kfz 1, 3 and 4 were supposed to replace the civilian vehicles previously procured by the Reichswehr with cross-country mobile capability, but manufacturing and design issues, as well as pre-war material limitations, led to these being phased out.
The Kit
As far as I know, this is the only injected plastic kit of this particular vehicle, although ICM produces and sells the car and gun separately. The first thing I noticed about ICM’s release was the unusual box. The kit is shipped in a sturdy, white ‘locking’ clamshell box. But instead of sliding a simple sleeve over the box, ICM drops a standard model box top over it. The overall impression is one of sturdiness. Since the kit is not shrink-wrapped, the double layering helps to ensure that nothing will be lost in transit. Nice. Once open, all parts are bagged and the decals are slipped inside the instruction booklet.
The plastic is soft but not too soft, and the molding is excellent with no noticeable flash or sink marks. The four tires and single spare are molded with their wheels as one piece, in plastic. The detail overall is crisp and the number of attachment points and nodes, while many, are located in areas that are easily addressed. While many of the parts are very delicate, ICM pulls off the design without resorting to using photo-etch, which is a big plus (for me at least).
The contents of the box include:
- Five sprues of parts molded in light-grey plastic
- One sprue of clear parts, including headlights, windows, and hand-operated searchlight.
- 1 small-sized decal sheet
- 1 24-page, full-size color instruction booklet, including a parts map and (two) three-view and (one) five-view color painting and decal guide. All text and label information are translated into English.
- Markings provided are for three vehicles, all WWII German Wehrmacht.
The Instructions
The instruction booklet is excellent. Printed in color on high-quality, satin-finish paper, it starts off with a short history and vehicle specifications, color reference information, contact information, and an excellent parts map with unused parts clearly identified. What follows is a two-color set of instructions broken into 82 well-illustrated, small steps. Images are rendered from several angles so you are never forced to guess about how things go on ‘the other side’. The last two pages show three, full-color multi-views of camouflage schemes – all in early-war German grey, as follows:
- Luftwaffe Ground Unit, Greece, 1940
- First Panzer Division, Greece, 1941
- Eleventh Panzer Division, Eastern Front, Year Unknown
Clearly ICM has invested heavily in making an excellent set of instructions, and the quality shows through. Good job.
(Minor errors in the instructions are called out in the build sections below.)
What to Consider Before You Start
There is a lot of detail that is visible on the finished model, adding several painting steps during the build which will cause you to deviate from the instructions as needed.
Some parts are very small and delicate and care in handling must be taken once they are attached. The wheels can be painted separately and attached at the end of the build.
Otherwise, everything fits very well – if it doesn’t, more than likely you have something wrong.
The Build
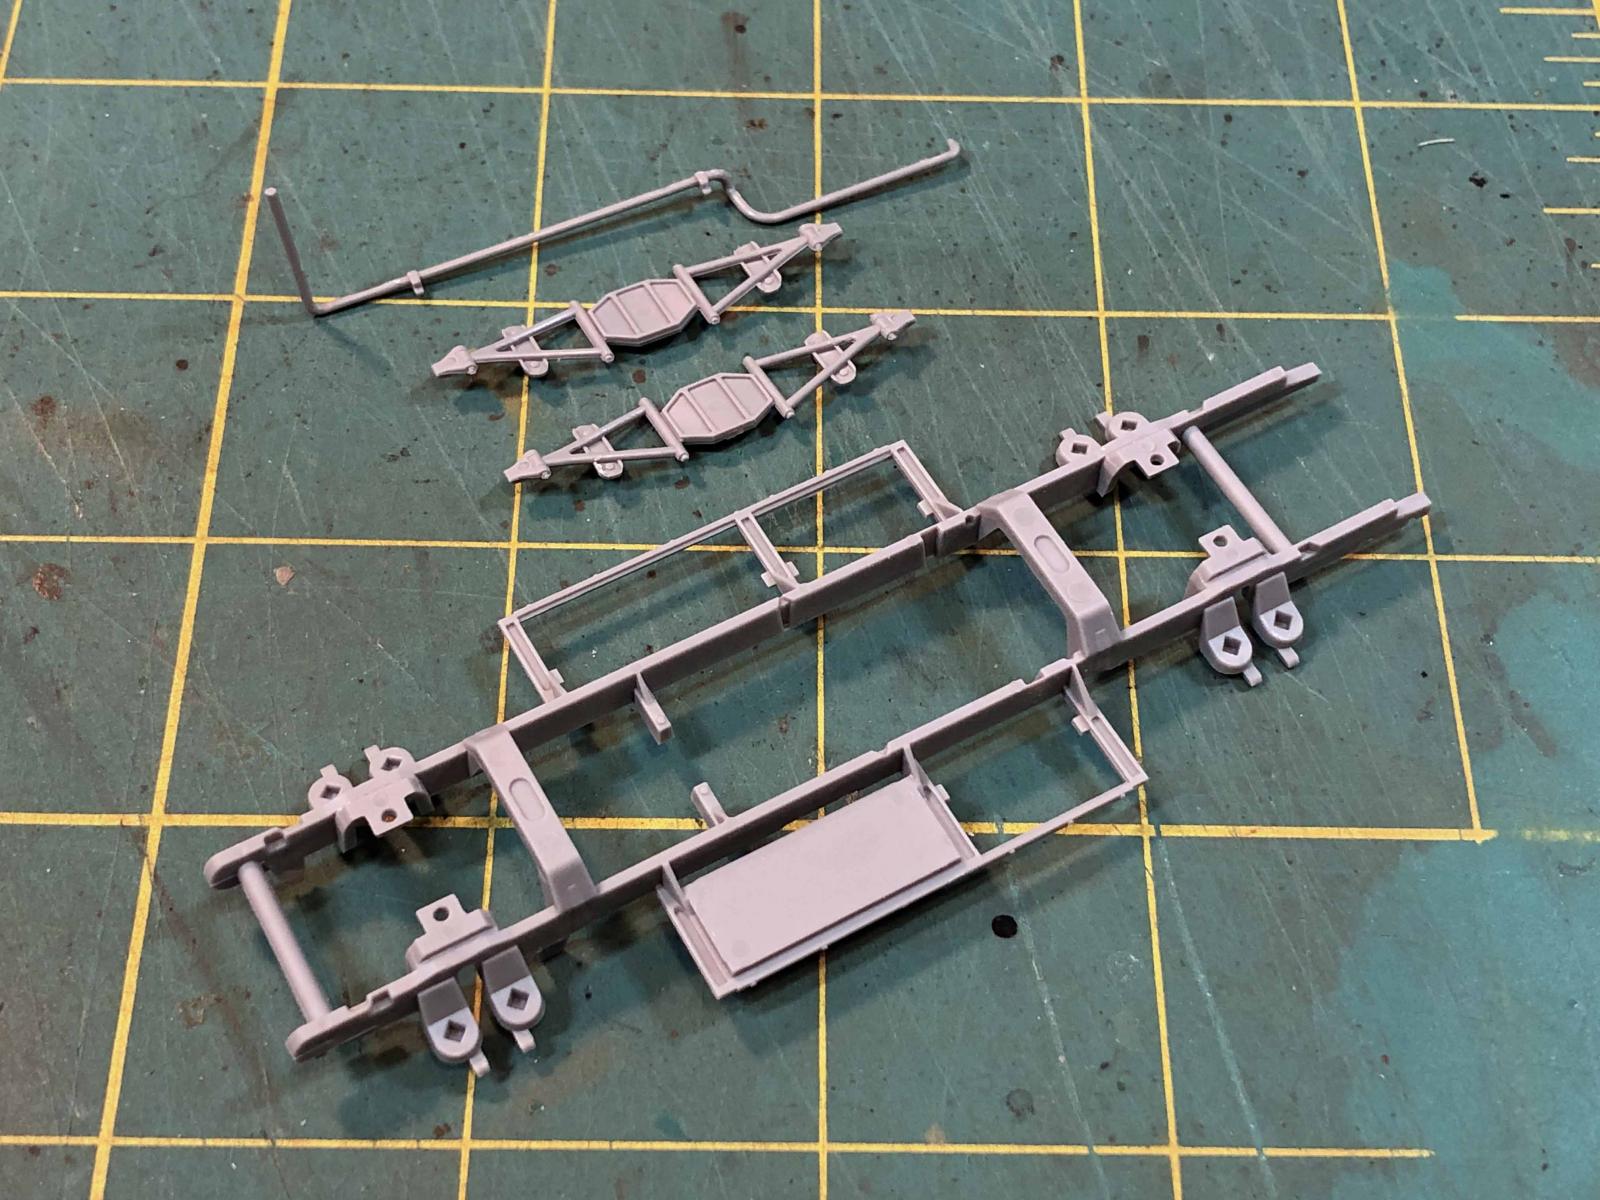
Assembly starts with the lower chassis, which is quite detailed and built in layers. That said, 90% of the frame comes as a single part (see image), which is a huge blessing, since in most kits like this, a mistake made with the frame can cause many heartaches later. ICM has made an easy task of what has been a finicky chore from other manufacturers - nice.
In Step 9, the exhaust pipe is supposed to attach to the frame using two notches that appear in the instructions but not on the model. Thankfully, there are enough visual cues, however, to place it correctly without the notches.
Steps 14-23 brings a reasonably detailed engine together, and you can model the hood to show what’s underneath, even though the interior of the hood does not contain any detail. If you choose to keep the hood closed, that beautiful engine disappears. Note: Part A16 in the instructions (Step 22) is actually Part B16 on the sprue. Also, what looks like an Oil filler pipe in Step 26, labeled ‘J’ in the instructions, is Part B13 on the spue.
The main floor of the passenger compartment is affixed to the frame in Step 30, a procedure that is usually fraught with misalignment issues, but not with this kit. You’ll know you’ve matched up the right spots by the firm seal you can see all around the assembly when complete.
While the wheels are assembled and attached in Steps 31-34, I left mine off until final assembly, after painting.
I broke a delicate handrail (Part A56 in Step 46) man-handling the vehicle, so I replaced it with brass tubing. I would consider leaving that off until just before painting, since the area is completely accessible. Note: Parts E8 and E4 (Steps 51 and 53) are reversed in the instructions – E4 fits into the port side of the rear compartment, and E8 fits in the starboard side. Also, something happened on page 16 of the instructions: the door assemblies identified in Steps 58 and 62 (assembles 57 and 60) do not exist in this kit. It is easier to look at the various parts involved than to explain what the errors are here.
I left the steering wheel, the shovel, and the windshield off until the very end of the build, finishing these items separately.
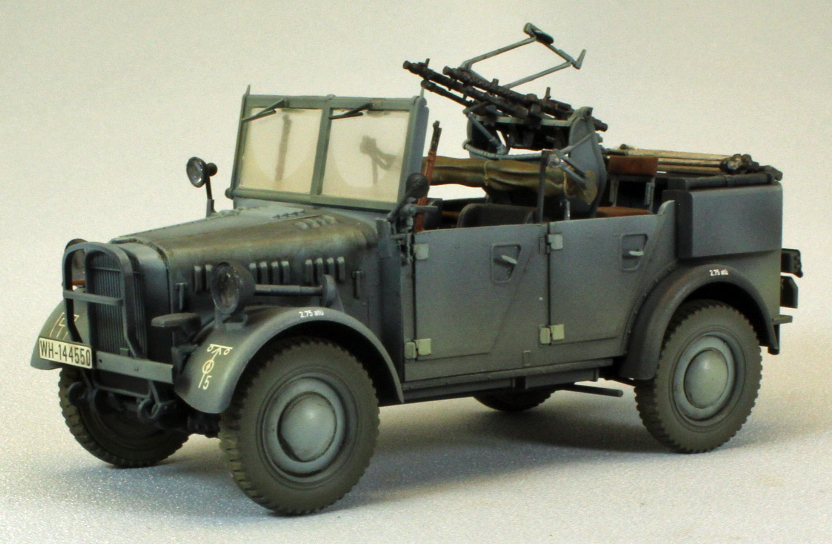
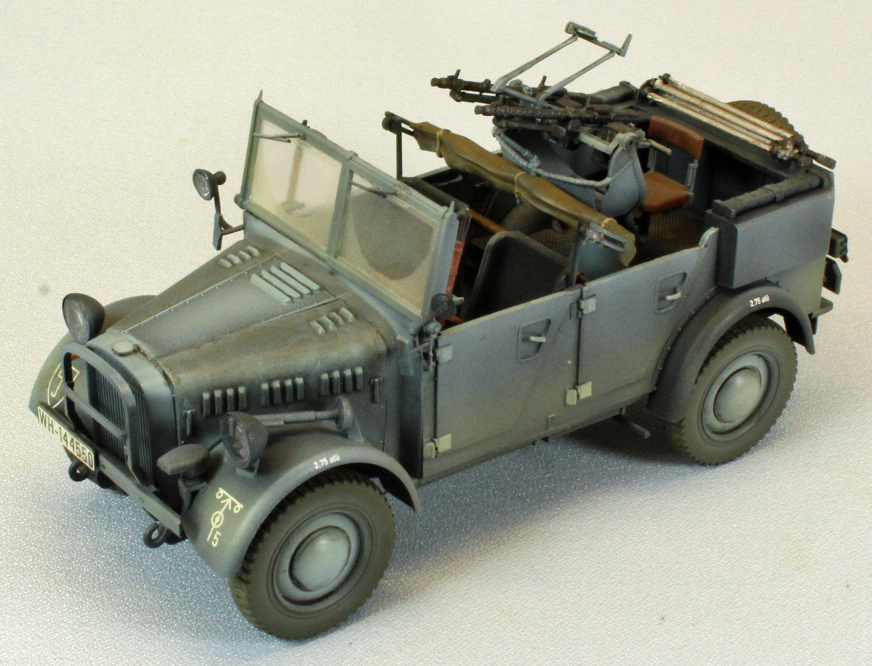
The Twin MG34 Machine Gun
The twin machine gun that sits on a pedestal, which includes an integrated seat and sighting mechanism, comes on its own sprue in the kit (and is also sold separately by ICM). Having experience with these kinds of assembles, I was a little worried about fit and complexity at first. But ICM came through again. Everything fits together perfectly – even the guns slip into their respective cradles with a satisfying ‘chunk’. Furthermore, the open design of the guns allows you to completely assemble everything before painting – a nice gift. The guns can be modeled in the ‘up’ combat position, or the ‘down’ travel’ position.
And then I was done. This little guy was ready for paint.
Painting, Decals and Finish
I decided to paint my Kfz 4 in an overall German Gray scheme with a little color-modulation thrown in to keep things interesting.
Before painting, I made a sticky board of all the parts that were finished separately. These included the shovel, steering wheel, windshield, wheels, rifles and canvas rack.
I started by applying a coat of (rattlecan) Krylon Flat Black Paint/Primer for my dark, primer/pre-shade coat. Surprisingly, this low-cost enamel solution sprays on easily and dries very thin and tough – replacing a time-intensive task I normally use an airbrush and more expensive paint for. I use a dark primer coat to give the plastic some grip, and to fill in the recesses - creating a shadow effect near the flat surface edges and adding depth for subsequent coats to come.
After the primer had degassed, I carefully laid down a graduating layer of AKI Real Color RC256 Blue Grey. I made sure to go slowly, feathering the bottom sides and hitting the highlighted areas, such as the hood panels and fender sides. I then hand-painted small details here and there using the same AKI Blue Grey.
With the basic scheme down, I went to work on the detail painting. Vallejo 826 Cam Medium Brown was used for the seats; the steering wheel and wooden gun parts received Vallejo 940 Saddle Brown, and the wooden shovel handle was painted Vallejo 311 New Wood. I painted the passenger compartment cover using Vallejo 314 Canvas (with detail using Model Master 2013 Afrika DunkleGrau), and the MG tripod poles Tamiya XF-16 Flat Aluminum. The tail light received Vallejo 307 Red Tail Light, and the metallic parts for the gun and canvas cover received Tamiya XF-84 Dark Iron. Tamiya X1 Gloss Black adorned the various knobs and other detail.
Once satisfied, I laid down several coats of Pledge floor polish (Future) to prepare the surfaces for washes and decals.
I applied the decals using Red and Blue MicroSol/MicroSet without any problems. The ICM decals are very thin and separate from the backing effortlessly. Once the decals were dry, I applied a wash using Mig Oil Shadow Brown to the entire vehicle. When I got to the wheels, I laid the vehicle on its side to allow the wash to dry evenly.
I followed this with a ‘road-dusting’ coat of Vallejo Model Air Light Brown and then shot the whole vehicle with Vallejo Flat Varnish to kill any shine left over.
I finished the vehicle by attaching the clear headlight lenses with Mig Ultra Glue. Done!
Conclusion
I recently finished another ICM kit (Kfz.247) and I have their new Marder I on my bench, ready to start. Needless to say, ICM’s recent offerings are a lot of fun to build, and this kit is no exception.
While this kit is challenging due to the number of small parts, the molding is crisp and everything fits. ICM deserves a lot of credit for such a great effort in engineering and design here – and they get it done without resorting to photo-etch parts, a big plus in my book.
One more point to make: my original sample copy arrived here in Seattle without the sprue that had the parts for the twin pedestal gun. The instruction booklet has contact information to use in this situation, so I emailed Valeriia in Kiev, Ukraine, who responded immediately, and promised to have one in the mail, promptly. Knowing that my missing sprue was probably not the highest priority for our friends out there, I didn’t expect to receive anything for a while, so I continued on with the build. Before I got to the part with the guns, however, I received a well-wrapped package containing one sprue, and a lot of stamps. Kudos to Valeriia, and all the others at ICM, who have made this build such a pleasurable experience.
ICM is building a solid reputation for producing excellent models. Sturdy and intelligent boxing to protect the sprues, consistent use of hidden connection points and modeler-assists, design of assemblies that other manufacturers are challenged by (such as a single-piece frame). ICM was able to bring together a nice little detailed kit without resorting to photo-etch or other finicky additions. And the instructions are superb.
Normally, for these reasons, I would have recommended this kit for all modelers, regardless of experience level, but the high count of small parts and intricate assemblies cause me to suggest that only modelers with a few builds under their belt should attempt a go at this kit. That said, I managed to muddle through the challenge myself, so if you go slow and test-fit the parts, anyone can create a nice replica of this interesting little vehicle.
I would like to thank ICM for providing this kit for review, and to IPMS USA for giving me the opportunity to build it.


Reviewer Bio
Eric Christianson

Eric Christianson is a father to two boys (Reed and Dean), the President of the Seattle Chapter of IPMS, and a long-time Little League umpire. He is also a devoted husband and companion to a wonderful woman named Jackie who enthusiastically supports his passions. Recently retired as a programmer, his home office has been scratch-built into ‘a perfect model room’. Modeling since he was a boy, Eric mostly builds armor these days, but still dabbles in 1/32nd aircraft and other types of models from time to time. He also enjoys presenting seminars on weathering and technique at local shows. Many of Eric’s kit reviews can be found on the IPMS USA website.
Comments
Add new comment
This site is protected by reCAPTCHA and the Google Privacy Policy and Terms of Service apply.
Similar Reviews