
'Fatto in Italia' - Vespa PX
From Italeri's website:
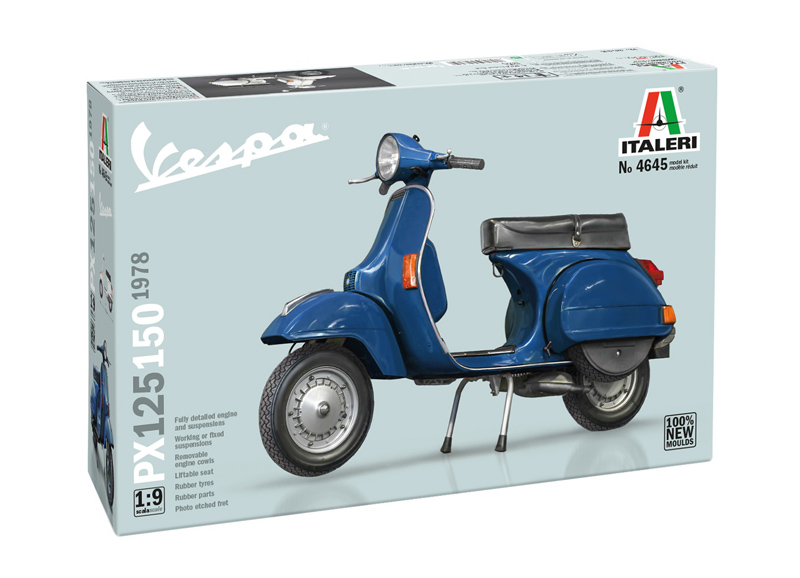
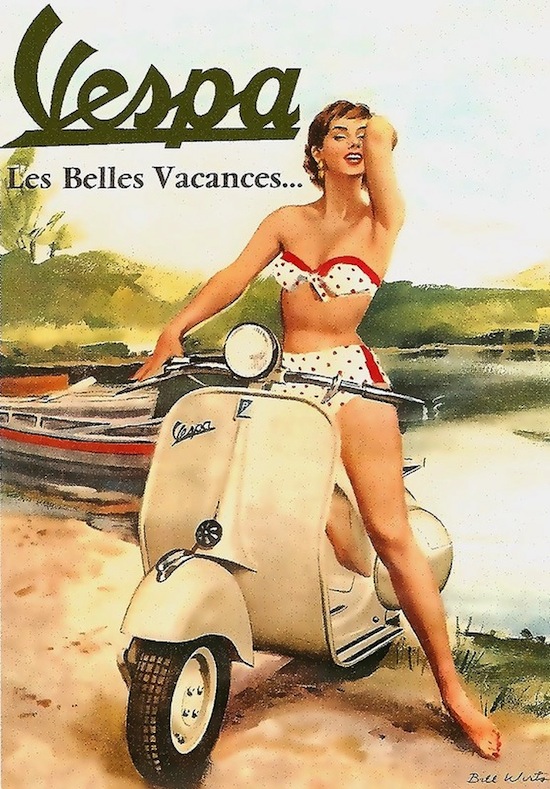
Produced by Piaggio from the late 1970s, the Vespa PX is one of the most iconic models of the Italian motorcycling tradition and a true two-wheeled legend, known all overthe world and capable of captivating generations of enthusiasts. With a unique and instantly recognizable design, it is characterized by its metal body and handlebar-mounted manual gear shift. Easy to ride, the Vespa PX was designed as the ideal solution for city commuting as well as for short leisure trips. It is the most produced and best-selling Vespa model of all time, with over 3 million units. The Vespa PX was not just a scooter, but a cultural icon of the 1980s. Its presence in films, music, and fashion turned it into a symbol of lifestyle and an icon of "Made in Italy".
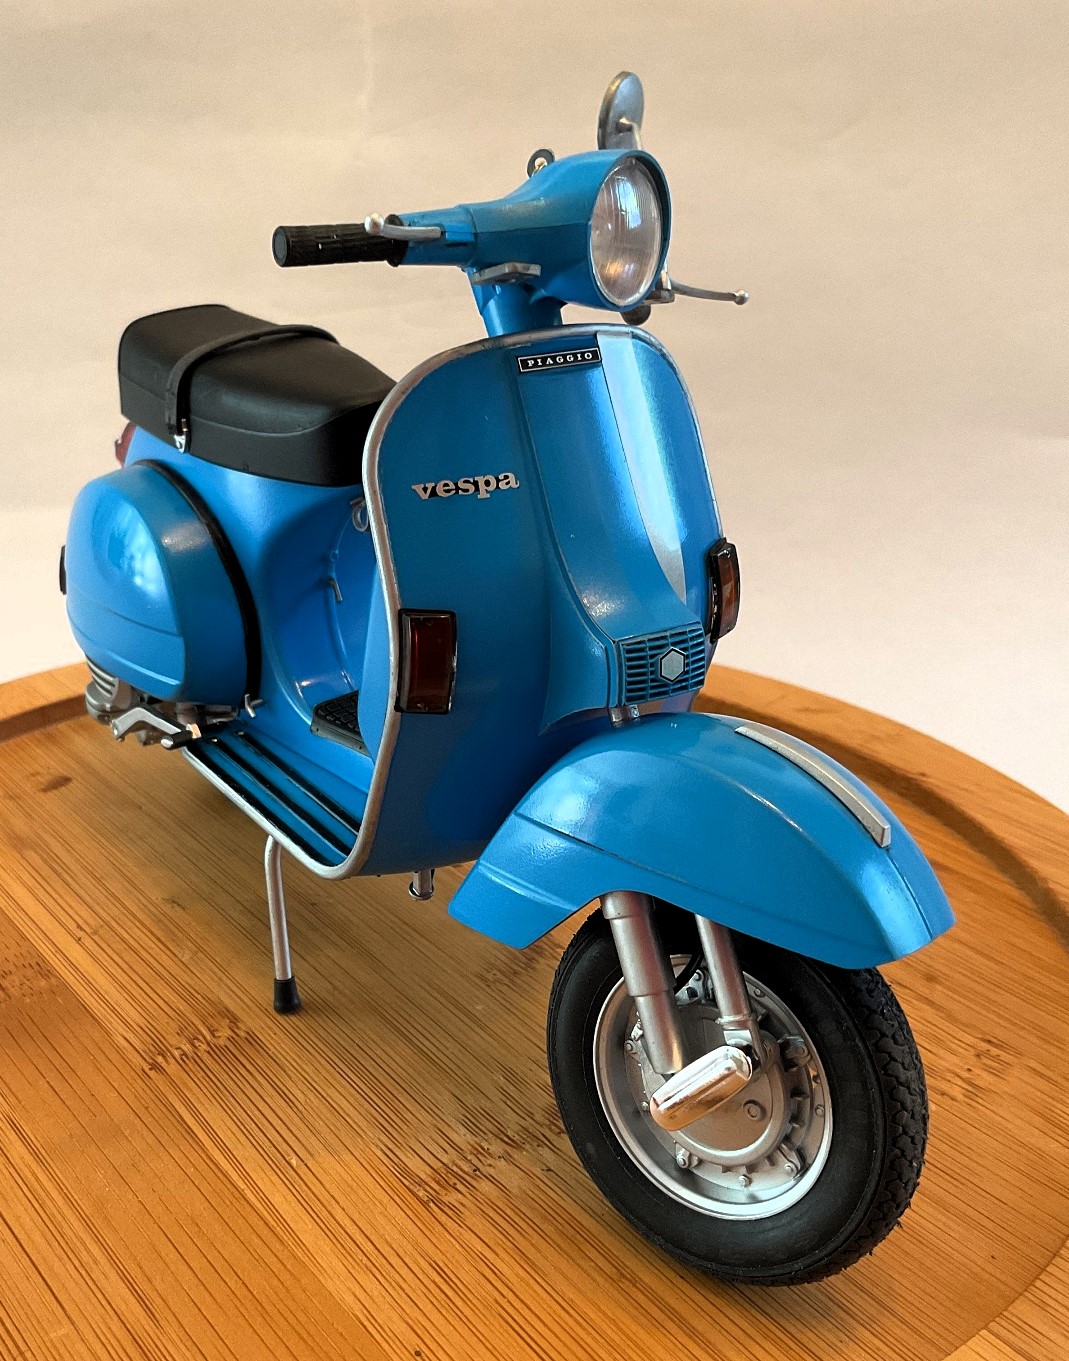
The 118 parts are 100% newly molded. The main body of the scooter are molded in deep blue with chromed bits for the shift levers, headed lamp bezel and assorted trim pieces. The engine bits are molded in a gray/silverish plastic. Black plastic fills in for the rest of the parts [seat, engine bits,etc.]. The clear parts represent the various turn signals/tailight lenses as well as the headlamp lense.
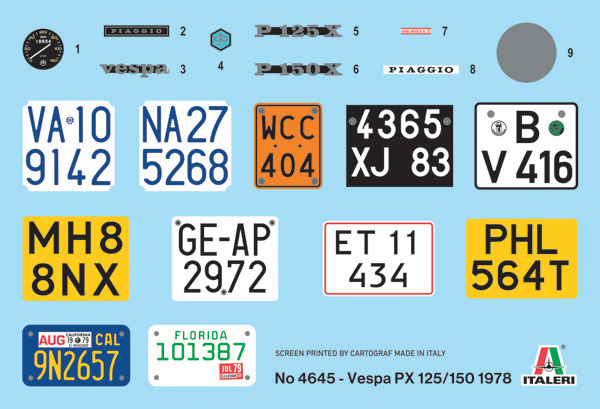
The water-slide decal sheet does have a number of license plates including one for California, another for Florida. [Although to do the Florida version justice you may need to find a soucre for an in-scale, alligator or iguana to drap over the scooter.] The decals work beautifully!
Other features are:
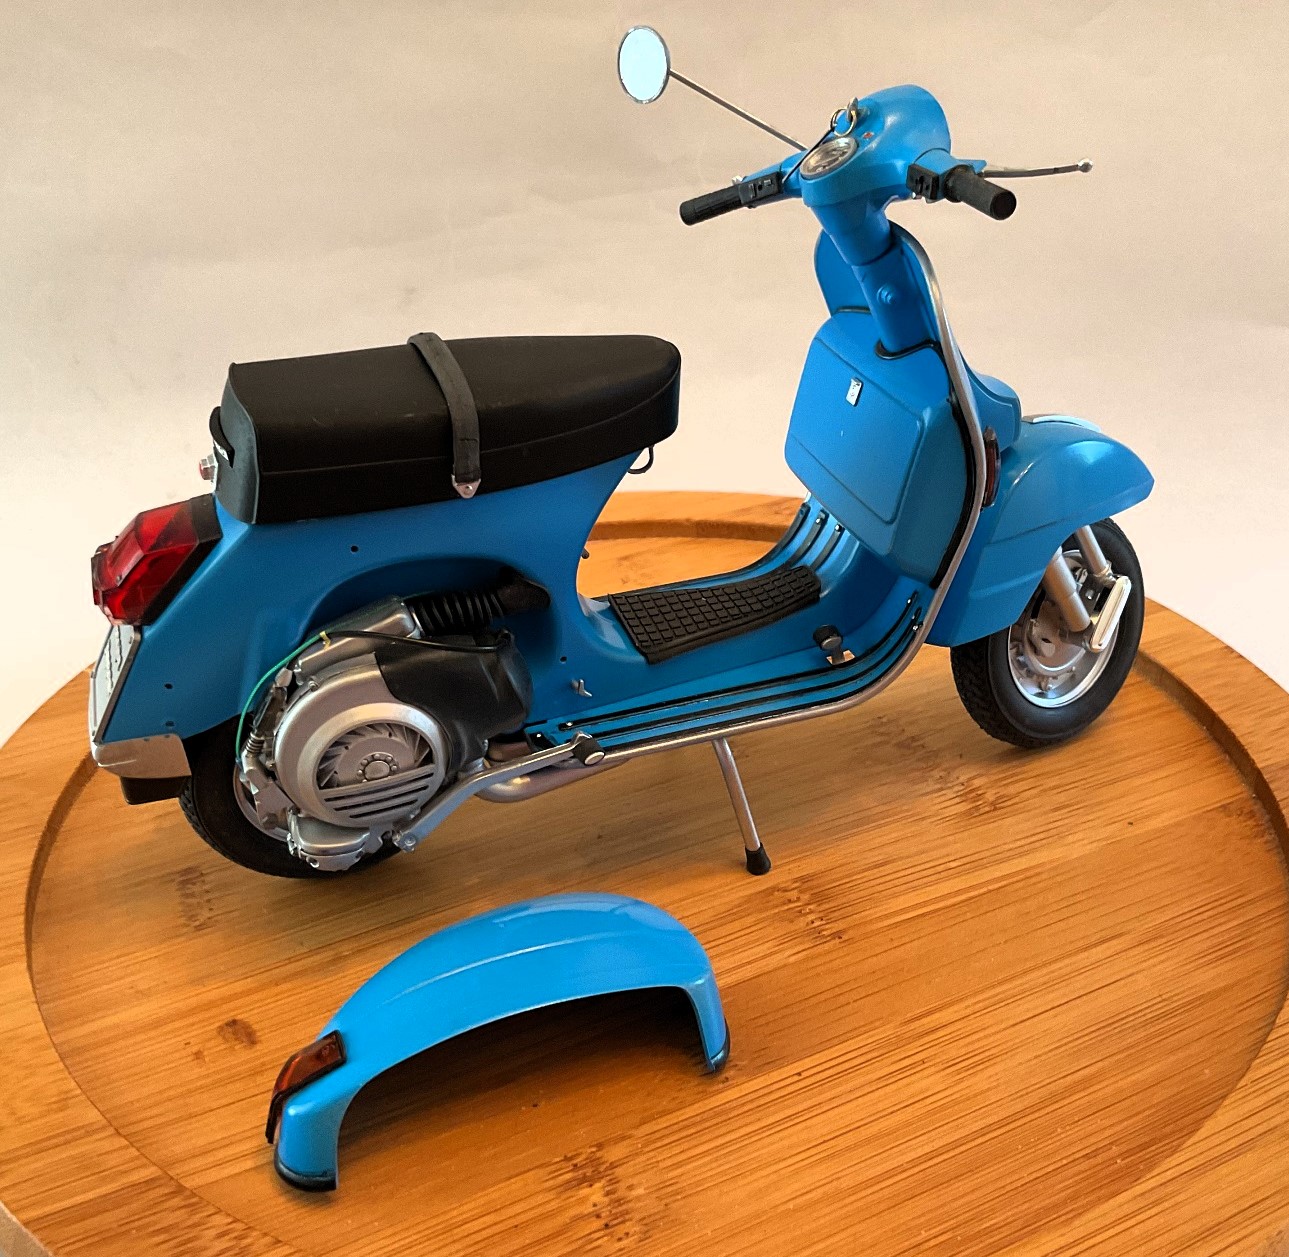
- Fully detailed engine and suspensions
- Working or fixed suspensions
- Removable engine cowls
- Liftable seat
- Rubber tyres
- Rubber parts [brake line tubing, hand grips, etc.]
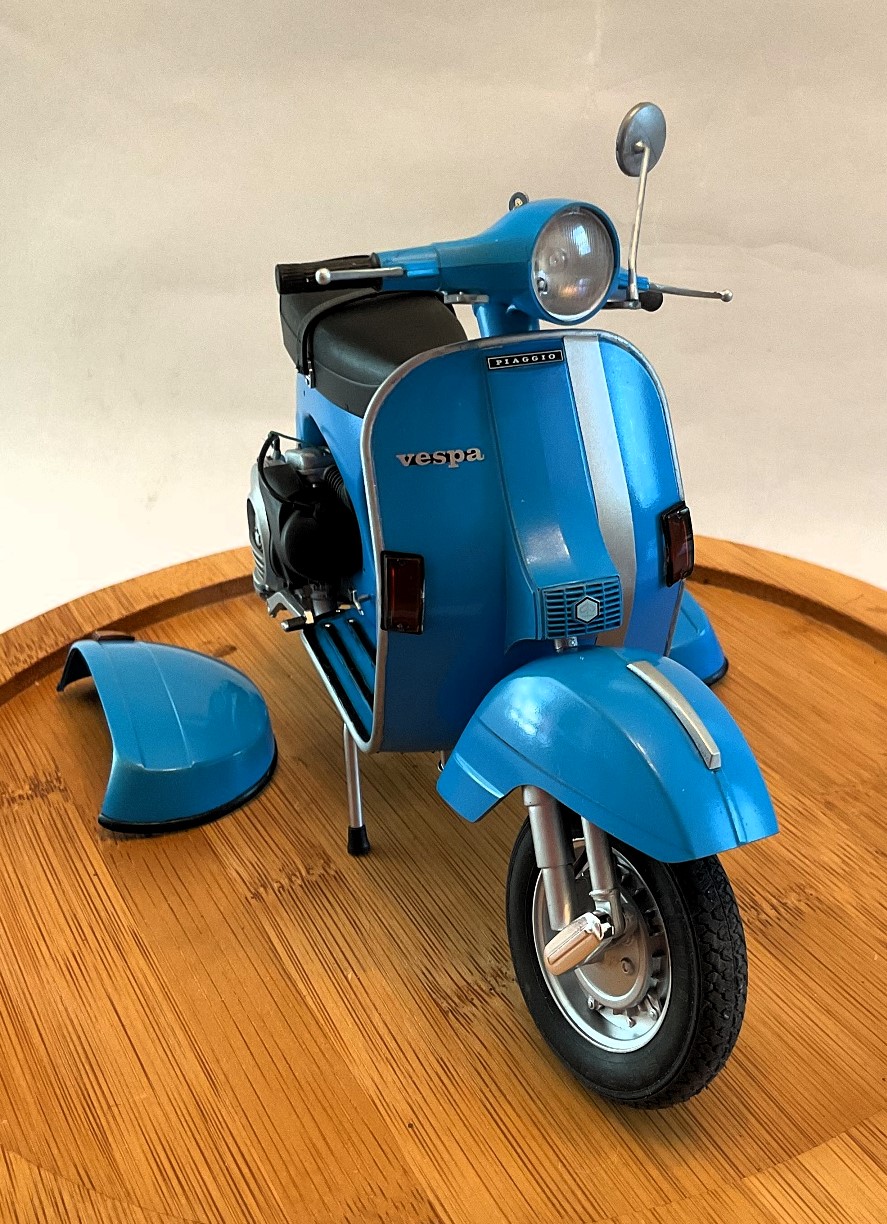
- Photo-etched parts [for vehicle badging]
- Color Instruction Sheet
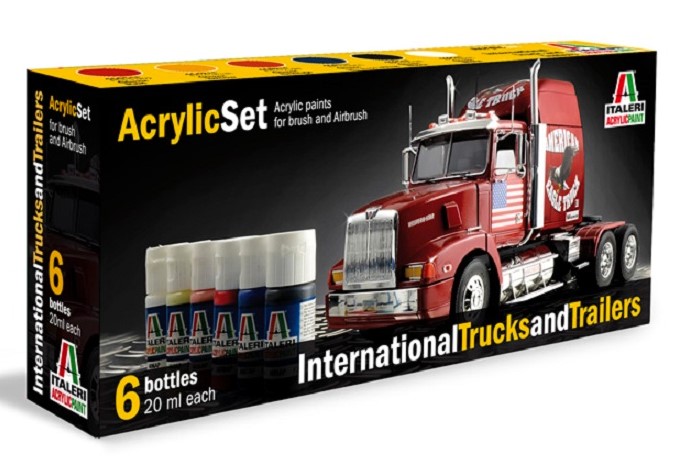
Color callouts are for Tamiya and Italeri paints. But matching those to your favorite paint manufacturer won't be much of a chore. While only one color scheme is presented, a little research will provide you with a plethora of options for your Vespa.
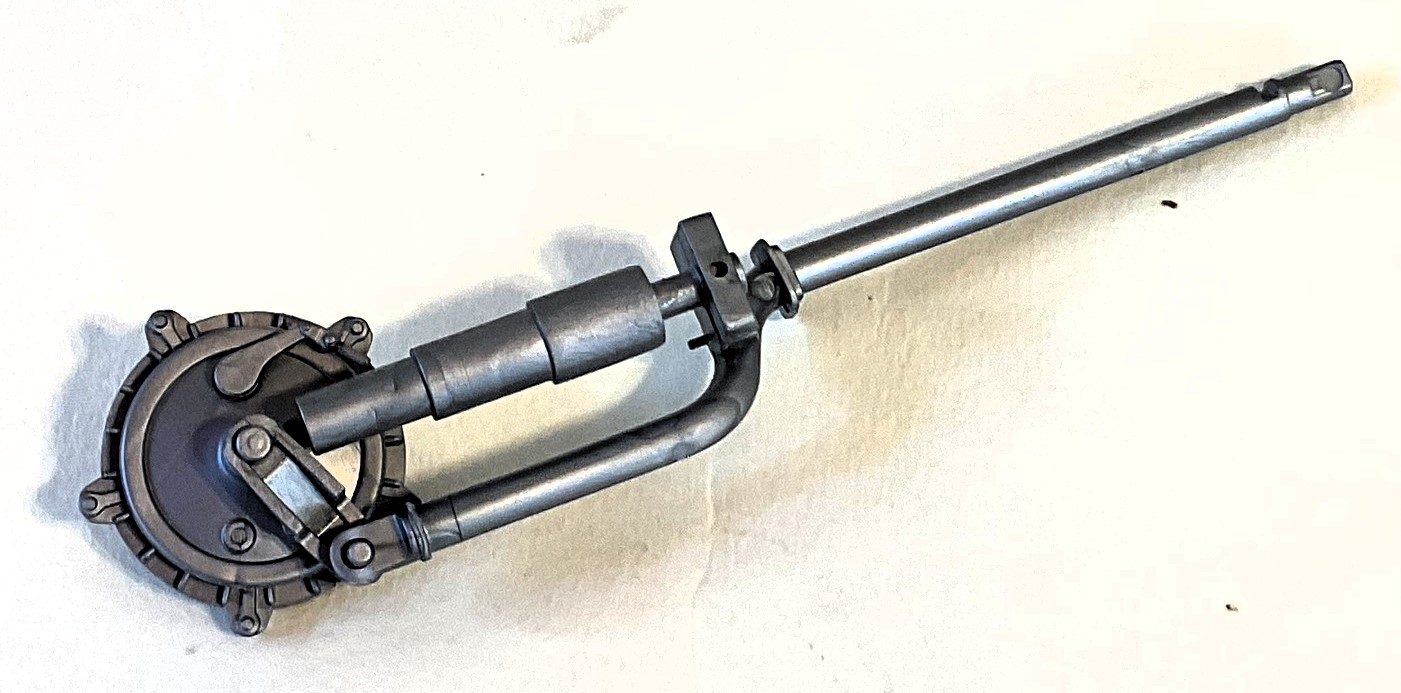
As it should, assembly on the Vespa starts with the engine. Italeri does provide vinyl tubing to replicate the various cables and brake lines. But for a more authentic look, you will need to add a few lines of your own. I did add green cord (electrical line) to the starter. There is an option to model working shock absorbers ['dinamic'] v. static at this stage, so do pay attention to the assembly sequence. That is probably the most challenging task you'll encounter.
There are a couple of inconsistencies with the assembly instructions [aside from misspelling dynamic]. When installing the kick-down stand one of the parts [mounting bracket] is mislabeled as #11E, should be #11D. Another concern that you might encounter is the position of the muffler. The illustration is rather vague as to its exact location. If you just follow the assembly sequence, the 'light will shine,' and the position will become obvious.
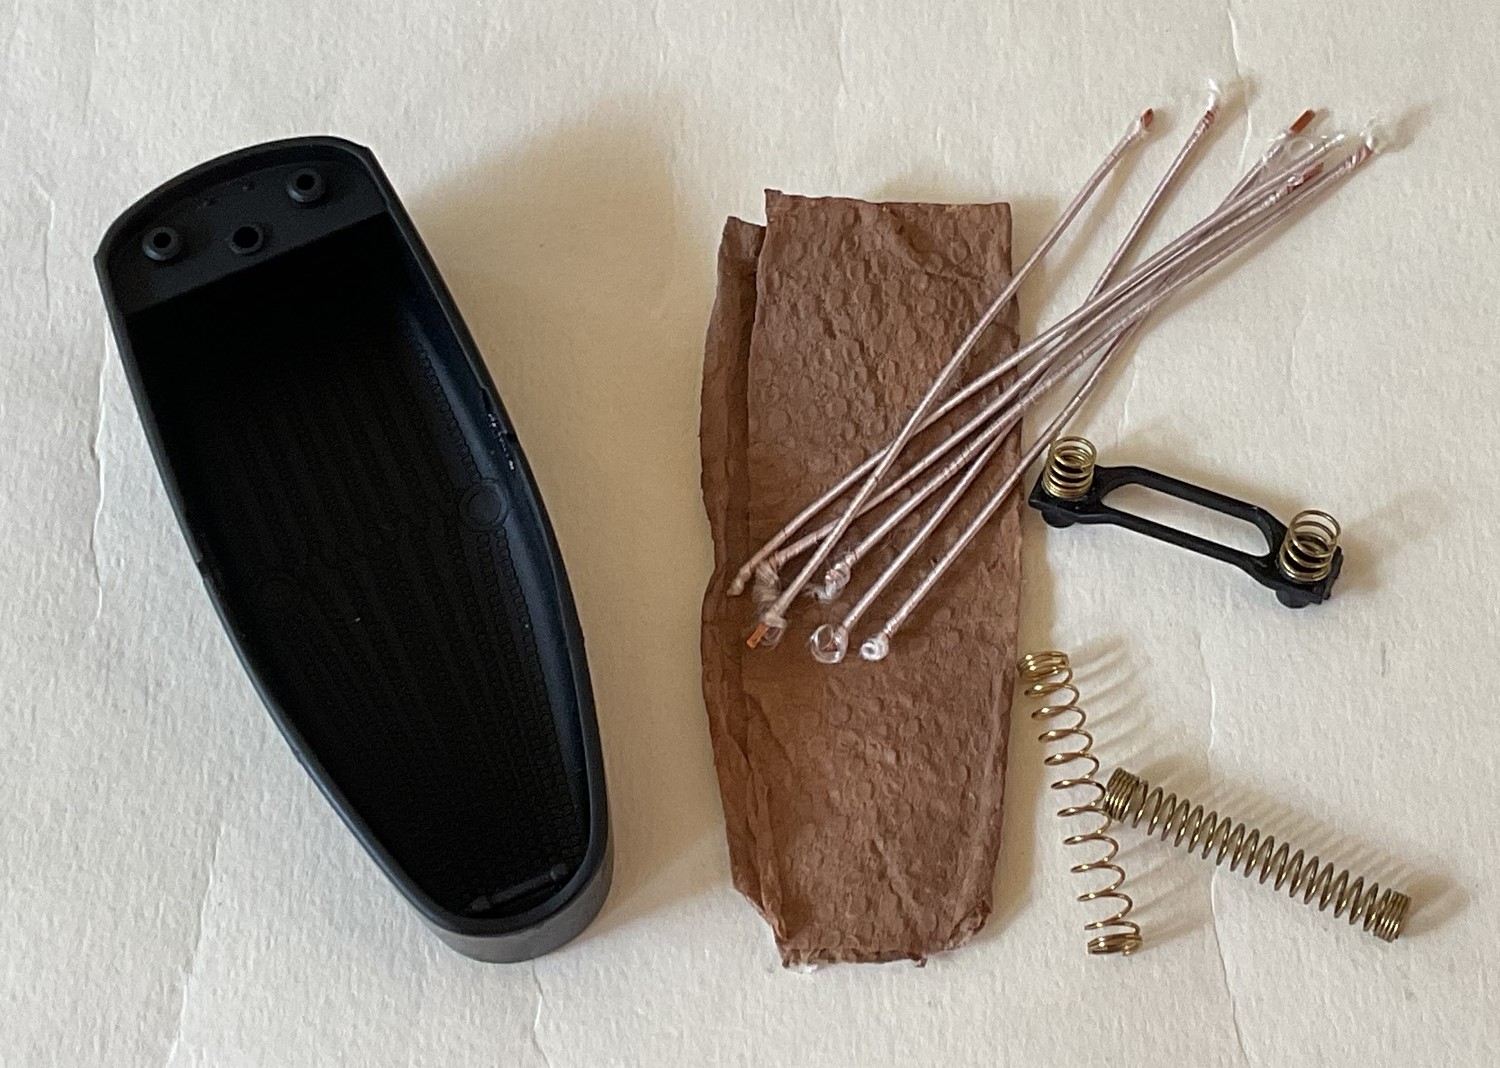
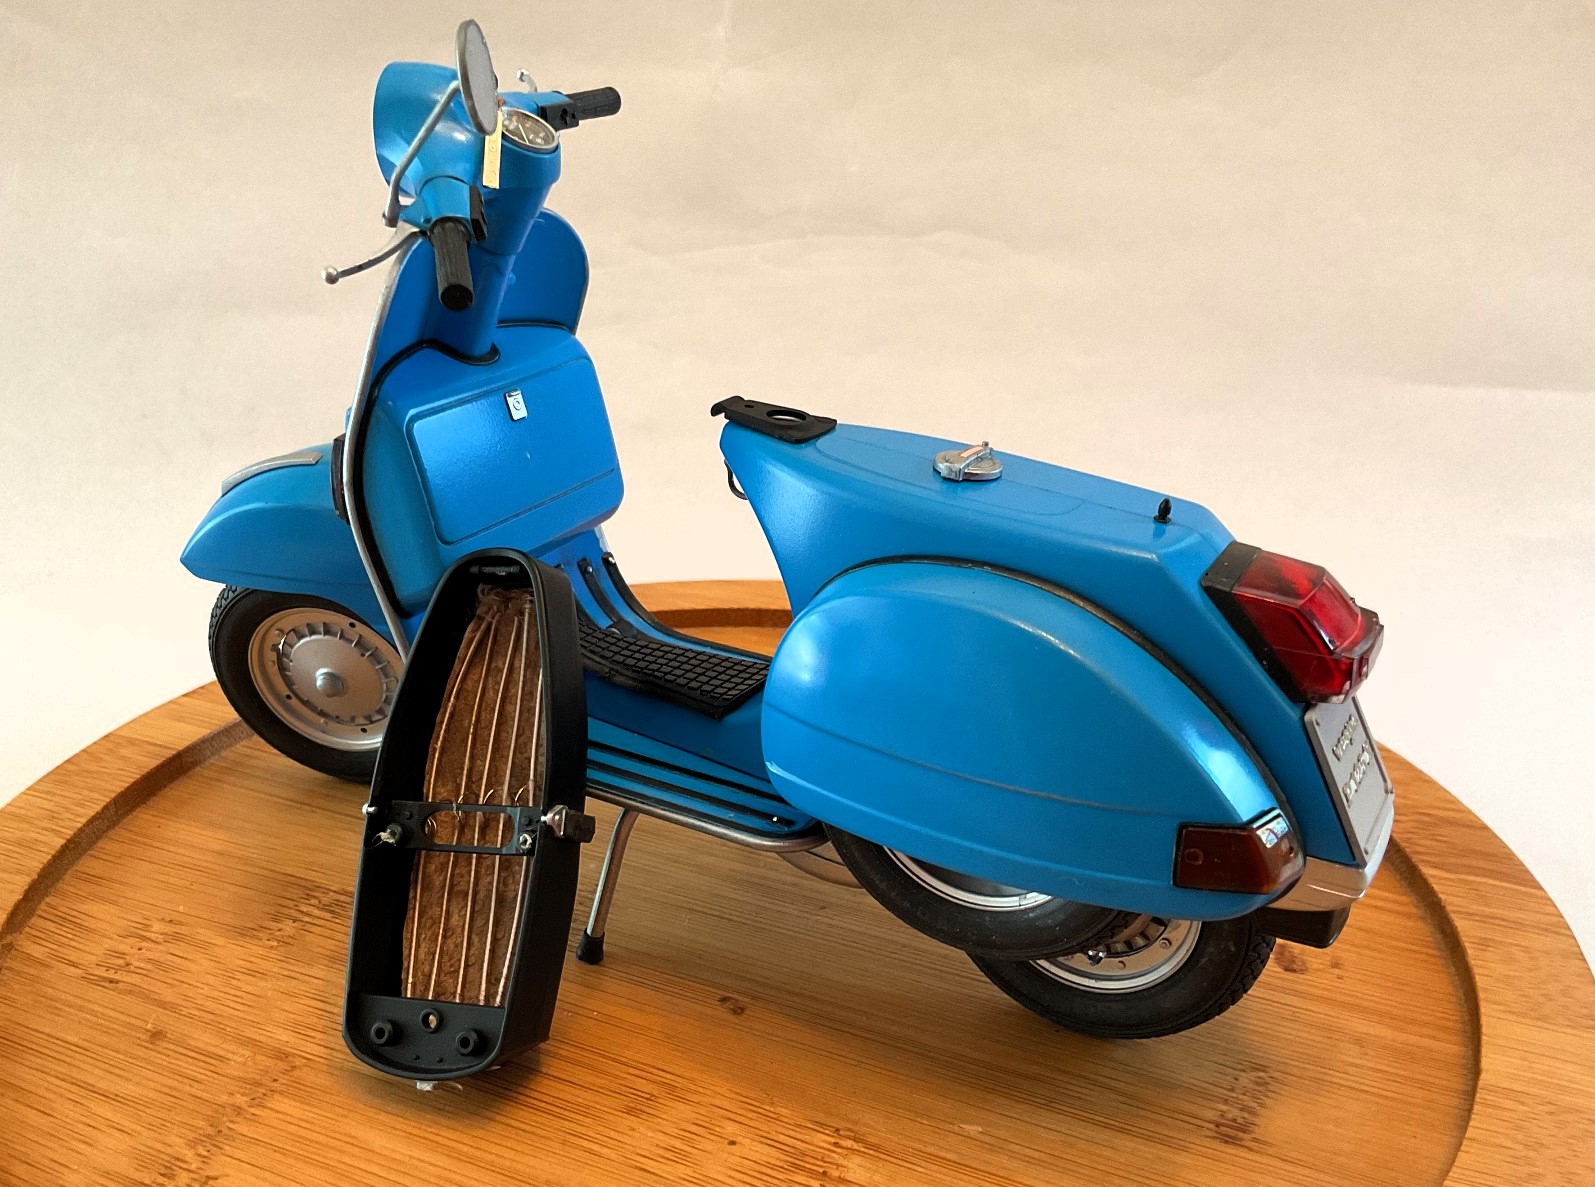
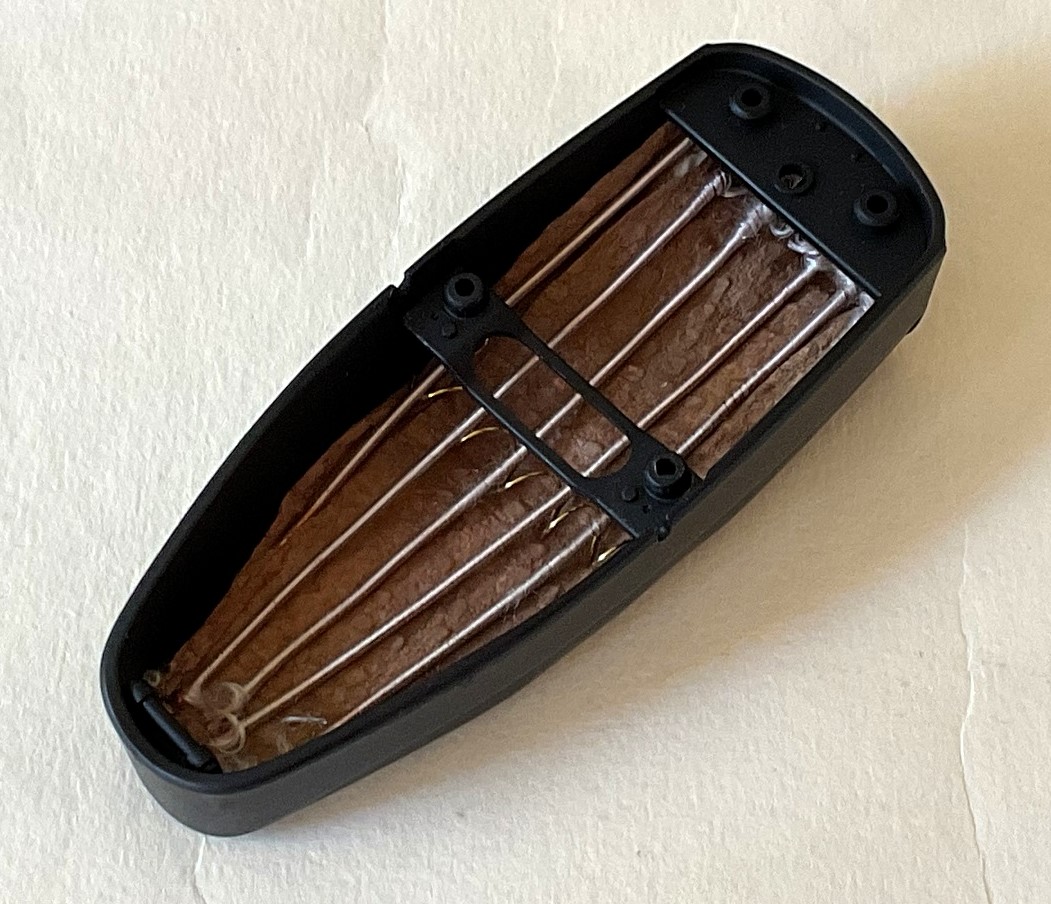
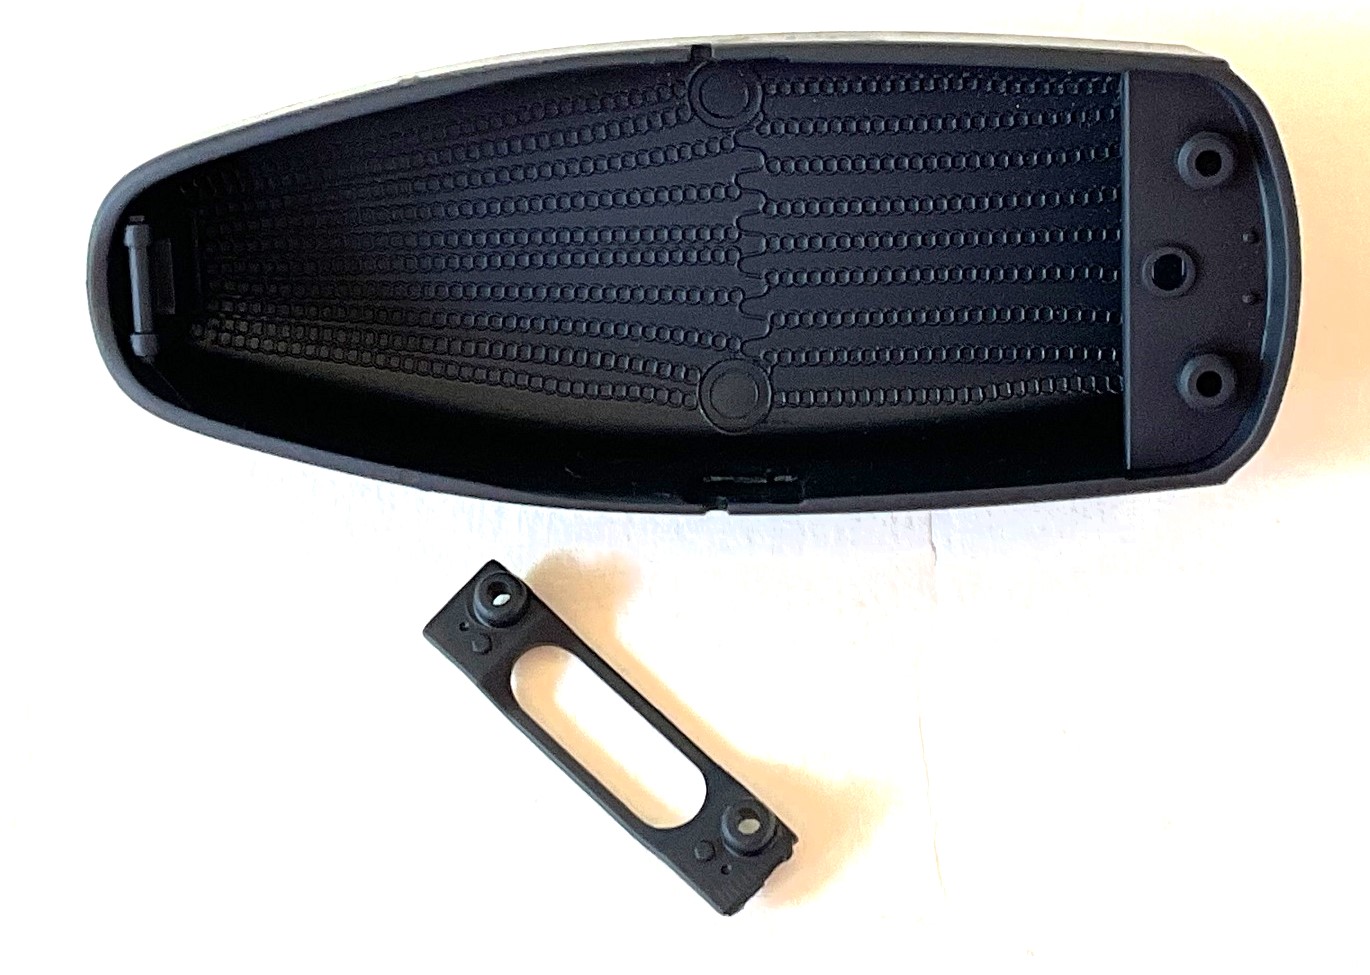
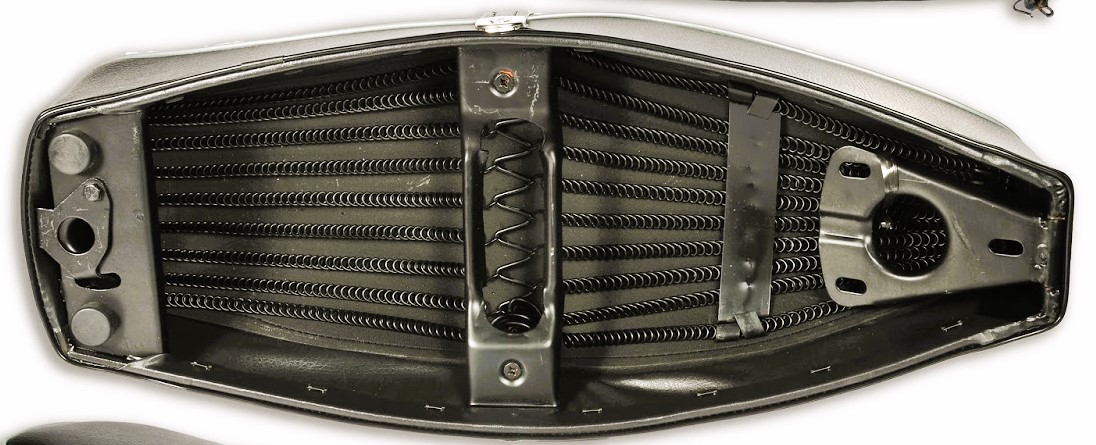
With the smallish parts count, you're pretty much finished assembling this Vespa way sooner than you might have first imagined. I did embellish the underside of the seat wth some threaded wire, ballpoint pen springs, and a napkin [for the seat padding].
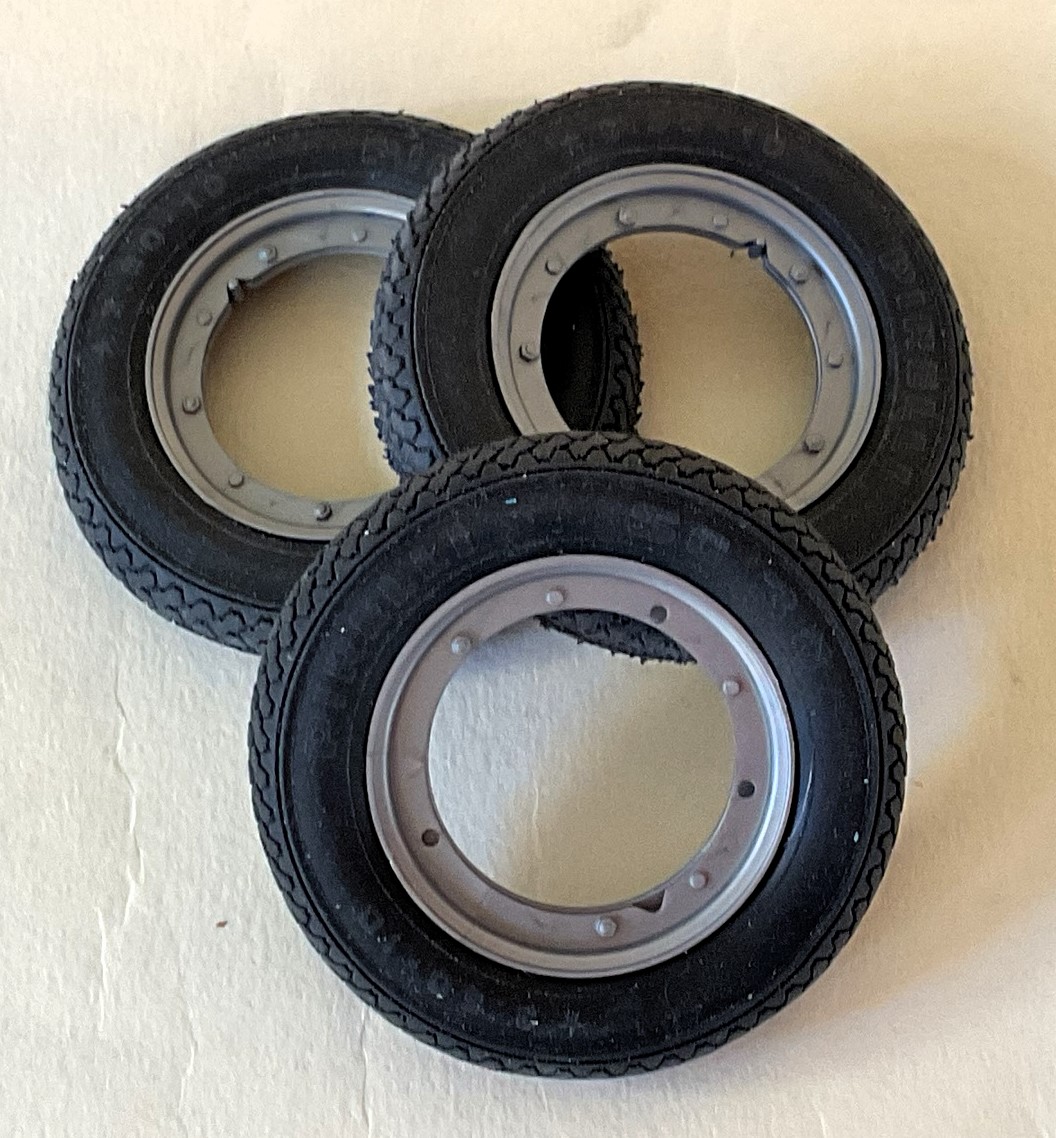
The three tires as well as some incidental bits [foot pad, air intake hose, handlebar grips, etc.] are soft, black vinyl. Those tires more than look the part and have raised badging on the sidewall. Pirelli, of course! The two-part rims, with molded valve stems, go together well.
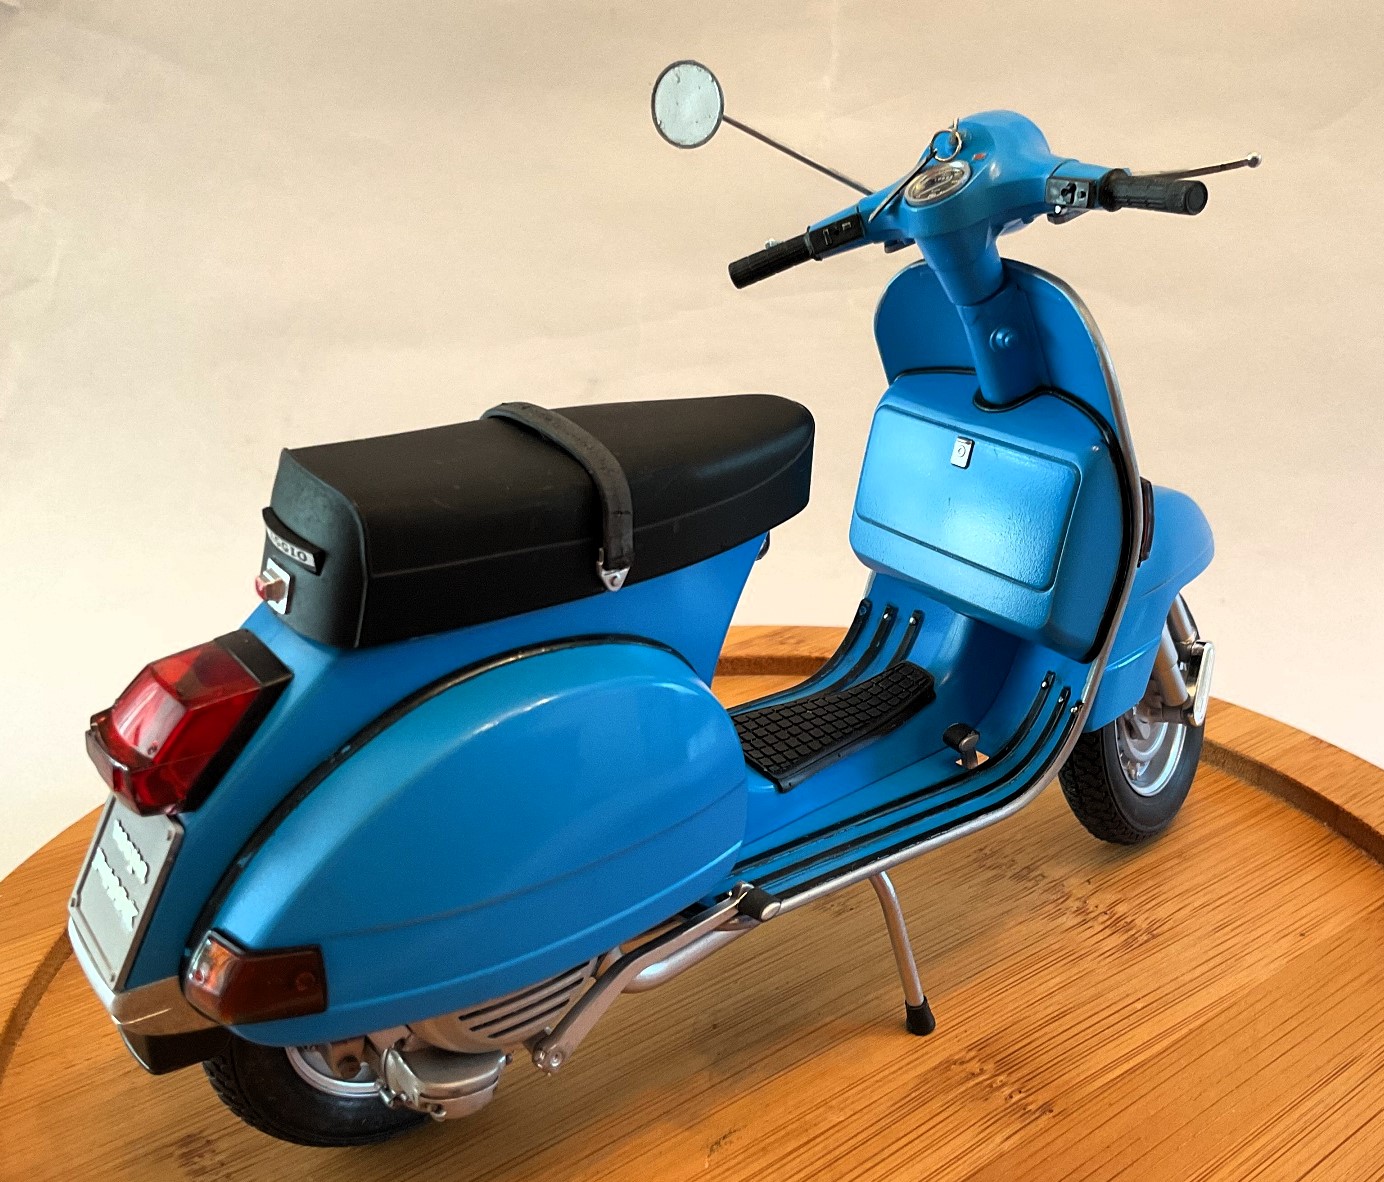
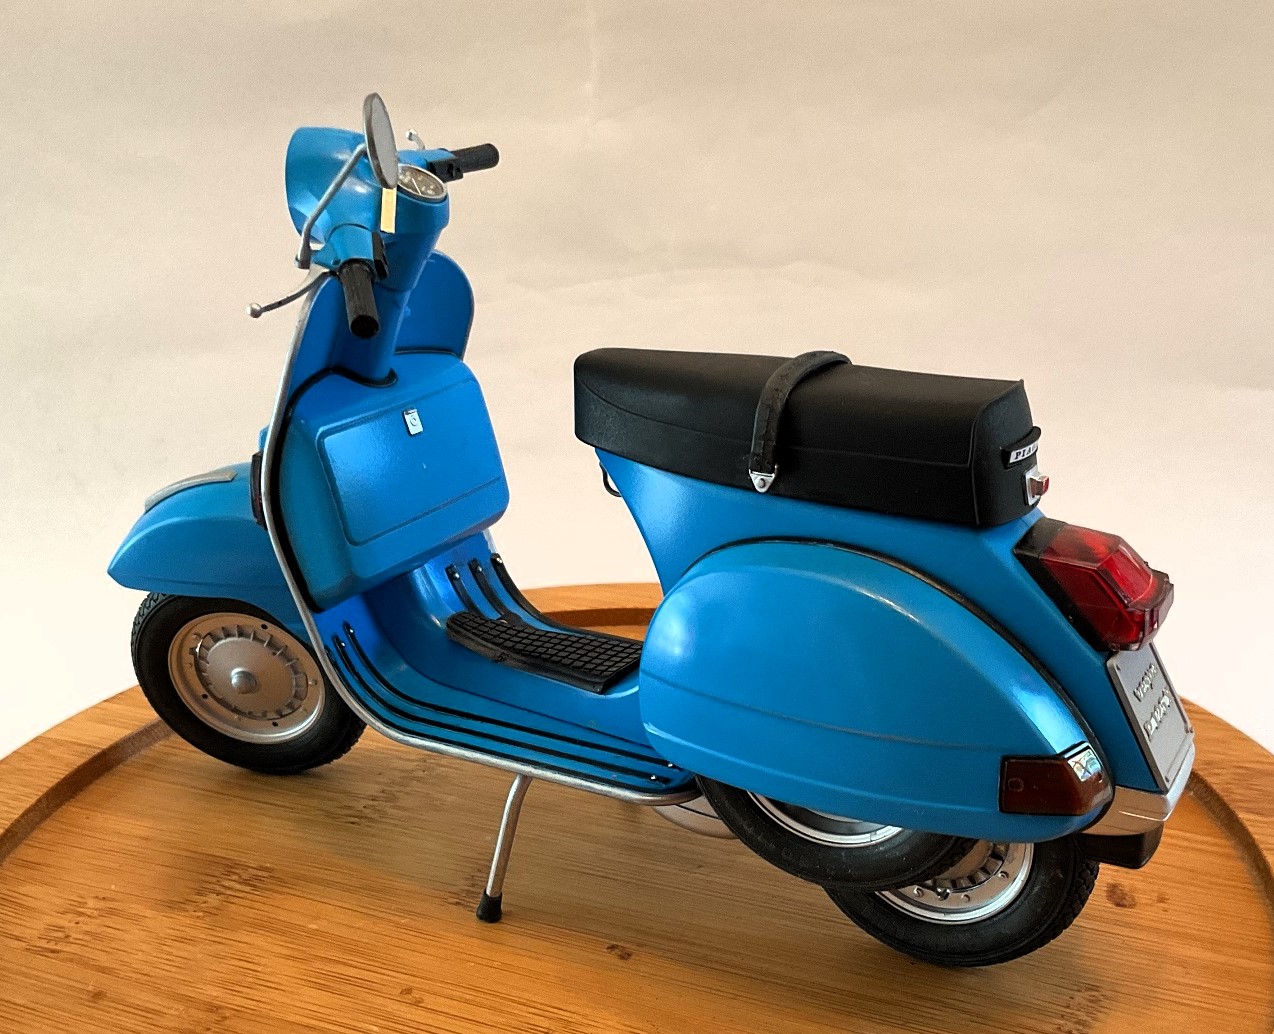
Assembly of the body parts is pretty foolproof. Part # 1B represents the cubby/glove compartment just forward of the driver. Someone with more skill than I could open the compartment, detail an interior and create a show-stopping scooter. That is something I considered but only briefly. The compartment, in reality, is just an open space where the jack and some hand tools were stored.
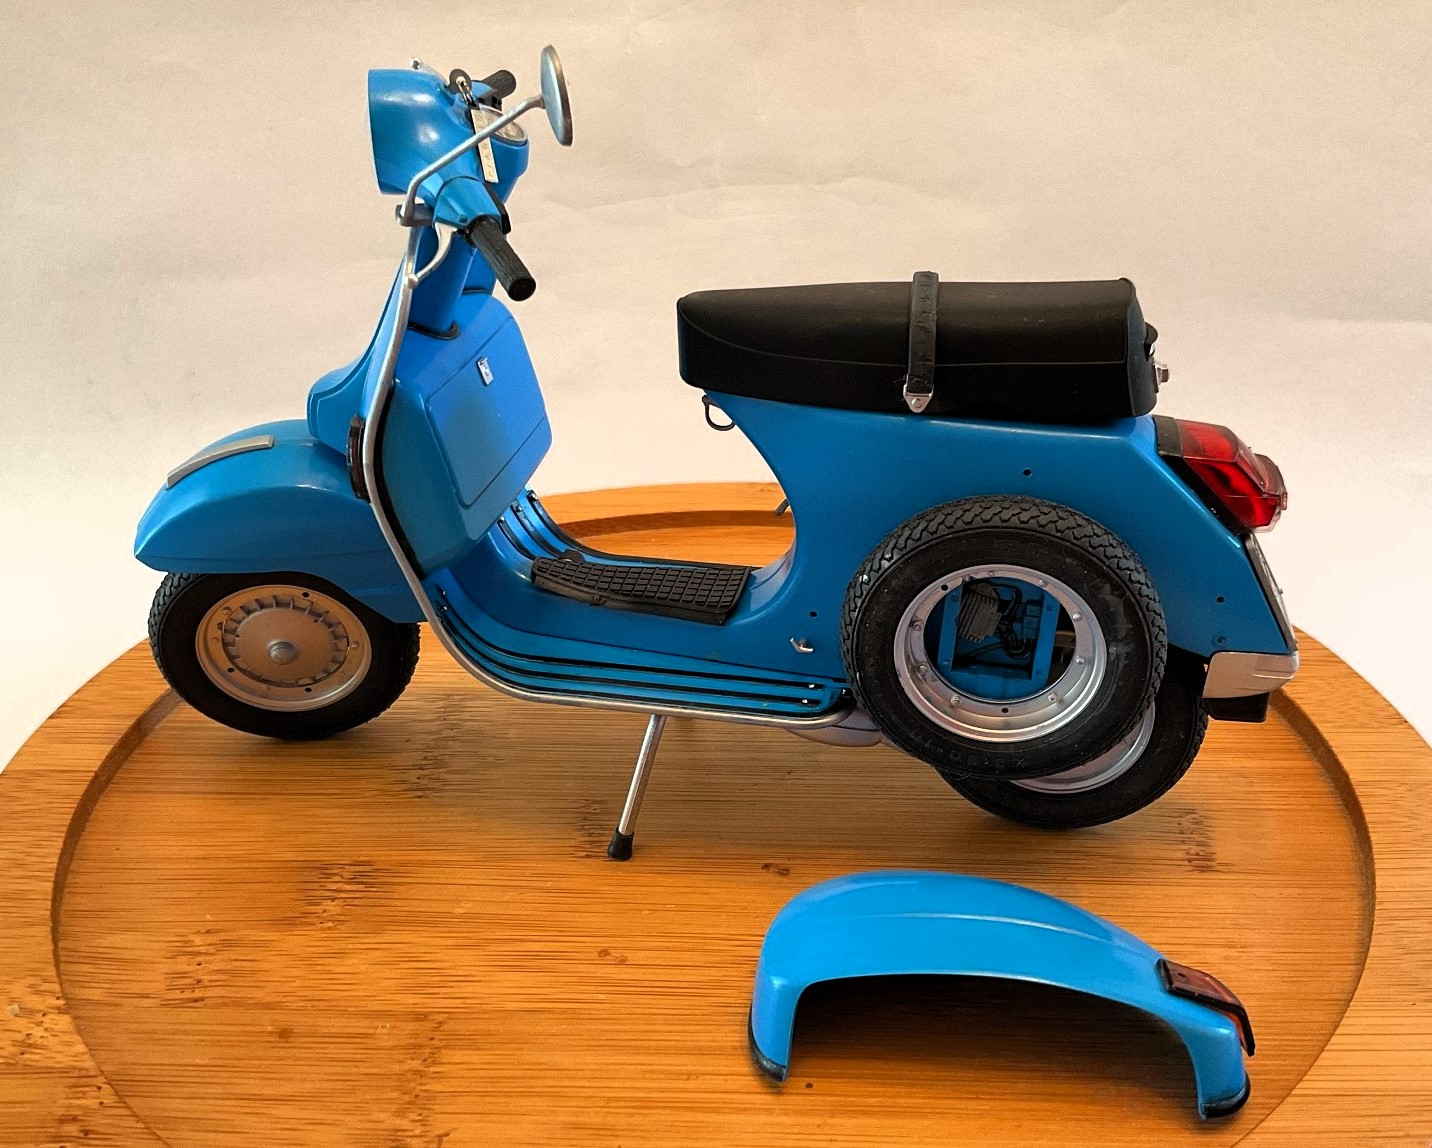
The side sponsors at the rear on the scooter were detachable on the real thing. The kit's parts are also detachable and might be left off to showcase the engine and spare tire. A facsimile of a battery is molded on the left side of the scooter behind the spare tire mount. Purists may want to replace that with something that is more presentable. The actual battery does protrude a bit more than what is represented by the kit part [# 1C].
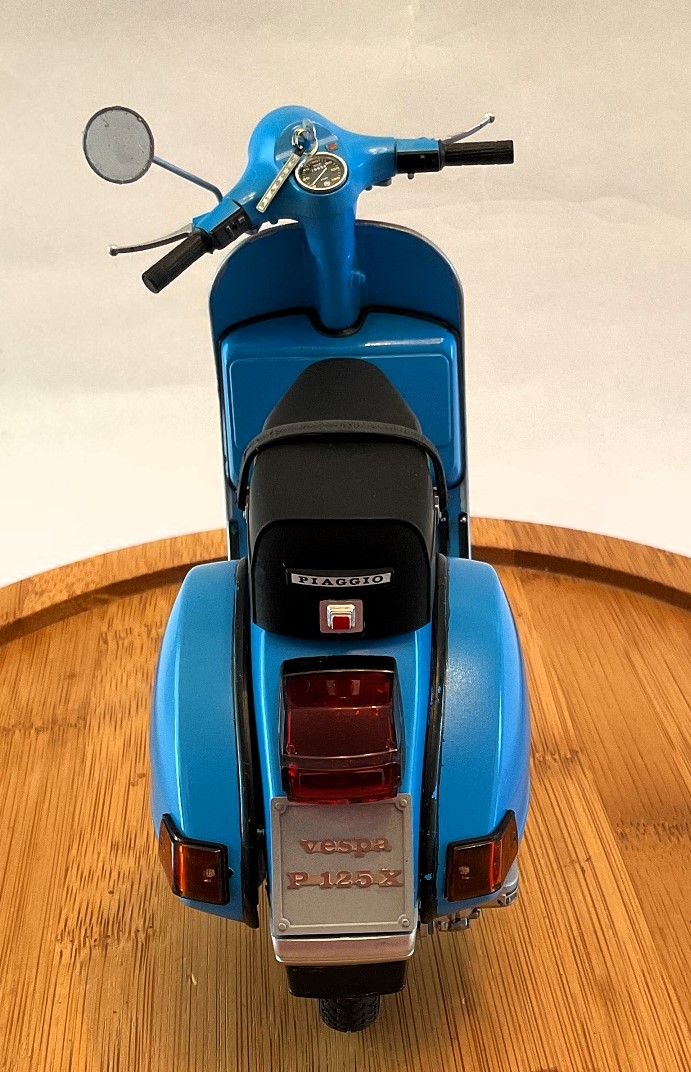
Getting back to the license plates for a moment. If you don't wish to use the Italian license plate [part # 13D] you will need to craft a backing plate, from paper, for whichever one of the other options you choose. The instructions are pretty vague on this subject, but the task is not insurmountable.
It should also be noted that the American version of this scooter had a different tail light assembly than the one provided. [Those pesky DOT rules.] Should you truly wish to model an American version of the scooter, you will need to account for that. While there are some other differences between the
European/American versions, the tail light is the most glaring. [There might be a pun in there somewhere?]
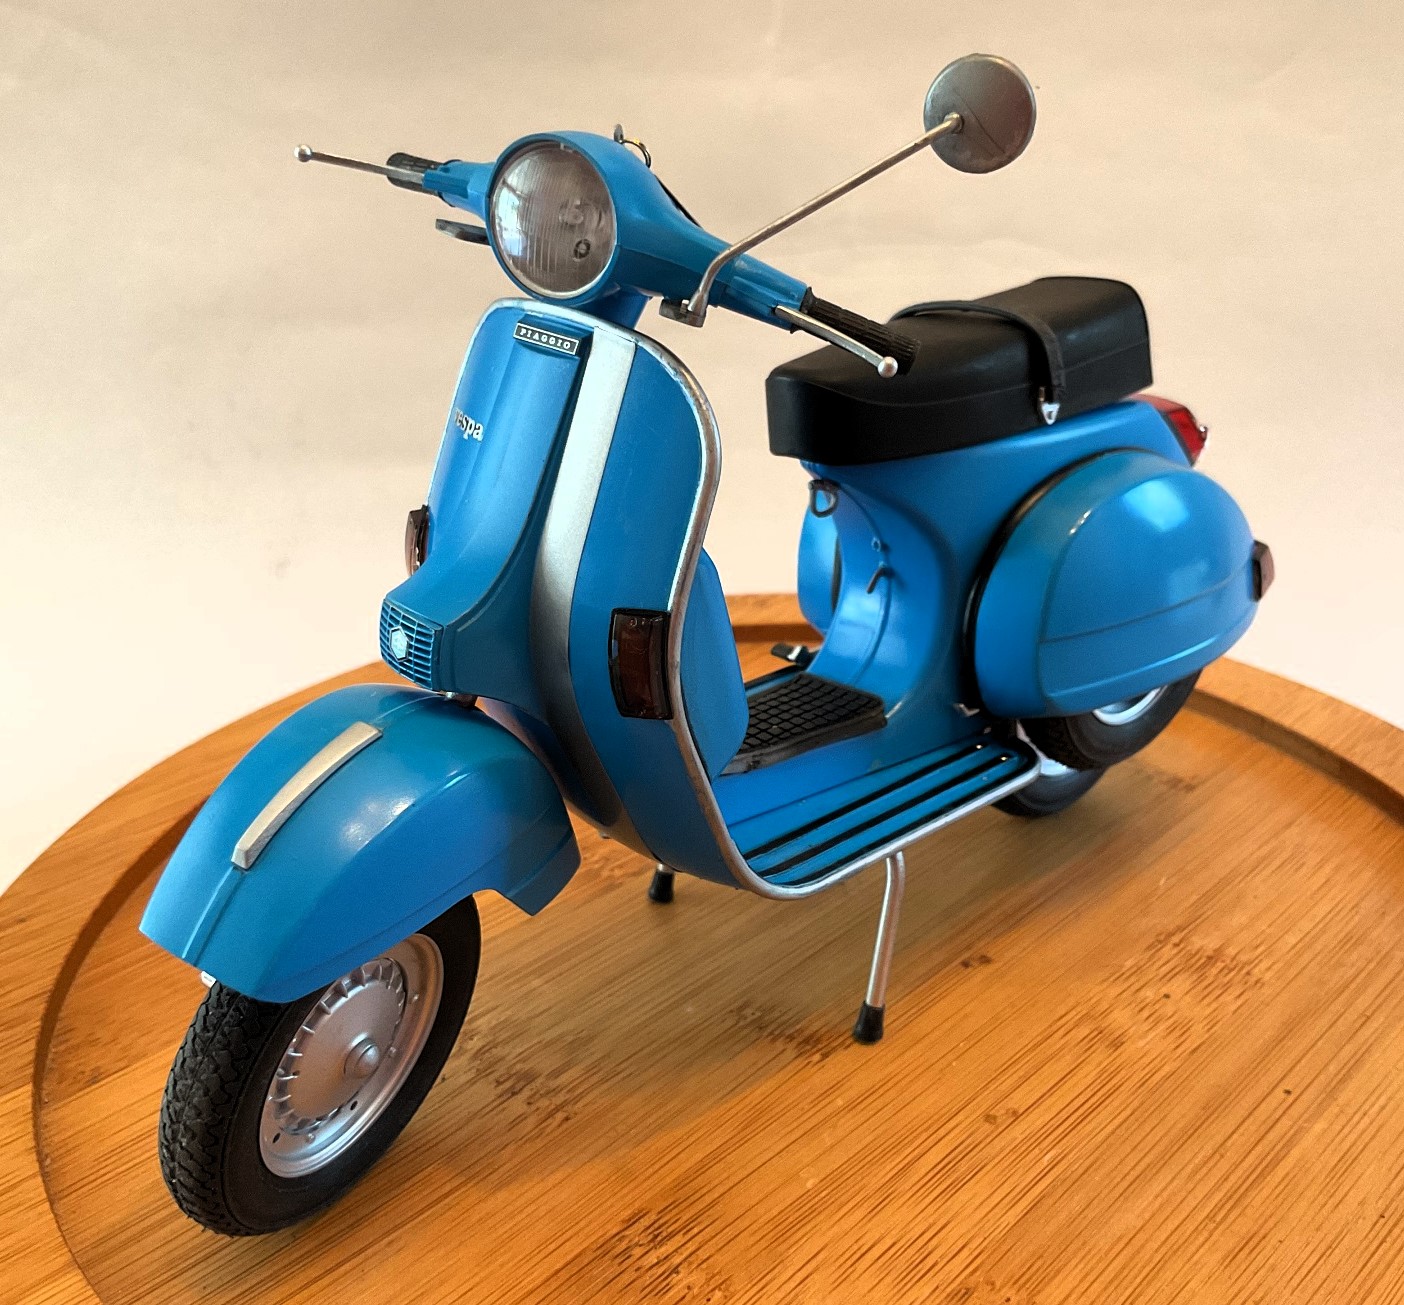
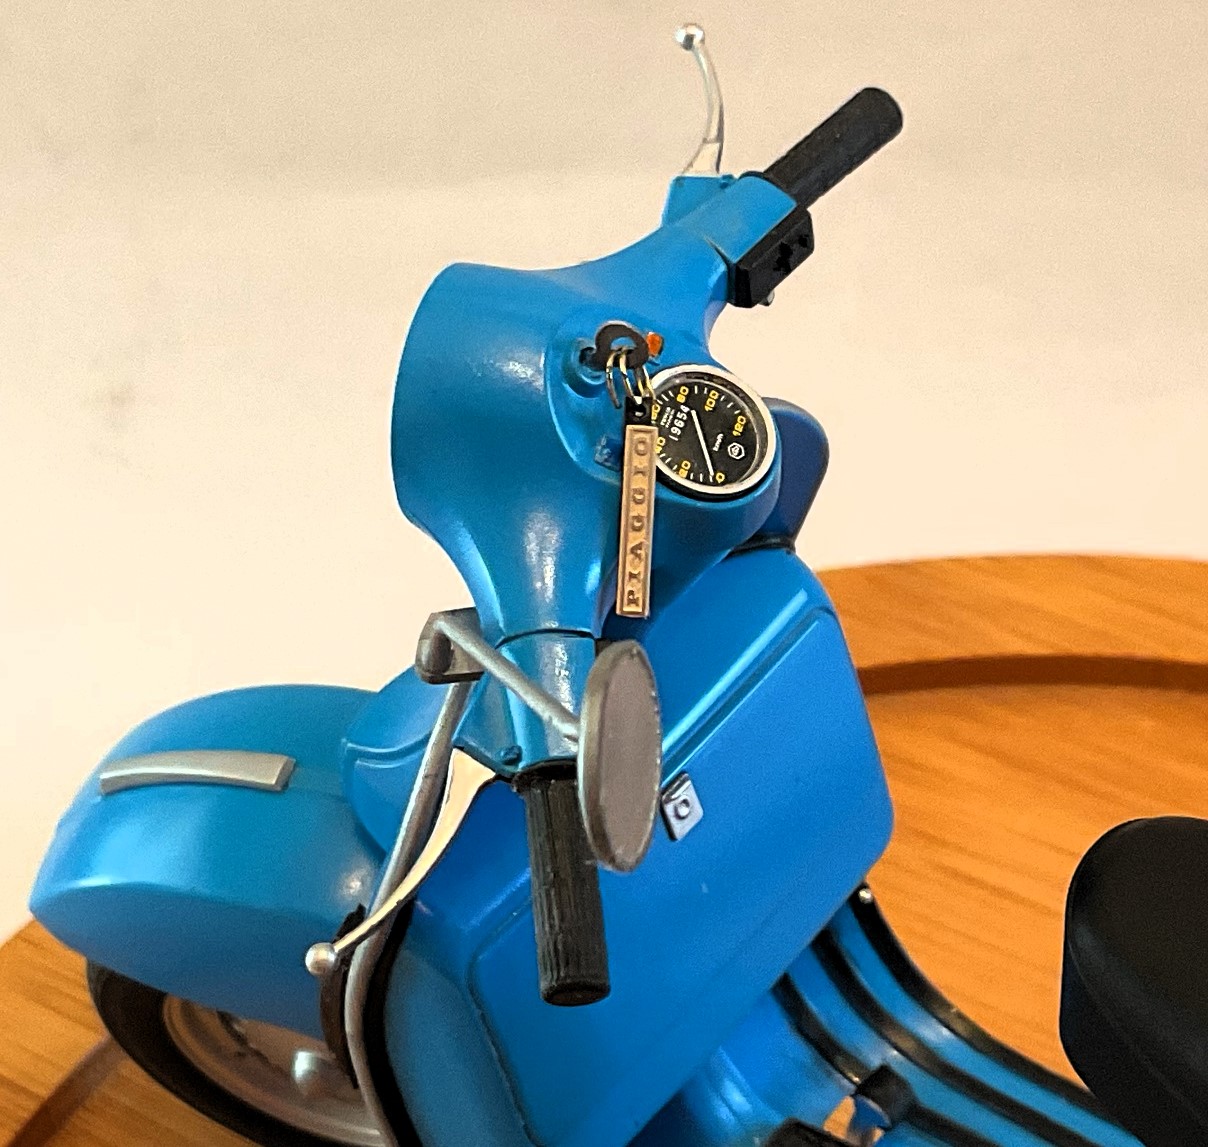
The handlebar is assembled from two parts to which are added the headlamp assembly, clutch and brake levers as well as two switch panels. These panels are home to the starter button, turn signal switch, high beam selector switch, etc., on the real scooter. As there isn't much in the way of molded detail on either of these parts so I added some from plastic stock. But the judicious use of paint and the odd decal here and there might be a viable option for adding the missing detail.
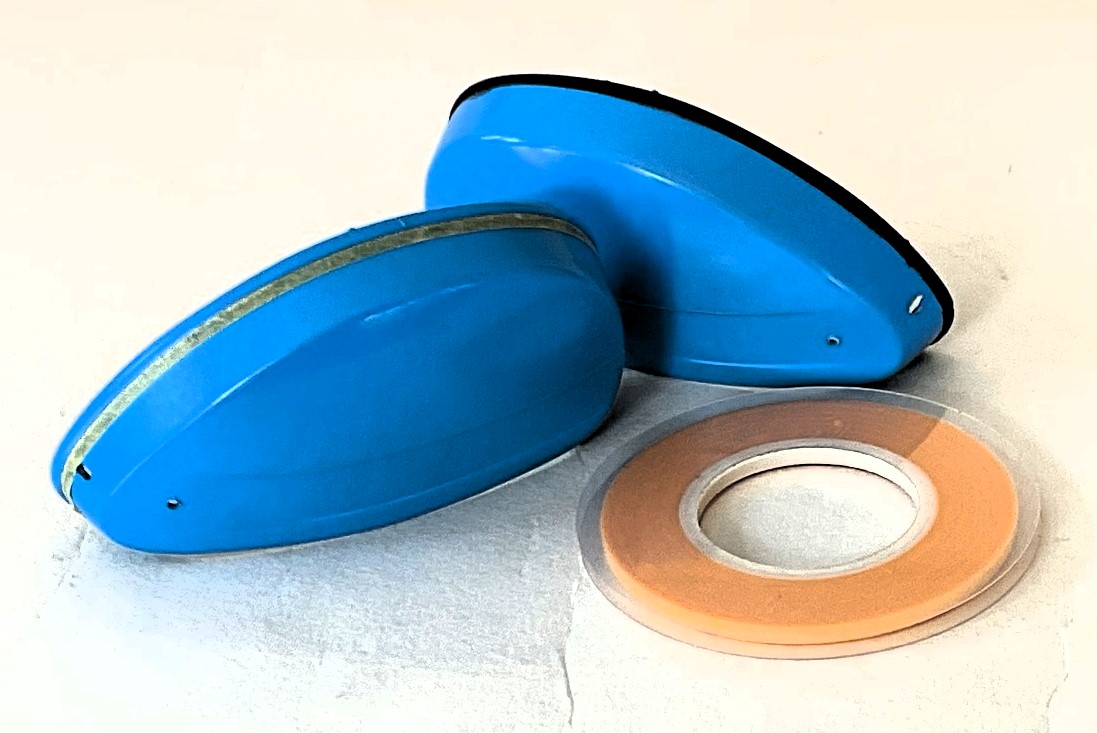
All of the body parts were painted Light blue and then lightly buffed. An added touch was to use commercial auto polish on those parts for a tad more shine. The aluminum bits [engine, wheels, etc.] were treated to a misting spray of Silver leaf. I masked around the chrome trim on the front shield and around the molded 'weather stripping' on the rear wheel covers and glove compartment/cubby with masking tape and painted those with aluminum and black paint pens, respectively.
To break up all that Light blue I fashioned a 'racing strip', on the front shield, from pin-striping tape from an auto supply store. I added rivets to the anti-skid strips on the running boards. These were made from the heads of some straight pins. Both the brake pedal and kick starter were embellished with electrical shrink tubing.
An added plus from the Italeri kit is the addition of a photo-etch key for the ignition switch. Fob not included. I fashioned mine from kit parts, some plastic strip, and some leftover spring from the seat modification. The World Wide Web has any number of sites for your edification should you wish to modify or embellish your Vespa. Oddly enough, there is a YouTube channel that devotes itself to restoration work on vintage Vespas.
This was a pretty fun kit to build with more than enough options for the crazed among us to detail to one's heart's content. Most of which could be done with a minimum of effort. [I just kinda stumbled into detailing the underside of the seat.] With supervision, Italeri's PX125 1978 Vespa could make for a nice kit for a novice to the hobby.
Ciao!
Grazie to Italeri and IPMS/USA for the review kit.
Comments
Add new comment
This site is protected by reCAPTCHA and the Google Privacy Policy and Terms of Service apply.
Similar Reviews