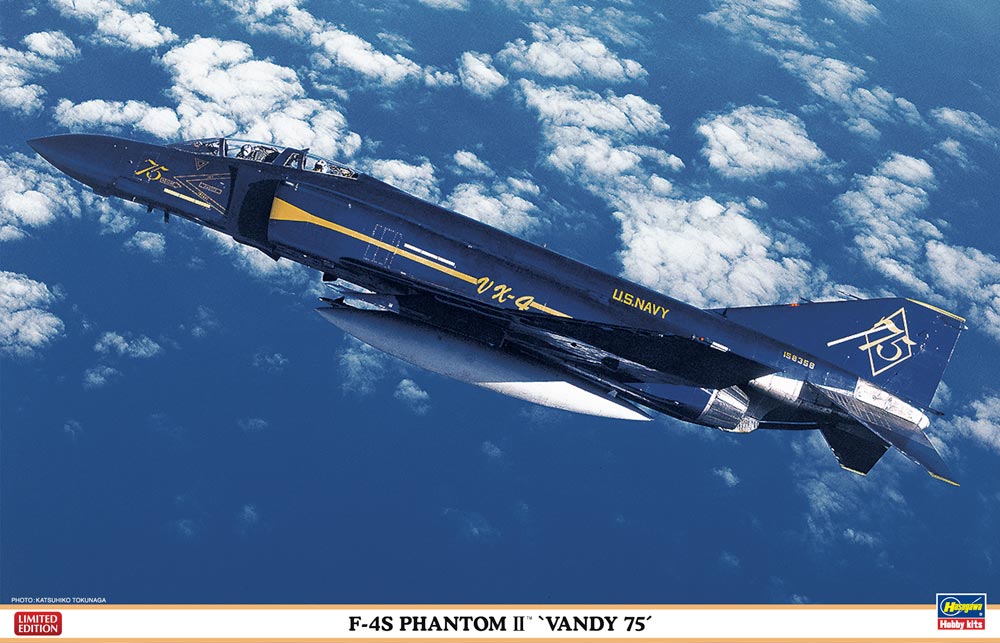
F-4S Phantom II “Vandy 75” Limited Edition
The Hasegawa F-4 Series Phantom II models have been a standard for the modeling community for a number of years. They have offered virtually every variant ever produced and flown in all services around the world. This specific release is Celebrating the dawn of carrier landings. On January 18, 1911, the first successful aircraft landing on a ship occurred when pilot Eugene Ely landed his plane onto the USS Pennsylvania (ACR-4). In 1986, Air Test and Evaluation Squadron Four (VX-4) celebrated the 75th anniversary of this historic occasion by adding special "Vandy 75" insignia to select F-4S Phantom IIs.
The kit is molded in a light grey, somewhat brittle plastic on 7 sprues, 1 sprue of clear and 1 small fret of photo-etch. A single sheet of nice looking, high quality decals rounds out the contents. In typical Hasegawa fashion, all spures and frets are identified in the 8 page instruction sheet with the parts that are not required being highlighted. This virtually eliminates all confusion for the modeler.
Construction is straight forward beginning with the seats and cockpit tub, fuselage and then the wing assembly. All parts fit together with little flash or trimming required. Make sure to take your time and glue the fuselage in small short areas as it will be a sanding problem if you don’t. I say this from experiencing a shift in the backbone by trying to do the top and bottom all at once.
I do have a few complaints in the fuselage and the main one is the fact that the intakes have no interior detail and end in a flat molding. A kit of this size and detail is begging for this to be properly ducted with at least a fan facing somewhere down the intake. A very small amount of putty was required on the lower rear seams for both intakes. Something that is really a pain is the removal of the small wing fences so the correct “Sierra” type can be properly placed. This is in a difficult area and one should exercise some patience. A similar removal of a stiffing plate on the horizontal stabilizers is also a bit troublesome and requires considerable patience as well.
While in fits together and sands out quite nicely, the 2-piece radome is a bit of a nuisance and with a little test fitting and some very minor sanding mounts perfectly to the fuselage.
Next is the gear and speed brakes and the photo-etch. The PE is 3 pieces that are wing stiffeners and lay down quite nicely. A great detail, only to well hidden on the underside. The nose gear and well are straight forward and detailed nicely. The same can be said with the main gear area and the speed brakes. Take your time in these areas as it is quite busy and there is a lot of parts in confined spaces. The main tires are 2 piece and will require a bit to clean up but are the correct shape. I finished out the underside with weapons and tanks. I loaded out all missiles and installed all of the tanks. The box cover art only shows the centerline tank installed in Navy grey and the paint guide shows it painted and decaled. I took a little artistic freedom at this point and used the centerline decals on the wing tanks as they just ‘pop’ a little more since they are not hid mostly out of sight. Not being one to neglect the centerline, I trimmed the extra “75” tail decals and placed them. Speaking of the decals, they performed nicely. I used a bit of different solutions in different areas to get everything lay down. One problem with the decals was the callouts for the canopies. The numbers on the sheet are opposite of what is pictured. I followed the sheet as printed and figured that a “Rear Admiral” should be in the rear seat. No offense to the Rear Admirals reading this.
I finished the model using Model Master enamels, metalizers, Tamiya paints and clear coated with gloss lacquer. Lastly, I installed the glass. Here in lies my biggest issue with this kit in that it does not include the single canopy that is in other Hasegawa F-4 releases. All of the pieces fit fairly well, but will take a bit of trimming and sanding to get the 4 pieces to correctly align and set correctly.
With all of this being said, I feel at the end of the day it produced a very striking F-4S that will get most folks to take a second look. The F-4 is one of those very distinctive looking and iconic aircraft that always looks good, especially in a high gloss blue and gold highlighted version.
I would like to thank the good folks at Hobbico, Inc for the opportunity to build and review this kit. Also, thanks to the IPMS guys for keeping this great program running and keeping us modelers on track and in line.


Comments
Build to come . . . .
Just bought this kit, plus some Dmold intakes to give it the internals it so desperately needs. Got a few more F-4's on the bench to do, but will be starting this one soon. Will report back when I do. I've been admiring this particular F-4 for a long time, and your write-ups sinched it for me, a few purchases later, and its in my stash, ready to take its turn. Just finished an Academy F-4C, currently doing and RAF F-4M, then this bird is next. Can't wait!
Add new comment
This site is protected by reCAPTCHA and the Google Privacy Policy and Terms of Service apply.
Similar Reviews