
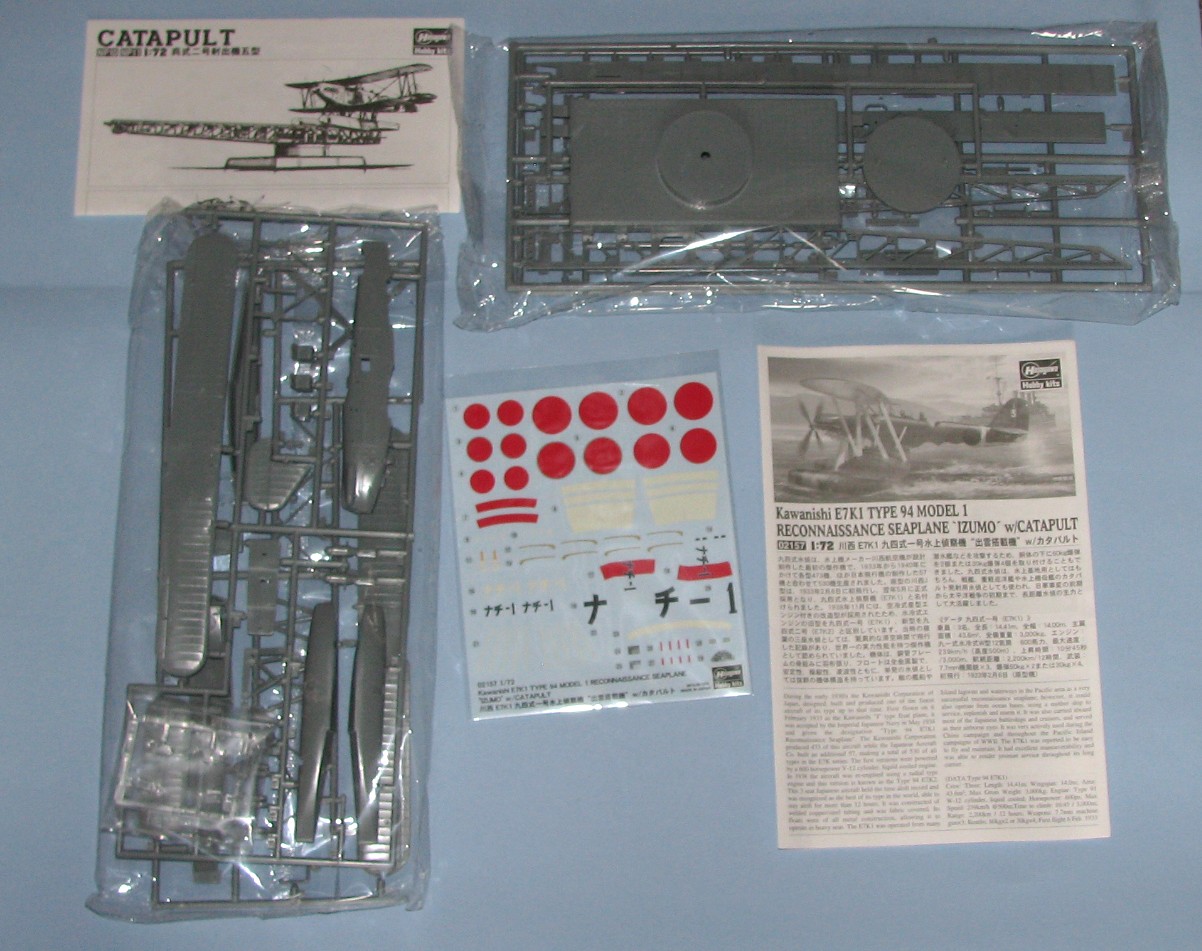
Kawanishi E7K1 Type 94 Model 1 Recon Seaplane 'Izumo' w/Catapault
History
First flown in February 1933 as the Kawanishi “J” type floatplane, it was accepted by the Imperial Japanese Navy in May 1934 and given the designation “Type 94 E7K1 Reconnaissance Seaplane” and 530 of all types in the E7K series were built. The first versions were powered by a 600 horsepower V-12, liquid cooled engine. In 1938 the aircraft was re-engined with a radial engine and was known as the E7K2. The E7K was constructed of welded copper/steel tubing and was fabric covered and the floats were of all metal construction allowing it to operate in heavy seas and was viewed as the best of its type as it was able to stay aloft for up 12 hours. The E7K type stayed in frontline service up to 1943 when it was relegated to second line duties.
The Kits
Inside the box you will find two bags of sprues, one contains the catapult (3 sprues of grey plastic) the other contains the aircraft (2 Sprues of grey and 1 clear plastic). Two sets of instructions and a decal sheet round out the contents. The plastic is crisply molded with a little flash but there are many pin marks and some are in very noticeable areas. The decals are in register and look great.
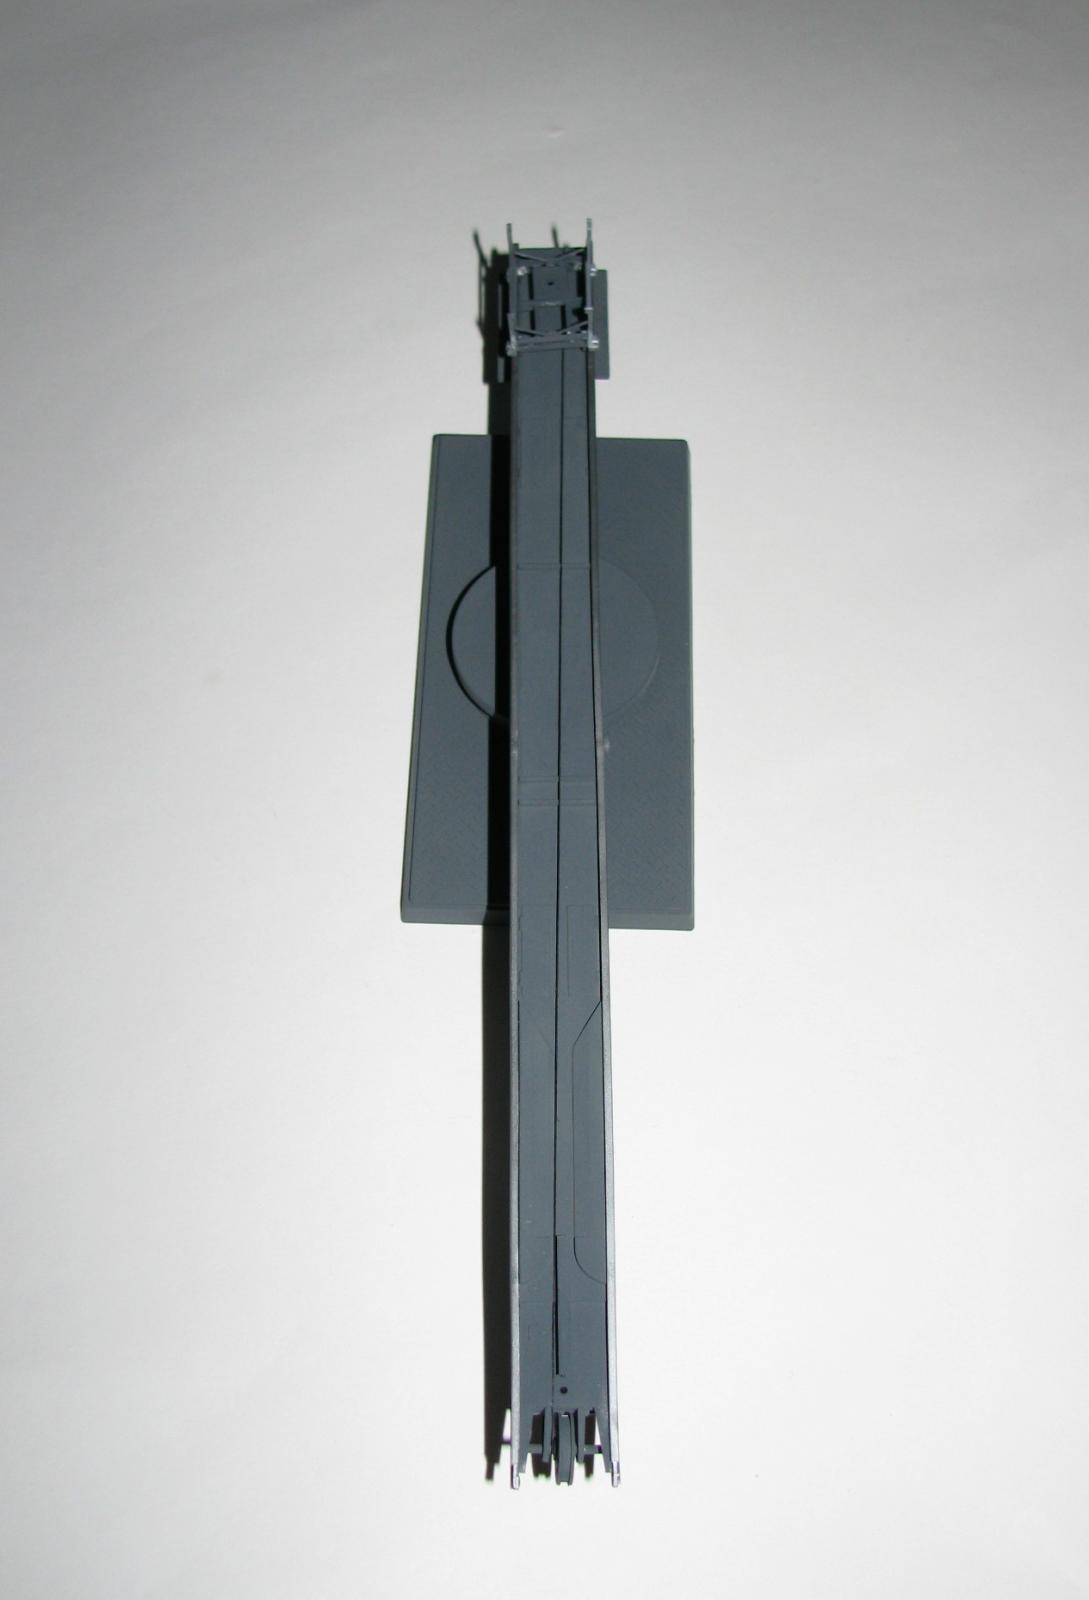
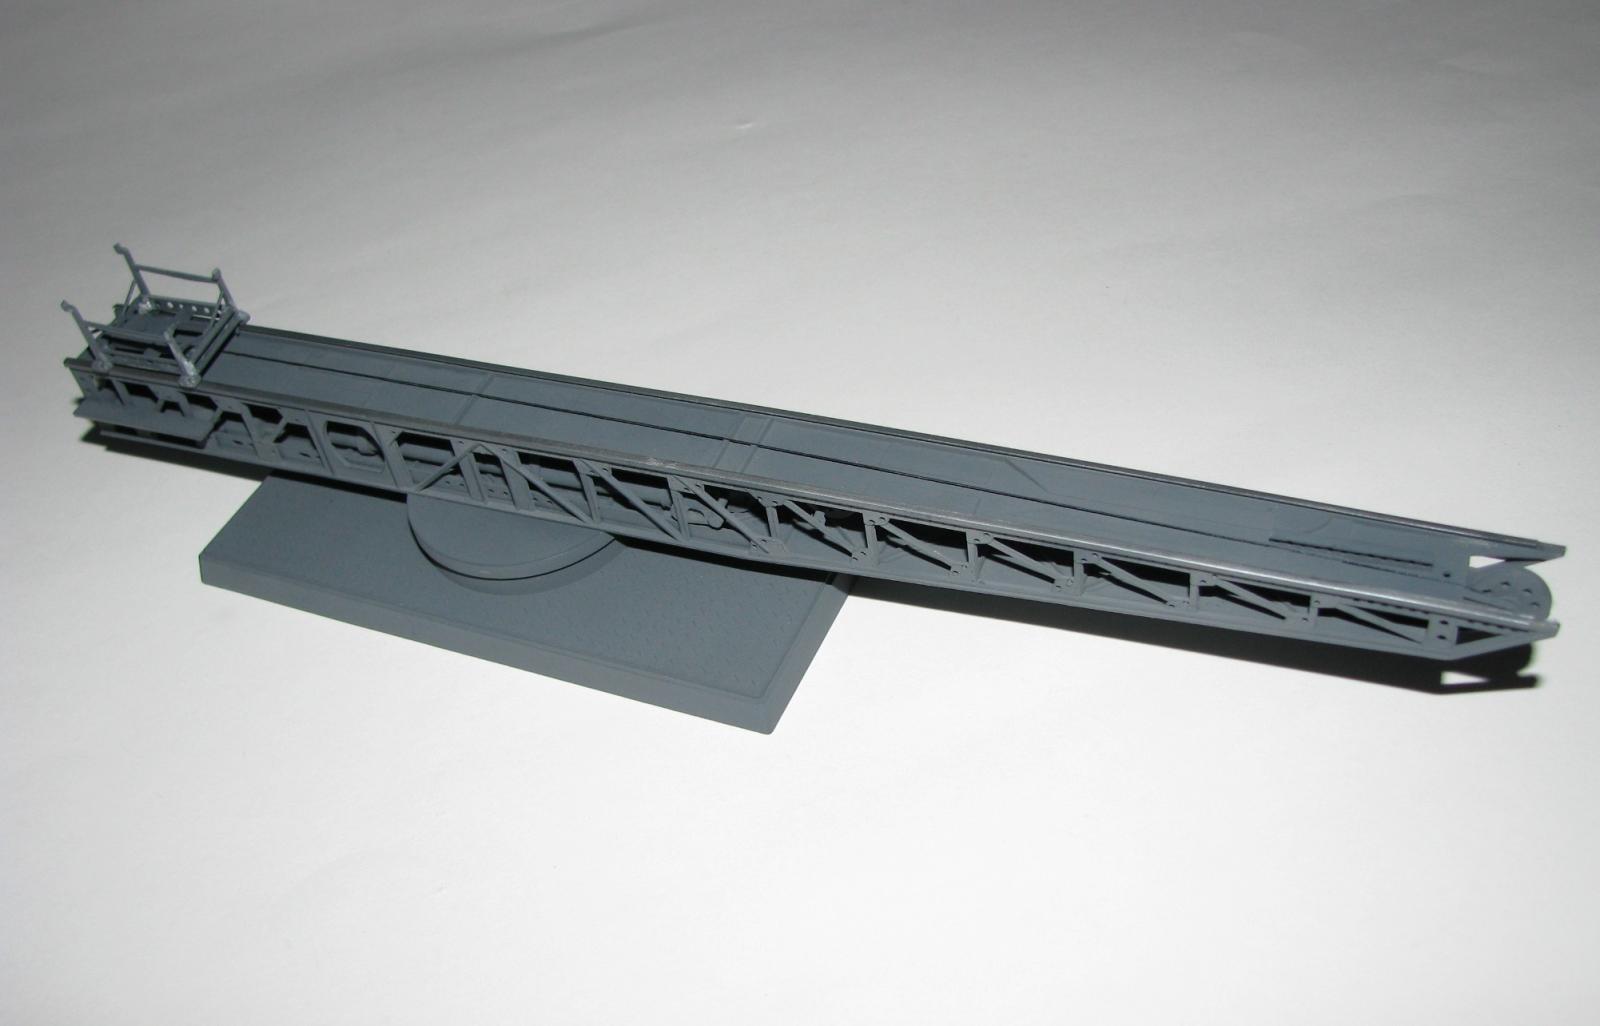
Kit #1 - The Catapult
Construction
7 steps are needed to finish this kit of roughly 35 pieces. Starting with the inner workings and lower platform the instructions give you an exploded view and are a little vague as to exactly where some of the parts go. You need to place the cable at this time as it lies under part #28. For this I used some silk thread that was colored with a very thinned out Testors Engine gray. Next up are the side pieces and rear bulkhead (Part #7) and I had trouble here with the rear bulkhead. Again the instructions are not all that clear and I ended up having to look at a couple other builds to see if I had placed it correctly. Another thing to note here is that there is bracing detail molded onto the side and bottom parts (#3, 4 & 5) make sure you get these details lined up. After all of this it’s time for the upper deck and again the instructions don’t give you that much to go on. All I can say is test fit, test fit, test fit. The last step is building the sled and you are given two options, one for the Alf (the one you need) and one for the Jake. Another exploded view that you really need to go slow on and test fit. Trust me it all goes together quite nicely once you figure it out!
Finishing
I used Tamiya XF-24 (Dark Grey) for the over-all color and Testors Buffing Magnesium with an oil/grease wash for the rails.
Kit #2 - The Aircraft
Construction
9 steps are needed to finish this starting with the cockpit or what little there is of it. 3 figures, 3 seats, a floor and a decal are all you get and once these are together the fuselage is ready for assembly. Yes the cockpit is very sparse but if you decide to use the 3 figures you’re not going to see much anyway. Next is the lower wing and ventral hatch and both of these parts needed a little filler but nothing too bad. You are too put the exhaust shrouds on at this time but for ease of painting I left these and the prop off until later.
Steps 5 & 6 are for the struts and upper wing assembly and I was very happy to find everything went together quite easy. One item that bothers me about this kit is the lack of any rigging diagram. Now this kit first came out in the 1970s and it shows its age but still is a nice little kit, HOWEVER, there should be some sort of rigging diagram in the instructions by now….just sayin. I used .005 nylon sewing thread for the rigging and used my lazy man's method to place it. I drilled holes through the wings, cemented one end to the lower wing, pulled the other end through the upper wing and cemented it then cleaned up the areas that were glued and was done.
Steps 7-9 are the construction and placing of the floats and this is a bit of a challenge. The floats are each made of two pieces and there is a one piece forward strut and two rear (left & right) struts. The instructions have you place the struts first (This is what I did) and then attach the floats. The floats did not want to go on straight as something was not quite right and I really am not sure what was wrong. The struts have a rectangular section of the float molded on them so there is a corresponding slot on the floats both forward and rear. As I fit the forward part perfectly, the rear wouldn’t fit and if I tried the rear first, the front wouldn’t fit. I decided to fit the front as best I could without totally messing up the rear and ended up having a couple small gaps to fill after the floats were on. I used 2 lb. test monofilament for the rigging on the floats and it looked pretty good….at least to my old Mk 1 eyeball.
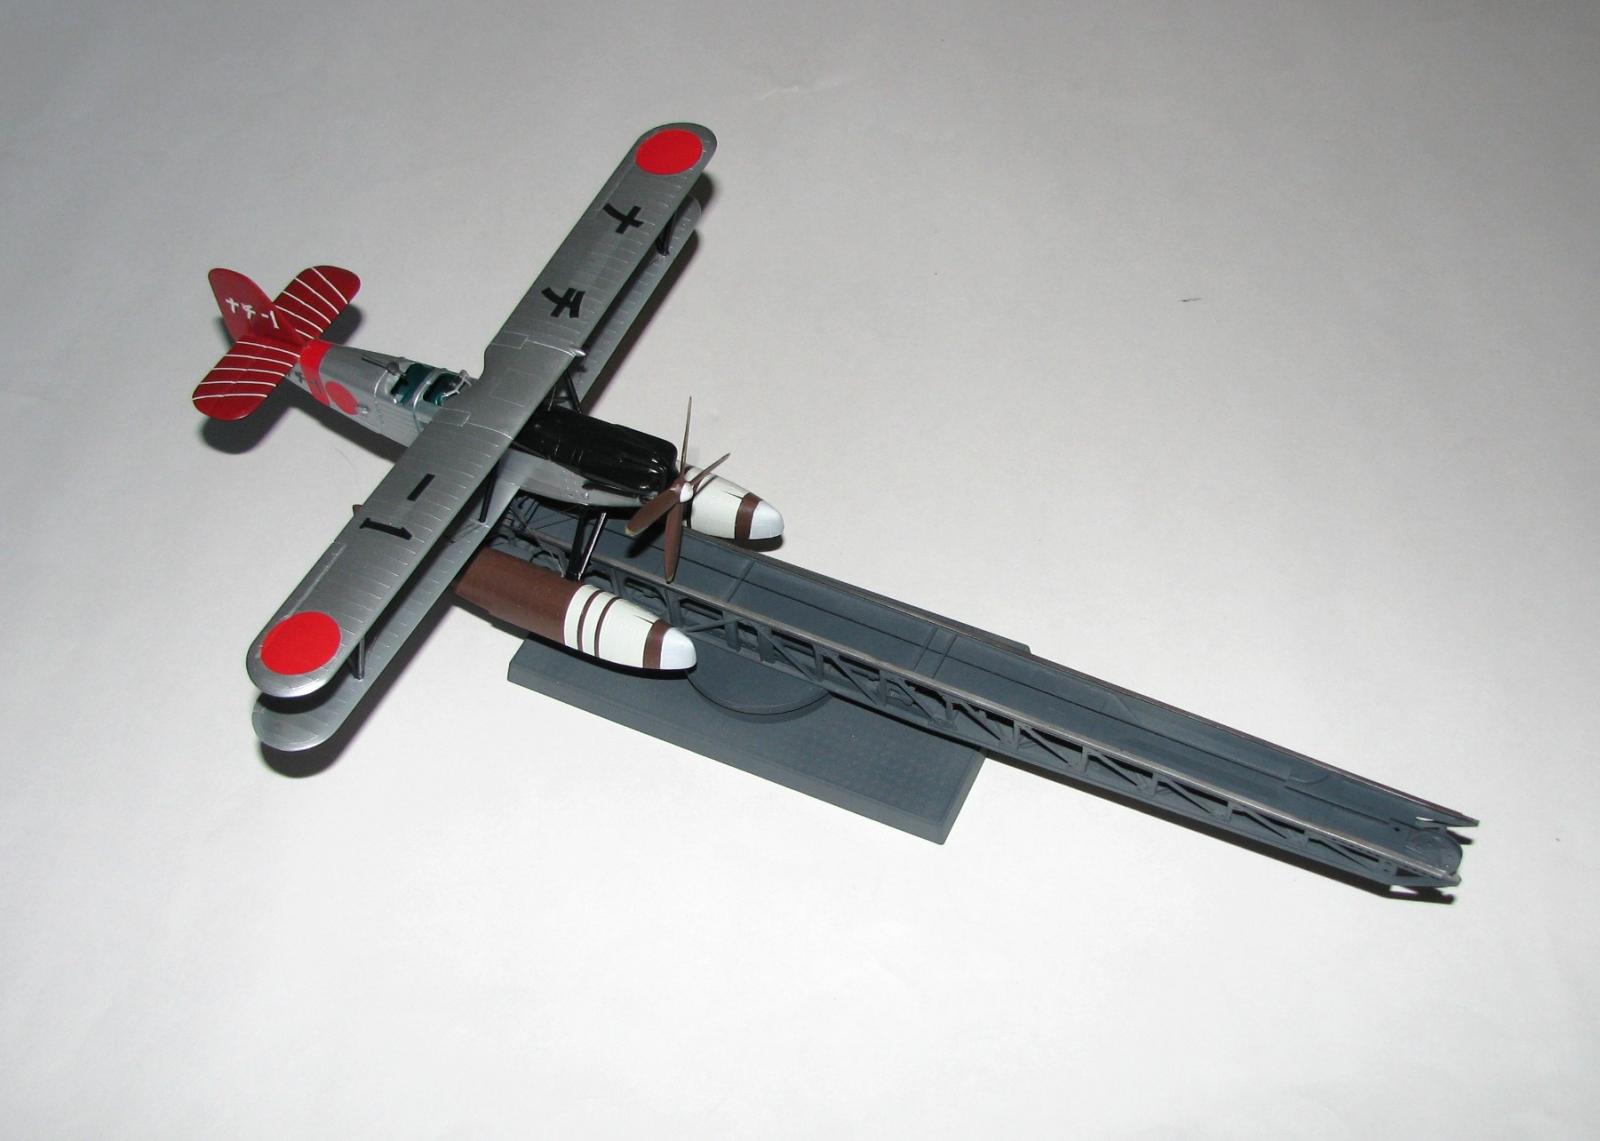
Now comes the fun where you attach the sled to the aircraft then place it on the catapult. The sled parts #32 & 33 have notches in them both forward and aft that allow the raised “pegs” on the aircraft to sit in. There are small pegs on the bottom of the sled that allow the sled to basically lock on the catapult. I was a bit worried of this due to the “accident” (Yep, it was ugly) but it was all pretty simple really and I had no problems with this.
Finishing
You are provided two marking options with this kit:
- An Earth Brown / Dark Green cammo scheme over Light Green (Mitsubishi) from the IJN Cruiser Izumo in 1940.
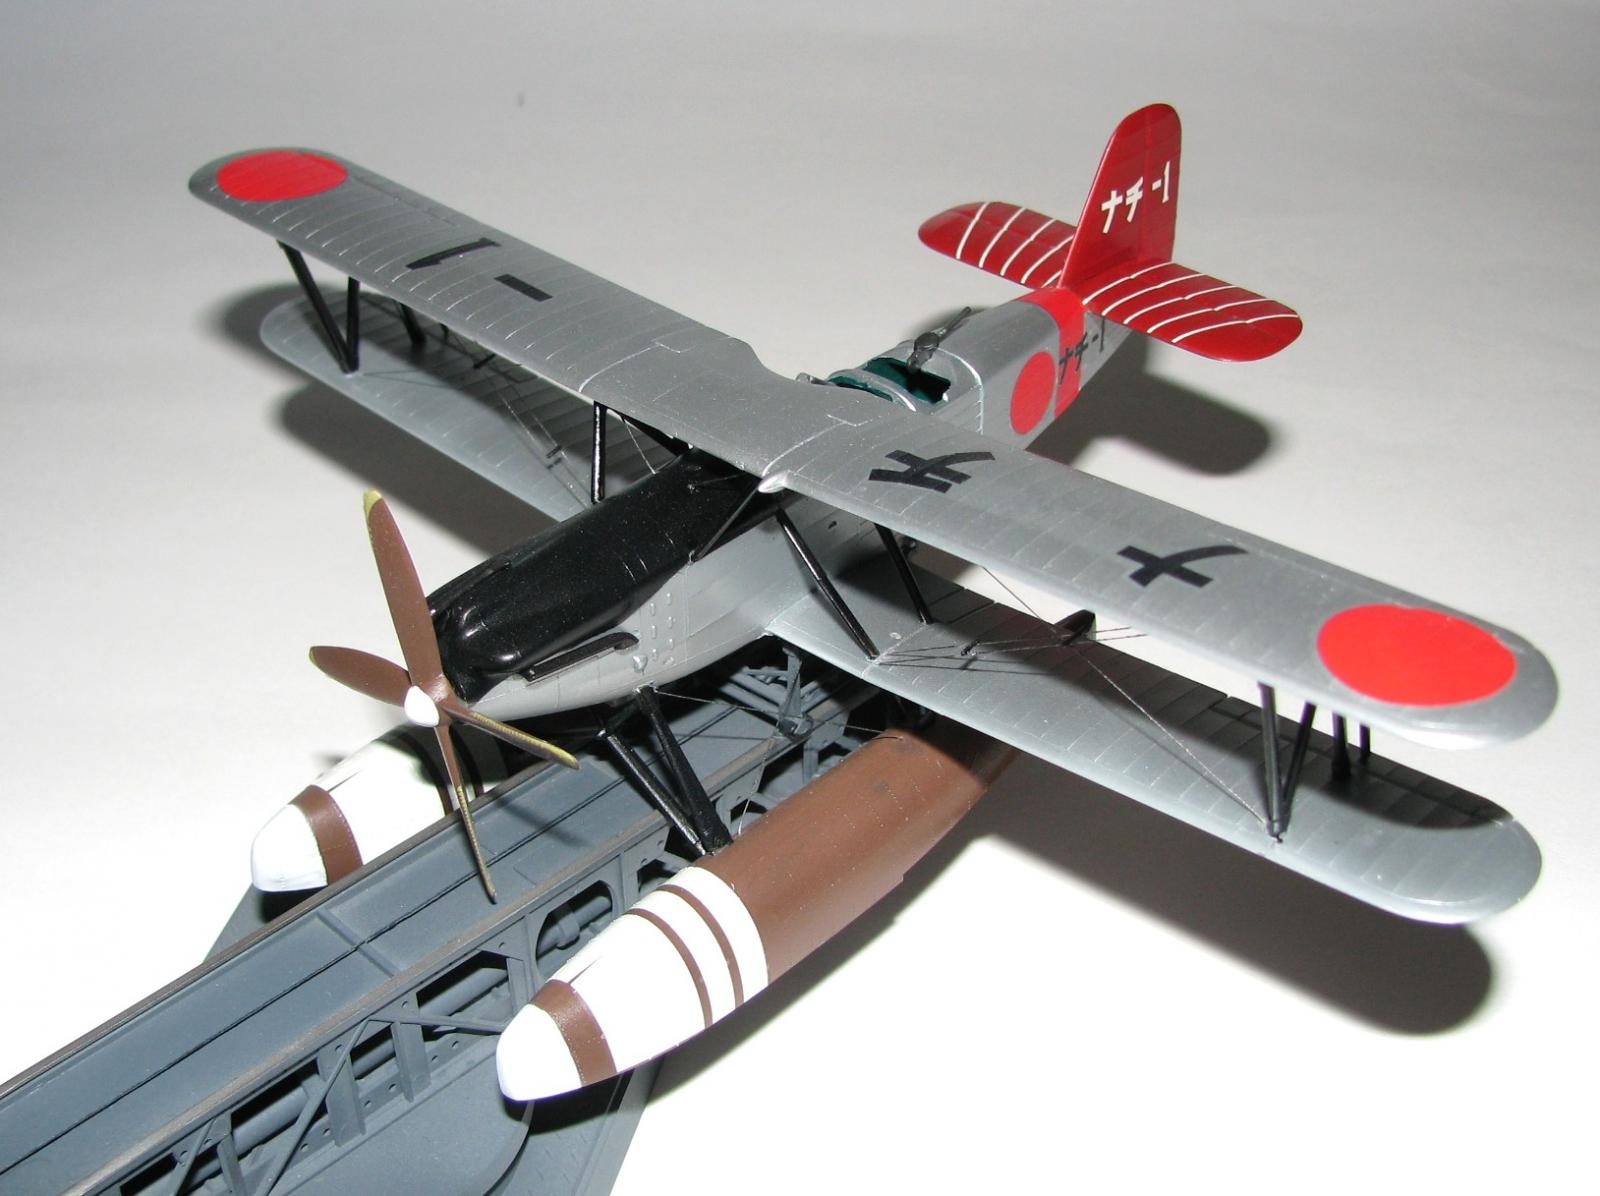
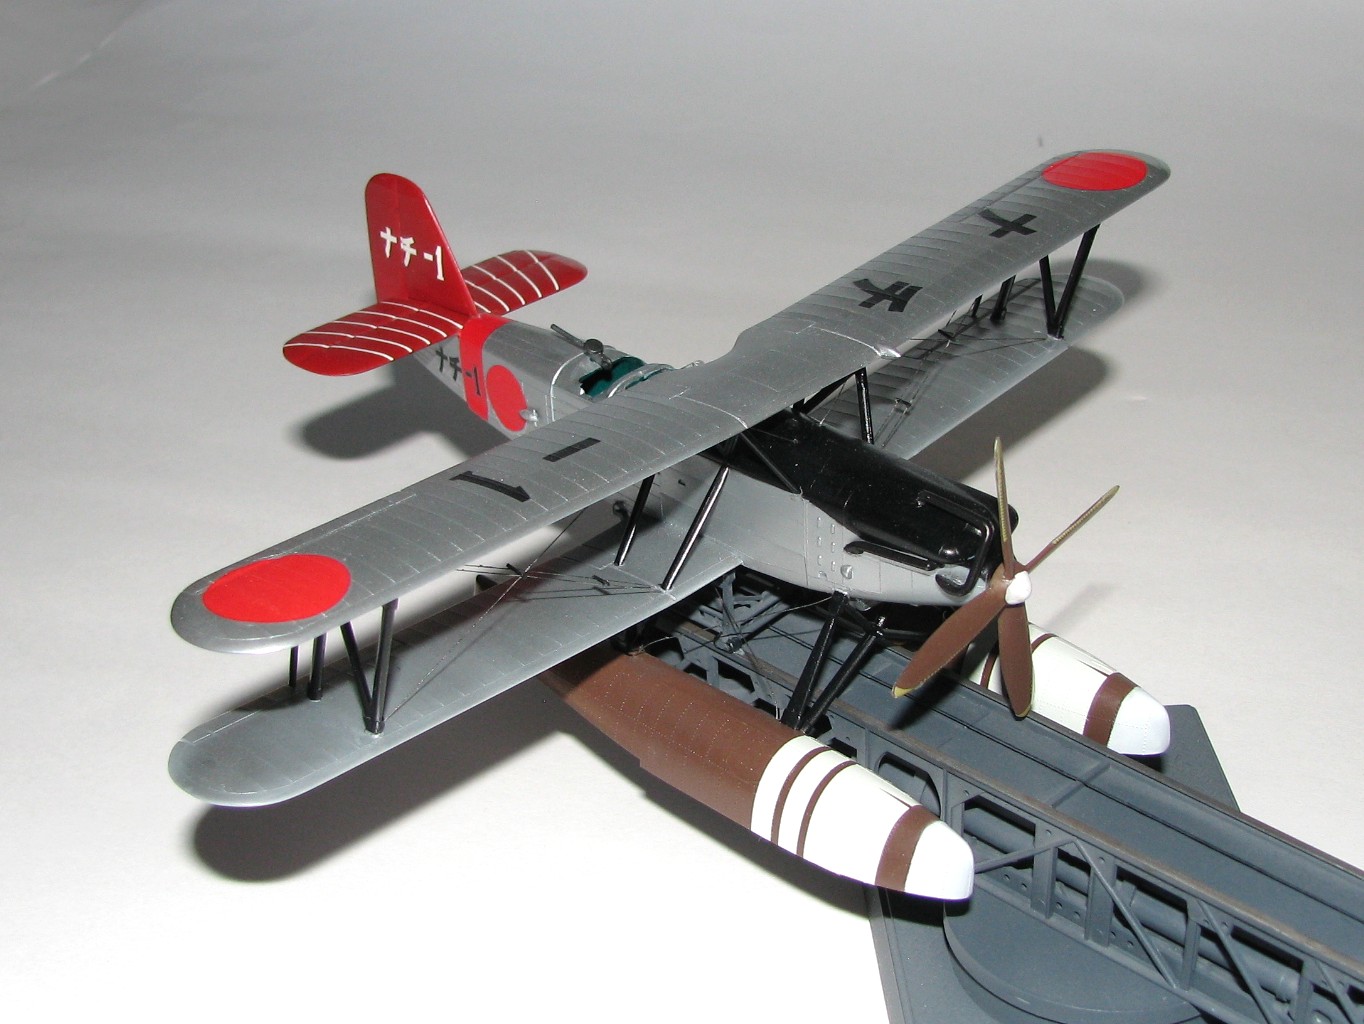
- An overall silver with red tail, black cowl & struts and Red Brown floats from the IJN Cruiser Nachi in 1936.
I chose option #2 and used Tamiya AS-12 (Bare-Metal Silver), X-18 (Semi-Gloss Black) and XF-7 (Flat Red) to finish this. Yes, I know the red doesn’t match but it looked spot on when I tested it. After I placed the decals though it was noticeably different...sigh, lesson learned. The decals went on beautifully and snuggled down with a little micro-Set & Micro-Sol. Two items of interest here: The float decal for option #2 is off-white so matching it is tough (I gave up trying) and the decal film in my example was cloudy and it dulled the finish a bit where it sits.
Conclusion
Yes this is an older kit and it shows, however, it’s still a pretty nice kit and fairly easy to build. I would recommend the aircraft kit to any modeler but the catapult might be a bit much for beginners.
The Accident
I didn’t want to mention this but figured it may be of some use to someone. Right after placing the decals on the upper surface I set the model on the table and walked away to watch some TV. I heard a crash and noticed my lamp/magnifier on the floor. The clamp had come loose and before it hit the floor…...you guessed it, right on top of the aircraft! Well, after a brief panic moment….OK maybe it a little more than brief, I set about fixing 2 wing struts, damaged rigging and severely damaged float struts. It was fairly simple to fix the wing and it’s rigging, which surprised me, but the float struts were broken in several different places and part of one had to be scratch built due to it being destroyed. In the end it was fixed well enough to attach it to the catapult, though some of the rigging is not quite as taut as before, and take some pictures, but I would not recommend anyone doing this so make sure your workplace is safe for both model and modeler!
I would like to thank Hasegawa for re-boxing this kit, Hobbico for supplying it and the review corps for letting me build it. Model on!!

Aircraft close up, left front
Aircraft close up, right front

Aircraft close up, right rear
Catapult upper view
Catapult, right side
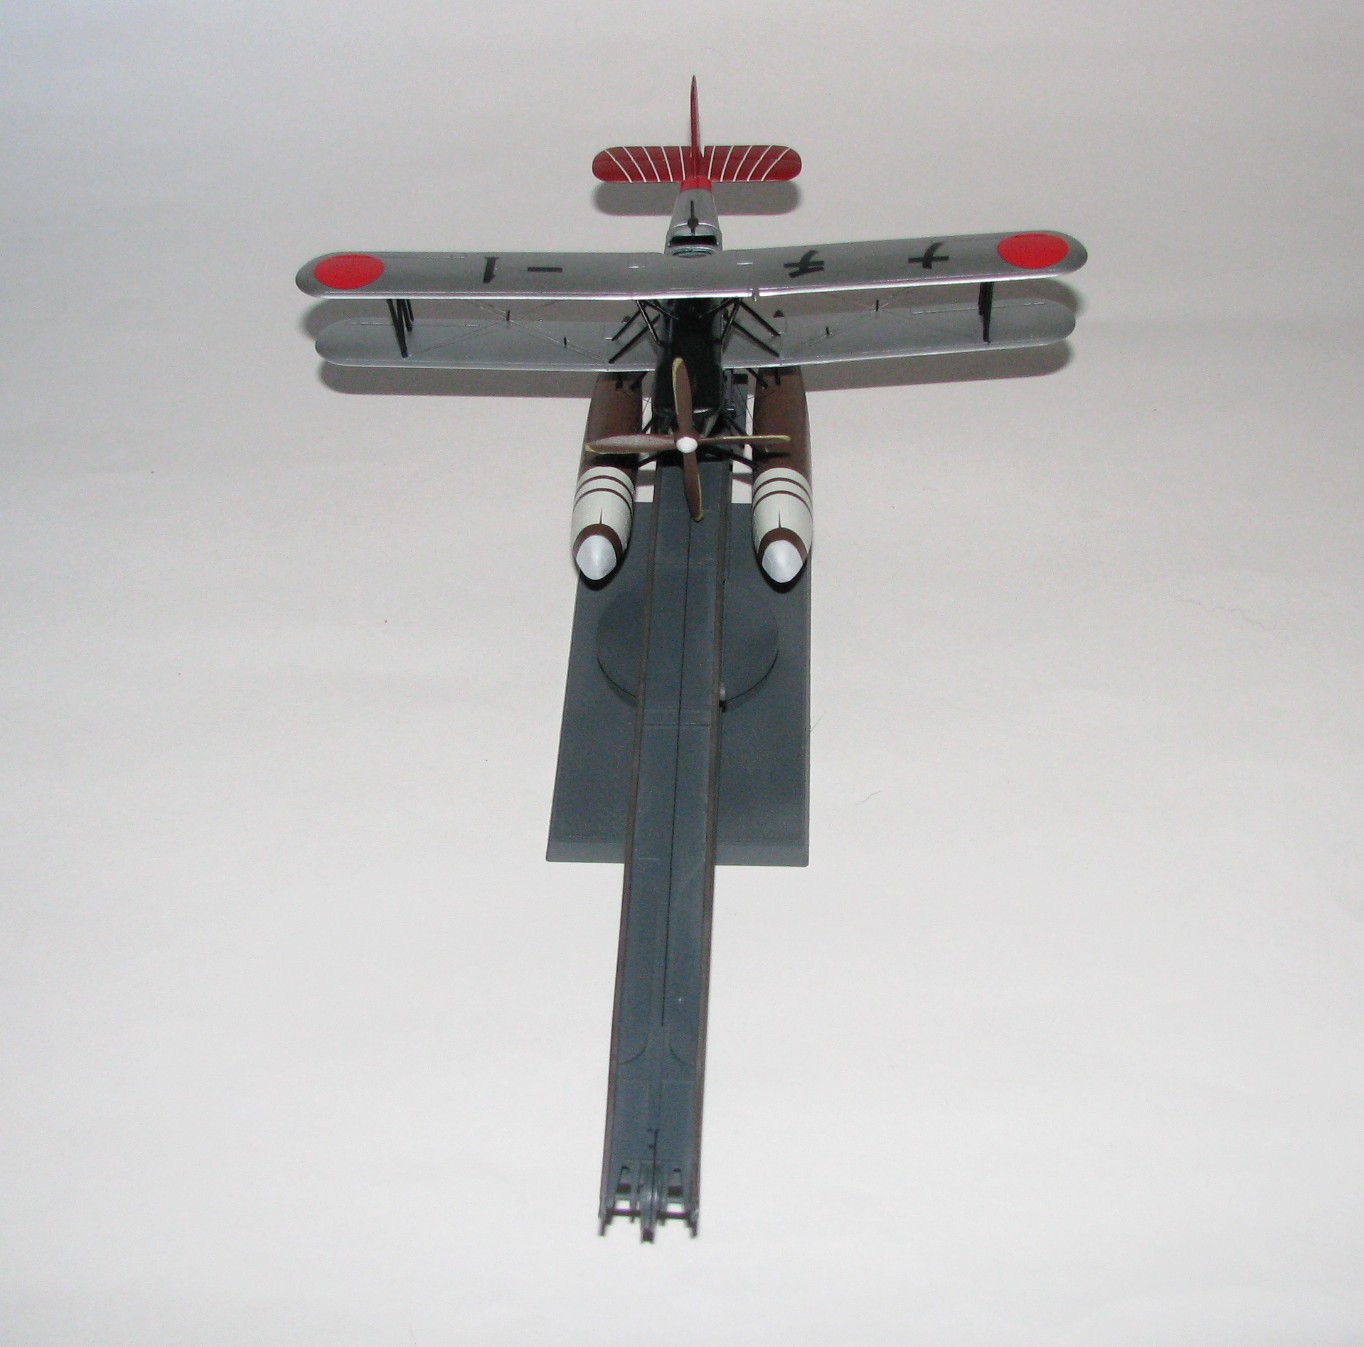
Completed kit, Front view
Completed kit, left front
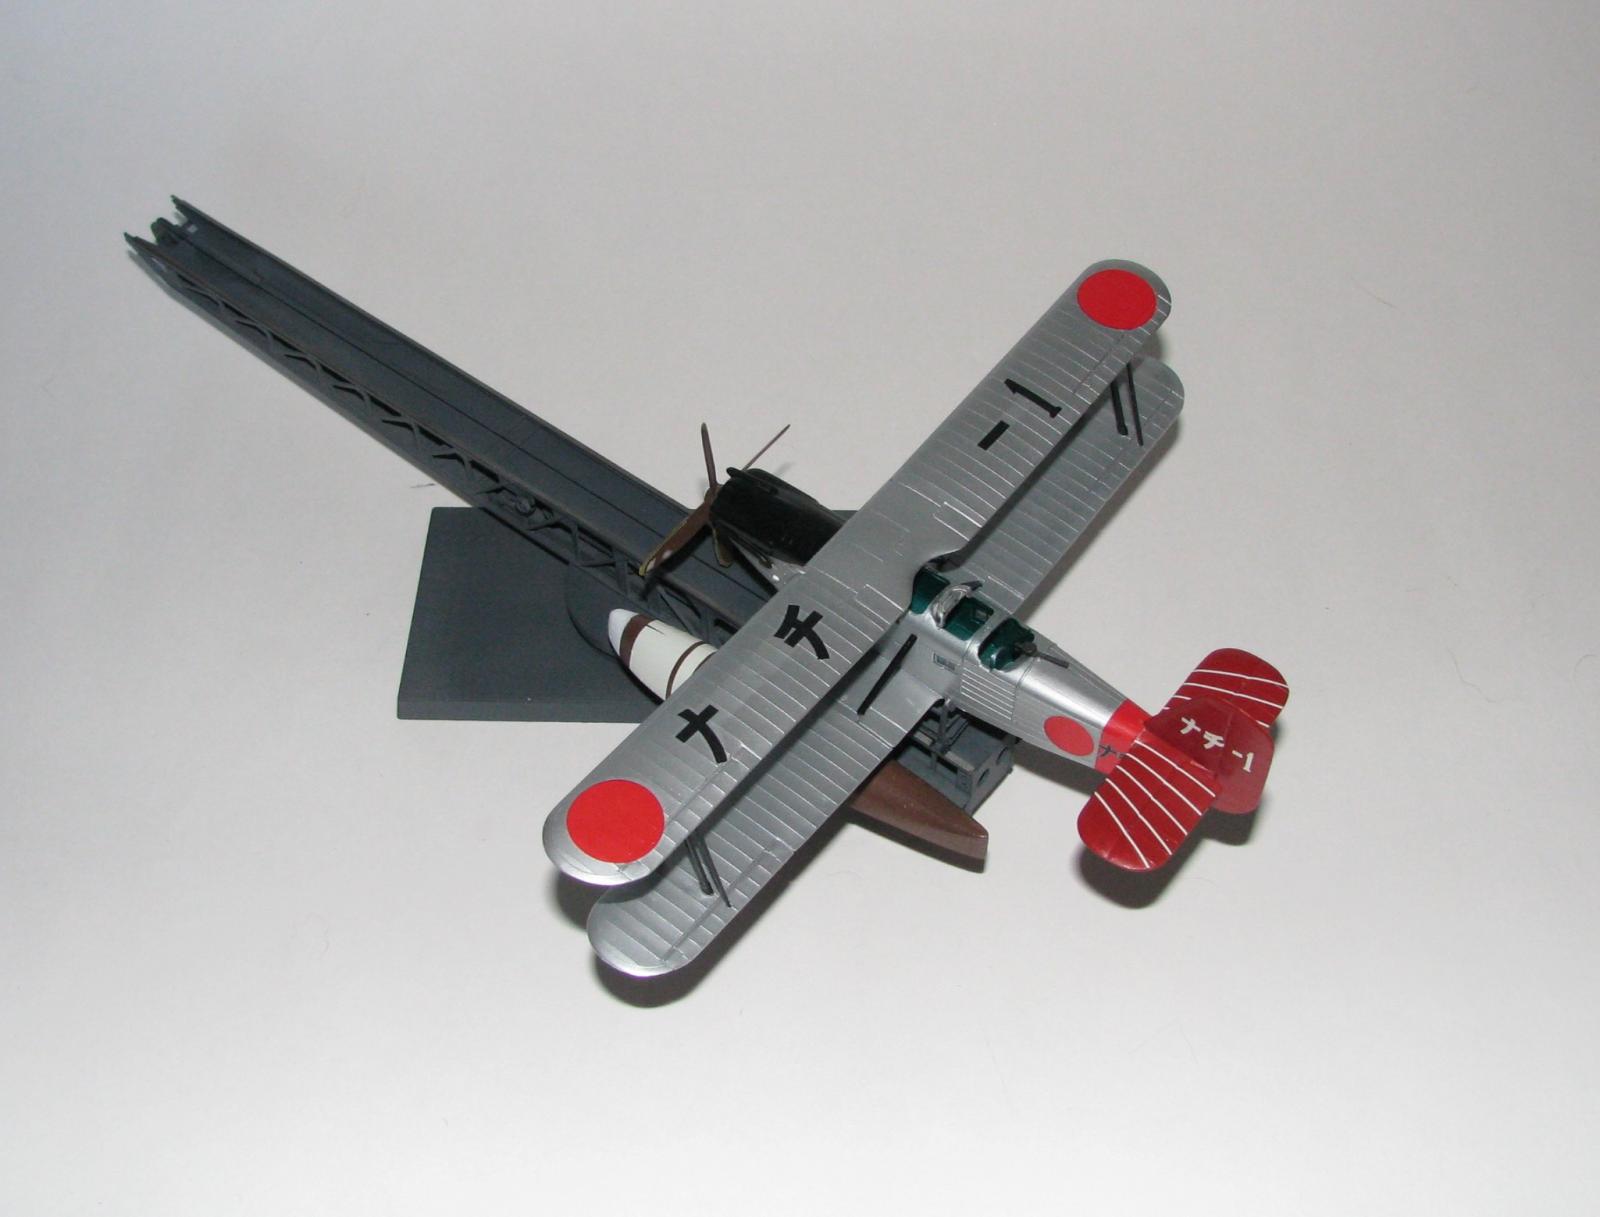
Completed kit, left rear
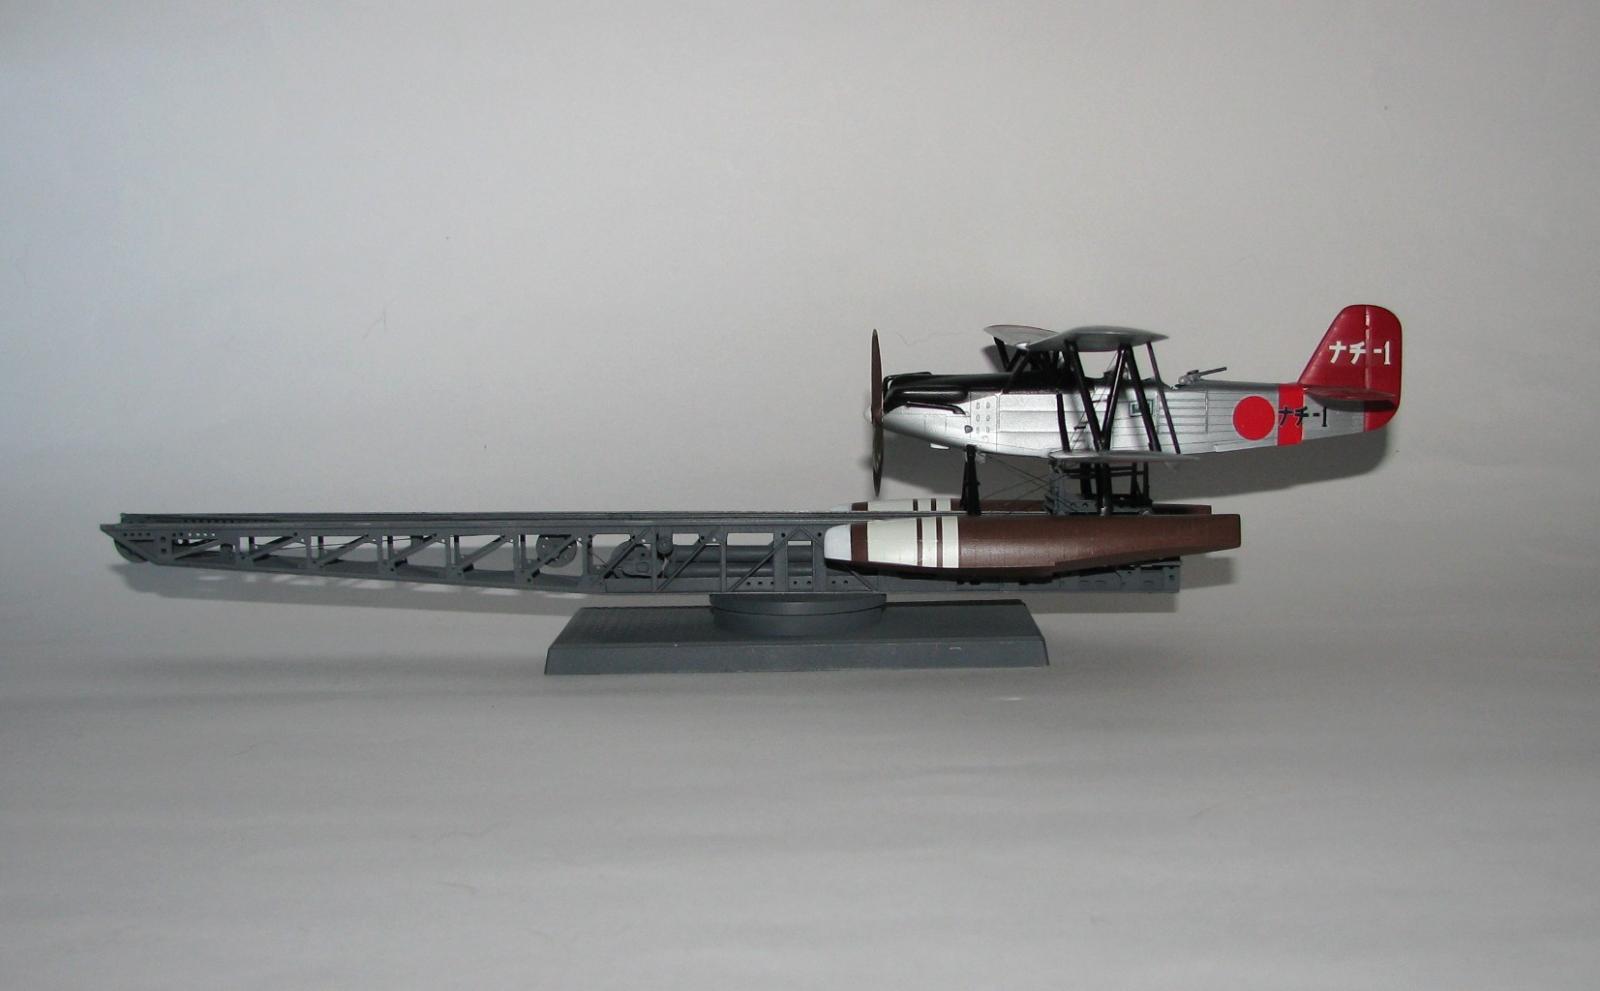
Completed kit, left side
Completed kit, right front
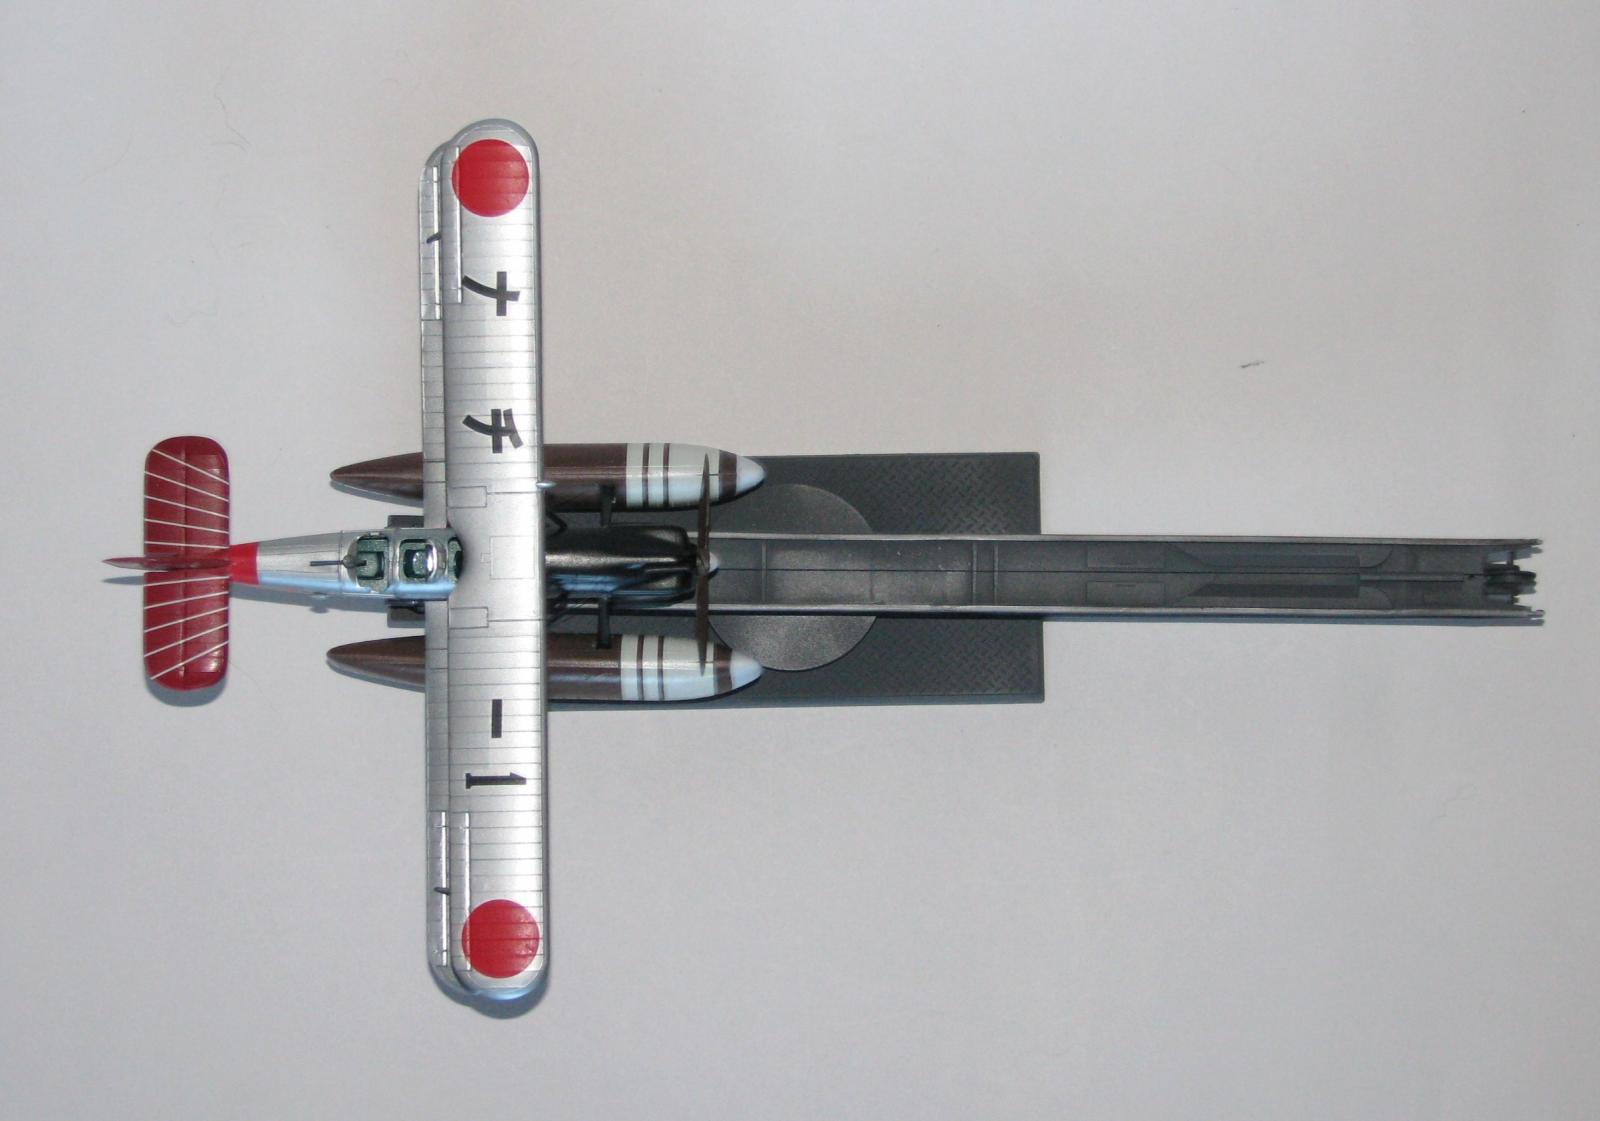
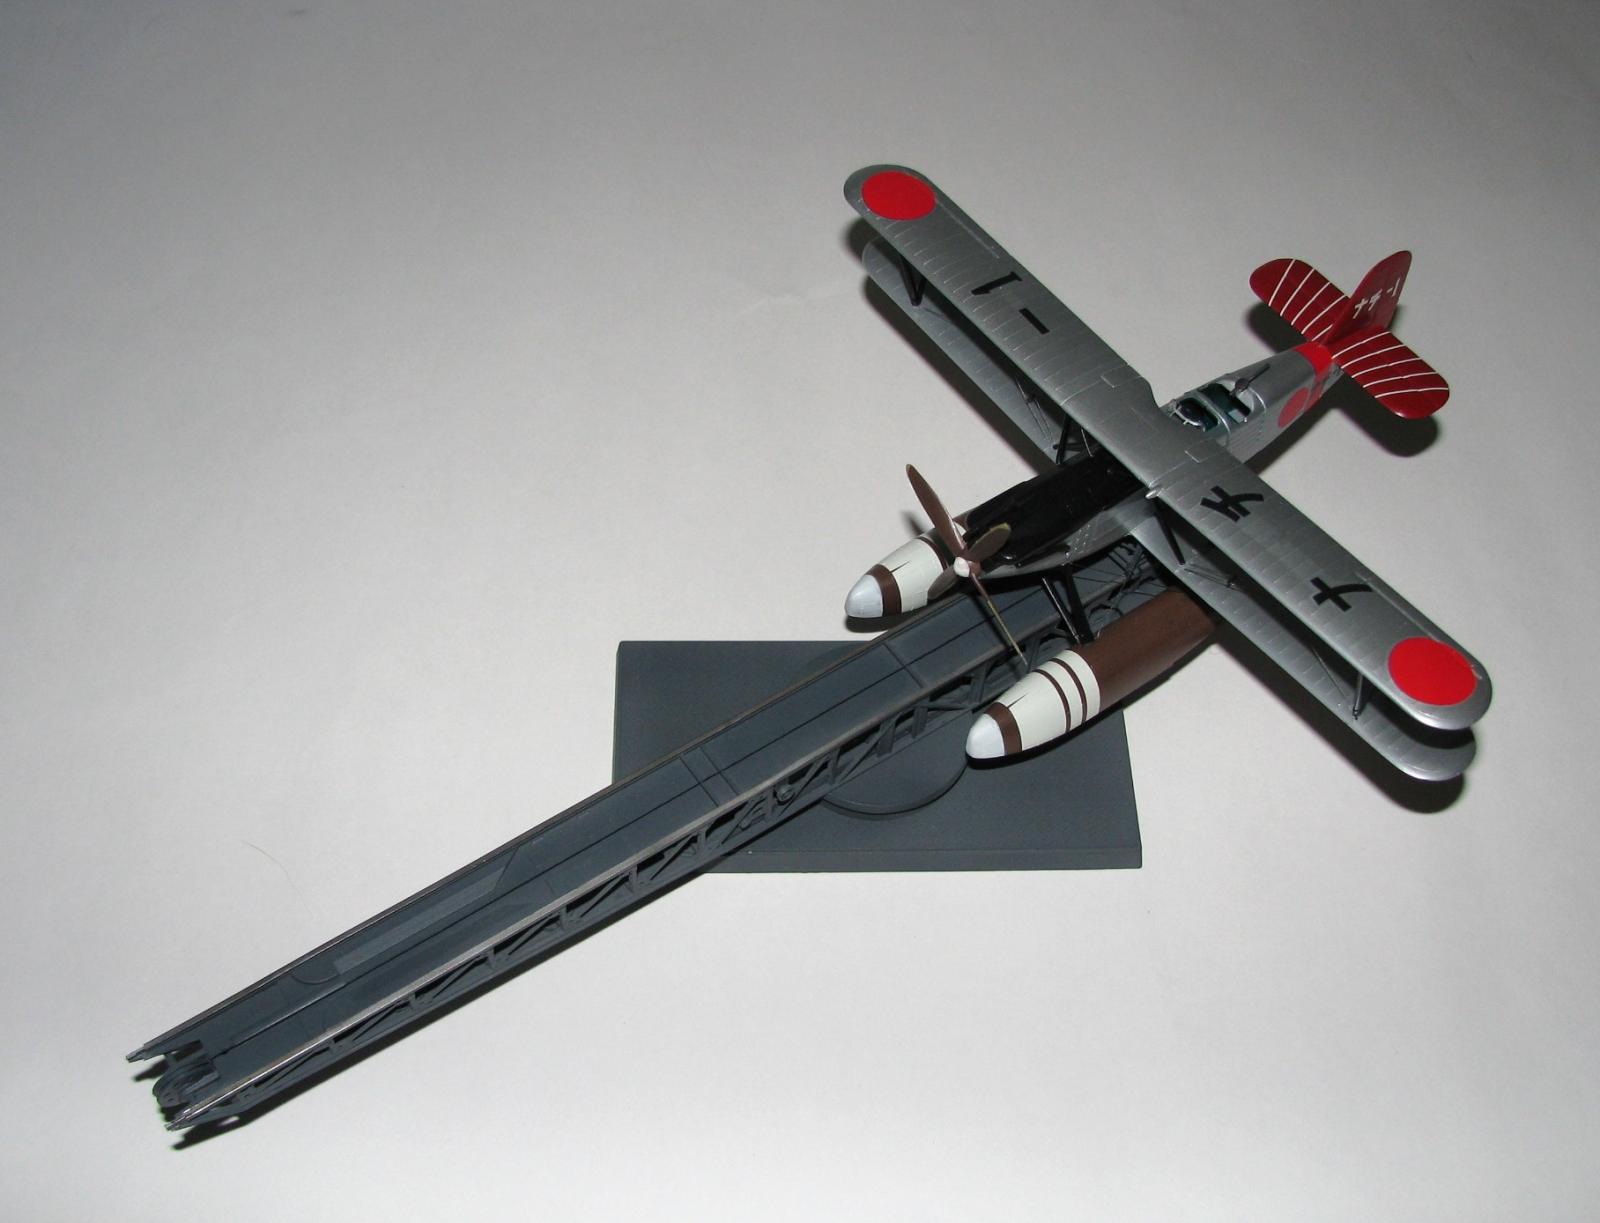
Completed kit, upper view
Comments
Add new comment
This site is protected by reCAPTCHA and the Google Privacy Policy and Terms of Service apply.
Similar Reviews