
Extra EA-300L (4-blade Propeller)
The Extra EA-300L is a two seat aerobatic aircraft designed and built in Germany and flown in many countries around the world. This kit is a revised version of the EA-300L kit previously issued by Brengun and includes a resin four bladed propeller and new decals for two aircraft registered in England, one from Germany and one from Austria.
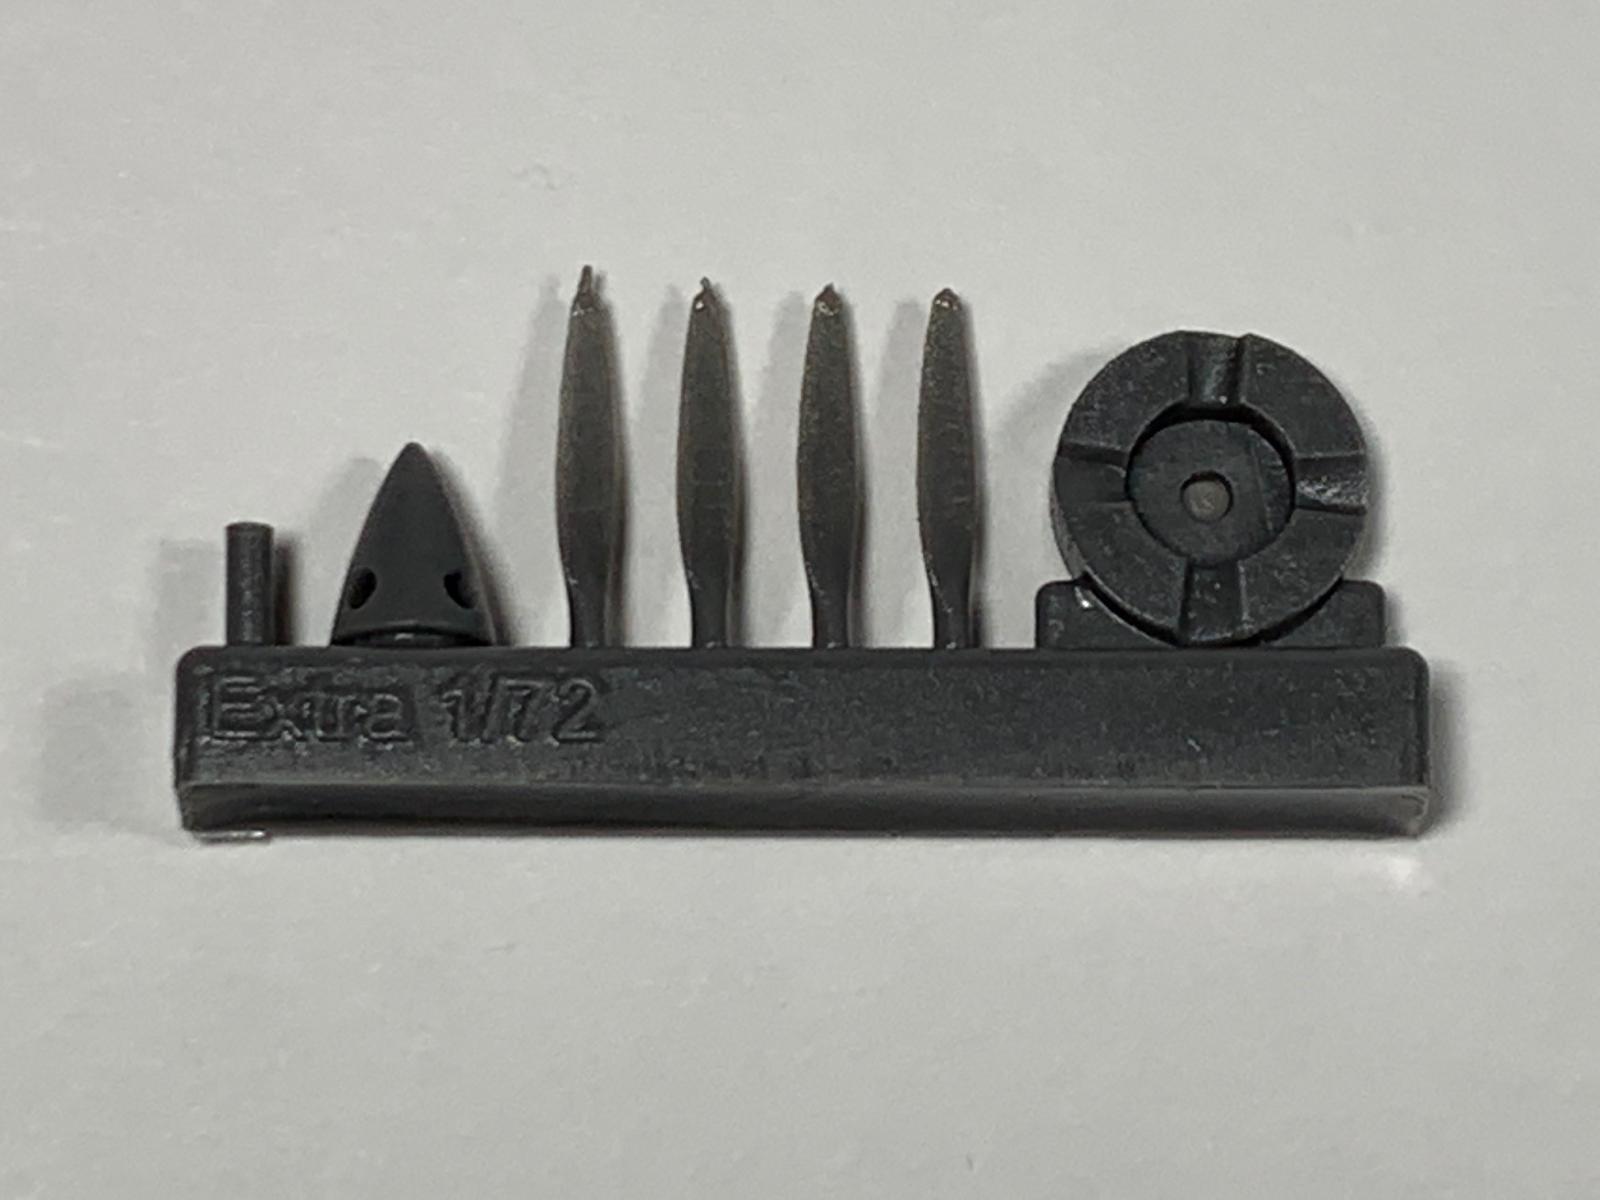
While the kit is a limited production kit with no locating pins on the parts, the fit is exceptionally good and Tamiya Extra Thin Cement works well with the plastic. The parts are on two sprues, but as there are no part numbers on the sprues, Brengun provides a parts diagram to help you locate the parts. I used a razor saw to remove parts from the sprues as needed and then cleaned up the attachment points with sanding sticks or sandpaper. All of the parts have a slight mold seam on them that will need to be cleaned up as well. To ensure that the gluing surfaces were even, I sanded the gluing edges of the fuselage halves and the wings on a piece of sandpaper taped to a piece of glass.
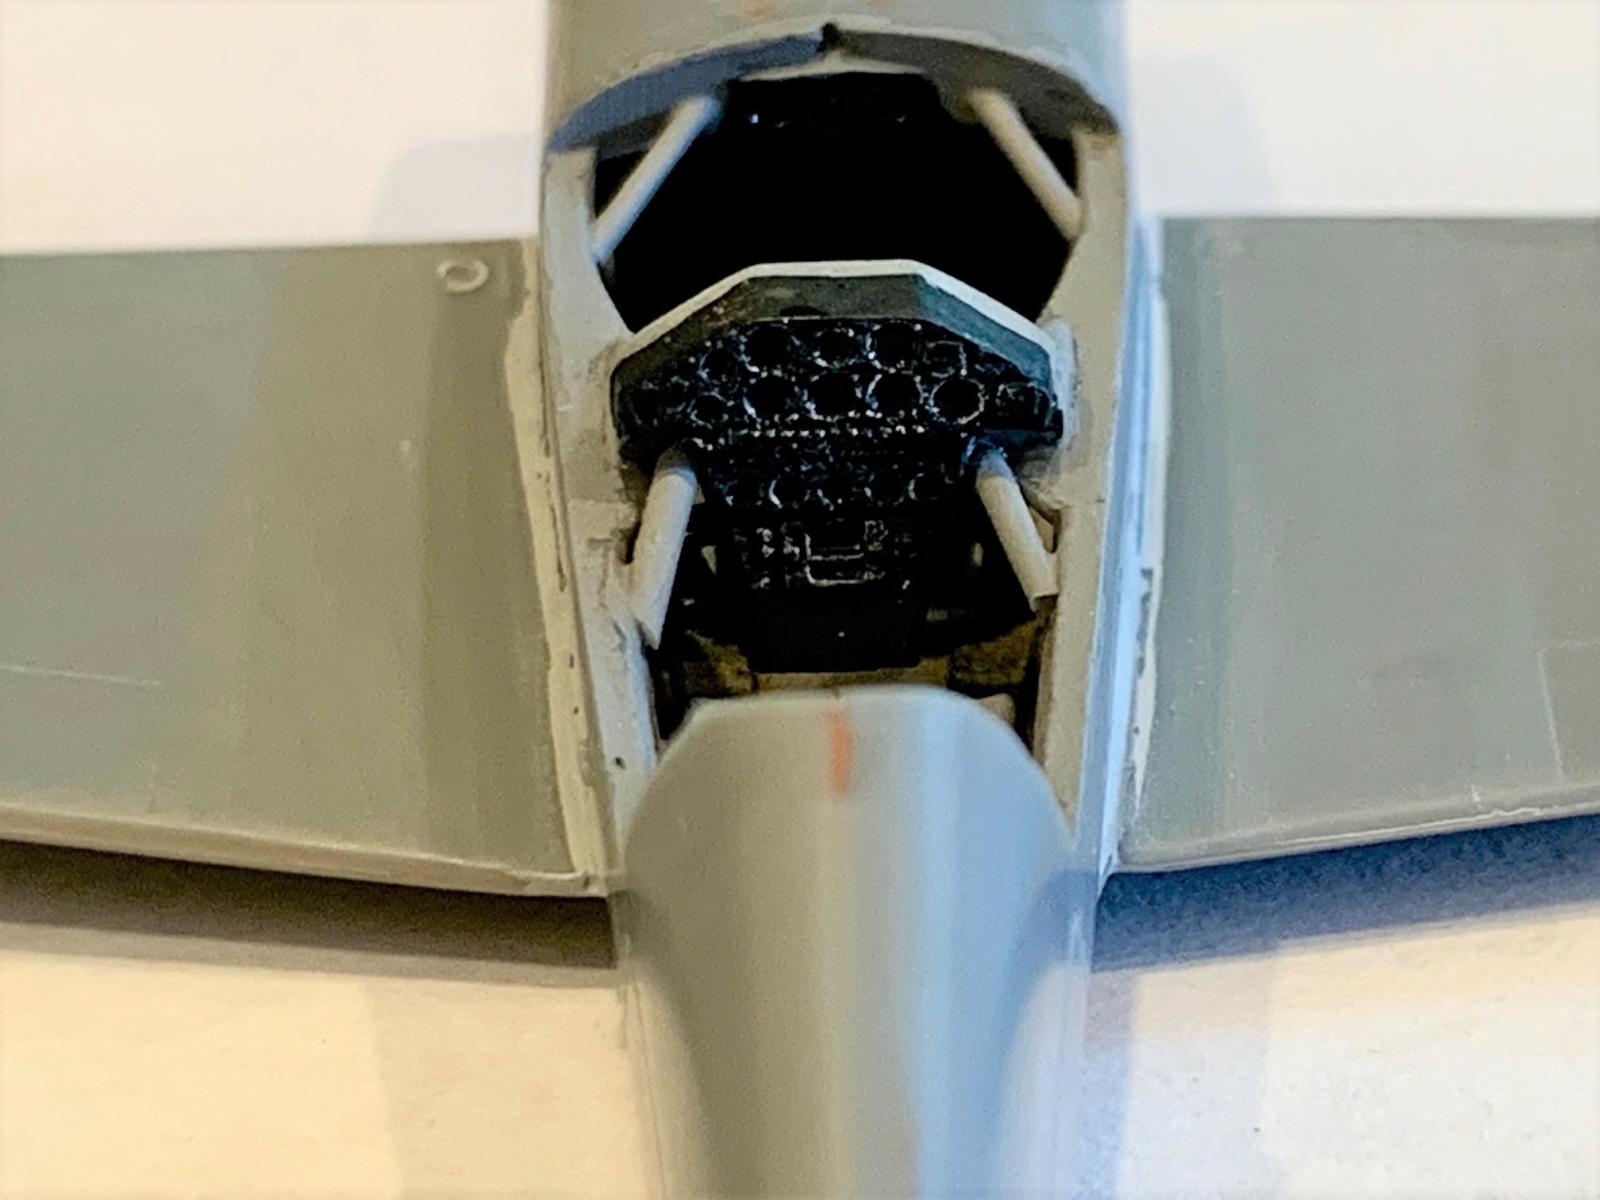
Construction begins in the cockpit with the seats and the main instrument panel. Brengun’s colors descriptions are pretty basic, but some quick internet searching helped me refine the colors and find close matches in my paint stash. I deviated slightly from the instructions in that I painted the main instrument panel black instead of dark grey and then dry brushed it with light grey and white to bring out the nicely molded details. Brengun would have you glue the control sticks to the seats in step A, but I elected to leave then on the sprue until later in the build in order to not lose them. The kit does not provide any seatbelts for either seat, but I strongly recommend you install some as once the canopy is on, their absence is really obvious.
Before painting the cockpit floor, I test fitted it between the fuselage halves and discovered that it was slightly too wide as the fuselage halves would not close around it. I sanded both sides of the floor part a little bit until I was able to close the fuselage halves around it.
I painted the cockpit interior light gray and then used a dark grey wash to highlight the roll-cage framework molded on the interior sides of the fuselage halves. By testing fitting the cockpit and the seats before assembling the fuselage halves I determined that I could insert the seats after the fuselage was assembled and since I expected to have to do some sanding on the kit at some point, I set the seats aside to be installed later.
Step C addresses the construction of the four bladed propellor, however, as the propellor blades are small and need to be painted white on the front and black on the back, I elected to paint then while they were still attached to the resin pour stub. I airbrushed the back side Tamiya NATO Black and the fronts Tamiya White. The instructions show that each blade has a red tip on the white side and a thin black strip painted on part of the left edge of each blade. I was able to manage the red tips, but not the thin black strip. As the spinner for the four bladed propellor is a resin piece, you will need to drill a hole in the back of it to attach the propeller shaft. I recommend using the circular resin alignment tool that is included for this in the kit to ensure the hole for the shaft is centered on the spinner.
Also, in step C the spatted wheels and what appears to be counterbalances (or something like that) are assembled. Pay close attention to the orientation of the mounts for the triangular parts as the mounts should actually be slanted forward, not aft as mine are. The wheels are assembled by gluing the two halves together and then cleaning up the seams. The wheels are handed, but as the attachment point for the gear strut is indented on the inside of each wheel assembly, they are hard to mix up.
Next up is the attachment of the rear cockpit bulkhead to the cockpit floor. I tacked the rear bulkhead in place and then closed the entire cockpit assembly up in the fuselage halves (without gluing them) in order to ensure that the rear bulkhead was at the correct angle. One the bulkhead joint had dried; I installed the engine face in the right fuselage half along with the assembled cockpit and the lower engine pan. Again, I put glue only on the right-hand side of the parts and then offered up the left fuselage half in order to establish the proper placement of these parts, then I removed the left fuselage half and let the parts set up completely. I then glued the left fuselage half to the right fuselage half, taped it up and set it aside to dry. Once dry, I used Mr. Surfacer to fill the seams and then sanded them smooth.
While this assembly was drying, I removed all four wing halves from the sprues, cleaned them up and glued top wing halves to the corresponding lower wing halves. These assemblies where clamped and taped together, then set aside to dry. There were some small gaps and seams on the leading and trailing edges of the wings which I also addressed with Mr. Surfacer and sanding sticks.
There are no locating tabs or slots to attach the wings to the fuselage, so I used superglue to attach the wings to give the joints some support. I used gel superglue in order to give me a little time to adjust the wings to ensure they were lined up with each other both horizontally and fore & aft and that they were at the same angle to the fuselage. Mr. Surfacer was also used to blend in these joints. The horizontal tails have small attachment tabs that insert into small slots on the fuselage, so I used superglue on them as well for strength and blended those joints with Mr. Surfacer.
Next up was attaching the fairings on the underside of the fuselage for the landing gear struts and then the struts themselves. Each of the fairings on my kit had a small sinkhole on it which were easily addressed with Mr. Surfacer. Like the horizontal tails, the struts have small tabs for attaching them to the fairings, so I used superglue again to give the joint some strength. One these had dried solid, I attached the wheels, making sure they were in line with each other and vertical, then I set the model up on blocks and let everything harden for a couple of days.
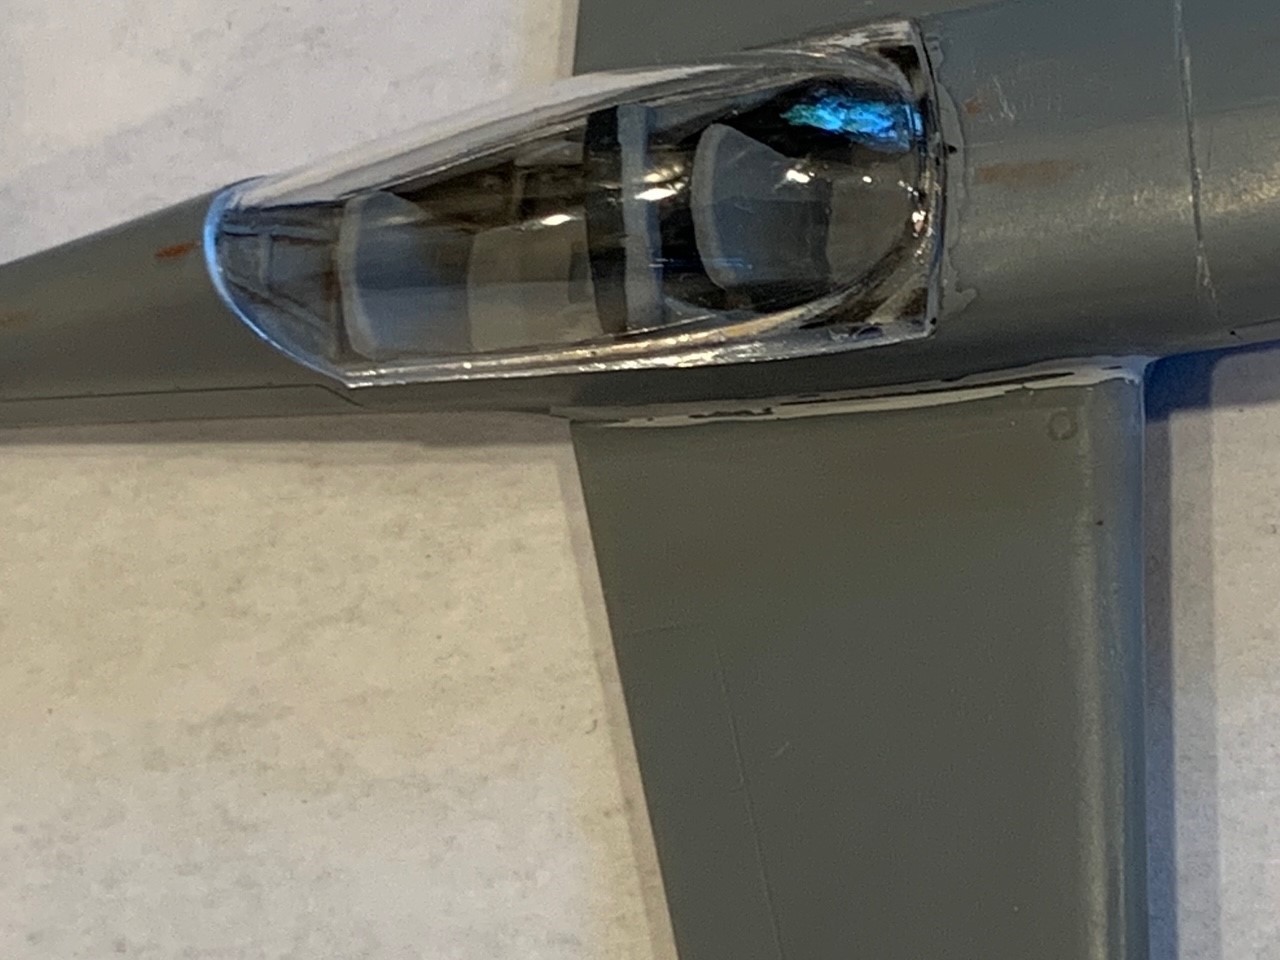
My first impression of the canopy was not the most favorable, as it looked cloudy and not exactly crisply molded. I polished it up like I would any other canopy then dipped it in Future and set it aside in a sealed container to dry. After letting it set for a couple of days, I opened up the container and discovered that Future had worked magic this time as now the canopy was crystal clear. While the canopy was drying, I installed the seats, control sticks and instrument panel in the cockpit. The kit also includes four braces, two for the forward portion of each cockpit that are apparently part of the roll-cage protecting the aircrew. The kit ones were a bit clunky looking, so I replaced them with stretched sprue cut to size.
The canopy on this aircraft is a single piece with no canopy bows or frames to get interfere with the pilots’ view. The kit canopy has faint lines showing the outline of the frame that surrounds the canopy, so I used clear Scotch tape to tape off the clear portion of the canopy once the Future had set hard. I see from Brengun’s website that they have a masking set for this aircraft, and I would recommend getting it to simplify masking the canopy. The canopy was then glued to the fuselage as the kit does not provide an option for having it open. I had to sand the edges of the canopy piece a little bit here and there to get it to fit into the opening on the fuselage, only to discover that the canopy was a little bit wider than the fuselage. So out came the sanding sticks again to blend the canopy into the fuselage.
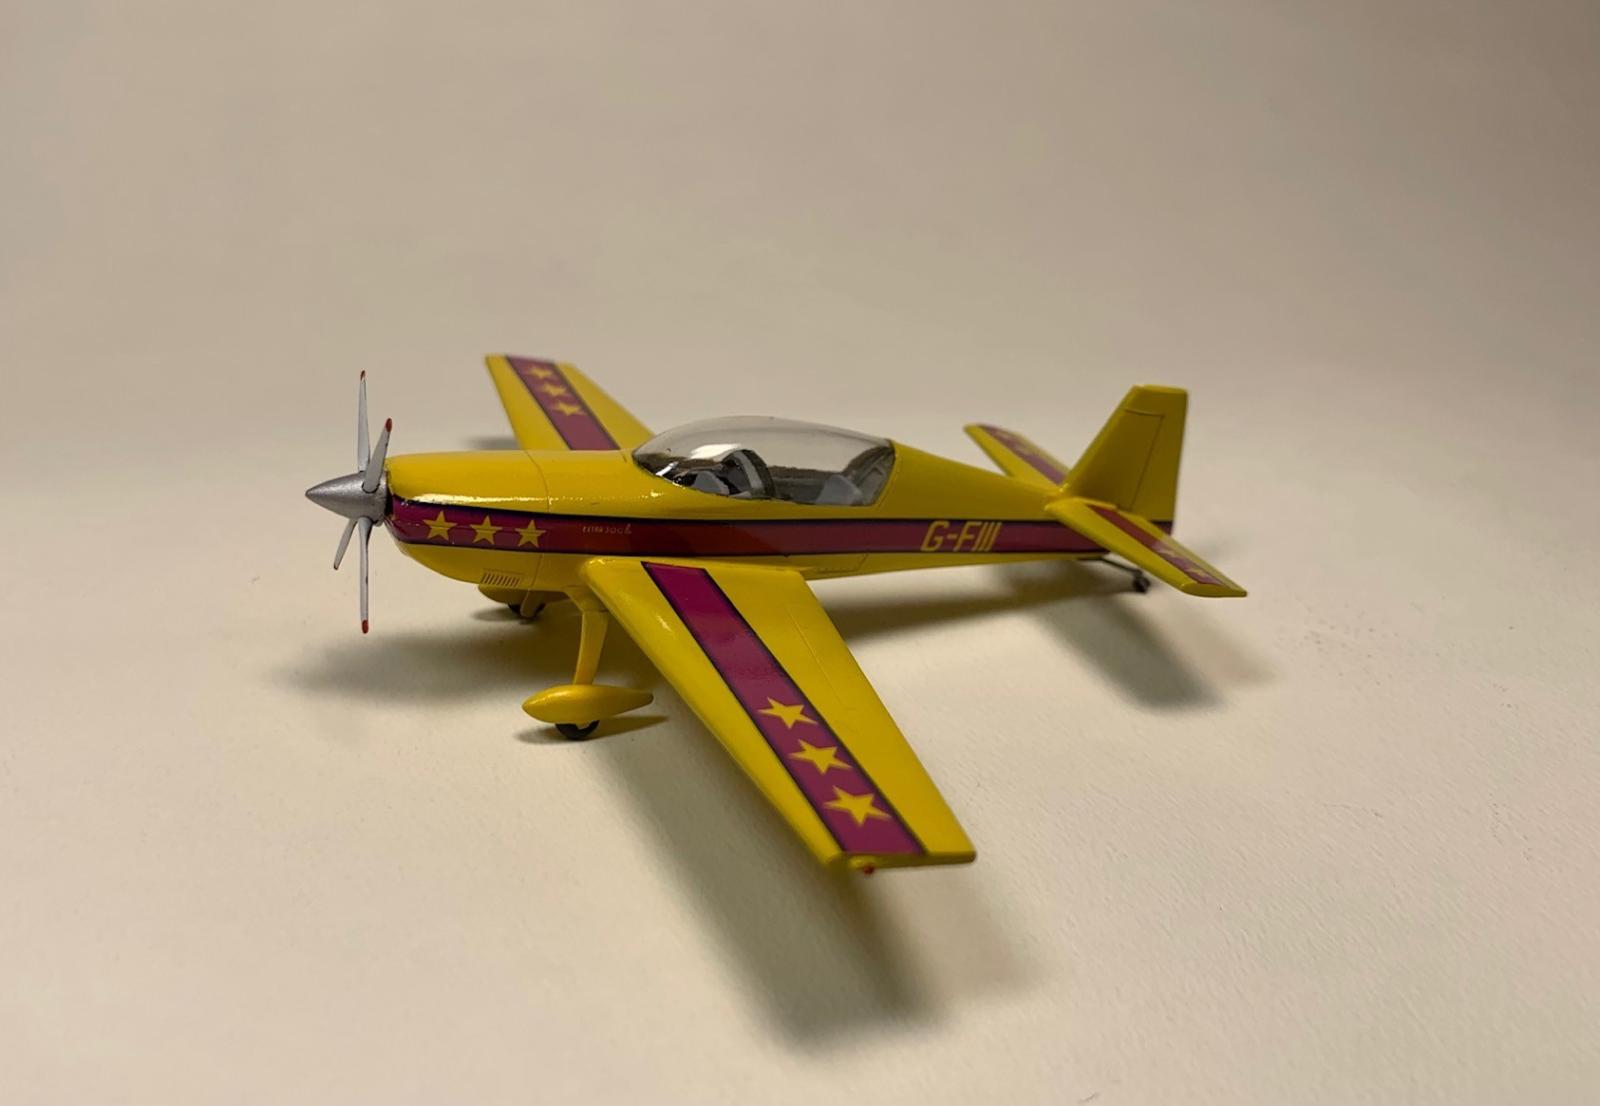
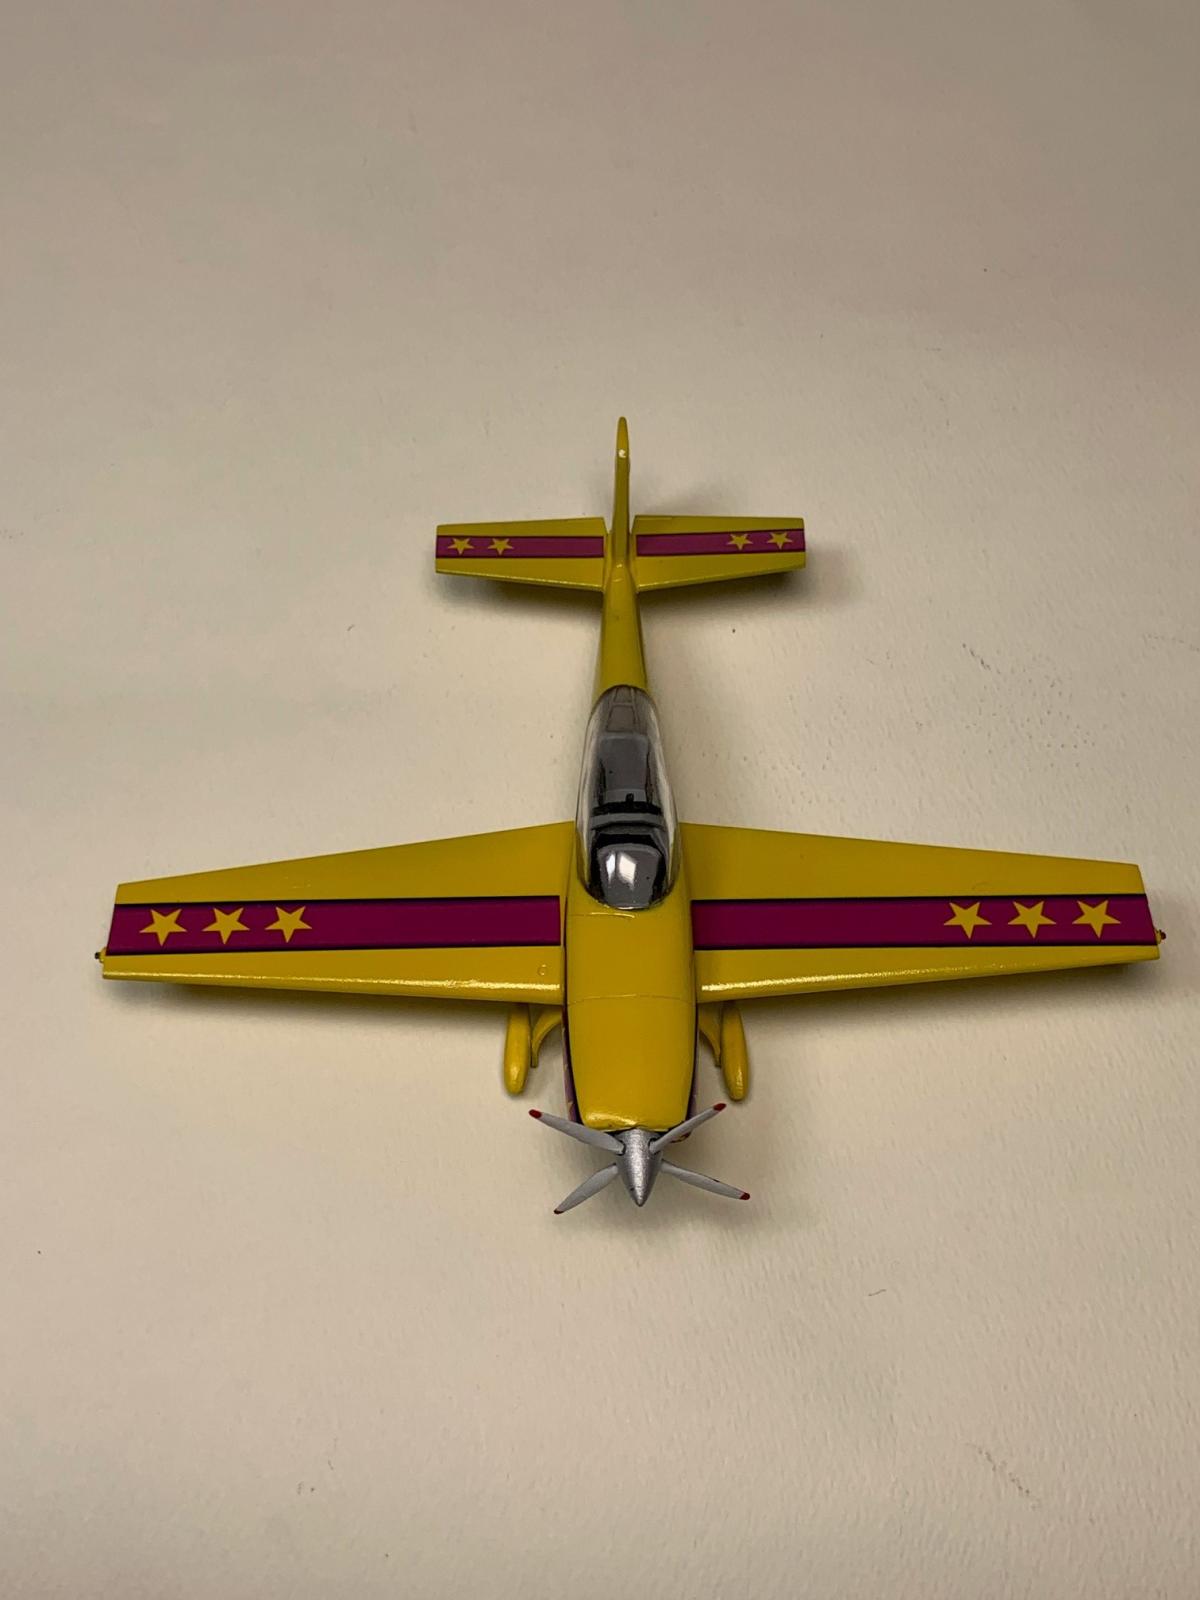
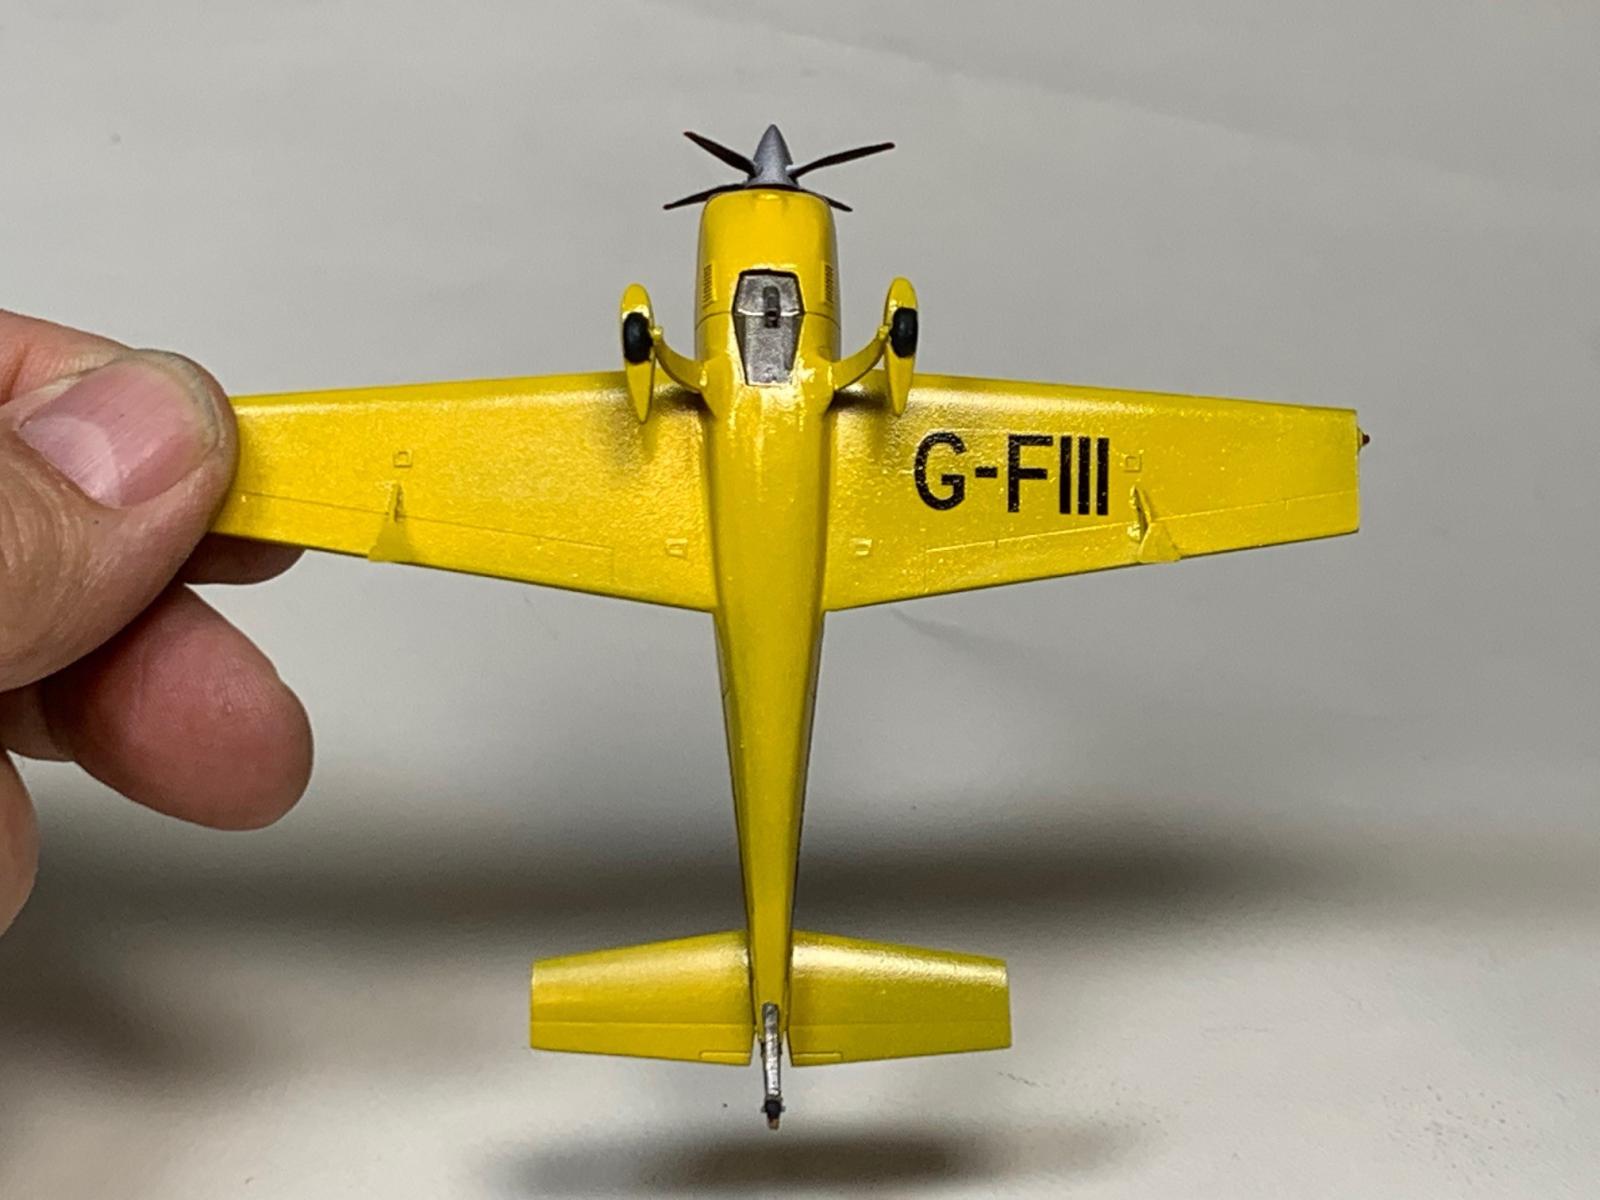
Once the canopy had been fitted and blended in, I glued on the underwing counterbalances (or whatever they are) and was ready for painting. The kit includes markings for four different aircraft and the paint schemes are set out on the instructions and on the bottom of the kit box. As I normally model military aircraft, and as the model is so small, I opted for G-FIII which is overall yellow with red wing and fuselage stripes. I first applied a coat of Tamiya white primer as a base coat and then applied multiple coats of Tamiya XF-3 Flat Yellow to gradually build up the color. Once the paint had dried for a couple of days, I polished it with different grades of sandpaper to smooth out the finish and then applied several coats of Future to prepare for decals.
Decaling went fairly quickly as there are only seven decals (not counting the propeller decals) – two wing stripes, two tail stripes, two fuselage stripes and the G-FIII registration code under the left wing. Take your time and use plenty of water or wetting solution to give you time to get the decals in the proper spot, and to ensure that both sides match up. I had difficulty getting the fuselage stripes to line up around the very front of the engine cowling, but fortunately I was able to hide the worst join behind the propeller when it was installed. The instructions say that you are to place decal D4 on the white side of each propeller blade, however, there are only three of this decal on the decal sheet. Since they were so small, I left them off completely.
Once the decals had dried, I removed the tape from the canopy and airbrushed a final coat of Future over the entire aircraft. Next, I painted the wheels NATO Black and attached the tail skid/wheel, which I had painted separately. The propeller blades were removed from the resin pour stub cleaned up and installed into the spinner using the provided alignment tool. The last step was supergluing on the propeller.
I really enjoyed this kit, and it was a pleasant change of pace from the military aircraft I normally build. My only regret is that I did not make some seatbelts as the lack of them really shows under the nice clear canopy.
Highly recommended. Thank you to Brengun for the review kit and to IPMS/USA for letting me build and review it.


Comments
Add new comment
This site is protected by reCAPTCHA and the Google Privacy Policy and Terms of Service apply.
Similar Reviews