
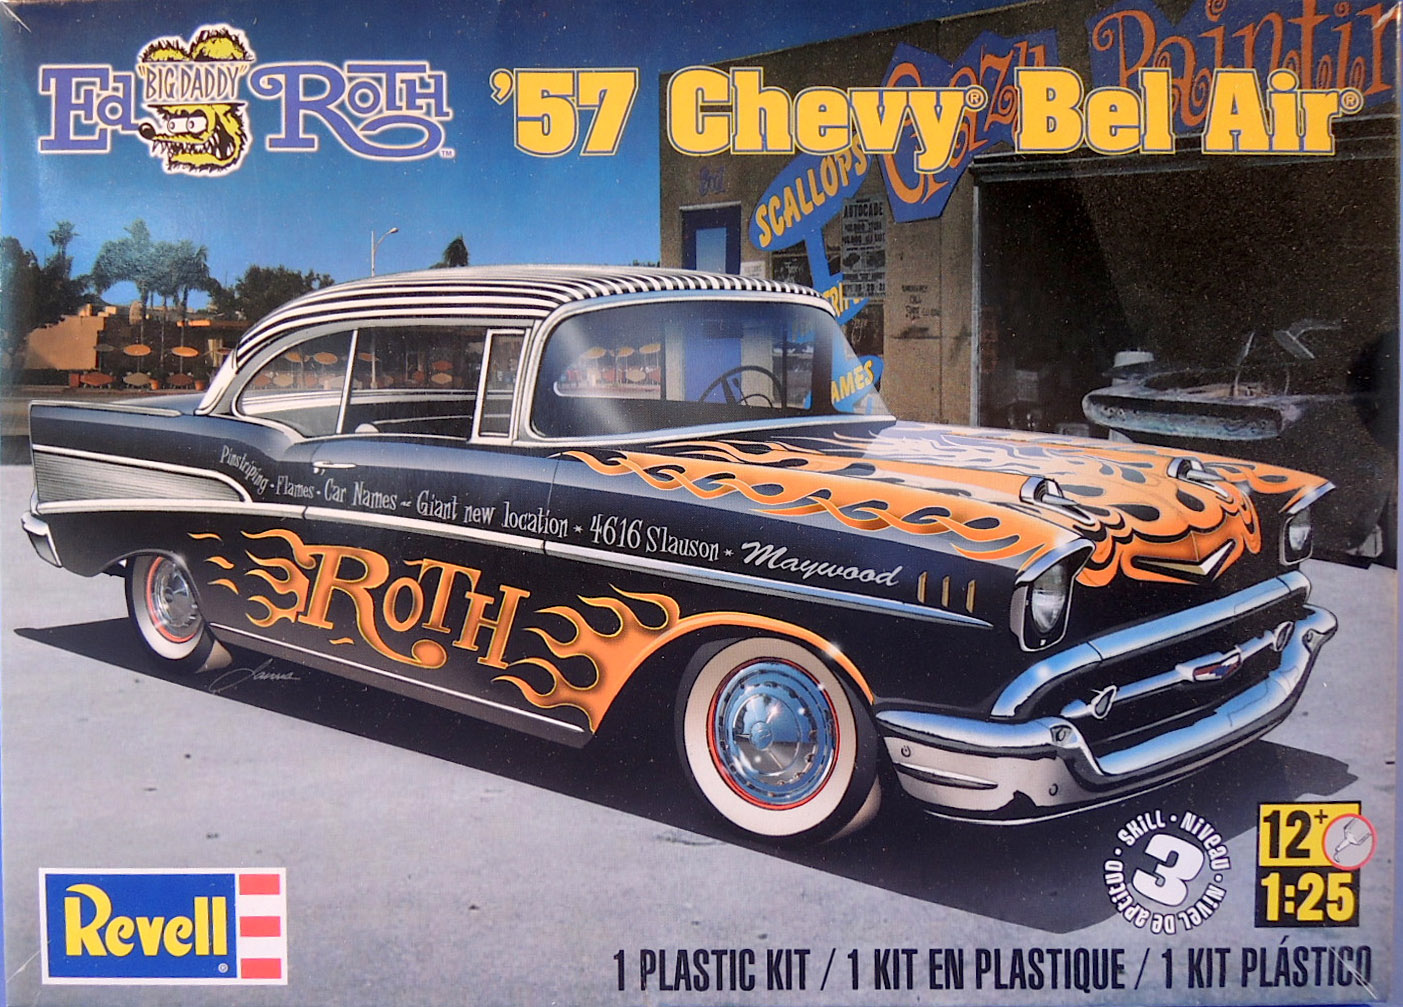
Ed 'Big Daddy" Roth '57 Chevy Bel Air
This is a tough kit to assemble. Not that it's difficult, but the parts are rough, fit loose, and require a lot of cleanup of flash and ejection pins. Several of the parts have a copyright date of 1973 and the years have not been nice to this kit. The kit has some interesting detail, particularly on the engine and its internal compliments, but the molding has lost a lot of detail. There’s lots of flash to clean up and some of the ejection pins are almost big enough to have their own part number. The part fit is loose and difficult to align correctly.
The kit has options for three different versions: street, Roth, and a drag version. Kit includes choice of three different engine intakes and has opening doors and trunk lid.
From Revell’s website:
Ed Roth painted this '57 Chevy® in a custom paint scheme to help promote his California pin striping shop. It was the perfect ride to blazon his name down the side of in flaming letters. For 1957, the New Bel Air® model was equipped with a fresh 283ci V-8. Additionally, Bel Air® had reached the peak of refined retro elegance. Their fins and headlamps were stylish and the interior was spacious, comfortable and elegant. Kit features optional drag version with choice of three engine intakes, plus opening doors, hood and trunk lid.
Instructions are an 8 ½ X 11 stapled booklet with 16 pages and 19 steps. The instructions are in English, French, and Spanish. A handy list of parts is included with the instructions and gives the part number and name of the parts. Painting instructions are included using generic names for paints. Detail painting instructions are included with the appropriate assembly steps. The instructions include paint and decal placement for the Roth version and the Drag version.
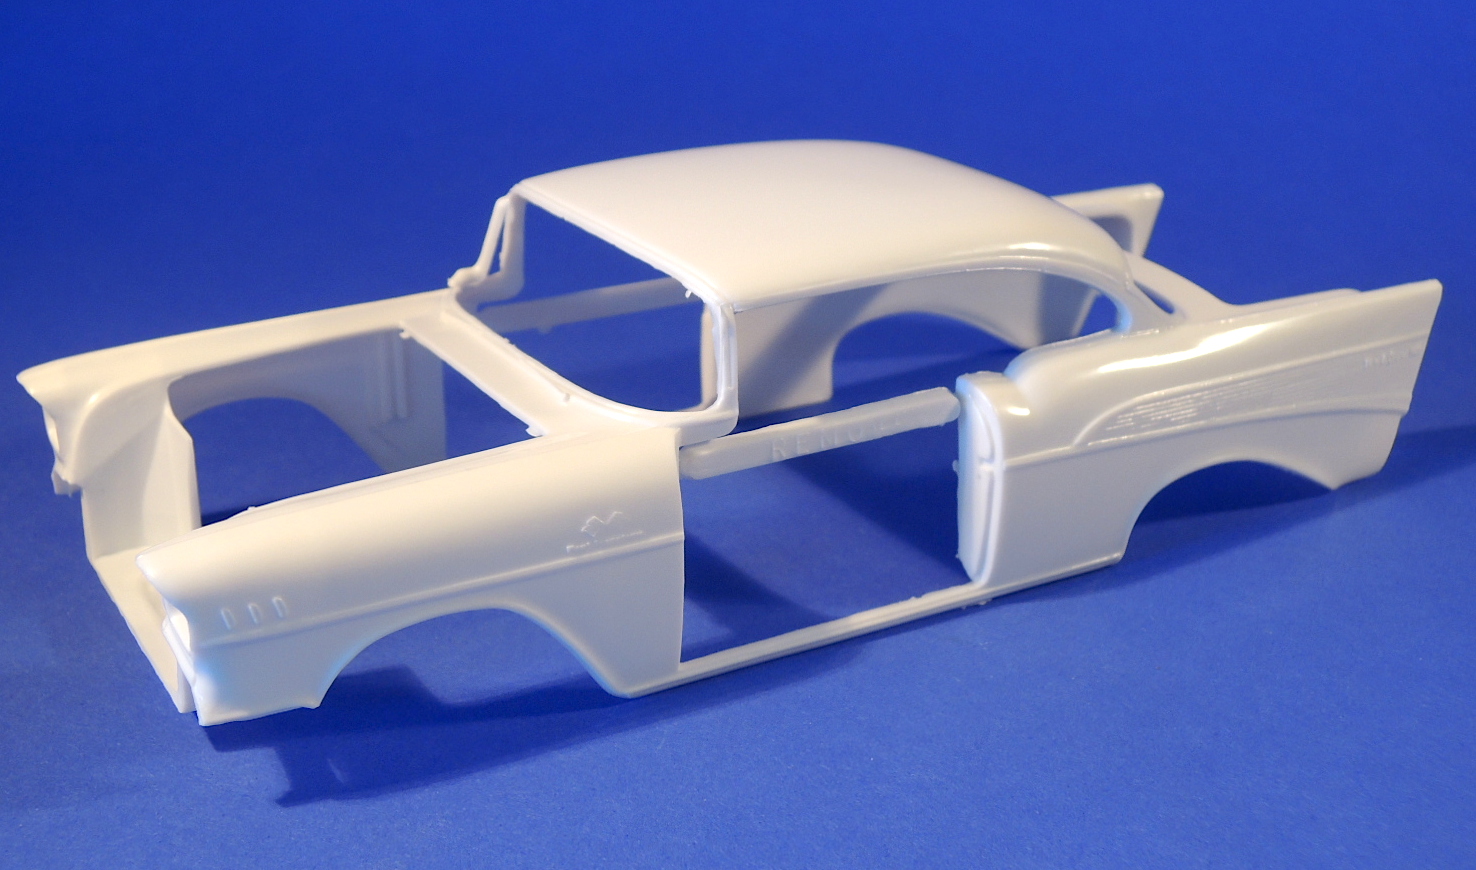
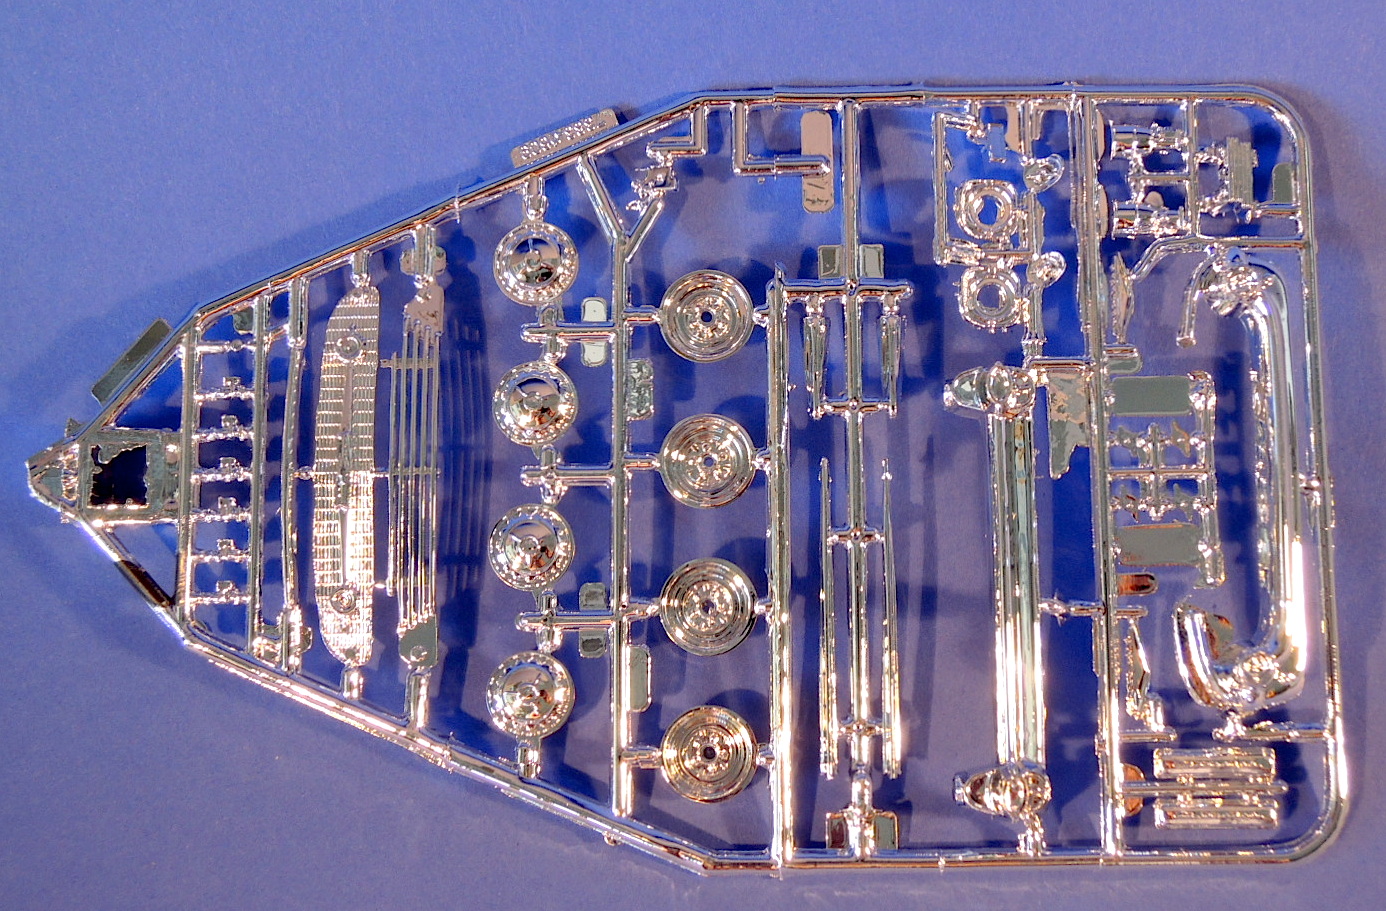
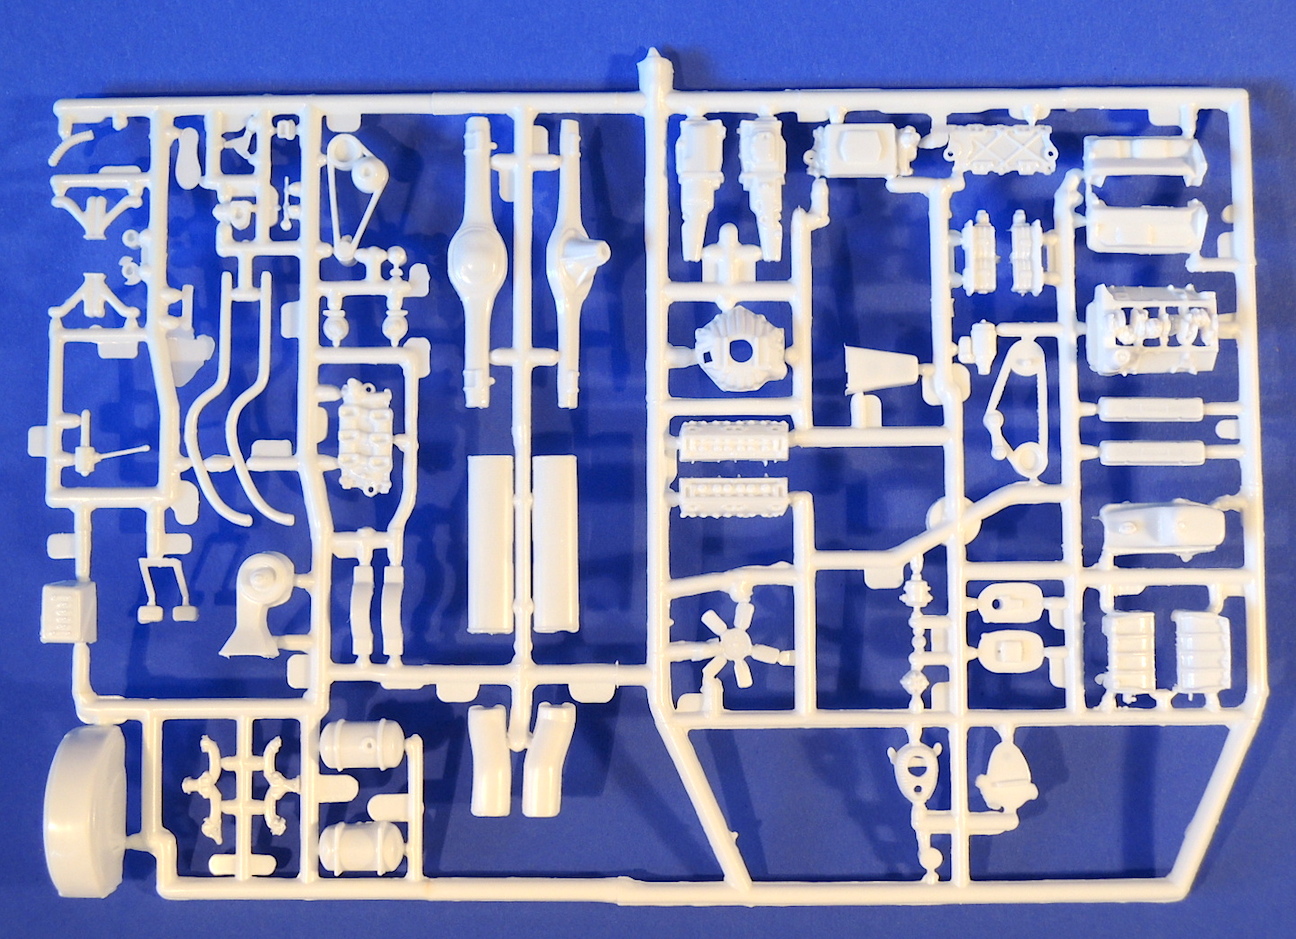
Kit includes 185 pieces and comes on 4 white plastic sprues, a one-piece white plastic body, 1 clear plastic sprue, 1 chromed plastic sprue, 4 rubber tires, and a decal sheet dated 2014.
The greenhouse on the body does not appear stock, but looks like it has been chopped. The body mold seams are fairly well concealed in the crease line on top of the fenders, and along the top of the rear fins. There is a fair amount of flash on the body that will need to be cleaned up. Body molding is a little soft but generally good. The plastic parts for the glass appear fairly clear. The chrome parts have Revell’s typical heavy chrome plating and more experience modelers may want to remove and replace the plating with one of the metal finish paints. The chrome parts have so much flash and the detail is so soft that it's hard to see where the part is. The chassis and firewall have copyright dates of 1973. All of the white plastic parts come bagged together, and the chrome parts and clear plastic parts are each bagged separately.
The rubber tires have a nice tread detail but do have a center seam and sprue attachment that will need to be cleaned up. No lettering is provided on the sidewalls. Only one set of tires is provided for use on all versions of the kit. Even in 1957 the drag version would have different tires.
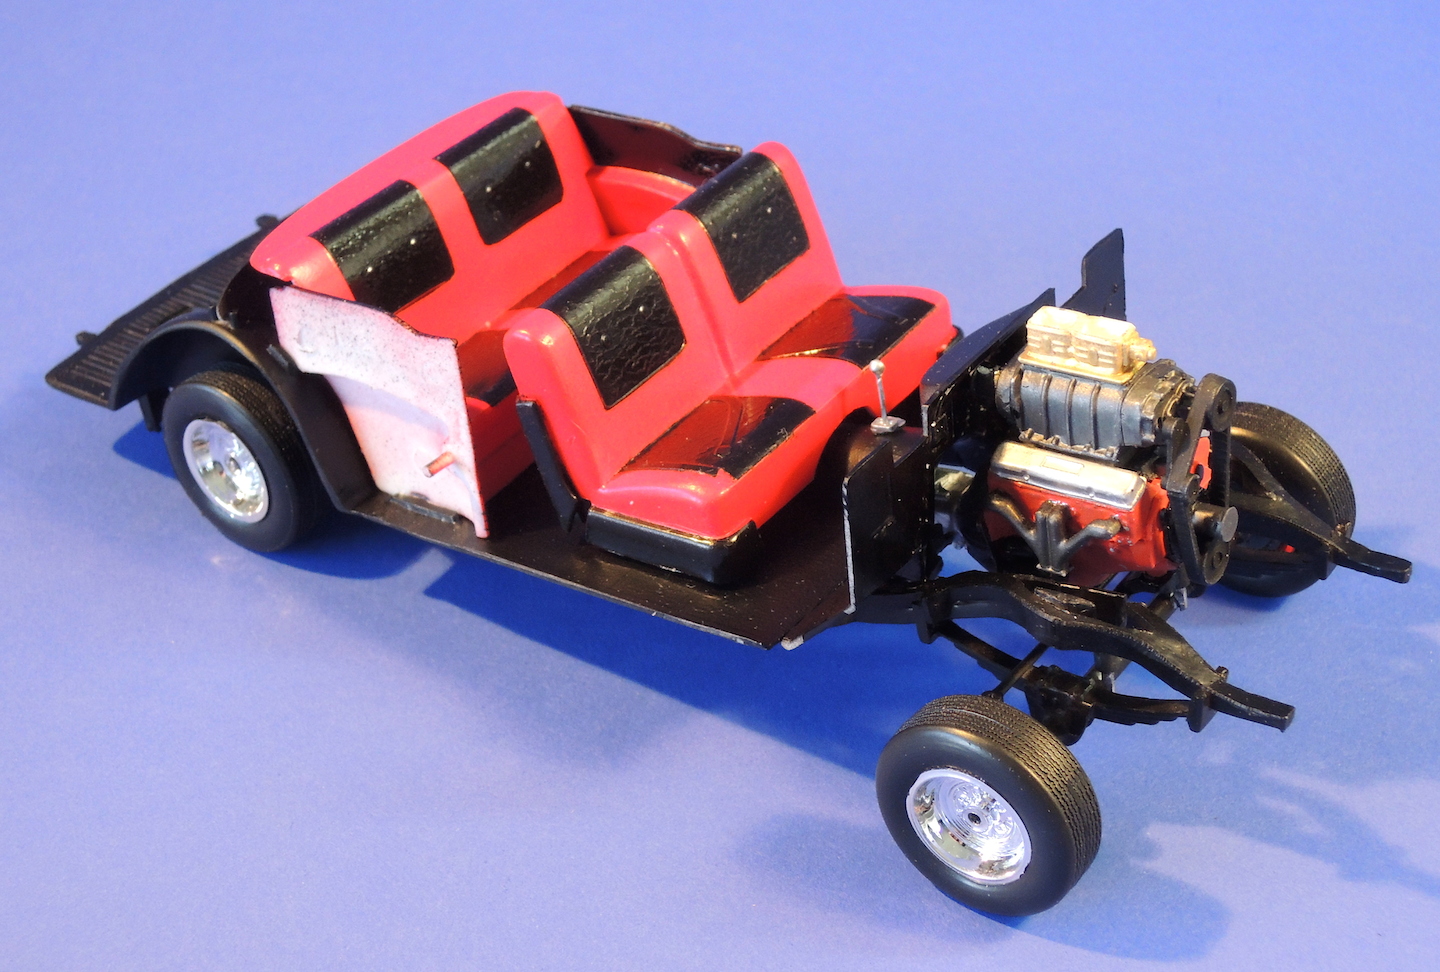
Assembly begins in step 1 with the engine block, oil pan, and transmission. Revell has separated the engine block into upper and lower halves, which reveals the crankshaft the lower half of the engine block, and the top of the pistons in the upper half of the engine block. Steps 2, 3, and 4 are for installation of the air intakes and valve covers for the Roth, Street, and Drag versions. The Roth version is a fuel-injected assembly, the street version is 3 - 2 barrel carburetors, and the drag version is a 4 barrel carburetor and a blower. I decided to use the drag version of the engine for this review sample.
The engine is both good and bad. The initial release may have had very nice detail, but it appears the molds have deteriorated as there's lots of flash and the fit of parts is not very good. The top of the carburetors and the blower did not fit together well and need to be smoothed out considerably. I couldn't get the blower and it's manifold to align correctly with the engine, and the timing cover, part #110, required a piece of plastic shim.
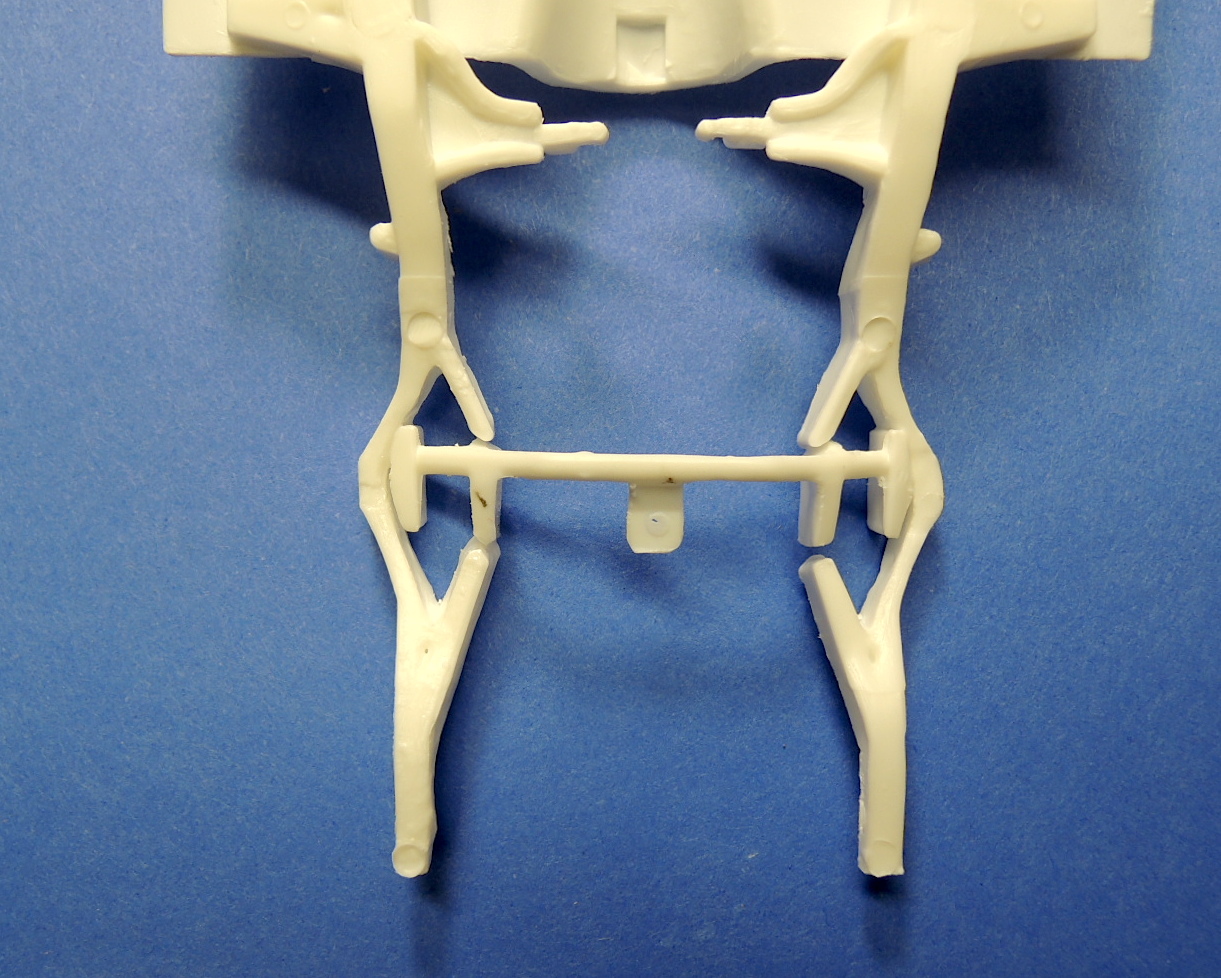
I also used the drag version of the chassis. There was so much flash on part #49, the front crossmember, that I ended up cutting off the locating pins for the shock absorbers as it was buried in the flash. The fit of the front crossmember is extremely loose in the chassis. Moving onto step #7, the engine did not fit straight in the chassis either.
Step 8 is the assembly of the wheels and tires. The inner wheels, part 67, were deformed and in some cases actually had voids in the plastic. The instructions said to not use glue for the wheels, but they would not stay in place without gluing. The plastic rear axle did not seem to be long enough so I ended up gluing the wheels to the brake drums. The front wheels were so loose I had to use five-minute epoxy to fill in the gaps.
Step 10 assembles the interior seats and floorboards. The rear panel on the front seat didn't fit very well and a large gap had to be filled with putty. The instructions call for the seats to be either copper or metallic purple, and the accent panels to be flat black or aluminum. I decided to make the seats red with black accents. I plan to paint the exterior of the car in a gloss black finish like the instructions call out for the Roth version.
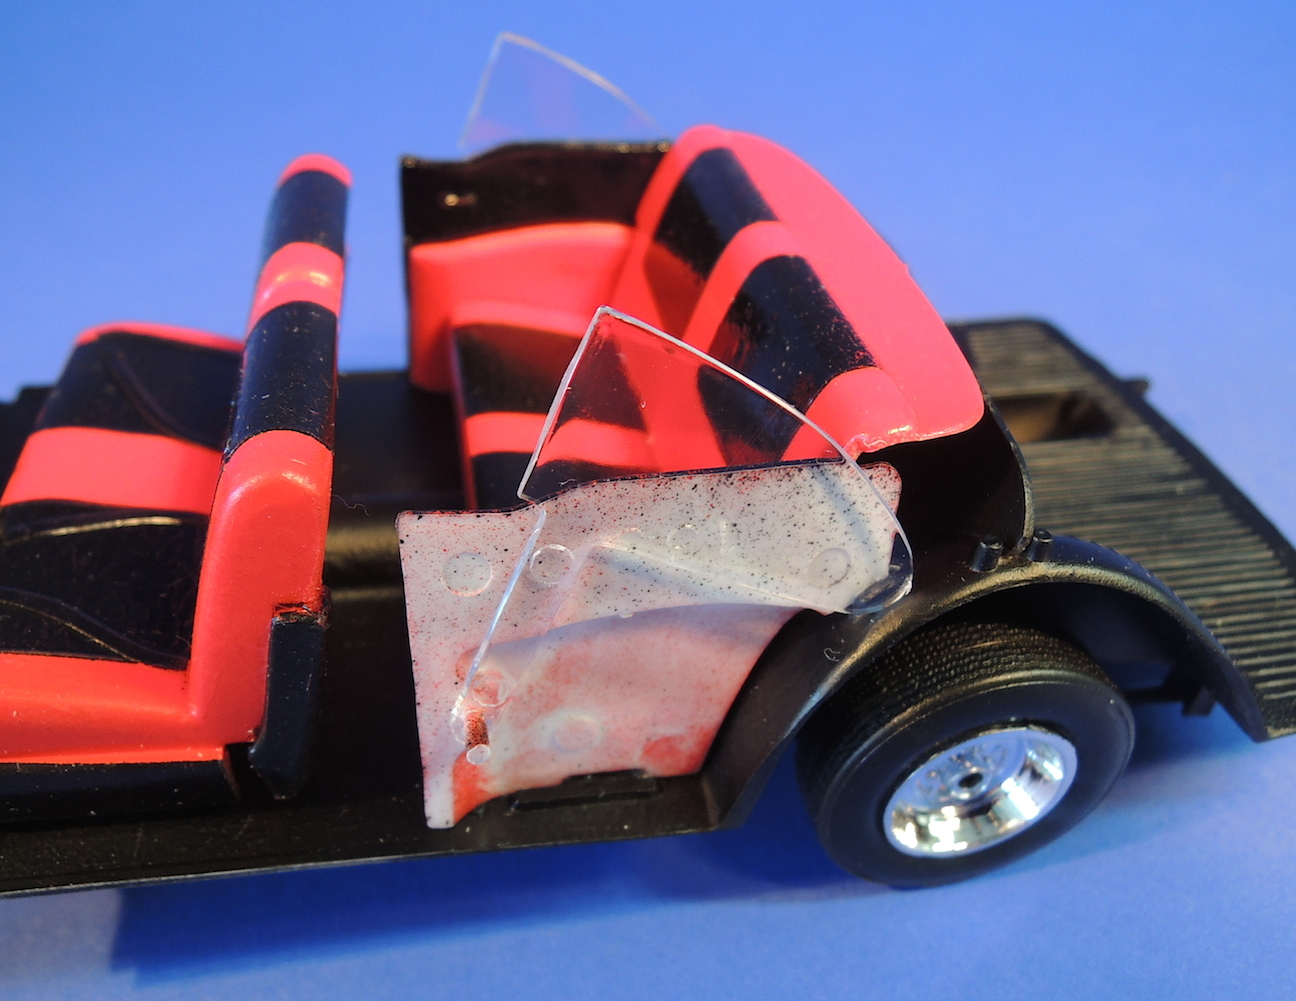
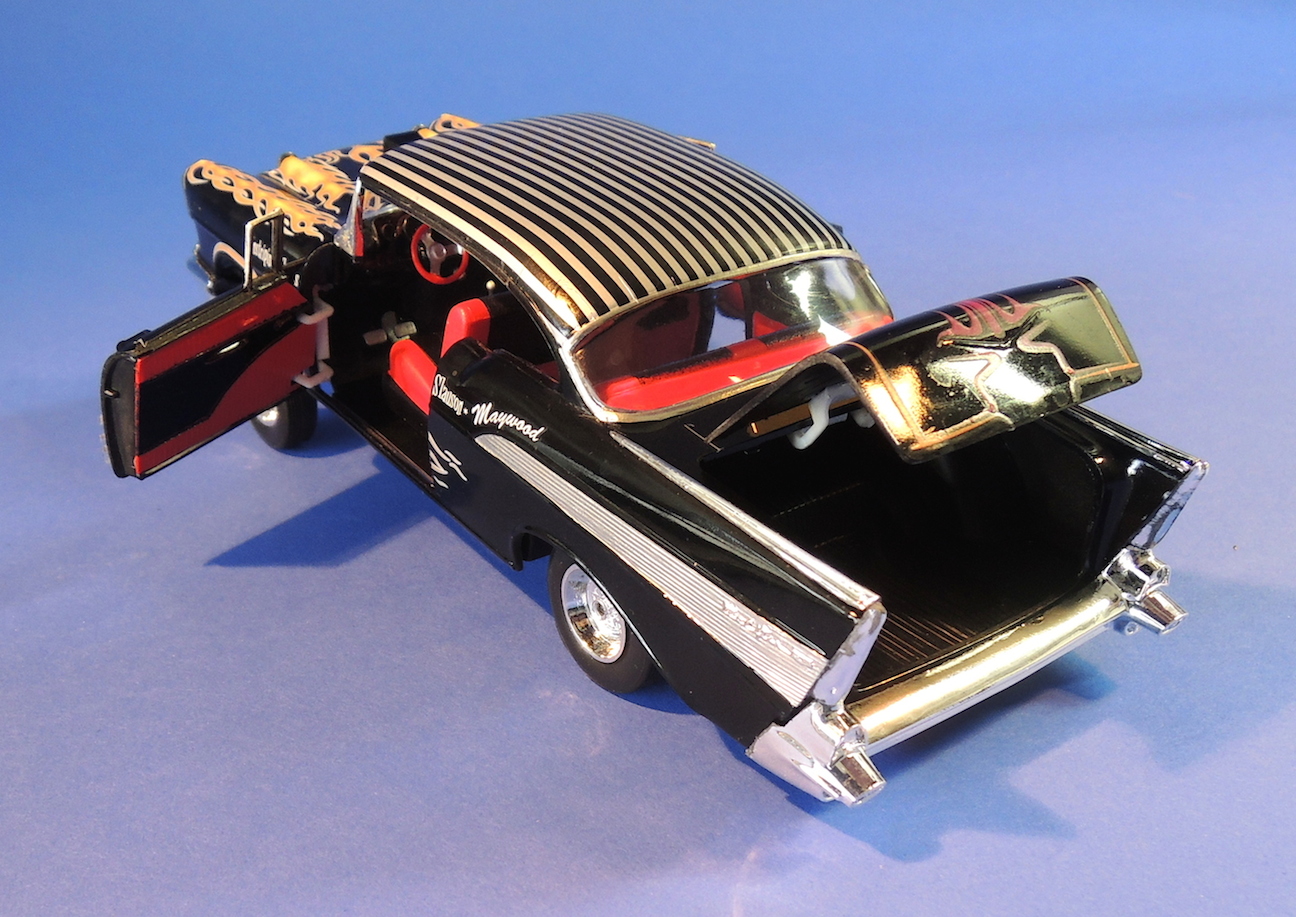
A unique feature of this kit when it was originally issued is the opening doors, hood, and trunk. Revell has used an interesting technique for the interior door panels - they are reversible for the different versions of the vehicle. I plan to use the pleated upholstery of the Roth version. The hinges for the doors ended up being really clunky and didn't hold the doors horizontal when open.
In step 14 the front windshield did not fit, leaving large gaps on all sides of the window. I had to cut off the sides of the dashboard to get it to fit between the door hinges.
I was using the drag version of the engine with the blower so in step 50 I cut out the hole in the hood. Turns out the hole is not big enough for the blower. This step also installs hinges for the hood and trunk, which both end up being very loose also.
Revell includes rear side windows, which are supposed to rotate up and down, however I had trouble attaching the body to the chassis and gave up trying to get the windows located properly. The fit of the body to the chassis was poor and I needed large clamps and five-minute epoxy to hold it in place.
Step 16 installs the front bumper and I used the street grille configuration. The grille fits very loosely into the bumper and the bumper itself was a sloppy fit to the body.
The only new thing in this kit appears to be the decals for the Roth and drag versions. I wanted to use the flames from the Roth version even though I pretty much built the drag version of the car. The details are thick and the colors not as vibrant as shown on the boxtop. The thick decals did not respond well to Microsol and I had trouble getting them to lie flat in several locations.
In summary this is a difficult kit due to the numerous cleanup of parts required, poor fit, and lack of detail in the parts. The sprues indicate a copyright in 1974, however Revell first issued a ‘57 Chevy in 1963 and I suspect many of these parts are left over from that original molding. The molds for these parts leave a lot of flash, large ejection pins, and have softened with very little detail. The chrome sprue is especially messy and requires a lot of cleanup, which leaves exposed black plastic on the edges of the pieces.
This kit would frustrate a beginning modeler with the challenge of trying to get it assembled. A more experienced modeler would also be frustrated with the poor results after a difficult build.
Thanks anyway to Revell for continuing to re-release older kits in new versions. Thanks to the great IPMS/USA review team for letting me review the kit.


Comments
Add new comment
This site is protected by reCAPTCHA and the Google Privacy Policy and Terms of Service apply.
Similar Reviews